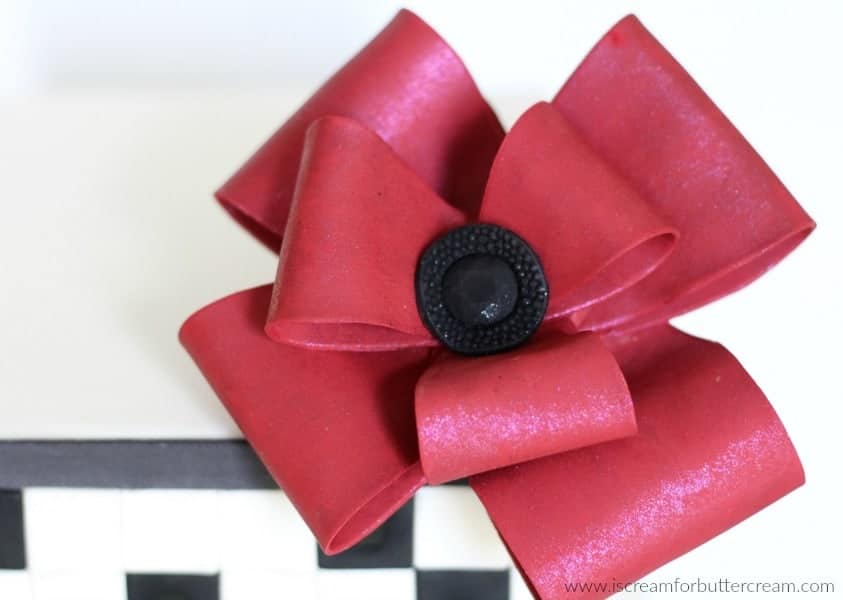
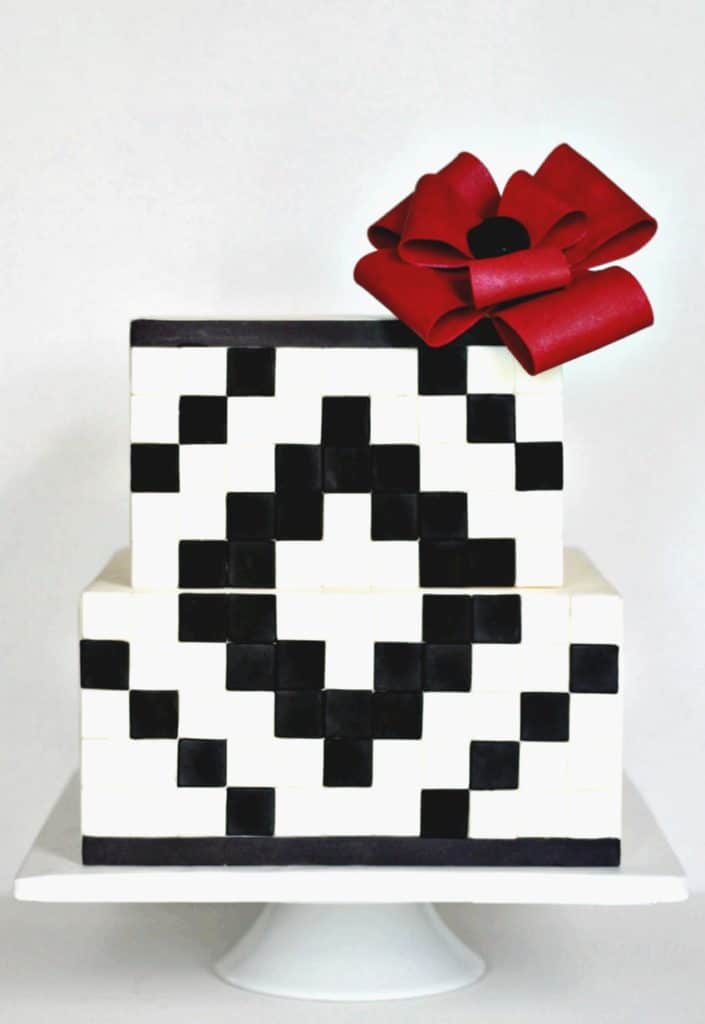
Previously I posted a tutorial on how to make the black and white geometric cake and I wanted to show you how to make the fondant looped bow I added to that cake. I love coming up with different looking things to add to my cakes, other than just groupings of flowers or your average bow.
You’ll want to start on this bow ahead of time because the loops need to completely dry out and firm up before you use them.
This post contains affiliate links. As an Amazon Associate, I earn from qualifying purchases. You can see my policies linked in the website footer.
Supplies You’ll Need:
- Red fondant (or the color of your choice)
- Black fondant
- Edible Red Luster Dust
- Mini pizza cutter (for cutting the fondant strips)
- Small fondant roller or pasta roller attachment for your mixer
- Lemon extract or vodka
- Red Candy melts (or the color that matches your fondant color)
- Jewel mold ( I used this one, but just choose your fancy)
Making the Loops:
Use your small fondant roller or pasta machine and roll out your red fondant. Roll it out fairly thin, but not as thin as you would roll out for gumpaste petals (about a 2 on the pasta roller).
Lay out your strips on your work surface. Cut them into rectangles. You’ll want them in different sizes so you’ll have choices when you put the bow together later on. I cut some longer, fatter strips for the back, probably about four to five inches long and two and a half inches wide. Also, make some smaller and skinnier strips for the middle layer of the bow. It doesn’t matter if the ends are cut straight. You’re about to cut them off.
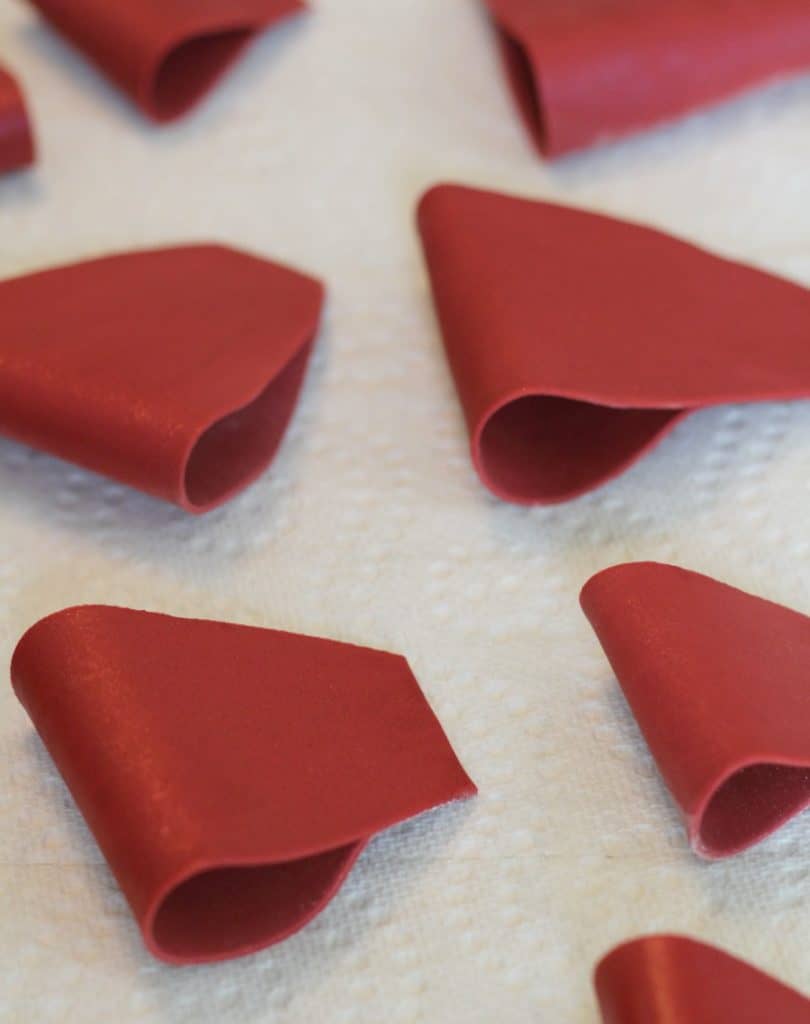
Take some rolled up tissue or paper towels and place in the middle of your fondant strip. Dab a little water on one end and then loop the other end over the paper towel and attach the ends together. Yeah, I use a lot of cornstarch and powdered sugar on my surface so my loops don’t stick.
Now take your mini pizza cutter, or a knife, and cut the ends into a ‘V’.
You can cut off any pointy bits if you want.
You’ll use four big loops for the outside and three small loops for the inside, but you want extra. Some of them may break while you’re putting the bow together, plus you want multiple sizes for more options.
After you’ve made all your bows, set the loops aside on a cake board, sprinkled with cornstarch, to dry. I let mine dry for several days. I wanted them completely firm and dried out.
When they are good and firm, take a dry brush and brush off all the cornstarch.
Mix your luster dust with a little lemon extract and paint one side of your loops. By the time you paint all the loops, they’ll be dry, so you can start painting the other sides.
Now, I went ahead and also painted the inside of the loops as well. That way, you can see the sparkle when you look at the bow from any angle. Set them aside to fully dry (actually you’re just waiting for the lemon extract to evaporate). It will take maybe five to ten minutes.
Assembling the Bow:
You’ll want to make a base for your loops to attach to. Just take your red fondant and roll it into a ball. Lay it on your work surface (sprinkle your work surface with cornstarch so it doesn’t stick). Now, smash your ball down a bit to make a disk.
Oh, by the way, when you handle your bow loops, you’ll get luster dust glitter all over your hands and it will attach to just about everything else you touch, which is why my disk is sparkly 😉
Now, take your red candy melts and melt them in the microwave. I like using the same color as my bow because there’s a chance you might be able to see it after the assembly.
Lay out your loops to configure your bow. Figure out which loops are going where. I wanted to do five for the background petals, but they didn’t fit properly. Just kind of move them around and see what fits best for you. Now, aren’t you glad you made extra loops?
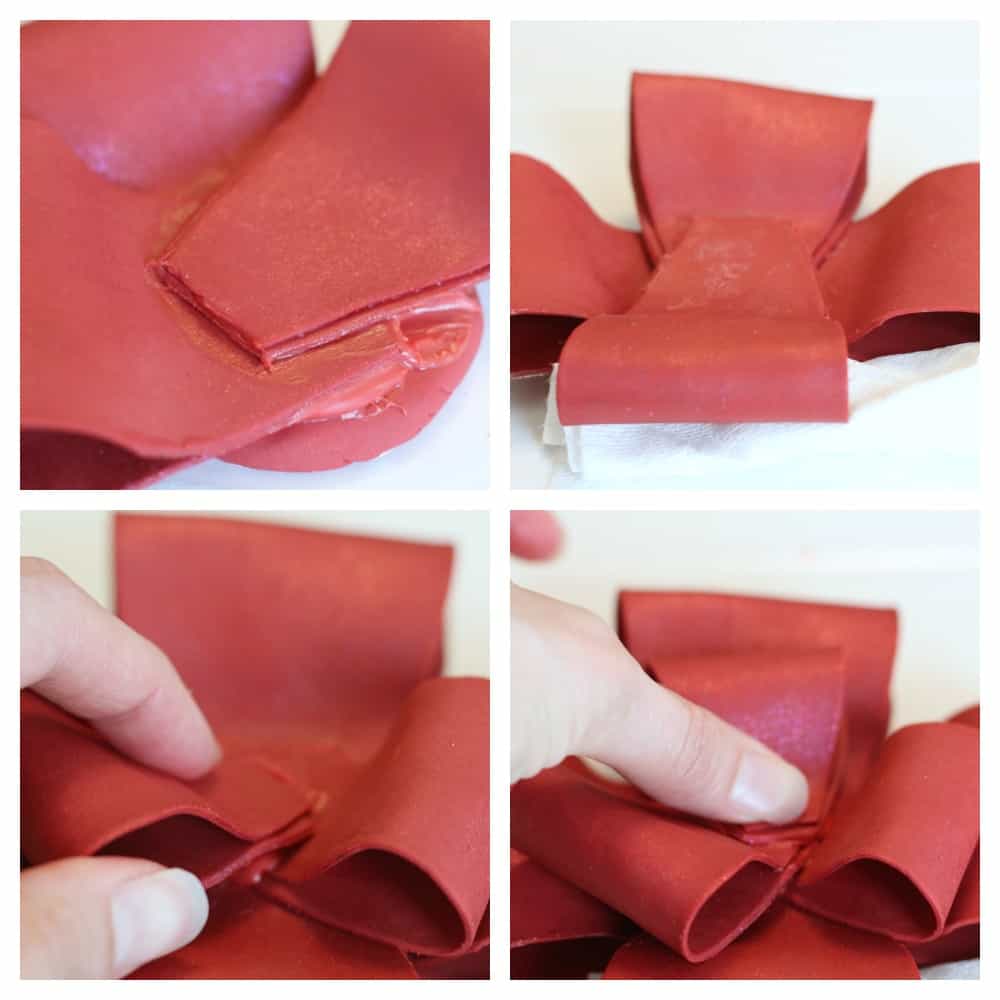
When you’ve figured out where you want each loop, start attaching them to the fondant disk with the candy melts. Just dab the melted candy melts onto the back of each loop and attach to the disk.
To get the large bows to stand in place until the candy firms up, you may want to fold up a bit of paper towel and set it under the outside of the loop.
After your first layer, put them in the fridge so the candy melts can firm up.
Once it’s firm, attach your top layer. If any of the candy melts seep out when you attach the petals, just use a brush to dab it up. Since we’re using the same color candy melts as the fondant, it’s not really a major issue.
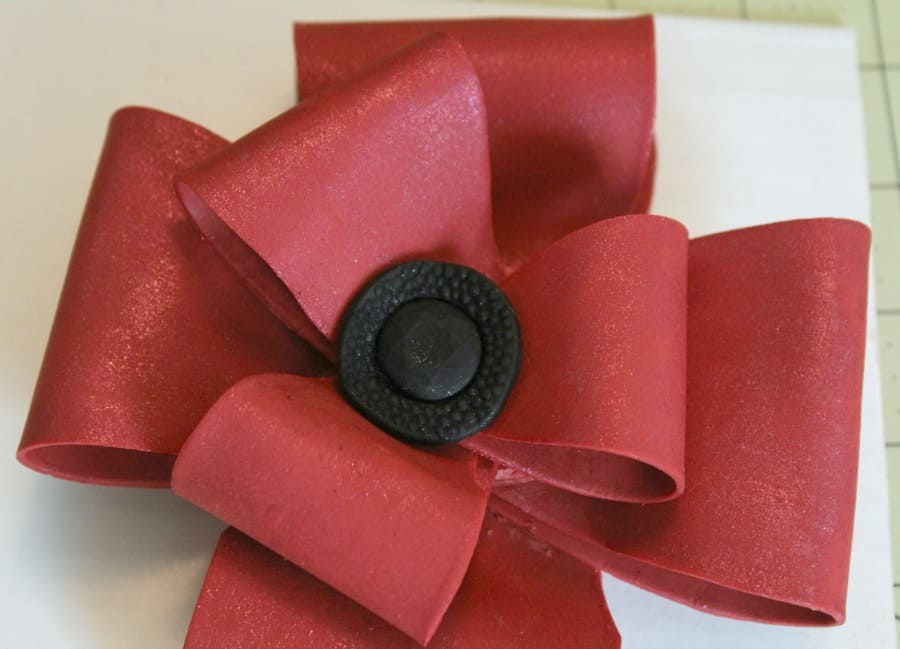
Set it in the fridge one last time to let the candy melts set up firm. Once everything is firmed up, you can attach the jewel in the middle.
Now take your jewel mold and use some black fondant (or the color of your choice) to make the jewel for the center of the bow. I used the bottom and middle mold areas, then attached the smaller jewel on top of the large one with a touch of water.
You can then just attach it to the middle of your bow with a bit of water. I also used a little edible black sparkle dust to brighten it up.
Attaching the looped bow to your cake:
This bow is a bit heavy and the back is a flattened area, so you can’t just attach it straight onto the cake. You need to build up a base to attach it to.
We’ll use fondant to do that. Hold your bow up to your cake and figure out where you want to attach it and at what angle. You’re going to have a back to this cake, but that’s okay. You can either add a couple loops to cover where the bow is attached, or just leave it as is, if the back of the cake won’t be seen.
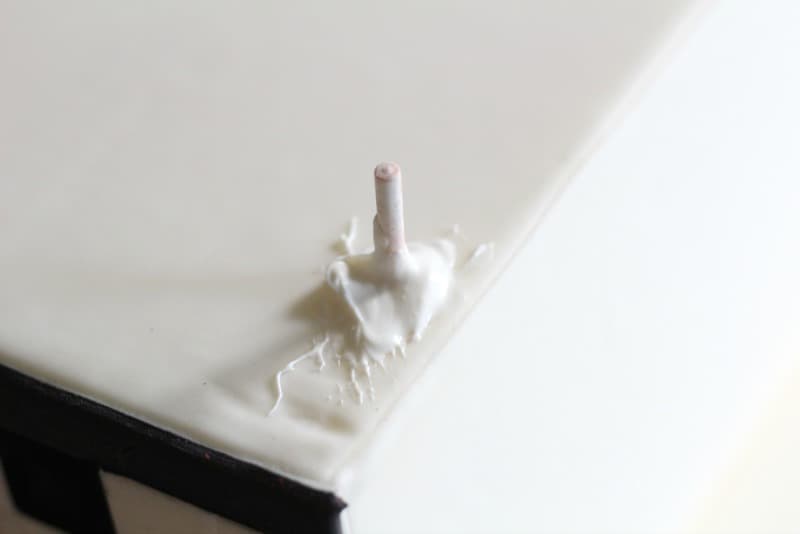
I needed my bow tilted up quite a bit, so I inserted a skewer as sort of a back rest for the bow. It might have been a little overkill because I think the next step would have been enough, but I don’t like to take chances.
Next take some candy melts (I used white here) and add a little around your skewer.
Ball up some fondant (I used white) and push it down and around the skewer. You’re making the ‘back rest’ for the bow now. Then add a little melted candy melts to that. Can you see the red luster dust? I told you, it gets everywhere 😉
Now attach your bow to that and move it around until you get the best angle.
At this point, you can cut off the sides of your fondant ball and make them smooth, or you can leave it as is, if no one is going to be looking at the back of the cake.
That’s it! You’ve made a beautiful sparkly looped bow! I think this bow would look adorable in hot pink or even in a glittery black!
Now it’s your turn to try out the looped bow and be sure to let me know how it goes!
If you’d like to see the tutorial on this geometric cake, just click here.
As always, I’m here for your questions, just shoot me an email. I’d love to hear from you.
PIN IT HERE! –>
Remember to subscribe to the blog, so you don’t miss any updates!
FREE: 7 Quick & Easy Tips to Make Your Cakes Look Professional

Ready to start making cakes that look amazing?
Grab this FREE guide with quick and easy tips to make your cakes actually look like a professional made them, so you can start showing them off!
See our privacy policy here.









Leave a Reply