
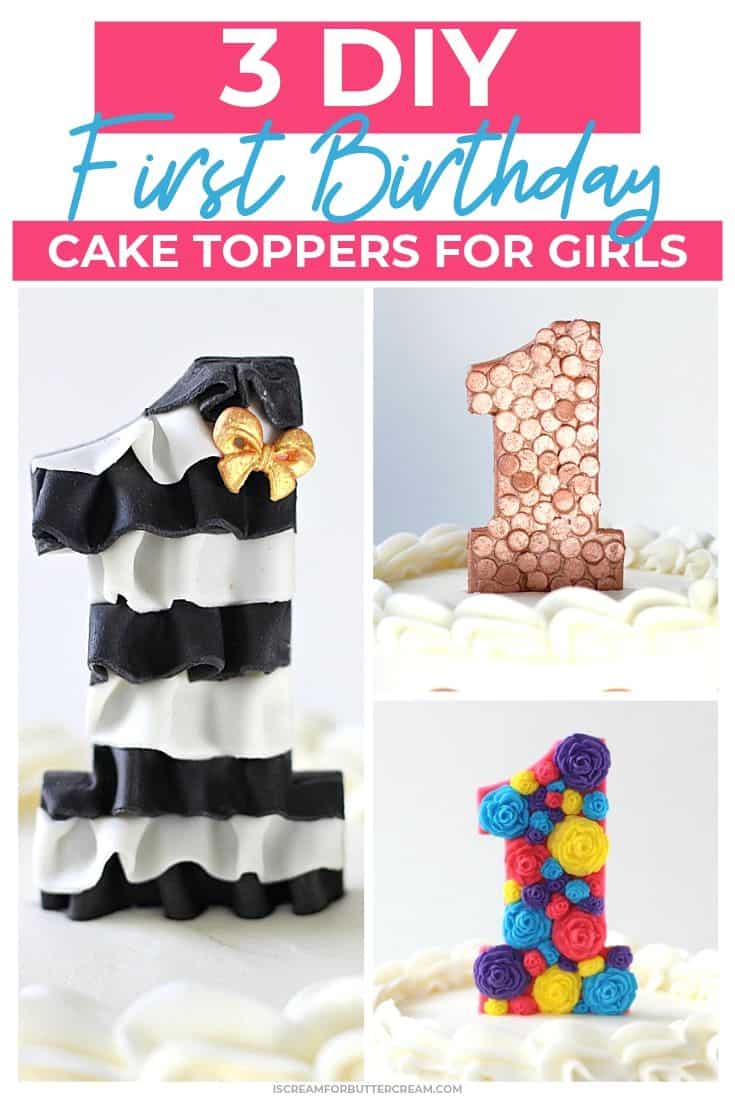
These 3 DIY first birthday cake toppers for girls are such a quick and easy way to decorate a first birthday cake.
The great thing about them is that you don’t have to go crazy with the design of the cake itself. You can make a simple cake and pop one of these into the top and you’ve created a custom look that’s beautiful.
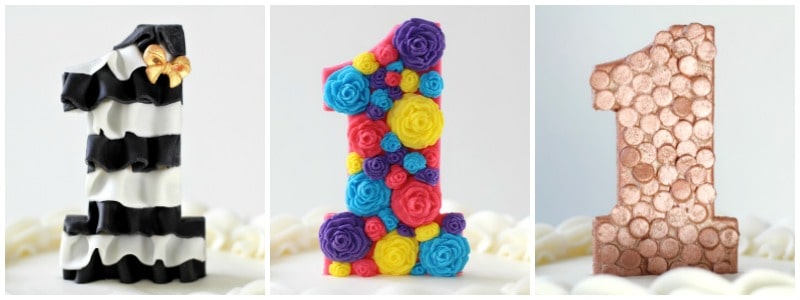
In this tutorial, we’ll be going through how to make each of these toppers. First we’ve got the ruffle topper, then the rose topper and finally the rose gold sequin topper.
They are not as hard as they may look, I promise.
Don’t forget to check out the video for each one after the instructions!
Now, let’s get started!
As an Amazon Associate, I earn from qualifying purchases.
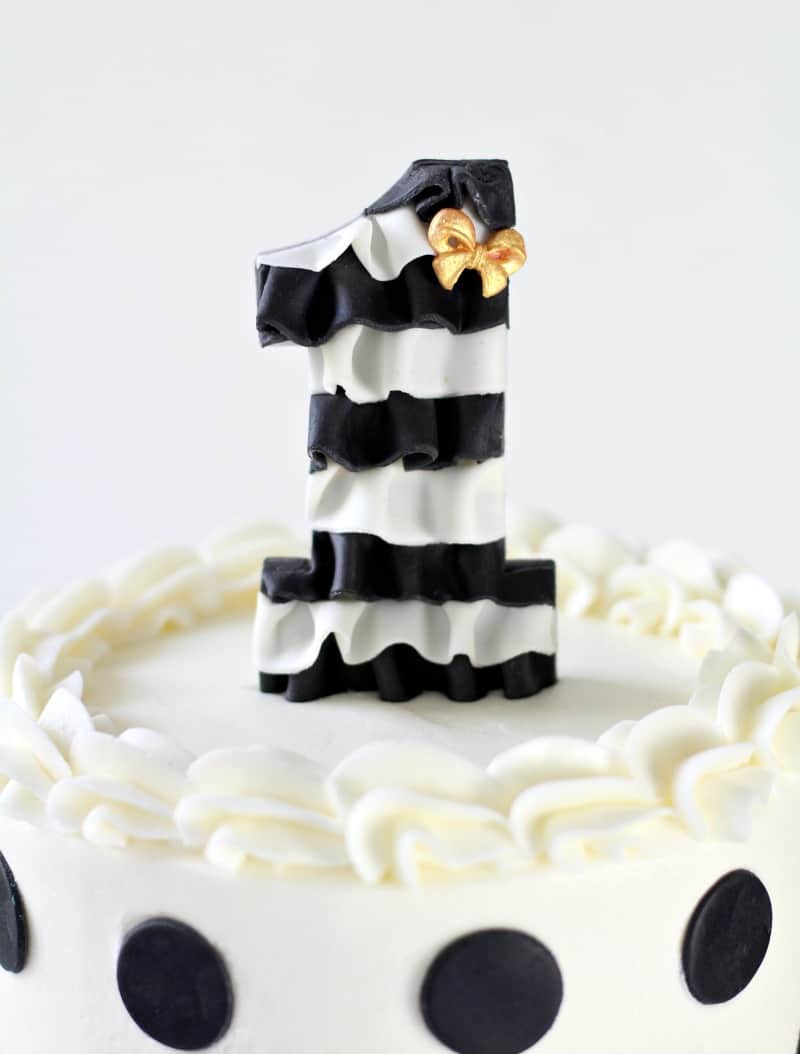
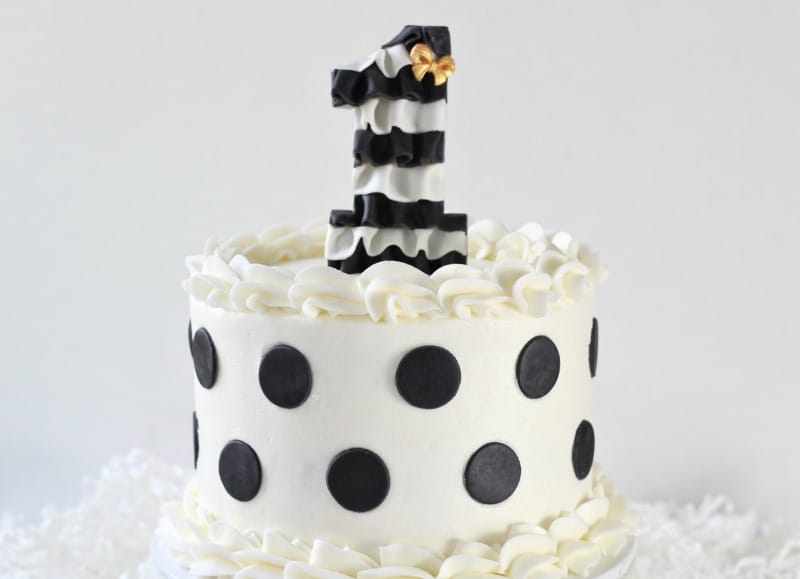
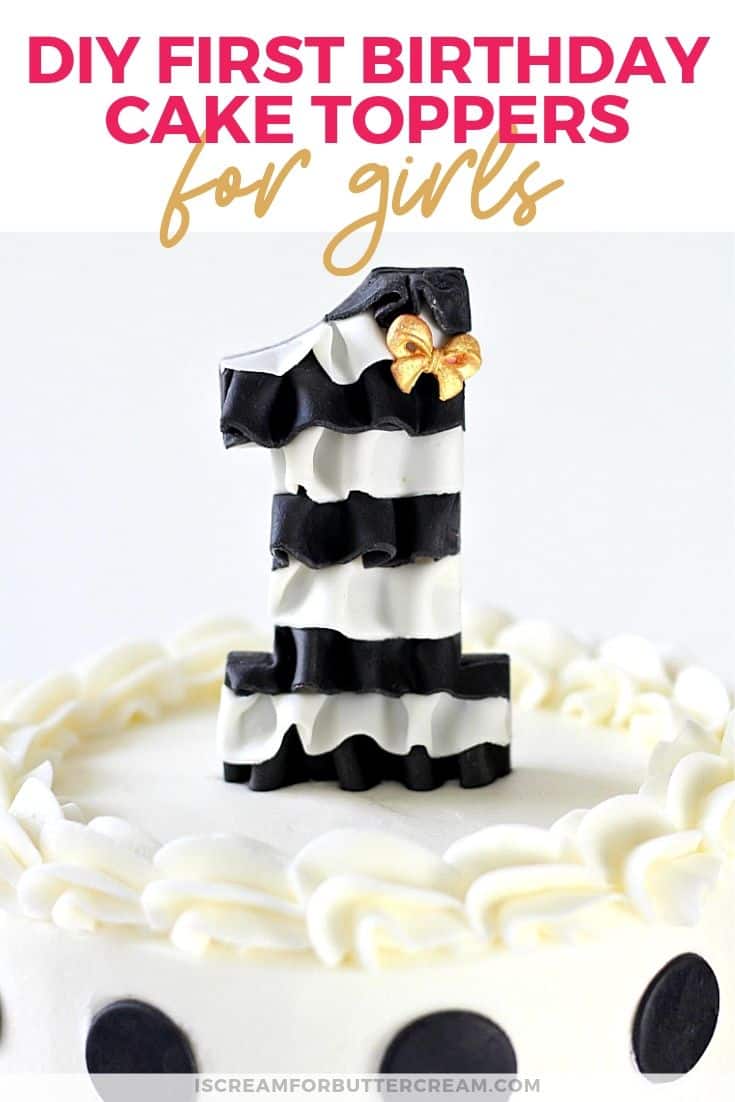
The Ruffle Topper:
Supplies you’ll need for the ruffle topper:
- A number cutter
- White and Black fondant
- Small bow mold
- Gold petal dust
- Popsicle or cake pop sticks
Making the Ruffle Topper:
(Don’t forget the video below for all the steps.) First you don’t want to cut your number out just yet. You just want to roll out a section of fondant, not too thin, but big enough for your number.
Roll out thin strips of black and white fondant, fold them in a loose accordion style, then crimp one edge with skinny wooden dowel or pencil.
You’ll add them to your larger piece of rolled out fondant with a bit of water. Make sure they overlap.
Next you’ll lay your cutter over it and press down. Let your number dry out completely. It’ll take at least a day.
Use your bow mold to make a bow and then paint with the gold luster dust and lemon extract. Attach to your topper with a bit of water.
Once everything is dry, turn your topper face down and attach a popsicle stick with a bit of water and lay a rolled out strip of fondant over that to keep it in place. Let it dry fully before inserting into the cake.
To finish this cake off, I just cut out some fondant circles in black and let them firm up, then attached to the cake with a bit of buttercream.
You can see the video with all the steps for the ruffle topper here:
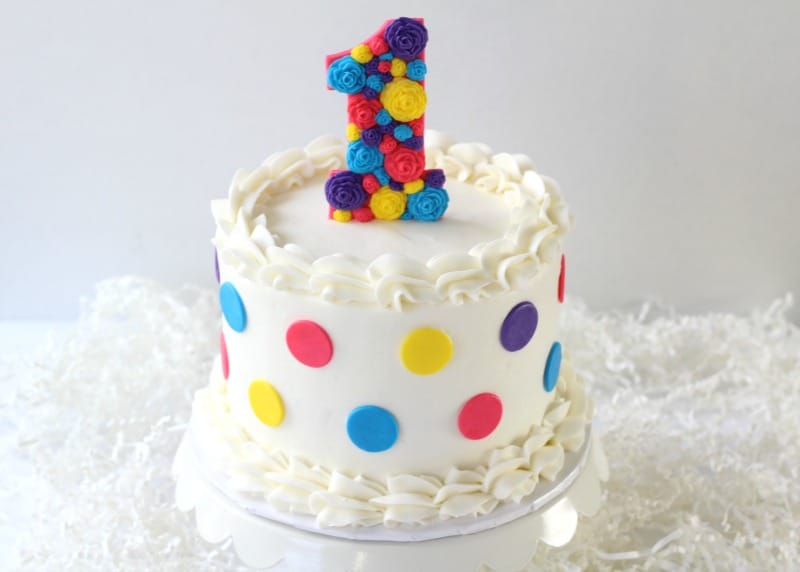
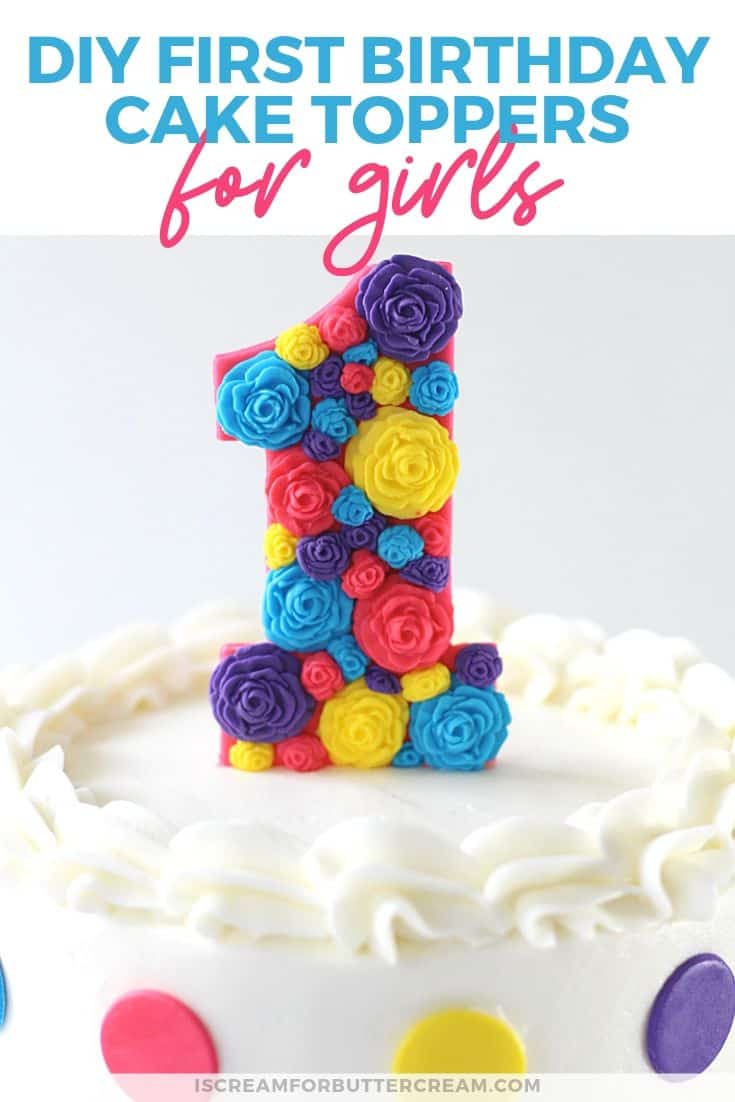
The Rose Topper:

Supplies you’ll need for the rose topper:
- Number cookie cutter
- White fondant
- Gel food coloring
- Small fondant rose mold
- Popsicle or cake pop sticks
Making the rose topper:
This topper is super easy. Mix the gel coloring with your fondant to make all different shades. You could do all the same color, multi-color like I did, or go for a monochromatic look. Once you’ve got your colors mixed, make sure they’re covered in a ziplock bag and set them aside.
Now, roll out some fondant for your number. You can use white or one of the colors you mixed earlier. Just roll it out, not too thin, and cut out your number. Set the number aside to dry out fully…at least a day.
Next add small pieces of the colored fondant into the rose mold. I used the two smallest sizes. I made about five of each color…you want options.
Once all the roses are made, add a little water to your number with a paint brush used only for caking. Now just start adding on your roses in a random pattern. You may need to add in some tiny ones in the bare spaces. Let it firm up.
Once it’s firm, you can turn it face down and add a popsicle stick with a bit of water, then cover with a strip of fondant to keep everything in place. Let it dry fully before inserting into the cake.
To finish this cake off, I just cut out some circles in the same color I made the roses. I let them dry and then attached to the cake with a little buttercream.
You can see the video with all the steps for the rose topper here:
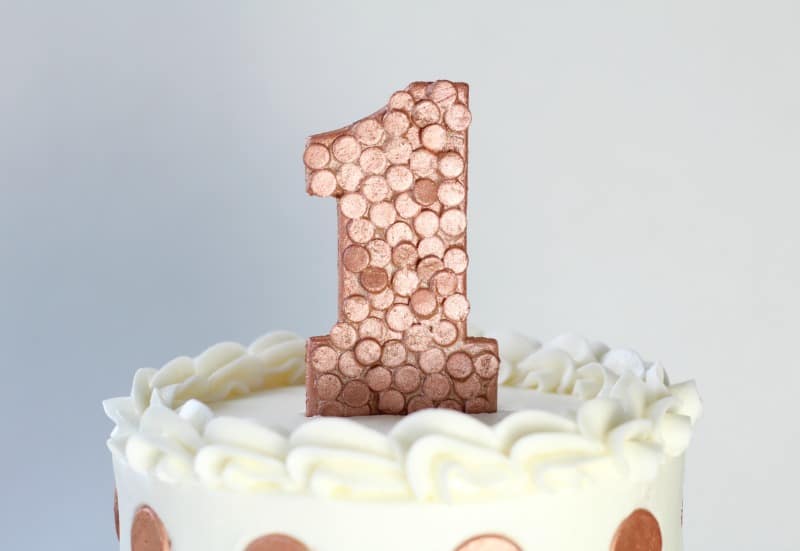
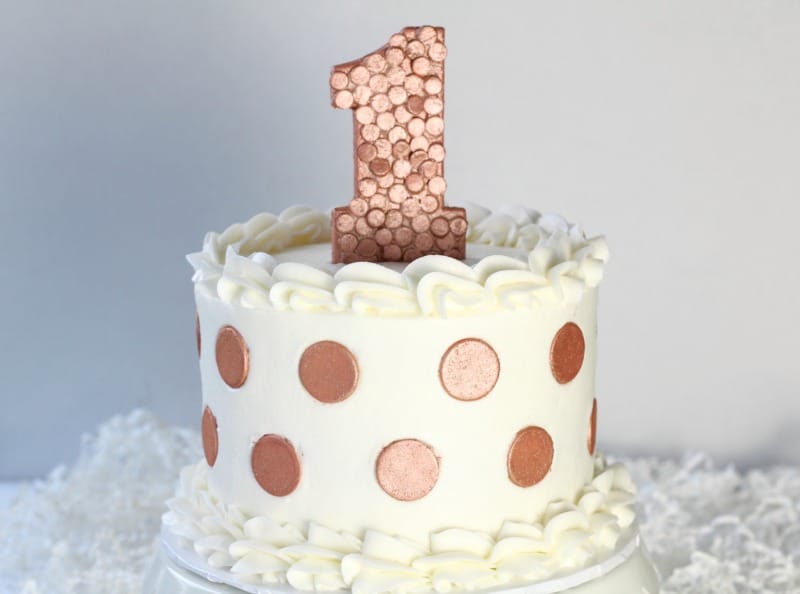
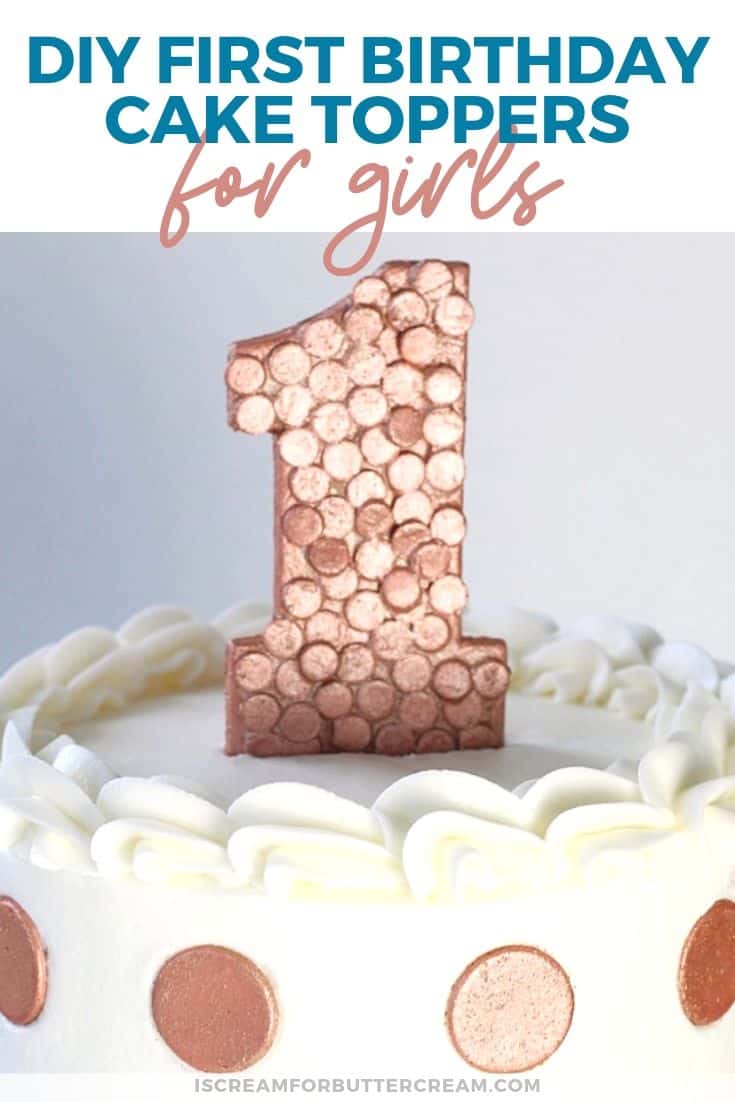
The Rose Gold Sequin Topper:
Supplies you’ll need for the rose gold sequin topper:
- Number cookie cutter
- White fondant
- Rose Gold luster dust or a mixture of gold, bronze and pink luster dusts
- Popsicle or cake pop sticks
- Piping gel
Making the rose gold sequin topper:
The first thing you want to do is roll out some white fondant. You don’t want it super thick, but you don’t want it too thin either. It needs to be sturdy. Now cut out your number and set it aside.
Next you’ll need to make the edible sequins. Just roll out some super thin white fondant, take a tiny circle cutter or you can use the end of an icing tip and cut out a bunch of small circles. Set them aside on foam or a cake board to dry out. You want them completely dried, so just let your number and your edible sequins dry for a day or so.
Once dried, brush on a layer of piping gel onto your number. Add the sequins to that, you’ll have to move them around a bit to get a good fit. Set it aside to dry. I let mine dry a few hours.
Next take your gold or bronze luster dust and mix with a little pink luster or petal dust. Add some lemon extract to make a thick paint. Just keep adding gold or pink to get the desired rose gold color, then brush onto the number. Be delicate, so you don’t knock off any of the sequins.
You’ll need to do a couple of coats then set aside to dry fully.
Once dry, turn face down and add a popsicle stick with a bit of water. Next add a strip of fondant over that to strengthen it up and let it dry fully before inserting into the cake.
To finish this cake I just cut out fondant with a small circle cutter and then painted them the same rose gold color. I let them sit to dry fully and then attached to the cake with a bit of buttercream.
You can see the video with all the steps for the rose gold sequin topper here:
So, there ya go…3 DIY first birthday cake toppers for girls that you can make! They aren’t super challenging AND they’ll make your creation beautiful!
The best part about these? You can make them WAY ahead of time, so when the party day is here, you just have to insert them into the cake and you’re done.
If you make one, I’d love to see how they turned out!
Don’t Forget to Pin it for Later!
Leave a Reply