
A step-by-step fondant gathered ruffle cake tutorial with tons of detail on how you can make your own beautiful ruffled cake with fondant pleats. This technique isn’t complicated and you’ll make some really pretty fondant frills to add to your cake.
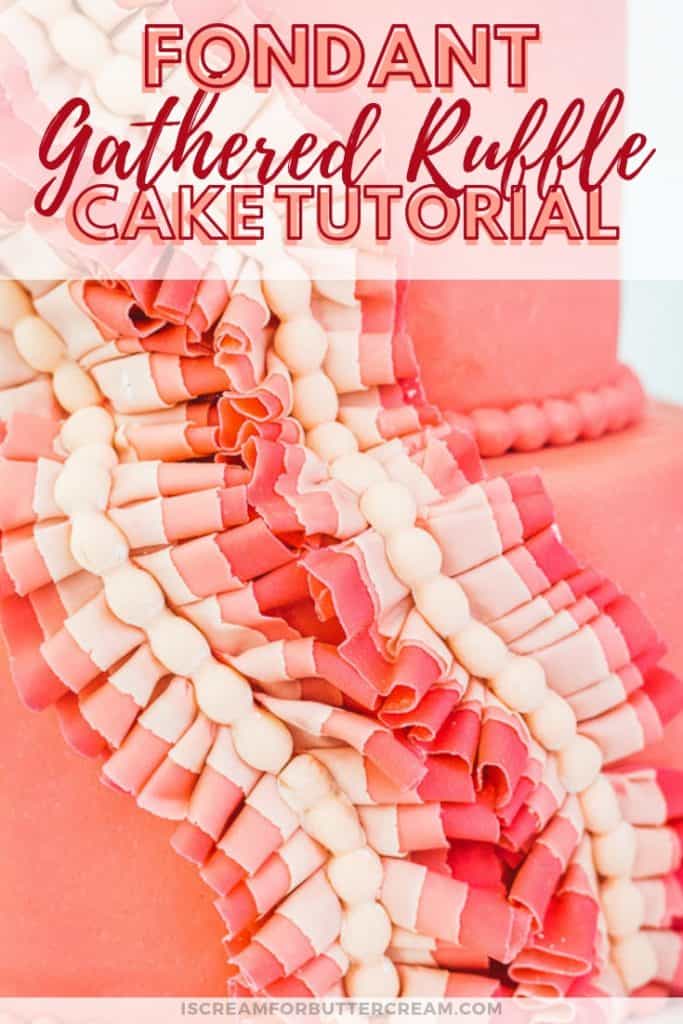
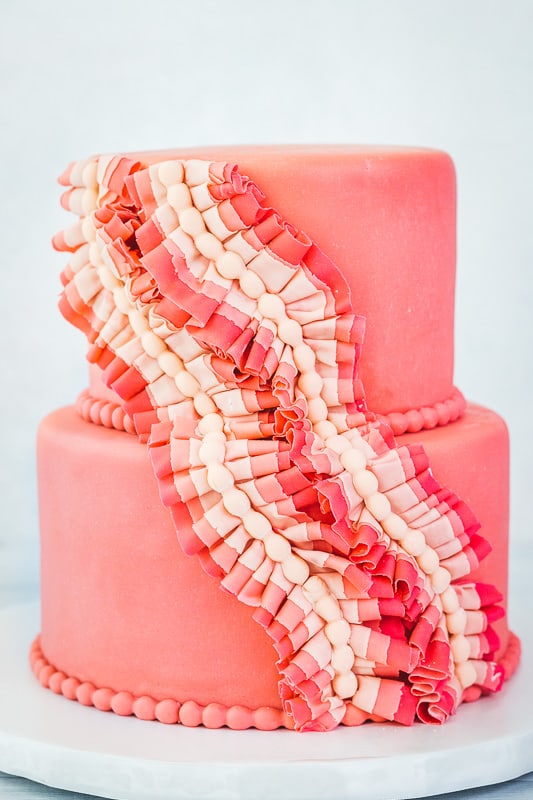
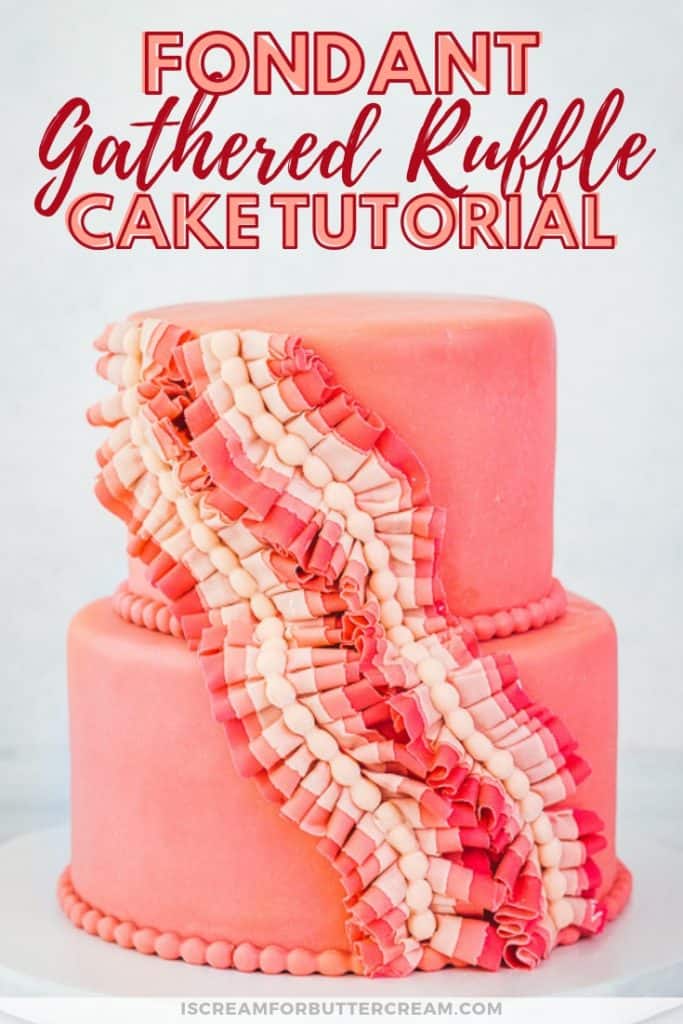
This one is so fun. It’s not your normal fondant ruffled cake. It’s a totally different take on it. I’m calling these ‘gathered ruffles’.
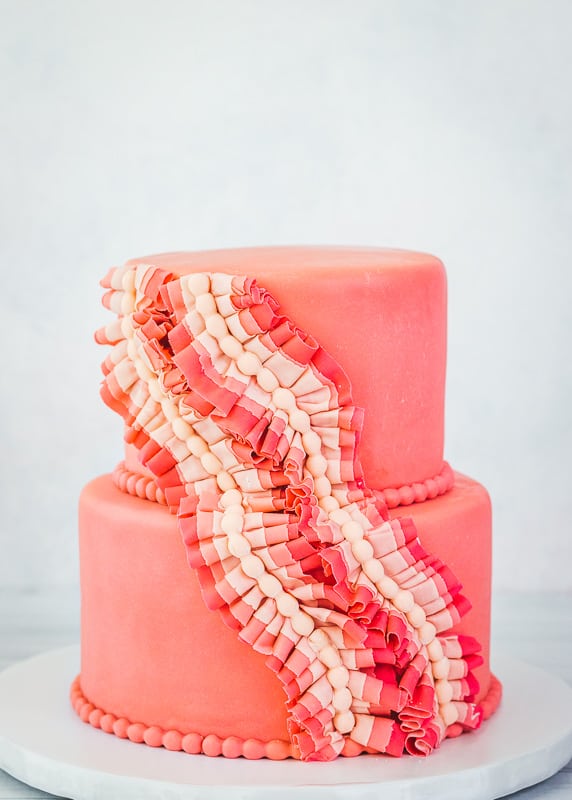
The fun thing about this cake is that you can essentially make this in any color combo you want.
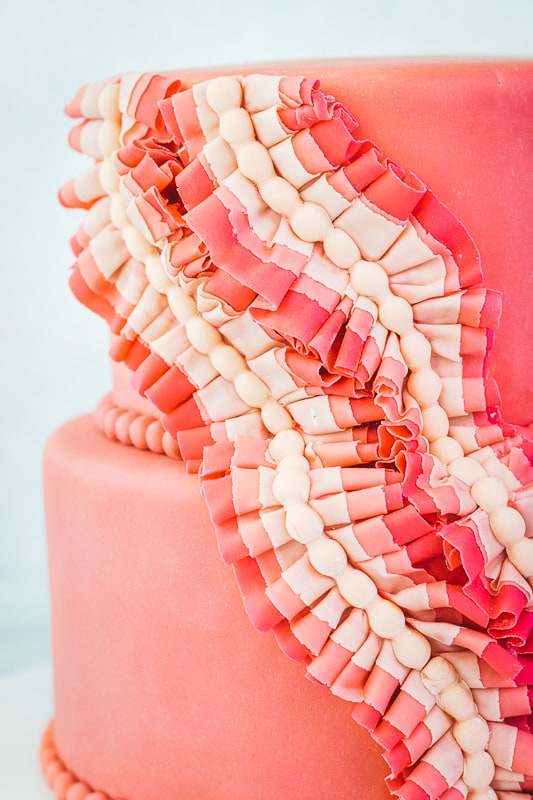
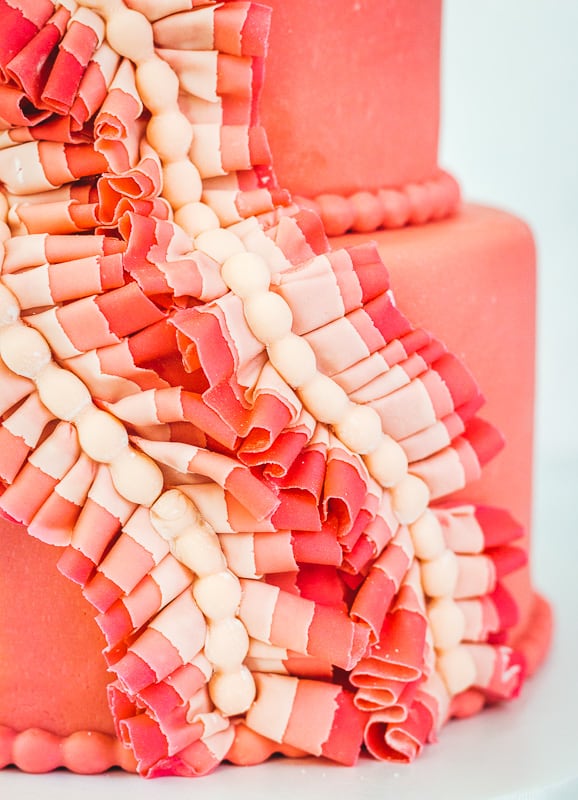
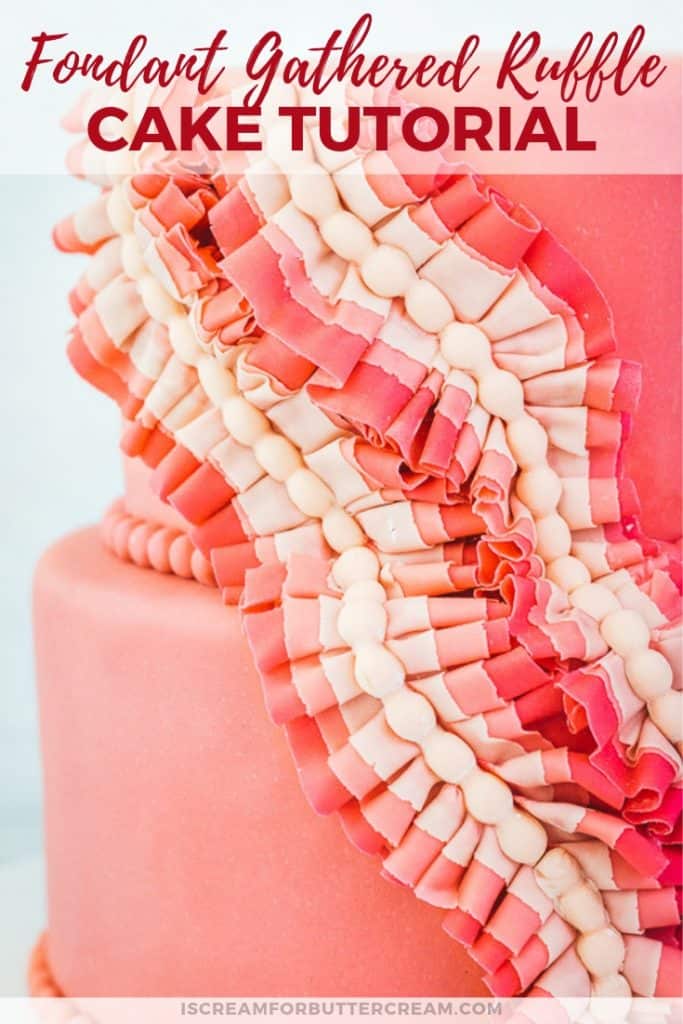
I really like the ombre look of it as well and the fondant pearls in the middle just pull everything together.
If you’re looking for even more ruffle ideas, I have a free course on creating fondant ruffle cakes. Yes, it really is free…no gimmicks. You can find that course here: Free Mini Course – Fondant Ruffle Cakes
Ok, let’s get started on this fun cake tutorial. By the way, there’s a video close to the bottom of this post that will help as well.
As an Amazon Associate, I earn from qualifying purchases.
SUPPLIES NEEDED FOR THE FONDANT GATHERED RUFFLE CAKE:
- A fondant covered cake Here are some posts that will help: How to Cover a Cake in Fondant and How to Stack a Cake
- Fondant in three colors (I used three different shades of coral.) You’ll need about a handful size of each color.
- Cornstarch shaker (You’ll need this to sprinkle on your fondant and work space.)
- Small fondant roller
- Pasta roller, or pasta roller attachment for a stand mixer (This is completely optional. You can hand roll everything out, but a pasta roller saves time and can get the fondant super thin.)
- Small paintbrushes used only for caking
- Dowels
- Fondant pearl mold
STEPS TO MAKE THE FONDANT GATHERED RUFFLE CAKE:
MAKING THE FONDANT GATHERED RUFFLE STRIPS:
First you’ll want to cover a cake in fondant. I used a two tiered cake here. A buttercream cake will not work as well because the gathered fondant ruffles will just be too heavy and could slide down the cake eventually.
Once your cake is covered and stacked, you’ll need to add color to three chunks of fondant. You’ll need dark, medium and light fondant in the same color.
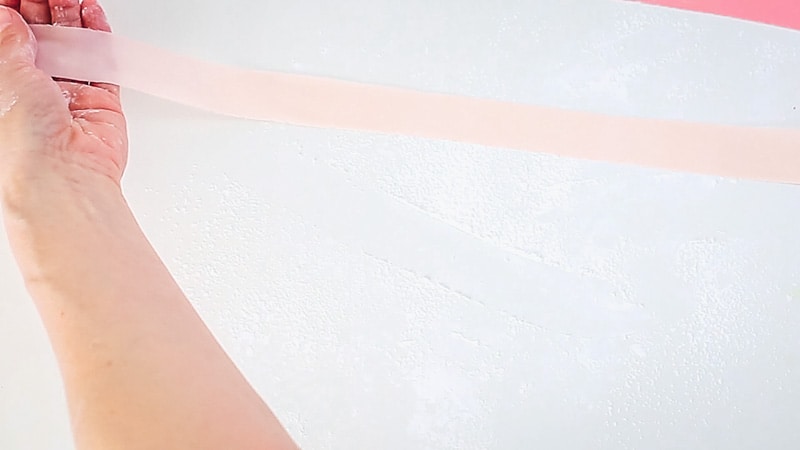
Take a section of the darkest color, sprinkle some cornstarch onto your work surface and onto the fondant and use your small fondant roller to roll it out in a long strip.
If you’re using a pasta roller attachment, you just need to roll it out thin enough to get it through the pasta roller. You’ll want to eventually get it to a level 6 on the pasta roller machine.
If you need to see how to use a pasta roller for rolling fondant, that’s in the free mini course for fondant ruffle cakes…you can see that link earlier in this post.
You really want to roll the fondant in a long strip and make it super thin. If you don’t roll out the fondant super thin, it will be too bulky when you go to gather it into ruffles.
This strip needs to be the widest strip for the gathered ruffles.
Set that strip to the side and work on the medium color. Do the same thing with that one. Roll it out with your fondant roller super thin, but you want this strip to be a little less wide than the first strip.
Next do the last color…the lightest color. This strip needs to be the skinniest strip.
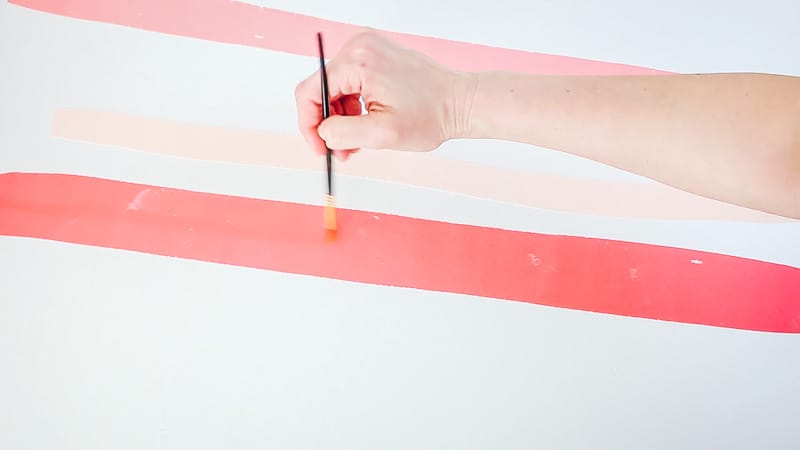
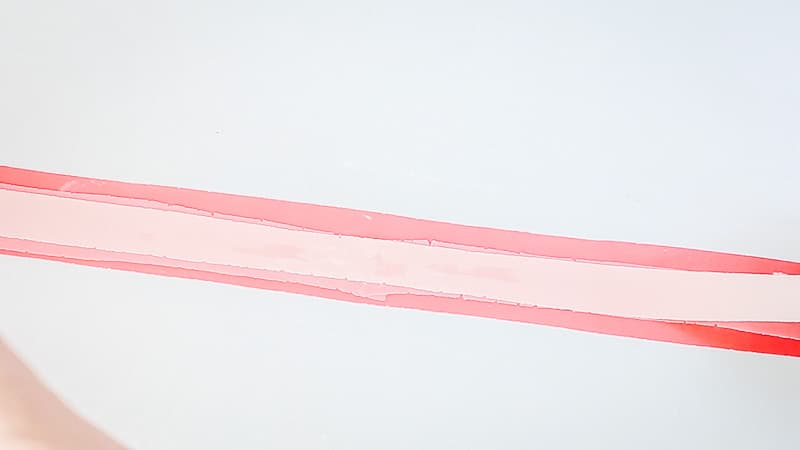
Now take the darkest strip and add a line of water down the middle with your paint brush. Make sure not to add a lot of water. You only need to do a damp line down the middle.
By the way, it’s okay for the edges of your fondant strips to be ragged. That’s actually a good thing. Plus if they tear, it’s okay too. That gives the ruffles some character.
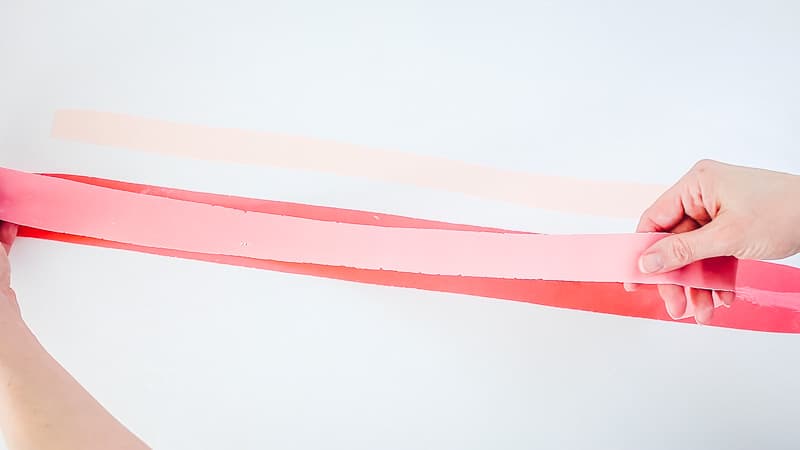
Now, lay the medium colored fondant strip on top of it.
Add a line of water on that strip.
Now lay the lightest strip of fondant on top of that one.
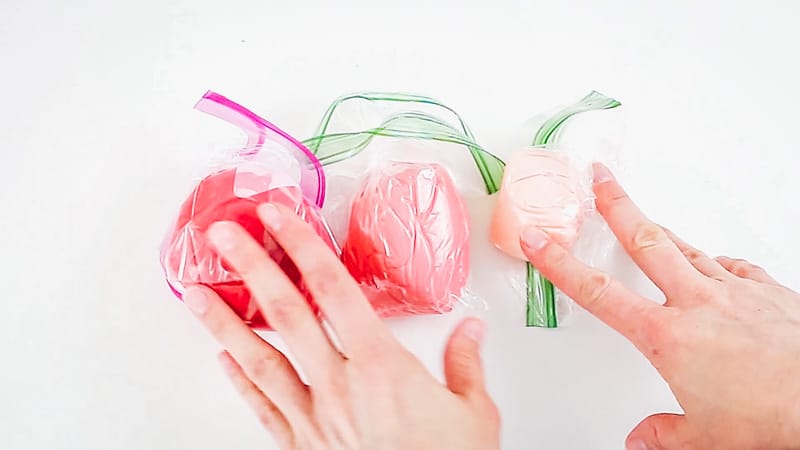
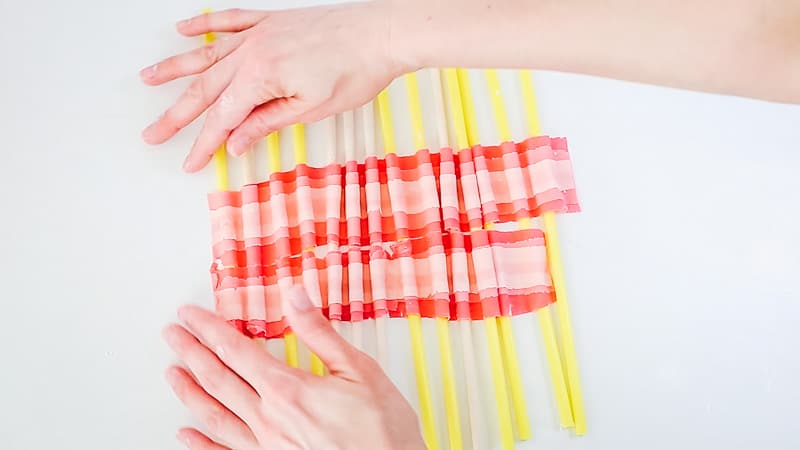
Now take your dowels and slide them under the fondant strip you just made.
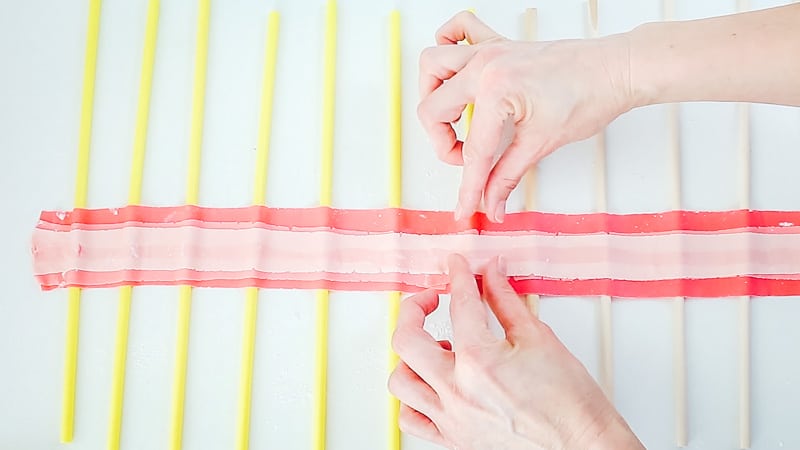
Once you get all the dowels under the strip of fondant, push them closer together. Just kind of roll the dowels together. (The video will show this better.)
Let it sit this way for about 10-15 minutes or so. You need it to firm up a bit, but you don’t want it to get hard, so don’t leave it like this for a long time.
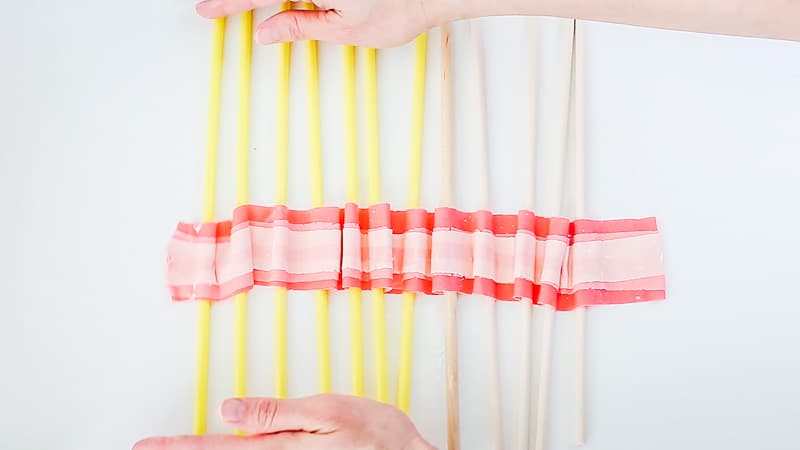
After it’s firmed up for 10-15 minutes, then slide out the dowels.
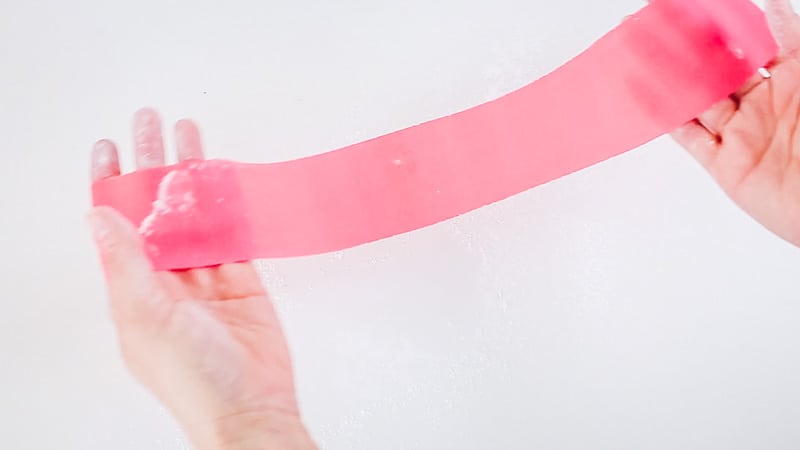
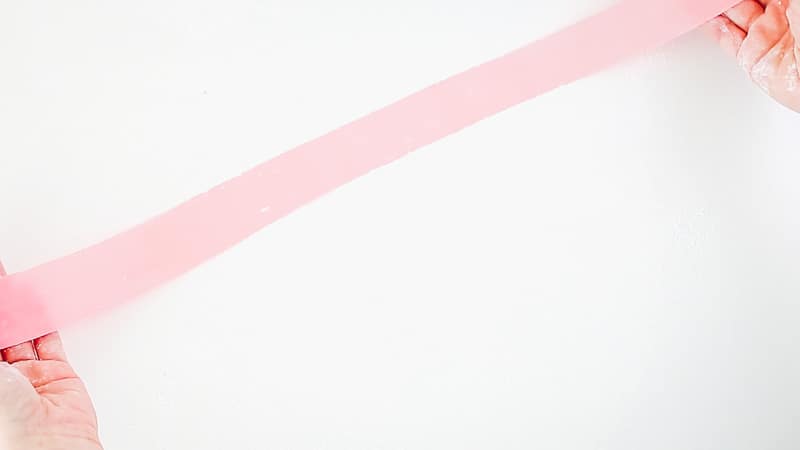
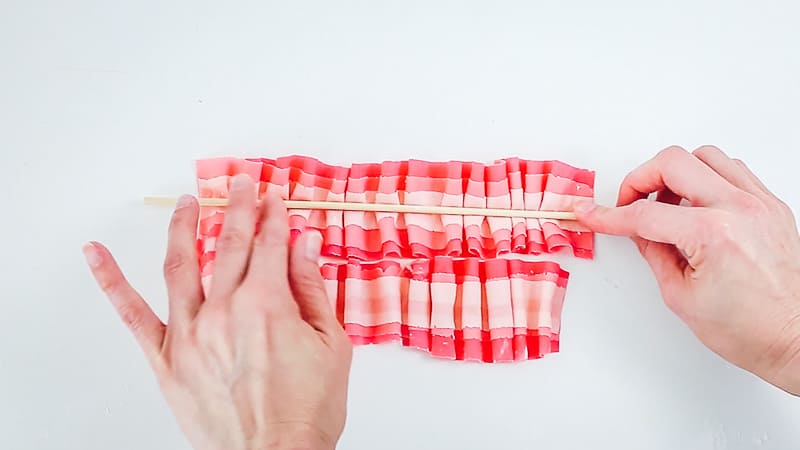
Now adjust the strip to make it straight.

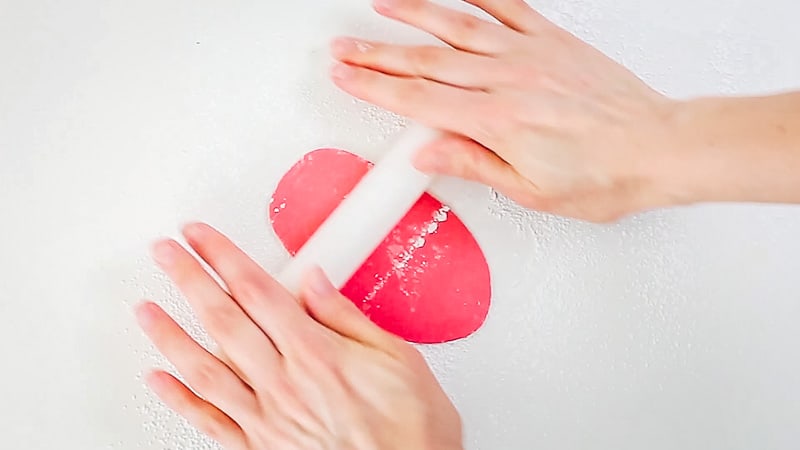
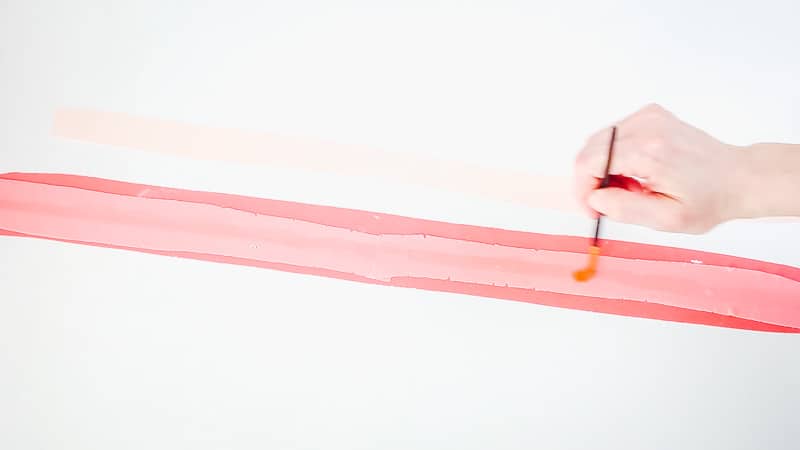
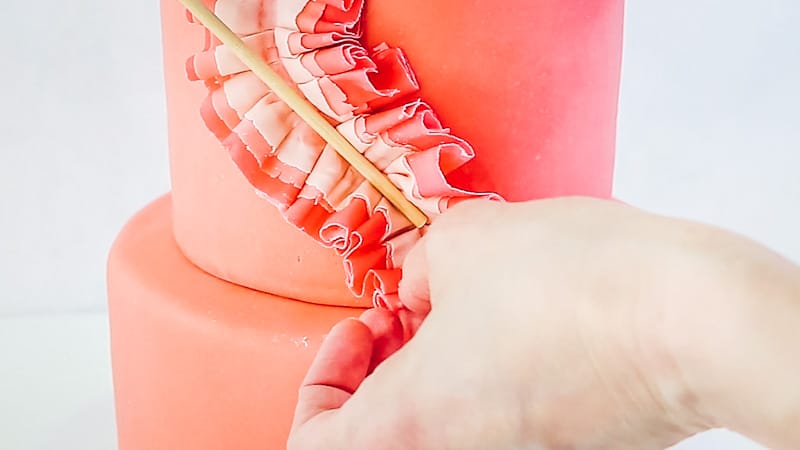
Take a dowel, or a wooden skewer and place it down the middle of your ruffle strip and push down.
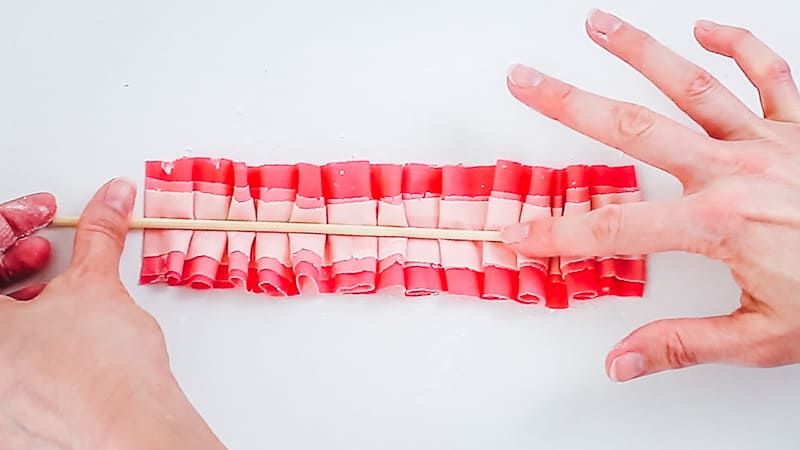
Next roll the skewer back and forth a bit. Be careful not to push it down so hard that you essentially cut through the fondant. You don’t want to cut through the fondant.
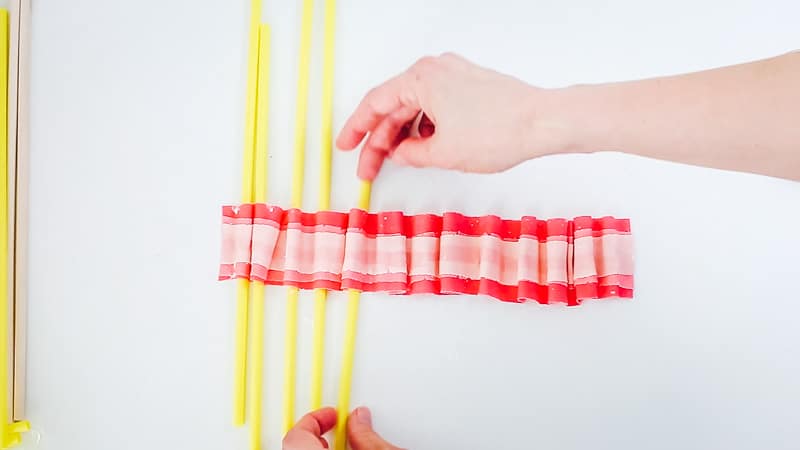
Set that strip of ruffles to the side, while you make more. Now, you don’t want it to firm up completely, so don’t set them aside to dry overnight or for several hours.
When you make these, be prepared to use them pretty soon.
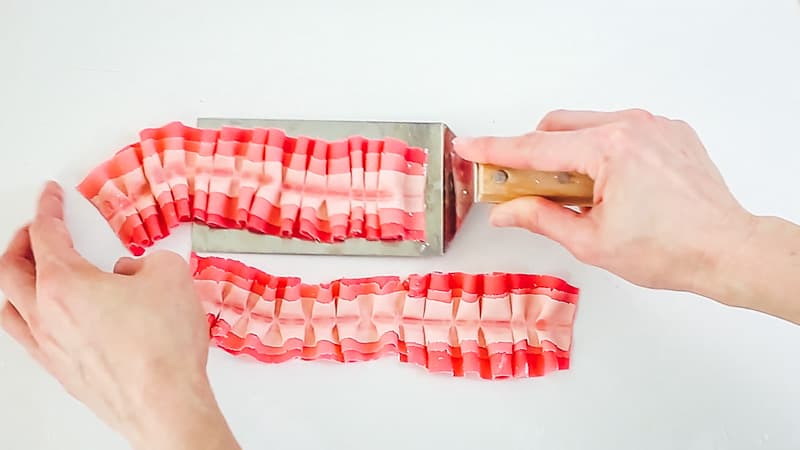
You’ll need to make several more strips of these gathered ruffles. I found that I could do a couple at a time and it made it go quicker.
Once you get several ruffle strips done, just set them to the side. I found using a hamburger flipper helped me pick up the strips and move them easier.
ADDING THE FONDANT GATHERED RUFFLES TO THE CAKE:
Take a look at your cake and determine where you’d like your ruffles. I decided to go with two rows of ruffles down the middle of my cake, but you can add them in any way your want.
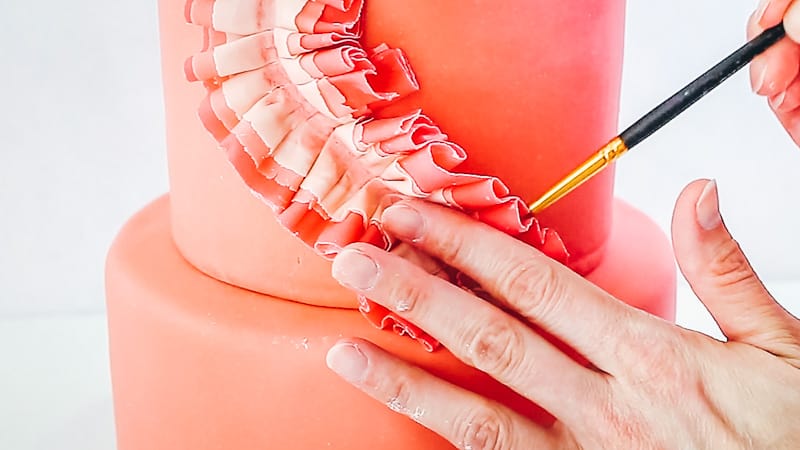
Take your small paint brush and add a bit of water to your cake where you’d like your fondant ruffles to go.

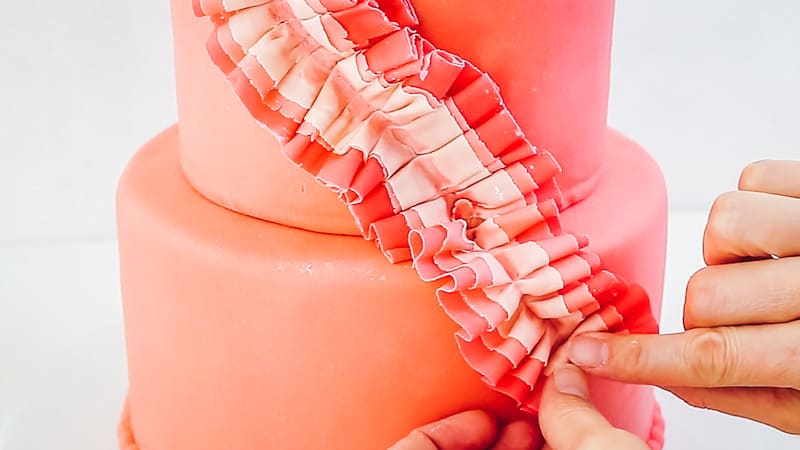
Now just cut off a section of one of your fondant strips and then attach to your cake. I wanted mine to have some curve, so I just sort of twisted them as I added them to the cake.
You’ll have to cut your ruffle strips into sections because if you try adding one of the entire strips, it too hard to work with.
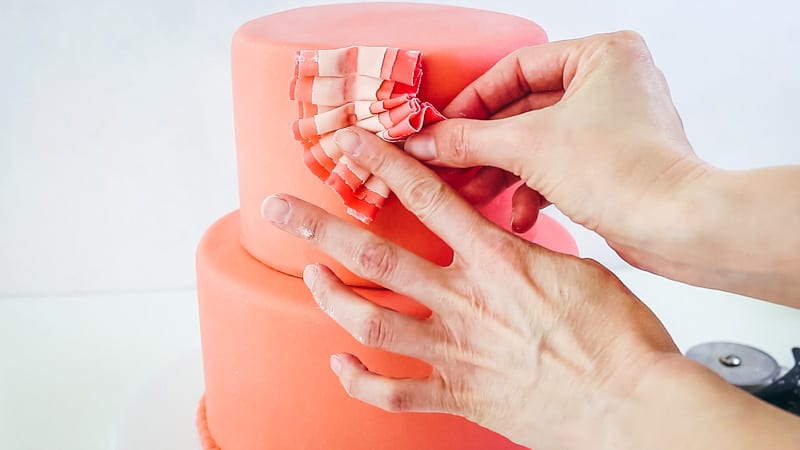
You’ll also need to add a bit of water behind some of my ruffles and attach them to the cake if they keep falling forward.
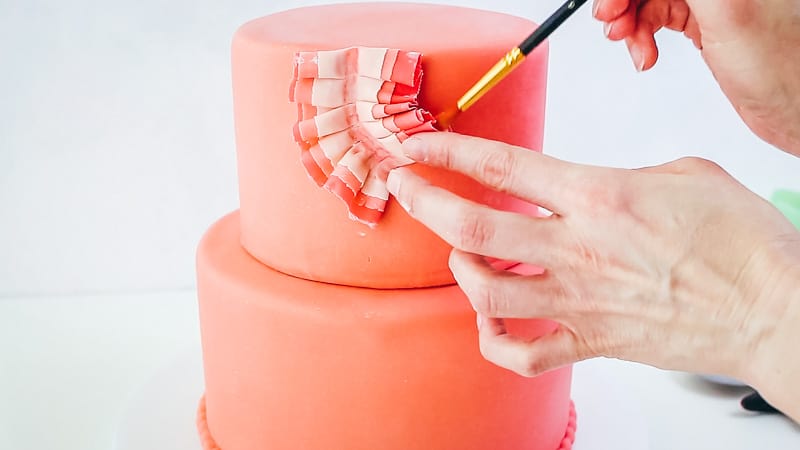
Add more water where you want to attach the next ruffle section.
Attach the next section of ruffles. It’s also helpful to use the wooden skewer or dowel to attach the fondant strips.
You’ll need to add a bit of water behind the ruffles to attach them to the cake.
Keep on adding more sections of the ruffles. Use the wooden dowel or skewer to help you attach them, so you don’t squish the ruffles.
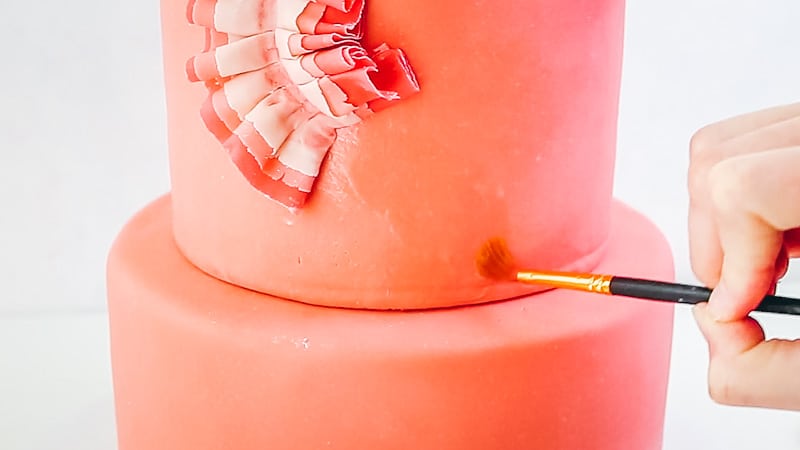
Add the second line of fondant ruffles.
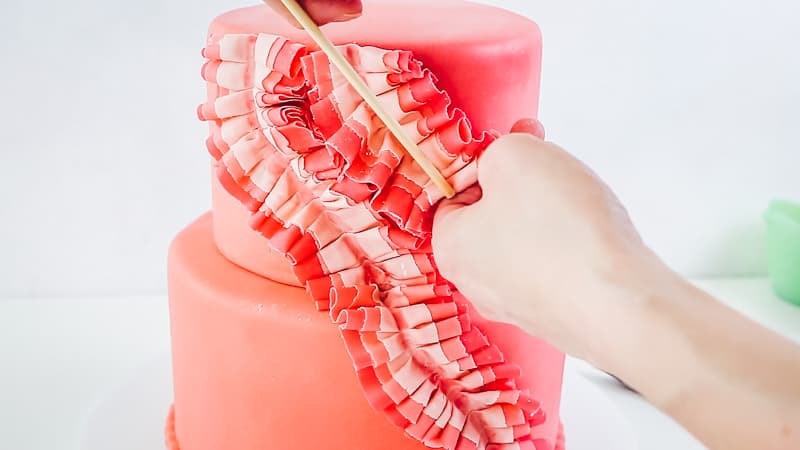
Keep going all the way to the bottom.

FINISHING OFF THE FONDANT GATHERED RUFFLE CAKE:
Now you’ll want to take the lightest color fondant you mixed up and make some fondant pearls for the center of the fondant ruffles.
Roll out a thin log of the fondant, dust the mold with cornstarch and push the fondant log into the pearl mold.
There are a lot of different pearl molds, but I find I really like to use the Wilton one. There’s a link for it in the supply list above.
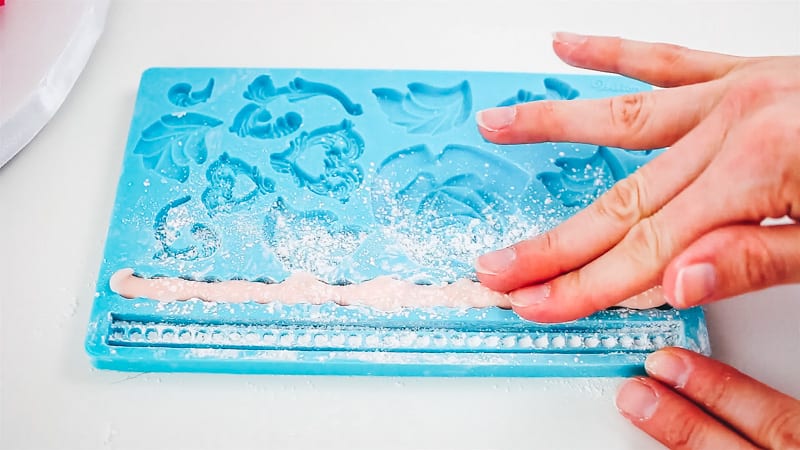
Dust the fondant again and take a palette knife and scrape off the excess on the top.
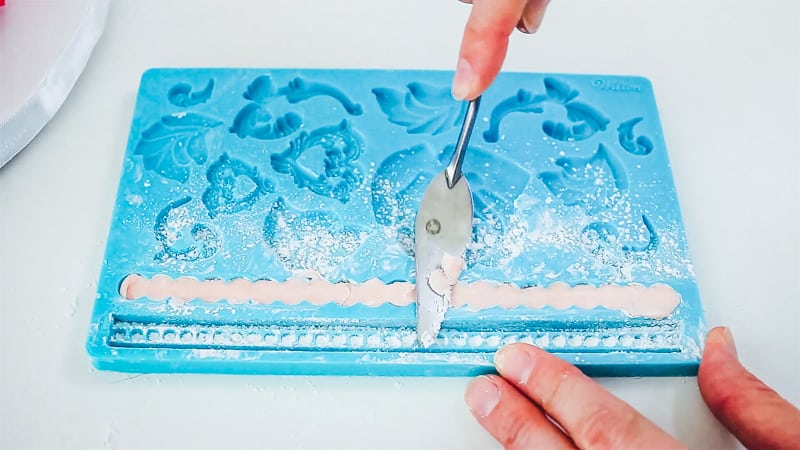
Next just bend the fondant mold and pull out the pearls.
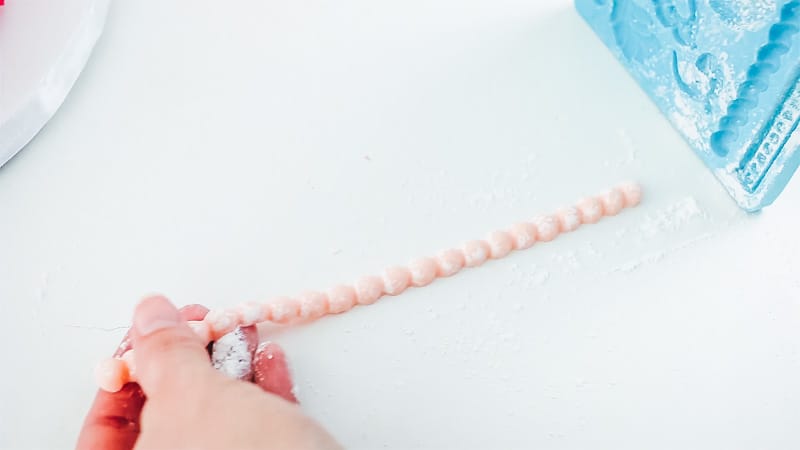
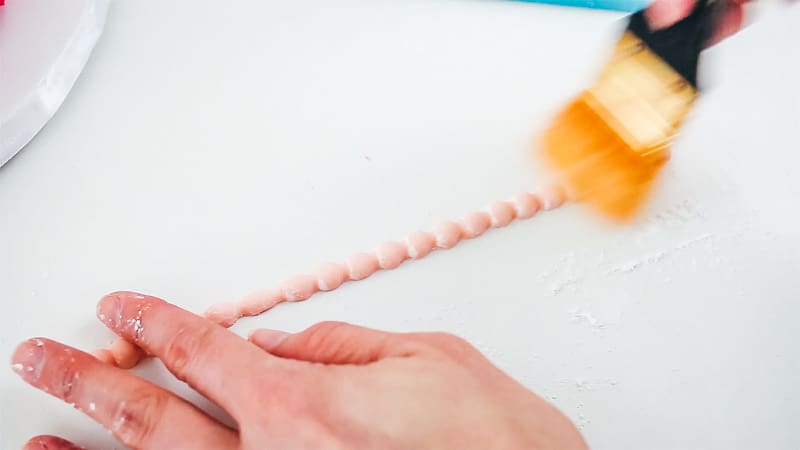
Brush off any excess cornstarch.
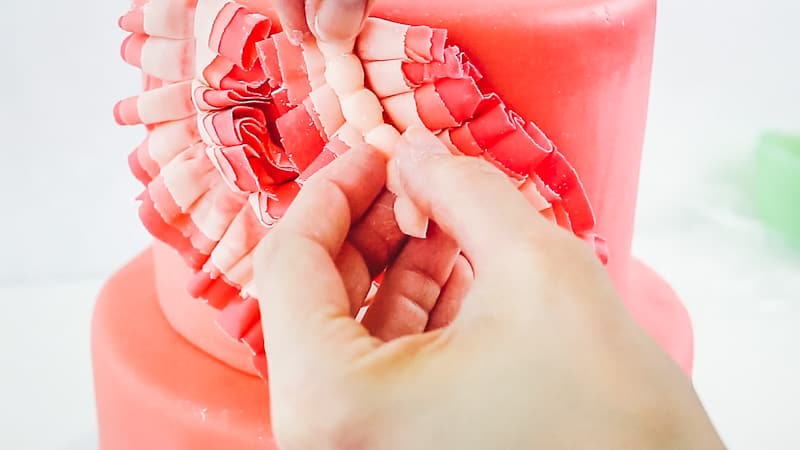
Add a bit of water to the very middle of your fondant ruffle strips.
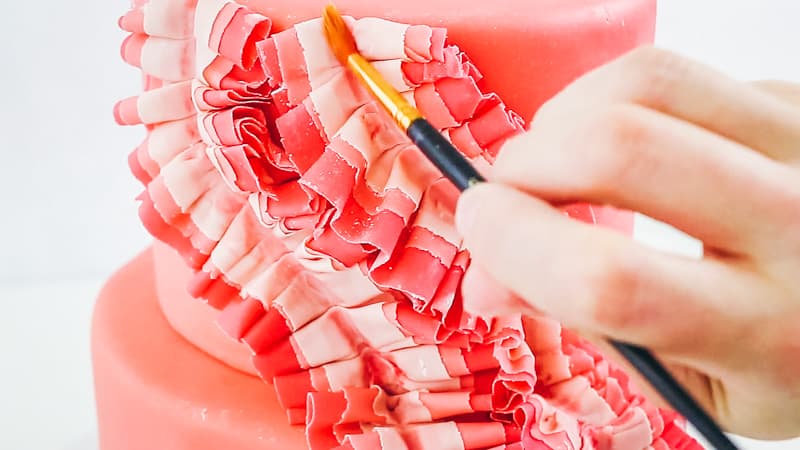
Attach the fondant pearls to the middle of each ruffle strip.
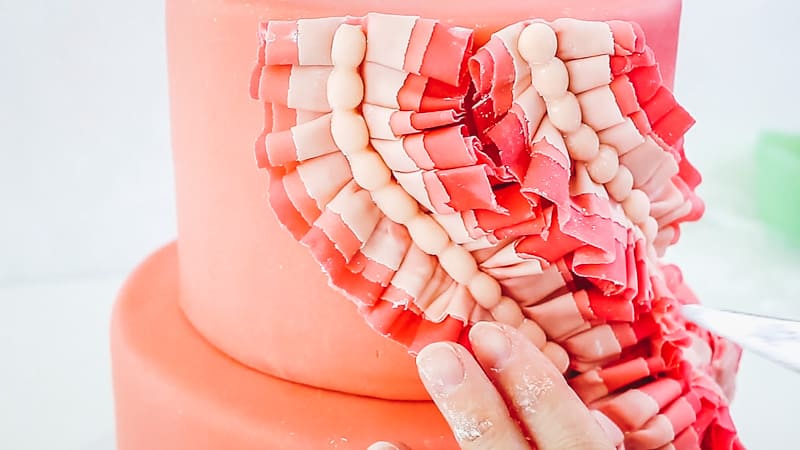
To finish everything off, make some fondant pearls the same color as your cake and then add them as a border to each tier.
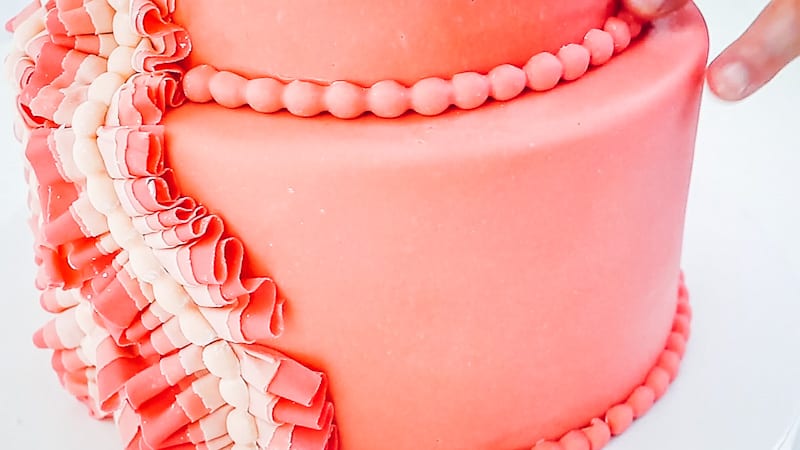
Lastly, take a dry brush and brush off any excess cornstarch you have left over on your cake and the ruffles.

Woo hoo! You did it! You’ve made a beautiful fondant gathered ruffle cake and it’s so different than any of the other ruffle cakes out there!
VIDEO FOR MAKING THE FONDANT GATHERED RUFFLE CAKE:
I hope you have fun with this one. The color combination ideas are truly endless and there are so many different patterns you could make with the ruffles.
Don’t Forget to Pin it for Later!
Kai
So beautiful! It reminds me of a flamenco dancer’s skirt. Thank you so much for your time and energy to share your experience and knowledge with me. Greetings from Joshua, TX.
Kara Jane
Thanks so much! Yes it really does look like a flamenco dancer’s skirt…I hadn’t even thought of that! And I’ve been to Joshua many times as a child. We had some really close family friends who lived there…lot’s of good times. 🙂