
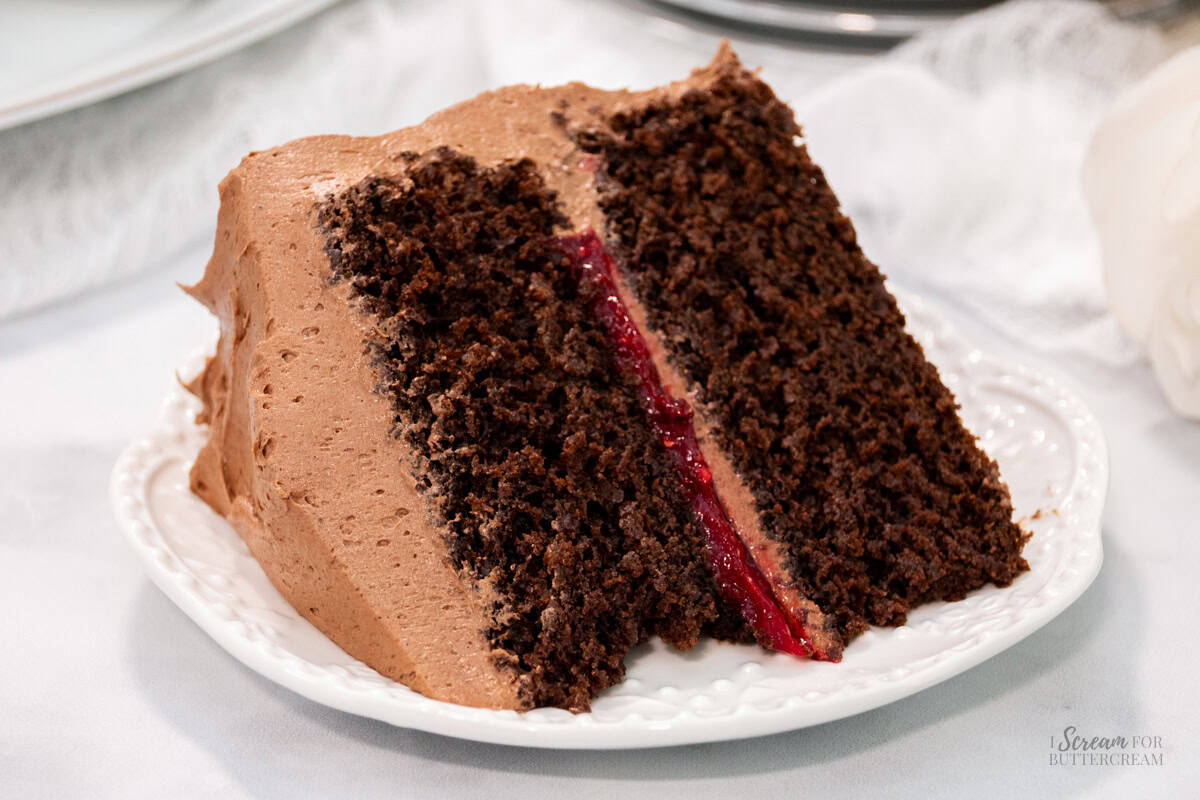
This rich, moist chocolate raspberry cake is layered with tart raspberry filling and chocolate buttercream, an easy recipe that's bursting with flavor.
There's just something about the pairing of rich chocolate and tart raspberries that really works and this cake brings both flavors together in every single bite.
It's super moist, full of rich chocolate flavor and layered with a fruity raspberry filling that's not too sweet at all. Frozen raspberries do the job beautifully here and it's an easy recipe with big payoff, whether you’re an experienced baker or just getting started.
Jump to:
This cake is perfect for birthdays and other special occasions. I would say it's more in the 'gourmet' genre, but at the same time, still easy to accomplish.
It's also easy to make, especially the cake portion. It's very easy to put together. The raspberry filling does need to be made ahead, though, so you'll want to plan a bit for that.

Why You’ll Love This Cake
- Super moist cake
- Tart and fruity, not too sweet, raspberry filling
- Uses frozen raspberries
- Rich chocolate flavor combined with a tart raspberry flavor
Pro Tips
- When adding the filling to the cake, make sure to add a thin layer of the chocolate buttercream on the first layer, then add the raspberry filling. This will keep the filling from soaking into the cake and making it soggy.
- It's also helpful to pipe an icing dam to keep the filling from squishing out. If you don't have an icing bag, feel free to use a plastic freezer bag.
Recipe

Chocolate Raspberry Cake
Ingredients
For the filling:
- 1 (10 ounce) bag frozen raspberries
- 1 tablespoon lemon juice
- ¼ cup water
- ½ cup granulated sugar
- 2 tablespoons cornstarch
For the cake:
- 2 cups all-purpose flour (Measured correctly: Spooned into the measuring cup and leveled off - don't scoop and pack the flour into the cup, that will add too much flour.)
- ¾ cup unsweetened natural cocoa powder (not Dutch cocoa powder)
- 2 teaspoons baking powder
- 1 teaspoon baking soda
- 1 teaspoon salt
- 2 cups granulated sugar
- ½ cup vegetable oil
- 1 teaspoon vanilla extract
- 1-2 teaspoons raspberry extract or emulsion (optional for a raspberry/chocolate flavor in the cake)
- 1 cup buttermilk
- 2 large eggs
- 1 cup hot coffee or very hot water
For the frosting:
- 1 cup unsalted butter, room temperature
- 1 cup salted butter, room temperature (if you can't get salted butter, just use all unsalted and add a pinch of salt.)
- 1 cup unsweetened natural cocoa powder
- 5 cups confectioner's sugar
- 1 teaspoon vanilla extract
- 3 tablespoons milk (may add another tablespoon if needed)
Instructions
For the filling:
- Make the filling ahead of time as it needs to cool down before it's added to the cake. It can also be made the day before and kept in the fridge until ready to use.
- Add the raspberries, lemon juice and only about half of the water to a large saucepan. Heat on medium and bring to a simmer. Let it simmer for about 5-7 minutes until the raspberries break down a little. Stir frequently.
- Take the raspberries off of the heat and strain out the seeds if desired. Add the strained mixture back into the saucepan and turn the heat back onto medium.
- Add the sugar to the mixture and stir in well.
- Mix the other half of the water with the cornstarch in a small bowl or measuring cup first, then pour into the raspberry mixture.
- Stir well and allow the mixture to lightly simmer for about a minute or so until it thickens, then remove from the heat.
- Allow the filling to cool to room temperature, then cover it and place in the refrigerator until ready to use. The filling must be cooled down, preferable chilled when assembling the cake.
For the cake:
- Preheat the oven to 350 degrees F.
- Spray, grease and flour, or add parchment paper to two, 8-inch round cake pans. Set aside.
- In a large mixing bowl, add the flour, cocoa powder, baking powder, baking soda, salt and granulated sugar. Whisk well and set aside.
- In a medium-sized mixing bowl, add the oil, vanilla extract, raspberry extract (optional), buttermilk and eggs. (Do not add the hot coffee or water yet.) Whisk well and add to the dry ingredients.
- Mix with an electric mixer on medium only until just combined (about 20 seconds). Mixing scratch cakes for too long or at too high of speed will cause the cake to turn out dense, rubbery or will fall.
- Add the hot coffee or water and mix on medium until well incorporated (about 15-20 seconds). Scrape down the sides and bottom of the bowl and mix again on medium only for about 10 seconds.
- Pour the batter into the pans and bake at 350 degrees F for approximately 35 – 40 minutes. Ovens vary. The edges of the cake will start to pull away from the pan a bit, the top will be slightly firm when lightly touched and a toothpick inserted into the center of the cake layer will come out with a few moist crumbs on it or clean, but no raw batter.
- Pull the cakes out of the oven and set them on a cooling rack to cool for approximately 10-15 minutes, then turn the cakes out the pans and allow to cool completely on the cooling racks before assembling and adding frosting.
For the frosting:
- Add the room temperature butter and the cocoa powder to a large mixing bowl and mix with an electric mixer on medium to medium-high until well mixed and smooth. Scrape down the sides of the bowl and mix again for another 20 seconds.
- Add 3 cups of the confectioner's sugar plus 2 tablespoons milk and mix on low until combined, then on medium-high until fully incorporated.
- Add the vanilla and the last 2 cups of confectioner's sugar. Mix on low until combined, then on medium-high until fully incorporated. Scrape down the sides of the bowl, then mix again for about 20 seconds.
- Check the consistency. If it's too thick, add 1 tablespoon of milk and mix again. Repeat until the desired consistency has been reached.
- For fluffy buttercream, mix for about 2 minutes on medium-high to high speed.
- For smoother frosting, mix on low for a couple of minutes.
- Timeline and How To Assemble:
- Make sure the cake has cooled completely and that the raspberry filling is chilled. The cake does not have to be chilled, but it should not be warm.
- Level the tops of the cake layers if needed however these cake layers should already cool flat on the top.
- Add a layer of the cake to a cake plate, then add a thin layer of the chocolate frosting. This will keep the raspberry filling from soaking into the bottom cake layer and making it soggy. It's also good to pipe an icing dam just around the inside of the cake layer to keep the raspberry filling from squishing out later on.
- Add the raspberry filling. Try not to add the filling close to the edges of the cake layer so that it doesn't squish out. Depending on how much the filling cooked down, there may be some extra left over. Don't fill the cake too much. Either add the leftover filling to the top center of the cake after it's frosted, or add it to an airtight container, store in the refrigerator and use as a jam on toast, etc. Just make sure to use it within about 5 days or so
- Next, add the last layer of cake, then cover the entire sides and top of the cake with the remaining chocolate frosting.
- See the notes section for best ways to store this cake, how to serve it and for more questions.
Notes
Nutrition
How to Share
I’d love for you to share this recipe link or tag it, but please do not share screenshots or copy/paste the recipe to social media as the content and photographs are copyright protected and we (bloggers) work really hard on our content. Sharing the link, tagging us on socials and pinning it is super appreciated though!
Steps to make this cake with step-by-step photos
(The full printable instructions are in the recipe card above.)
Step 1:
Make the raspberry filling first so it can chill completely. Don't skip the chilling step or the cake will just get soggy and collapse.

Step 2:
For the cake, mix up the dry ingredients in one bowl.

Add the liquid in another (except the water or coffee, and mix . Then add the water or coffee and mix again.

Step 3:
Pour the batter into prepared pans and bake at 350 degrees F for approximately 35 – 40 minutes.

Step 4:
Make the buttercream while the cakes cool.
Step 5:
Level the cake layers if needed and assemble the cake.
Add a thin layer of chocolate frosting to the first cake layer. Pipe a ring around the edge to hold in the raspberry filling.
Add the chilled raspberry filling. You might have some left over, depending on how much your filling cooked down or if you strained the seeds.

Step 6:
Stack the second cake layer on top and frost the entire cake with the rest of the buttercream. Enjoy!

Tips & FAQs
Yes, that works just fine.
Don’t use Dutch processed cocoa as it isn’t acidic like cocoa powder and using it would cause the other ingredients to need to be adjusted. If you want more information about the different types of cocoa powder, see this post: Why Do Recipes Say Not to Use Dutch Processed Cocoa Powder?
No, you can omit it if you like. It just adds a hint of raspberry flavor to the chocolate cake.
It’s really best if you can use real buttermilk, as it makes for a softer texture and really helps give the cake flavor. If you can’t get it, you can substitute with this sour milk recipe:
For every one cup of buttermilk called for, fill a measuring cup with 1 cup regular milk, take out 1 tablespoon and replace it with 1 tablespoon lemon juice or white vinegar and stir well. Let sit for five minutes, then it’s ready to use.
This will not work exactly the same as buttermilk, but can work in a pinch.
You don't, but just know that if you do, the cake will not have a coffee taste. The coffee just brings out the chocolate flavor. If you don’t like the idea of using it, though, you can just use water and it will turn out just as tasty. Just make sure not to completely omit the liquid altogether.
If this cake is dense, then it's likely that you either mixed too long or mixed at too high of a speed.
It's hard for me to gauge how much filling each individual will want, so I tend to write recipes that have a bit more, so that I'm covered. If you have filling left over, you can add a bit to the top center of the cake after it’s frosted, or add it to an airtight container, store in the refrigerator and use as a jam on toast, etc. I love adding mine to my Greek yogurt.
It's hard for me to gauge how much frosting each individual will want, so I tend to write recipes that have a bit more, so that I'm covered. If there is extra frosting, feel free to freeze it to use later.
Because this cake is filled with a fruit filling, it should be stored in an airtight container or covered well in the refrigerator. It can last up to 5 days.
This cake can be served at room temperature, cold, or even warmed up, however you prefer. Please note that the texture of the cake when chilled is a bit firmer.
Supplies
As an Amazon Associate, I earn from qualifying purchases.
Tried This?
If you give this recipe a try, I'd love to know what you think!

Keianna
I made this cake to take to work and it was a MASSIVE hit. One of my coworkers said it tastes just like his grandmother’s chocolate cake. That is a major compliment. I omitted the raspberry filling and replaced the raspberry extract with coffee extract. The frosting is very light and had a whipped texture. This will stay in my arsenal for sure.
Kara
Hi Keianna, So glad this was a hit! I agree with you – when someone says a cake tastes like their mom’s or grandmother’s, that’s the best kind of compliment. I love the idea of using the coffee extract as well! Thank you for your very kind review. 😊