I don’t do a ton of cake carving, but I have done enough to know what really helps and what actually makes it more difficult. Today I’m sharing my best tips for carving cakes.
This post contains affiliate links. As an Amazon Associate, I earn from qualifying purchases. You can see my policies linked in the website footer.
I’m not one of those cake decorators that does a lot of the huge sculpted cakes. I just like to keep things on a smaller scale and do cakes that don’t really take me a week to do. So big structured cakes just aren’t my jam, but I do like to do a little carving now and then and make some cute shapes out of cake.
I wanted to put together some ‘realistic’ tips for how to carve cakes when you need to make a 2D or 3D cake. These tips can really save you a lot of heartache, especially if you’re not in the habit of carving lots of cakes.
Alright, let’s get straight to the tips!
Chill the cake:
I’ve heard of some decorators being able to carve a room temperature cake, but I’ve found it really helps to carve it cold.
Some people freeze them. I don’t know about you, but I can’t carve a frozen cake. Just getting it cold seems to be enough for me.
It just seems to be much less crumbly when it’s cold.
Watch your cake fillings:
Don’t add too much filling between the cake layers, or you’ll really have a mess on your hands when you start the carving.
Some people actually stack their layers, carve and THEN add the filling. That probably cuts down on the mess, but I don’t really want to take my cake apart, add filling and then put it back together. I’d rather just deal with the mess that comes with carving a cake that has filling in it.
Don’t use any nuts or chips etc. in your cake or fillings. That’s going to catch on your knife and make it really difficult to carve.
You also don’t want to get all fancy on the fillings and add fruit. I’m sure it’ll taste really good, but it won’t carve well. It’ll just be a huge mess.
Use a really sharp knife:
Like I said earlier, I don’t tend to do a ton of carving, so I really have just used the knives I’ve had on hand…nothing special. I was using just an old knife that my husband had been given from an old family member. I don’t even know what kind it was…the handle was so worn. I would just sharpen it really well when I wanted to use it for carving and it worked ok for me.
I recently just bought a knife that works really well and it was pretty inexpensive. I’m not a knife aficionado or anything, but I like this one: ShanaSana Knife
It’s not a huge knife for a very large project, but I find it’s a good medium sized knife that works for the types of cakes I do.
Here’s another knife recommendation from Ashlee Marie: Best Cake Carving Knife from Ashlee Marie
Use a sturdy cake recipe:
You don’t want to use a dry cake, because you don’t want it to crumble easily, but you do need it to be on the dense side. If it’s really super moist, you might also have trouble with it falling apart on you. Here are some extra sturdy cake ideas:
Sharon's Sturdy Cake Recipe – scroll down on that page to grab the recipe.
Chocolate Cake Perfect for Carving by Veena Azmanov
My scratch and vanilla cake recipes are on the dense side as well and they will also work for carved cakes. Just remember you want to get them cold before carving. It really helps.
Chocolate Butter Cake Recipe
Vanilla Bean Cake Recipe
You can also give your cakes extra stability by using ganache over the cake. It firms up and helps hold everything together.
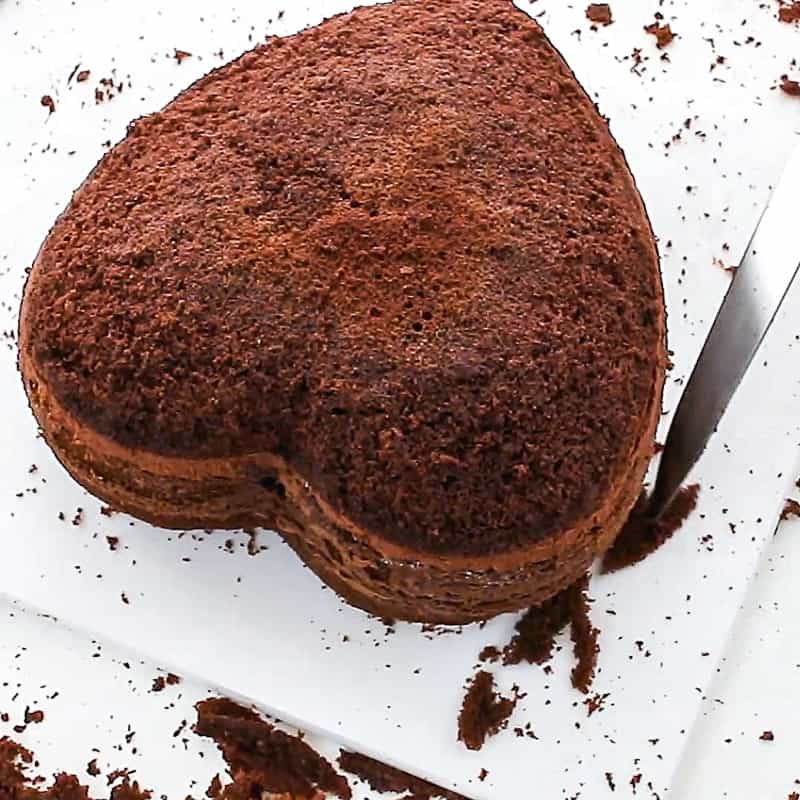
Something to note: If you’re making a big structured cake, then you’ll definitely need a more dense cake, but if it’s more of a 2D type cake and not something that is ‘structured’, you may get away with a lighter cake…even sometimes using a cake mix. I used a cake recipe for the heart drip cake (pictured below during the cutting stage) and it worked just fine…just follow the other tips in the post and make sure it’s cold when you carve it.
Alright let’s get to the next tip.
Use a template:
You might want to make a template to help you with the carving. This totally depends on your design of course, but it really does help.
For the corset cake below, I just printed off an hourglass shape from PowerPoint, blew it up and cut it out. I held this up to the cake as I cut the basic shape out. I just used it all around the cake as I carved. By the way, this was one of my very early cakes, so try not to judge the photography. 😉
For the heart cake below, at the time I didn’t have a heart pan, so I just printed out some heart clip art from online and then used that to cut out the shape.

This fireman cake was for a wedding I did years ago. I didn’t have a pan in this shape and I certainly wasn’t going to buy one to use just once, so I found some clip art online, printed it out and blew it up to the size I needed. I printed it on cardstock paper so that it would be a little more sturdy and then set that on top of the cake while I cut around it. (This one is also one from my early days. I used DIY templates for the middle design as well.)

You may have to chill it again before covering in buttercream or fondant:
Ok, you may know that I don’t normally chill my cakes before covering them in buttercream. Well this is one of those exceptions.
You’ve just cut the cake up and if you try to add buttercream, you may have a crumbling mess on your hands. I don’t normally like icing chilled cakes, so I would test this out first. Try covering it with a crumb coat and if it’s insanely crumbly, then you’ll just need to chill it before moving forward.
Then once it’s chilled and you go and add the crumb coat, make that layer of buttercream a thinner version of the final buttercream layer.
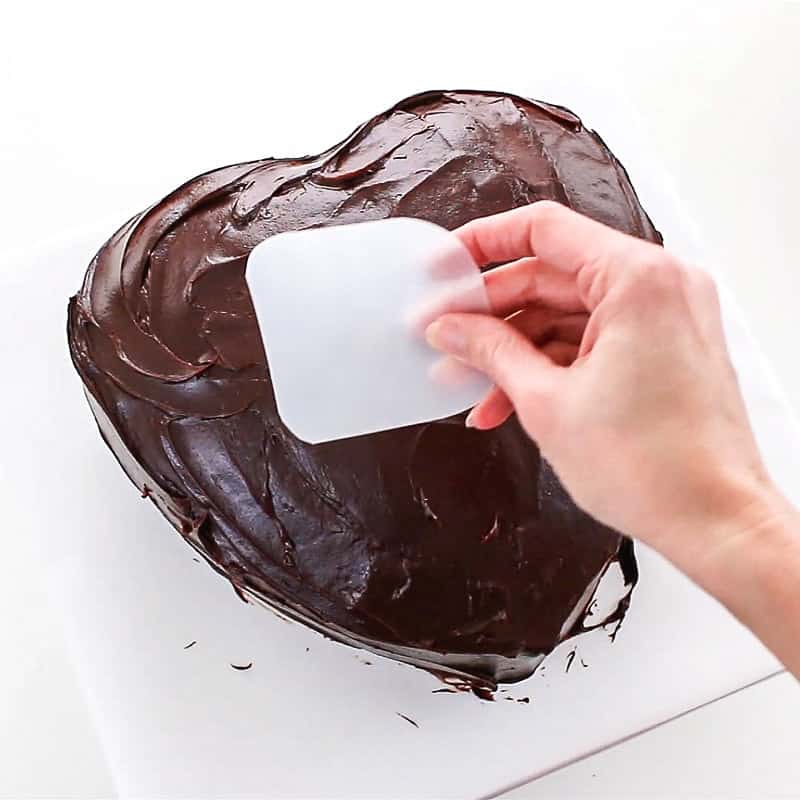
When you add your buttercream or ganache, use a pliable smoother to get it really smooth. Especially if you’ll be adding fondant to it. It’s got to be really smooth.
I like to just use a piece of plastic/acetate folder that I just cut into a square and rounded off the edges. It’s flexible and that’s helpful because it just sort of glides over the cake…especially those curved cakes.
Here’s a pic of that:
Save the cutoffs:
All that deliciousness that you just cut off…you don’t want to just go throwing all that away do you? I get it…some of it is in too little pieces to keep, but sometimes you’ve got big chunks that are cut off. You can use those to make cake pops or just to eat like they are! It’s also good to crumble over a bowl of ice cream. Ask me how I know. 😉
Don’t stress yourself out:
Ok, my final tip is to try not to stress about it. I know, easier said than done, but don’t think you need to be like these famous cake decorators and go to the extremes. Those cakes are beautiful, yours doesn’t have to be that way. I know mine sure aren’t.
My style is just more simple and I like staying in my lane. Yeah it’s fun to try new and challenging things…that’s how we learn, but don’t stress yourself out about it.
I just don’t do extreme cakes. At one point I thought I ‘needed’ to, but I just found they stressed me out. To each their own though. If that’s your thing, then I say go all out, but if the thought stresses you out and you just want to create something fun that people will enjoy, then don’t worry about it being a master showpiece.
We’re supposed to be having fun, right?
I really hope this was helpful and if you have any tips of your own for carving cakes, I’d love for you to add them to the comments below!
Other cake decorating tip posts you might like:
Tips for Covering a Cake in Fondant
Common Cake Decorating Problems and How to Avoid Them
Decorate Cakes Using DIY Templates






lamya
Brilliant!
Especially the last tip! I can totally relate with this and it felt so good to hear it from you xx.
Kara Jane
Wonderful! Yes we put so much pressure on ourselves to be the best, right!