• Skip to primary navigation
  • Skip to main content
  • Skip to primary sidebar
I Scream for Buttercream
  • Blog
    • Subscribe for Free
    • Exclusive Content for VIPs
  • Visit the Shop!
    • The Cake Blueprint
  • Recipes
    • Cakes
    • Frostings/Fillings
    • Cupcakes
    • Cake Pops
    • Other Sweets
  • Cake Decorating
  • Cake Baking Tips
  • About Kara
  • FAQs
    • Contact Me
    • Terms and Conditions
      • Privacy Policy
      • Advertising Disclosures
      • Cookie Policy
      • Food Safety, Allergy & Nutrition Disclaimers
    • Accessibility Statement
menu icon
go to homepage
subscribe
search icon
Homepage link
  • Blog
    • Subscribe for Free!
    • Exclusive Content for VIPs
  • Visit the Shop!
    • The Cake Blueprint
  • Recipes
    • Cakes
    • Frostings/Fillings
    • Cupcakes
    • Cake Pops
    • Other Sweets
  • Cake Decorating
  • Cake Baking Tips
  • About Kara
  • FAQs
    • Contact Me
    • Terms and Conditions
      • Privacy Policy
      • Advertising Disclosures
      • Cookie Policy
      • Food Safety, Allergy & Nutrition Disclaimers
    • Accessibility Statement
×
Home » Blog » Cupcake Decorating

How to Keep Cupcake Pans Looking New

Updated: Oct 20, 2024 · Published: Oct 20, 2024 by Kara · This post may contain affiliate links · This blog generates income via ads

  • Email
  • Facebook

These easy tips will help keep your cupcake pans looking new while preventing rust and stubborn baked-on stains that are tough to remove.

A clean cupcake pan filled with white liners that have been lightly sprayed with nonstick cooking spray, ready for baking.
Jump to:
  • Problem #1
  • Problem #2
  • Other posts you might like

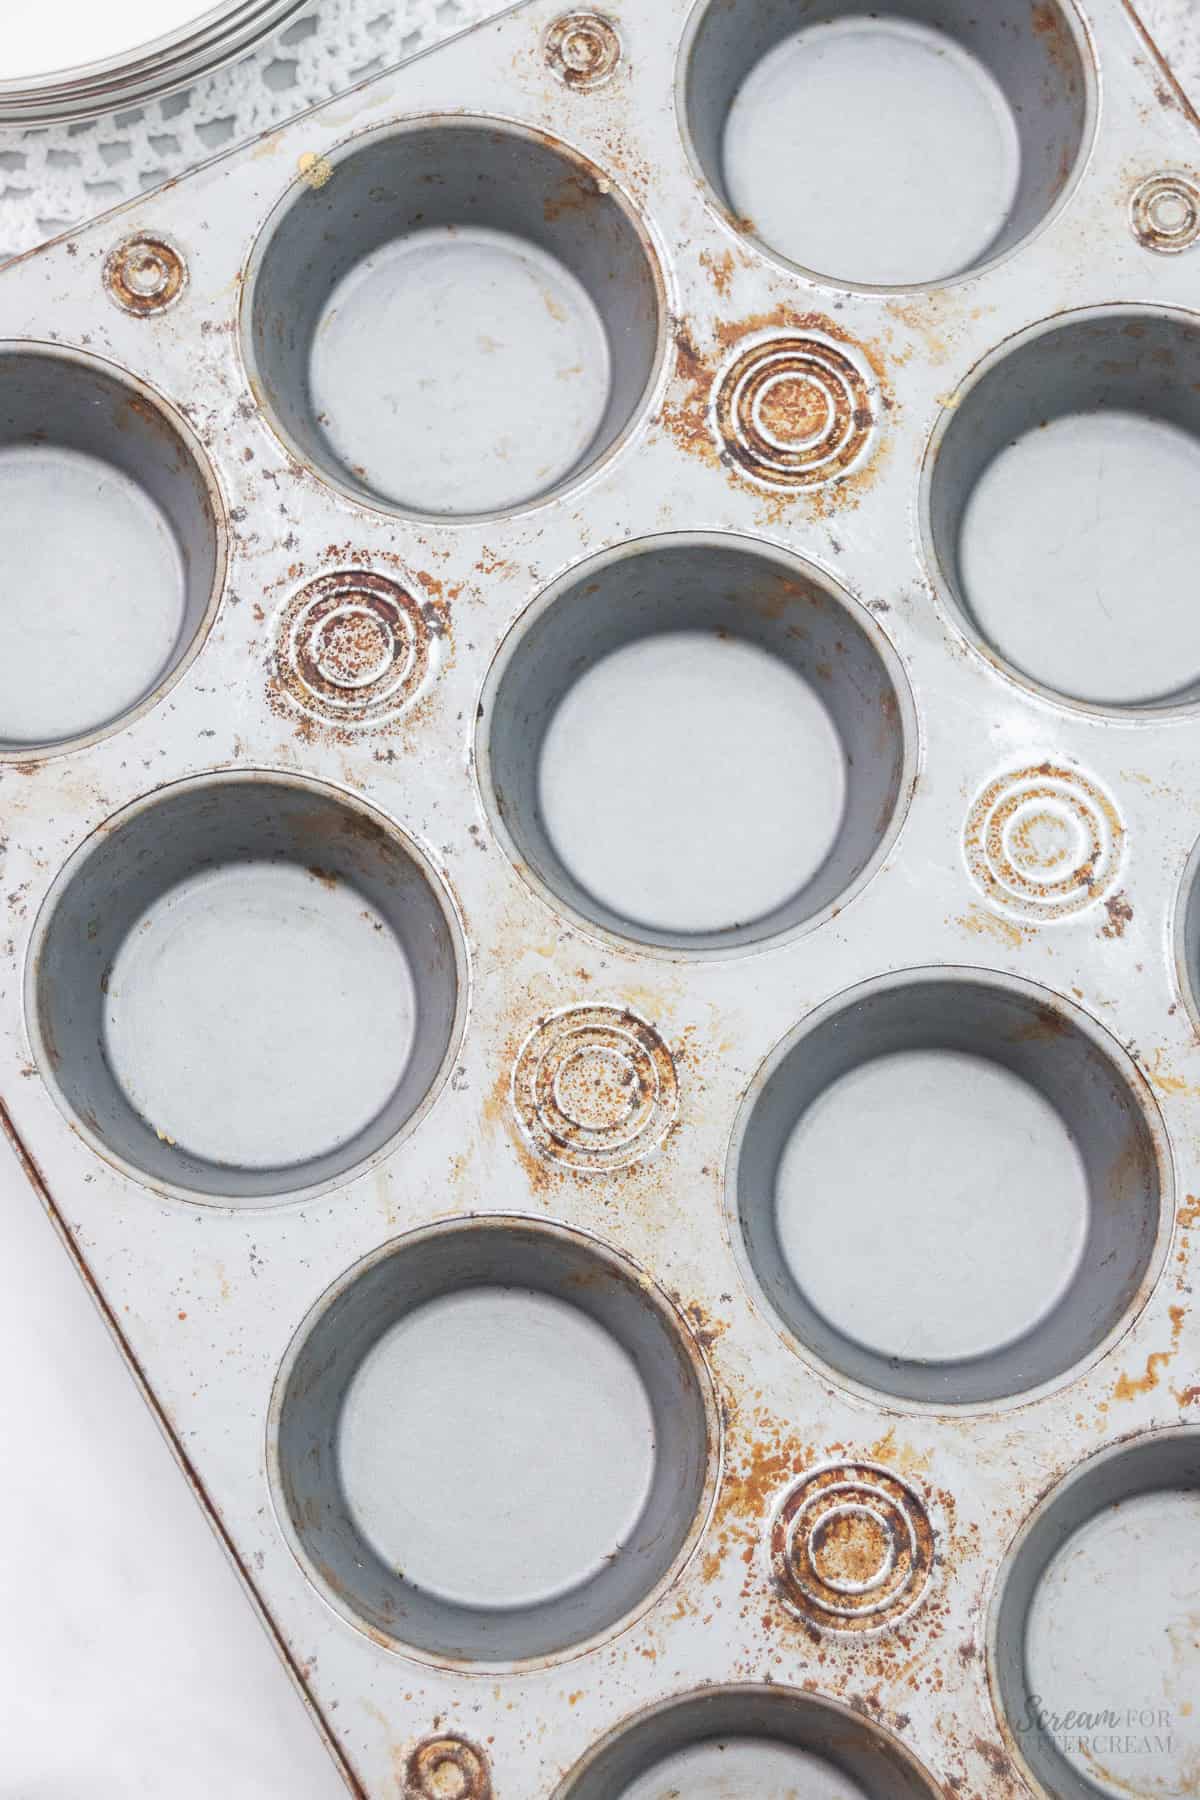
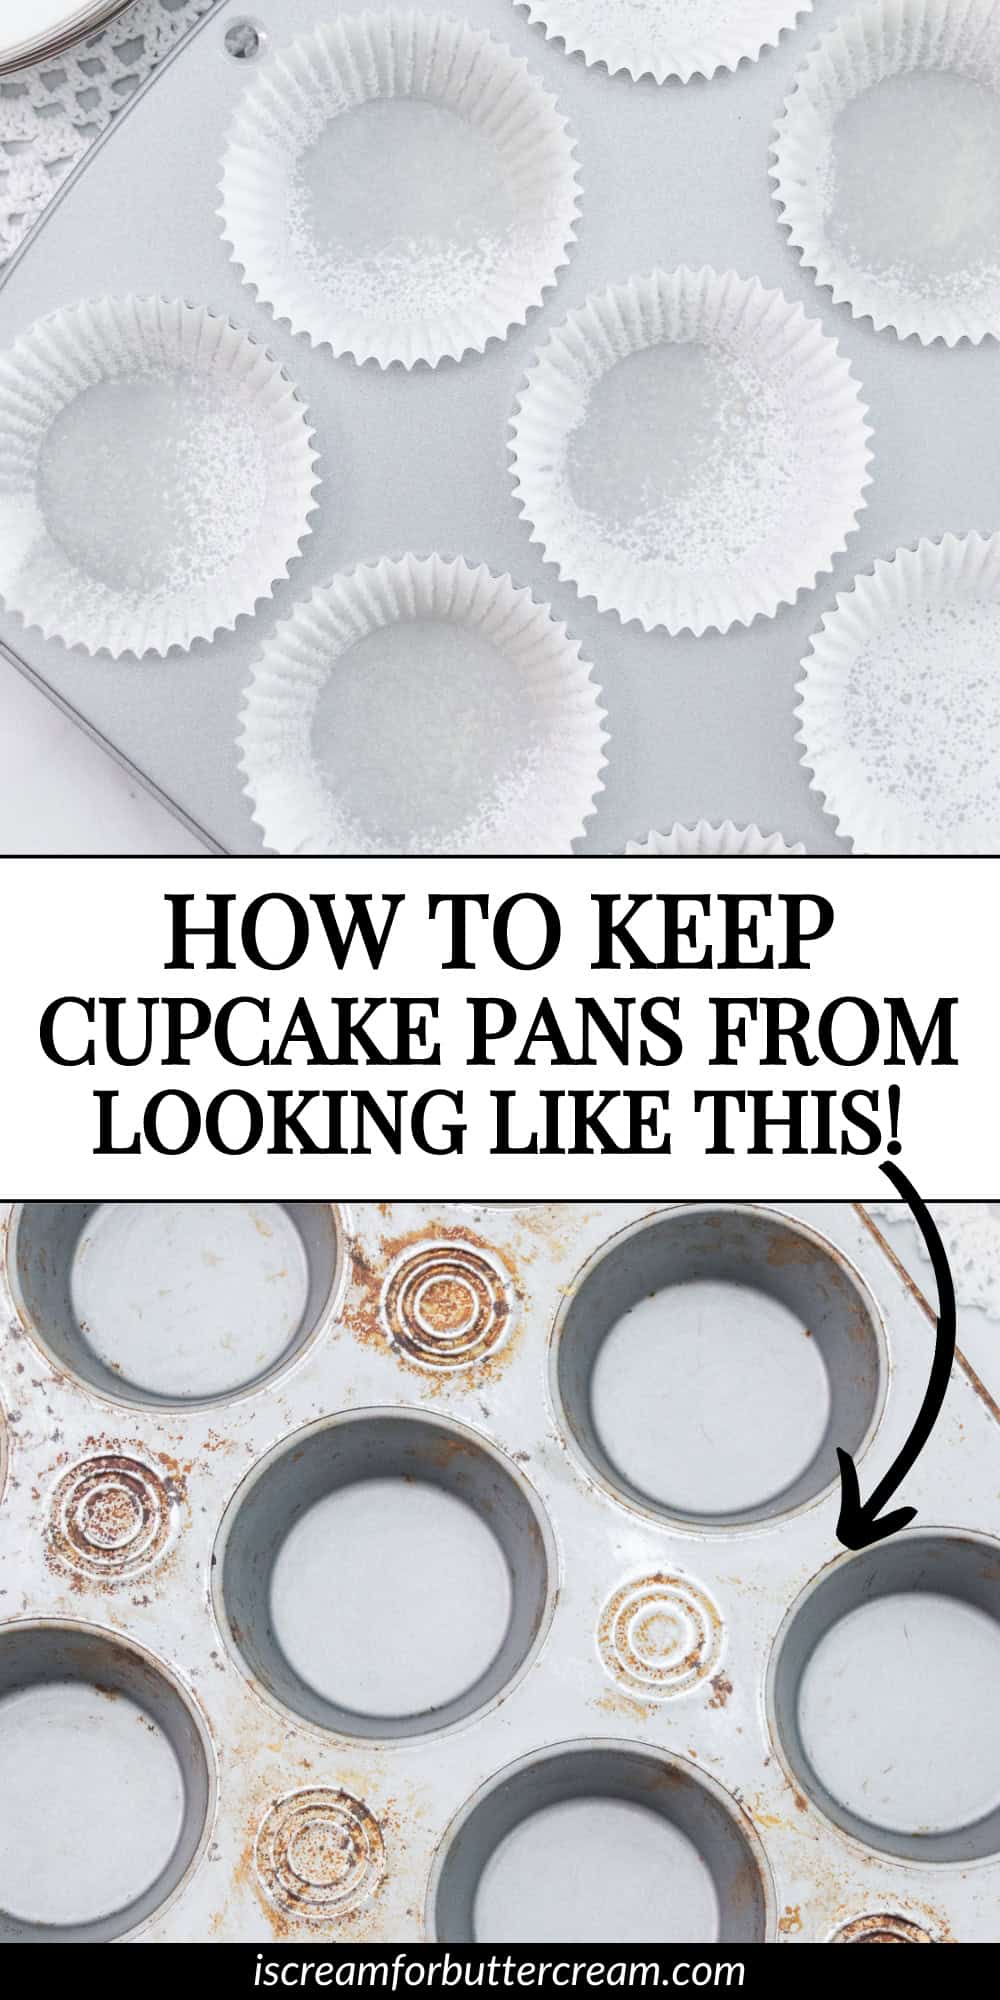
If you’ve ever had issues with your cupcake pans turning out like this (see image below), there are a few reasons it can happen.

A used cupcake pan showing signs of rust and baked-on stains, with worn spots in several of the cups.

Problem #1

Rust

If you’re washing cupcake pans in the dishwasher, if not dried completely, they can just sit in there without properly drying and depending on what kind of pan you’re using, that can cause rust.

Now, some of the newer pans are rust resistance, so you may not have that issue, but it’s something to think about.

A used cupcake pan with rust and baked-on stains, lined with clean white paper cupcake liners.

How to fix it:

If your pans already have rust on them, it might be too late. Iv’e tried all kinds of things to clean rusted pans, but honestly none of them worked super well.

You can however prevent it if you hand wash your pans and dry them off afterwards. Yes, I know this takes more time, but when I started handwashing all of my baking pans, they 100% last longer and look better.

Problem #2

Baked on non-stick spray

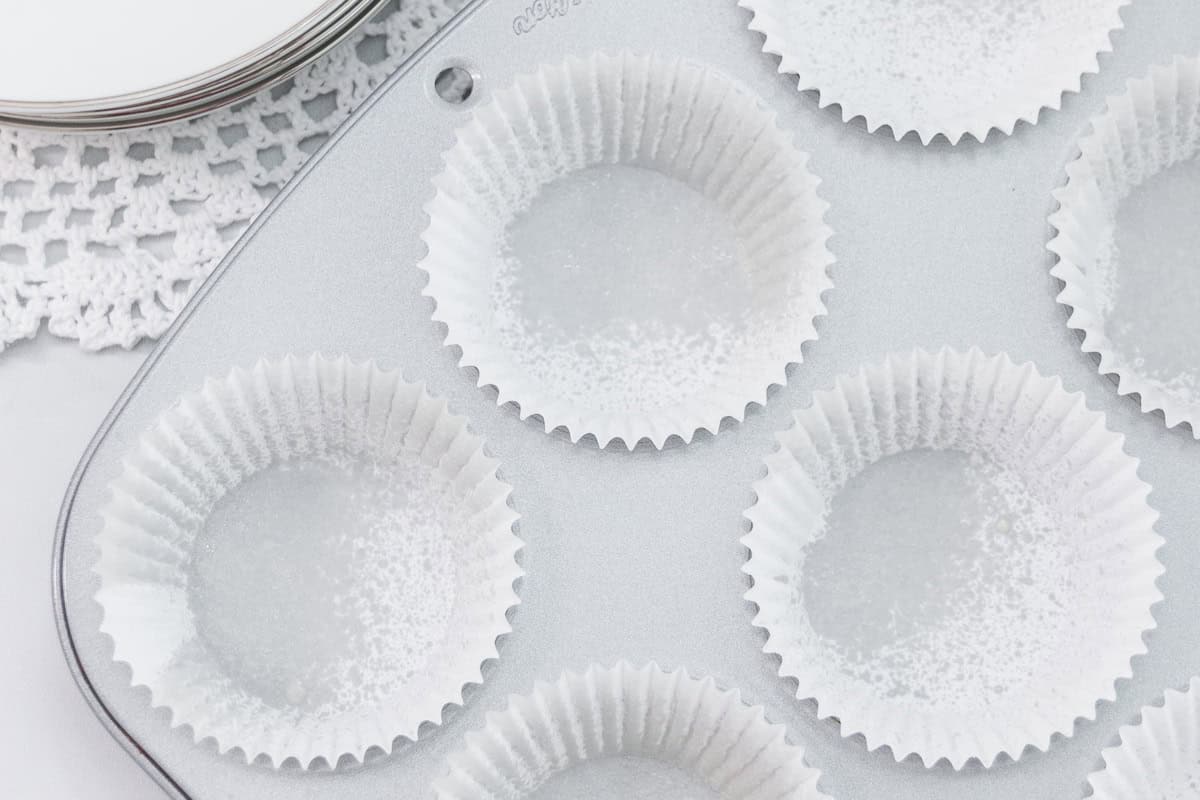
To me, this is usually the culprit. If you use baking spray to spray your cupcake liners, it’s also getting all over the pan, then it’s getting baked onto that pan when you bake your cupcakes.

A hand sprays nonstick cooking spray into white paper liners arranged in a rust-stained cupcake pan, with white roses in the background.

How to fix it

If you already have the baked-on spray, it’s really hard to remove. I’ve never been able to fully remove it. It happened to multiple pans before I realized what was causing it.

Once it’s baked on, it forms this gummy consistency. It just won’t come clean enough.

The solution isn’t giving up on using baking spray, it’s just using it a bit differently.

If you add cupcake liners to the cupcake pan first and then spray the baking spray onto the liners, well you’re going to get overspray onto the pan, then it will get baked on.

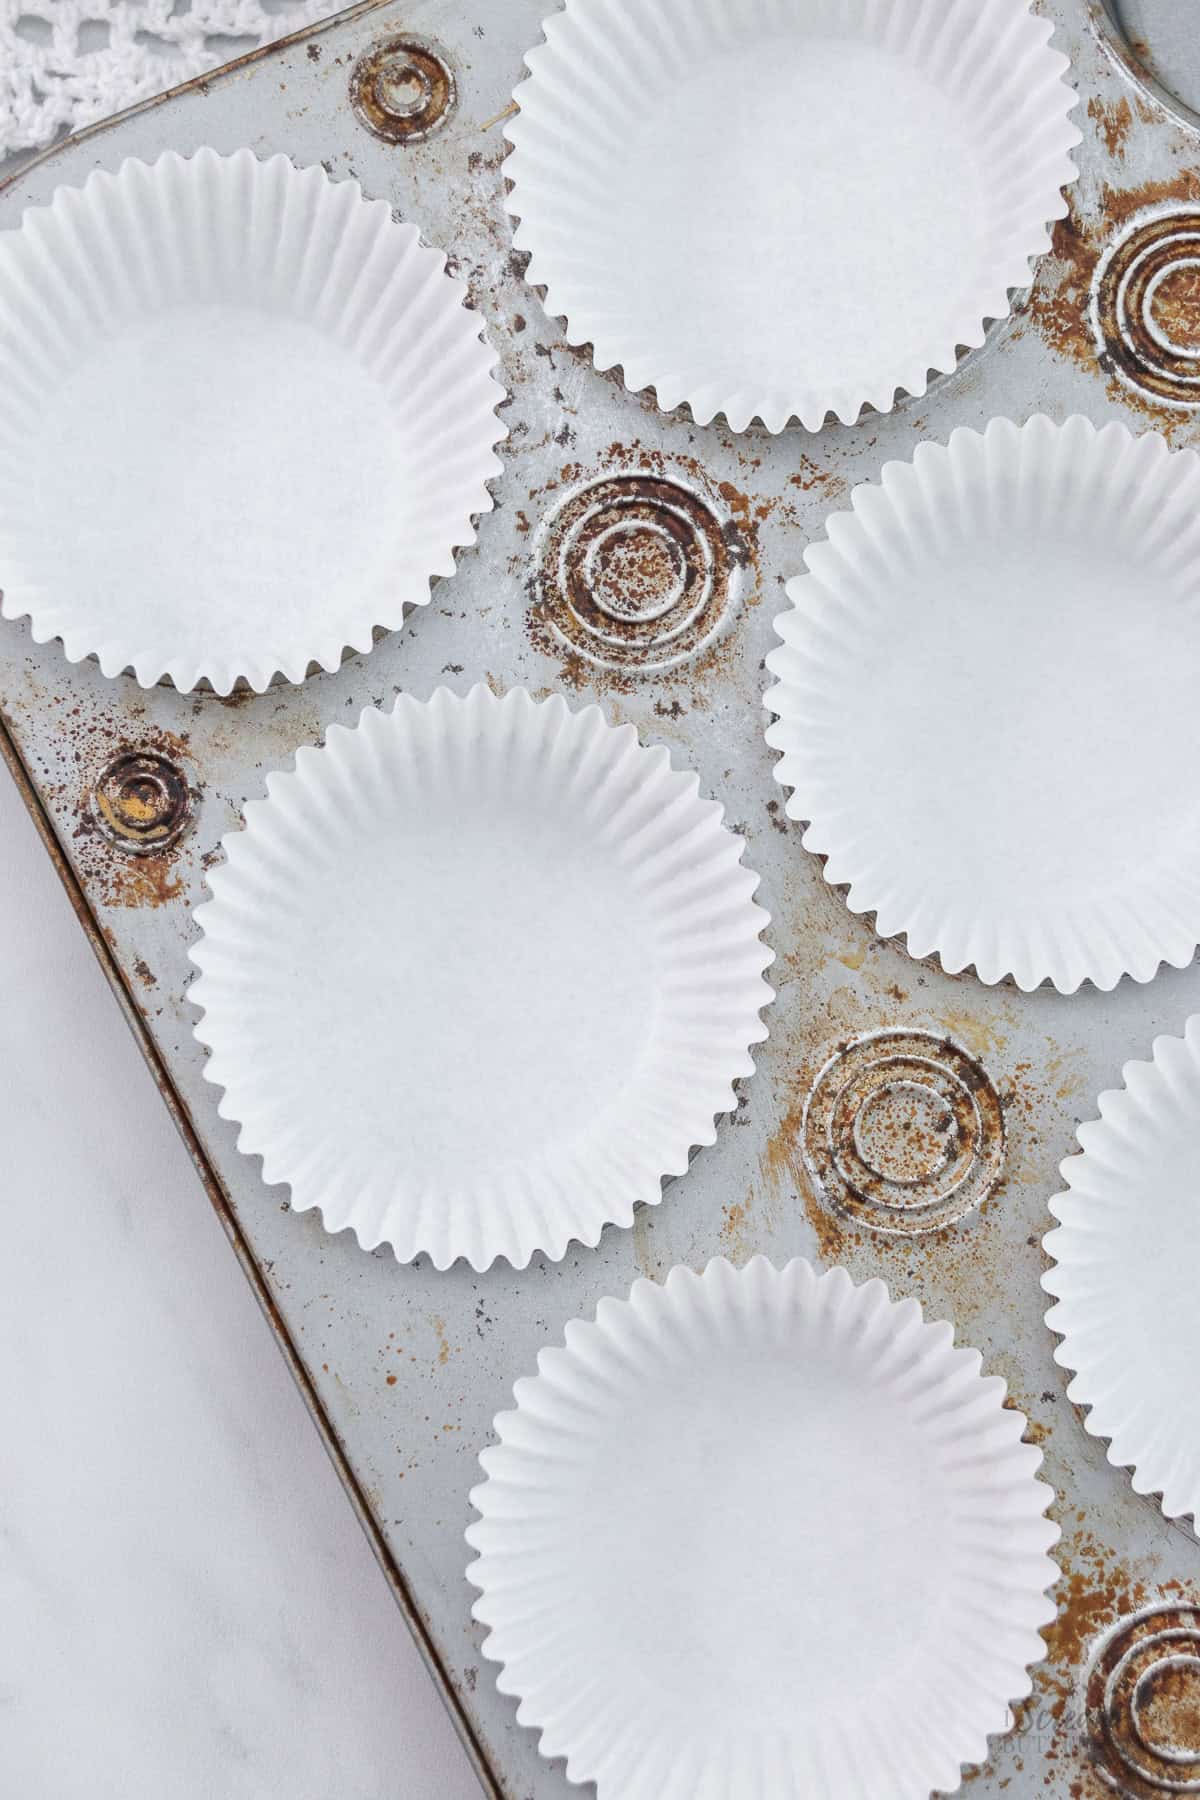
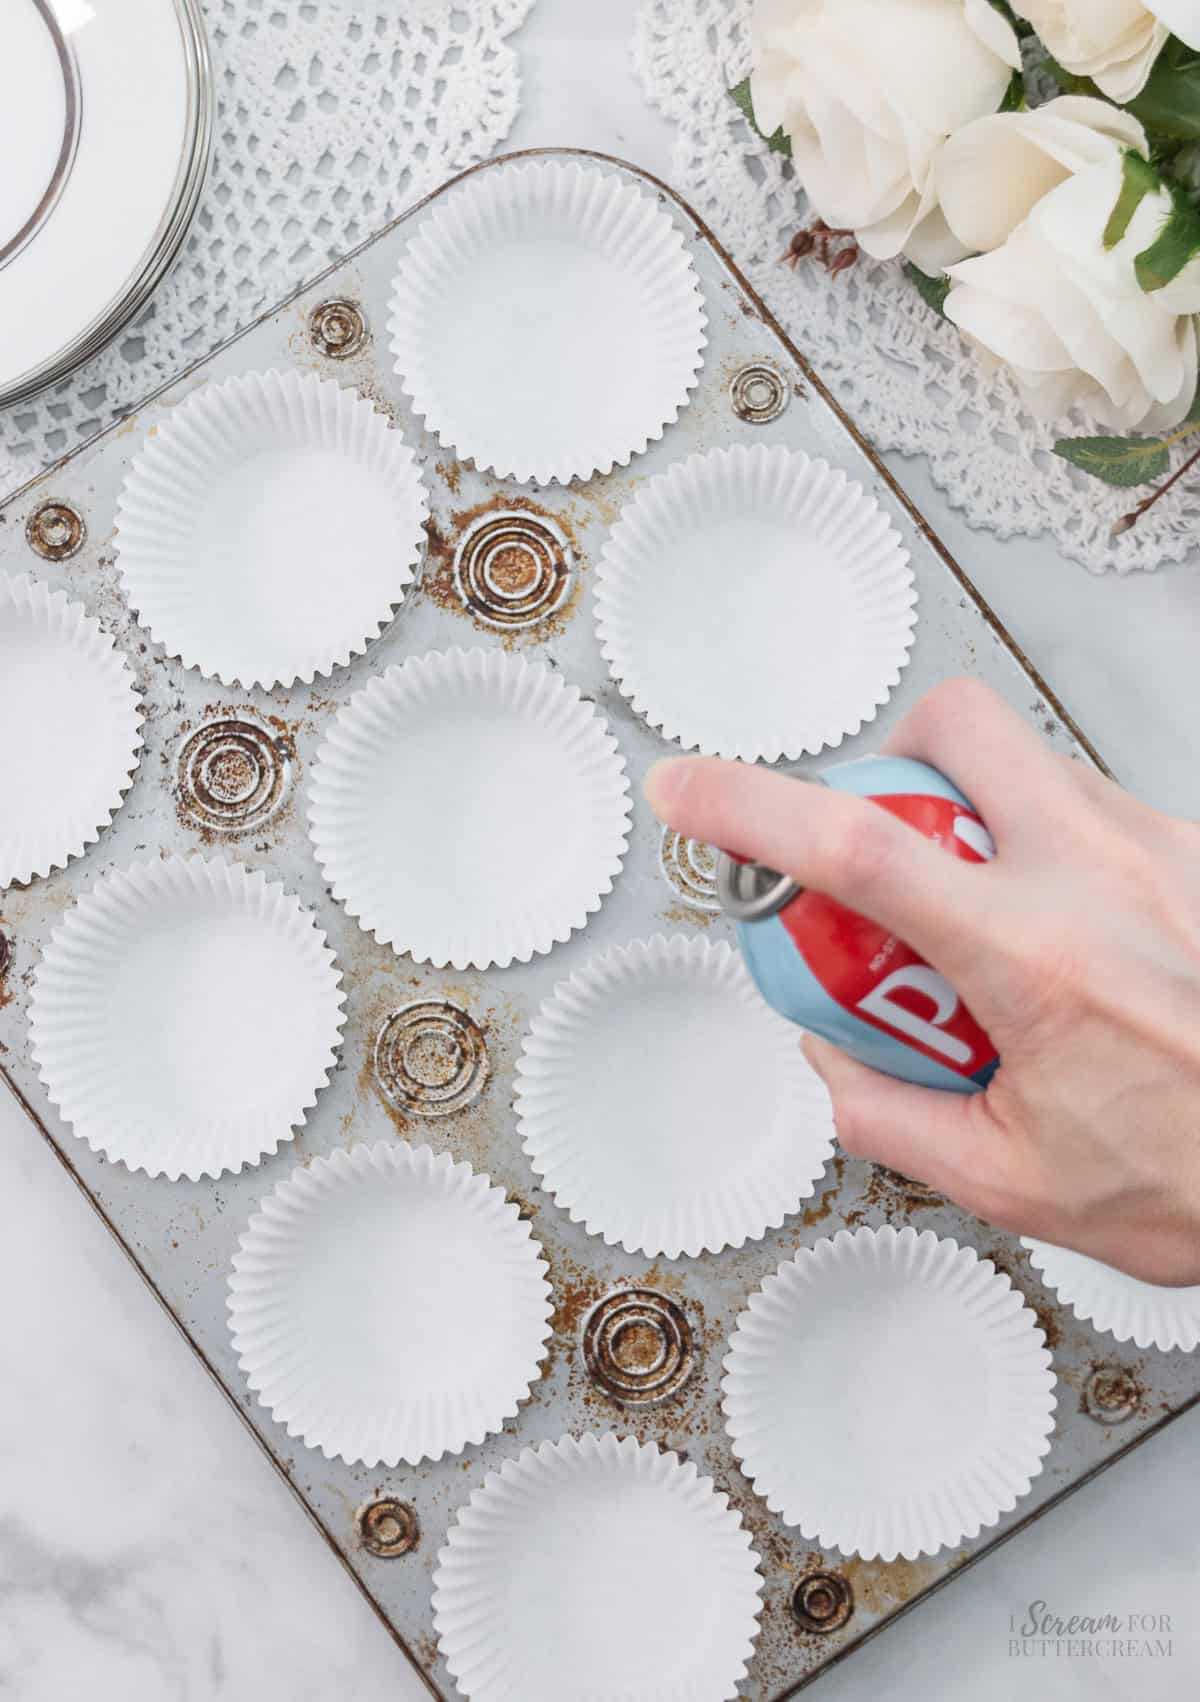
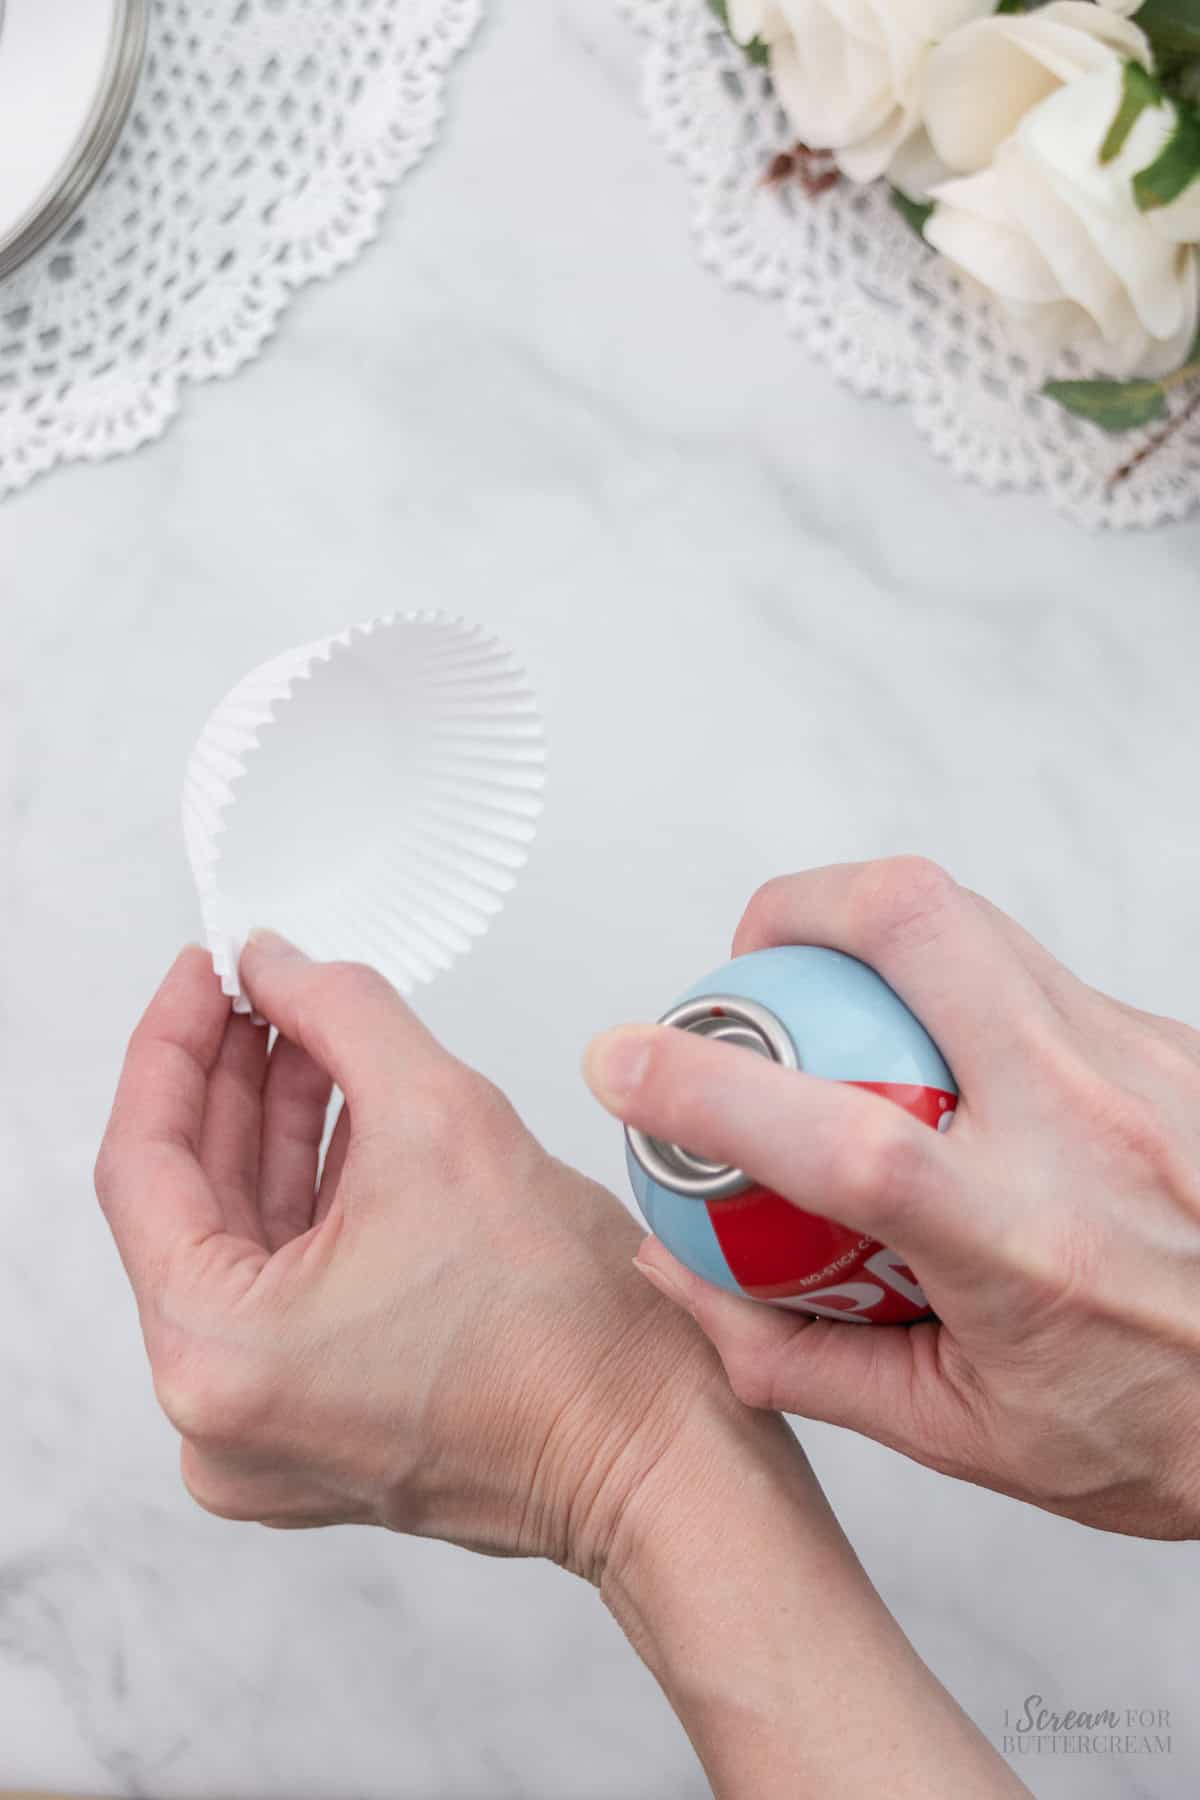
The solution is to spray each individual cupcake liner before you add it to the pan.

I know it sounds cumbersome and time consuming, but it really does not take that much more time and it’s worth it in my opinion.

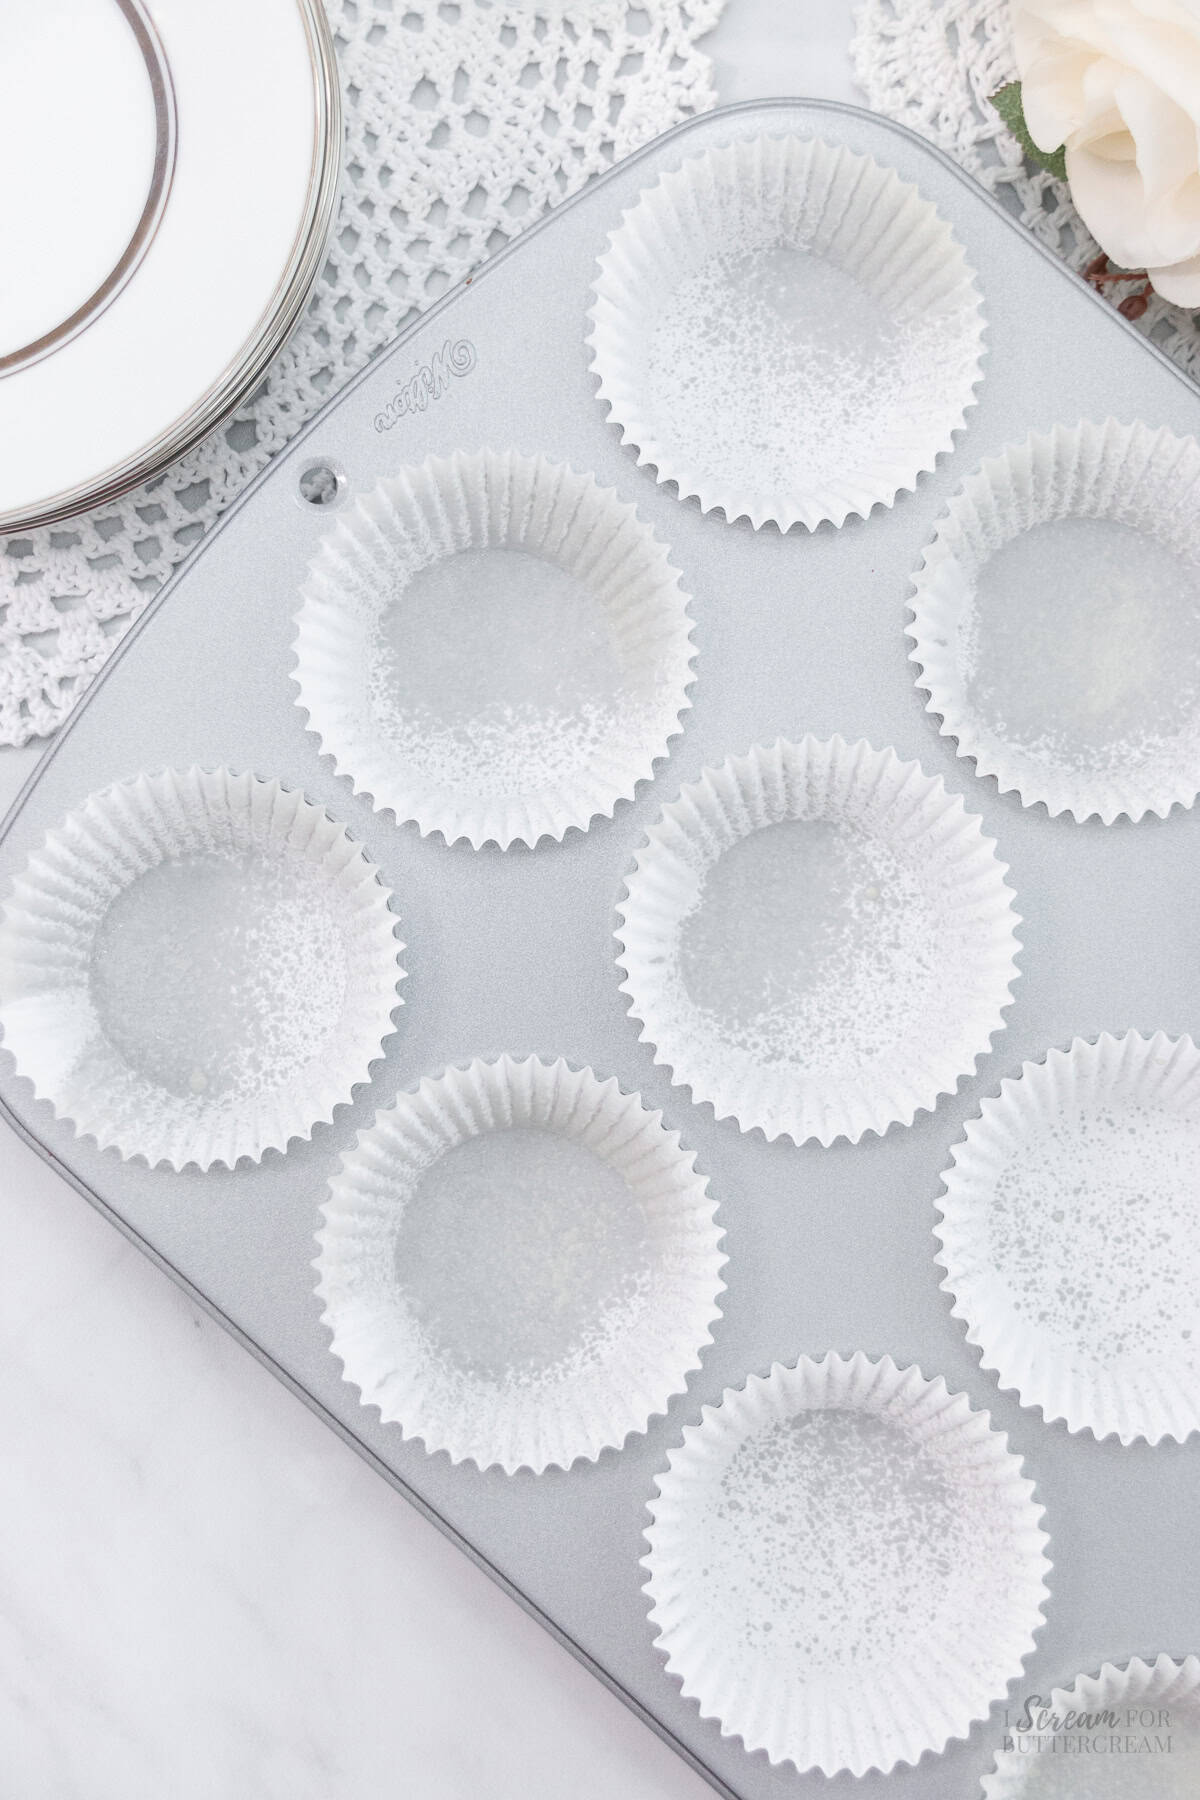
What I do is to just put all the cupcake liners into the cupcake pan, but then move over to the sink and pick up each individual cupcake liner and spray it, holding it over the sink (not over the pan), then pop the liner back into the cupcake pan. This way no overspray gets on to the top of the pan.

A hand holds a white cupcake liner while spraying it with nonstick cooking spray, with white roses and lace decor in the background.

Now, you could just spray all the liners while they’re sitting in the pan and then take a wash cloth or paper towel and wipe up any overspray, but to me, that seems like it would take more time, but to each their own.

A clean cupcake pan lined with white paper liners that have been lightly sprayed with nonstick cooking spray, with decorative plates and lace in the background.

Now if you don’t have an issue with your cupcake pans getting dingy, well then that is awesome for you and you don’t have to worry about this.

If you’re like me though and have struggled with this, then this is what I’ve found to actually work and I’ve been able to keep my cupcake pans looking new by handwashing them and drying them off and by not letting baking spray even touch them.

Other posts you might like

  • How to Ice Cupcakes without a Piping Bag
  • Best Chocolate Cupcakes
  • How to Store Cupcakes
  • How to Keep Cupcakes from Drying Out
  • How to Freeze Cake and Cupcakes
A side-by-side comparison of two cupcake pans: the top pan is clean with white liners, while the bottom pan shows rust and baked-on stains. Text reads, "How to keep cupcake pans from looking like this!" with an arrow pointing to the stained pan.

FREE GUIDE: 5 Easy Tips for Making Great Tasting Cakes

Ready to start making cakes that taste amazing?

Grab these FREE easy tips, so you can stop wasting ingredients and start making scratch cakes that actually turn out every single time!

Plus you'll get updates each week with new recipes and cake tips...all for free!

    We won't send you spam. Unsubscribe at any time.

    Built with Kit
    « Easy Cream Cheese Spice Cake
    Rich Chocolate Buttercream Frosting »
    • Email
    • Facebook

    Filed Under: Cake Baking Tips, Cupcake Decorating, Cupcakes, Recipes

    Reader Interactions

    Comments

    1. Pam Gross

      October 25, 2024 at 2:04 pm

      I have never spayed cupcake papers.
      When I bake something that sticks to the paper, I use parchment paper cups. Nothing sticks it.
      Paper Chef® Large Culinary Parchment Baking Cups
      60 . Locally bought at Kroger for $2.19
      I love using them.

      Reply
      • Kara

        October 27, 2024 at 12:27 pm

        Thanks Pam!

        Reply

    Leave a Reply Cancel reply

    Your email address will not be published. Required fields are marked *

    Recipe Rating


    Primary Sidebar

    • Facebook
    • Instagram
    • Pinterest
    • YouTube

    Hey there, I’m Kara!

    Hi, I'm so glad you're here! Cake shows up at our most important and happiest moments in life, like birthdays, weddings, baby showers and holidays. It's also for those everyday moments...it makes them even better. Put simply, cake just makes us happy! I love trying out new cake flavor combinations and decorating ideas. Have a look around and I bet you can find a cake recipe or tutorial for any of life's big moments and those everyday moments too. Click here if you want to learn more about me!

    FREE GUIDE: 7 Easy Tips to Get Professional Looking Cakes!

    Even if you've never baked or decorated a cake before!

    Grab the FREE guide plus get email updates & see behind the scenes fun each week.

      We won't send you spam. Unsubscribe at any time.

      Built with Kit
      • Let’s Make a Cake!
      • Blog
      • Privacy Policy
      • Cookie Policy
      • Terms and Conditions
      • Advertising Disclosures

      Copyright © 2025 ·