
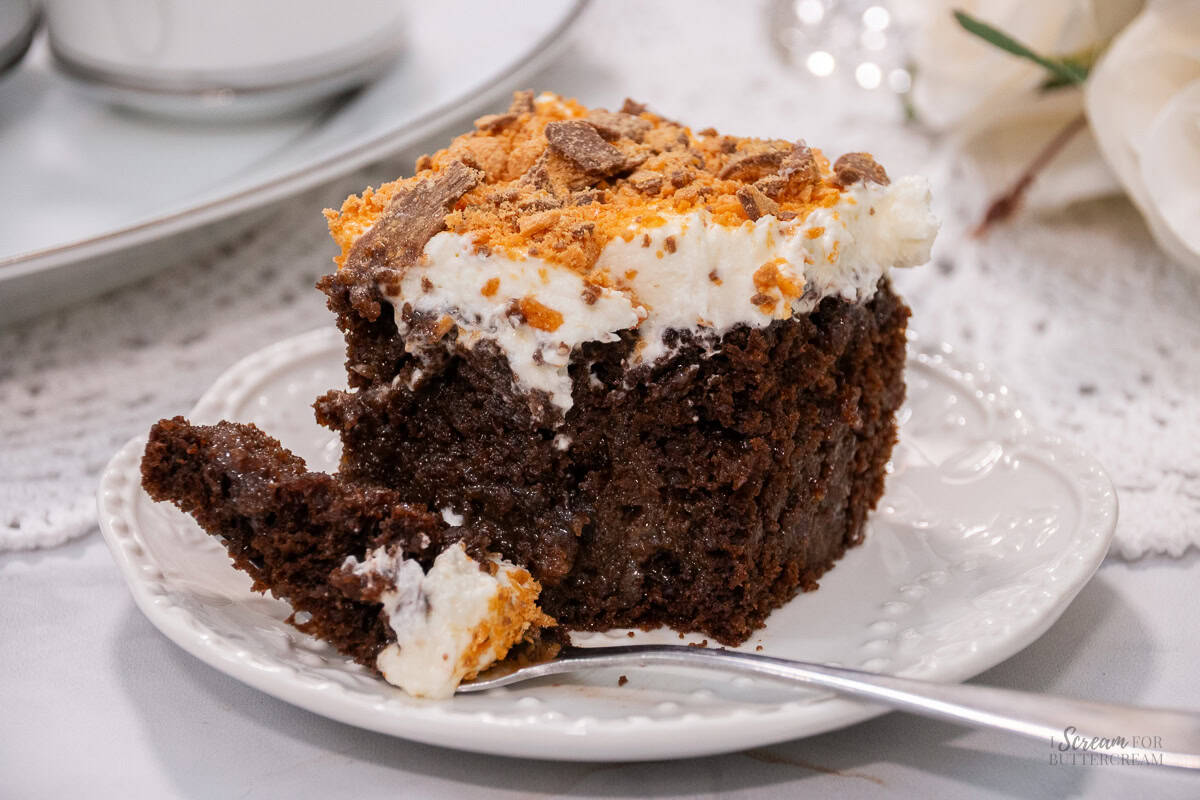
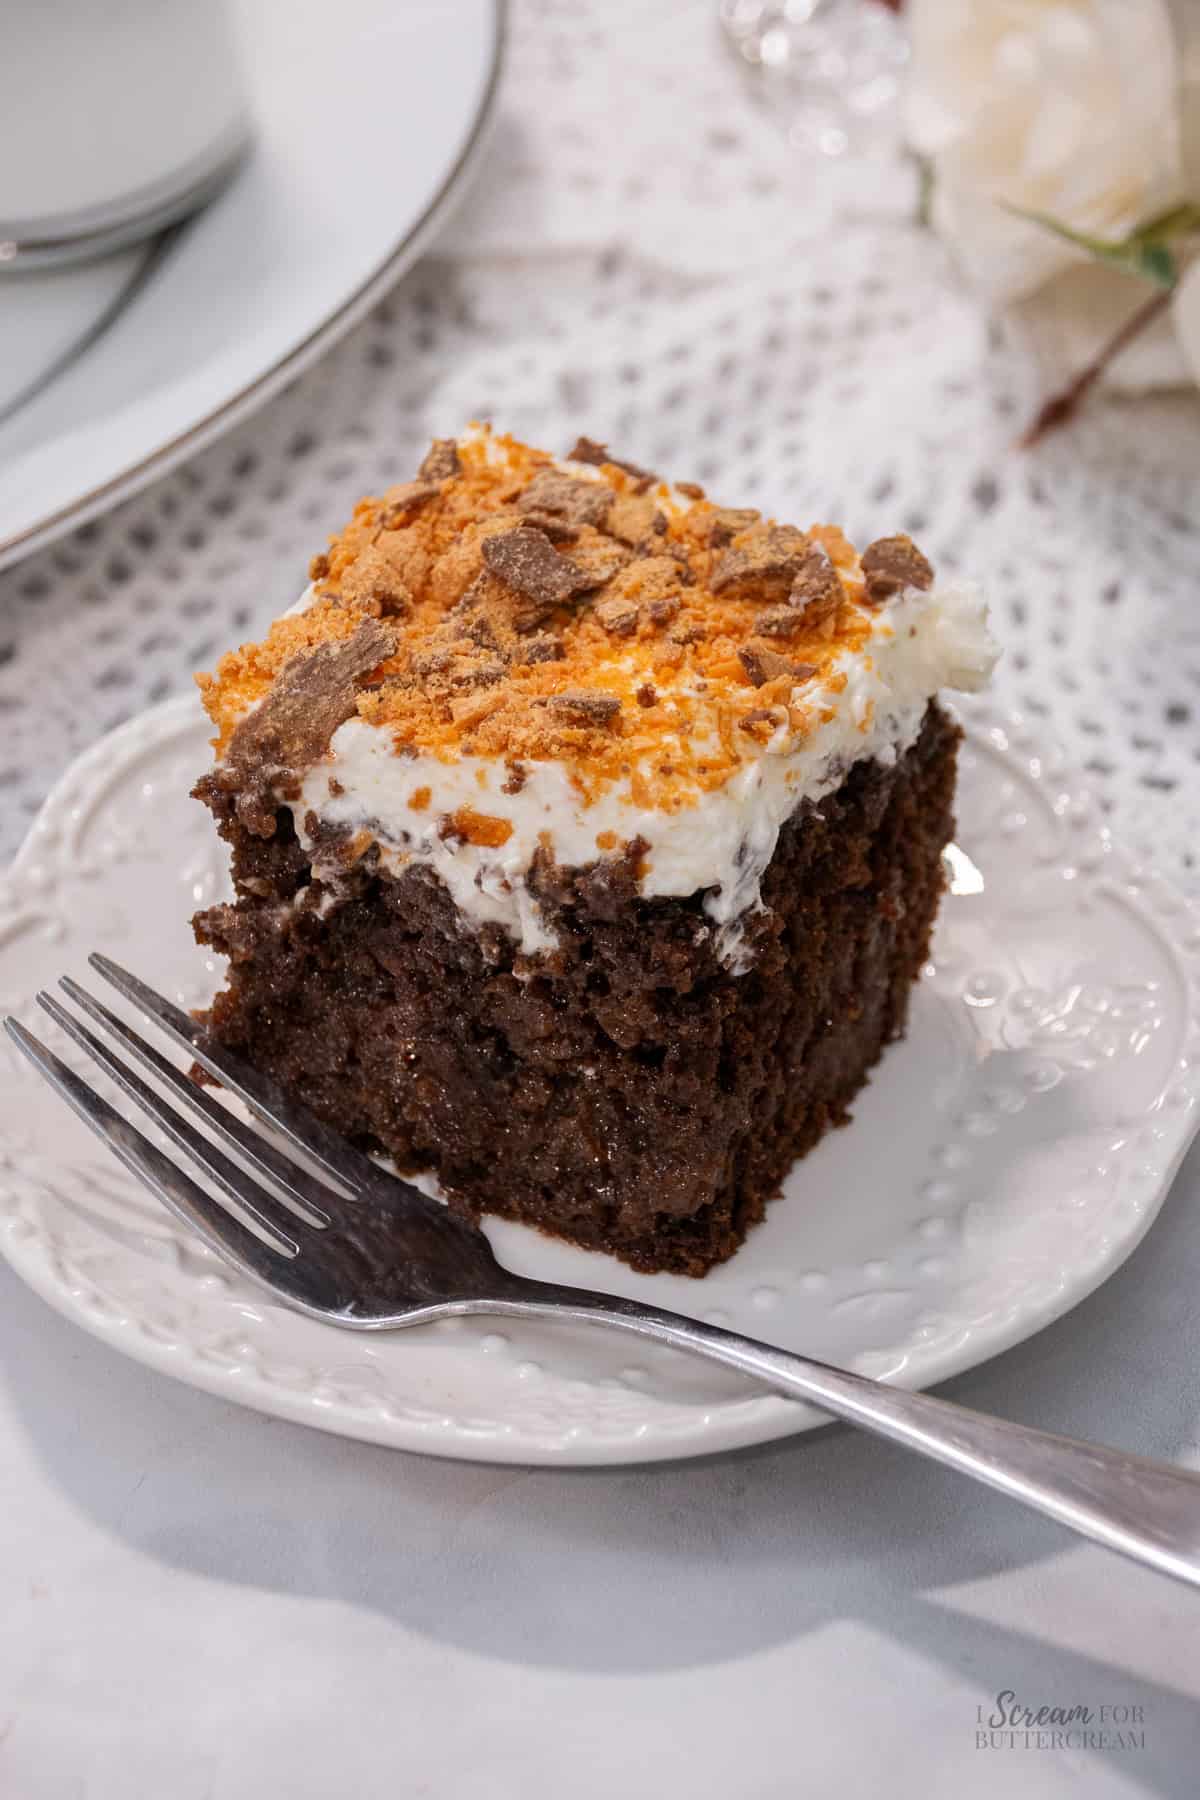
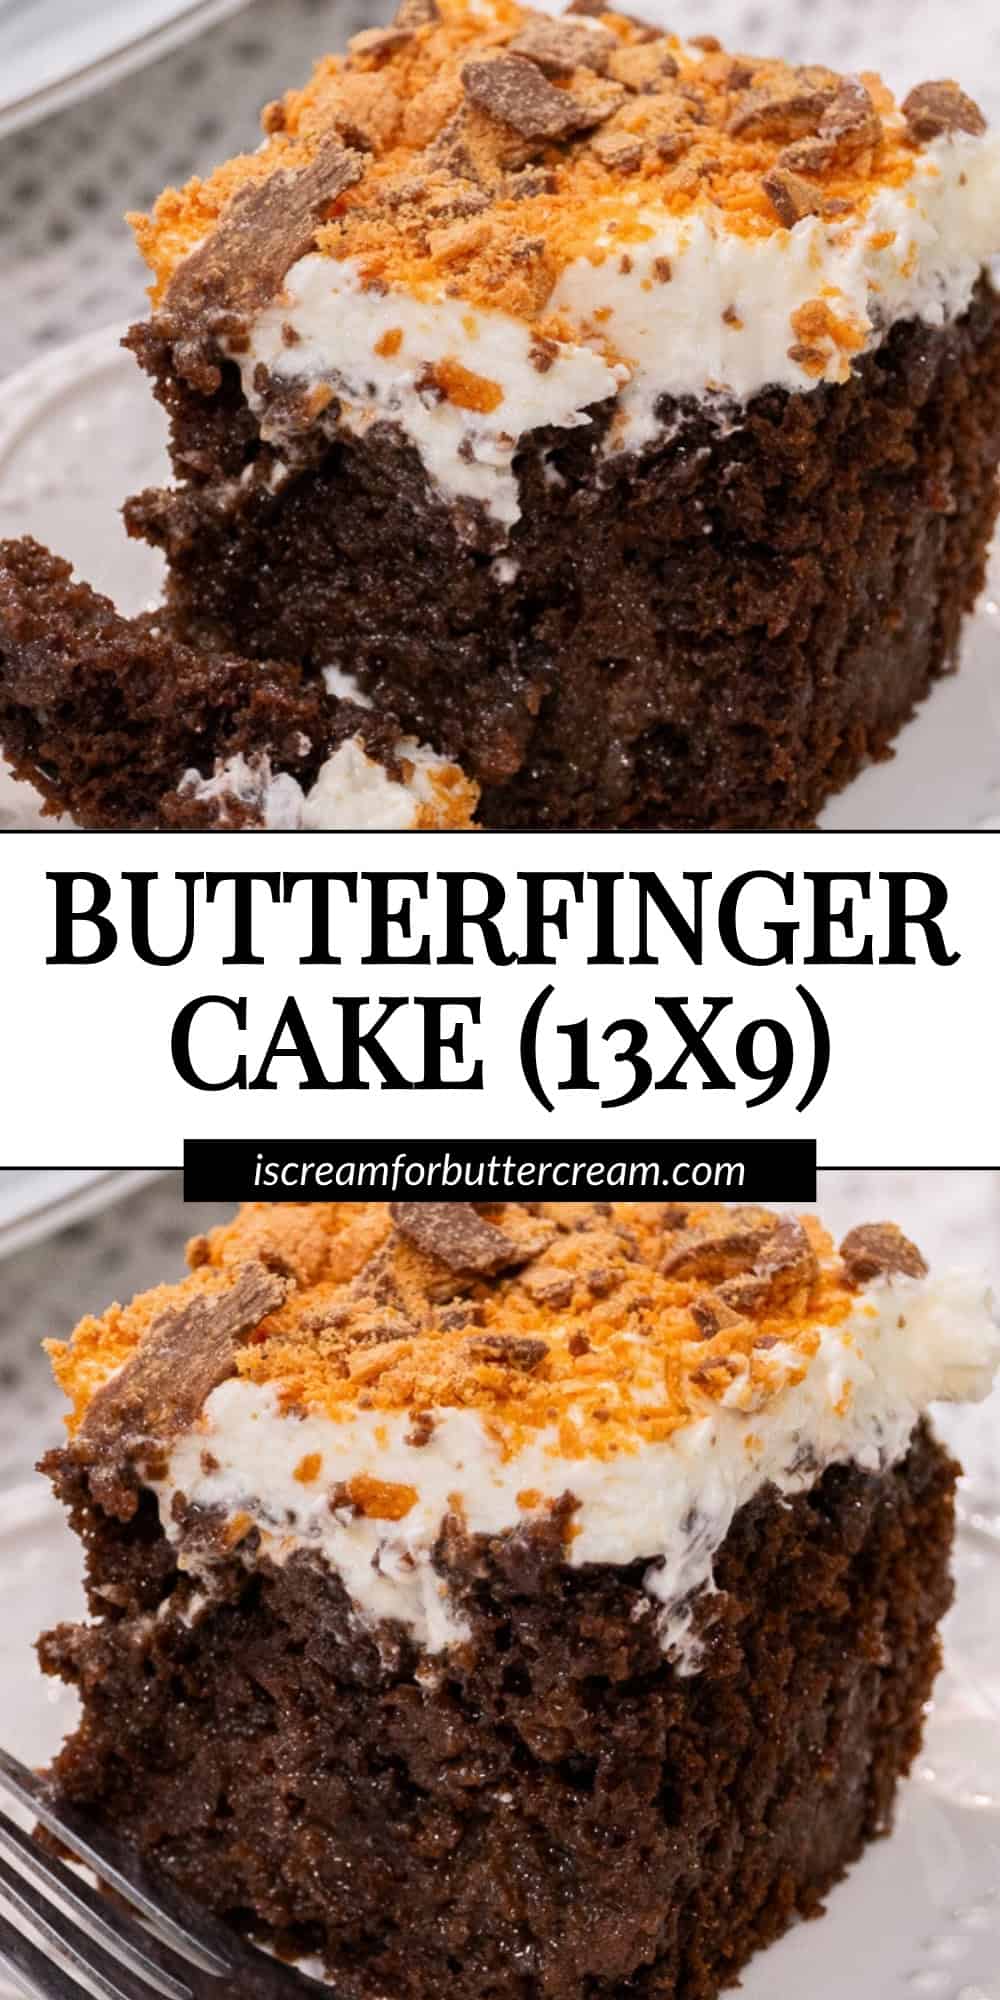
This scratch Butterfinger cake has a rich chocolate cake layer with caramel soaked into the cake all topped with a decadent cream cheese frosting with whipped cream and crushed Butterfingers.
Jump to:
Ok, I have a real soft spot for Butterfingers. My dad's absolute favorite candy was Butterfingers. He loved them.
Now, I also love to look through old church cookbooks and I saw a recipe for Butterfinger cake. I thought, what a fantastic idea! This recipe, however, was made from a cake mix. There's nothing wrong with that, but I really wanted to make a scratch version of it.
I have to say, I think it's really worth it to make this thing from scratch. I think my Dad would have really loved this cake. It's insanely rich and sweet, so if you don't have a sweet tooth, it might not be the cake for you, but if you do, then you're golden.

Why You’ll Love This Cake
- A ‘from scratch’ rich chocolate cake
- Caramel soaked into the cake
- Lucious cream cheese topping with crushed Butterfingers
- Easy to mix together
Pro Tips
- Make sure to let the cake cool completely before adding the cream cheese topping and add the crushed butterfingers right before serving to keep them crunchy.
Recipe
Butterfinger cake (13×9 cake from scratch)
Ingredients
For the cake
- 2 cups all-purpose flour (Measured correctly: Spooned into the measuring cup and leveled off – don't scoop and pack the flour into the cup, that will add too much flour.)
- ¾ cup unsweetened natural cocoa powder (not Dutch cocoa powder)
- 2 teaspoons baking powder
- 1 teaspoon baking soda
- 1 teaspoon salt
- 2 cups granulated sugar
- ½ cup vegetable oil
- 1 teaspoon vanilla extract
- 1 cup buttermilk
- 2 large eggs
- 1 cup hot coffee or very hot water
- If you do not want to make the cake from scratch, you can instead prepare 1 box of chocolate cake mix according to the instructions on the back of the box
For the glaze (This glaze is very sweet. If that's not your thing, consider only using ½ the glaze)
- 1 (12 ounce) jar caramel topping
- 1 (14 ounce) can sweetened condensed milk
For the topping
- 1 (8 ounce) container Cool Whip
- 1 (8 ounce) block cream cheese, near room temperature
- ½ cup unsalted butter, near room temperature
- 1 cup confectioner's sugar
- 2 large Butterfinger bars crushed
- 1 tablespooon milk
Instructions
For the cake
- Preheat the oven to 350 degrees F.
- Spray or grease a 13×9 inch pan. (I use a glass pan.)
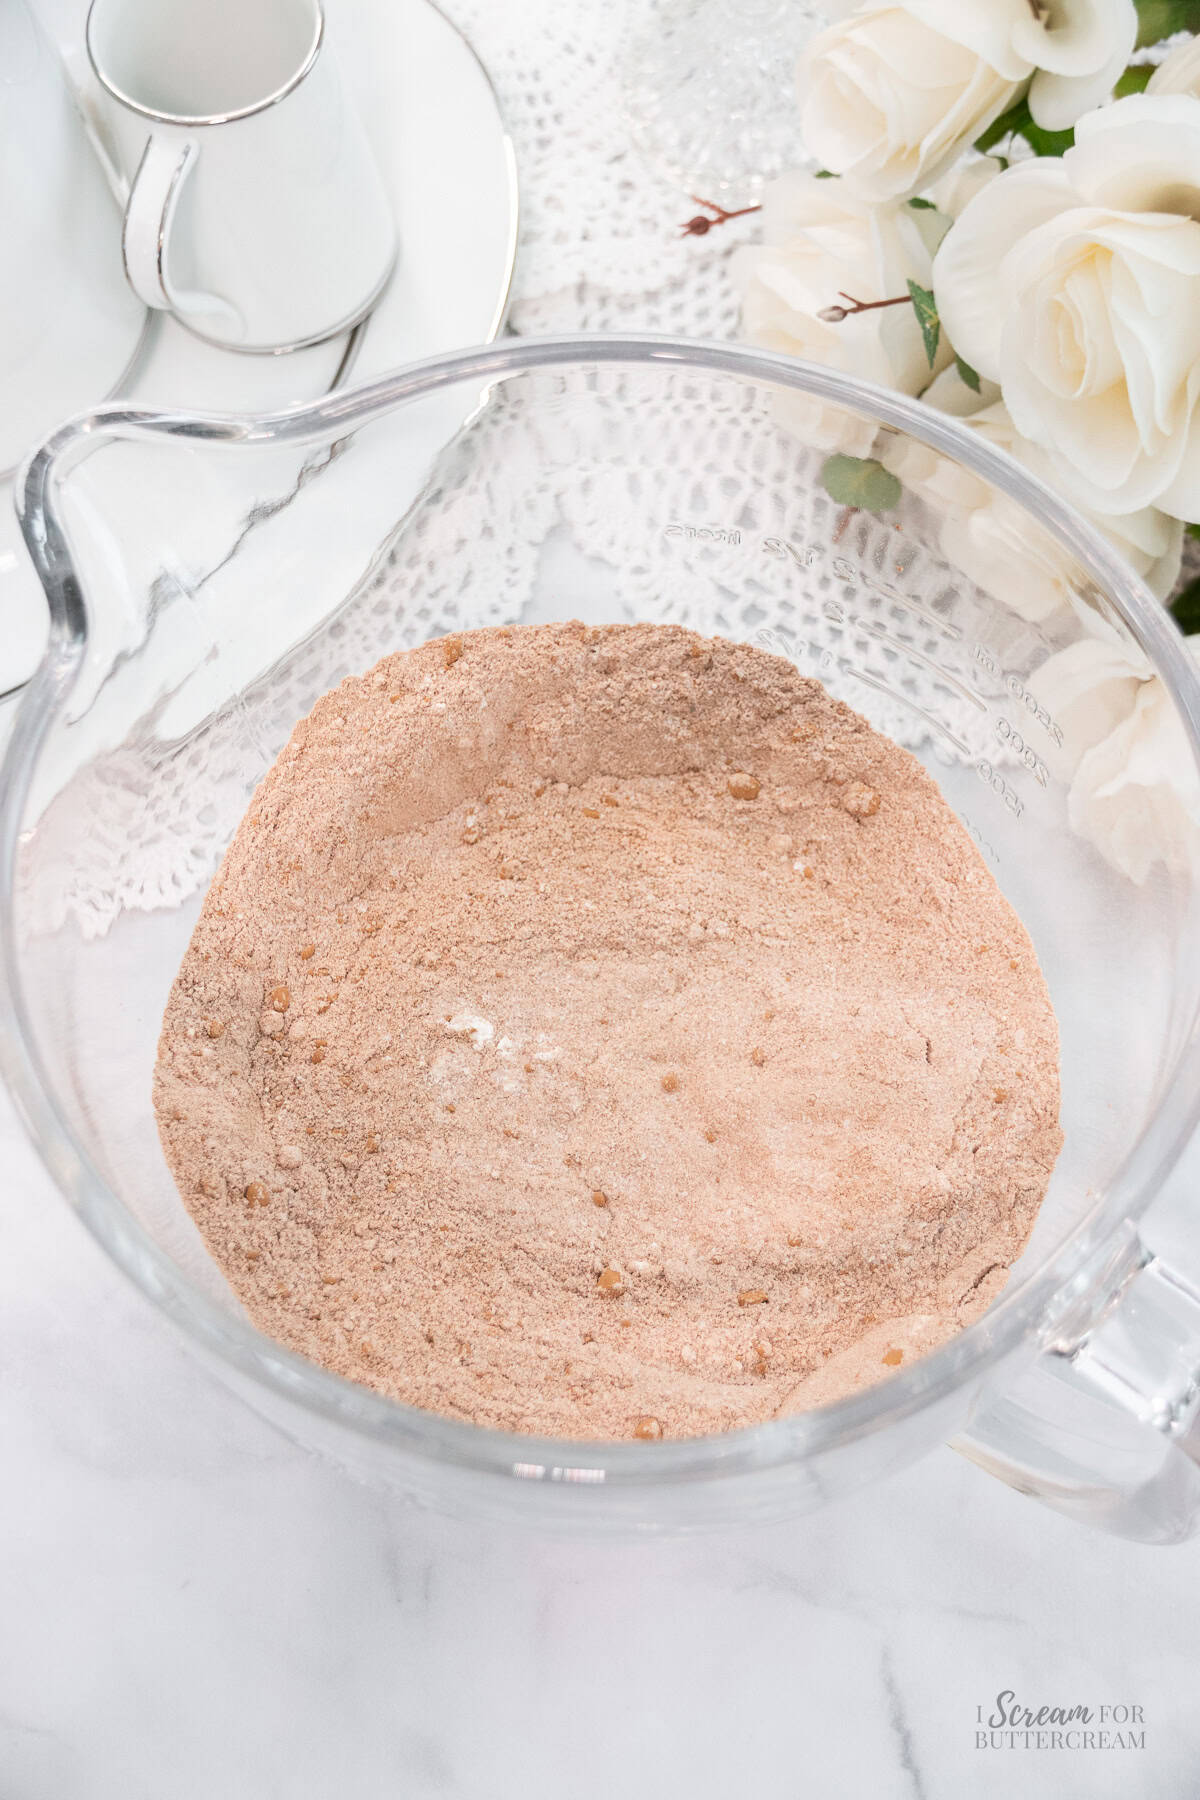
- In a large mixing bowl, add the flour, cocoa powder, baking powder, baking soda, salt and granulated sugar. Whisk well and set aside.
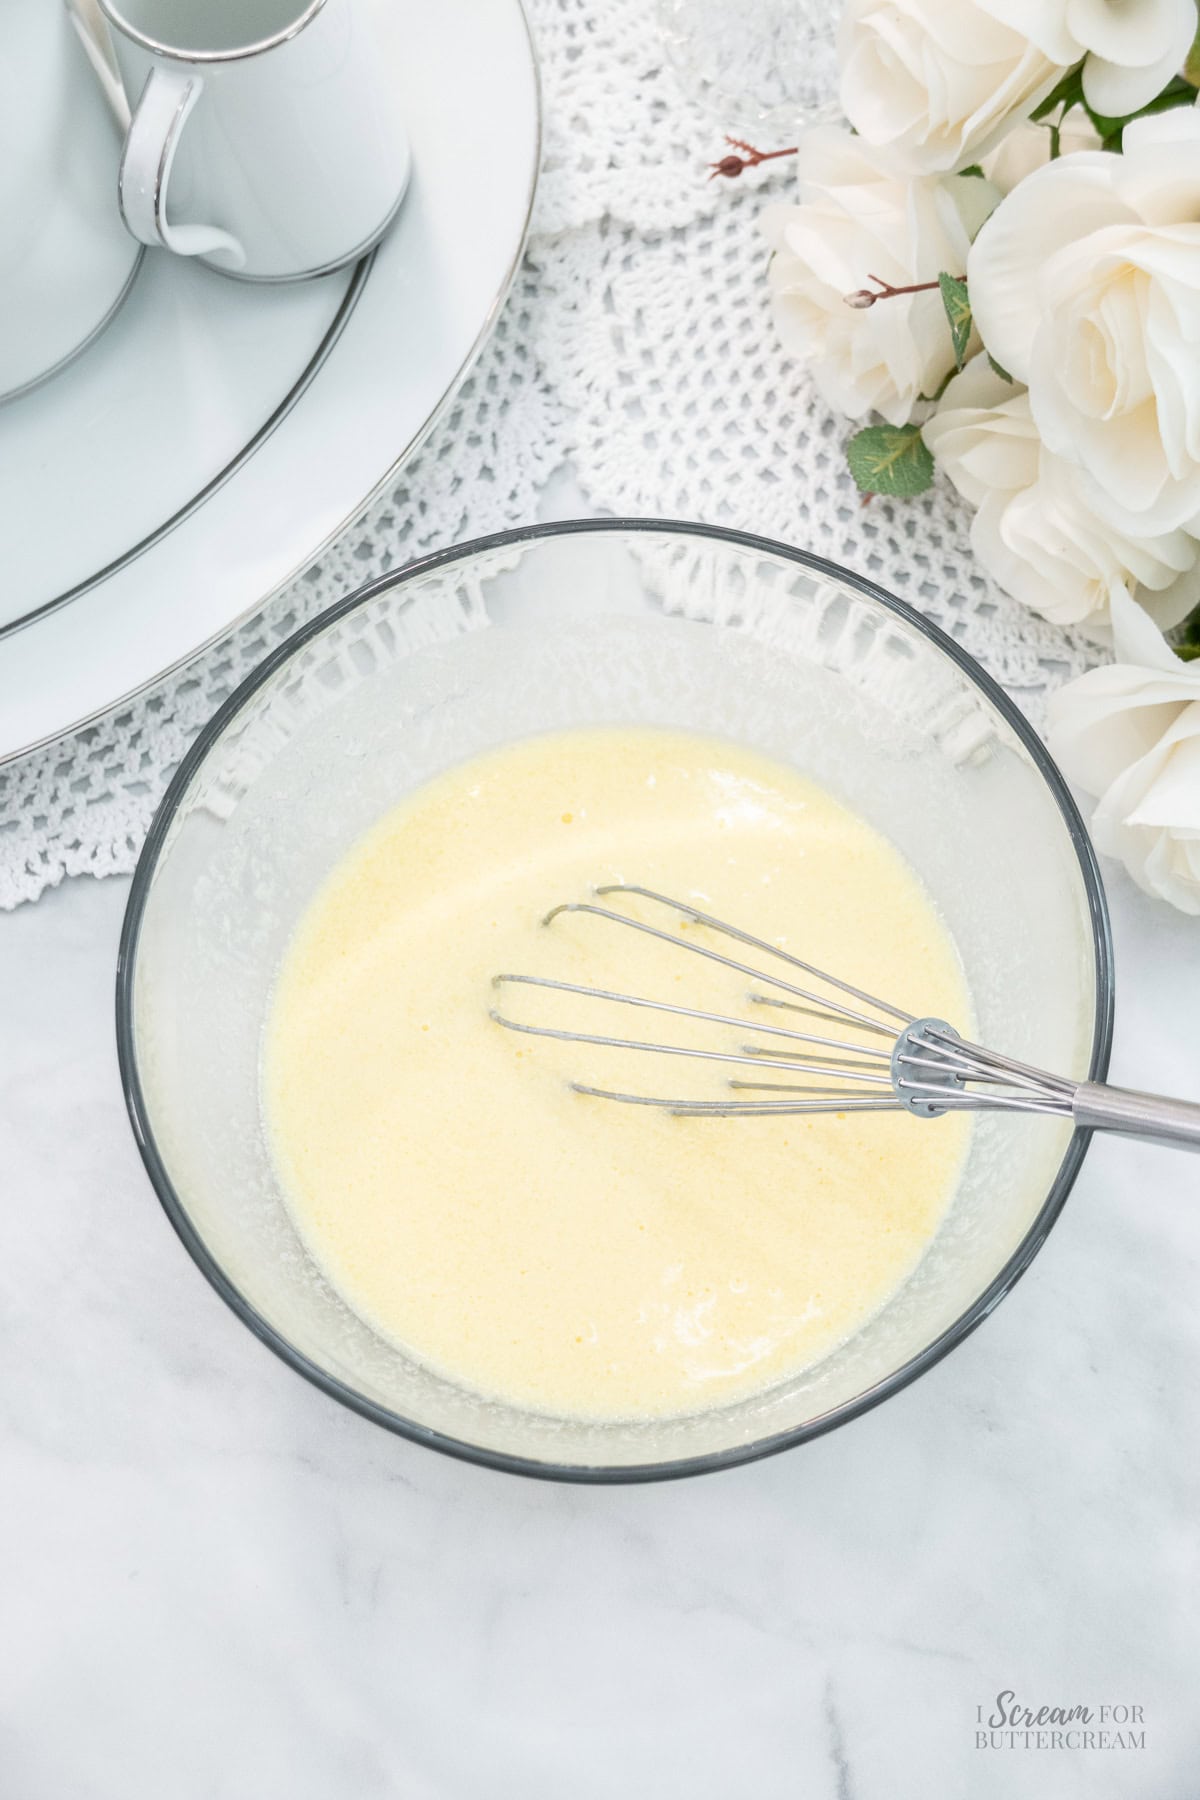
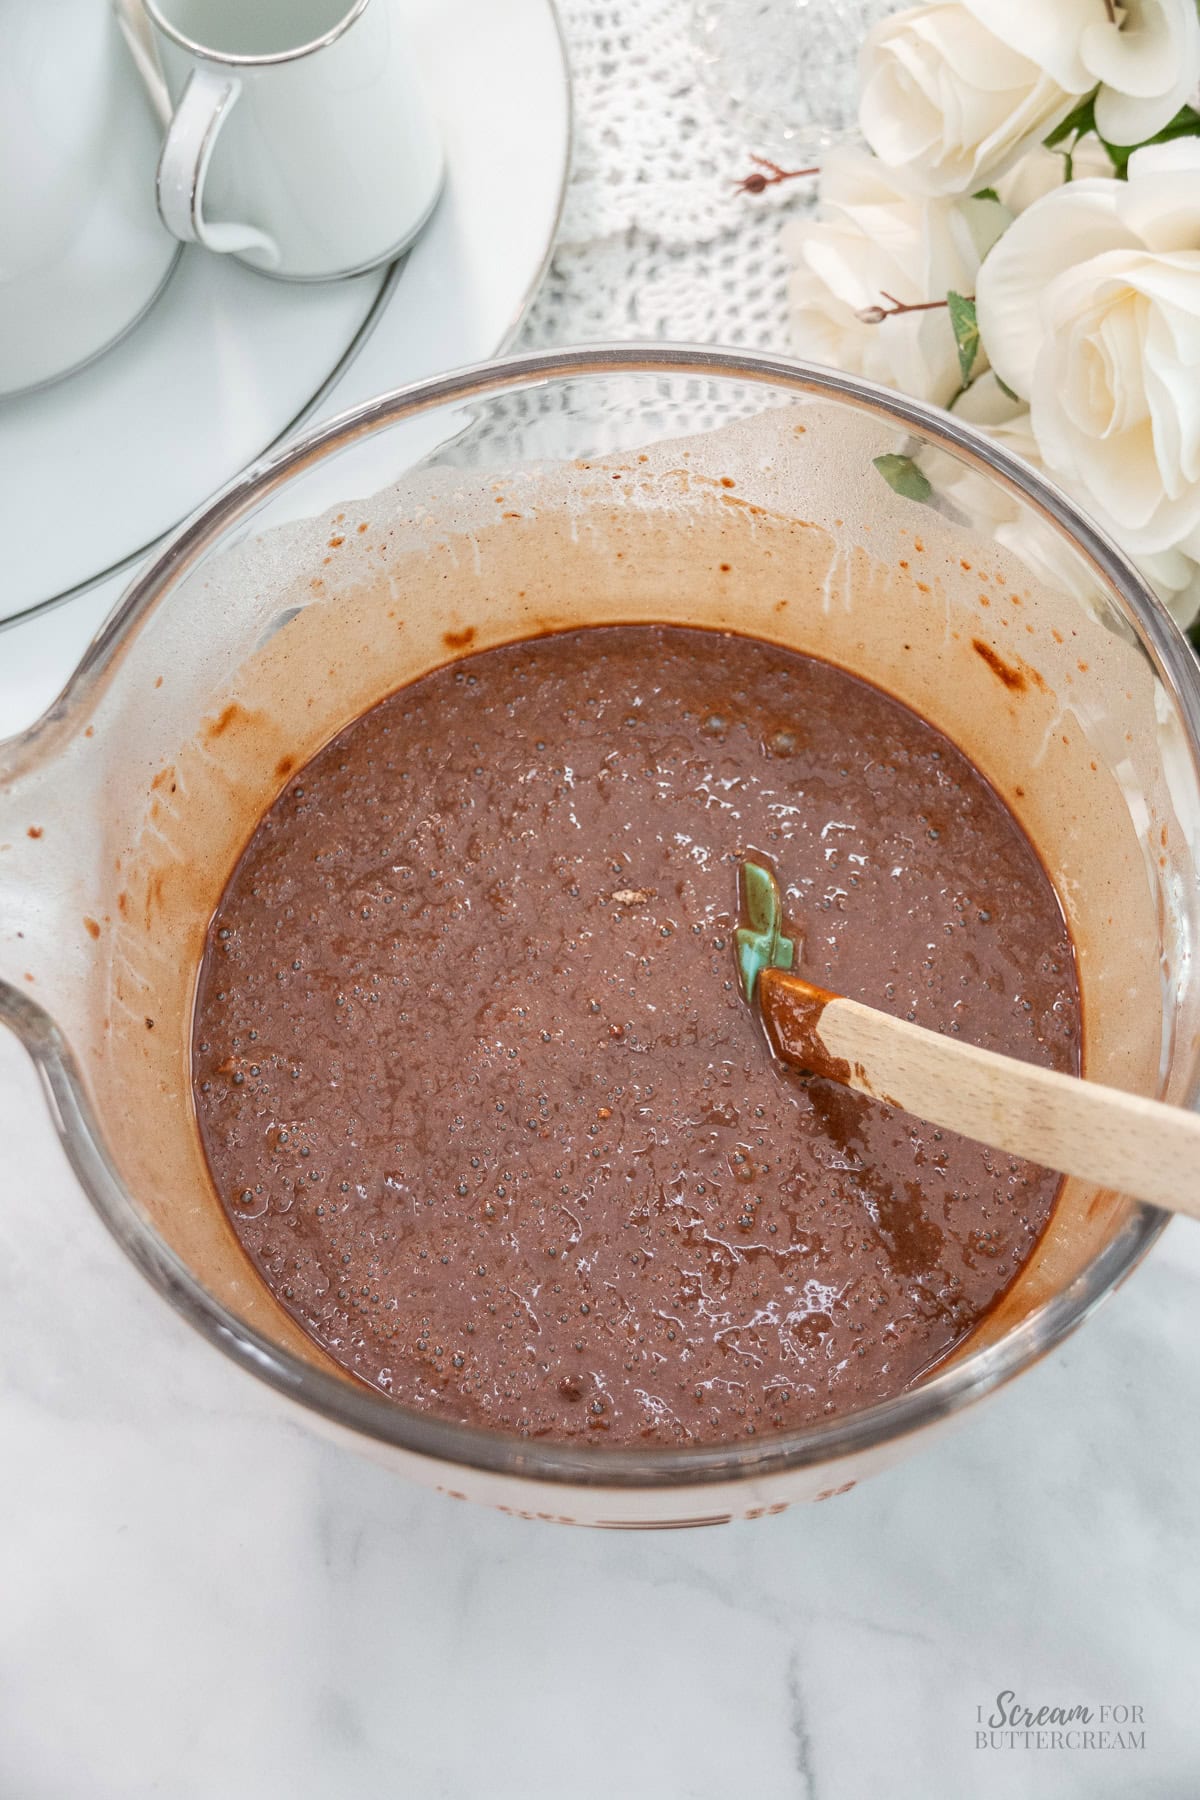
- In a medium-sized mixing bowl, add the oil, vanilla extract, buttermilk and eggs. (Do not add the hot coffee or water yet.) Whisk well and add to the dry ingredients.
- Mix with an electric mixer on medium only until just combined (about 20 seconds). Mixing scratch cakes for too long or at too high of speed will cause the cake to turn out dense, rubbery or will fall.
- Add the hot coffee or water and mix on medium until well incorporated (about 15-20 seconds).
- Scrape down the sides and bottom of the bowl and mix again on medium only for about 10 seconds.
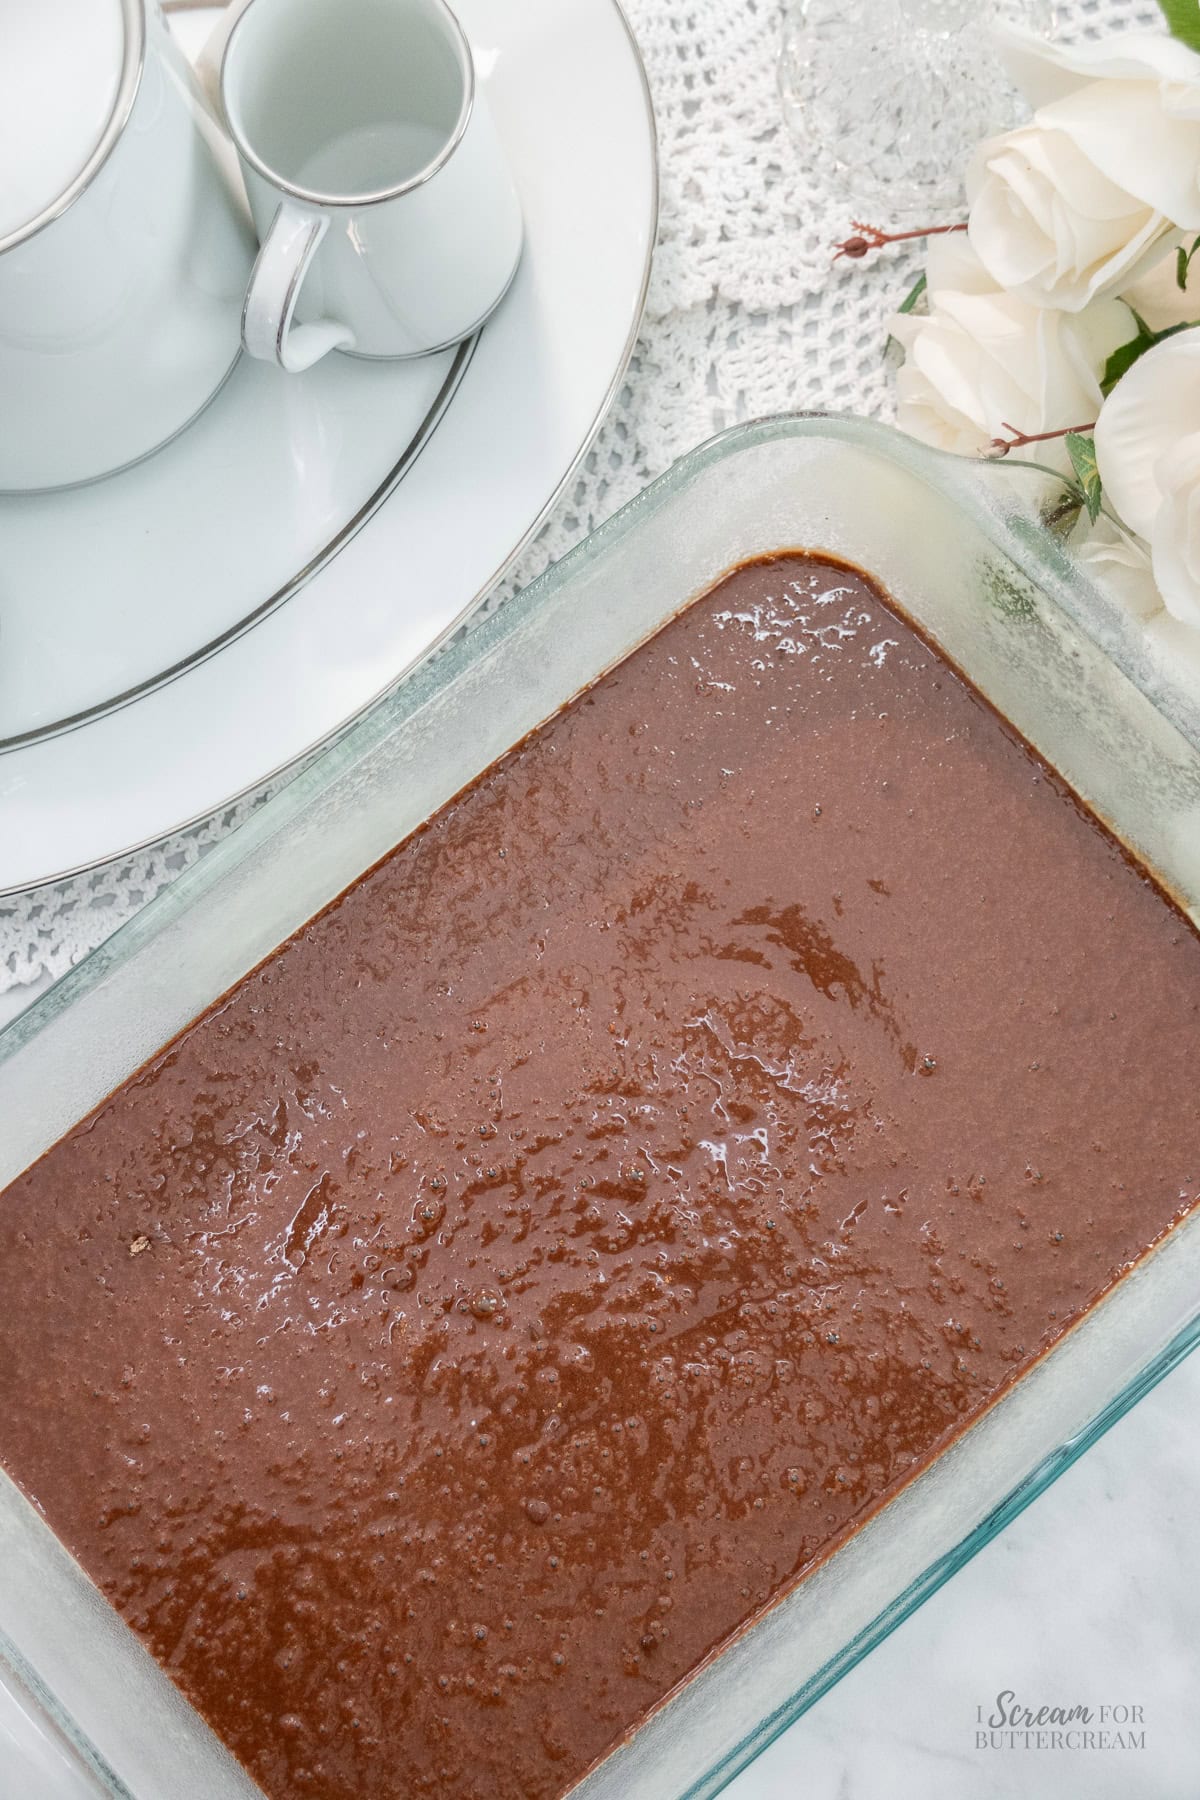
- Pour the batter into the pan and bake at 350 degrees F for approximately 25-20 minutes. Because ovens vary, just know you may end up needing to bake this a little longer, just watch it closer. The edges of the cake will start to pull away from the pan a bit, the top will be slightly firm when lightly touched and a toothpick inserted into the center of the cake layer will come out with a few moist crumbs on it or clean, but no raw batter.
- While the cake is baking, make the glaze.
For the glaze
- IMPORTANT NOTE: This glaze is very sweet and makes the cake very rich. If you do not like very sweet cakes, you may consider only using half the glaze.
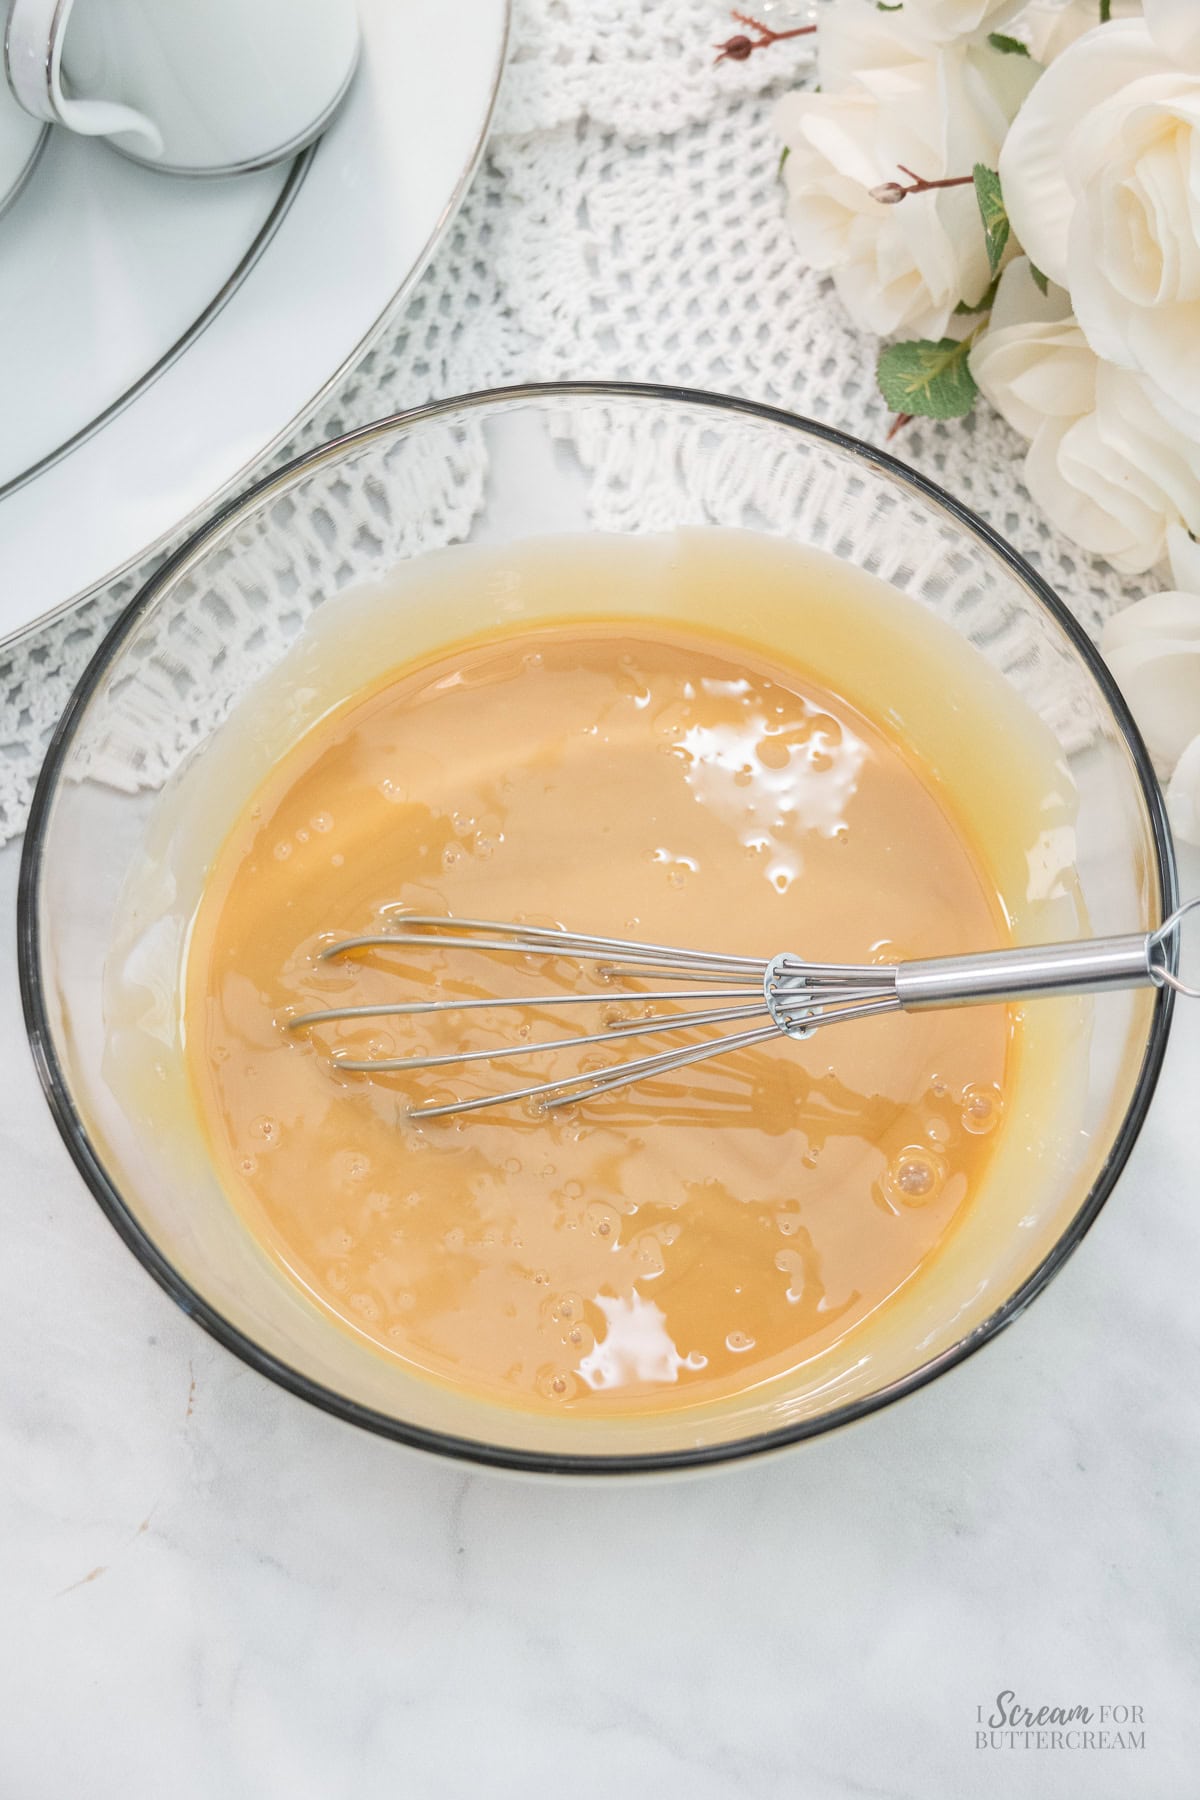
- While the cake is baking, mix together the sweetened condensed milk and the caramel sauce, then set aside.
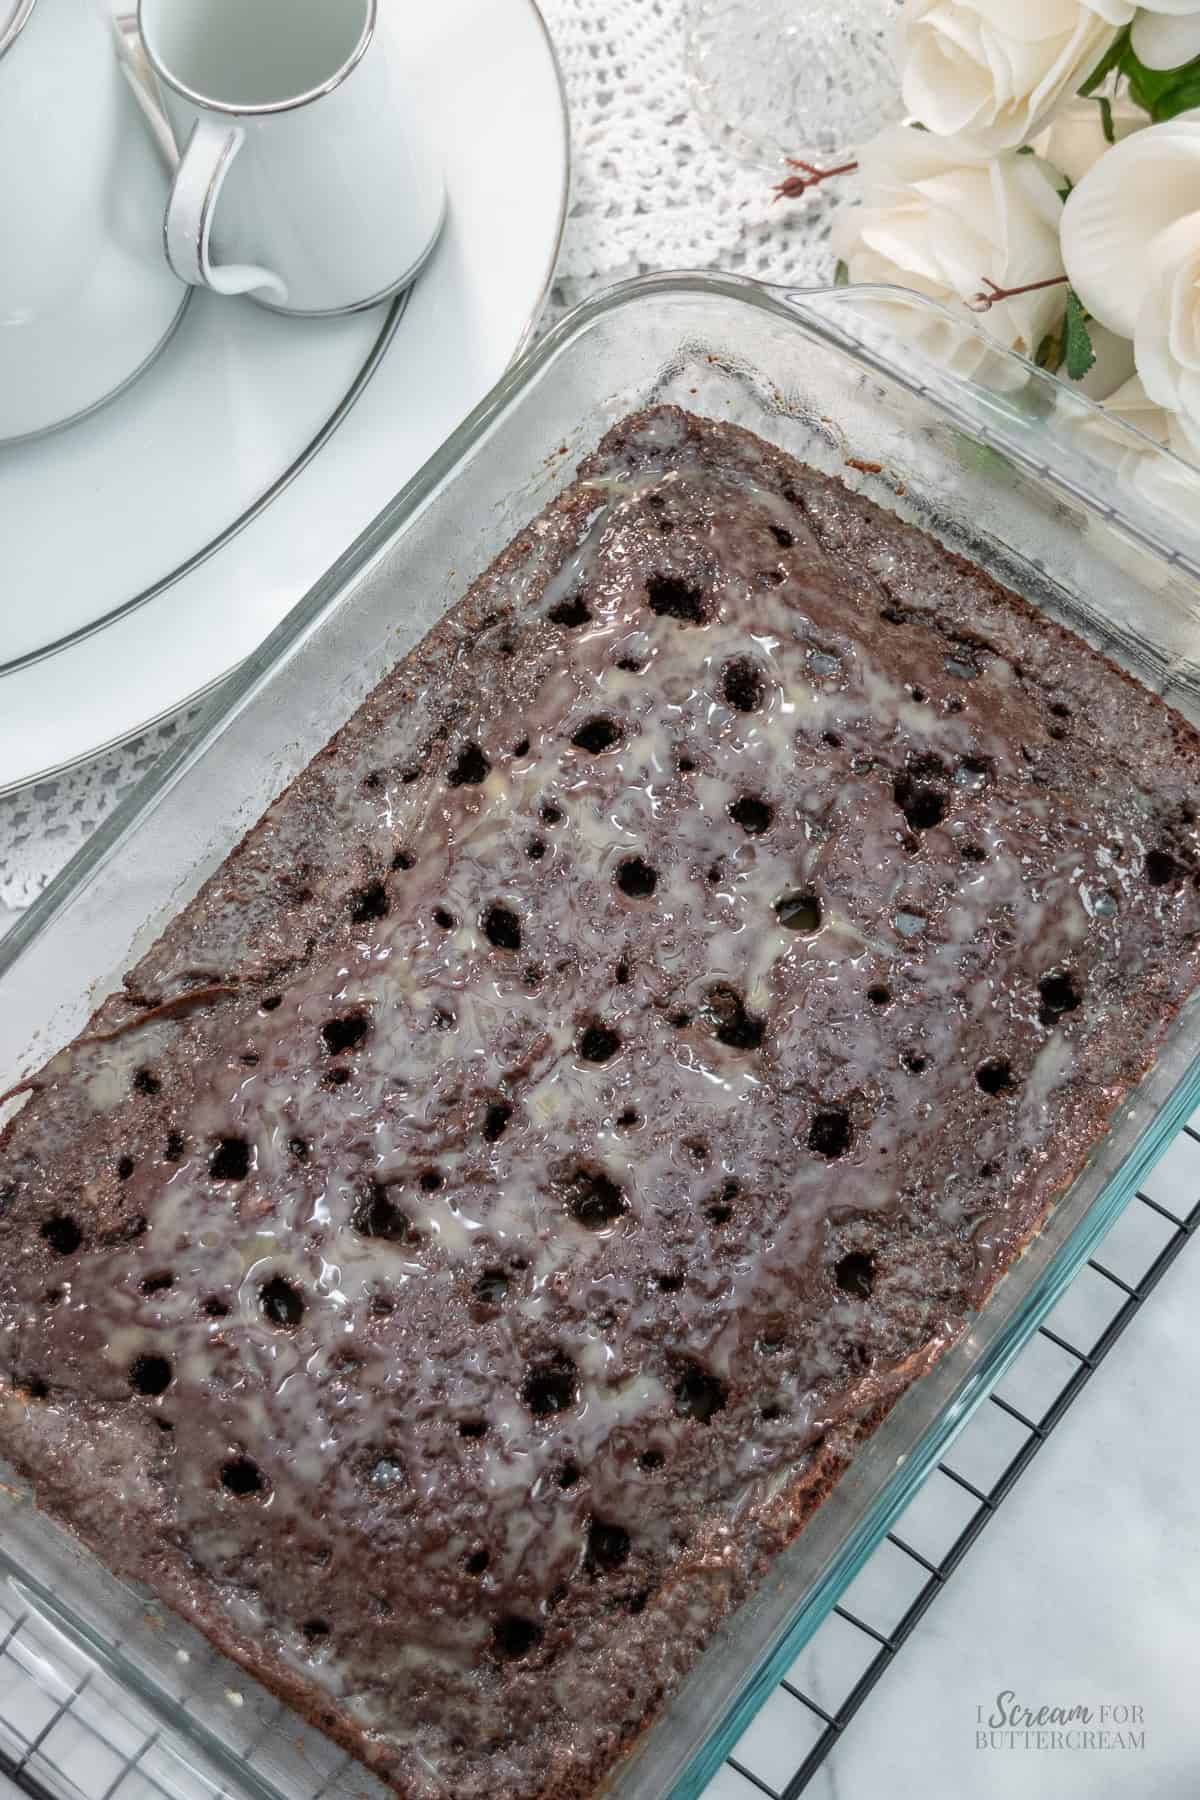
- Immediately after removing the cake from the oven, poke holes in the top of the cake with a skewer, a slim dowel or the handle of a wooden spoon. Make sure to only poke the holes about an inch deep. Try not to go all the way down to the bottom of the pan.
- Pour the milk and caramel mixture over the hot cake and allow it to cool completely on a cooling rack.
- Once cooled almost to room temperature, cover it and set it inside the fridge to chill completely or at least a few hours.
For the topping
- While the cake is being chilled, add the room temperature cream cheese and butter to a large mixing bowl and mix with an electric mixer on medium-high until smooth.
- Add the confectioner's sugar and mix on medium-high speed until well combined. You might need to add in a tablespoon of milk if it's too thick.
- Add the Cool Whip to the mixture and mix on medium-high for about a minute until well combined and fluffy.
- After the cake has chilled completely, spread the topping over the cake.
- Sprinkle crushed Butterfinger candy bars on top of the topping.
- Store cake, covered well, in the fridge. Serve chilled.
Notes
Nutrition
How to Share
I’d love for you to share this recipe link or tag it, but please do not share screenshots or copy/paste the recipe to social media as the content and photographs are copyright protected and we (bloggers) work really hard on our content. Sharing the link, tagging us on socials and pinning it is super appreciated though!
Steps to make this cake with step-by-step photos
(The full printable instructions are in the recipe card above.)
Step 1:
First, you'll make the cake by preheating the oven to 350 degrees F and greasing or spraying a 13×9-inch pan.
Step 2:
In a large mixing bowl, add the flour, cocoa powder, baking powder, baking soda, salt and granulated sugar. Whisk well and set aside.
Step 3:
In a medium-sized mixing bowl, add the oil, vanilla extract, buttermilk and eggs. (Do not add the hot coffee or water yet.) Whisk well and add to the dry ingredients.
Step 4:
Mix with an electric mixer on medium only until just combined, then add the hot coffee or water and mix on medium until well incorporated.
Step 5:
Pour the batter into the pan and bake at 350 degrees F for approximately 30-35 minutes.
Step 6:
While the cake is baking, make the glaze by mixing together the sweetened condensed milk and the caramel sauce.
Once the cake is baked, immediately remove it from the oven and poke holes in the top of the cake with a skewer or slim dowel and pour the milk and caramel mixture over the hot cake.
Allow it to cool completely on the counter, then when it's almost to room temperature, cover it and set it inside the fridge to chill fully.
Step 7:
Once it's chilled, you can make the topping. Just add the room temperature cream cheese and butter to a large mixing bowl and mix with an electric mixer on medium-high until smooth.
Add the confectioner's sugar and mix on medium-high speed, then add the Cool Whip to the cream cheese and butter mixture and mix on medium-high for about a minute until well combined and fluffy.
Step 8:
After the cake has chilled completely, spread the cool whip and cream cheese mixture over the cake, then sprinkle the crushed Butterfinger bars on top of the topping.
Tips & FAQs
It’s really best if you can use real buttermilk, as it makes for a softer texture and really helps give the cake flavor. If you can’t get it, you can substitute with this sour milk recipe:
For every one cup of buttermilk called for, fill a measuring cup with 1 cup regular milk, take out 1 tablespoon and replace it with 1 tablespoon lemon juice or white vinegar and stir well. Let it sit for five minutes, then it’s ready to use.
This will not work exactly the same as buttermilk, but can work in a pinch.
You don't but just know that the cake will not have a coffee taste if you do use it. The coffee just brings out the chocolate flavor. If you don’t like the idea of using it though, you can just use water, and it will turn out just as tasty. Just make sure not to completely omit the liquid.
No, those are two different things and using evaporated milk instead of condensed sweetened milk will not give you the same results.
Feel free to use a box chocolate cake mix and mix per the directions on the box, then follow the rest of the instructions.
Poke the holes as deep as you can without touching the bottom of the pan. That way, the bottom of the cake doesn't get super soggy.
Absolutely. In fact, this cake is even better made the day before you plan to serve it.
This cake should be stored in an airtight container or covered well in the refrigerator and can last up to 5 days.
This cake is generally served cold, however you can set it out about 20 minutes before serving to let it soften, as most cakes will firm a bit when chilled.
Supplies
As an Amazon Associate, I earn from qualifying purchases.
Tried This?
If you give this recipe a try, I'd love to know what you think!
Leave a Reply