
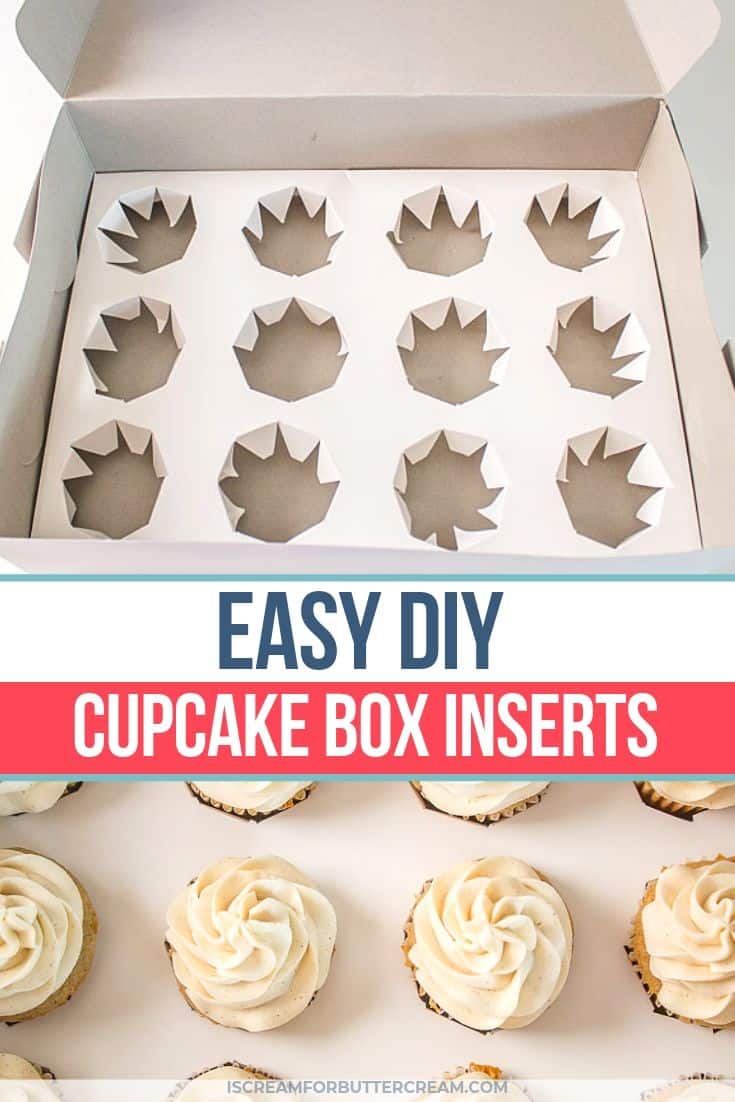
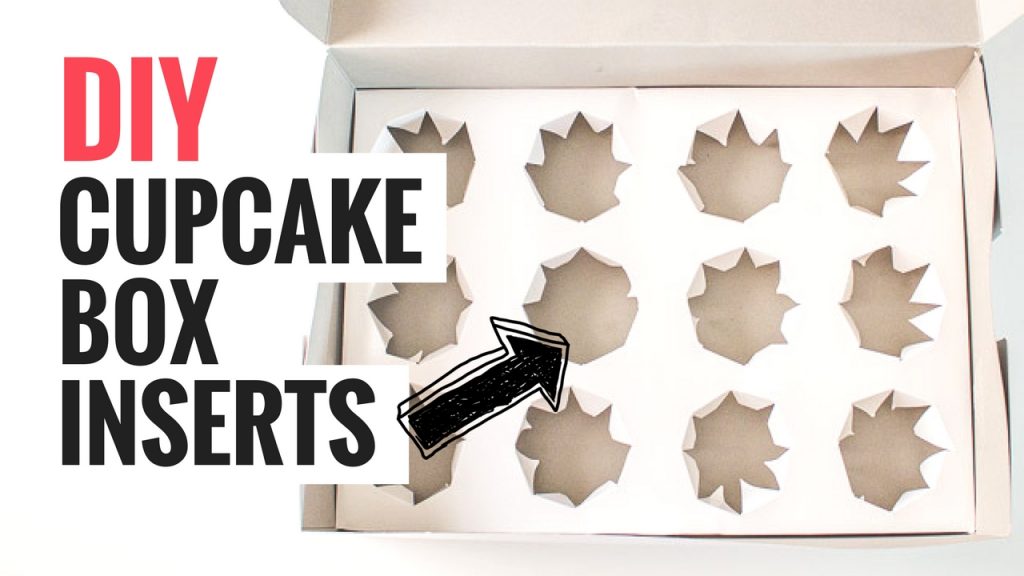
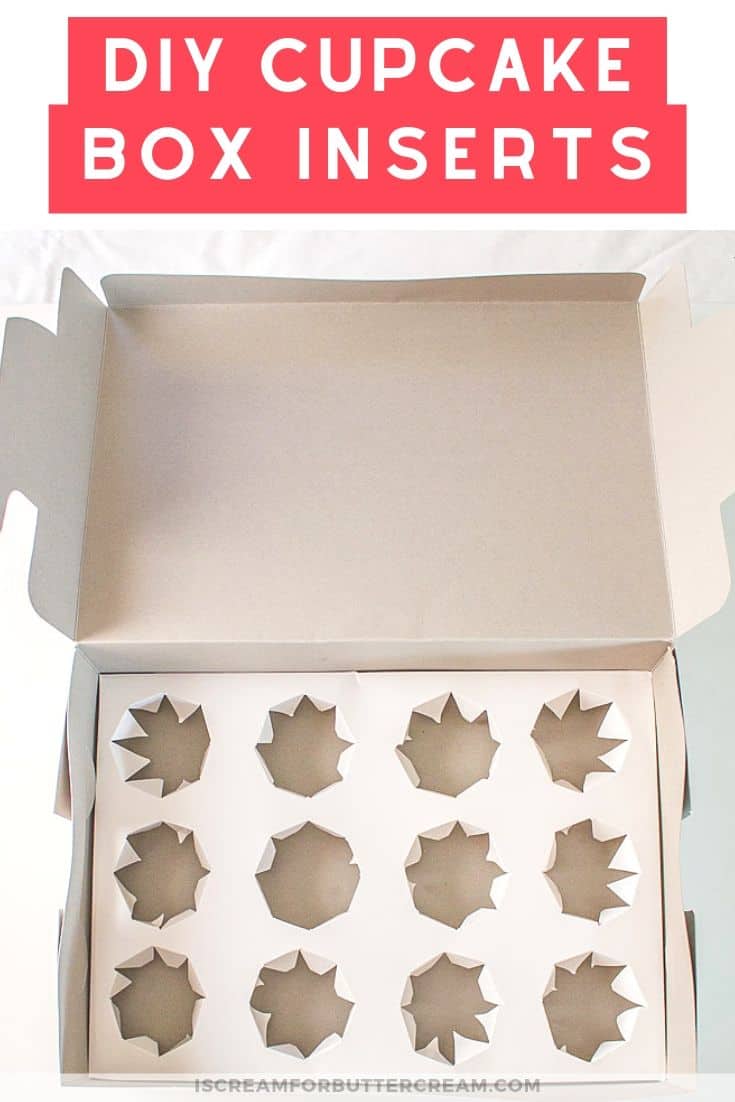
Traveling with cupcakes just got easier. and these DIY Cupcake Box Inserts are super easy to make. If you ever have trouble transporting cupcakes, these inserts will keep them from toppling over and you can use any box you have.
I don’t know about you, but I can never find cupcake box inserts at any of my local stores. Sometimes my Walmart has boxes with the inserts included, but they can get a little pricey, so I figured out a way I could make my own on the cheap.
You can always order these things online, but honestly sometimes, I just don’t think ahead and I need them in a pinch. The great thing about this tutorial is that you can make the inserts to fit any sized cake or cupcake box that you have on hand. Really it’ll work for any type of box you’ve got.
With these inserts, there’s no more worrying about your cupcakes toppling over when you’re traveling. And even if you don’t plan on traveling with them, it’s a handy way to keep your cupcakes covered and fresh. No more plastic wrap messing up your cupcakes!
Okay, since you’ll be using plain poster board, this project is fairly cheap to do AND you can probably get a couple sets out of just one poster board.
Alright, let’s get to the tutorial. I’ve included some screenshots of the whole process with notes, but don’t forget to check out the video below that to see it coming together.
As an Amazon Associate, I earn from qualifying purchases.
Supplies You’ll Need for the DIY Cupcake Box Inserts:
- Poster Board (any color you want)
- The box you plan to use (you can use whatever size you want)
- Round Circle Cutter (you’ll use this to trace around) I used a 2 ½ inch round circle cutter, which is a good size for a standard cupcake. You can grab a circle cutter set here: Circle Cutter Set
- Exacto Knife
- Ruler (I used an acrylic ruler because it’s see-through, large and really handy to have.) You can grab one like mine here: Acrylic Ruler
- Scissors
Making the DIY Cupcake Box Inserts:
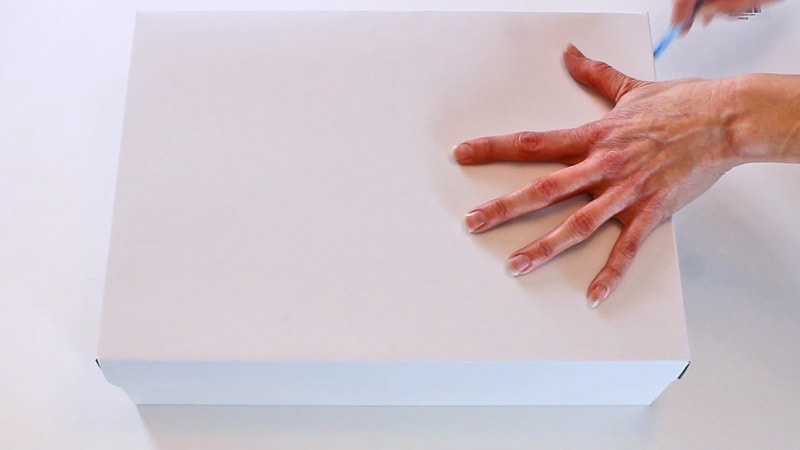
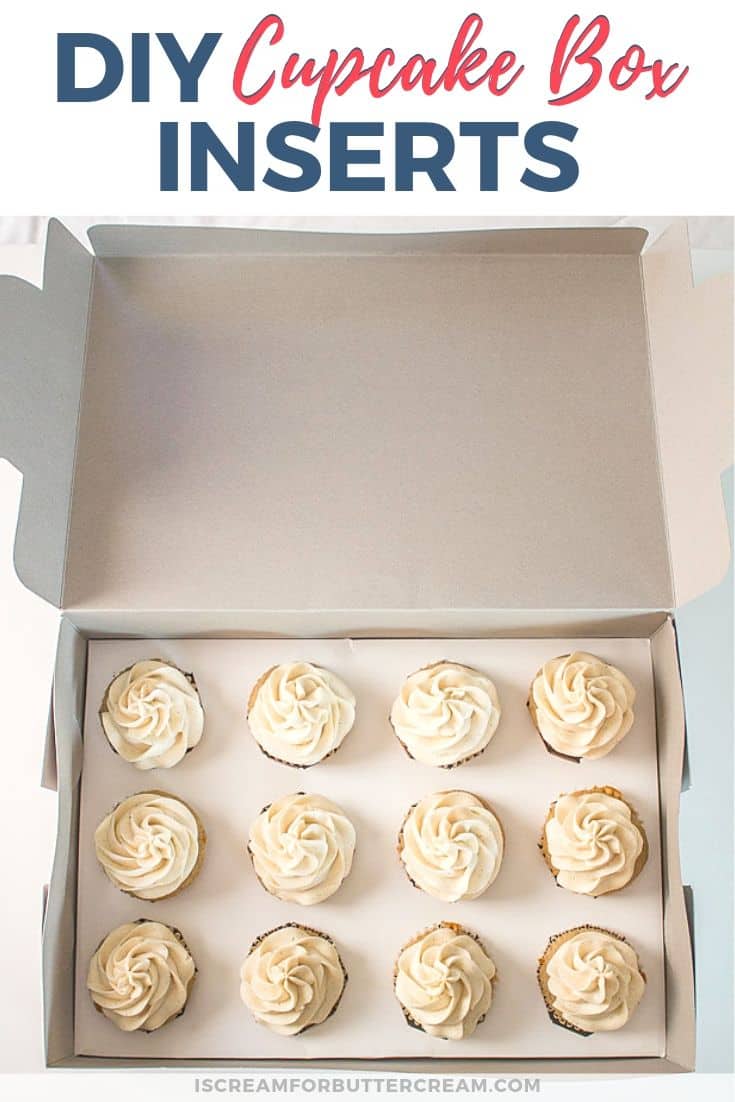
First you’ll need to find a box. You can use any box you’ve got. I used a cake/cupcake box I’d bought from Michael’s craft store.

Take your poster board and set the box on top of it. Trace around the box onto the poster board.
Now take your ruler and mark one inch around the line you just traced.
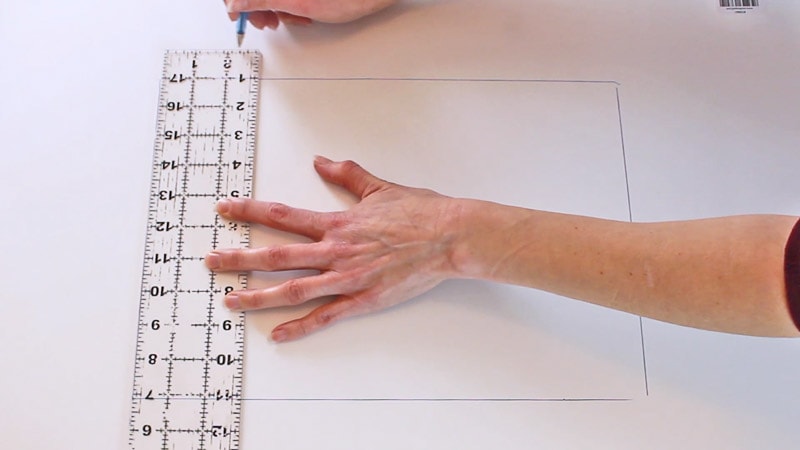
Make sure to do this all the way around.
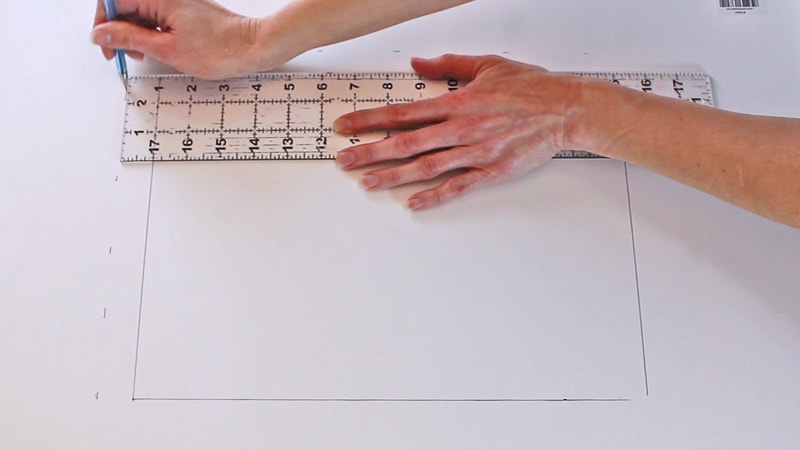
Now use your ruler to make a straight line where you just marked.
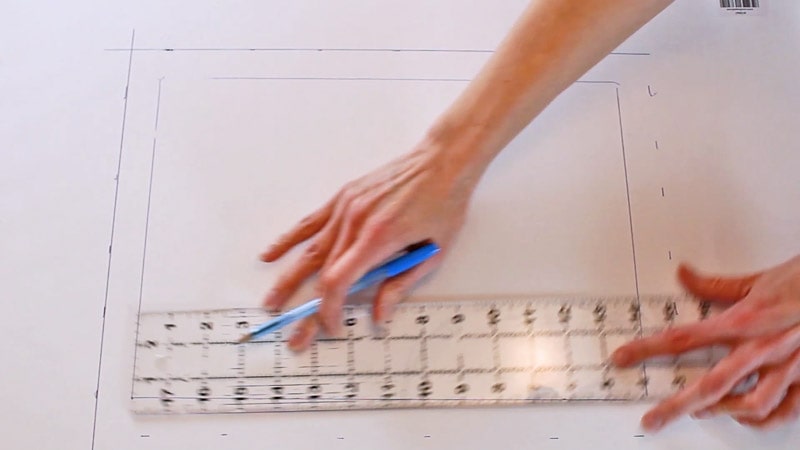
Cut around the outside line.
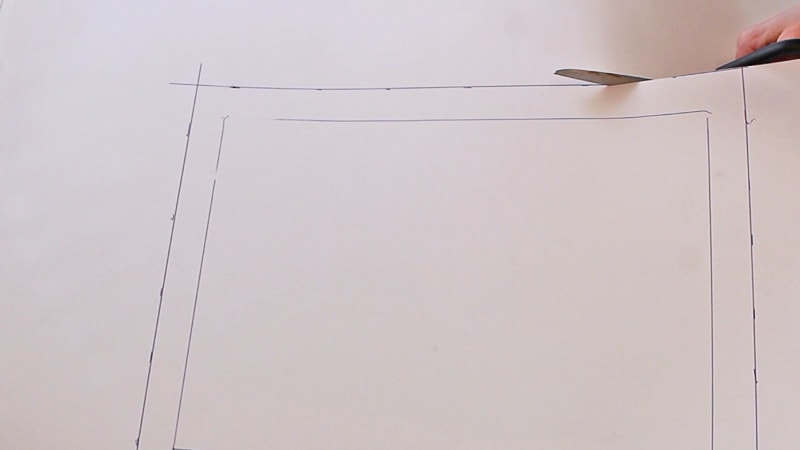
Cut on that outside line on all four sides.
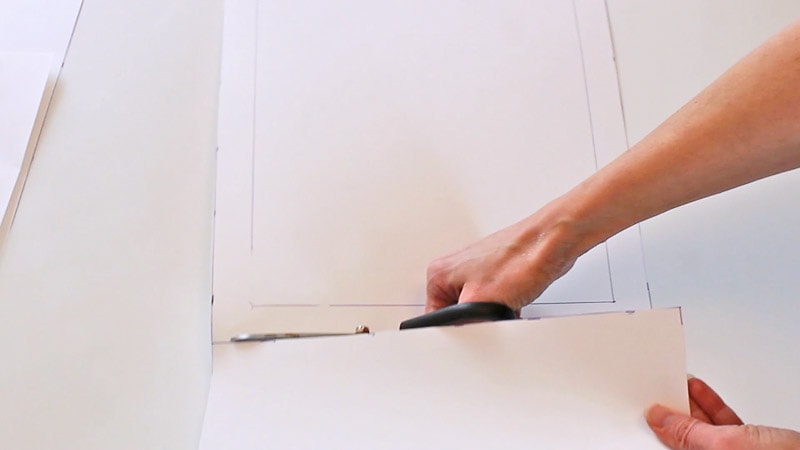
Cut out each corner.
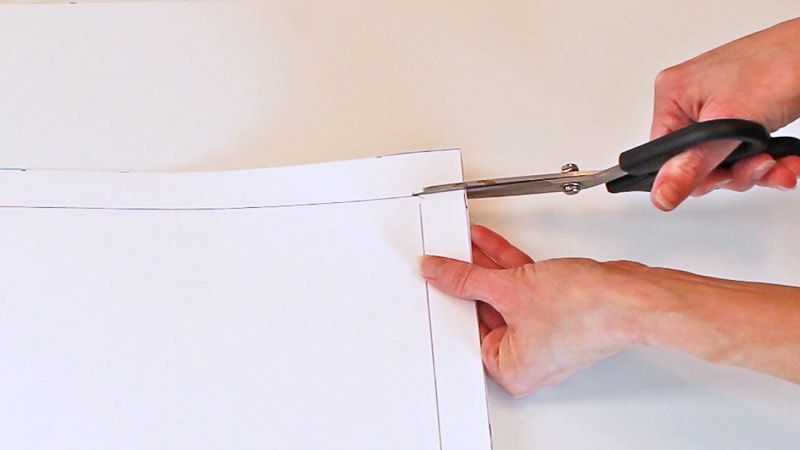
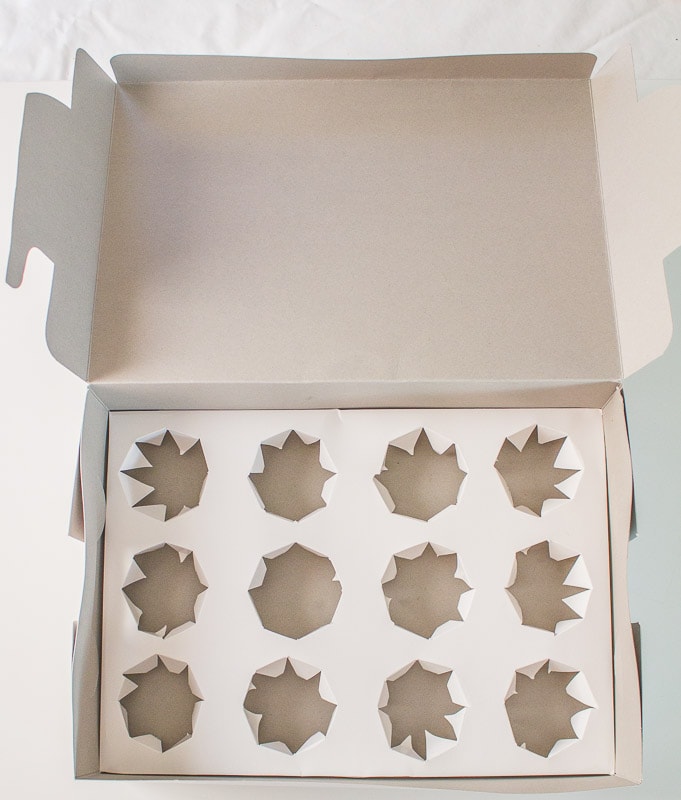
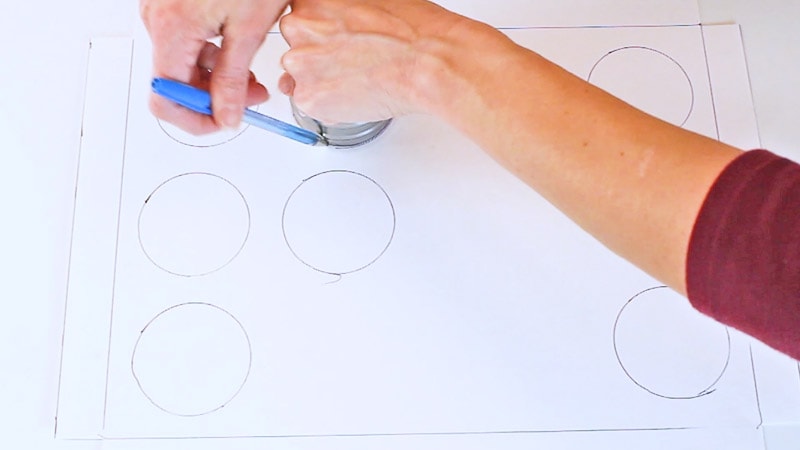
Take your circle cutter and trace around it as many times as will fit, or for the amount of cupcakes you’re needing to box up.
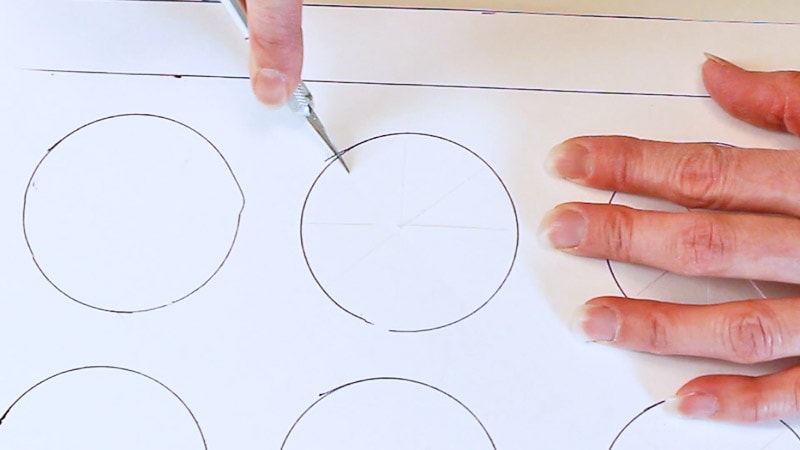
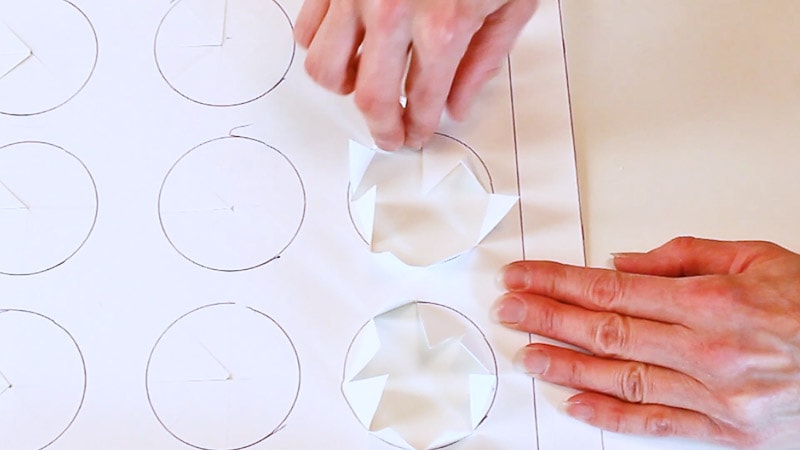
Take your exacto knife and cut slits into each circle. I cut mine like a pie.
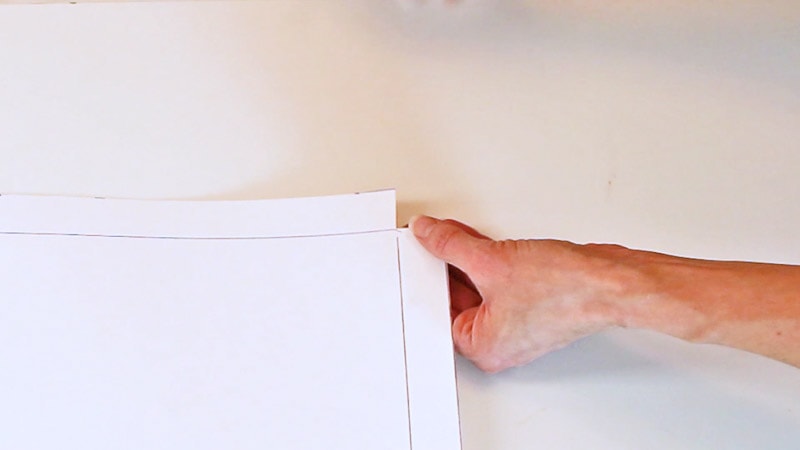
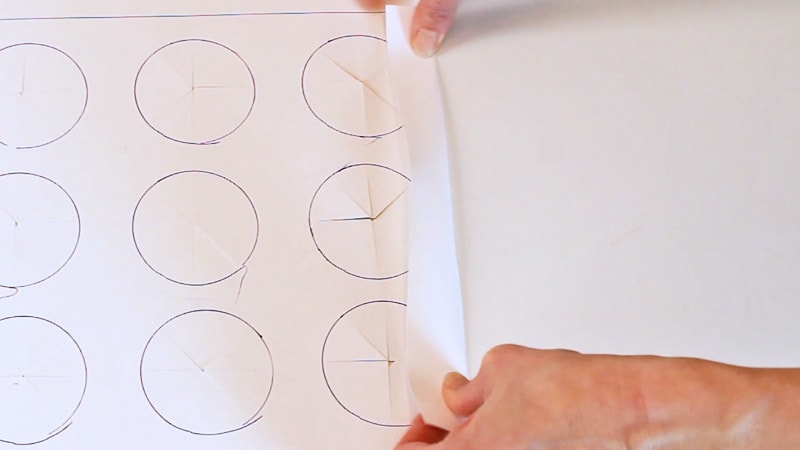
Take the ends of your insert and fold them in along that inside line you made when you traced around the box.
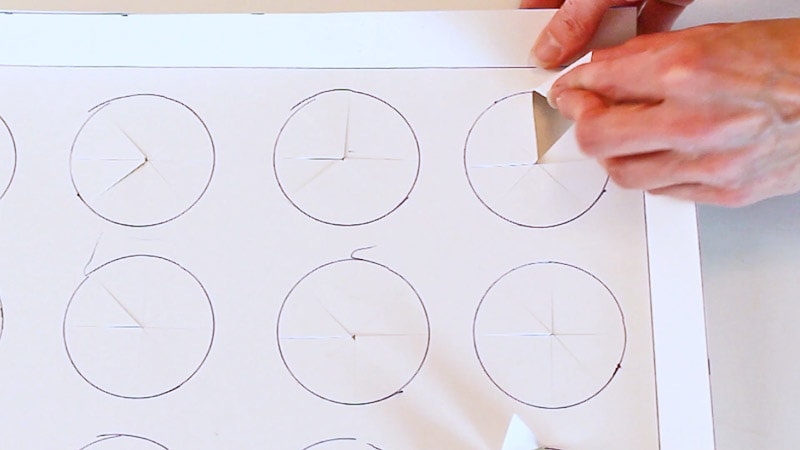
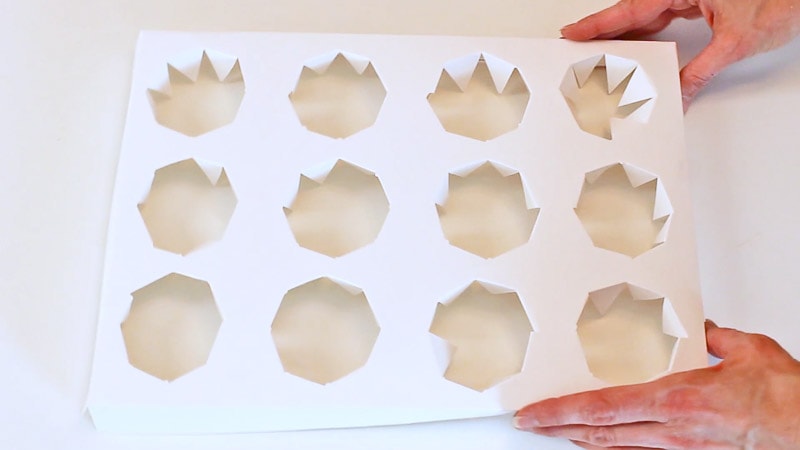
Now, fold back the areas you cut in each circle.
Turn it over and make sure everything looks good and that it’s not folded too wonky.
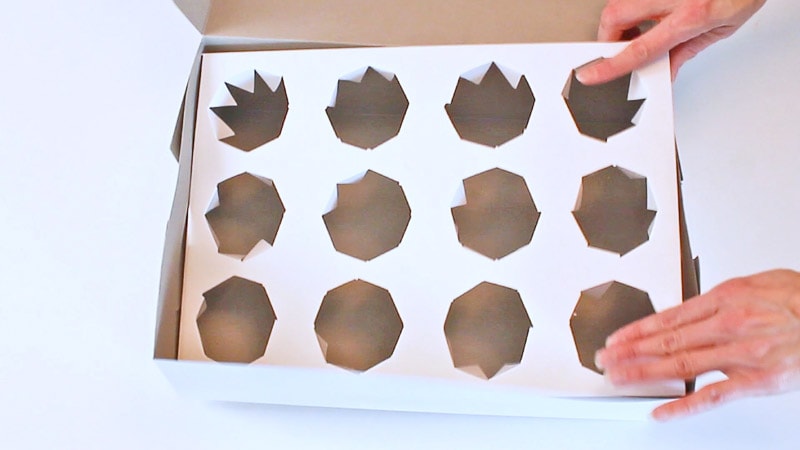
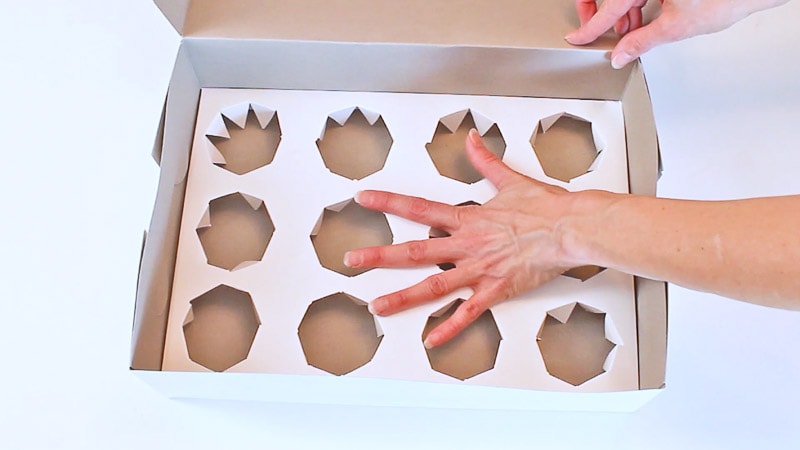
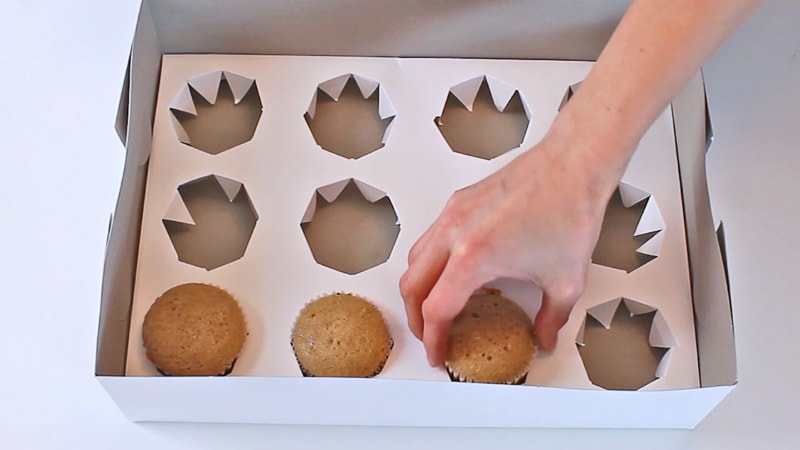
Now, just add it to your box. It’ll be snug, but you’ll need to push down the corners of your insert, down into the box.
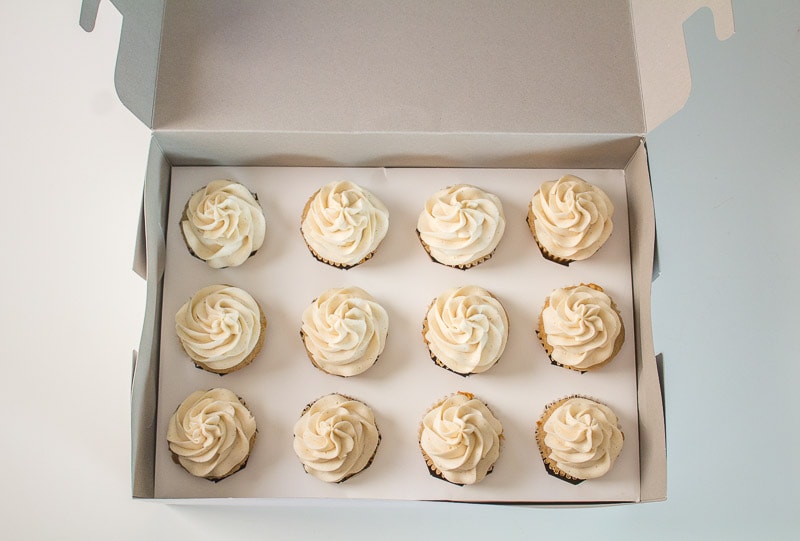
I like to go ahead and add my cupcakes before icing them.
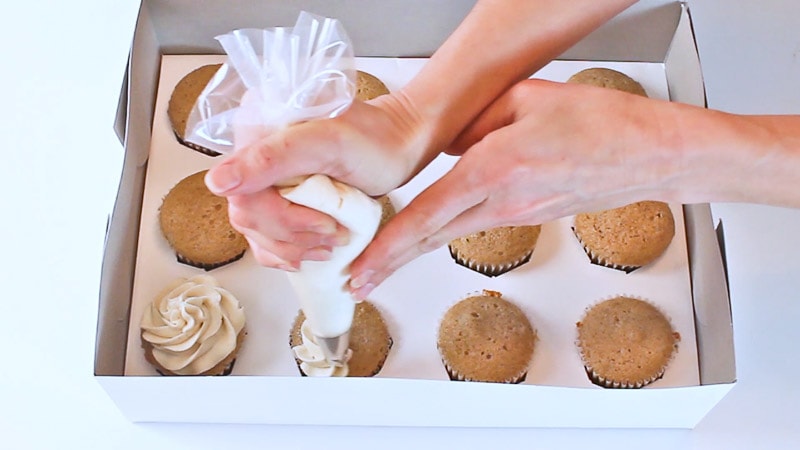
Then just pipe on your buttercream.
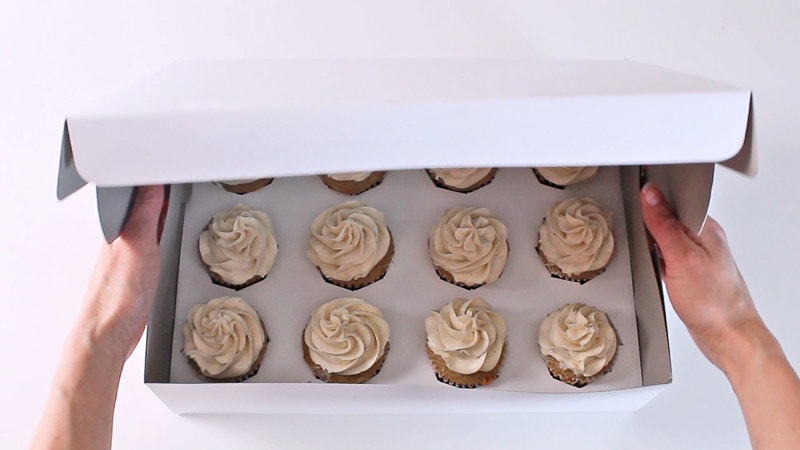
Pop the lid on and you’re ready to go!
Ok, there you have it! Now you can make cupcake inserts for any box you’ve got!
Here’s the video for the DIY Cupcake Box Inserts:
Don’t Forget to Pin it Below!
Tammy
really liked this idea! i though it was simply & practical and really clearly explained. I think I will try this!! thanks!
Kara Jane
Oh wonderful! I often wonder if I’m explaining things okay…thanks for letting me know! 🙂
Setty
Thanks so much Kara i was about to buy boxes with the holes but know i see this ill just buy empty boxes and make my own holes may God bless you 🙏🏽💃🏽🥂🥰🙋🏽♀️
Kara
Awesome! So glad it was helpful!
Linda
Kara, what a great idea! Thank you for sharing.
Kara Jane
Oh you’re so welcome! 😉
ADDANKI
Amazing Kara. Thanks for posting a very useful tutorial with excellent illustrations and a video , It will surely help many. I was just imagining the hard work behind to this great job, Hats off to you. Also i saw your free ruffles cake course to learn to do ruffles on a fondant cake. great job again ,
Kara Jane
You’re so welcome and I’m glad it was useful for you! It IS a lot of work, but I really have fun with it and enjoy it. 😉 Thanks again for your sweet comment!
Sharee M.
I feel like crying right now. Lol. OMG I seriously love you for this woman!!! I needed a cupcake box last minute and it was hard to find one that holds 48. Thanks for this!!!
Kara Jane
LOL! Yay…I’m so glad it helped!
Mattie Scott
Amazing! I love your Idea. next time I’m going to make my own box instead of buying it form the market. Thank you so much for the helpful post. 🙂
Kara Jane
Hi Mattie, thanks so much and I’m so glad it was helpful!
Ash
What size box did you use?This looks like a really good idea!
Kara Jane
I can’t remember the size of the box. I think I just got one of the rectangle cupcake/cake boxes from Walmart. Maybe around 12×8? Somewhere around that size.
Arlette Hunnakko
Hi Kara,
Thanks for that cupcake box tutorial. Just what I needed! My problem is how to lift them out gracefully without mushing the nice frosting…lol Maybe tongs?
God bless!
Kara Jane
Oh yes…that’s an age old problem. lol The only thing I know to do is chill them a bit in the fridge, so that the icing firms up just enough. That way, you’re less likely to mess up the icing too badly.
Sidra
awesome DIY, we need to use this for parfait boxes as most boxes and inserts out there are for cup cakes but this can be really helpful for parfait boxes as well.
Kara
Oh yes! Great idea!