
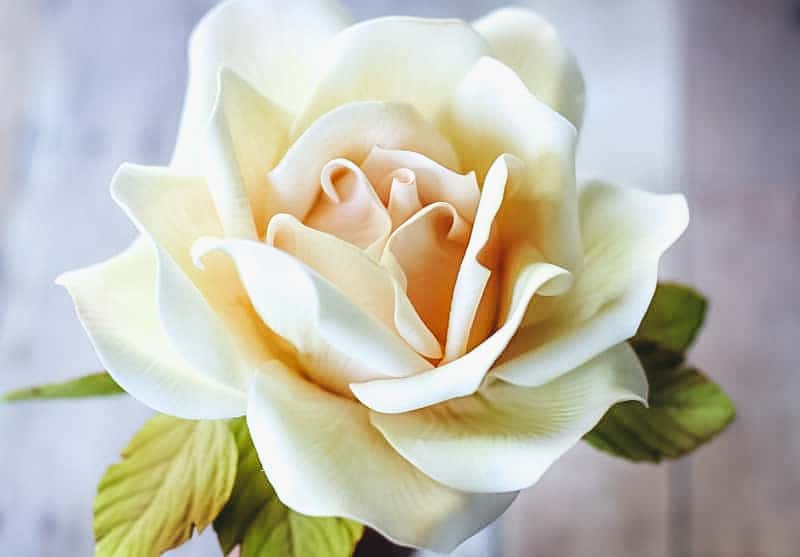
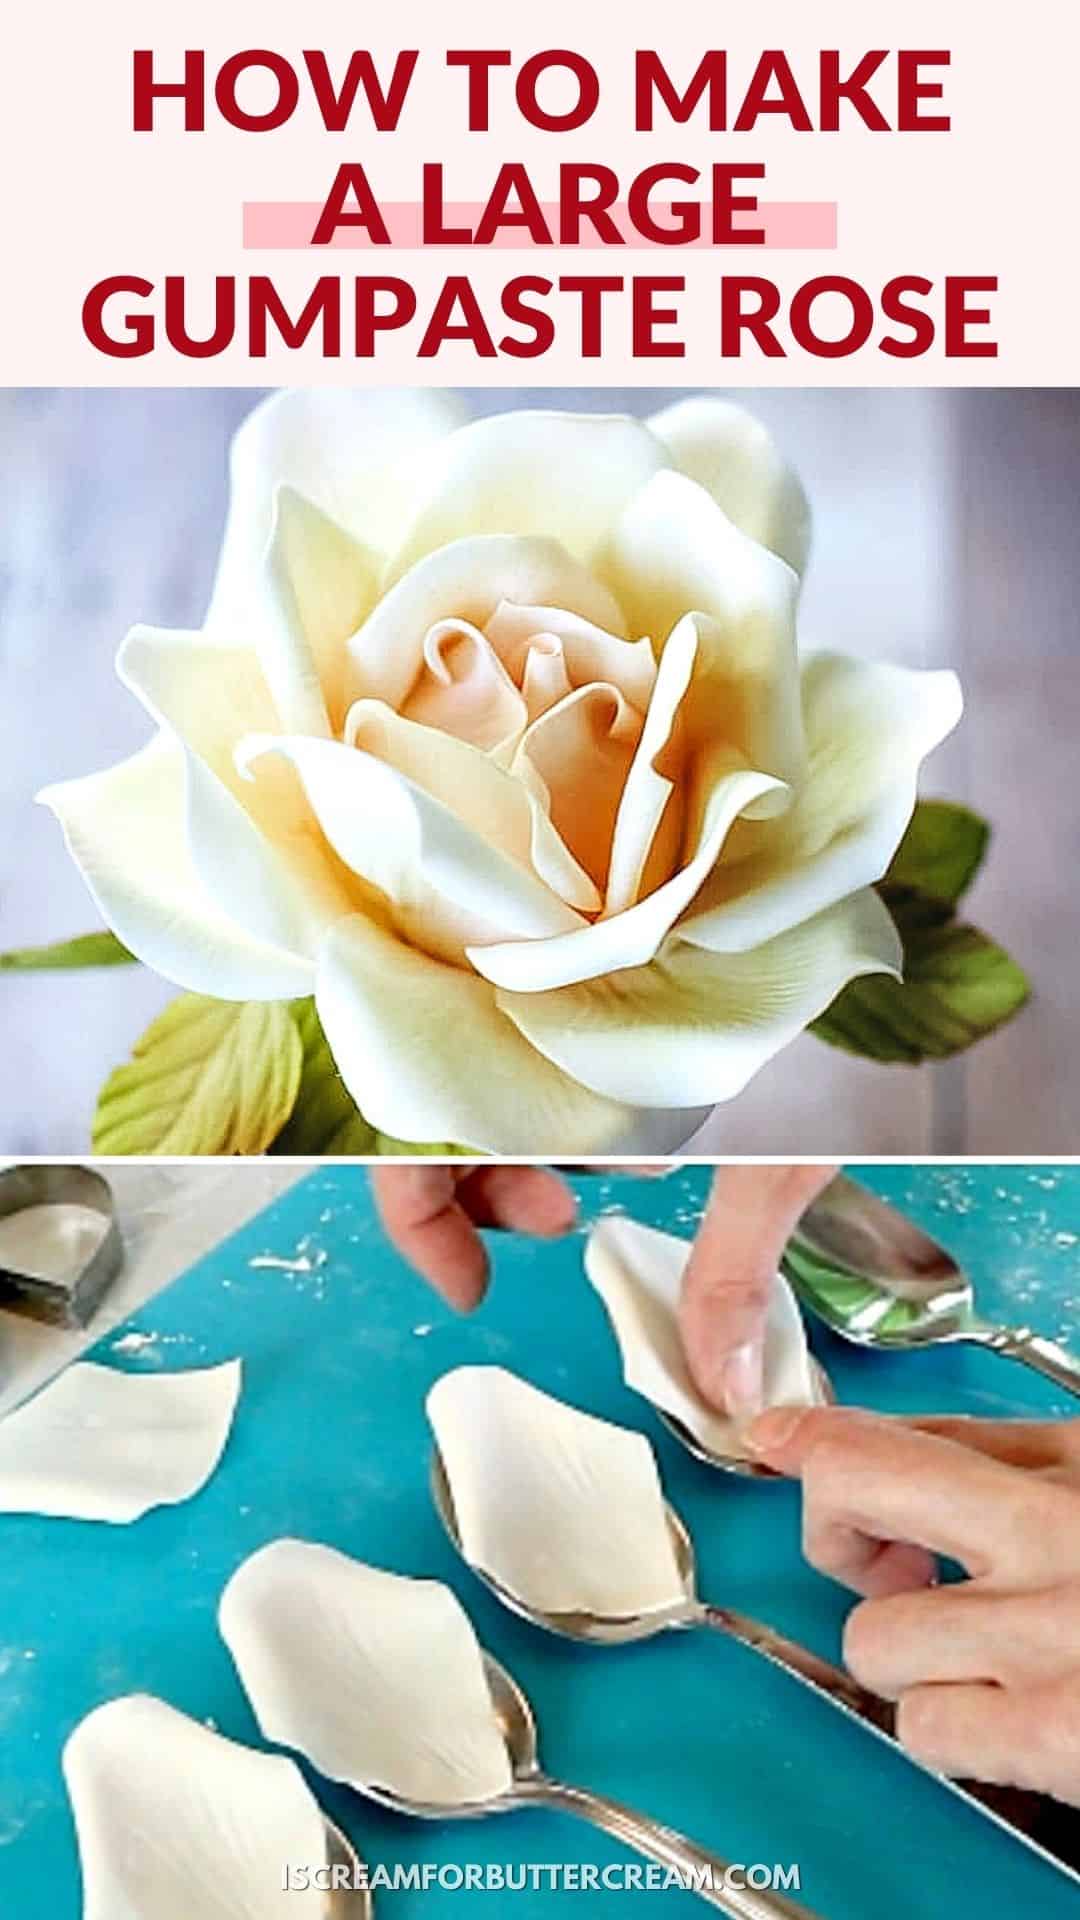
This very detailed tutorial will show you step-by-step how to make a beautiful, perfect large gumpaste rose from start to finish.
Making gumpste flowers (specifically roses), doesn’t have to be so challenging. You just need a plan and this gumpaste tutorial is an easy-to-follow process that will guide you through making roses.
If you’ve been frustrated with making gumpaste roses, don’t worry. I’m going to share with you all my best tips. There are some tips and tricks for sugar roses that really make it simple and possible to create beautiful roses for your cakes.
In this post you’ll find detailed written instructions, a video and a printable guide to use (and yes that’s all free).
This post is the first of a three-part series. After you’ve completed your rose, just click the next title on the list to continue on. Here’s the list of each post.
- How to Make a Large Gumpaste Rose (you’re here now)
- How to Add Color to a Large Gumpaste Rose
- How to Make and Color Gumpaste Rose Leaves
First I’ll say that there are a multitude of ways to make a rose. I’m going to show you what I do. Hopefully, it gives you a great starting off point and you can adjust it to what works best for you.
I’ve written instructions below with screenshots. I’ve also included the supplies you’ll need plus some extra tips. There’s also a narrated video below, so you can actually see it being made.
Jump to:
As an Amazon Associate, I earn from qualifying purchases.
Supplies You’ll Need to Make a Large Gumpaste Rose:
- Gumpaste: You need gumpaste…fondant will not work as well. I normally use store bought gumpaste, either wilton or Satin Ice.
- Rose Petal Cutter Set: We'll use the three largest cutters in the set) These cutters are very similar to what I used: Rose Petal Cutters; And these cutters look a bit wider than what I used, but they are a good brand and would work as well: Ateco Rose Cutter Set
- Shapers: (This is optional, but they're very handy to maneuver the petals around when you're attaching them.)
- Petal Veiner: - Here 's one similar to mine: Rose Petal Veiner
- Ball Tools: (You don't absolutely HAVE to have this but it's really useful in giving your petals a nice curve.)
- Wilton Fondant 9 Inch Rolling Pin or Pasta Roller Attachment (Ok, you don't HAVE to have a pasta roller attachment, but it is pretty awesome if you do. You can get your gumpaste really thin and even with a pasta roller.)
- 18 gauge floral wires: I usually get the paper covered wires.
- Floral tape
- 1 inch styrofoam ball: Try to get the compressed styrofoam…it's smoother.
- Hot glue
- Wire cutters: Because you may need to cut your wires shorter, so go ahead and get the bigger ones…they'll cut through almost anything.
- Gumpaste shaping foam: (You'll use this with your ball tool to give the petal curves.)
- Gumpaste shaping mat
Ok, let’s get started. Don’t forget, there’s a video at the end that will show you all the steps.
Steps for Making the Large Gumpaste Rose:
Making the Base:
First of all, some people like to make their rosebuds out of gumpaste. If I’m making a small rose, that’s fine, but it really makes for a heavy flower when you’re making a large rose.
Other’s prefer to use the styrofoam cones you can buy at cake decorating supply stores. None of these places near me, keep those in stock and frankly, sometimes I just don’t think ahead to order them.
I came up with this method of just using a one-inch styrofoam ball and it works just as well and they’re so much easier to find, plus they’re fairly cheap.
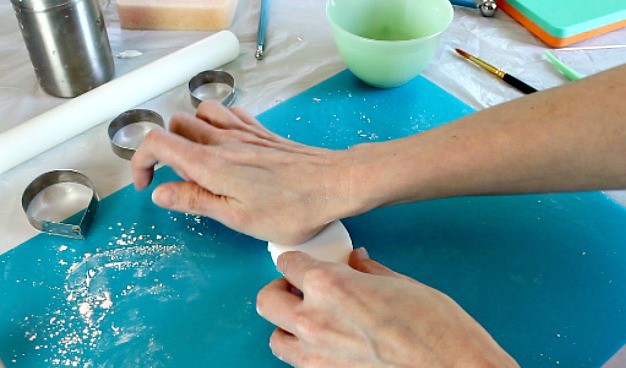
First tape three of the 18 gauge wires together with floral tape. Usually, the styrofoam balls will have a hole at the bottom. If yours doesn’t, just make a hole with a skewer or your wires.
(Oh and try to get the more compacted styrofoam balls, they seem to work better. I’ve added a link to them up in the supply list.)
Next squirt in some hot glue and insert the wires that you taped together. Let it firm up fully.
Again, we’re using styrofoam, so that it won’t add a bunch of weight to your flower.
Making the Petals and Putting it Together:
We’ll be using the three largest petal cutters in the set.
The Bud:
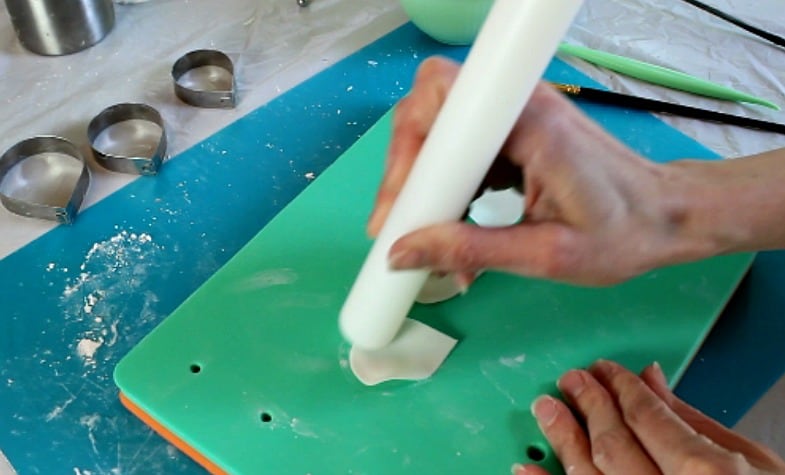
First, you need to sprinkle cornstarch on your rolling mat, so your petals won’t stick. Then roll out your gumpaste super thin.
If you’ve got a pasta roller attachment, I like to roll them out at about the number five setting. If you don’t have one, just use your small fondant roller.
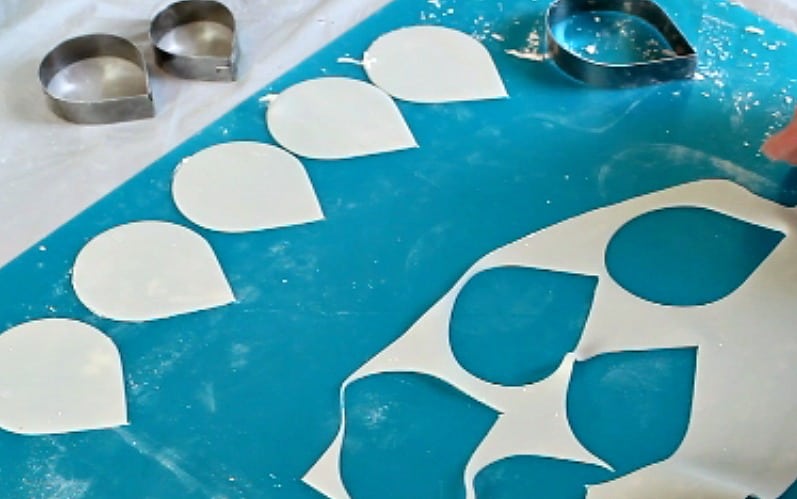
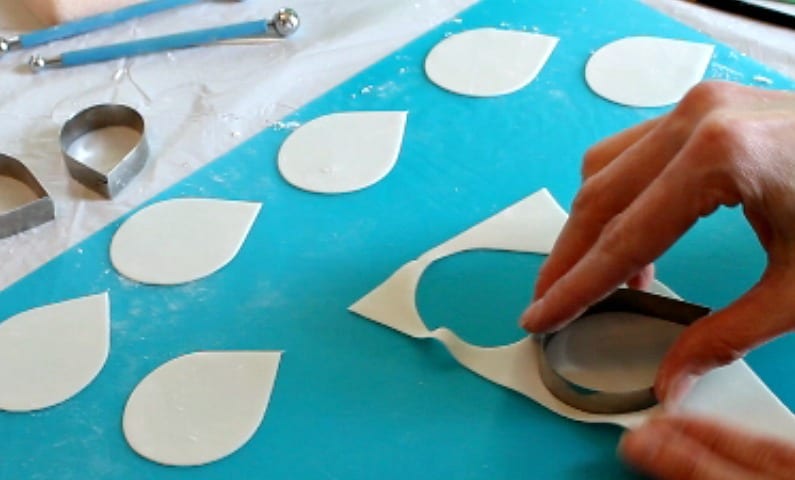
First I’ll say that I usually widen my petal cutters a bit. I just pull them apart a tad.
Take your largest petal cutter, I know it sounds weird to use the largest cutter, but just trust me, and cut out one petal. This will be your bud.
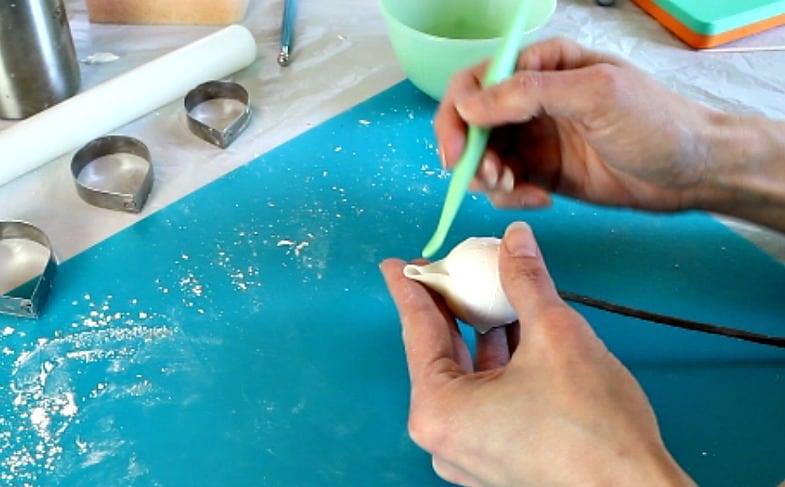
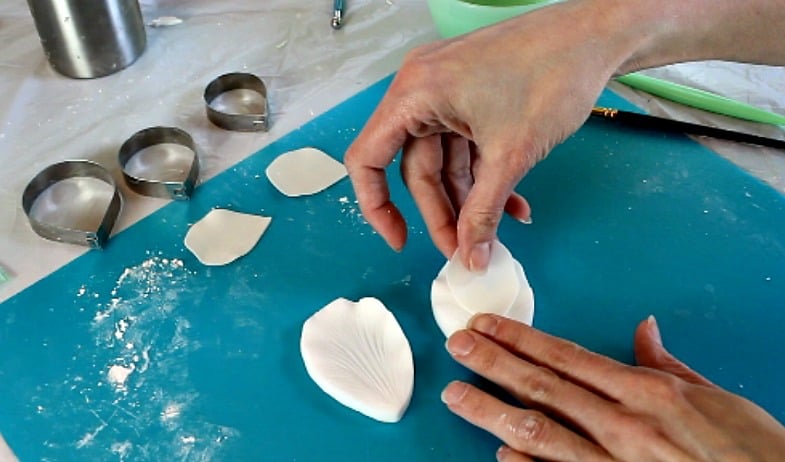
Use your foam mat (the firmer one) and thin the edges with either a ball tool or your fondant roller.

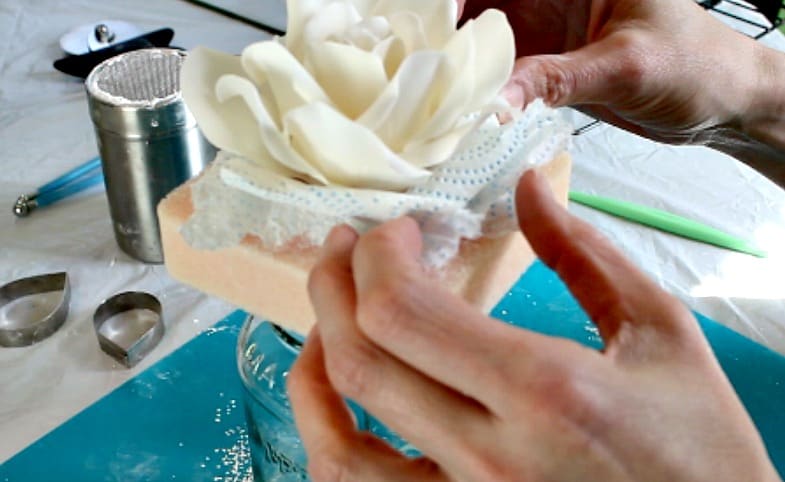
Now, add the petal to the veiner and press.
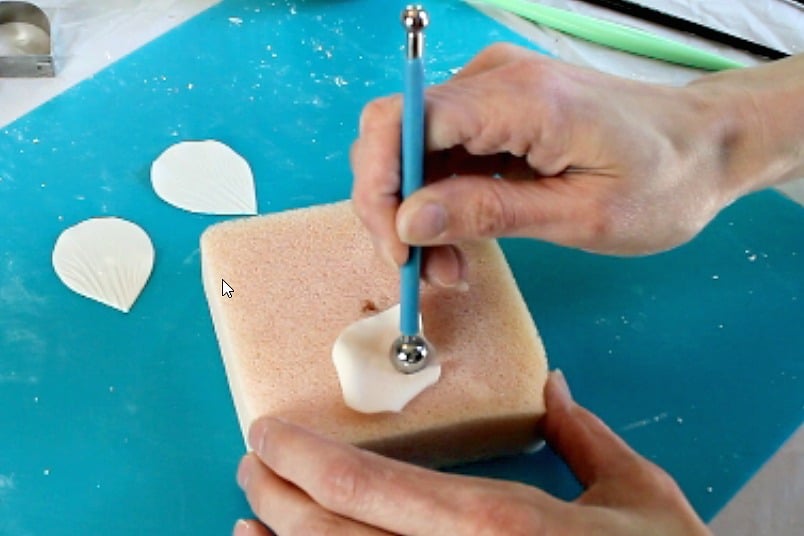
Attach the petal to your styrofoam ball with a bit of water. Just wrap it around and let the cone stick up from the ball.
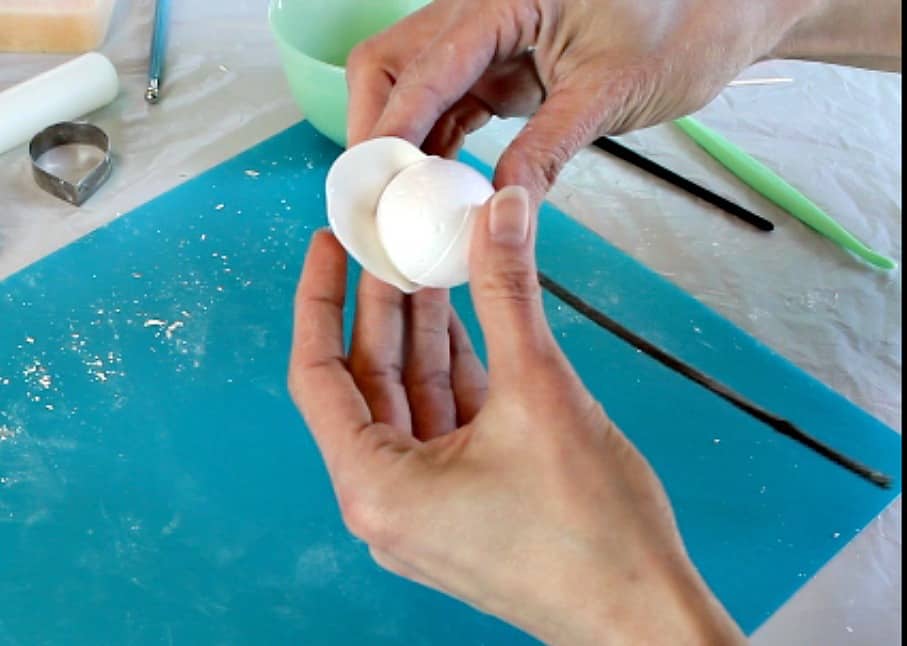
Use your fondant tool to help you adjust it. It’ll take some fidgeting to get it just right.
Now just stick the flower in a block of foam while you work on the next petals.
The First Round of Petals:
For the first round of petals, roll out your gumpaste as you did for the bud. Now, use the smallest petal cutter and cut three petals.
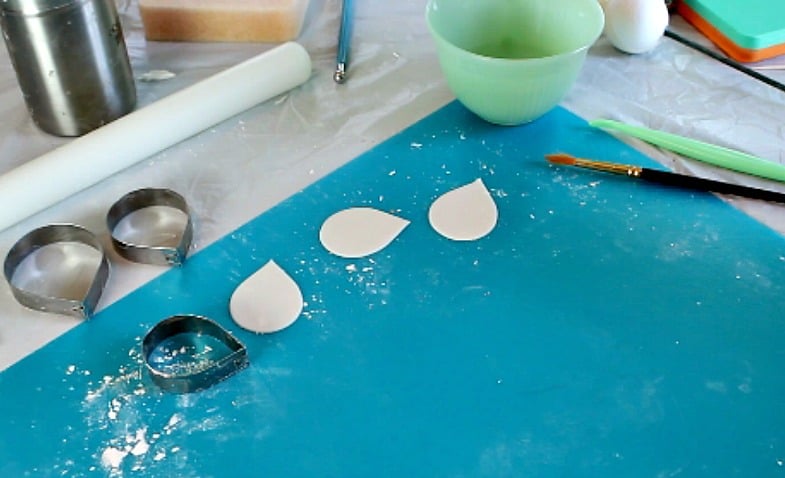
Thin the edges with your fondant roller.
Vein them.

Use a toothpick to curl the edges back a bit.
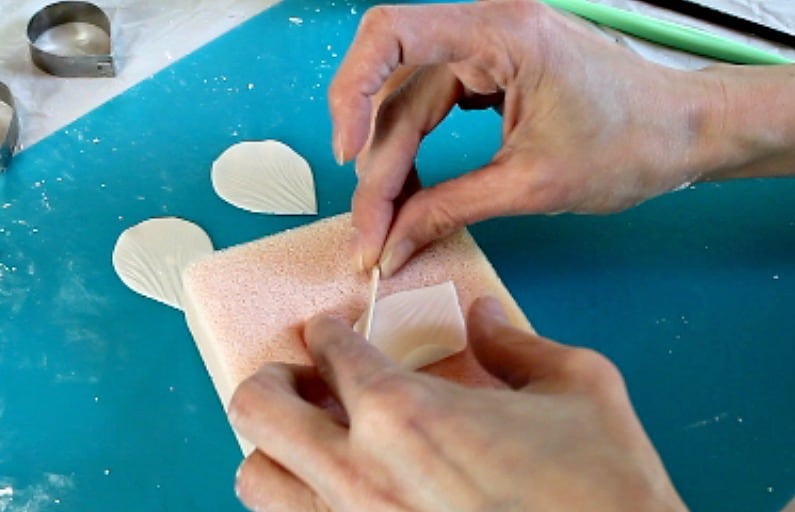
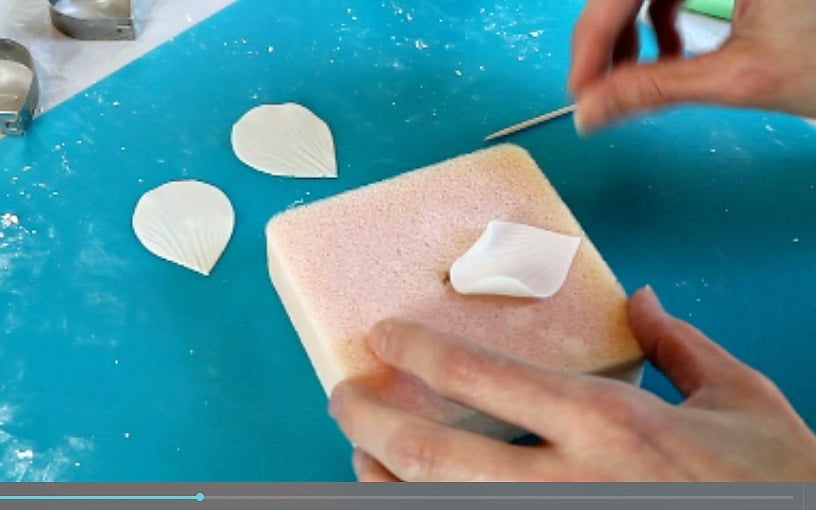
Now turn the petal face down on the soft foam and use a large ball tool or your fondant roller to cup the middle a bit.
Attach the petals around the bud with a bit of water. The curls will be facing out.
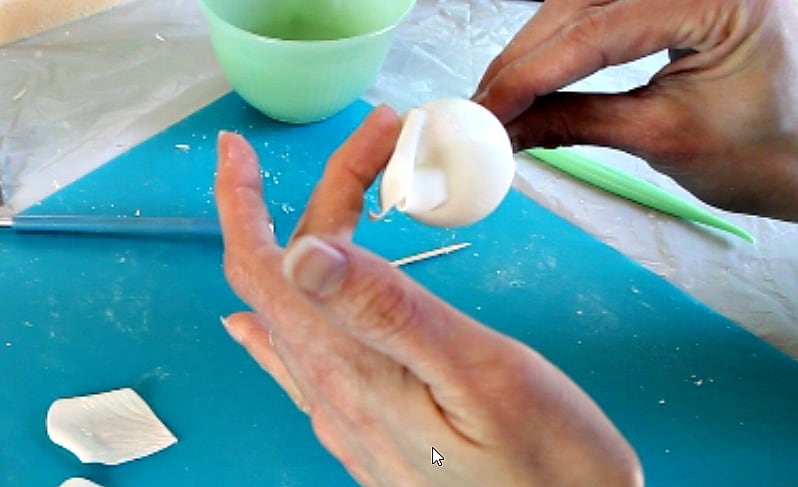
Try to overlap them a bit if you can and make sure the top of the petals are a little bit higher than the bud you just made.
Now, set the stem of the flower into the foam while you work on the next round.
The Second Round of Petals:
For the second round of petals, roll out your gumpaste like before. Use the next largest size petal (your middle size) and cut out three petals.
Thin the edges and vein them. Use the toothpick trick and curl the edges, then turn them face down and cup the middle with your ball tool.
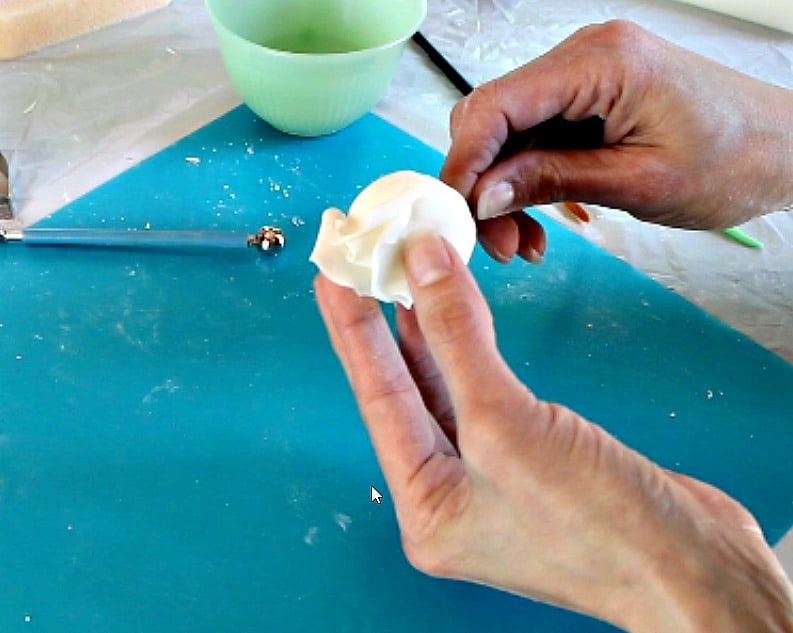
Now just attach these as you did before. Make sure to attach each petal where the petals you put on earlier meet up.
Try to overlap them a bit and make sure that the tops of the petals are slightly higher than the round of petals before. (This is important or the middle of your rose will look to high and will give it a weird look.)
Don’t worry about the bottom of the styrofoam ball right now. It’ll eventually get covered.
Once those petals are on, stick your flower in some foam and work on the next round of petals.
The Third Round of Petals:
On this row, use your largest petal cutter and cut out five petals.
Do the same as the other petals by thinning the edges, veining them, curling the edges and cupping the middle.
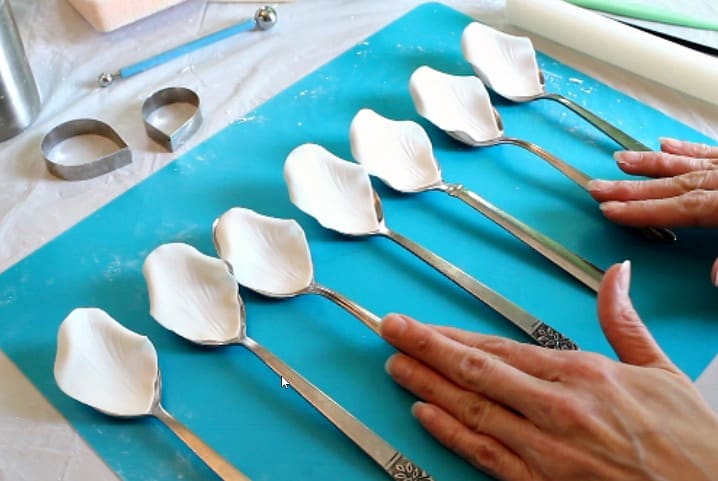
We’re adding one more step here. Take five tablespoons and lay your petals on top of them. Make sure the curled edges of your petals are facing down.
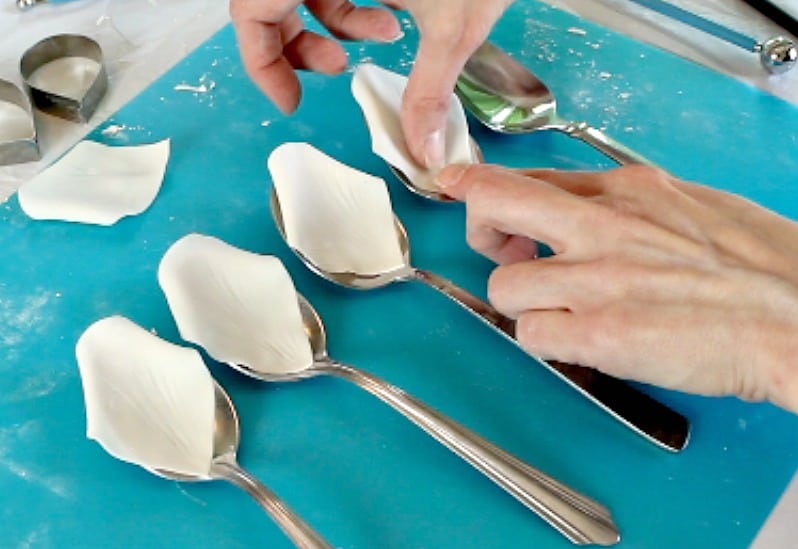
Leave your petals on the spoons for about 15 – 20 minutes or so to let them firm up a bit. Don’t let them completely dry up though.
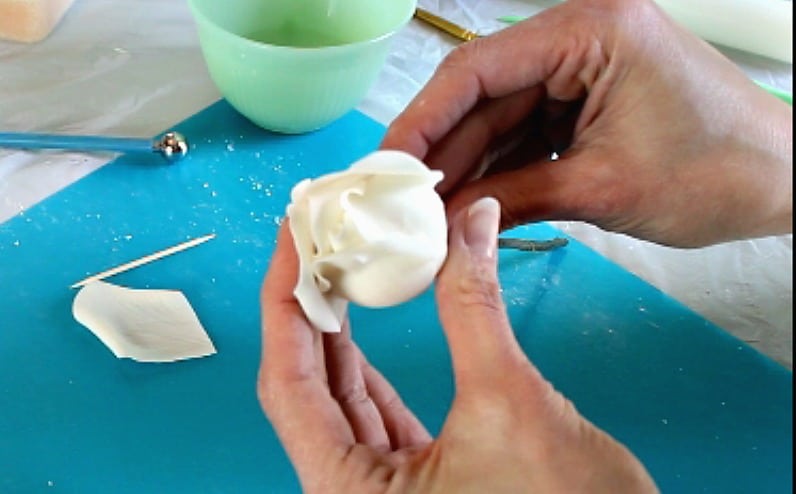
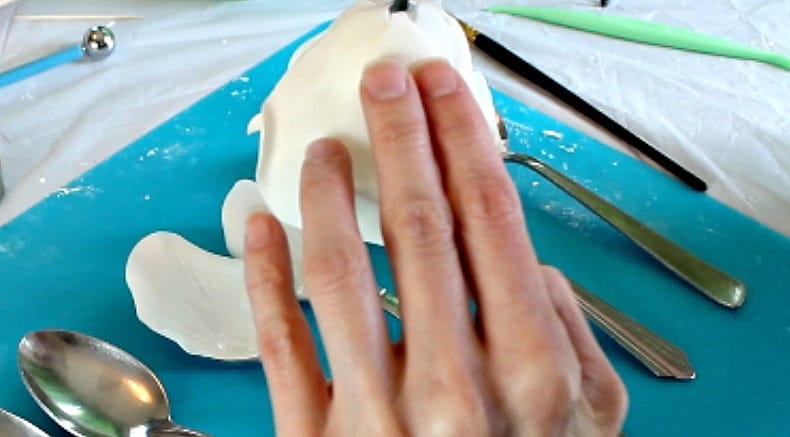
Next, just attach them to the rose with a bit of water. You don’t need to add water to the entire petal just the bottom and up the sides a bit.
Make sure to overlap them when you attach them and make sure the tops are level with the row before them.
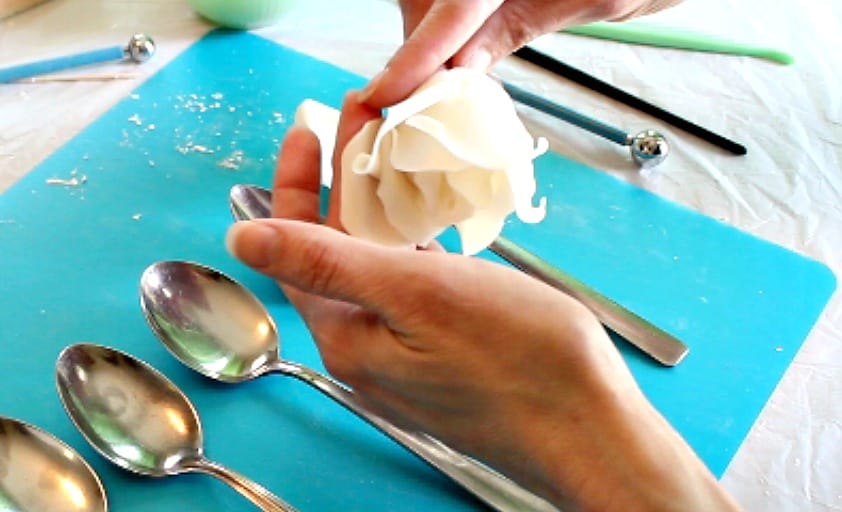
Now let your flower dry a bit while you work on the last round.
The Fourth Round of Petals:
Now we’re really rolling. This is the last round. (Of course, you can always just go one more round after this if you want to make a really full rose.)
Use the largest cutter and do the same thing as the step before except cut out seven petals.
Thin them, vein them, curl the edges and set them on tablespoons the same as you did before. Let them set up for 15 – 20 minutes.
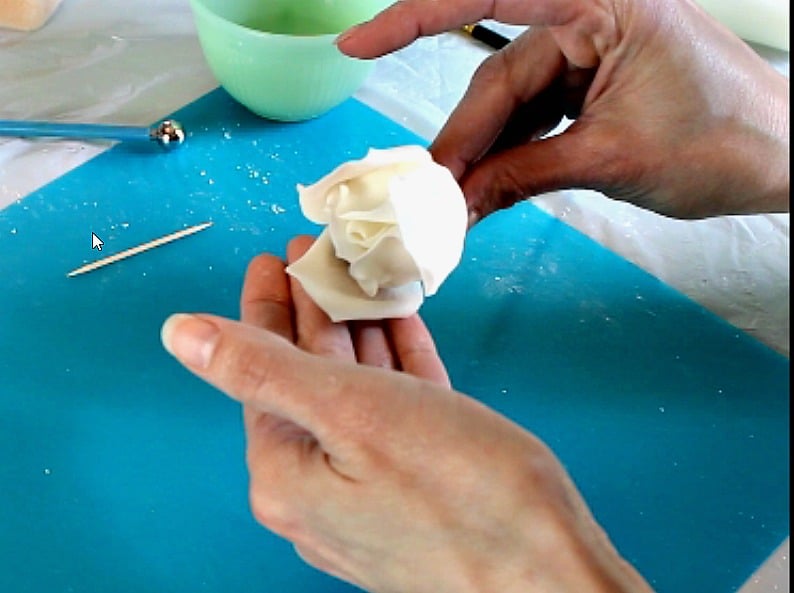
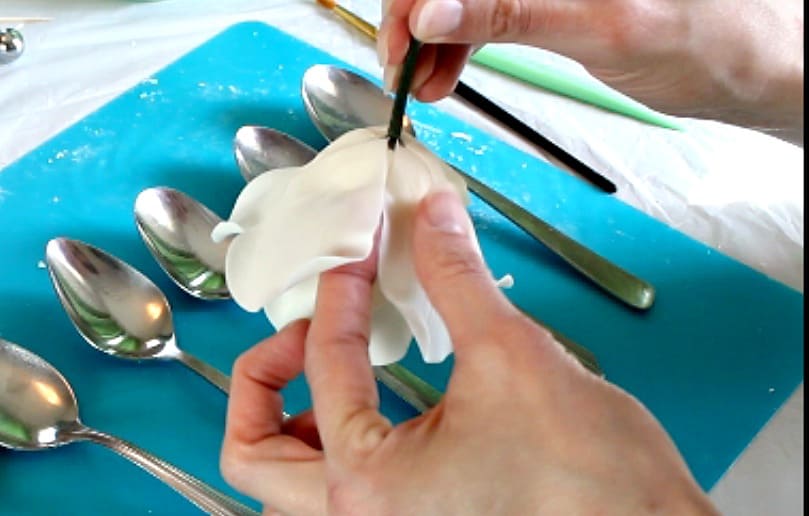
Now just attach them to your rose and make sure to overlap them as you add them. At this point, it’s easiest to turn your rose upside down and attach them.
For this row of petals, the tops of the petals need to be a little lower than the petals before.
I find that when I attach them while holding the rose upside down, if I just line the point of the petal up to the bottom of the styrofoam ball, it ends up being about the right height.
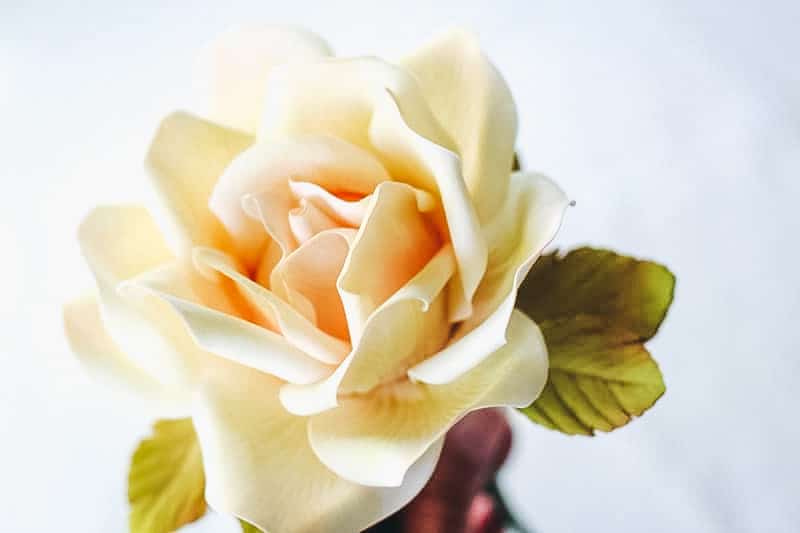
Drying the Rose:
Once you add these petals, you won’t be able to just stick it back into the foam or the petals will flop down. You can bend the wire and hang it over a taller cooling rack, so it just hangs upside down, or you can set a piece of soft foam over a tall glass and poke the wires through it and let the rose sit on top of the foam.
If you go that route, just add some bits of foam or paper towel under the rose petals to keep them from falling down too much. This method will give your rose a more open look and it’s what I prefer.
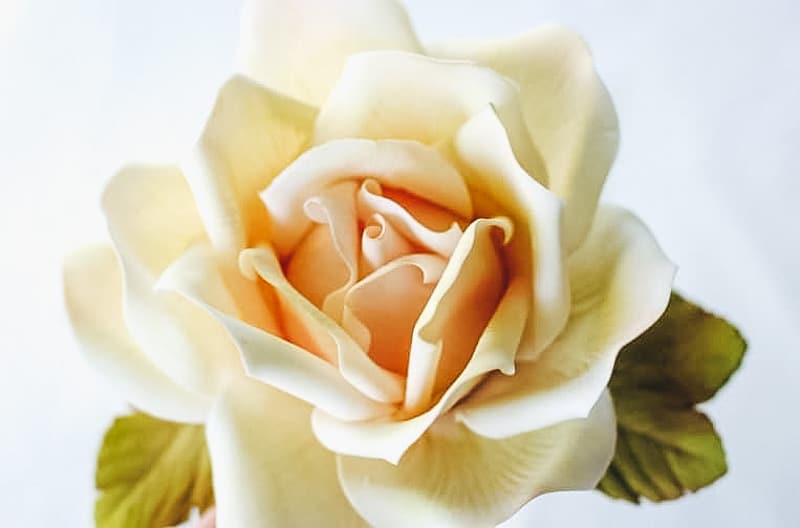
Important Petal Height Note:
My most important tip is to get your petal height correct. That will make or break your rose. If the middle is too high it just looks weird.
You want the rows like below:
- The first row just a tad higher than the bud.
- The second row higher than the one before.
- The third row the same height or a bit higher than the second row.
- The fourth (last) row, lower than the third.
Video:
Make sure to check out the video below, so you can see all the steps.
So you made it through! Yeah! I know I gave you A LOT of detail here, but I wanted to try to make it as clear as possible.
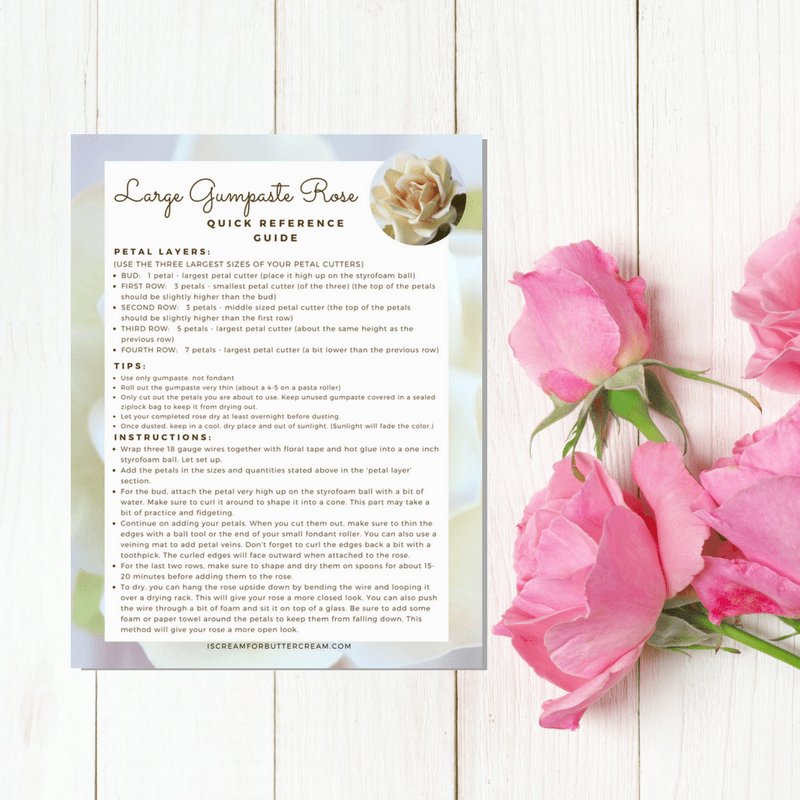
Printable Reference Guide:
Want a free printable quick reference guide for making the large gumpaste rose? Just click the graphic or button below and it will download automatically.
Also, don’t forget to check out the related posts and videos linked below:
Don’t Forget to Pin it for Later!
ELIZABETH
HOLA, DESDE CHILE
ME PUEDES DAR TU RECETA DE PASTA DE GOMA POR FAVOR
SON HERMOSOS TUS TRABAJOS Y QUISIERA PODER HACER LO MISMO
SALUDOS
ELY
Kara Jane
Hi there, I don’t make my own gumpaste. I actually just buy it premade. I’ve heard good things about Nicholas Lodge’s gumpaste recipe. You can find that here: https://sugargeekshow.com/recipe/nicholas-lodge-gumpaste-recipe/ I normally buy mine and it’s usually the Wilton brand or Satin Ice brand because that’s what’s easier for me to find in my area.
Wer ruft An
It takes mybreath away! Spectacular!
Kara Jane
Thanks so much!
WILMA BARBOSA FAGUNDES
If I want to put another row of petals, how many should they be? Seven of the largest or more? I’m trying hard to make your beautiful rose but I’m struggling with the measures, thepetals are not covering much of the ball and I am on my third trial. Too small petals, I guess. Thank you very much for the detailed tutorial.
Kara Jane
Hi there, when making it larger, you can just add another row of the largest petals you have, but you don’t necessarily need to add more than the previous row. On the outer rows, you actually want to add less or about the same amount and add them a little more spaced out plus a bit further down than the previous row. If you add a lot and don’t add them a little lower, then it starts to look a little weird. You don’t have to add the exact amount that the tutorial calls for though. If your petal cutters are a bit smaller than the ones that are shown, you may need to make a smaller rose, which means the styrofoam ball for the middle needs to be a bit smaller. Don’t feel like you have to follow each step exactly…if you need to adjust it for the supplies you have then that’s completely fine.
Donna
Can I use chocolate plastic instead of gum paste?
Kara Jane
If you want to use modeling chocolate, I’d use a different tutorial because this one really needs gumpaste. Here’s the other tutorial I have for making fondant roses, which would work with the modeling chocolate: https://iscreamforbuttercream.com/easy-fondant-rose-without-tools/
carolina Gómez
Me encantó tu vídeo, es necesario usar CMC?
Kara Jane
Thanks! If you use gumpaste, then you don’t have to use CMC because it will harden on it own.
Jackie Cooper
In the introduction you have a link to 1 1/2 inch styrophone balls, but you mentioned later that you developed the idea on one inch balls. Can you please advise which size I need as I have ordered the large one’s
Kara Jane
Hi Jackie, You could really use either size, I’ve updated the link to 1 inch balls so it’s not confusing, but if you’ve ordered the 1 1/2 inch size, those will work fine. The main thing is that you want the smooth, more compact, styrofoam if you can get it.
Gioia
I used your video to make a large gumpaste rose for a 30th rose-gold themed cake. It turned out pretty good! I say pretty good, not because of anything lacking in your video but my lack of experience and skill. I will improve though! It really is a wonderful video, thank you. A few notes that I have:
1. Could you add the measurements of your cutters in your description, please? I know we can adjust the size but it would be so nice to have a reference point, thank you.
2. I didn’t have a fondant roller so I used one of the compressed Styrofoam balls to thin and ruffle the edges, it worked great!
3. I was able to hang my rose upside down between petal applications to dry and that helped a lot.
4. I didn’t have ant of the foam mats (I will in the future) so I used foam packing sheets. Worked great and didn’t stick. Thanks again! Everyone was impressed and I told them it was your video.
Kara
Hi Gioia, I’m glad the first attempt at the rose turned out pretty good! It does take a while to get the hang of it. My first ones definitely didn’t turn out so great. 😉
Thank you for sharing the things you used when you didn’t have the exact supplies. That will be very helpful to other people as well and give them the confidence to try even if they don’t have all the supplies.
As far as the measurements for the petal cutters go. There’s a section in the post that lists the supplies, if you click on that first petal option, it’ll take you to the Amazon link to the ones I used. (Here’s what they said the measurements are though: specification:2.95*2.36*1.97*1.65*1.30*0.98*0.68- inches) I’m not sure if they’re just measuring the length or from the widest area or not, but those are the same ones that I used, so hopefully that helps. I recently had eye surgery so I can’t bend down or move stuff around much or I would go and dig mine out and measure, but that should help a little. 🙂
Anna Sullivan
You mentioned something about dusting…how do you do that? Also, do you ever have to eat the rose, because I am not planning on it and just seemed to think this was a good way to make roses. Please respond back soon.
Kara
Hi Anne, so dusting just means coloring the rose. I used edible colored dust to do that. There are several tutorials for the large gumpaste rose and one is for coloring and dusting it. All of those posts with their links are listed at the beginning of this post, but here is the link to the coloring and dusting post: https://iscreamforbuttercream.com/add-color-large-gumpaste-rose/
To answer your other question, the rose isn’t meant to be eaten…that’s mainly since the middle is styrofoam, but even when the middle is made from fondant or gumpaste, the sugar flowers usually aren’t actually eaten. If it’s all made from gumpaste or fondant, then it’s technically edible, but they just aren’t that good. I mean it dries hard and usually has coloring on it and it’s just not something that’s delicious, so they’re meant really just to be food safe and beautiful things to decorate the cake with. I hope that makes sense. If you want a super easy way to make a fondant rose though that is more beginner friendly, I have a tutorial for that and that one doesn’t require any supplies. Here’s the link for that: https://iscreamforbuttercream.com/easy-fondant-rose-without-tools/
Hope this helps.