
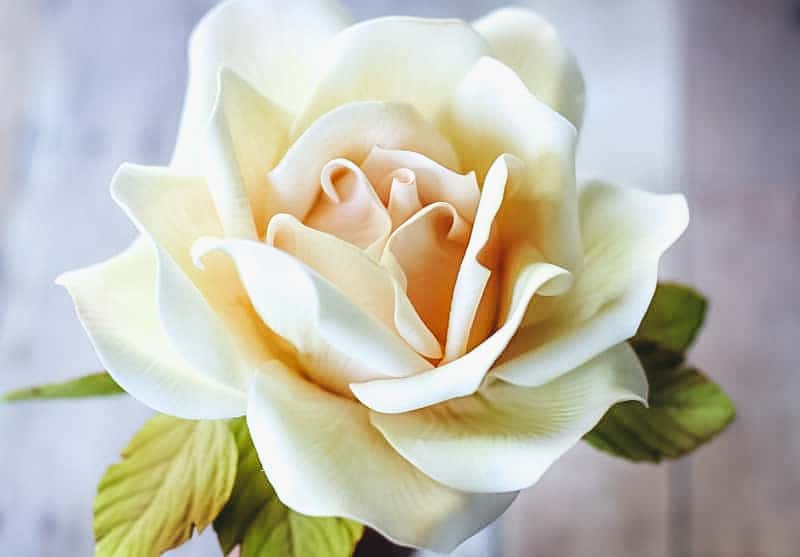
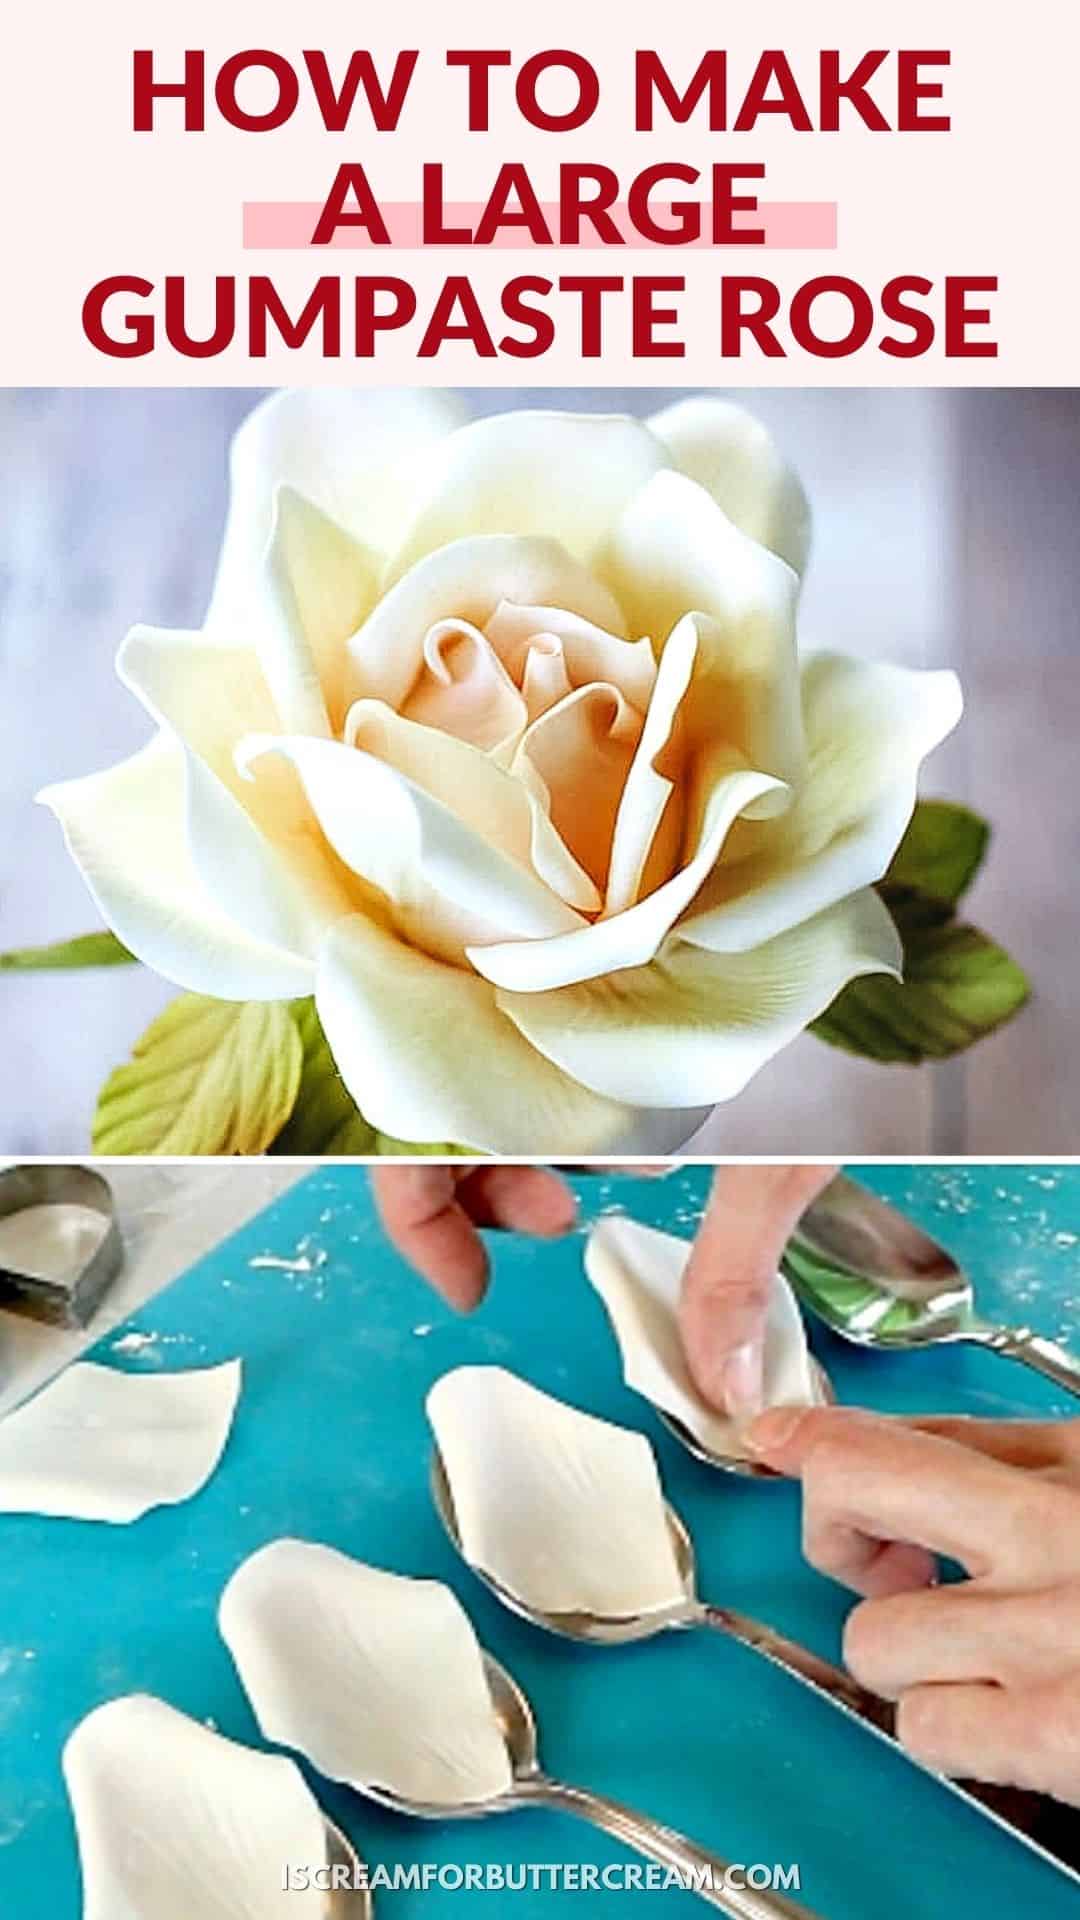
This very detailed tutorial will show you step-by-step how to make a beautiful, perfect large gumpaste rose from start to finish.
Making gumpste flowers (specifically roses), doesn’t have to be so challenging. You just need a plan and this gumpaste tutorial is an easy-to-follow process that will guide you through making roses.
If you’ve been frustrated with making gumpaste roses, don’t worry. I’m going to share with you all my best tips. There are some tips and tricks for sugar roses that really make it simple and possible to create beautiful roses for your cakes.
In this post you’ll find detailed written instructions, a video and a printable guide to use (and yes that’s all free).
This post is the first of a three-part series. After you’ve completed your rose, just click the next title on the list to continue on. Here’s the list of each post.
- How to Make a Large Gumpaste Rose (you’re here now)
- How to Add Color to a Large Gumpaste Rose
- How to Make and Color Gumpaste Rose Leaves
First I’ll say that there are a multitude of ways to make a rose. I’m going to show you what I do. Hopefully, it gives you a great starting off point and you can adjust it to what works best for you.
I’ve written instructions below with screenshots. I’ve also included the supplies you’ll need plus some extra tips. There’s also a narrated video below, so you can actually see it being made.
Jump to:
As an Amazon Associate, I earn from qualifying purchases.
Supplies You’ll Need to Make a Large Gumpaste Rose:
- Gumpaste: You need gumpaste…fondant will not work as well. I normally use store bought gumpaste, either wilton or Satin Ice.
- Rose Petal Cutter Set: We'll use the three largest cutters in the set) These cutters are very similar to what I used: Rose Petal Cutters; And these cutters look a bit wider than what I used, but they are a good brand and would work as well: Ateco Rose Cutter Set
- Shapers: (This is optional, but they're very handy to maneuver the petals around when you're attaching them.)
- Petal Veiner: - Here 's one similar to mine: Rose Petal Veiner
- Ball Tools: (You don't absolutely HAVE to have this but it's really useful in giving your petals a nice curve.)
- Wilton Fondant 9 Inch Rolling Pin or Pasta Roller Attachment (Ok, you don't HAVE to have a pasta roller attachment, but it is pretty awesome if you do. You can get your gumpaste really thin and even with a pasta roller.)
- 18 gauge floral wires: I usually get the paper covered wires.
- Floral tape
- 1 inch styrofoam ball: Try to get the compressed styrofoam…it's smoother.
- Hot glue
- Wire cutters: Because you may need to cut your wires shorter, so go ahead and get the bigger ones…they'll cut through almost anything.
- Gumpaste shaping foam: (You'll use this with your ball tool to give the petal curves.)
- Gumpaste shaping mat
Ok, let’s get started. Don’t forget, there’s a video at the end that will show you all the steps.
Steps for Making the Large Gumpaste Rose:
Making the Base:
First of all, some people like to make their rosebuds out of gumpaste. If I’m making a small rose, that’s fine, but it really makes for a heavy flower when you’re making a large rose.
Other’s prefer to use the styrofoam cones you can buy at cake decorating supply stores. None of these places near me, keep those in stock and frankly, sometimes I just don’t think ahead to order them.
I came up with this method of just using a one-inch styrofoam ball and it works just as well and they’re so much easier to find, plus they’re fairly cheap.
First tape three of the 18 gauge wires together with floral tape. Usually, the styrofoam balls will have a hole at the bottom. If yours doesn’t, just make a hole with a skewer or your wires.
(Oh and try to get the more compacted styrofoam balls, they seem to work better. I’ve added a link to them up in the supply list.)
Next squirt in some hot glue and insert the wires that you taped together. Let it firm up fully.
Again, we’re using styrofoam, so that it won’t add a bunch of weight to your flower.
Making the Petals and Putting it Together:
We’ll be using the three largest petal cutters in the set.
The Bud:
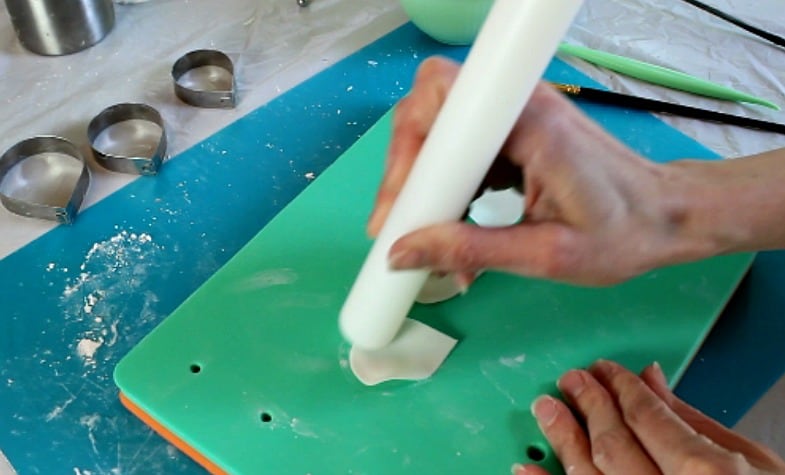
First, you need to sprinkle cornstarch on your rolling mat, so your petals won’t stick. Then roll out your gumpaste super thin.
If you’ve got a pasta roller attachment, I like to roll them out at about the number five setting. If you don’t have one, just use your small fondant roller.
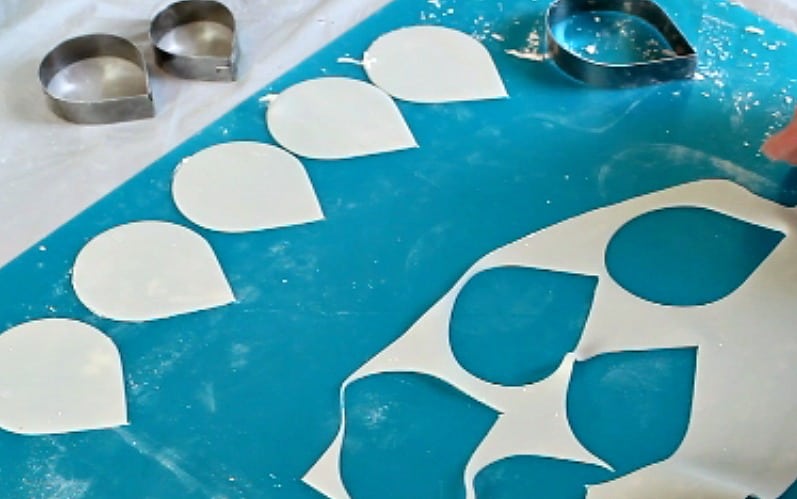
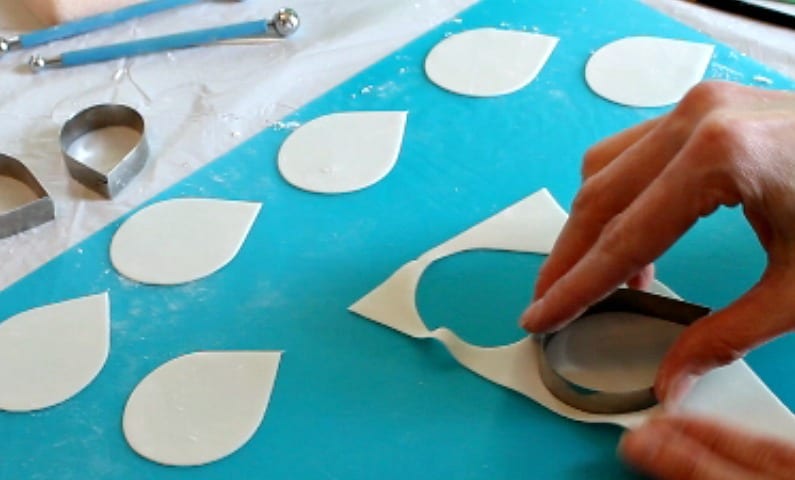
First I’ll say that I usually widen my petal cutters a bit. I just pull them apart a tad.
Take your largest petal cutter, I know it sounds weird to use the largest cutter, but just trust me, and cut out one petal. This will be your bud.
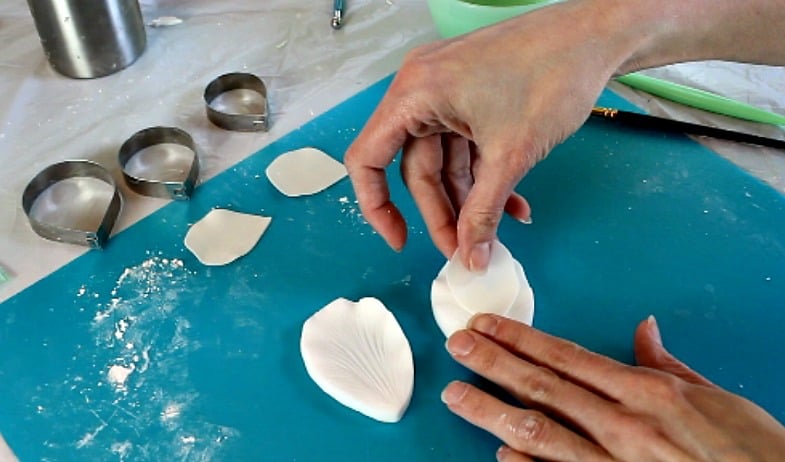
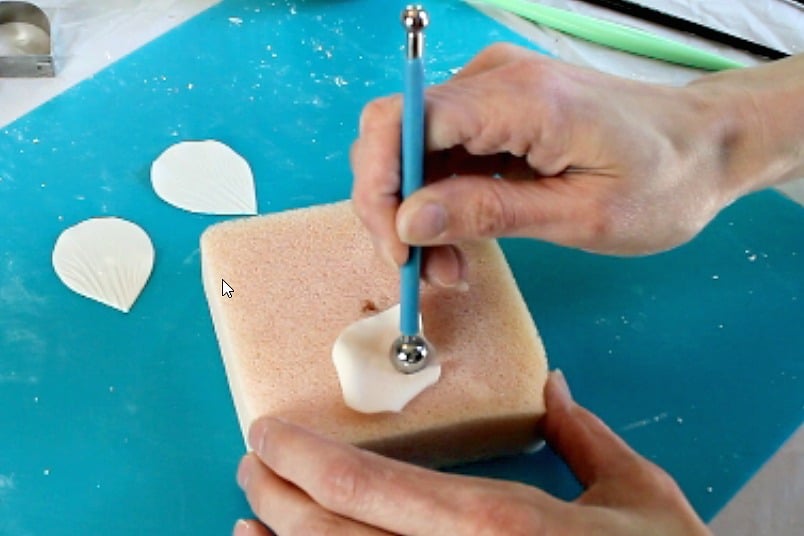
Use your foam mat (the firmer one) and thin the edges with either a ball tool or your fondant roller.

Now, add the petal to the veiner and press.
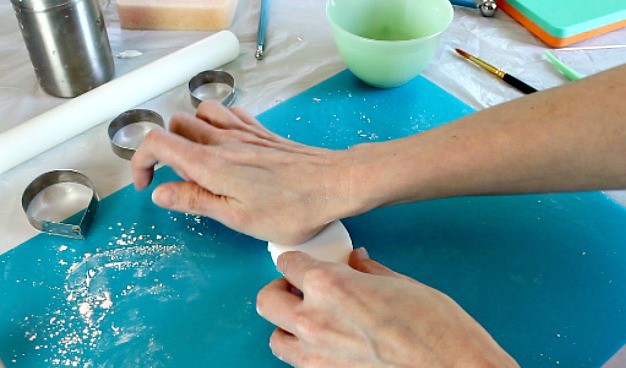
Attach the petal to your styrofoam ball with a bit of water. Just wrap it around and let the cone stick up from the ball.
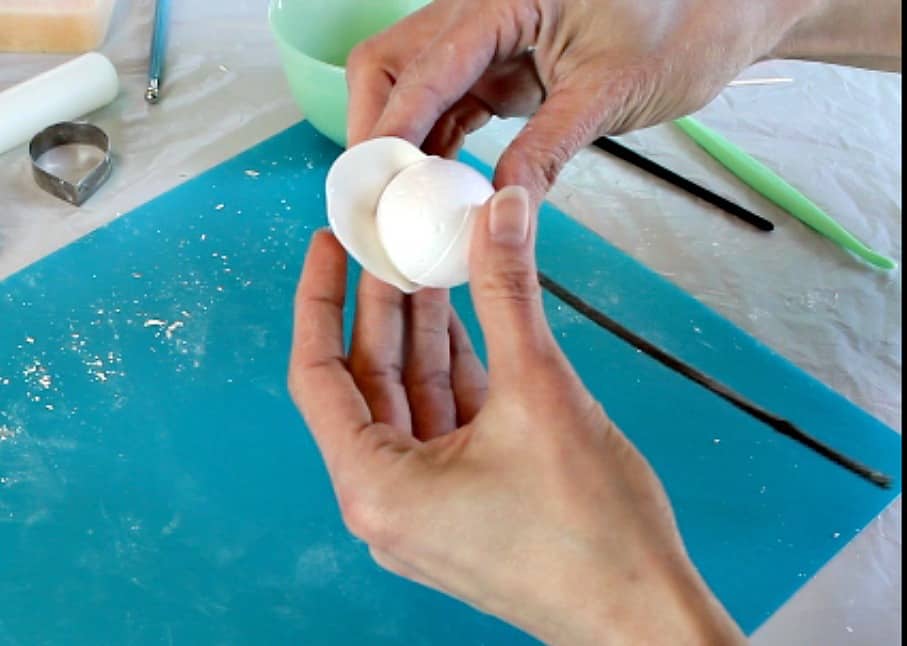
Use your fondant tool to help you adjust it. It’ll take some fidgeting to get it just right.
Now just stick the flower in a block of foam while you work on the next petals.
The First Round of Petals:
For the first round of petals, roll out your gumpaste as you did for the bud. Now, use the smallest petal cutter and cut three petals.
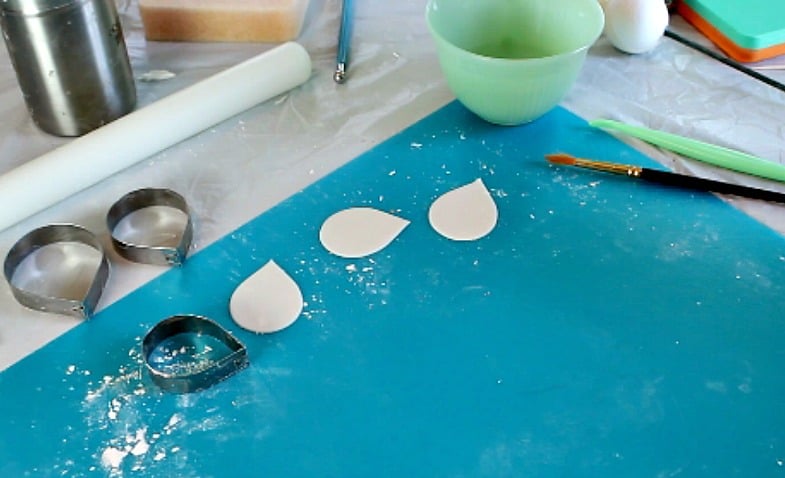
Thin the edges with your fondant roller.
Vein them.

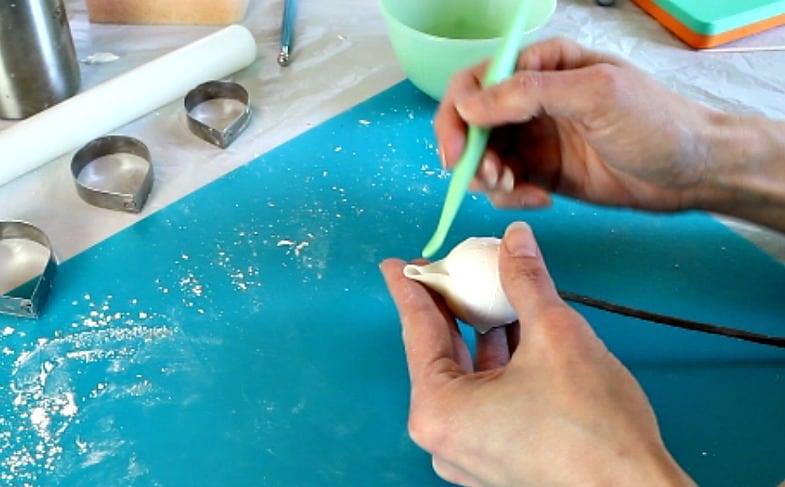
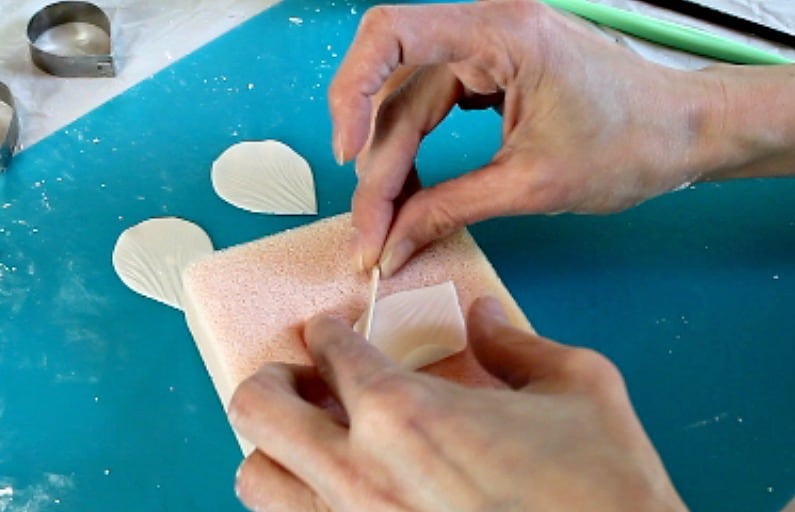
Use a toothpick to curl the edges back a bit.
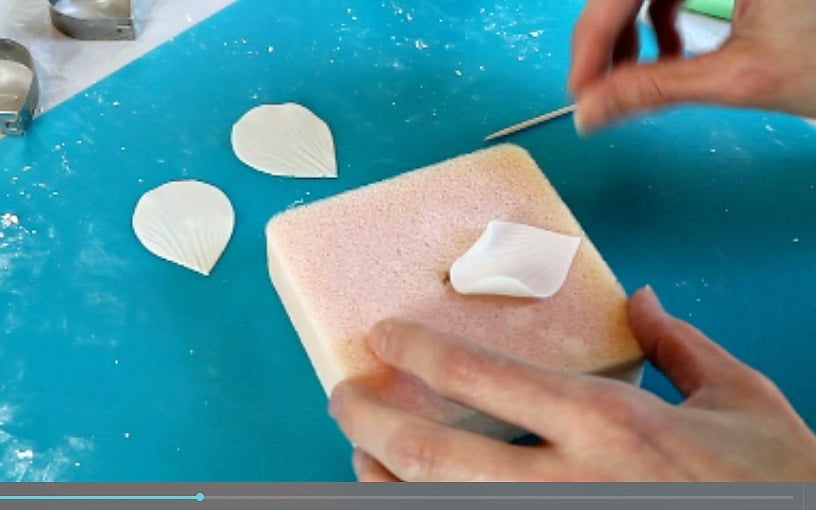
Now turn the petal face down on the soft foam and use a large ball tool or your fondant roller to cup the middle a bit.
Attach the petals around the bud with a bit of water. The curls will be facing out.
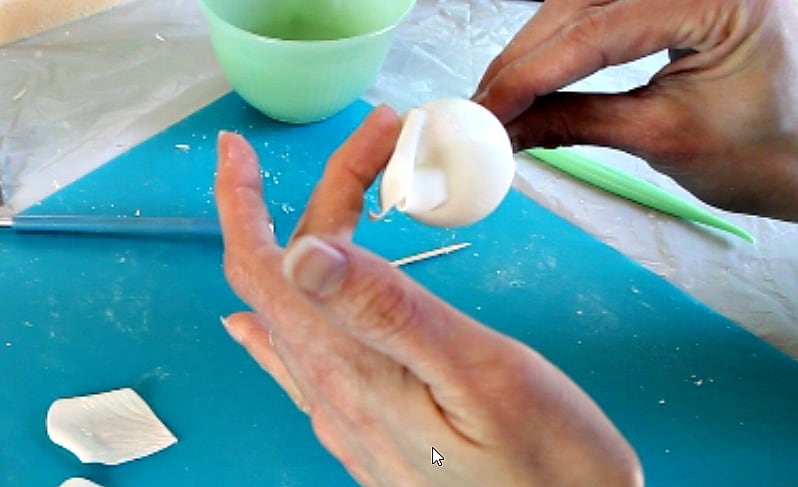
Try to overlap them a bit if you can and make sure the top of the petals are a little bit higher than the bud you just made.
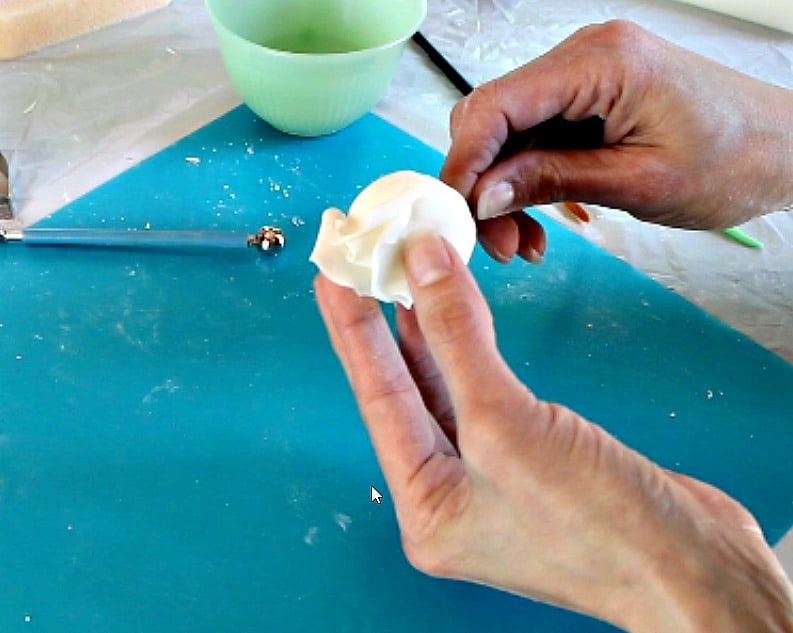
Now, set the stem of the flower into the foam while you work on the next round.
The Second Round of Petals:
For the second round of petals, roll out your gumpaste like before. Use the next largest size petal (your middle size) and cut out three petals.
Thin the edges and vein them. Use the toothpick trick and curl the edges, then turn them face down and cup the middle with your ball tool.
Now just attach these as you did before. Make sure to attach each petal where the petals you put on earlier meet up.
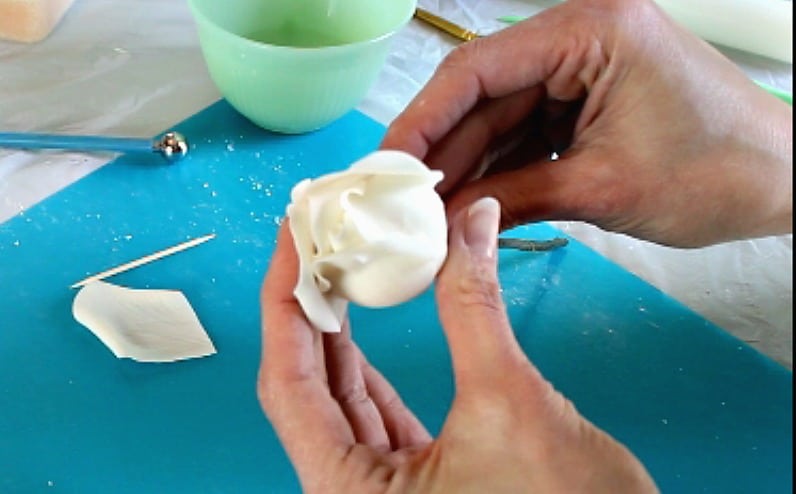
Try to overlap them a bit and make sure that the tops of the petals are slightly higher than the round of petals before. (This is important or the middle of your rose will look to high and will give it a weird look.)
Don’t worry about the bottom of the styrofoam ball right now. It’ll eventually get covered.
Once those petals are on, stick your flower in some foam and work on the next round of petals.
The Third Round of Petals:
On this row, use your largest petal cutter and cut out five petals.
Do the same as the other petals by thinning the edges, veining them, curling the edges and cupping the middle.
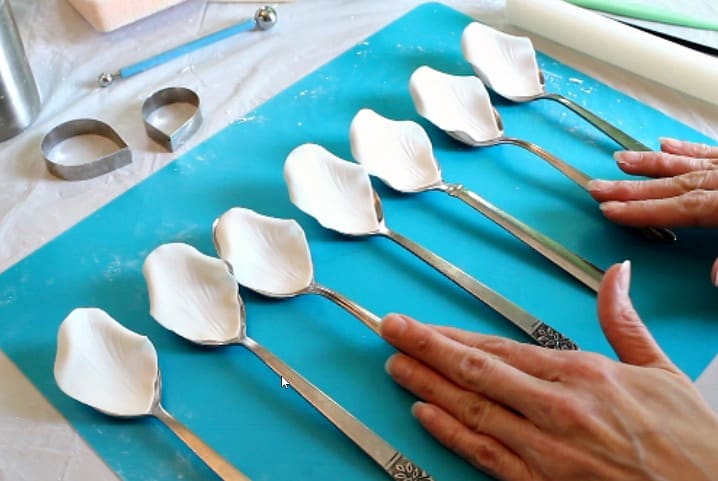
We’re adding one more step here. Take five tablespoons and lay your petals on top of them. Make sure the curled edges of your petals are facing down.
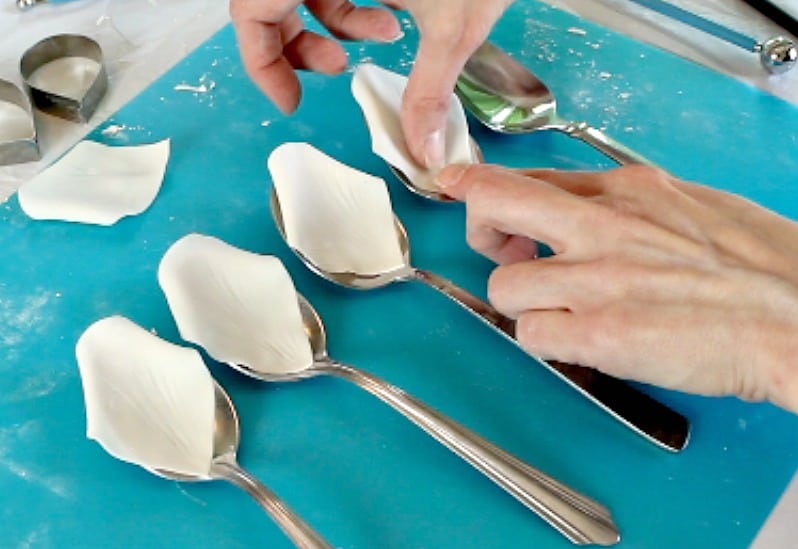
Leave your petals on the spoons for about 15 – 20 minutes or so to let them firm up a bit. Don’t let them completely dry up though.
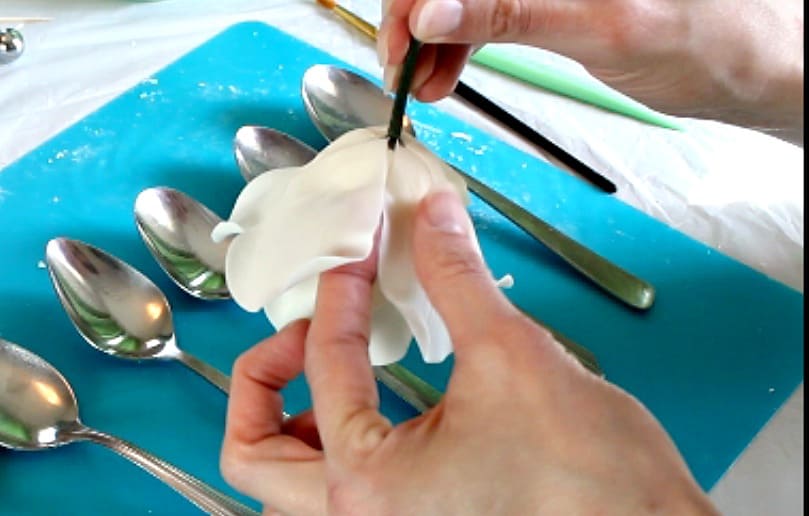
Next, just attach them to the rose with a bit of water. You don’t need to add water to the entire petal just the bottom and up the sides a bit.
Make sure to overlap them when you attach them and make sure the tops are level with the row before them.
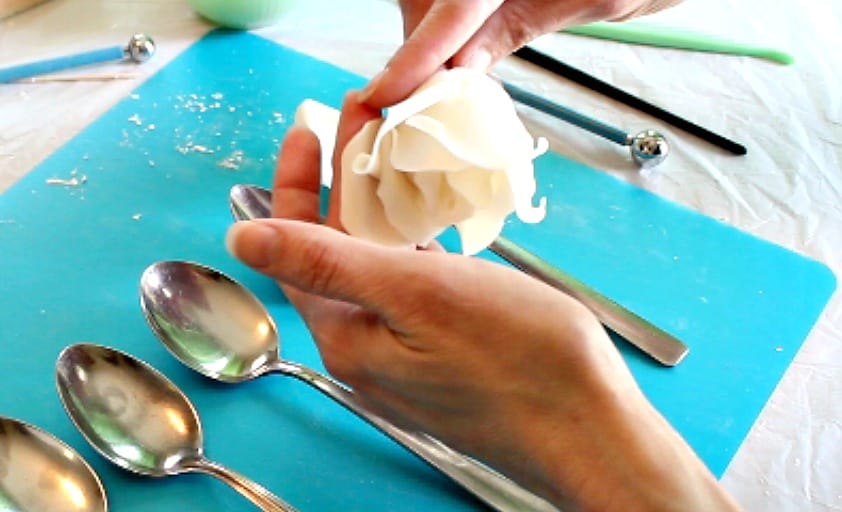
Now let your flower dry a bit while you work on the last round.
The Fourth Round of Petals:
Now we’re really rolling. This is the last round. (Of course, you can always just go one more round after this if you want to make a really full rose.)
Use the largest cutter and do the same thing as the step before except cut out seven petals.
Thin them, vein them, curl the edges and set them on tablespoons the same as you did before. Let them set up for 15 – 20 minutes.
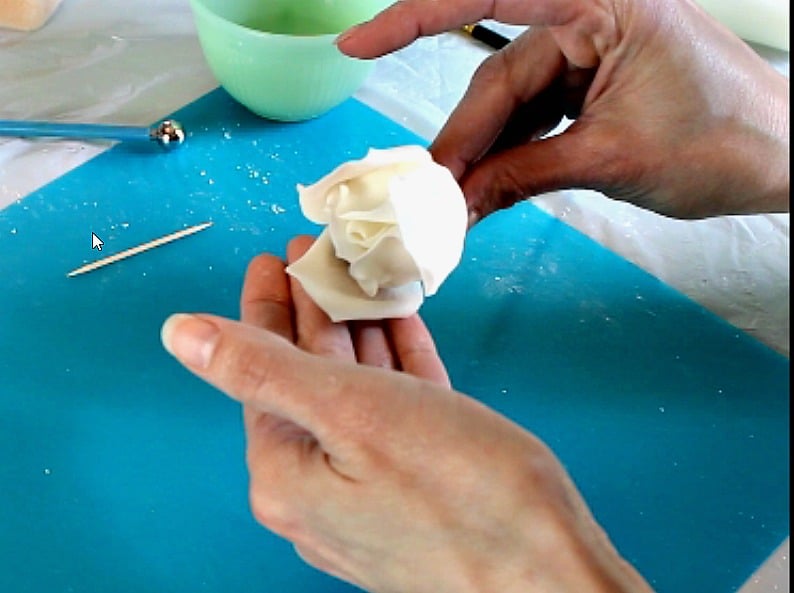
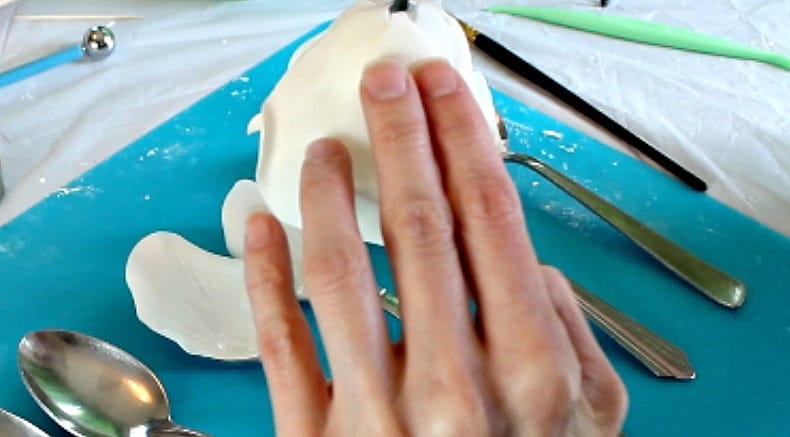
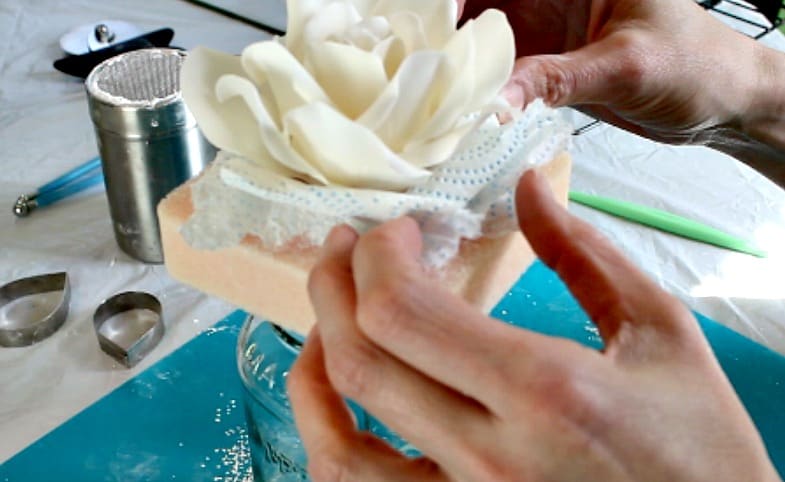
Now just attach them to your rose and make sure to overlap them as you add them. At this point, it’s easiest to turn your rose upside down and attach them.
For this row of petals, the tops of the petals need to be a little lower than the petals before.
I find that when I attach them while holding the rose upside down, if I just line the point of the petal up to the bottom of the styrofoam ball, it ends up being about the right height.
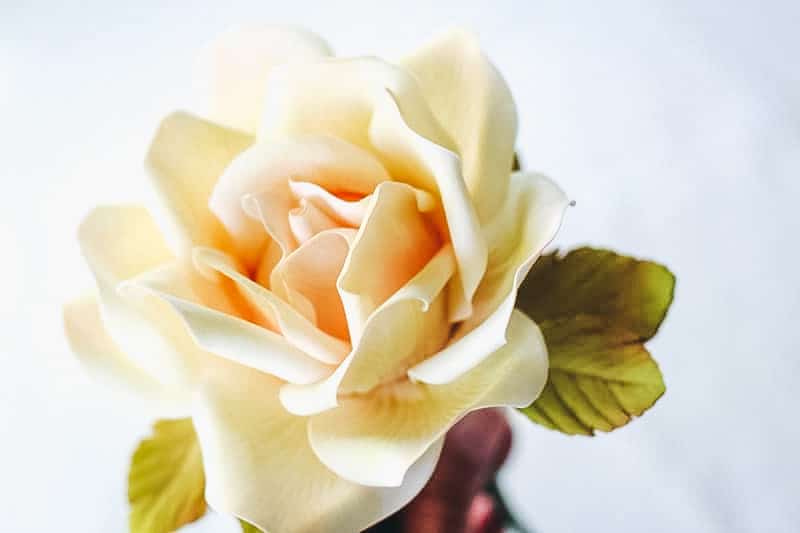
Drying the Rose:
Once you add these petals, you won’t be able to just stick it back into the foam or the petals will flop down. You can bend the wire and hang it over a taller cooling rack, so it just hangs upside down, or you can set a piece of soft foam over a tall glass and poke the wires through it and let the rose sit on top of the foam.
If you go that route, just add some bits of foam or paper towel under the rose petals to keep them from falling down too much. This method will give your rose a more open look and it’s what I prefer.
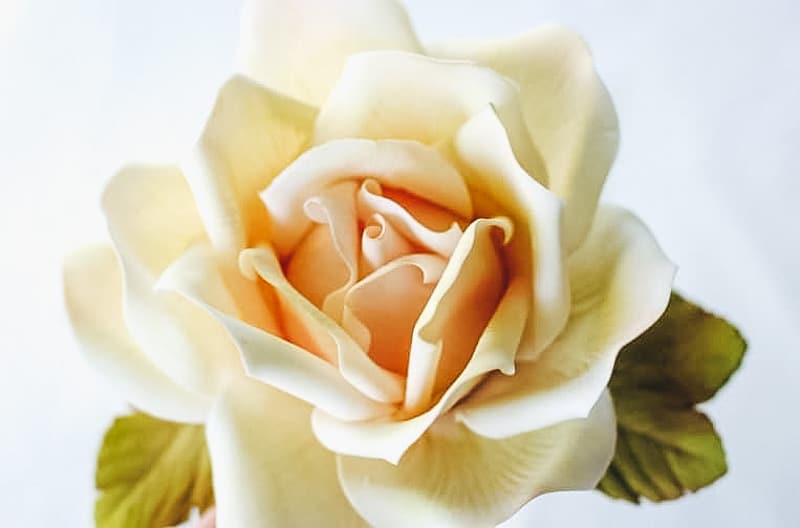
Important Petal Height Note:
My most important tip is to get your petal height correct. That will make or break your rose. If the middle is too high it just looks weird.
You want the rows like below:
- The first row just a tad higher than the bud.
- The second row higher than the one before.
- The third row the same height or a bit higher than the second row.
- The fourth (last) row, lower than the third.
Video:
Make sure to check out the video below, so you can see all the steps.
So you made it through! Yeah! I know I gave you A LOT of detail here, but I wanted to try to make it as clear as possible.
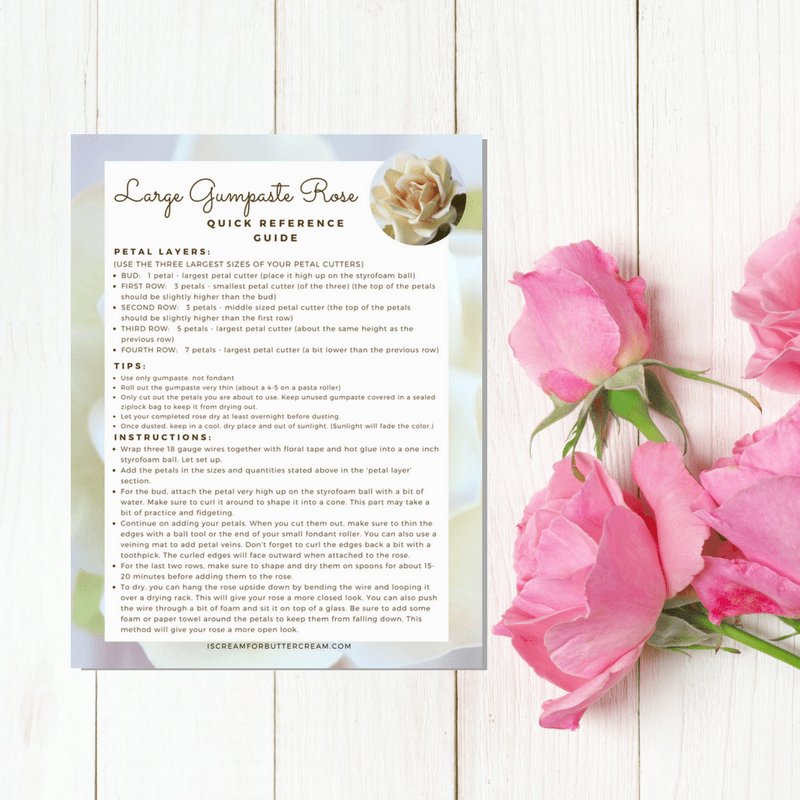
Printable Reference Guide:
Want a free printable quick reference guide for making the large gumpaste rose? Just click the graphic or button below and it will download automatically.
Also, don’t forget to check out the related posts and videos linked below:
Don’t Forget to Pin it for Later!
Karen
Thank you so much for sharing your info with us!! I can’t wait to make a rose and I hope it turns out as well as ur!!
Kara Jane
Hey Karen, you’re welcome and thanks for the nice comment 😉 The first couple times you do it, you might need to fiddle with it a bit…it just takes some getting used to, but you’ll get in a groove. You should have seen my very first rose…it looked terrible, but I was so proud. 😉 Let me know how it goes!
Rita Sivakumar
it is so beautiful. I make gum paste roses but your tutorial made a lot of difference. thank you so much for posting this video. you can see some of my flowers on my face book under Art and Craft.
Kara Jane
Oh thank you! Glad the video helped 🙂
Hadiza
I have not made a rose before it’s looks easy,here I ll try it.thank you so much.
Hadiza
Please i need a recipe for fondant icing, and also red velvet cake.thanks for your time.
Kara Jane
Hi, I either use Satin Ice premade fondant or the recipe from Cake Geek show. You can find it here: https://sugargeekshow.com/recipe/lmf-fondant-recipe/
It’s a tasty fondant and works really well.
As far as a red velvet cake, I don’t have a recipe on my blog for that yet. You might try the one on Kara’s Couture Cakes. I haven’t tried this one, but her recipes are usually very good. http://www.karascouturecakes.com/karas-perfect-red-velvet-cake/
Emily
Thanks for the tutorial after many tries I think I’ve got it not at good as your’s but getting closer wish I could show you
Kara Jane
Hey Emily! That’s great! I’m so glad my tutorial helped ? If you’d like to send me a pic, you can send me an email if you want. My email is kara@iscreamforbuttercream.com. I’d love to see it!
Val
I have been trying to make roses for the last two years and have never been pleased with what I have made. Today I followed your tutorial and for the first I am absolutely delighted with the result. I have a beautiful rose and am looking forward to making many more. Thank you so much.
Kara Jane
Hi Val, that’s wonderful! I’m so excited it worked out and that my tutorial was helpful. Giving you a virtual high-five right now! 😉
Gaynor
Hi Val
Just wondered roughly how much flowerpaste is required to make one of your lovely roses.
Thank you
Kara Jane
Hi there, I’ve never really measured how much gumpaste it takes for the rose. I usually buy my gumpaste premade in a package and that lasts me awhile. I just pinch off bit by bit to make the rose. If I have to guess though, I’m thinking probably a palm full. You’ll be rolling the petals out pretty thin, so it ends up going a long way. Hope this helps!
Tracey van Lent
Thank you from New Zealand! Is it ok to sit gumpaste flowers on top of buttercream icing or with the moisture in the icing make them soft and collapse them?
Kara Jane
Hi Tracey, That’s a good question. The gumpaste roses are fine to put on buttercream. Just attach them a couple hours before the event and they should be fine.
Carole
What brand of gum paste do you use, or do you make your own?
Kara Jane
I normally just use the Wilton brand, but I’ve used Satin Ice before and it works as well.
Carole
Thank you,.
Shirley
Kara Jane,
Beautiful Roses!!! Of all the tutorial out there, your roses are the best! I do have a question about the size of the cutters. I have a 10 piece set of rose petal cutters and the largest fr mine is about 4 1/2″….Could you tell me the size of your cutters….I tired to determine them by the size of the veiner (which I have purchased :)). Thanks a lot!
Shirley
Kara Jane
Hey Shirley, Yes I sure can and thanks so much for the compliment on the tutorial! So my petal set is only a set of seven and the largest cutter is slightly over 2 1/2 inches from the top to the bottom. I must say a 4 1/2″ petal cutter is enormous! That would make a gigantic rose, but wouldn’t that be so pretty though? 😉
Bea
Hi Kara, I’m wanting to learn to make cake toppers and flowers. Yours is so much better than using the rose cutter thing and rolling it around. Also have you tried wafer paper yet?
Kara Jane
Hey yes! I LOVE wafer paper. I covered the front of a middle tier on a wedding cake with wafer paper flowers. They’re so delicate looking. Anyway I’m hoping this tutorial helps you!
Kelly Smith
Thank you for sharing your techniques . I tried it and it came out so life like ! I’m so happy . Just a question , how do you get it to stick to the ball well ? It seemed to want to fall off the ball ! Any tips ??
Thank you again
Kara Jane
Oh I’m so glad the tutorial helped! I just use water to attach mine to the styrofoam ball. I have better luck when I use the styrofoam that’s really smooth. I’m not sure what kind of styrofoam that is, but it seems like those balls come in two different types. One that’s really smooth and dense and doesn’t have a bunch of holes in it and the other kind is really bumpy with lots of holes. I hope that made sense. Anyway, you can use either kind, but I find that if I use the second type, it’s hard for me to get my fondant to stick. If you did use the more solid styrofoam and still had trouble, instead of using water to attach it, you could use egg whites. They get really sticky. Just brush that on instead of the water. Another option is to dissolve a tiny amount of fondant or gumpaste into your water and then use that as the glue. That’ll be a bit more sticky than just water. I hope this helps!
Kelly Smith
I will try to find that smooth ball . I’m just gonna order a ton now that I’m hooked on making these ?. Thanks for all your help !
Kara Jane
Sometimes they’re hard to find. I think I found them once at Walmart and then had to get them from Amazon. I’ve got a link in the post and it should be to the smooth ones. And yeah, I order a big bag at a time. Sometimes you can even get them in multiple sizes all in one bag which is handy for making all different sized roses.
Christine Broecker
I love your tutorial. But I want to use your techniques on a different substance. Would I be able to use clay instead of gum paste? I know I would have to vary the beginning. Styrofoam would not work for firing in the kiln. Thank you for your thoughts.
Kara Jane
Hi Christine, I haven’t worked with clay really at all. I find it fascinating though. I’m thinking that forming a rose out of it would be a similar process. The bud would just have to be formed out of clay as well. I have made plenty of them out of play-dough…I know that’s not the same as working with clay, but you can use this method (and another one I’m about to tell you about) with different mediums. I’ve also made paper roses in a similar way. I do have another tutorial on making fondant roses without any tools. It’s completely made out of fondant and that might be more helpful if you want to use clay. There’s no rolling out anything, or even cutting anything. You literally just use your hands. Here’s a link to that: https://iscreamforbuttercream.com/easy-fondant-rose-without-tools/
I hope this helps!
Haniyyah Jewell
Hi. I will be trying out my first big fondant rose and was wondering how big is your finished rose as the styrofoam ball you used it 1 and 1/2 inches which is 4cm and I am wanting to fit possibly 3 roses as a topper for a 6 inch cake for a wedding. Many thanks.
Kara Jane
These roses are probably around 4 inches wide. If you need smaller roses, you can use a smaller styrofoam ball for the middle and you could also not open up the petals quite as much. I hope everything goes smoothly!