
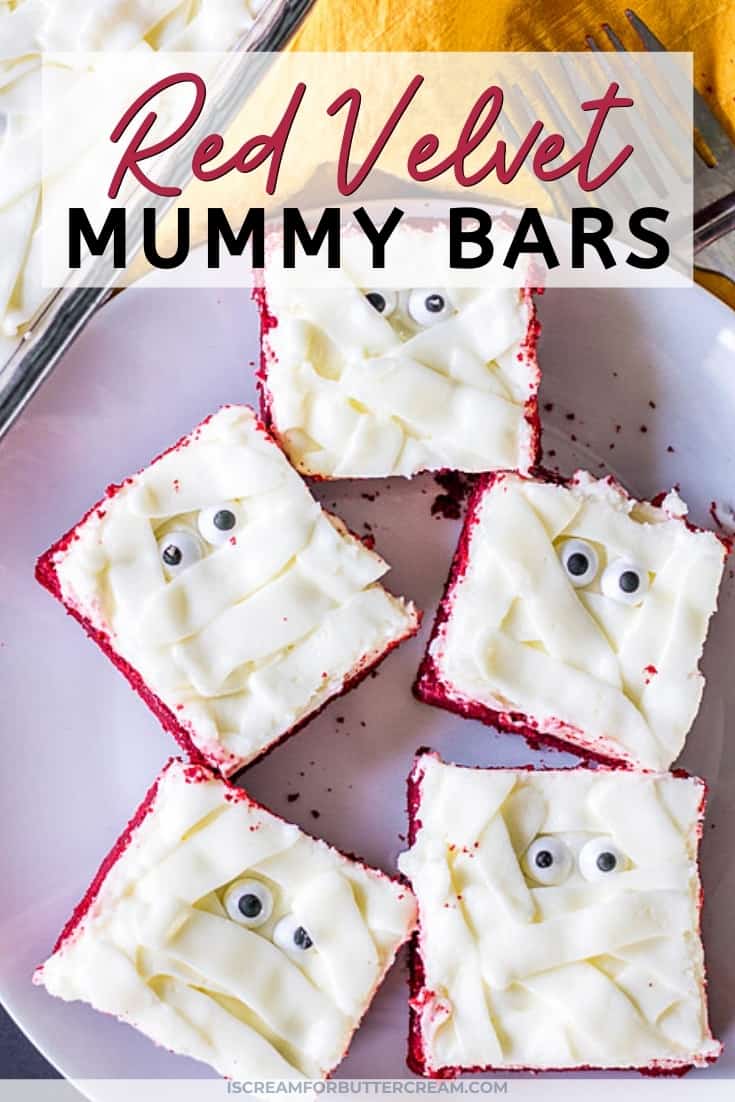
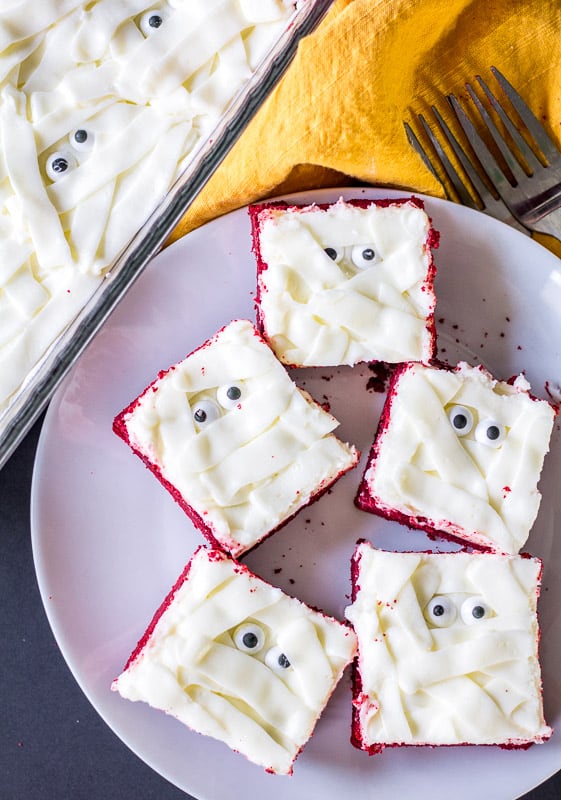
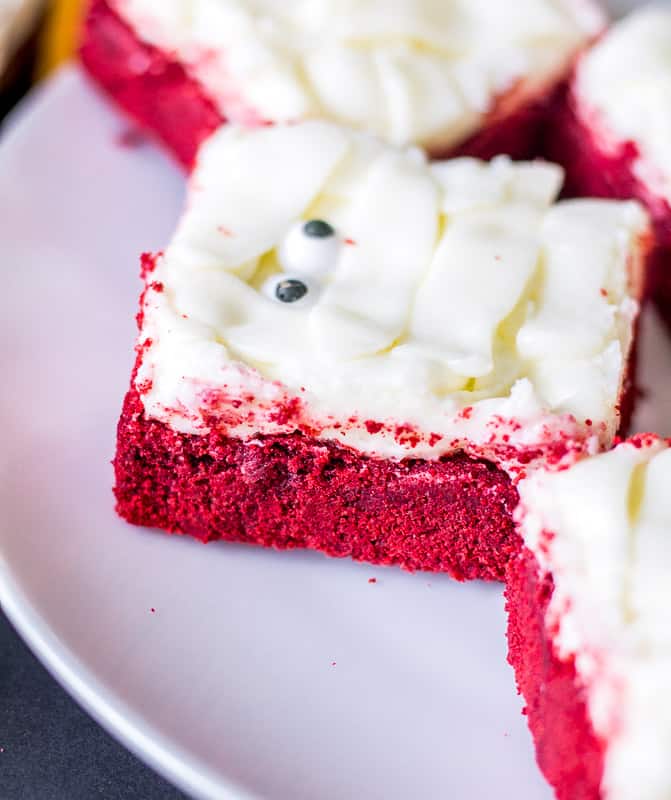
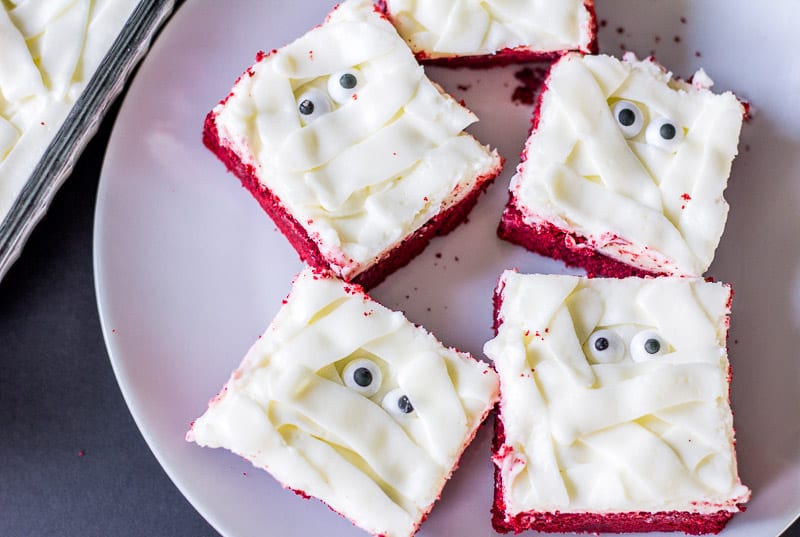
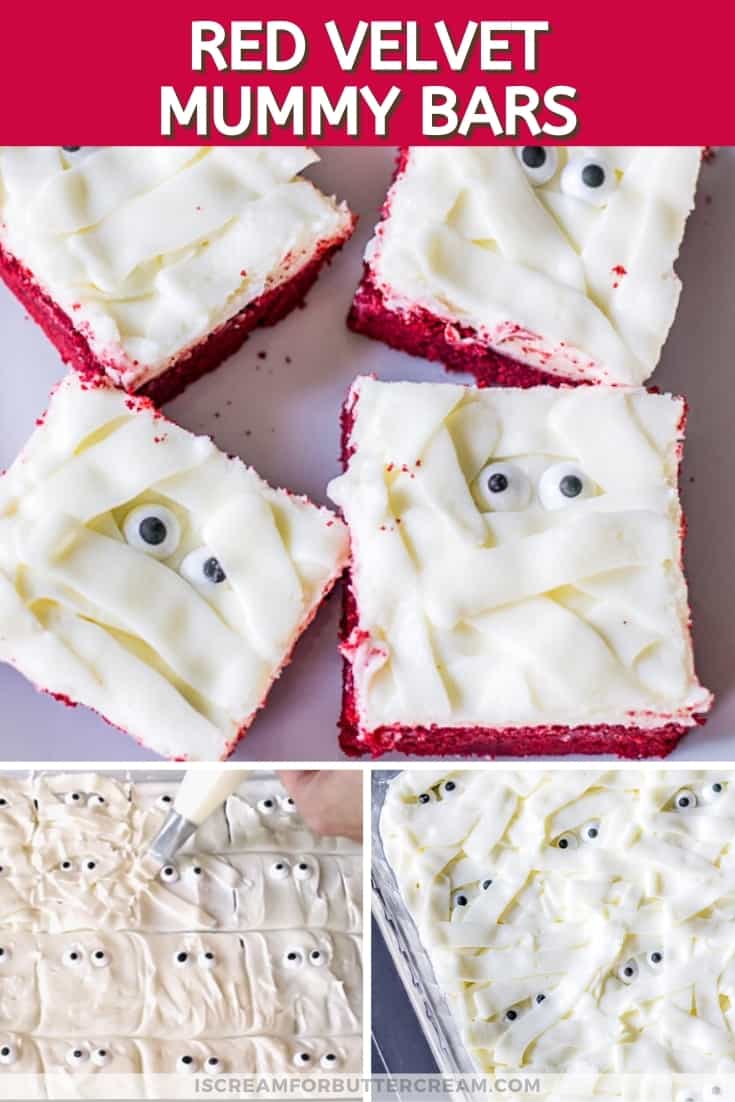
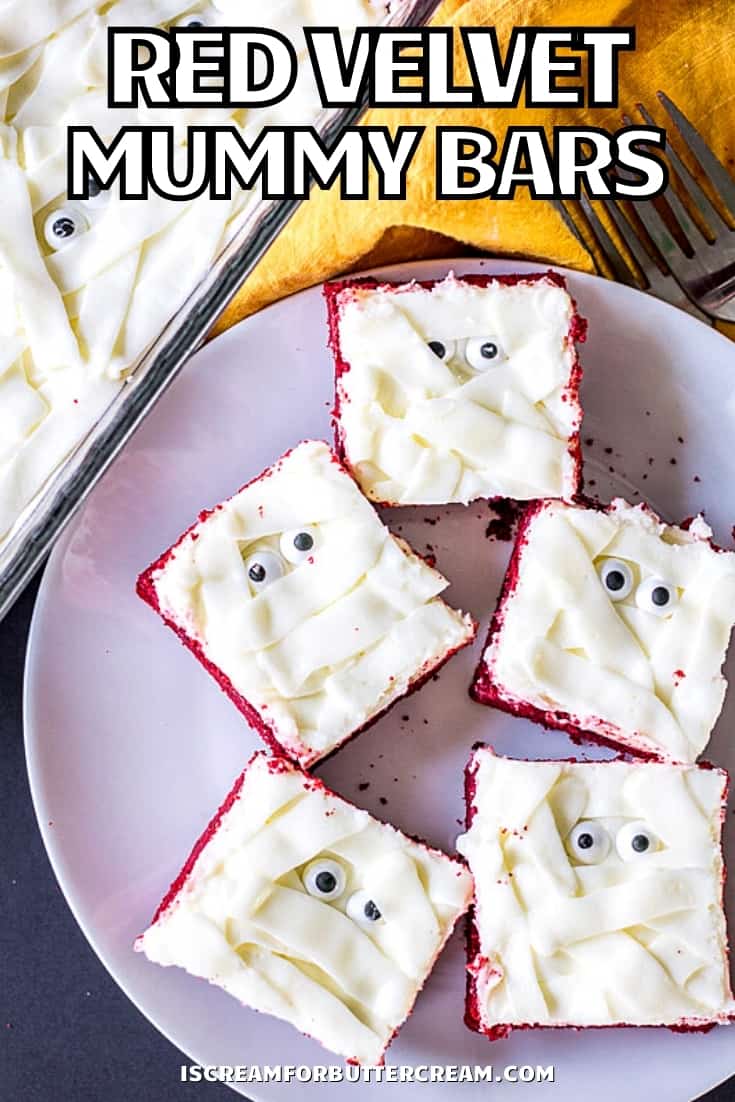
These red velvet mummy bars are so fun and such an easy Halloween treat for kids both young and old. The chewy bar layer is made using a red velvet cake mix as the base of the recipe, so it’s super easy to mix up.
The topping is a yummy cream cheese buttercream spread on and then piped on to get that mummy look and don’t forget those little mummy eyes peeking out from under. So fun for Halloween!
I’m having fun with Halloween this year and these Mummy Red Velvet Chewy Bars are really bringing out the kid in me. It’s a fun and easy Halloween treat for kids both young and old.
When I was a kid, we weren’t allowed to go trick-or-treating. We sort of just ignored that day. As an adult, I enjoy this season. I feel kinda guilty because I do, but I really only like the more ‘silly’ Halloween, than ‘scary’ Halloween. Which reminds me, have you seen the Glowing Ghost Tutorial yet?
So, back to these Mummy Red Velvet Chewy Bars. These aren’t hard to create. The good thing is if you’re bringing it to a party, you can prepare your pan, pipe your mummies, go ahead and cut the squares and then you really just have one dish to carry. You’re not trying to box up cupcakes etc. Super easy to take along.
The chewy bar part is actually made from a cake mix. It’s so easy a two year old could do it. Not kidding. I used a red velvet cake mix, but you can really use any flavor you want. Basically, you’ll just add one egg and a stick of butter to the dry cake mix, mix together and then press into a 13 x 9 inch pan. You’ll then bake at 350 degrees for only about 15 minutes.
The trick is to not bake it much longer than that, or the bars will get too hard. You want them to remain chewy when they cool.
The top of the bars are covered in cream cheese buttercream. I’m obsessed with anything that’s got cream cheese in it and I could eat this stuff straight out of the bowl. (I kinda did, actually.) Now, since we’re using real butter and not shortening for this buttercream, it won’t be bright white. You can grab my cream cheese buttercream recipe here: Cream Cheese Buttercream Recipe
I used clear vanilla extract, so that I wouldn’t add any more color than necessary and whipped the icing longer than usual, since it tends to get whiter the longer you whip it. I was okay with the color it ended up because I really like the taste of actual butter in my buttercream.
If you want bright white buttercream, you could perhaps use shortening or half shortening and half butter instead of all butter, but it just doesn’t taste as good as the all butter version. It’s your call.
As an Amazon Associate, I earn from qualifying purchases.
Supplies Needed for the Mummy Chewy Bars:
- 1 Recipe Chewy Bars (in this post after the tutorial)
- 1 Recipe Cream Cheese Buttercream
- Ateco Icing Ribbon Tip #45
- Piping Bag
- Candy Googly Eyes
Making the Mummy Chewy Bars:
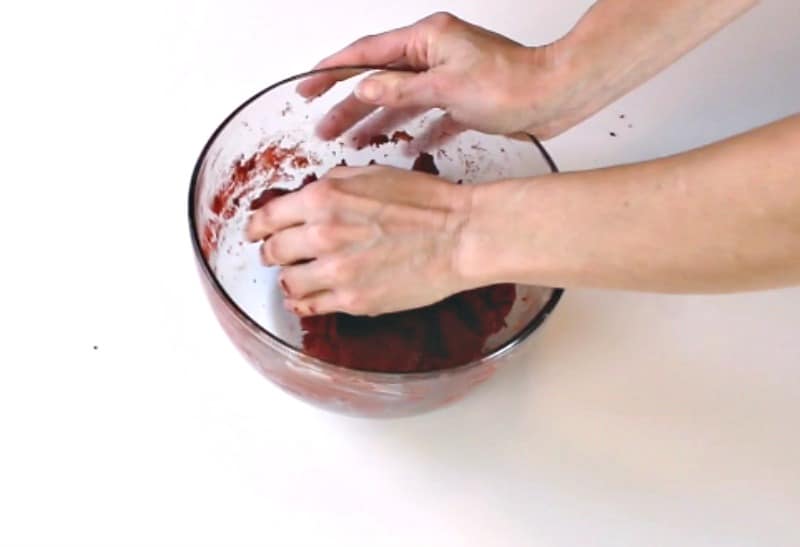
First you’ll want to mix up your chewy bars. You can mix the batter initially by using a mixer, but ultimately, you’ll need to get in there with your hands. It’s a very thick batter and that’s about the only way it’s going to be mixed thoroughly.
Obviously you’ll need clean hands for this and you’ll also want to either spray your hands with non-stick cooking spray or slather on a little shortening to keep the batter from sticking to them.
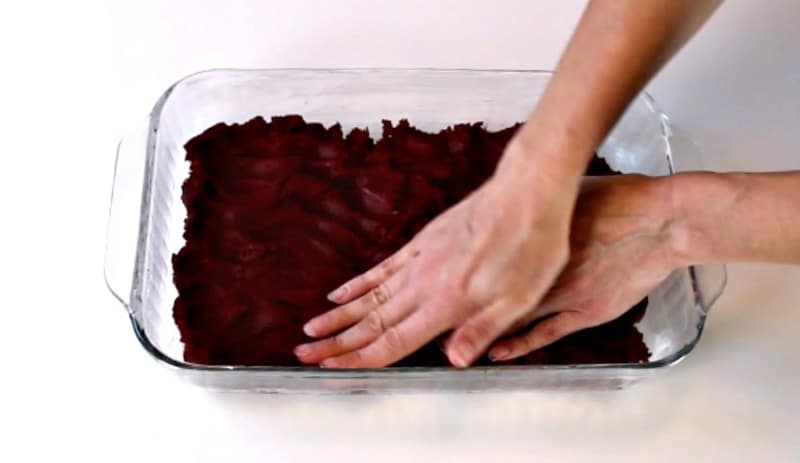
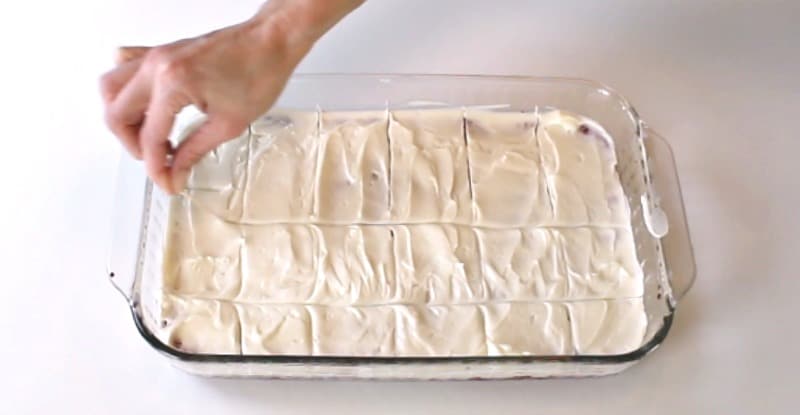
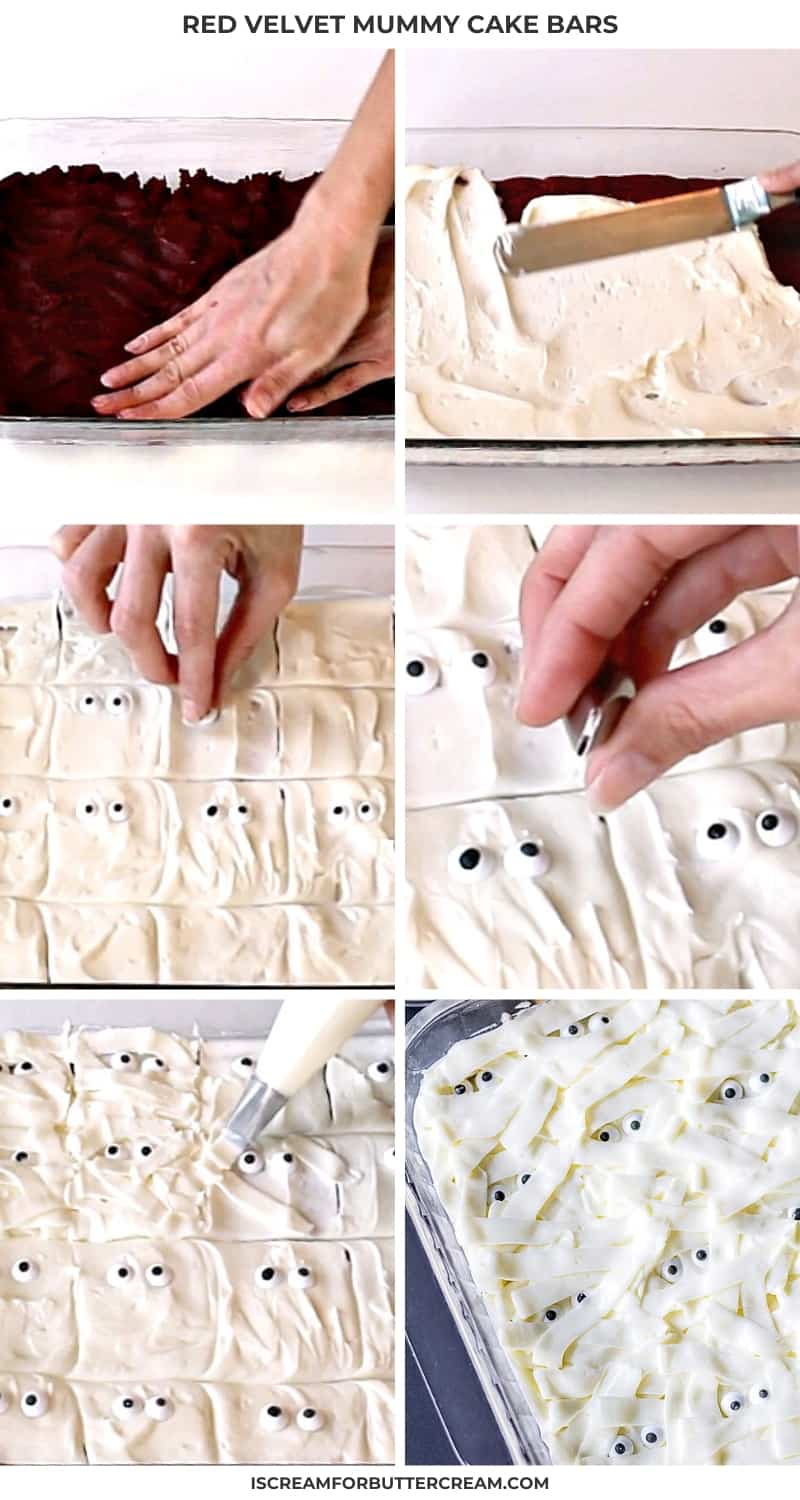
Once it’s mixed thoroughly, take the batter and press it into a greased 13 x 9 inch pan. Make sure the pan is greased.
Next you’ll bake it at 350 degrees for about 15 minutes. I baked these a couple times and 15 minutes was the max time because any longer, they’ll harden up too much when they cool.
Now just set it aside to cool completely while you make your buttercream.
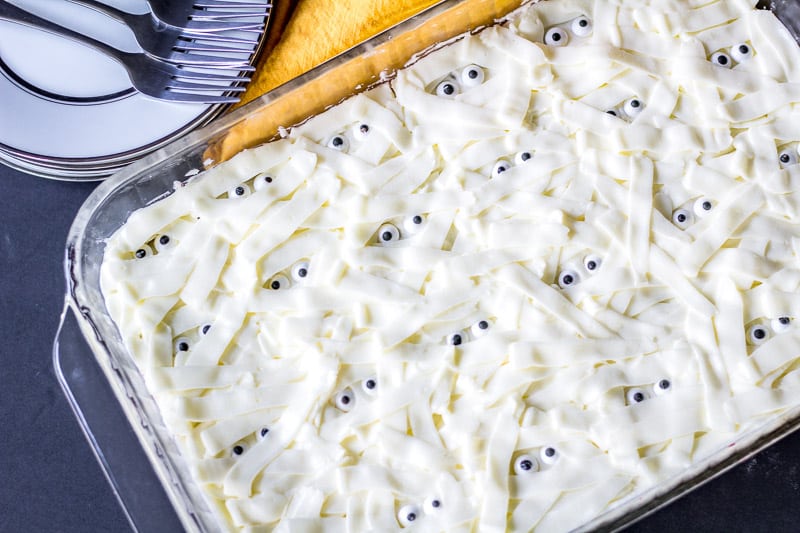
Once you mixed up your cream cheese icing, spread a layer onto your cooled bars. Make sure the bars have cooled completely though.

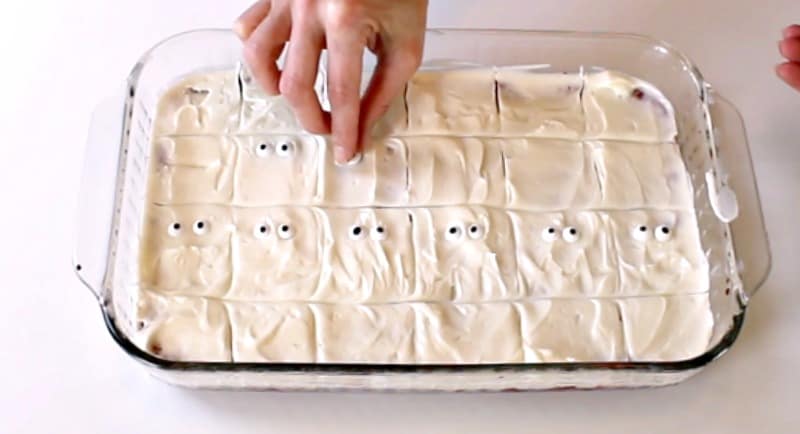
You’ll want to refrigerate the rest of the cream cheese buttercream for about 20 to 30 minutes before piping because it needs to set up a bit. Cream Cheese Icing has a tendency to get soft on you.
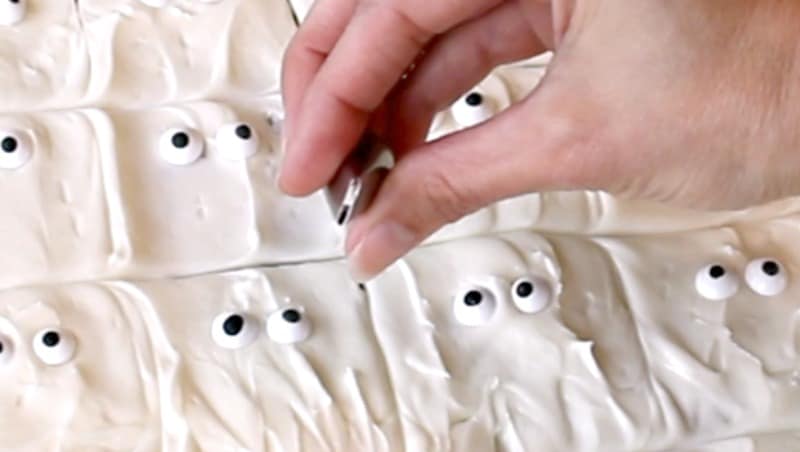
While your buttercream is chilling, you can add your candy eyes. To do this, I scored the bars into squares. Just use a toothpick and drag across the icing. I did this, so I could gauge where each mummy would be. That way, I knew how far apart to space the sets of eyes. Make sense?
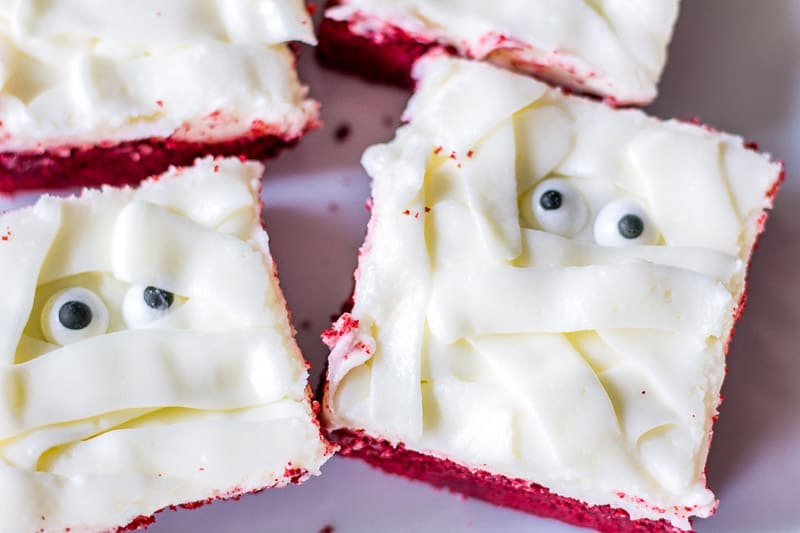
Now just add mummy eyes to each square.
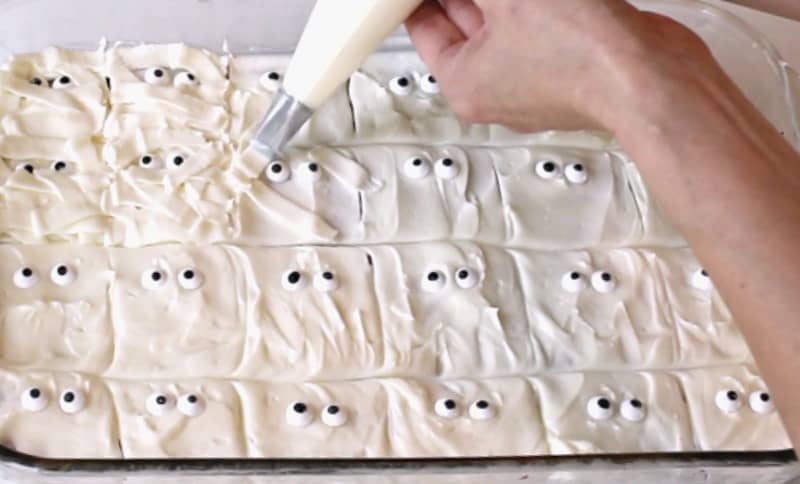
After your buttercream has firmed up a bit (but it’s not hard) add it to a piping bag with your ribbon icing tip. You can use any flat ribbon tip you want. The Ateco #45 tip worked out great for me.
Now all you’ve got to do is just pipe the strips onto the mummies. I did a square at a time, that way each mummy had it’s own coverings and still looked good once the squares were cut and served. Be haphazard about piping the strips. They should be random.
By the way, the recipe for cream cheese icing makes enough to cover an 8″ round, layer cake, so you will have some left over. In no way do I think that’s a bad thing. In fact, pop that in a bowl, slap a label on it that says ‘vegetables’ and pop that puppy in the back of the fridge. No one will mess with it and you can sneak in some spoonfuls every now and then. I won’t tell.
Now, once you’ve finished piping, just pop the whole thing in the fridge until the party. Take them out about 30 minutes before the party, so it’ll have a chance to get closer to room temperature. You’ll want to store any leftovers in the fridge though because the cream cheese buttercream is perishable.
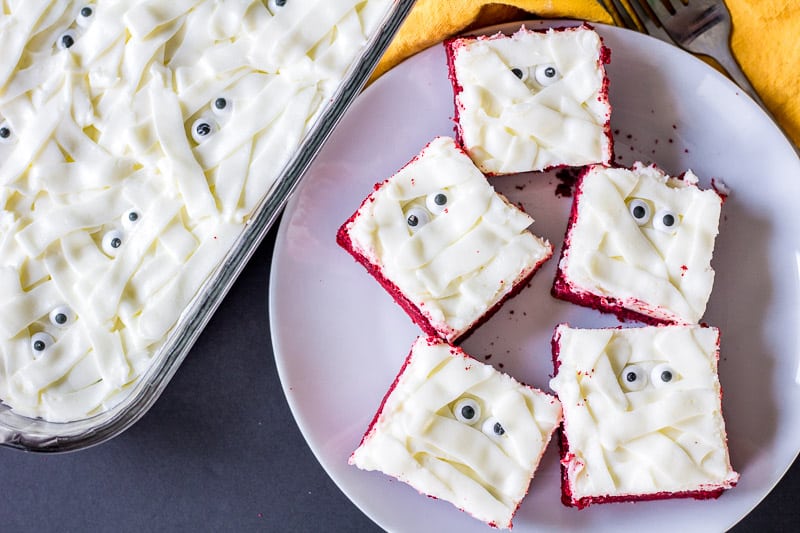
Aren’t they cute? And so easy to put together. Remember you can use any cake mix flavor, I just decided to go with red velvet, since I think it makes the mummies look a little more creepy 😉
Note About Recipe Measurements: I write recipes using volume (cups) measurements because here in the U.S., this is what people are more familiar with and I don’t want anyone to feel intimidated when baking. For metric/weight measurements, click the ‘metric’ button under the ingredients in the recipe card below. The weights are converted by a program, not me, and it’s just a best guess. I can’t guarantee that weighing the ingredients will produce the exact same results, since I test recipes using volume measurements.
Recipe

Red Velvet Chewy Bars
Ingredients
- 1 pkg. red velvet cake mix (I used Betty Crocker Super Moist)
- 1 large egg
- ½ cup butter (1 stick butter)
Instructions
- Preheat your oven to 350 degrees. Grease a 13 x 9 inch pan.
- Add your cake mix, egg and butter to a mixing bowl.
- Mix with a mixer until it’s all combined.
- Then mix with your hands that are coated in shortening or sprayed with non-stick cooking spray. Mix completely. The batter will be very thick.
- Press the mixture into a greased 13 x 9 inch pan.
- Bake at 350 degrees for about 15 minutes. Don’t bake it much longer than that, or the bars will get to hard when they cool.
Video
Notes
Nutrition
How to Share
I’d love for you to share this recipe link or tag it, but please do not share screenshots or copy/paste the recipe to social media as the content and photographs are copyright protected and we (bloggers) work really hard on our content. Sharing the link, tagging us on socials and pinning it is super appreciated though!
Don’t forget to pin it below!
Leave a Reply