
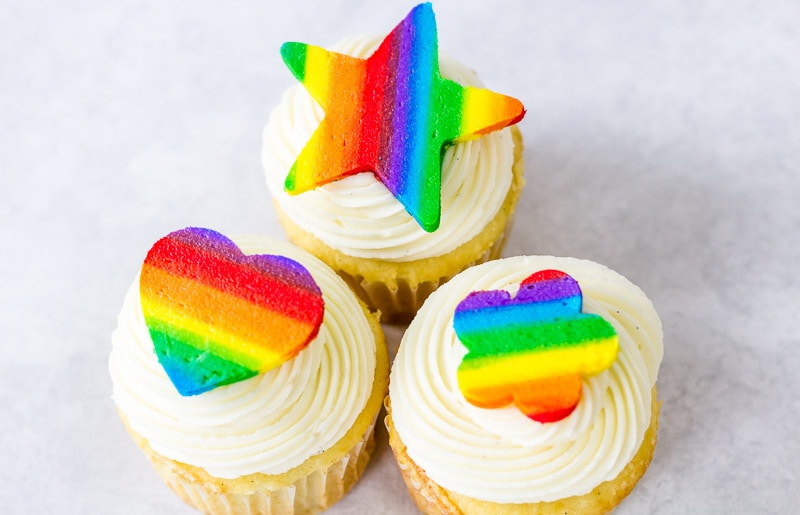
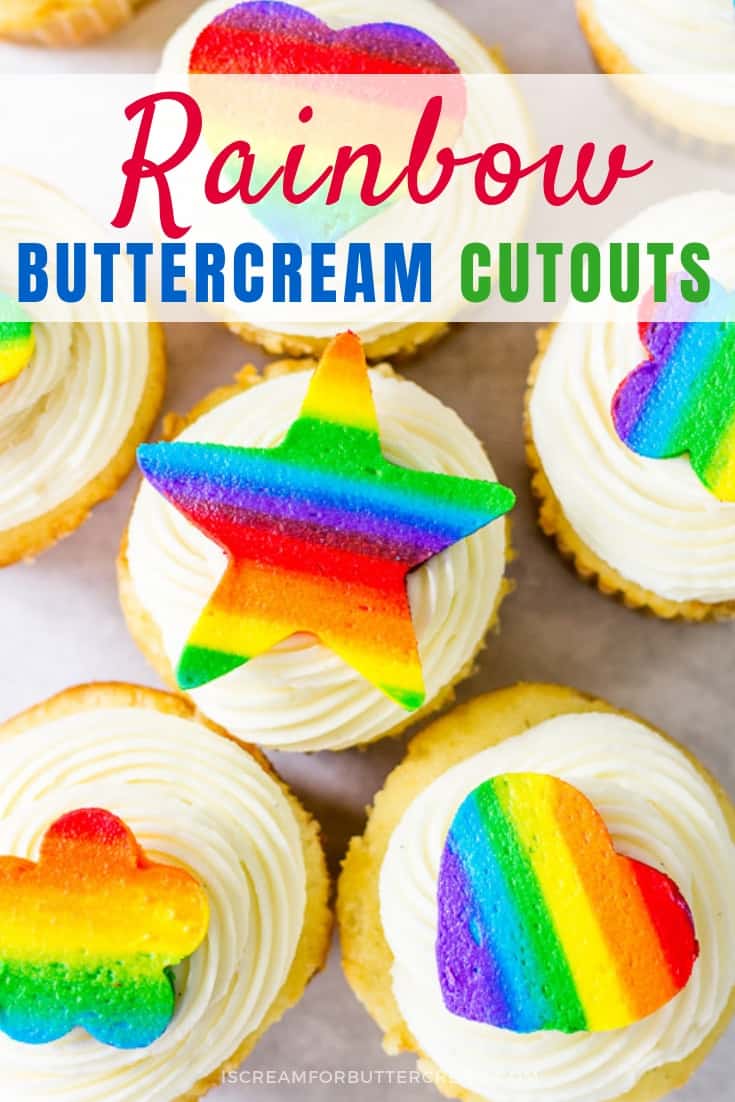
Sometimes you just want to make something cute and easy, but you don’t want to mess with fondant. These cute rainbow buttercream cutouts are the tasty and perfect way to embellish your cakes or cupcakes.
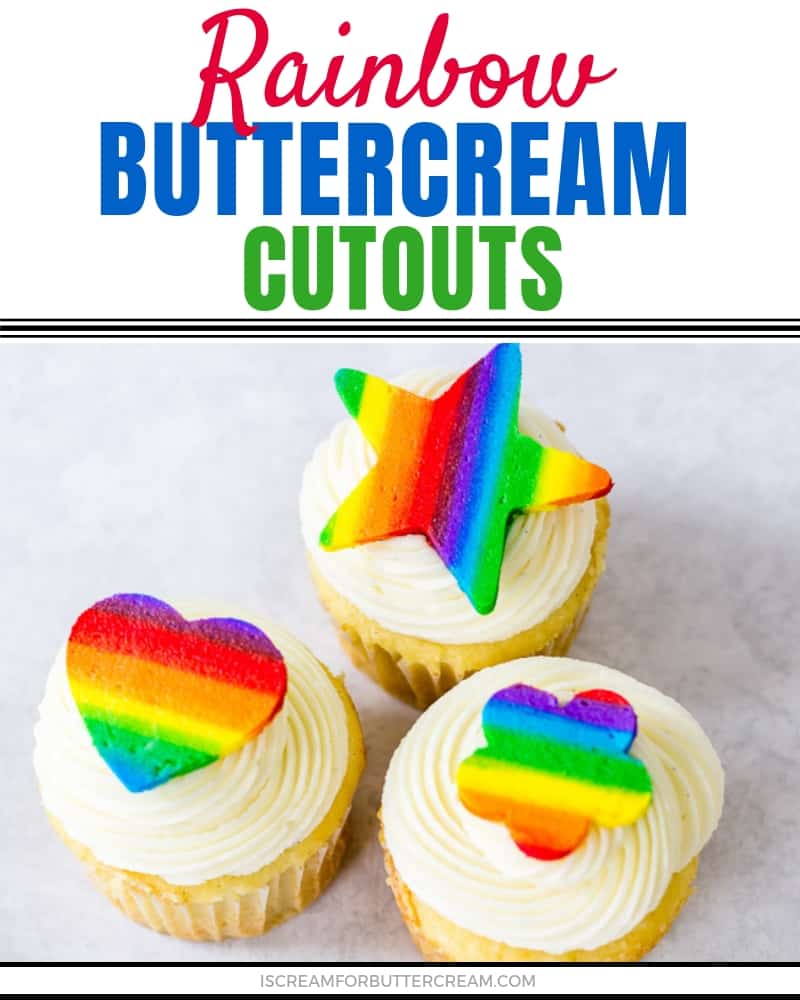
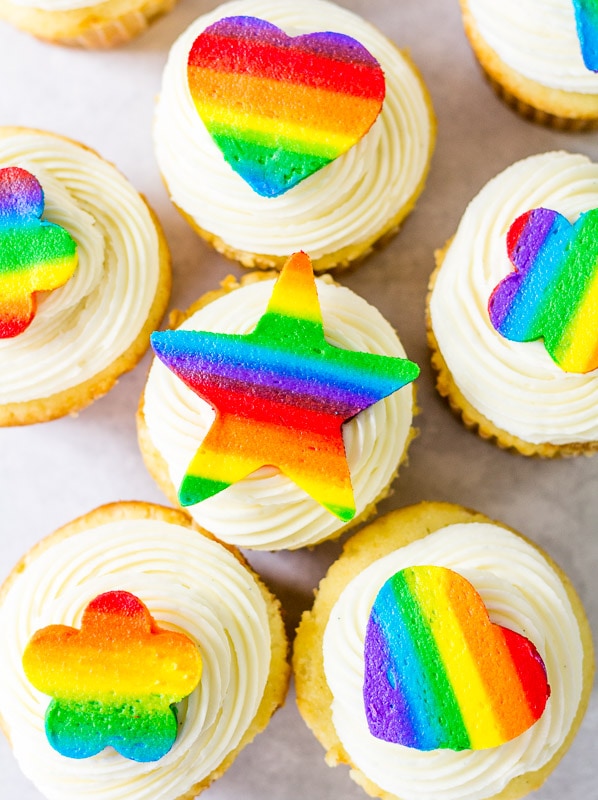
Rainbow frosting is so fun and it’s really not hard to do. Get the look of fondant, but without all the hassle and make them in any shape you want. They can be added to a cake with just a dab of buttercream, or just use them to top your cupcakes…plus you can cut them into any shape you like.
The trick with these buttercream cutouts is to use all butter buttercream. If you use shortening in your buttercream, it just won’t firm up as much as you need it to. You can find my buttercream recipe here: Vanilla Bean Buttercream

Make these in any colors you like…although I think rainbow is really eye-catching.
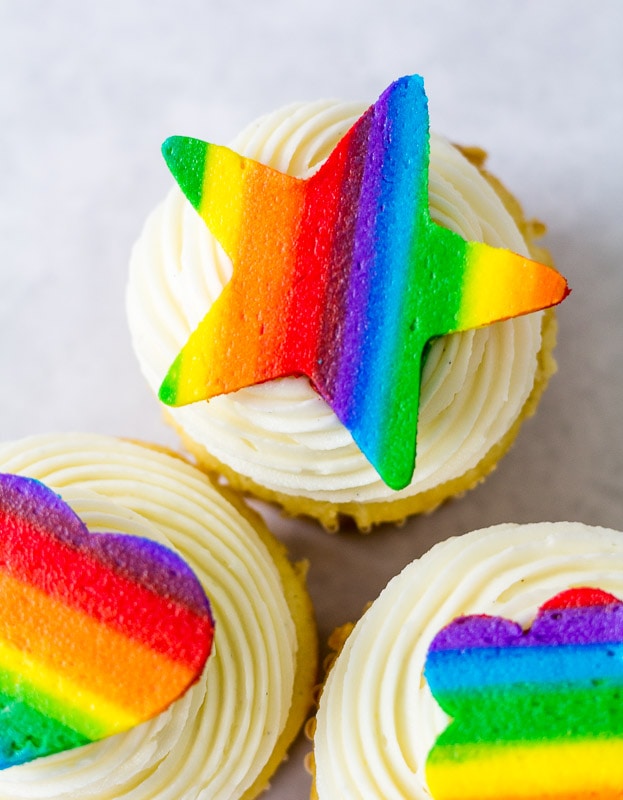
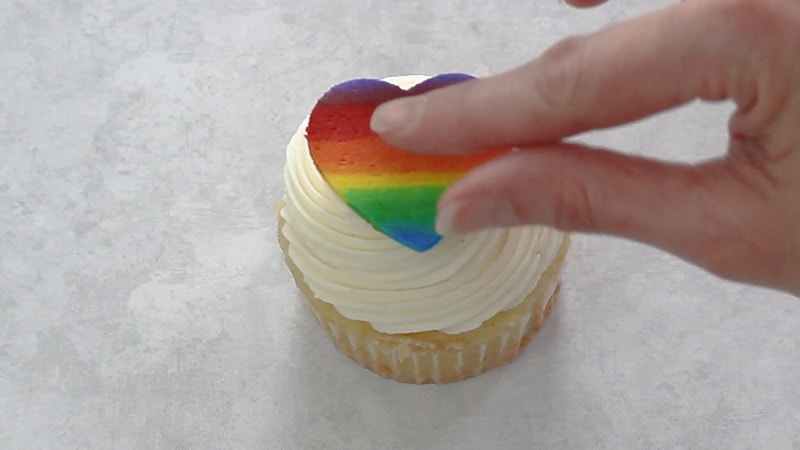
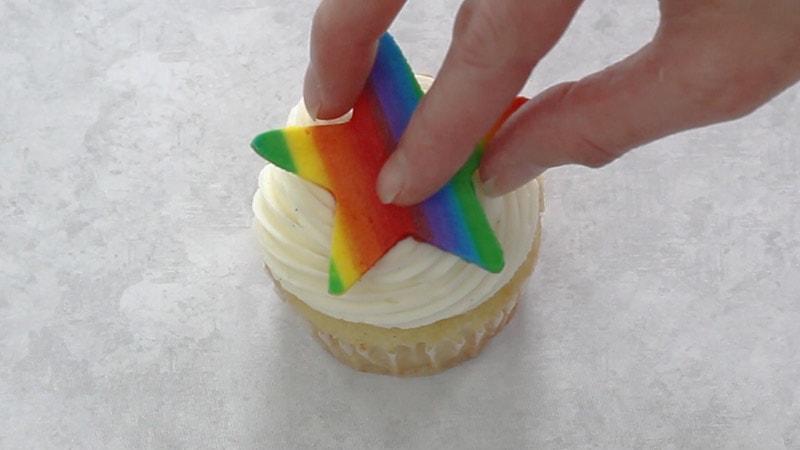
You can also use any shaped cutters you like. I just went with a heart, a star and a small blossom.
I have another tutorial similar to this. I love how you can make designs and cutouts similar to what you can do with fondant, but it’s actually buttercream. You can see the other tutorial here: Geometric Buttercream Cake
Ok, let’s get to the tutorial. I’ve added some screenshots of the process and below and there’s a video close to the end of the post to show how it all comes together.
This post contains affiliate links. As an Amazon Associate, I earn from qualifying purchases. You can see my policies linked in the website footer.
Supplies Needed for the Rainbow Buttercream Cutouts:
- Buttercream (remember to use all butter and no shortening) I used half the recipe. You can find that recipe here: Vanilla Bean Buttercream
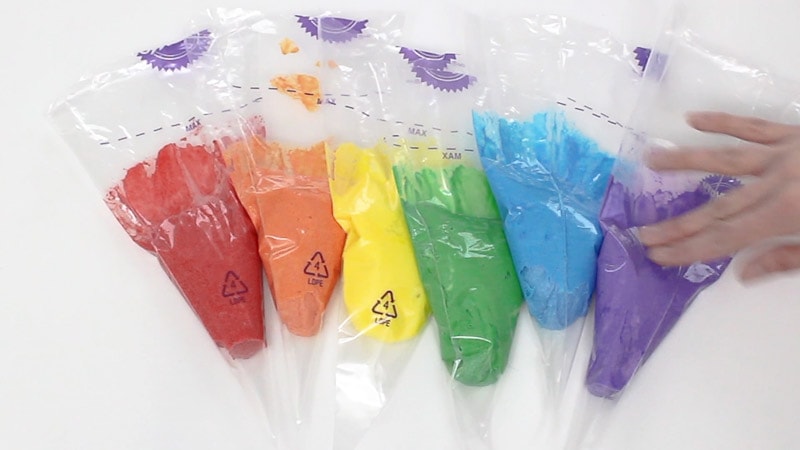
- Gel Food Coloring (Gel coloring is best because it doesn’t dilute the icing and you can get a deeper color) I used red, orange, yellow, green, blue & purple
- Icing bags (you’ll need one for each color)
- Buttercream smoother
- Cookie sheet
- Wax paper
- Cookie cutters – I used some similar to these: Star Cutters, Blossom Cutters, Heart Cutters
- Palette knife (These can also be found in the craft or pottery aisle at your local Walmart or craft store) These are super helpful when moving around the shapes.)
- Your cake or cupcakes to add them to – Here’s my go-to vanilla cake recipe: Favorite Vanilla Bean Cake Recipe
How To Make The Rainbow Buttercream Cutouts:
Once you’ve made your buttercream, divide it into six different bowls. Add your gel coloring and mix well.
Add each color to piping bags.
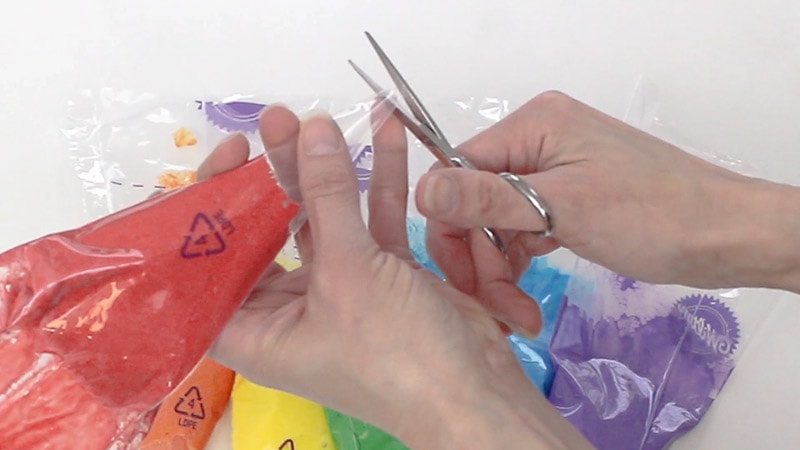
Snip off the end of the piping bag. Make sure to snip only a small amount though. Your lines you’re about to pipe need to be skinny.
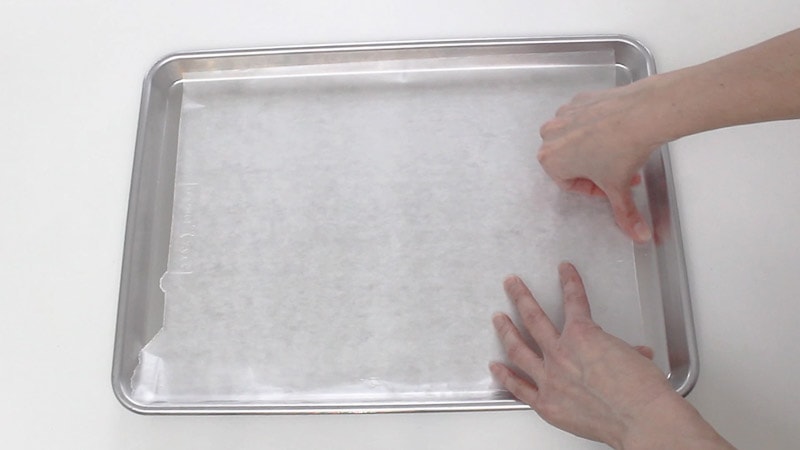
Now take your cookie pan and tape on a piece of wax paper.
Once you’ve got the wax paper taped down well, Pipe skinny lines of each color. It doesn’t need to be perfect here. Mine was far from it and sometimes the buttercream just doesn’t come out smoothly since there’s only a small opening in the bag.
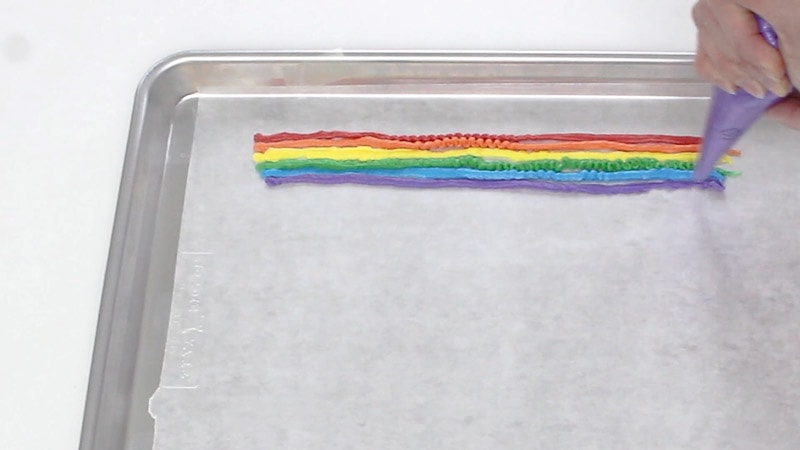
You can keep adding your colors in order of the rainbow until you get a good size section. Once you get a section of buttercream large enough to where you can get enough shapes cut out of it, go over each line of buttercream again with that same color.
You want it to be thicker, so just pipe over each color again.

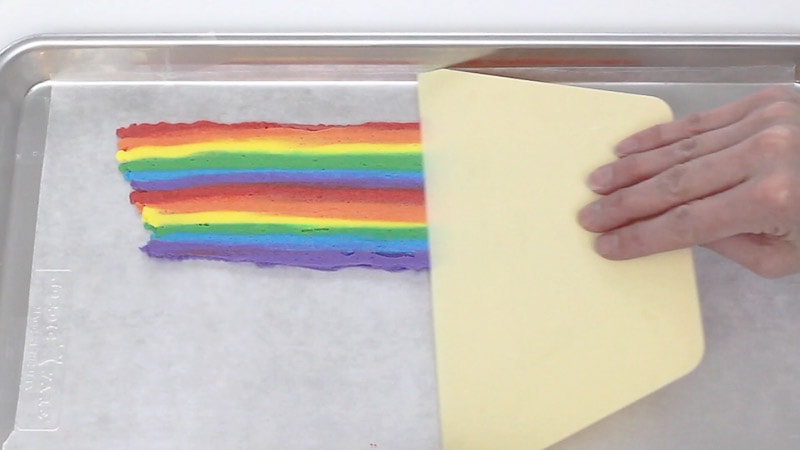
Once you’ve done that, take your buttercream smoother and do one swipe across your buttercream. You want medium pressure here. If you press really lightly, it won’t smooth it well. If you press to hard, it’ll thin the icing too much and perhaps mix the colors too much.
Clean off your smoother completely and then smooth over your buttercream one more time.
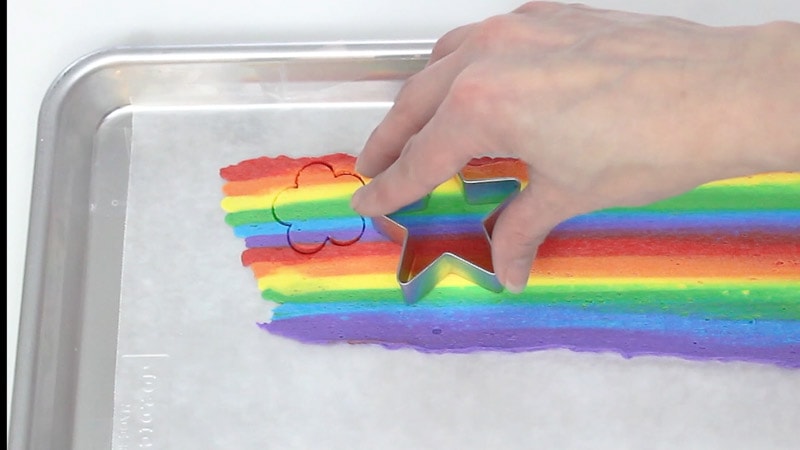
Pop your cookie sheet in the fridge so the buttercream will firm up. It should be firm enough in about 15-20 minutes. Once chilled, you can cut out your shapes. Make sure to clean off your cutter each time you stamp, so the colors don’t bleed the next time you stamp.
When you push down your stamp, you’ll need to jiggle it just slightly from side to side, instead of just pressing down and straight up again. Jiggling it will help your cutter release better when you pull it back up. Don’t try to lift out the shapes just yet.
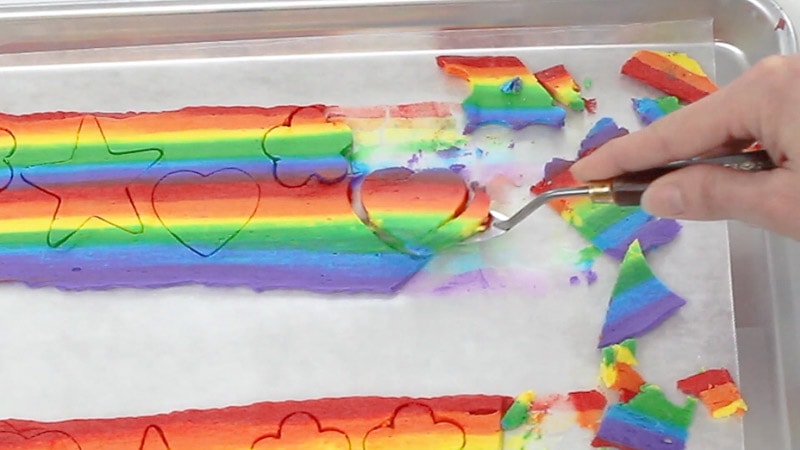
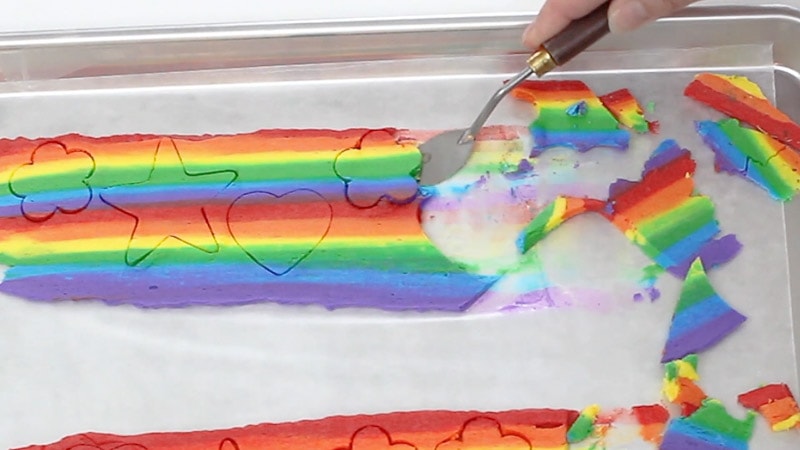
Once you’ve stamped everything you want, pop the cookie sheet back in the fridge to chill again for another 10-15 minutes.
Once it’s chilled, use the palette knife to scrape off the excess around each shape and then slide it under each shape and pull up and off the wax paper. Set the shapes on a cake board or another piece of wax paper and chill until ready to use.
To attach to a cake, you’ll just need to add a dab of buttercream to the back of each shape and then attach to the side or top of your cake. Make sure they are good and chilled and try not to handle them too much before attaching them.
You can also attach to the top of your cupcakes like I did. If you’re icing isn’t flat on the top of your cupcake, you’ll want to keep them chilled, so your buttercream shapes don’t go a little limp.
Video for the Rainbow Buttercream Cutouts:
There you go! Aren’t they cute! These are so fun, they taste good AND they’re really eye-catching. I hope you have fun with these!
Elaine
Will italian meringue buttercream work for this?
And.. can I stick the buttercream cutouts to the side of the cake and it won’t slide off? Thanks. Hope you respond. 🙂
Kara Jane
I’m not sure if Italian meringue would work. American buttercream seems to work well because it has butter in it and the butter firms up really well in the fridge or freezer. Swiss meringue might work okay since it has butter in it and can firm up, but I’m just not sure that Italian meringue would. I have actually used these on the sides of a cake before. Here’s a post on that: https://iscreamforbuttercream.com/geometric-buttercream-cake/