
Have Questions or Need More Details?
Don't forget to check out the Tips & FAQ section in the post!
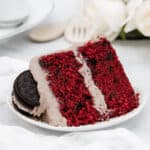
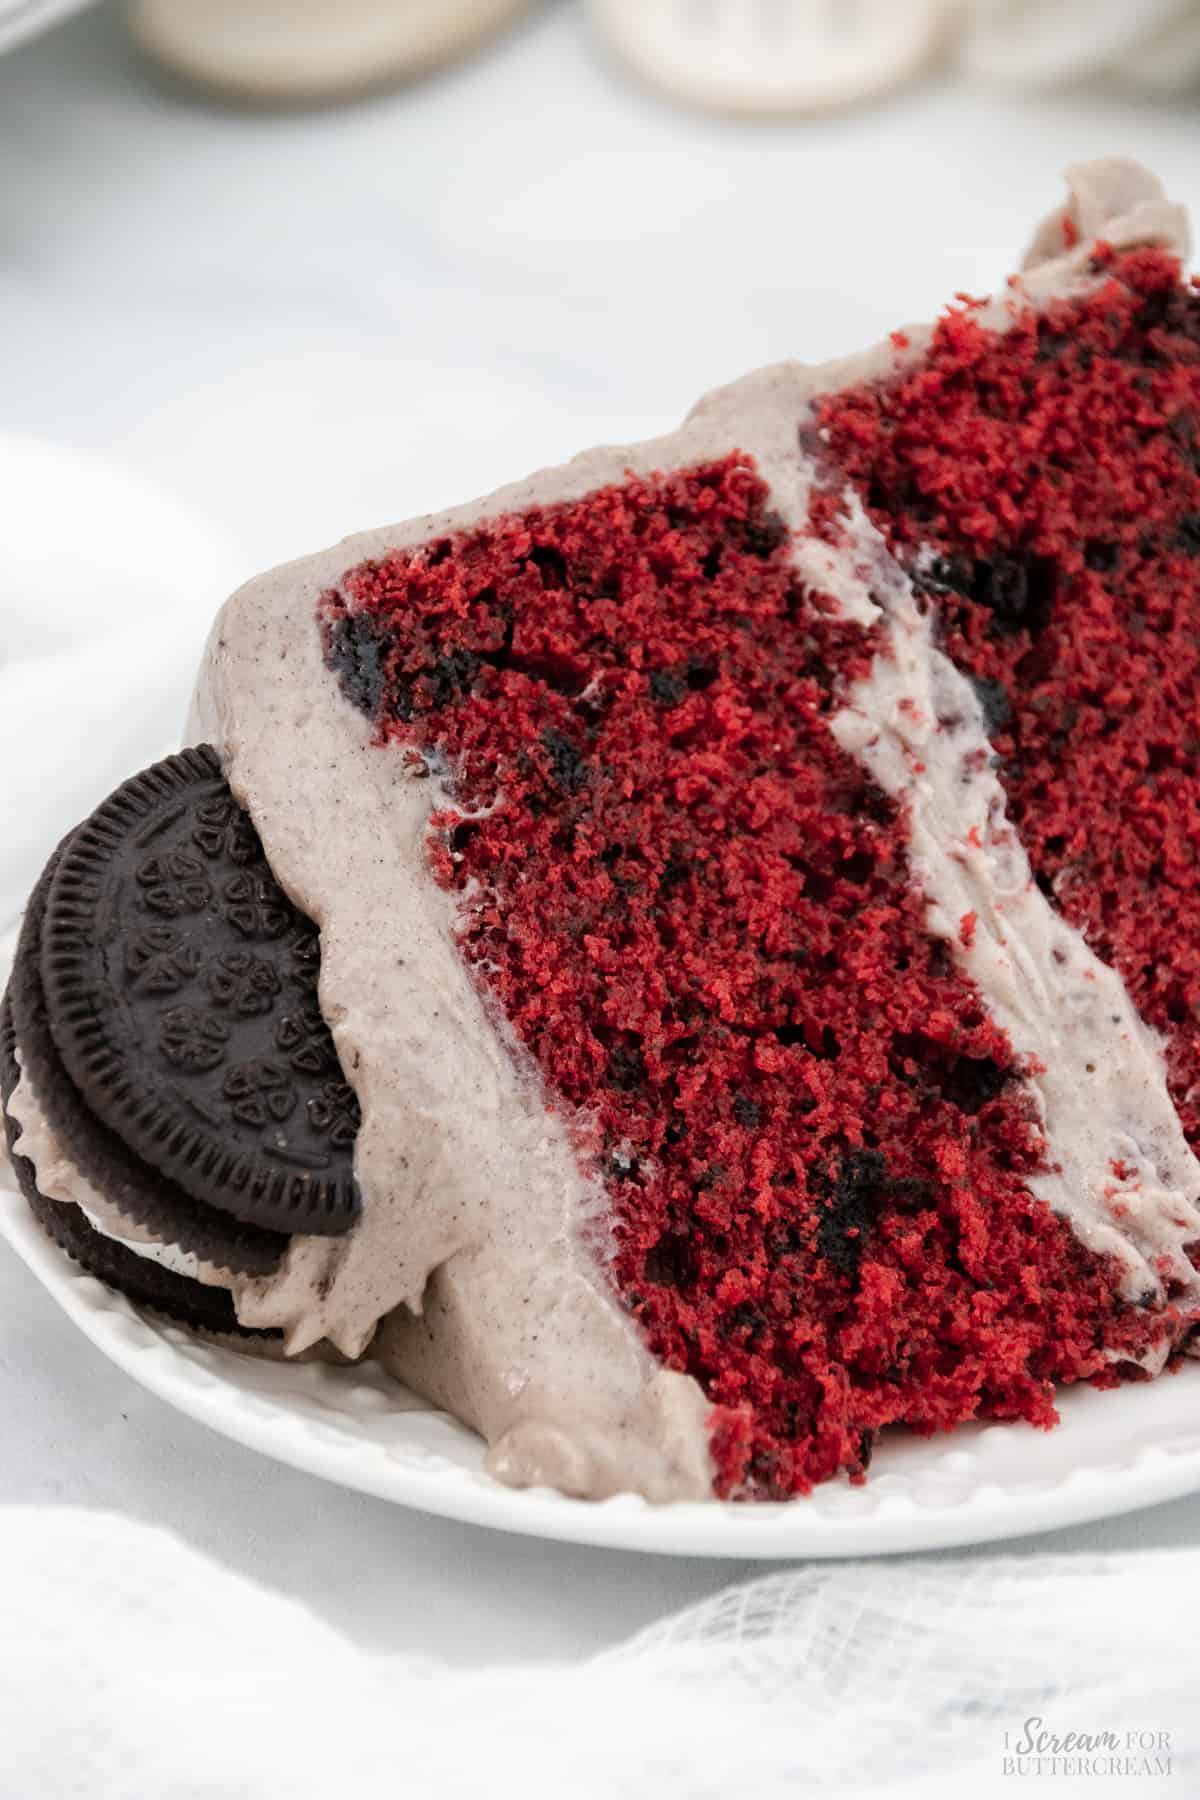
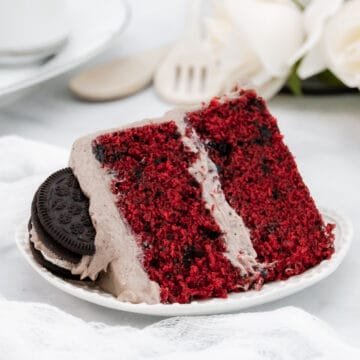
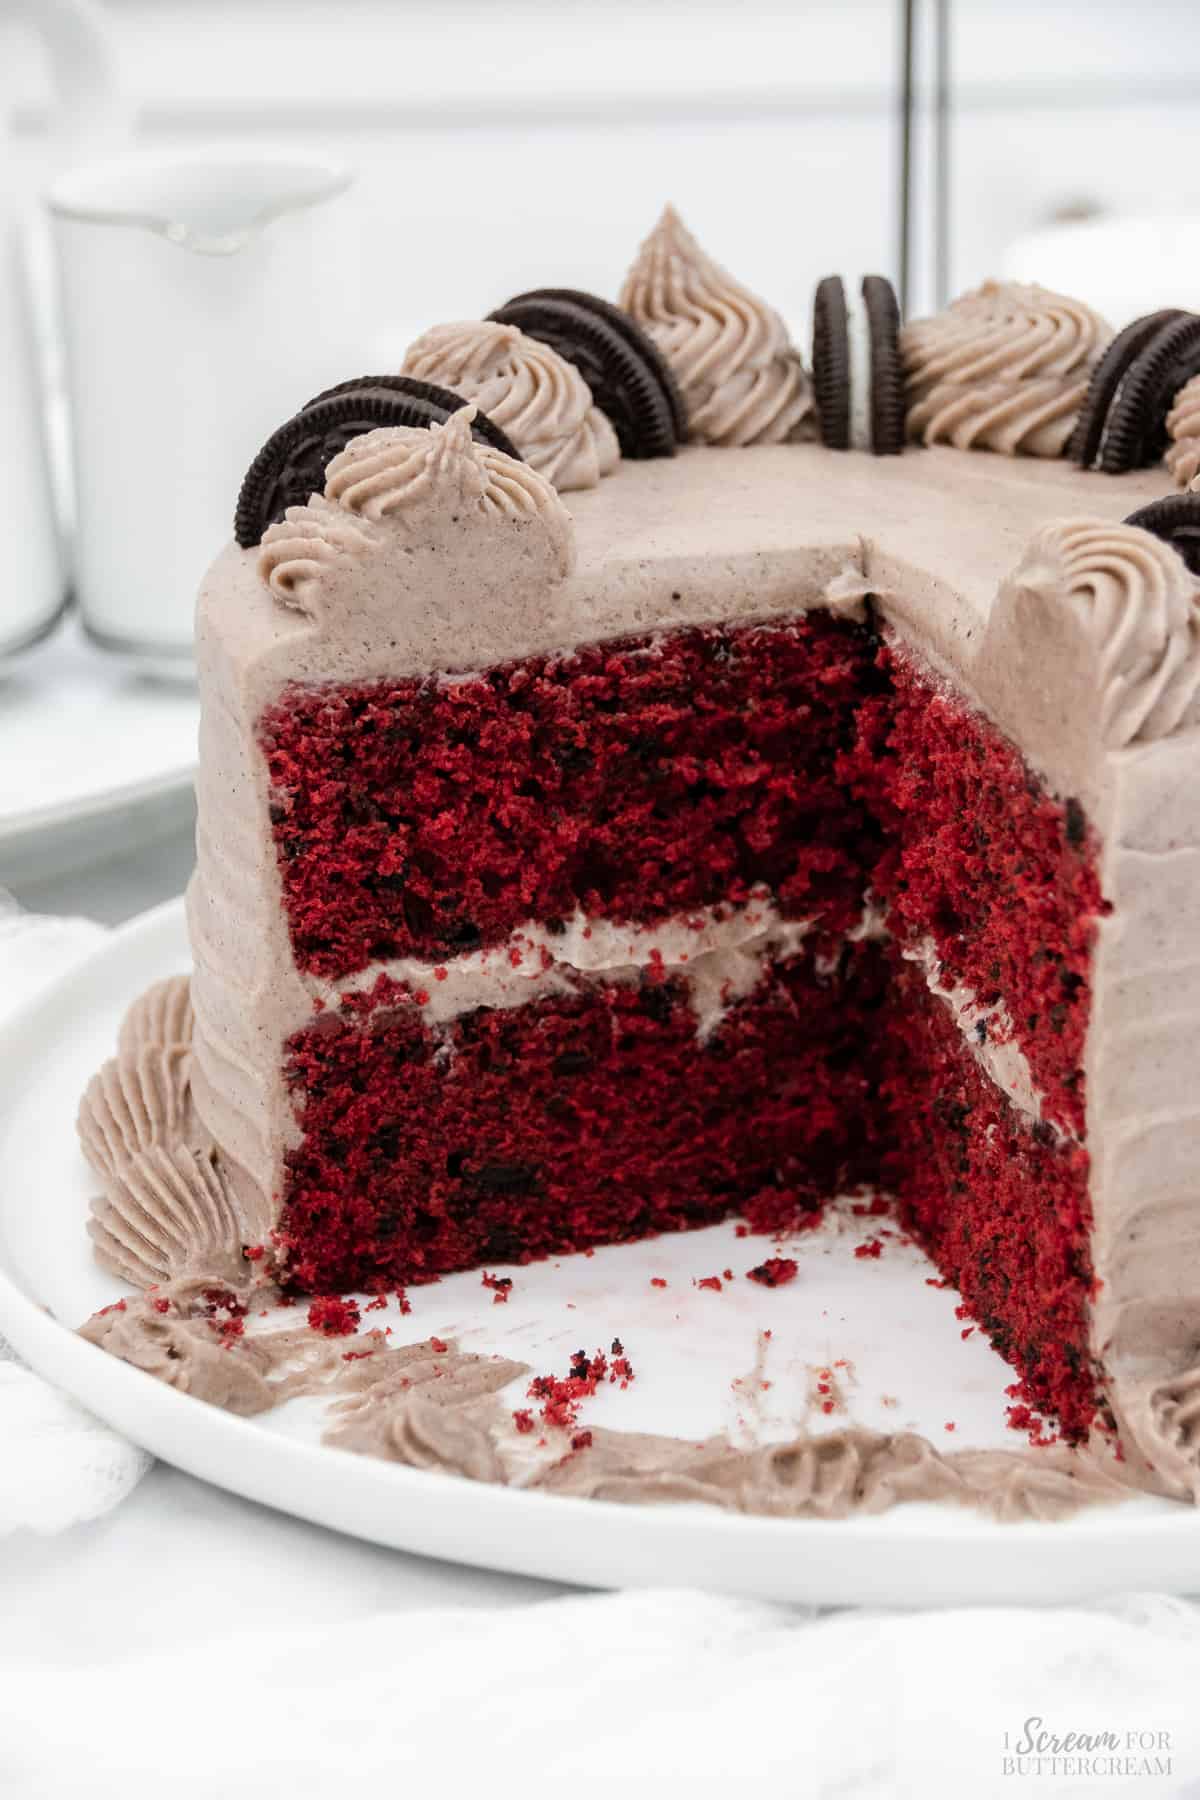
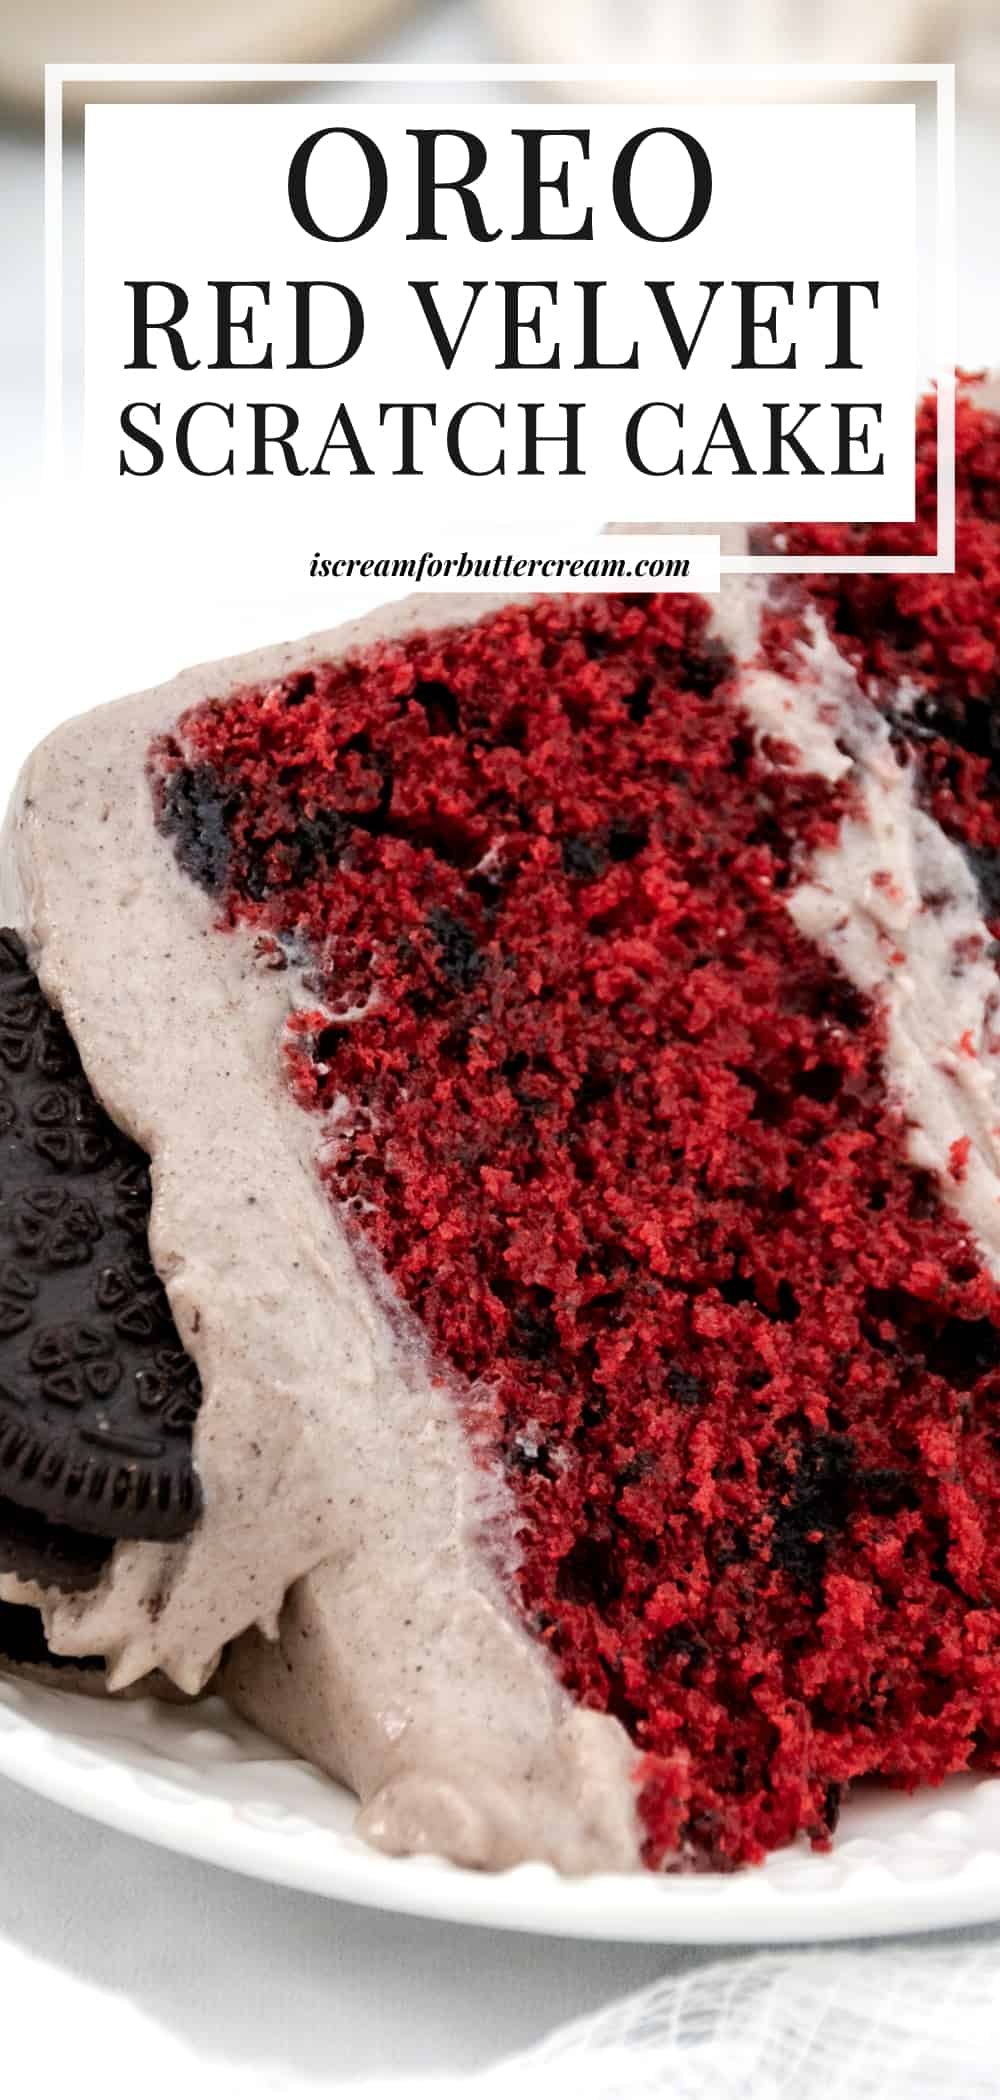
This homemade red velvet Oreo cake is baked from scratch, super moist, topped with Oreo cream cheese buttercream and is a perfect treat for birthdays or family gatherings.
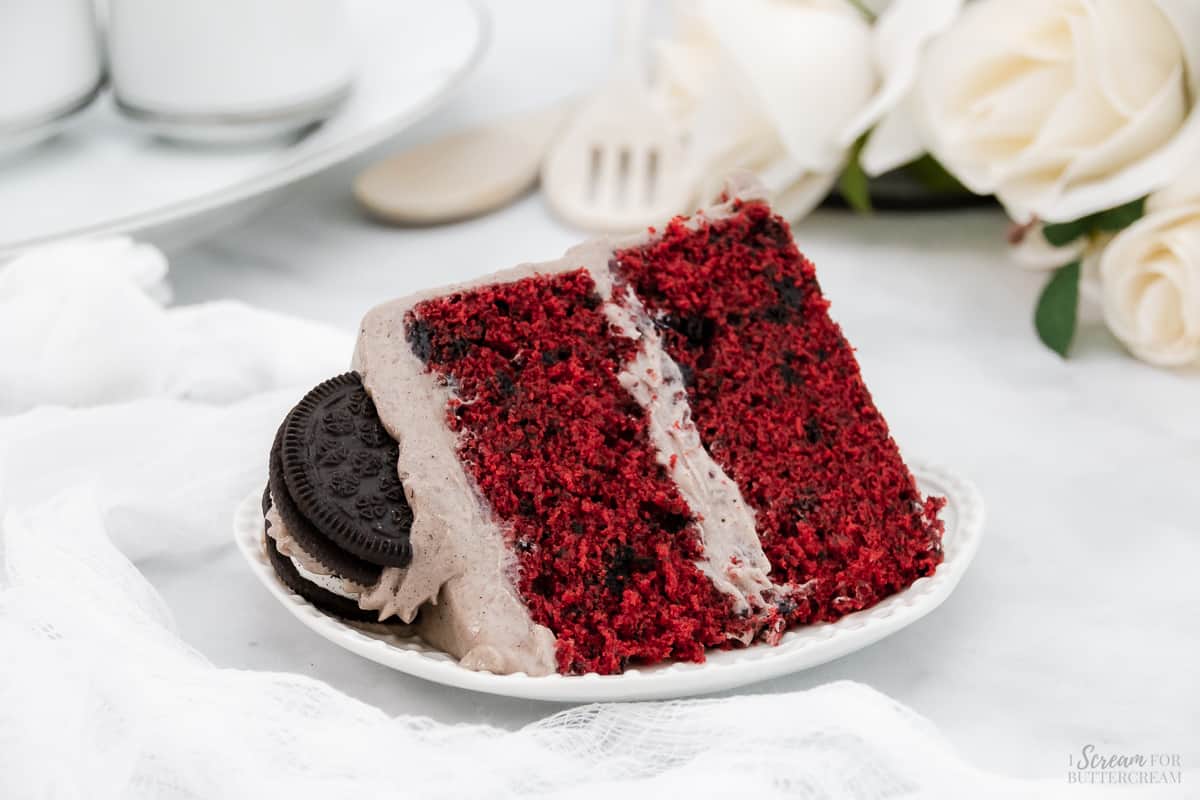
This cake combines the classic style of red velvet with the irresistible crunch of Oreo cookies. This is a twist on the classic red velvet cake and in my opinion anything chocolate or Oreo goes perfectly with red velvet.
Hey there! Before you scroll, there’s lot’s of important stuff in the post!…including the FAQ section, which may answer any questions you might have about this recipe. Enjoy!
So, personally, I LOVE using sour cream in cakes and typical red velvet cakes include buttermilk. I already have a red velvet cake using sour cream on this site, but I thought it would be a good experiment to write a recipe that included both buttermilk and sour cream.
The result is truly amazing. This cake is so moist and so delicious. Some cakes firm up too much in the fridge, but this one retains its moisture.
What’s great about this cake:
- It’s made from scratch but it’s still really easy to mix up.
- It’s super moist because of the oil, buttermilk and sour cream and it stays moist even when stored in the refrigerator.
- The combination of Oreo cookies and red velvet flavor is amazing.
- Cream cheese buttercream is taken up a notch with added crushed Oreos giving it that cookies and cream flavor.
- It’s totally customizable. You could even add mini chocolate chips, change the frosting to plain cream cheese, vanilla or chocolate.
Main ingredient notes:
Now let's talk a little about just some of the ingredients in this cookies and cream red velvet cake. (The printable list of all ingredients are in the recipe card below.)
For the cake:
All-Purpose Flour: This is the foundation of the cake and it provides structure and texture.
Cocoa Powder: Did you know that red velvet cake actually has a bit of cocoa powder in it? It’s not enough to make it taste really chocolaty, but it reacts with the baking soda, add a bit of flavor and helps to deepen the red color.
Buttermilk: This ingredient is a star in this cake and helps make the cake tender and moist.
Sour Cream: Oh yeah, this baby’s got both buttermilk and sour cream, so you know it’s going to be super moist with a tender texture.
Red Gel Food Coloring: That red color is what gives it that iconic red velvet look. To get the red color, you’ll need red gel food coloring. You want the gel type and not the liquid type. I’ll get more into that in the FAQ section, so make sure to check out that section if you have questions or need clarification.
Unsalted Butter and Vegetable Oil: This is part of the fat content in the cake (besides what the sour cream and buttermilk add). These ingredients will make the cake moist, and rich and it’ll really help give the cake a more tender crumb. Oh and did I mention that butter makes cakes taste SO good?
Vinegar: Yes, I know vinegar sounds weird to put in a cake but trust me on this…it’s just adding in another acid that works with all the ingredients to make this cake tender and tasty. It definitely won’t make the cake taste like vinegar.
Chopped Oreos: This is the star ingredient. I love the taste of chocolate with red velvet cake and these add a little crunch too, which is nice.
For the Oreo cream cheese frosting:
Unsalted Butter: Butter provides the base for the buttercream and gives it a smooth texture.
Cream Cheese: Cream cheese works wonderfully with red velvet. It’s that classic taste combination.
Confectioners Sugar: This is what will sweeten and thicken up the frosting so that it’s the proper spreadable consistency.
Crushed Oreos: Adding crushed Oreos to this frosting turns it into the best cookies and cream frosting.
(Make sure to check out the FAQ section below in this post for ingredient and substitution questions.)

How to make this cake:
Let's talk a little about how to make this red velvet cake with Oreos (The printable instructions are in the recipe card below.)
Step 1:
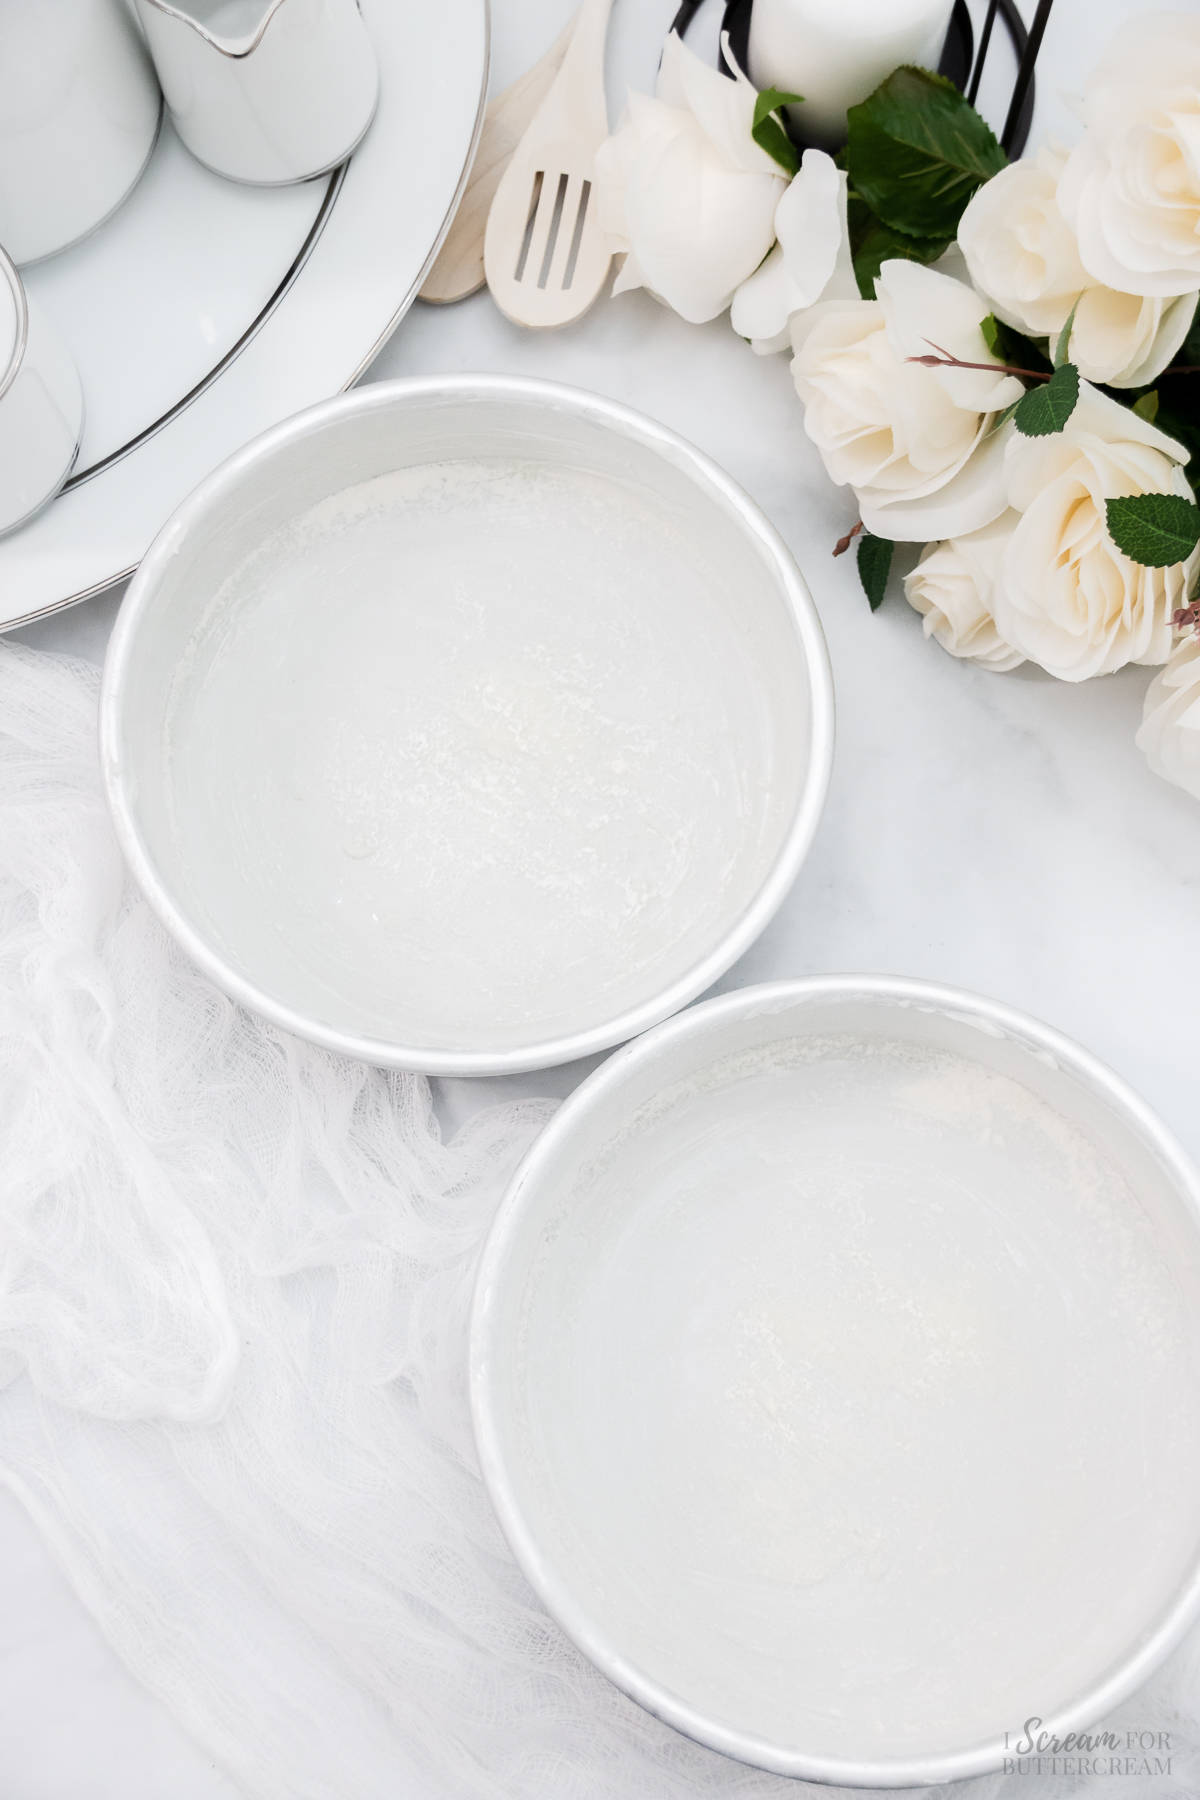
First, make sure to preheat the oven to 325 degrees F and you’ll want to grease and flour two, 8-inch round cake pans, then set aside.
Step 2:
Add the flour, baking soda, baking powder, cocoa powder and salt to a medium-sized bowl and whisk well, then set aside.
Step 3:
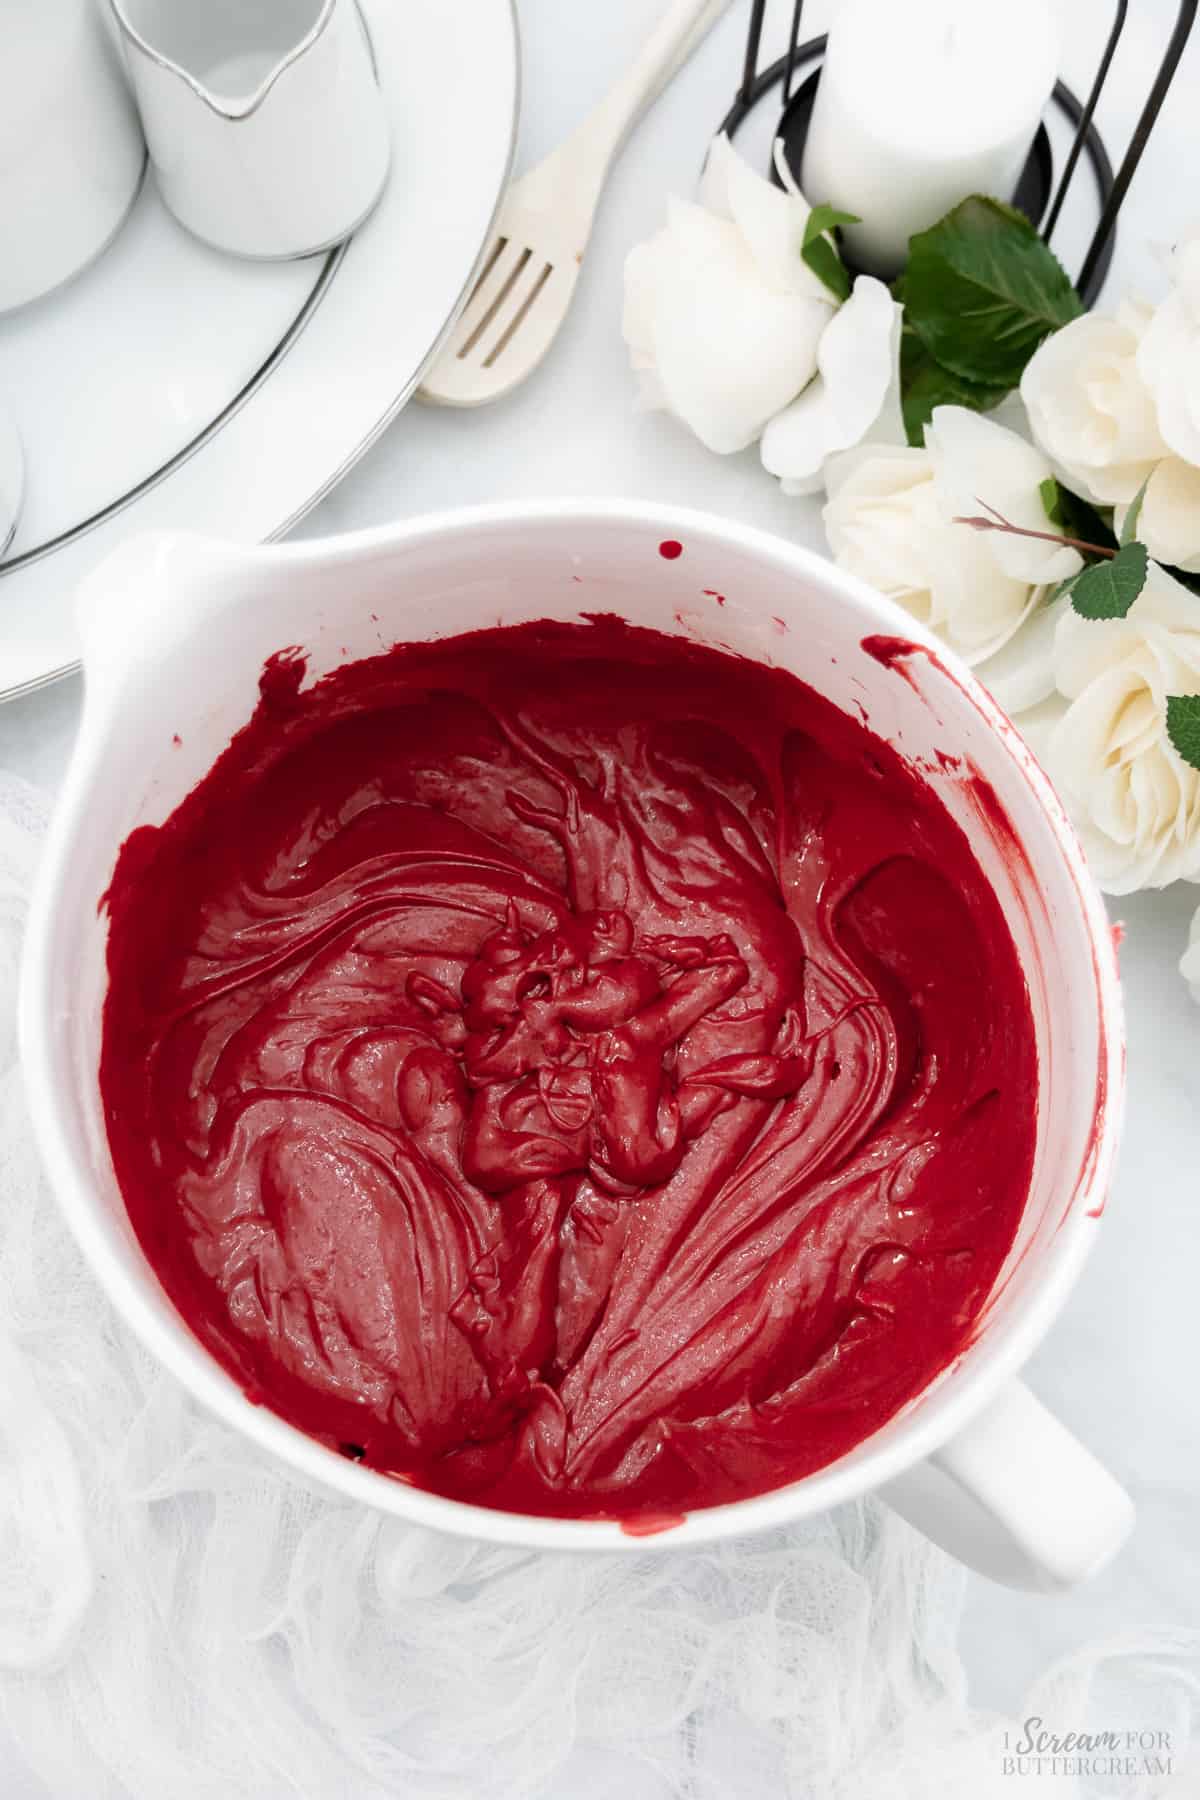
In another bowl, add the buttermilk, sour cream, vinegar, vanilla, oil and gel food coloring. Whisk well and set aside.
Step 4:
Now take a large mixing bowl, and add the room-temperature butter and the sugar and mix with an electric mixer on medium-high speed for several minutes until its light and fluffy.
Step 5:
Next, add the eggs one at a time, and mix on medium speed for just 20 seconds after adding each egg.
Step 6:
Now, alternately add in the dry mixture and the liquid mixture to the butter mixture, starting and ending with the dry mixture. Start and end with the flour mixture.
Step 7:
Next, stir in the chopped Oreos and mix them in by hand only until well combined.
Step 8:
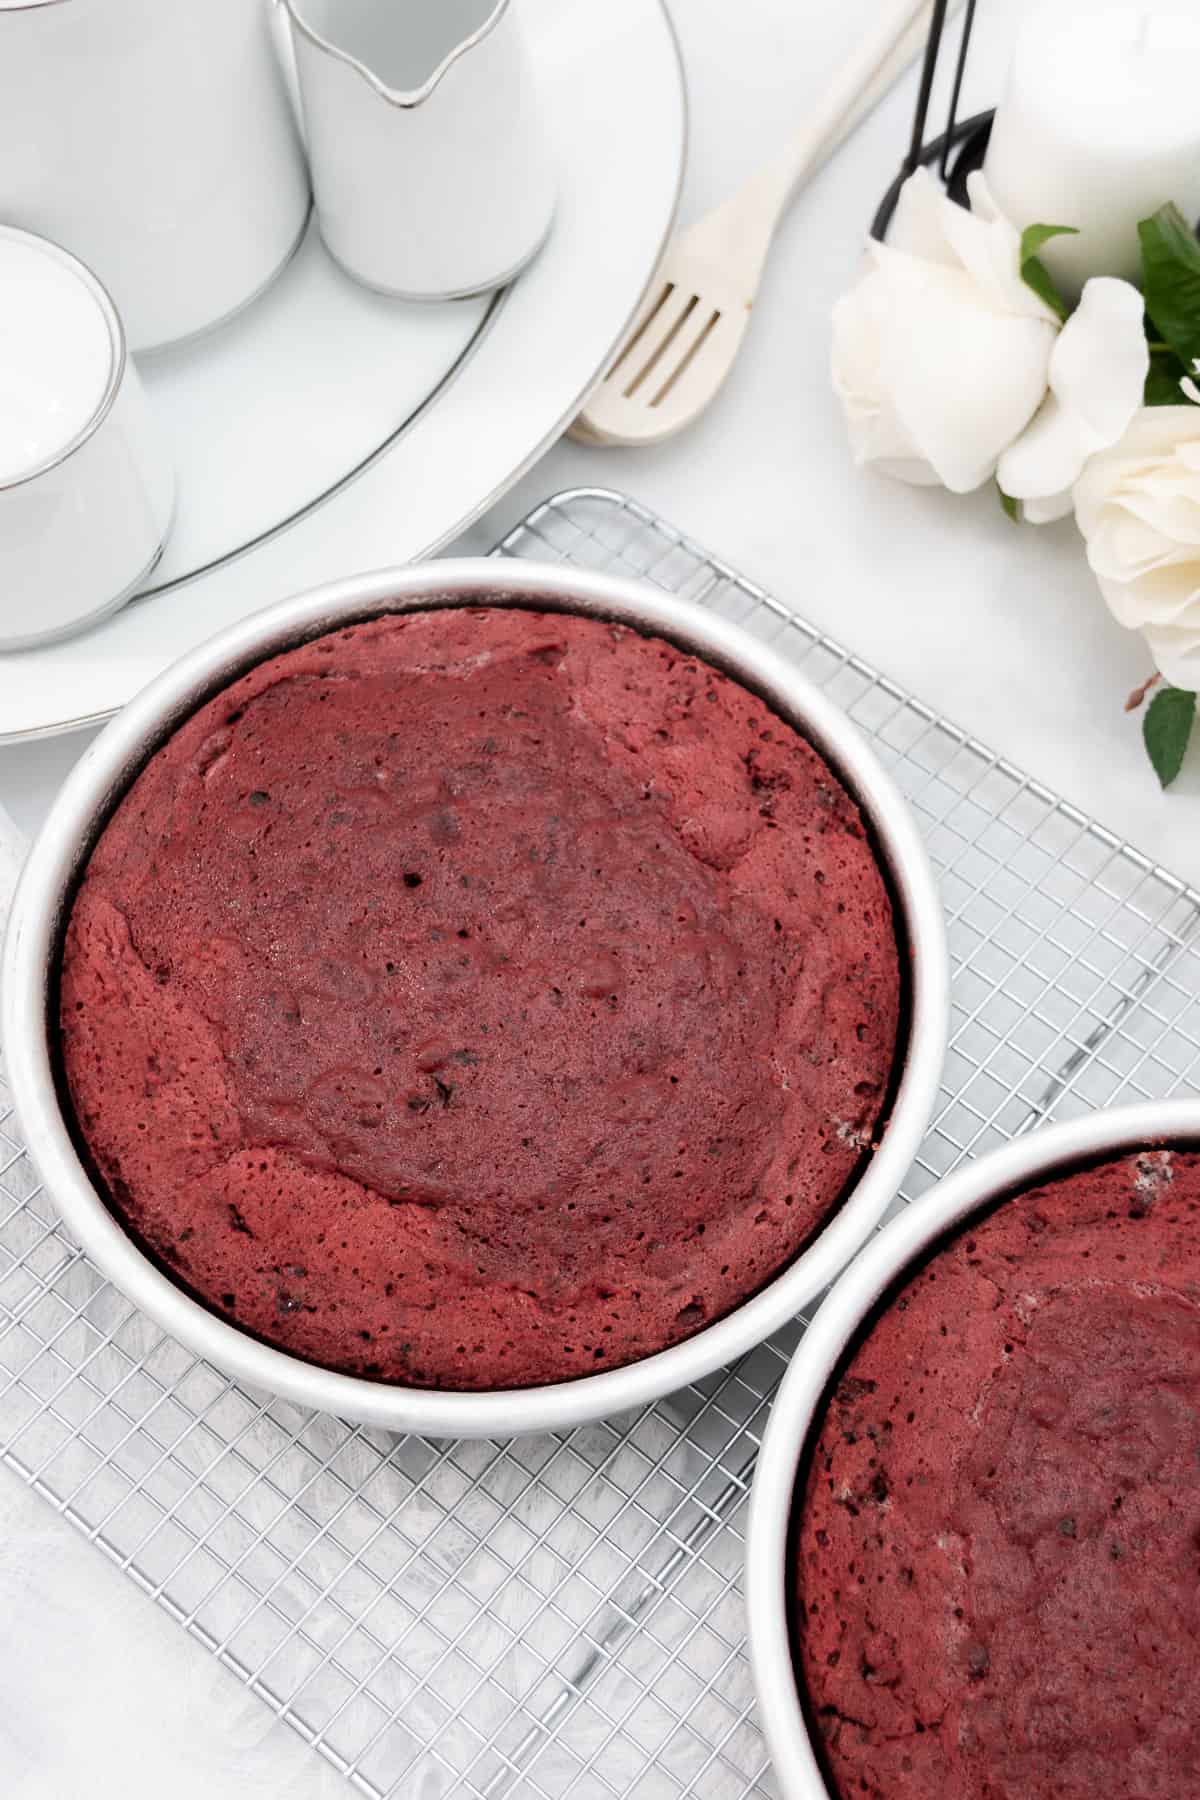
Pour the batter into the prepared pans, smooth the batter evenly and bake at 325 degrees F for approximately 50-60 minutes. Ovens vary.
Step 9:
Once baked, remove the cake layers from the oven and place them on a cooling rack, still inside the pans, for about 15 minutes. The cake layers may flatten out a bit as they cool.
Step 10:
After about 15 minutes turn the cake layers out of the pans and set them onto the cooling racks to let them cool completely

Step 11:
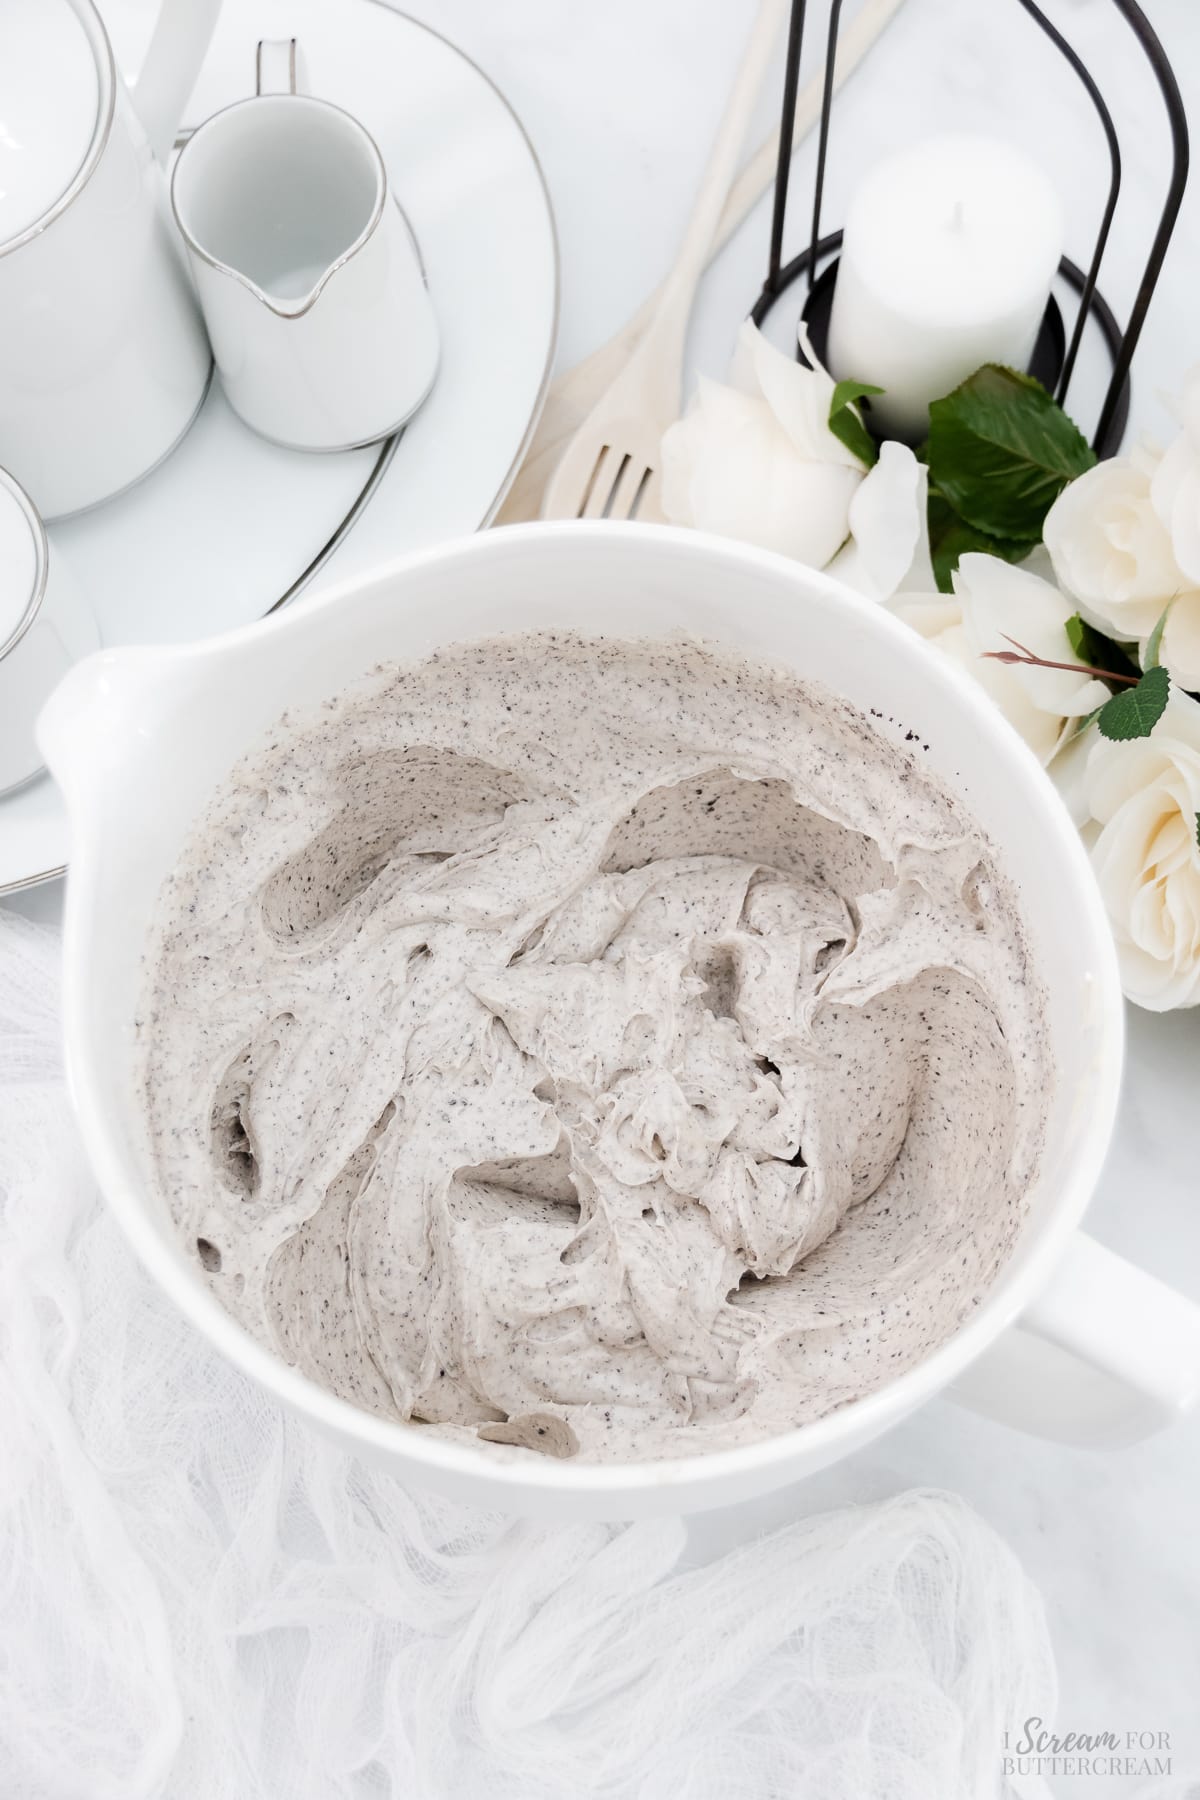
Next, make the frosting. You’re basically just mixing all the frosting ingredients together, then adding in the crushed Oreos.
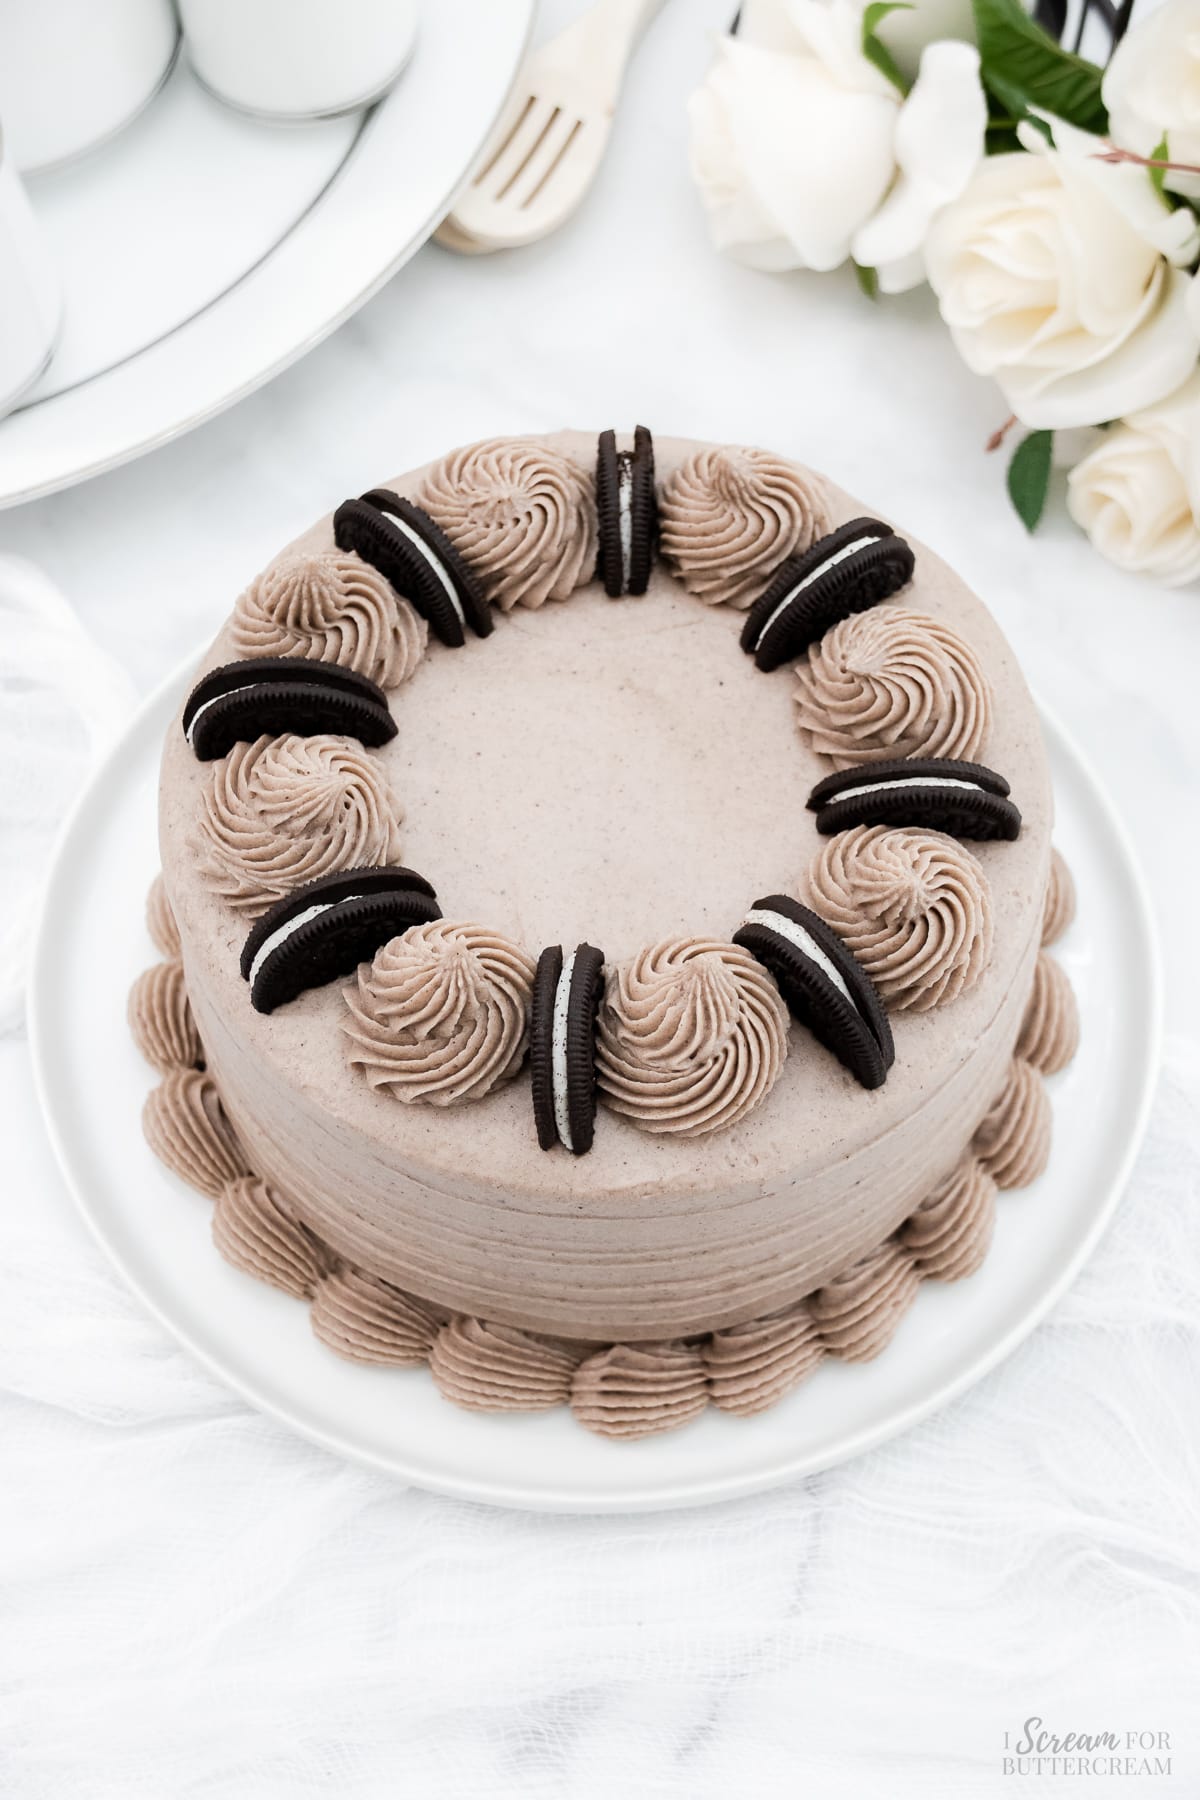
Step 12:
Add the frosting to the cooled cake layers, decorate it how you like and enjoy!
(Remember that the instructions will also be in the recipe card below.)
Note About Recipe Measurements: I write recipes using volume (cups) measurements because here in the U.S., this is what people are more familiar with and I don’t want anyone to feel intimidated when baking. For metric/weight measurements, click the ‘metric’ button under the ingredients in the recipe card below. The weights are converted by a program, not me, and it’s just a best guess. I can’t guarantee that weighing the ingredients will produce the exact same results, since I test recipes using volume measurements.
Recipe
Red Velvet Oreo Cake
Ingredients
For the cake:
- 2 ¾ cups all-purpose flour (Measured correctly: Spooned into the measuring cup and leveled off - don't scoop and pack the flour into the cup, that will add too much flour.)
- 1 teaspoon baking soda
- 1 teaspoon baking powder
- 2 tablespoons natural unsweetened cocoa powder
- ½ teaspoon salt
- 1 cup buttermilk, near room temperature
- ½ cup sour cream, near room temperature
- 1 teaspoon white vinegar
- 2 teaspoons vanilla extract
- ½ cup vegetable oil (or canola oil)
- 1 ½ tablespoons red gel food coloring, may use a bit more for a darker red color. (Good gel colors are Americolor Super Red, Wilton No Taste Red and Chef Master Christmas Red) (If you don't like the idea of adding red food coloring, you DO NOT have to add it. The cake will still taste great, it just won't be red.)
- ½ cup unsalted butter, room temperature
- 2 cups granulated sugar
- 3 large eggs, room temperature
- 2 cups coarsely chopped Oreo cookies, do not take the filling out of the Oreos (about 15-20 Oreos)
For the Oreo cream cheese frosting:
- 1 ½ cups unsalted butter, room temperature
- 2 (8 ounce) packages cream cheese, room temperature
- ⅛ teaspoon salt
- 1 teaspoon vanilla extract (or vanilla bean paste)
- 7 cups confectioners sugar
- 1 teaspooon milk, only if needed
- ⅔ cup crushed Oreo cookies
Instructions
For the cake:
- Preheat the oven to 325 degrees F.
- Grease and flour two, 8-inch round cake pans and set aside.
- Make sure to set the cold ingredients out, so they can come closer to room temperature before making the batter. This will keep the batter from clumping up and will help it mix better.
- In a medium-sized bowl, combine the flour, baking soda, baking powder, cocoa powder and salt. Whisk well and set aside.
- In another bowl, add the buttermilk, sour cream, vinegar, vanilla, oil and gel food coloring. Whisk well and set aside.
- In a large mixing bowl, add the room-temperature butter and the sugar and mix with an electric mixer on medium-high speed for several minutes until light and fluffy.
- Add the eggs one at a time, and mix on medium speed for just 20 seconds after adding each egg.
- Scrape down the sides and bottom of the bowl and mix again on medium, only until everything is well incorporated.
- Alternately add in the dry mixture and the liquid mixture to the butter mixture, starting and ending with the dry mixture.(Add in ⅓ of the dry mixture and mix on medium just until combined. Add in ½ the liquid mixture, mixing on medium only until combined. Add in another ⅓ of the dry mixture, mixing on medium only until combined. Add in the last of the liquid mixture, mixing on medium only until combined, then the last of the dry mixture and mixing on medium until combined.)Be very careful only to mix until just combined. Mixing too long and at too high of a speed can cause the cake to come out dense, rubbery or to fall in the middle.
- Scrape down the sides of the bowl and mix again only for 7-10 seconds or so. The cake batter should be thick and fluffy at this point.
- Add the coarsely chopped Oreos and mix in by hand only until well combined.
- Pour the batter into the two prepared, 8-inch round cake pans, smooth the batter evenly and bake at 325 degrees F on the middle rack for approximately 50-60 minutes. Ovens vary, so start checking at about 45 minutes.
- The cake layers are fully baked when a toothpick inserted into the center of each layer comes out with a few moist crumbs on it or clean, but no raw batter. The sides of the cake layers will also slightly pull away from the pans.
- Remove the cake layers from the oven and place them on a wire rack, still inside the pans, for about 15 minutes. The cake layers may flatten out a bit as they cool.
- After 15 minutes turn the cake layers out of the pans and set them onto the cooling racks and allow them to cool completely before adding filling and frosting.
- Once cooled, add one layer on a cake plate and add Oreo cream cheese frosting. Add the second layer of cake and cover the entire cake with the Oreo cream cheese frosting.
- Feel free to use vanilla buttercream with added crushed Oreos if you don't like cream cheese frosting.
- See the notes section for best ways to store this, serve it and for more questions.
For the Oreo cream cheese frosting:
- (This recipe makes plenty of frosting to fill this layer cake, cover it and to add piped borders. If you do not like want that much frosting, feel free to make only half the frosting recipe. Half the frosting will give you a light amount of frosting for the outside and the filling.)
- In a large mixing bowl, add the butter and mix well with an electric mixer on medium-high speed until smooth.
- Add the cream cheese and mix well on medium-high speed until smooth.
- Add the salt, vanilla and three cups of confectioners sugar. Mix on medium-high until smooth.
- Add in the last four cups of confectioners sugar and mix well on medium-high until smooth.
- Add the crushed Oreos and mix well on medium-high.
- Check the consistency. If the frosting is too thick, add a teaspoon of cream or milk, mix well and test again.
- Note that this frosting is a creamier and softer frosting than regular buttercream because it's made with cream cheese. To decorate the cake, this might need to be chilled for about 15 minutes,, so that it firms up a little, but not too much.
- See the notes section for best ways to store this cake, serve it and for more questions.
Notes
You can also pop a slice in the microwave to warm up a bit, but not too long as it’ll melt the cream cheese frosting quickly. For other questions: Make sure to check out the TIPS & FAQs section below this recipe card, which should answer other questions you may have about ingredients, substitutions, other pan sizes, etc. Nutritional values are an estimate. *This recipe card may contain affiliate links. As an Amazon Associate, I earn from qualifying purchases.
Nutrition
How to Share
I’d love for you to share this recipe link or tag it, but please do not share screenshots or copy/paste the recipe to social media as the content and photographs are copyright protected and we (bloggers) work really hard on our content. Sharing the link, tagging us on socials and pinning it is super appreciated though!
Video:
coming soon!
Tips & FAQS:
Make sure not to pack the flour down into the measuring cup when you’re measuring. Spoon the flour into the cup and level it off, but don’t scoop the flour with the measuring cup as that can end up adding too much flour to the batter and will make the cake dry and/or dense.
It’s really best if you can use real buttermilk as it makes for a softer texture and really helps give the cake flavor. If you can’t get it, you can substitute with this sour milk recipe:
For every one cup of buttermilk called for, fill a measuring cup with 1 cup regular milk, take out 1 tablespoon and replace it with 1 tablespoon lemon juice or white vinegar and stir well. Let sit for five minutes, then it’s ready to use.
This will not work exactly the same as buttermilk, but can work in a pinch.
Sour cream is best in this recipe as it helps make a very moist cake and gives a little flavor. If you don’t have access to it, you can use plain yogurt, but use the full-fat yogurt instead of the low fat or fat free type.
It’s really best if you can include it as it subtly enhances both the flavor and texture of the cake. It will not make the cake taste like vinegar. You’ll never know it’s in there. It just enhances things. If you don’t have it though, you can omit it.
Try to use the gel food coloring as it’s more concentrated. If you use the liquid kind you can get at the regular grocery store, it may not add enough color to make the cake red.
I have a few links to gel food coloring that works well in the supplies list below this section.
Yes, you can. However, keep in mind that natural food coloring may result in a lighter red hue.
No, you can omit it. The cake will taste the same, it just won’t be red.
No. You can absolutely omit the Oreos and you’ll have an amazing classic red velvet cake.
Unsalted is best because you can estimate the proper amount of salt for the recipe plus salted butter has more water content in it, however, if you’re unable to get unsalted butter, you can use salted in the cake and the buttercream, but omit the additional salt that each recipe calls for.
The butter needs to be at room-temperature so that it will emulsify (mix) better with the sugar.
In my non-scientific explanation, basically all the molecules need to really get in there and intermingle.
The other ingredients are best used at the same temperature as adding cold milk and eggs to the warmer butter and sugar mixture, can sometimes make the butter cold again and cause it to clump up.
It’s not the end of the world if this happens, but it’s better if you can prevent it.
Be very careful not to mix the batter too long. Scratch cakes should not be mixed for minutes at a time, or they will become dense. Stop mixing once the ingredients are well incorporated.
Oh yes, absolutely. A hand mixer works just as well as a stand mixer.
Feel free to add a cup or so of mini semi-sweet chocolate chips to really bump up the chocolate flavor.
The cake layers are fully baked when a toothpick inserted into the center of each layer comes out with a few moist crumbs on it or clean, but no raw batter. The sides of the cake layers will also slightly pull away from the pans.
Because this cake has cream cheese frosting, it will need to be stored in an air-tight container or covered well in the refrigerator It can last up to 6 days.
This cake can be served either chilled, at room temperature or slightly warmed, however cakes are generally the best texture when they’re at room temperature. If the cake has been chilled, it can be set out to come closer to room temperature for about 20-30 minutes before serving.
You can also pop a slice in the microwave to warm up a bit, but not too long as it’ll melt the cream cheese frosting quickly.
The cake layers can be made ahead of time and frozen if desired. Let the baked cake layers cool completely, then wrap in plastic wrap and foil and place in the freezer for up to two months.
To thaw, place the wrapped cake layers on the counter at room temperature and let thaw completely, then remove the wrapping. Once defrosted, add frosting.
I have not tested this recipe out as cupcakes, but it should work just fine. Fill 2 cupcake pans (24 cupcakes) with cupcake liners and fill with batter about ⅔ of the way full. Bake at 350 degrees F (instead of 325 degrees F) and start checking for doneness at around 20-25 minutes.
No. You can use whatever frosting recipe you like. Feel free to make it your own. If you just want to add vanilla buttercream, I have a recipe here: Vanilla Bean Buttercream
If you’d rather add chocolate buttercream, I have a recipe here: Double Chocolate Buttercream
No. You can if you like, but it’s not necessary. You can always just add the frosting with an icing spatula or a knife.
Yes, however, if you want to bake this recipe in two, 6-inch pans, you don’t want to use all the batter as it might overflow the pans since you’ll be using smaller pans. Pour the batter about ⅔ of the way up each 6-inch pan and use any leftover batter to make a couple cupcakes. Make sure to start checking for doneness about 15 minutes earlier, since the pans are smaller. It may not be done that early, but that’s when you want to start keeping an eye on it.
If you have three, 6-inch pans, then just divide all the batter between the three 6-inch pans. The layers will be a bit thinner than usual, so you will want to start checking for doneness about 15-20 minutes earlier, just in case.
Yes, however, you will need more batter as this recipe only makes enough batter to fill two, 8-round pans. To get enough batter for the two, 10-inch round pans, just mix up a recipe and a half and then divide between the two 10-inch pans. The cake may need to bake up a bit longer, but just keep an eye on it.
Yes, however, the layers might be a little thinner than if you’d baked the batter in two, 8-inch round pans. Also, start checking the cake for doneness about 10 minutes earlier or so, since the batter won’t be as deep in the pans and will bake quicker.
Probably although I haven’t tried it out. If you do try it, pour the batter into two prepared loaf pans and bake at 325 degrees F and start checking at around 30 minutes or so, although it may need a bit more time.
Probably although I haven’t tried it out. If you do try it, make sure to grease and flour the bundt pan very well so that it doesn’t stick. Bake at 325 degrees F for the same amount of time although it will likely take longer to bake since a bundt pan is deeper. Do not pull it out until the cake is fully baked. The cake will be firmer to the touch and not jiggly and a toothpick inserted into the cake will come out either with a few moist crumbs on it or clean.
Probably although I haven’t tried it out. If you do try it, make sure to grease and flour or spray the pan, then bake at the cake at 325 degrees F and start checking at around 35 minutes or so, although it may take a longer amount of time to bake so keep an eye on it. The cake is done baking when a toothpick inserted into the cake comes out either with a few moist crumbs on it or clean.
This recipe makes a lot of frosting to fill this layer cake, cover it and to add piped borders. If you do not like want that much frosting, feel free to make only half the frosting recipe. Half the frosting will give you a light amount of frosting for the outside and the filling.
You can pipe simple borders, rosettes and swirls with this frosting, however it is a softer frosting as it’s made with cream cheese, so it’s not good for piping flowers or intricate designs.
The red color of this cake makes it beautiful for Christmas and Valentines Day, but it’s also great for a family dessert, birthday parties or any other get-togethers.
Yes, this cake will work for stacking as long as you use proper supports as you would stacking any cake.
Supplies used:
- Mixing bowls
- Measuring cups and spoons
- Electric hand mixer or stand mixer
- Silicone spatulas
- Whisks
- Oven mitts
- Cooling racks
- Cupcake pans
- 8-inch baking pans
- Icing spatula
- Cake decorating turntable
- Vanilla bean paste
- Red gel food coloring-here are some options: Americolor Super Red, Wilton No Taste Red, Chef Master Christmas Red, Satin Ice Deep Red
Amber
I’ve made this twice now. Once regular in 6″ pans (just like the recipe). The second I made it into 24 cupcakes with gluten free flour (Jules gf flour to be specific and altered the oven temp and time like she suggested in the Q &A section) and had enough left over to make a small cake in a loaf pan. Both times it came out PERFECT and better than you get in restaurants. My husband even said it was the best red velvet cake he’d ever had ( and we had that for our wedding cake). This is a moist, decadent and chocolatey dream of a recipe. If you’re on the fence to try it, Just Do It. You will not be disappointed if you follow all of the tips she gives. Kara, thank you for sharing this recipe with the world. Your love and hard work showes thru your recipes. I have several that are staples in my kitchen.
Kara
Oh wow, what a great review! I’m so glad to hear that this works well with GF flour as well. And you’re so welcome for the cake recipes…I’m just so glad you found a few that are staples for you. Thanks again for the wonderful review!
Danielle
Hi. Can you use cake flour instead of regular flour? I know this may seem like a stupid question, but I’ve seen recipes that states only to use regular flour.
Kara
Hi Danielle, this is NOT a stupid question at all. You can use cake flour if that’s what you prefer. I personally prefer all-purpose flour, because for some reason that I’m entirely sure of, my cakes using all-purpose flour seem to turn out more moist. It should work out fine using cake flour though. You’ll just need to adjust the amount. You’ll want to add an extra 2 tablespoons of cake flour per cup of flour called for in the recipe.