
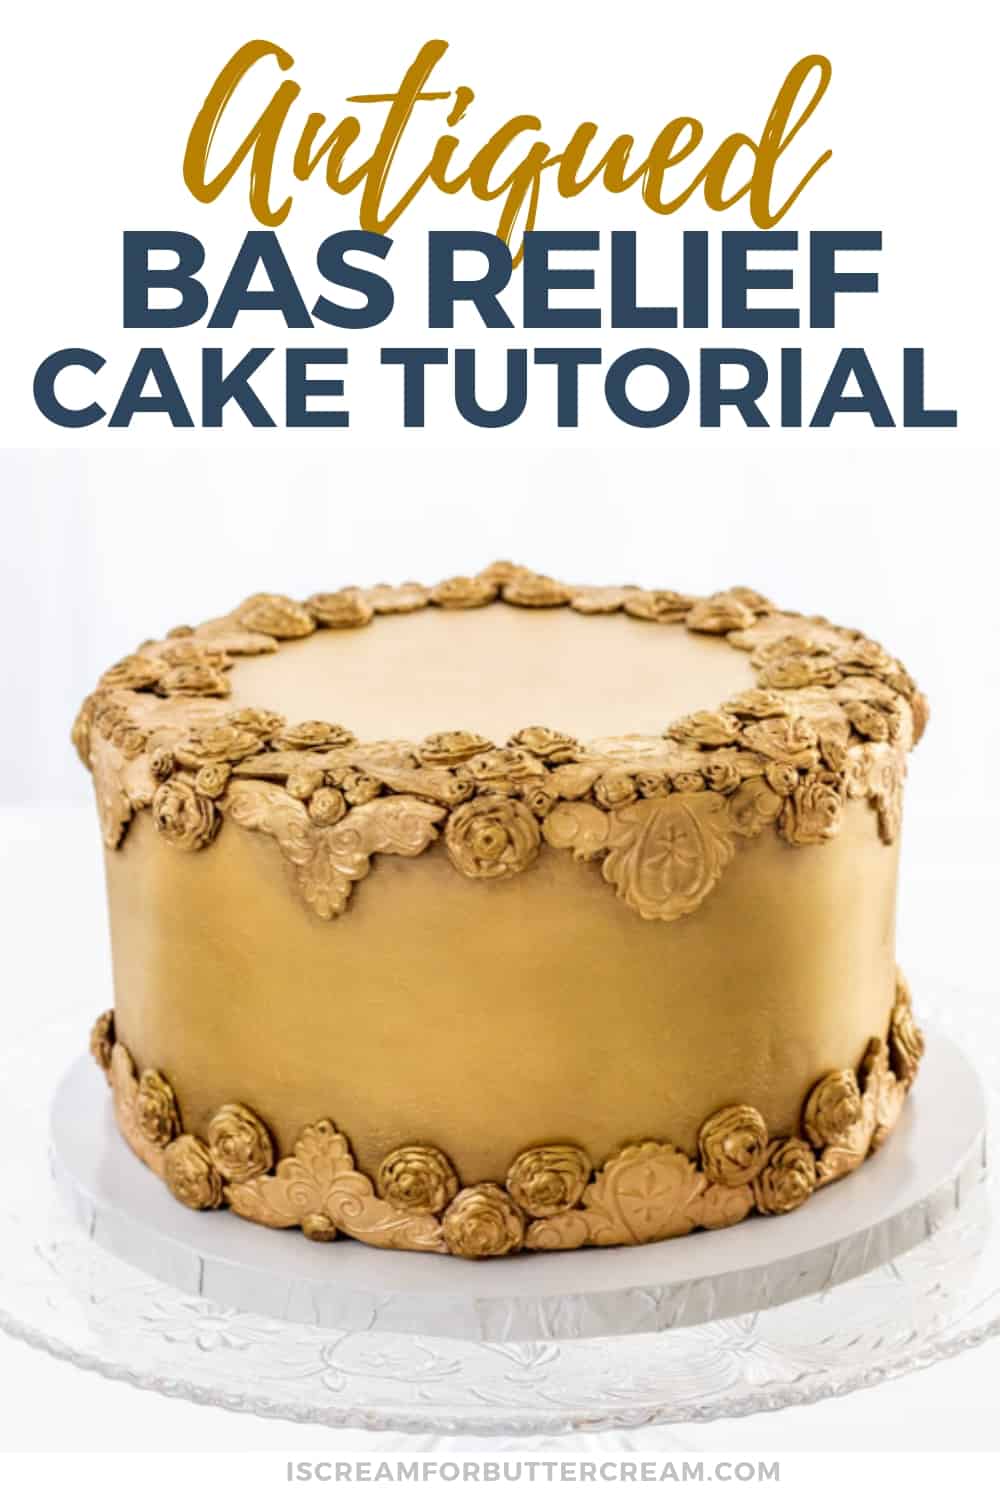
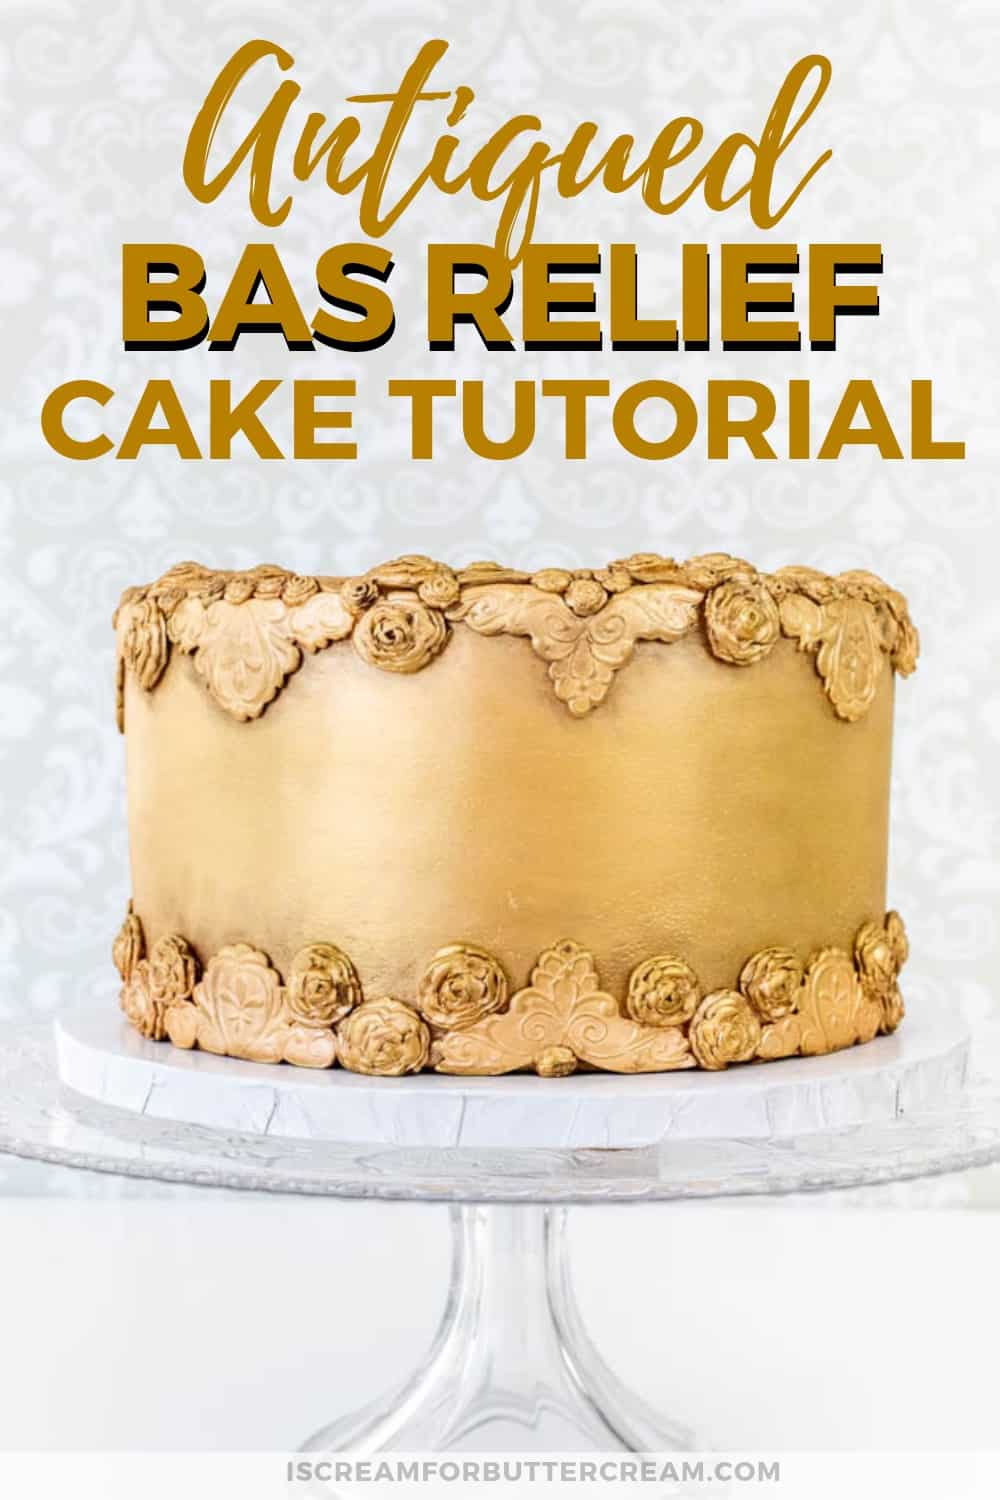
Have you seen those gorgeous bas relief cakes on Pinterest or any of the cake decorating sites? I LOVE them. You can do so many different things with this technique. You can change up the shapes of the fondant you’re adding, or the colors.
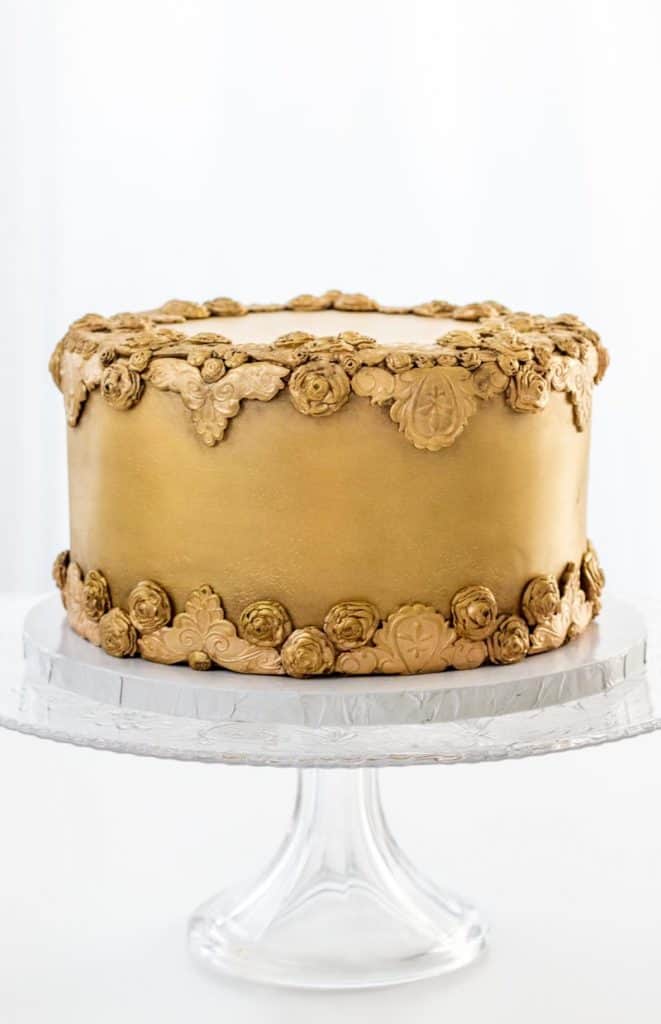
You can make it super light and feminine, or you can give it a sort of vintage, patina look to it. For this one, I decided I wanted to try an antiqued bas relief cake style.
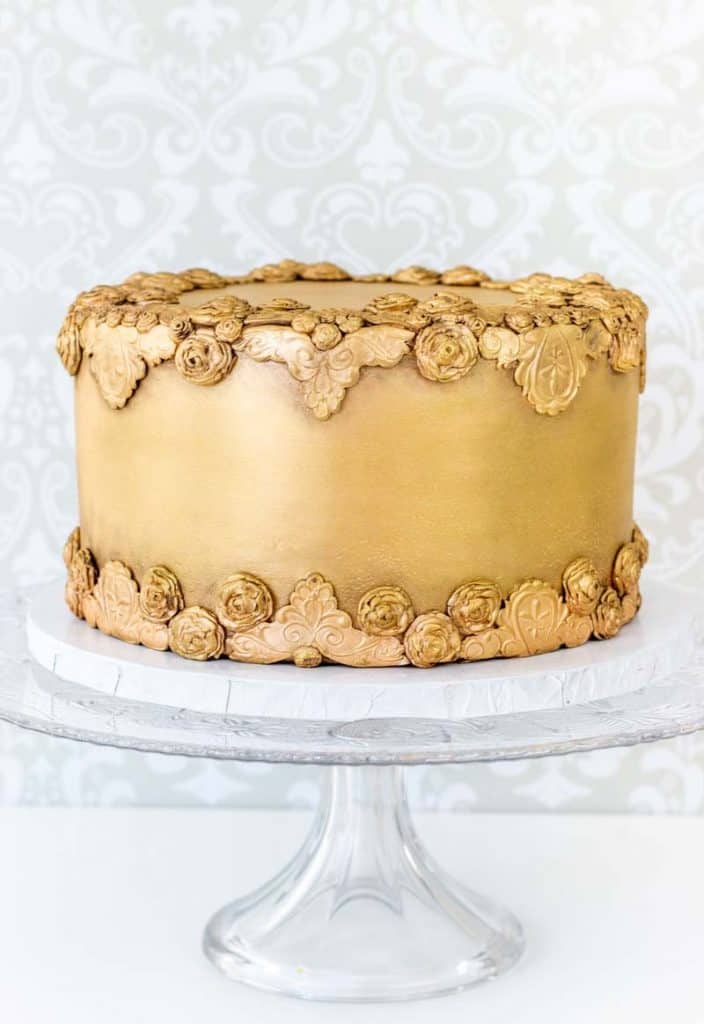
It looks kind of queenly, right? What I mean is I think it just looks vintage and fancy…like it’s fit for a queen.
So let’s talk about what this bas relief thing is anyway. Get ready, cuz I’m about to break out the dictionary.
Ok, so Webster’s says this is the definition: Sculptural relief in which the projection from the surrounding surface is slight and no part of the modeled form is undercut. Uh okay…that doesn’t really help much, I know. Basically it’s a form of sculpture where shapes are cut from the stone, but not cut deeply.
To get some examples, you’ll have to google. People are so talented and there are some amazing artists out there. Also, I think maybe the queen of bas relief cakes might be Maggie Austin. If you ever get time, just google her cakes…absolutely beautiful.
So I wanted to do my own version, but I didn’t want to go all crazy on you and do a huge three tiered cake project. Of course you can always do this as a huge cake…just do it for however many tiers you want, but in this tutorial I just wanted to show you my method.
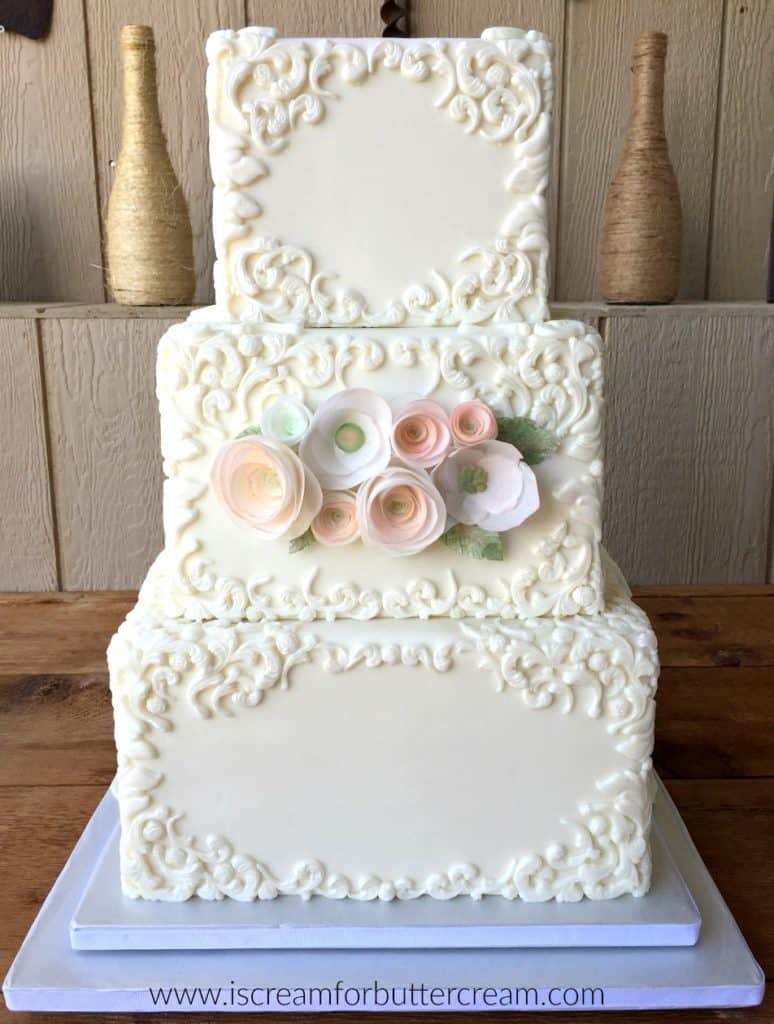
I’ve done this type of cake before for a wedding. That one was a bit different, as it was a square cake and had different scrolls on it, but I used the same method.
In this tutorial, we won’t actually be carving out anything. We’ll be adding molded fondant onto the cake to get the ‘look’ of bas relief. It’s such an elegant look and you really don’t have to be exact…feel free to change up your fondant shapes to fit your needs.
One quick thing to note, when you’re molding all your fondant pieces, you don’t want them to dry out on you. You can make them as you go (while adding them to the cake), but if you really need to make them ahead of time, but want them to stay pliable, I’ve got a post that will show you how I did that for the cake above. You can see that post here: How to Keep Fondant Decor Soft & Pliable.
I’ve added a bunch of screen shots with detailed steps below, but you can also catch the video close to the end of the post.
Alright, let’s get to the supplies need.
As an Amazon Associate, I earn from qualifying purchases.
Supplies for the Antiqued Bas Relief Cake:
- Fondant
- Baked cake (I like to use three layers of cake)
- Scroll molds (I’m calling these scrolls because I don’t know what else to call them) – Here are some options: Scroll molds similar to the ones I used, scroll mold option 2
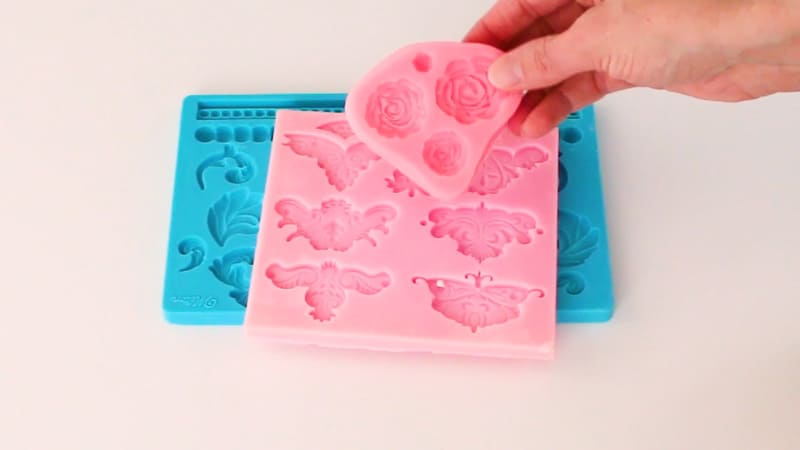
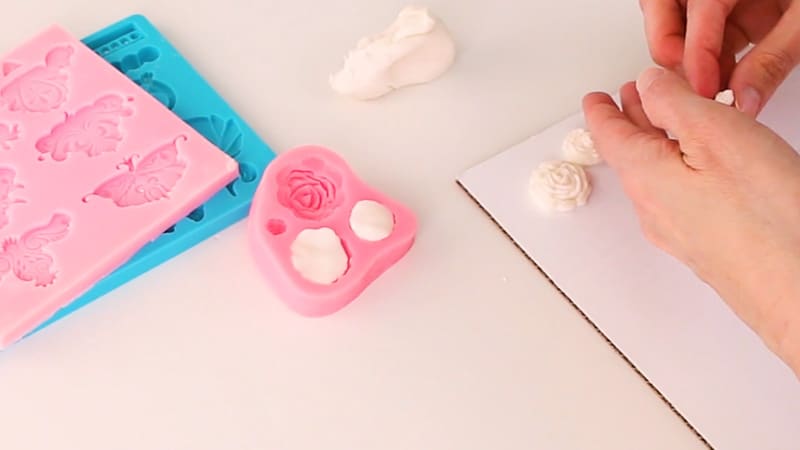
- Rose mold
- Pallet knife
- Cornstarch and a cornstarch shaker
- Small, medium and large brushes used only for caking
- Antique Silk Edible Luster Dust
- Lemon Extract (or vodka)
- Dark Gold Edible Luster Dust similar to this one
- Cocoa Powder
- Black Petal Dust
Steps for Making the Antiqued Bas Relief Cake:
The first thing you’ll need to do is cover your cake in fondant. I’ve got a post on all my best tips for doing that if you’d like to check that out here: Tips for Covering a Cake in Fondant
Once you’ve got your cake covered, just set it to the side while you work on your fondant molds.
You can mold a bunch of fondant at once and then add it to your cake, or you can just mold them as you go. That’s up to you. You don’t want to mold the fondant pieces and then let them harden though. You need them pliable in order to add them to the cake.
I used this scroll mold. (I added a couple links to similar ones on Amazon in the supplies section of this post.)
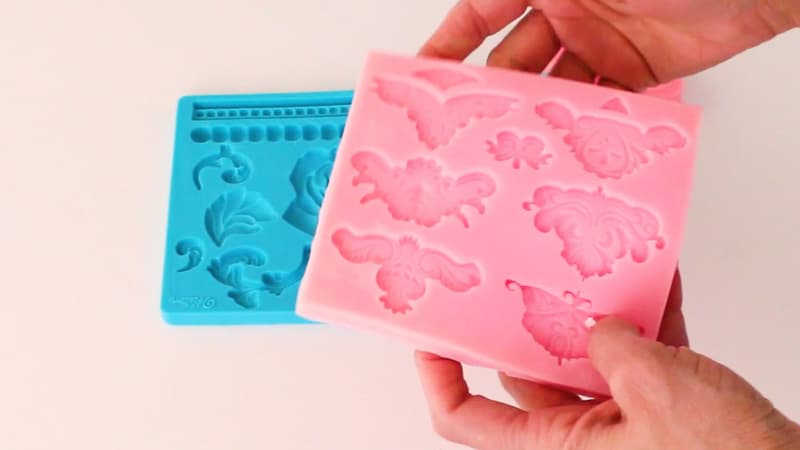
And this is the rose mold I used. (I’ve also added a link to this mold in the supplies section.)
Now, just take your fondant and push into your molds.
The roses are pretty easy to do. I used the tiny rose mold and then the medium sized mold.
Then you’ll want to make some scroll molds. Just push your fondant into the molds. You may need to sprinkle on some cornstarch to keep your fingers from sticking to the fondant.
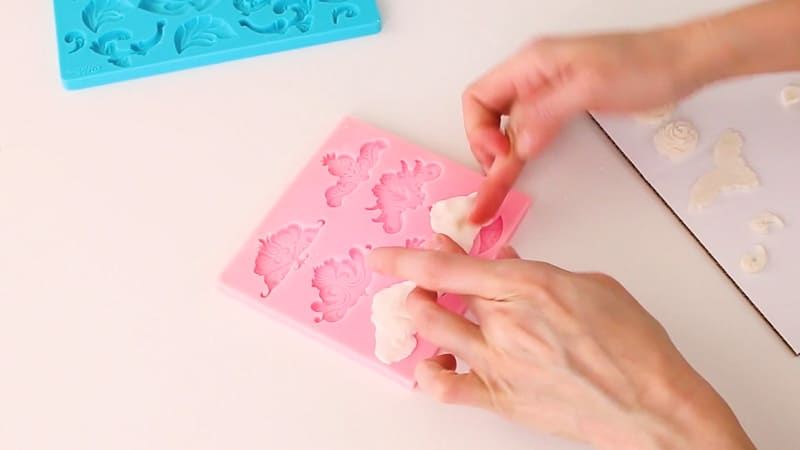
The trick to these is to use your pallet knife and basically ‘saw’ off the fondant to make it level with the mold.

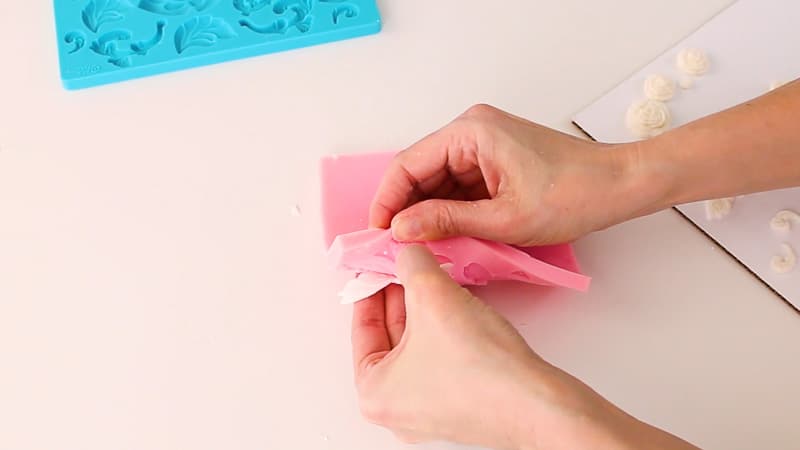
Then you’ll want to just bend your mold and pull out the fondant scrolls (or whatever those shapes are called).
If you have trouble getting the fondant out of the mold, you can pop it in the freezer for just five minutes or so and then they’ll pop on out.
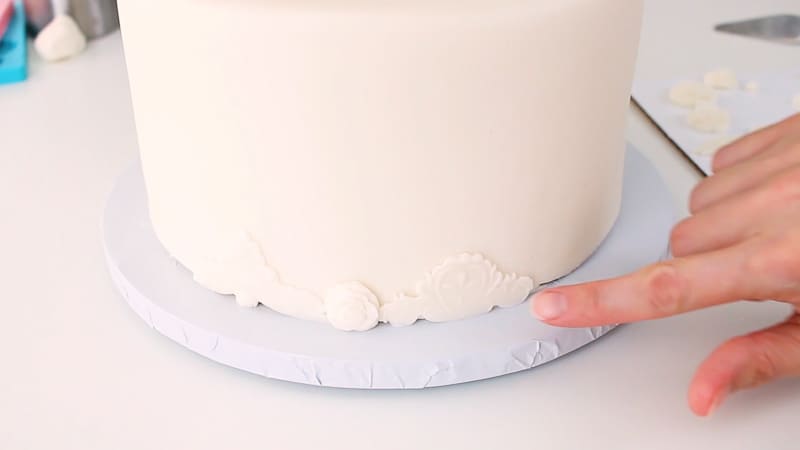
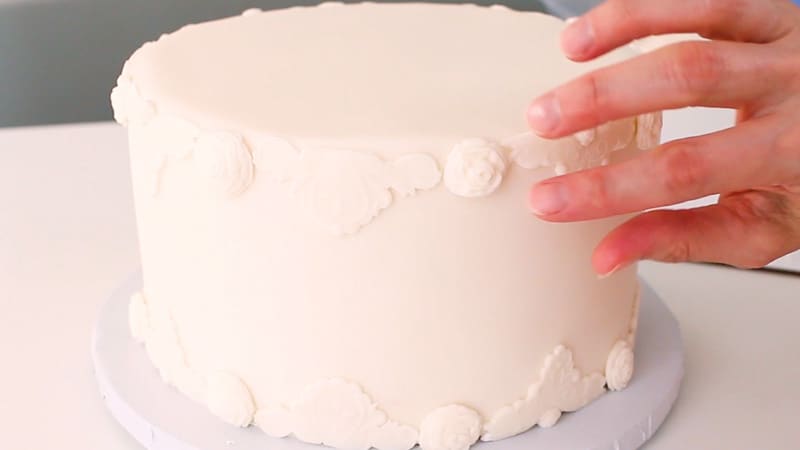
Once you’ve got a few made, you can start adding them to your cake.
Just use a small brush dipped in water. You don’t need a lot of water.

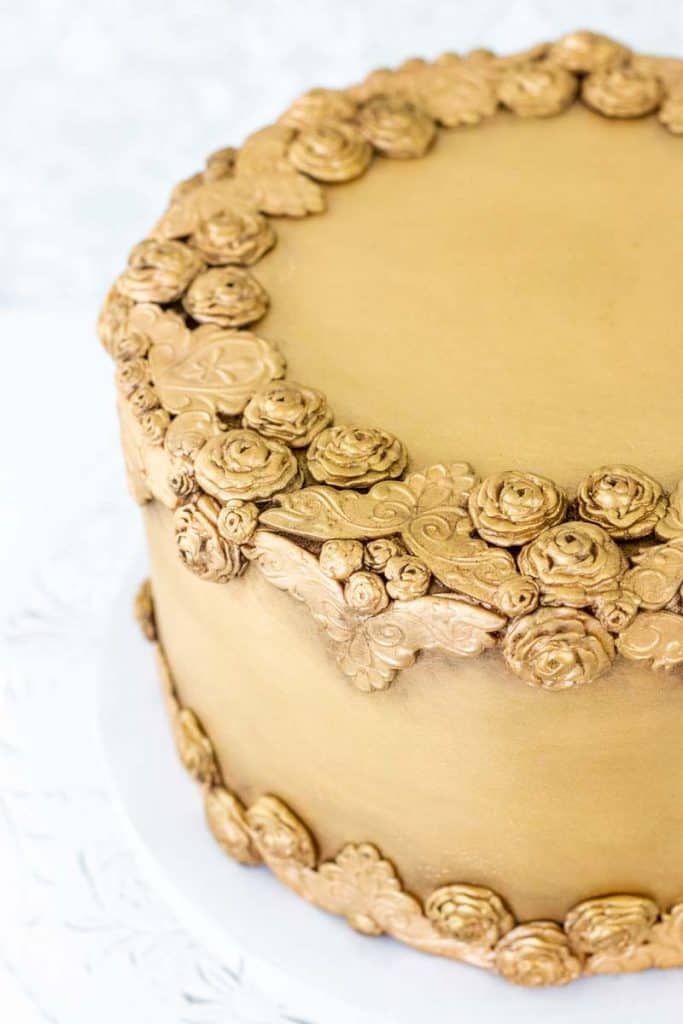
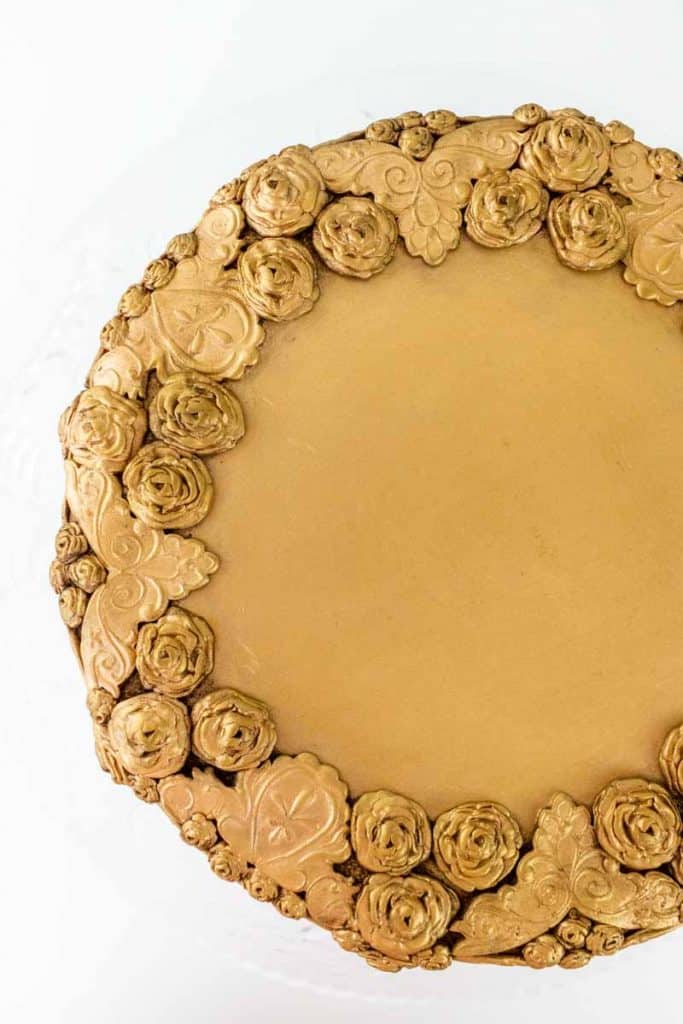
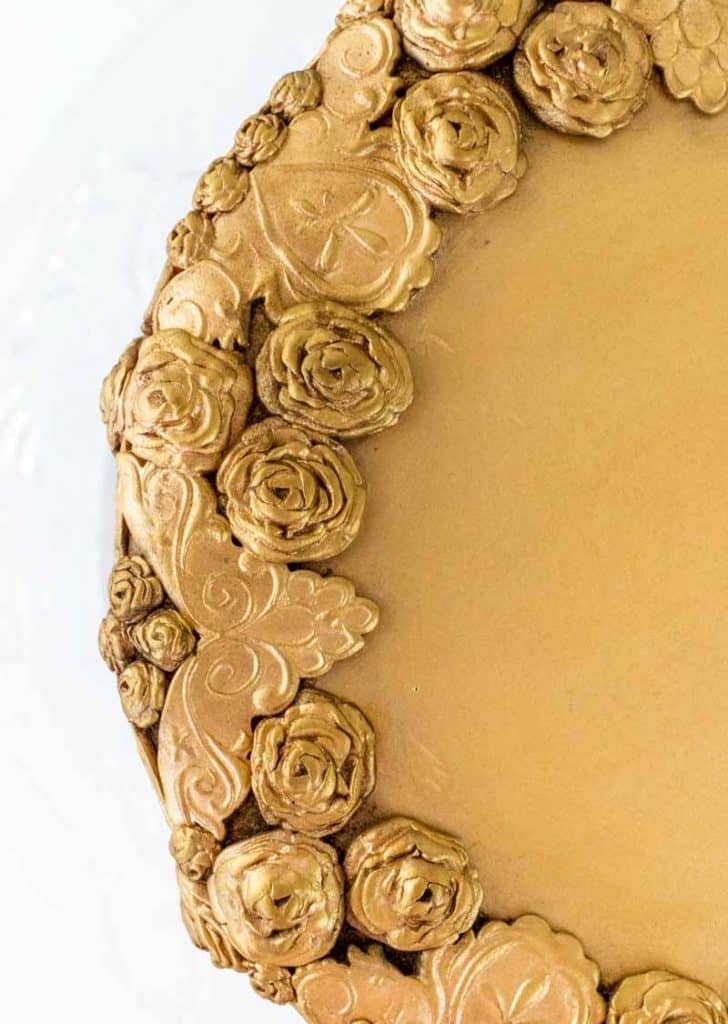
Just attach the scrolls to your cake. I alternated mine and added a medium size rose between each.
Do this around the entire bottom edge of the cake.
Now you’ll want to attach the scrolls and roses to the top, but add them so the scrolls are pointing down…just do the inverse of what you did on the bottom of the cake.
You’ll also want to add the scrolls and medium sized roses around the top of the cake with the scrolls pointing in.
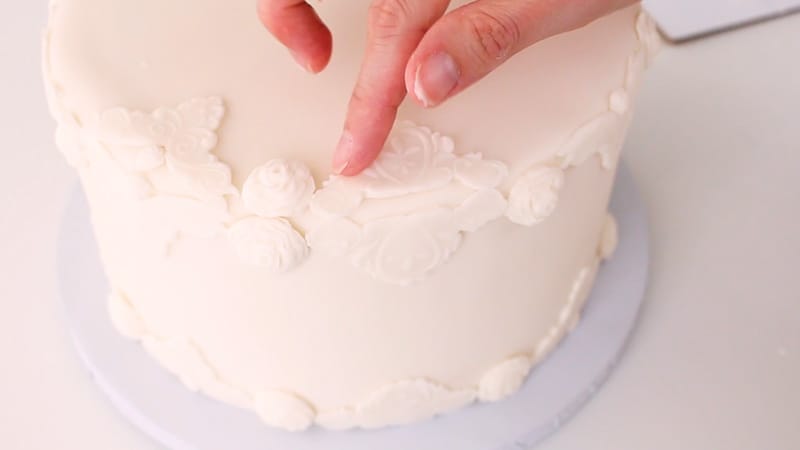
Now you’re going to add in some tiny roses in any of the bare spots.
Next, add in some medium sized roses. You’ll add them around the other medium sized roses you already attached to the cake. Do this for the top and for the bottom.
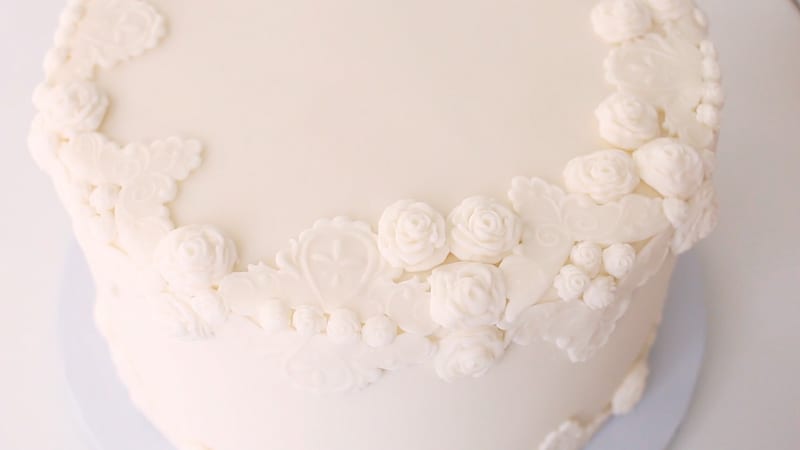

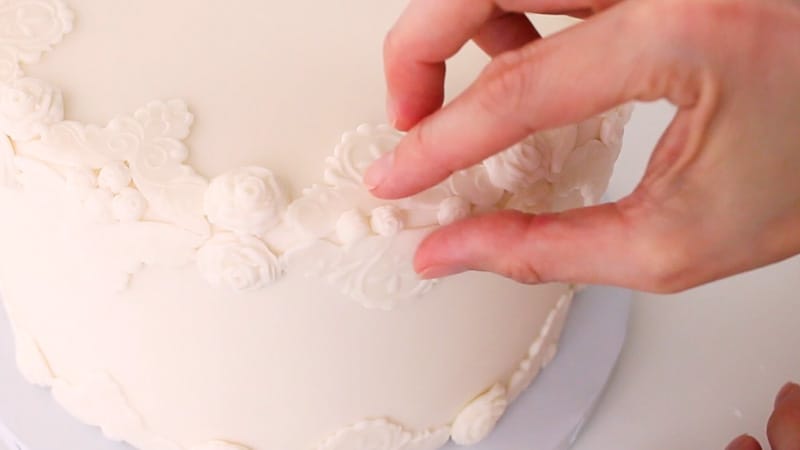
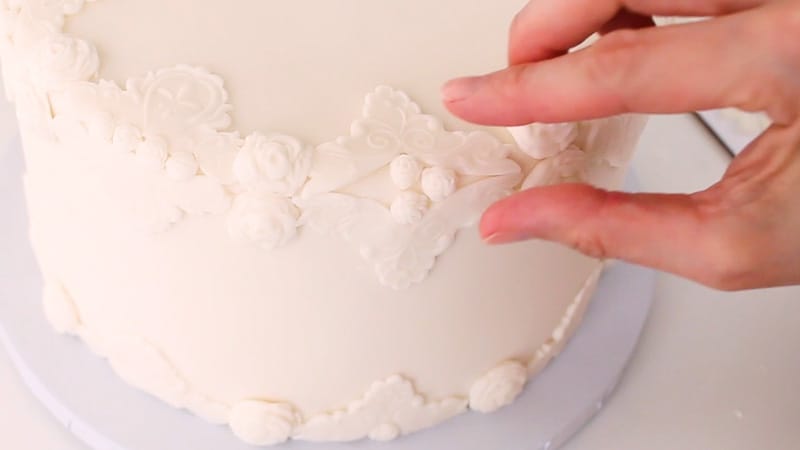
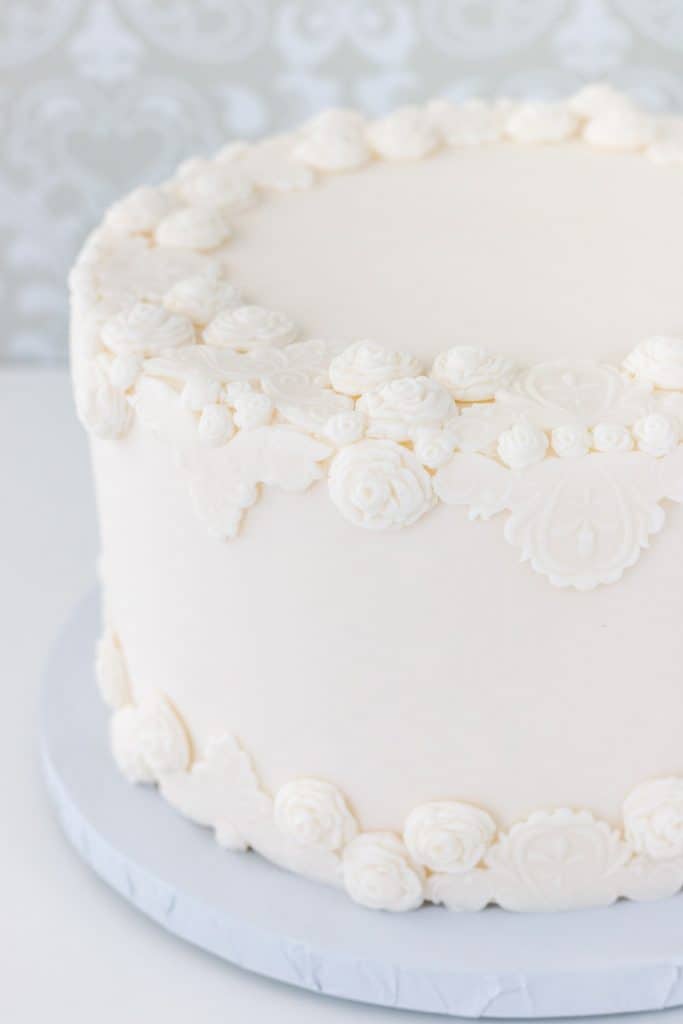
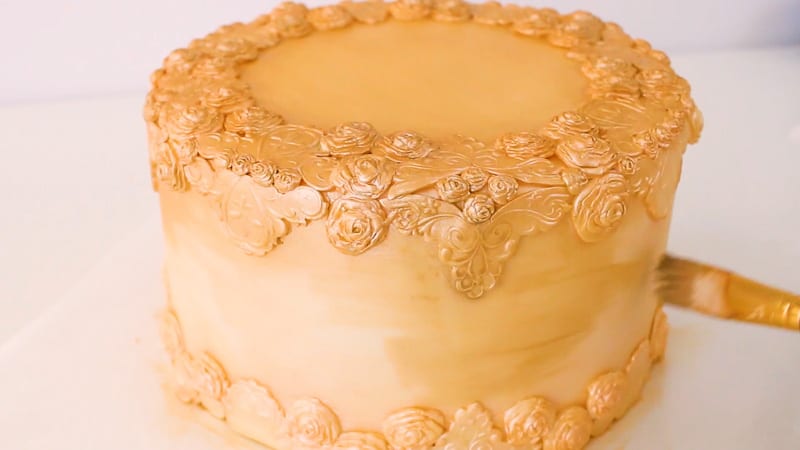
Ok once you’ve got all your fondant pieces on, it should look similar to this:
Now you’ll want to add a bunch of the antique silk luster dust to a bowl, then add in a touch of the dark gold. Add in lemon extract or vodka and mix it well.

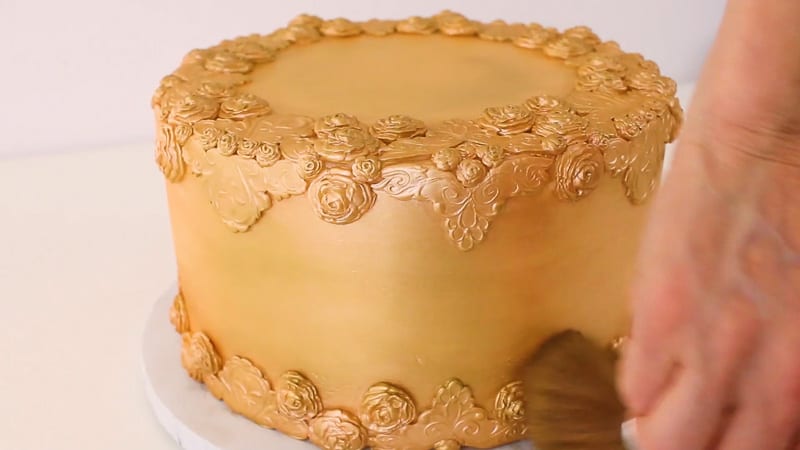
Now you’ll just paint the mixture onto your cake. You may need to add lemon extract periodically to your mixture.
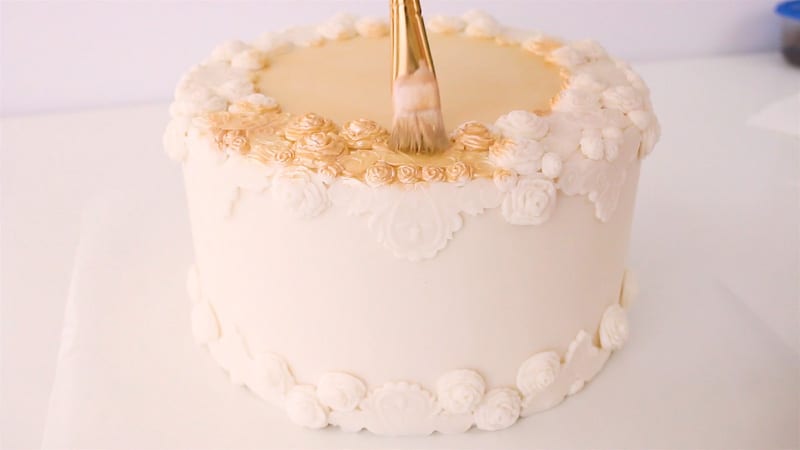
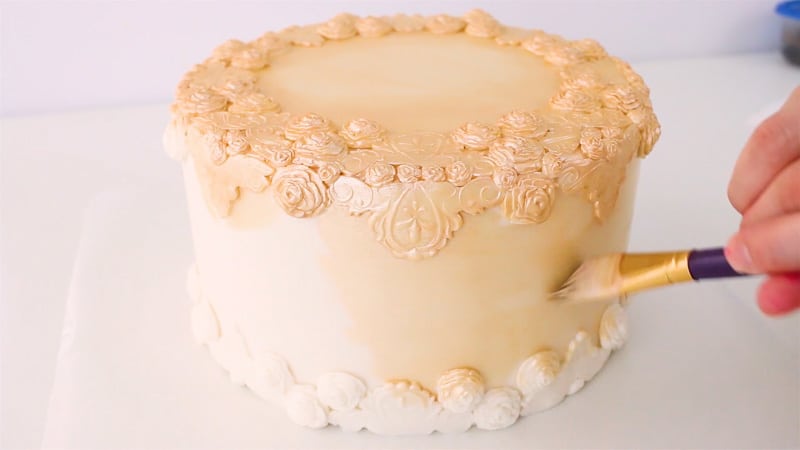
Let it dry (it should only take like 10 minutes) and then paint on another layer. This next layer, you can add a little more gold to it.
Now you want this layer to dry fully, so let it sit there for about 15 minutes.
Now add some gold luster dust to a bowl. You’ll leave this dry because you’ll just buff this all over your cake. This is what will bring out the shine. Take a large brush (I just use a large blush brush) and add it to your cake.
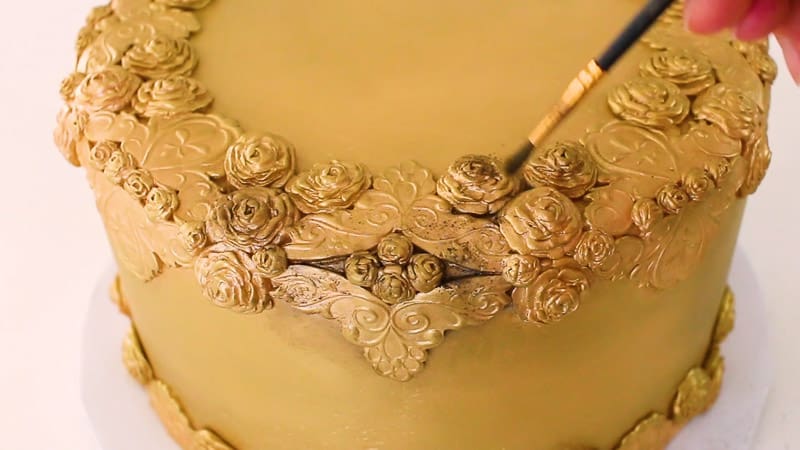
Once you’ve got it all shiny and pretty, now you’ll antique it a bit.
Add some cocoa powder and a bit of black petal dust to a small bowl and mix it up. Don’t add any extract, you’ll add this to the cake dry.

Now use a small brush and brush this mixture into all the cracks and edges of your fondant pieces.
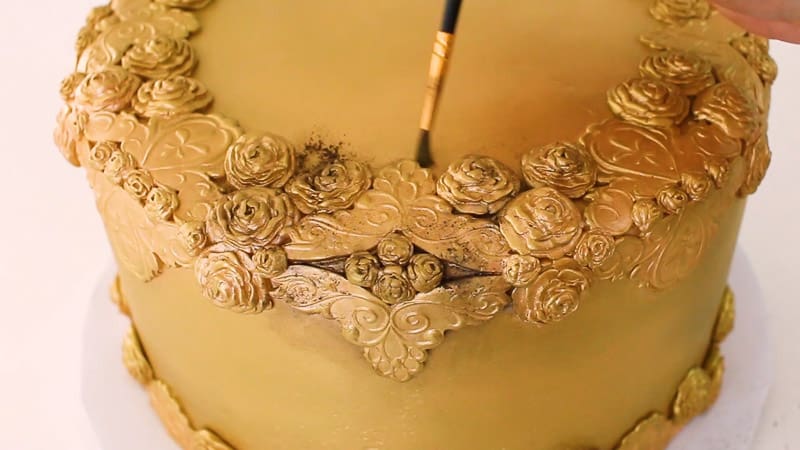
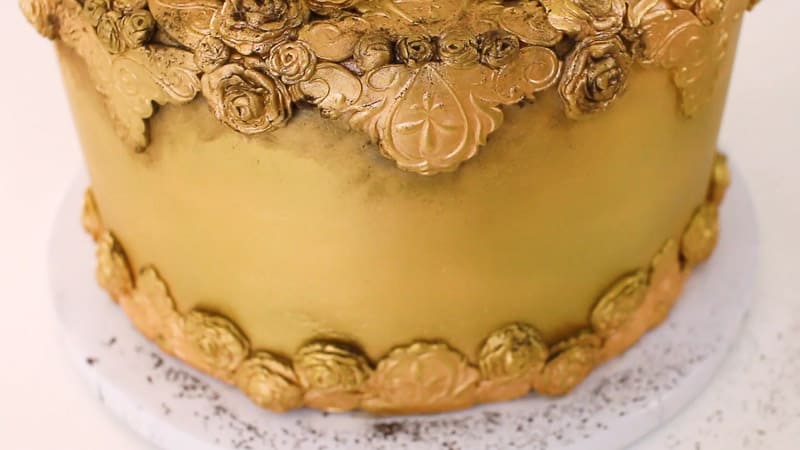
Now just take your large brush, the one you used to buff on the gold, and just brush off all the excess cocoa powder mixture.
You’ll probably have to clean up your cake board with a moist paper towel. Theoretically, it would be better to add your cake to your bottom cake base after you’ve antiqued it.
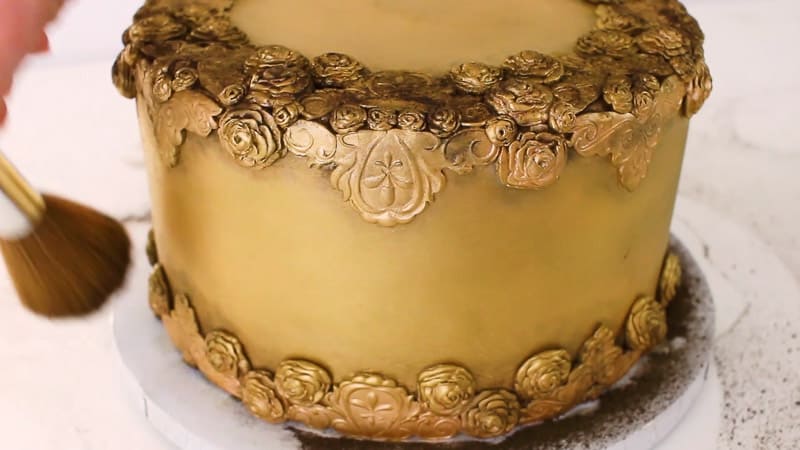
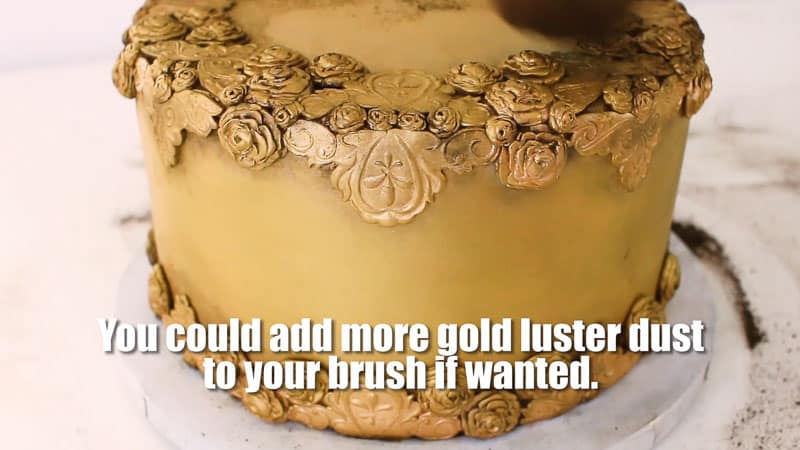
You can add a little more gold dust if you need to as well.
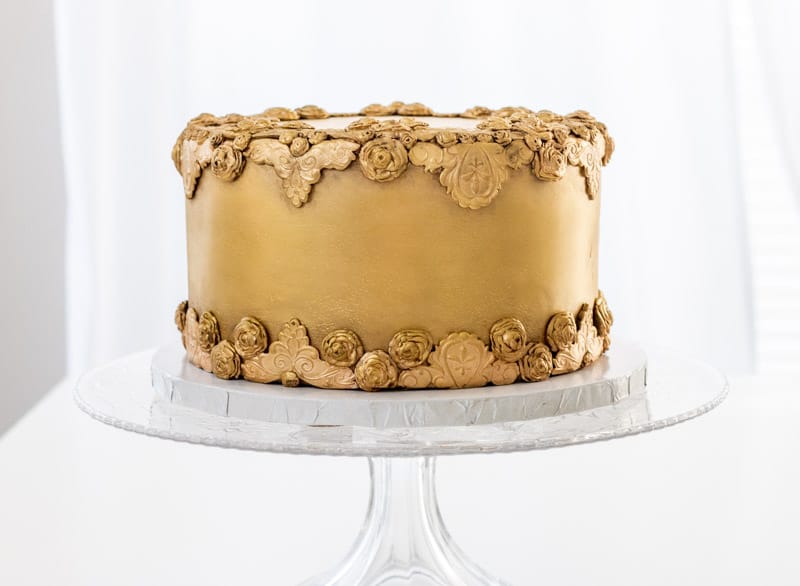
Ok once you’ve got it all buffed out, that’s it! Now you’ve got a beautiful antiqued bas relief cake!
And here’s the video to show how it’s done:
Don’t forget to check out the post on keeping your fondant decor soft and pliable here: How to Keep Fondant Decor Soft & Pliable
I’ve also got a helpful video on Tips for Covering Cakes in Fondant. You can see that here: Tips for Covering Cakes in Fondant
Ok, what did you think? I can think of a hundred different versions of this that I’d like to do. I think doing it in a dark navy blue with some luster dust and a little antiquing to it would be so pretty.
Don’t Forget to Pin it for Later!
Leave a Reply