
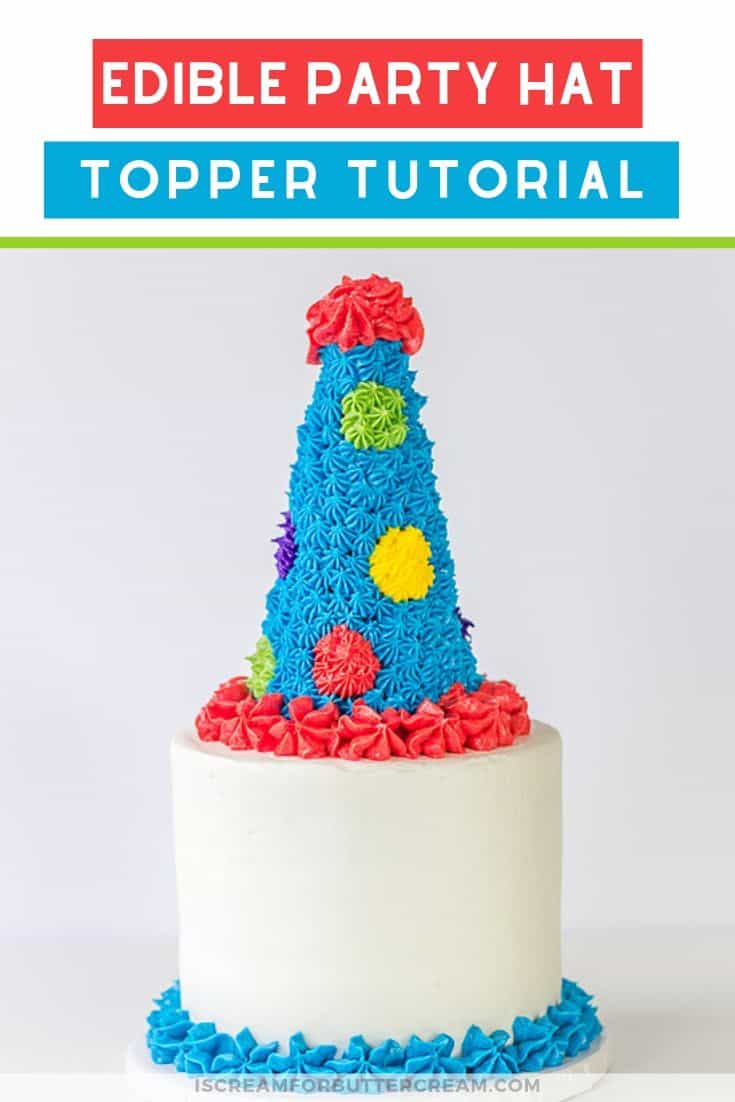
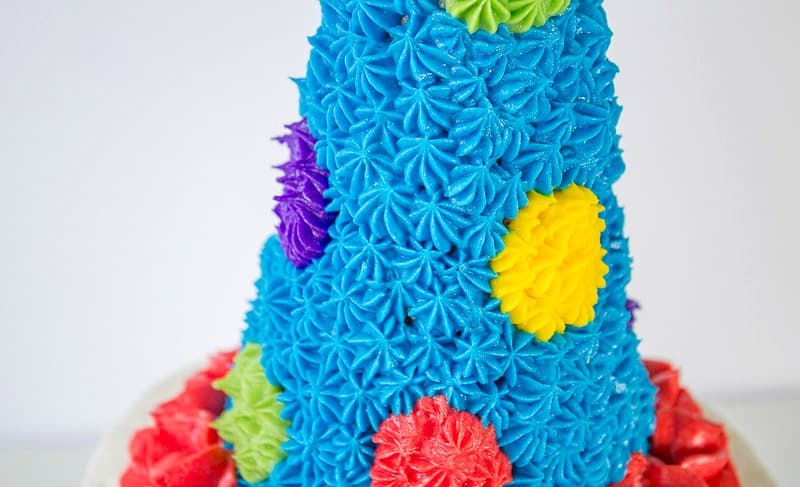
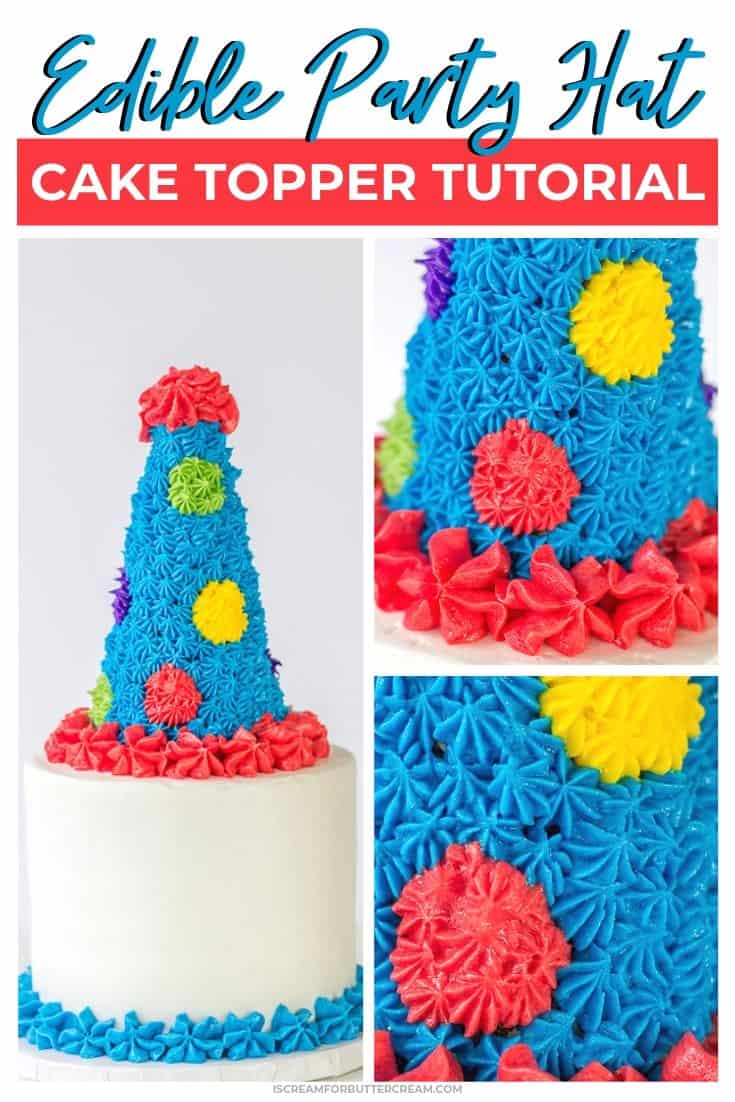
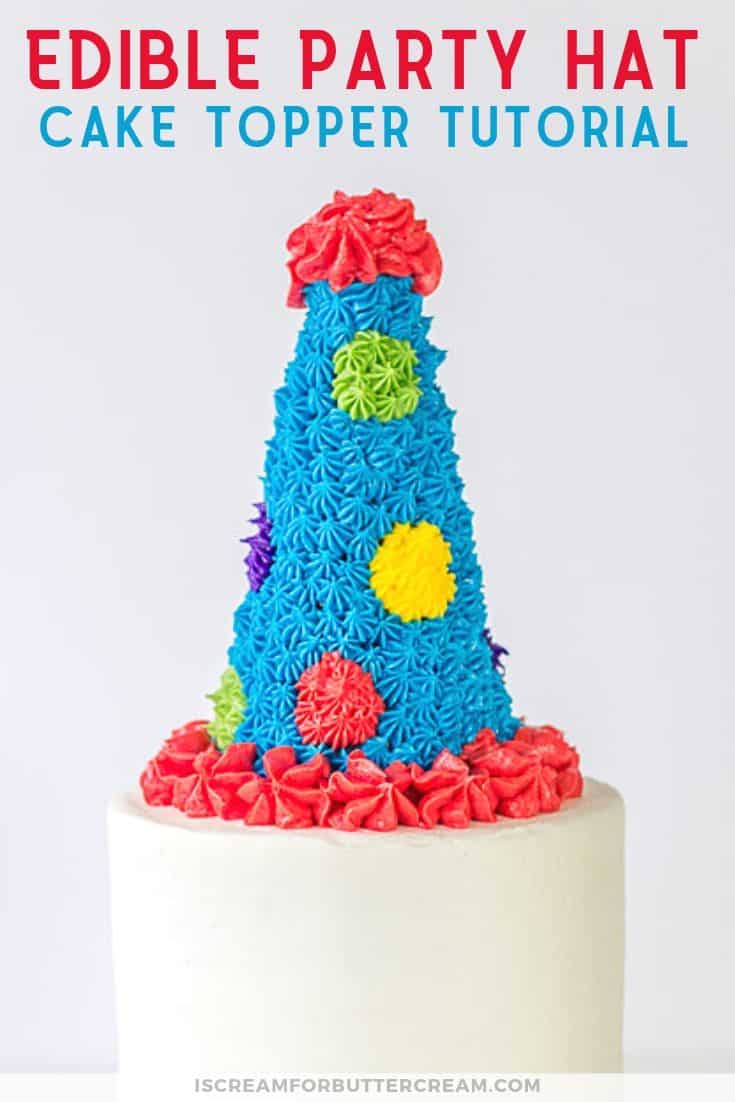
Want a cake that doesn’t involve fondant AND you want a topper on your cake that you can actually eat? This edible party hat cake topper is the answer because it’s actually made from rice krispie treats then covered with piped buttercream.
 Uh, what kid wouldn’t want that on top of their cake?
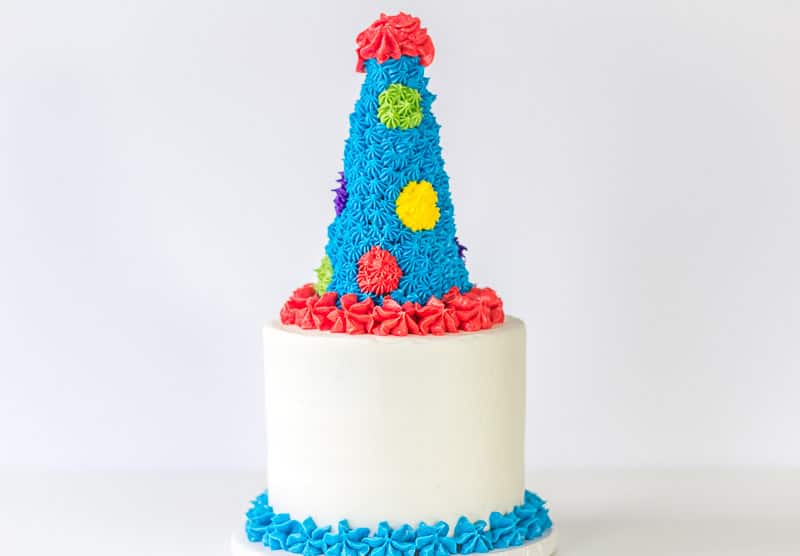
You can do the hat or cake in any color you’d like. I just went for those bright party colors.
This post contains affiliate links. As an Amazon Associate, I earn from qualifying purchases. You can see my policies linked in the website footer.
There’s no real piping skills needed for this. You just need some piping bags and a star tip. It helps to have more than one star tip, so you don’t have to keep changing your bags, or at least have some icing couplers for your piping bags so you can move your icing tip easily to the next bag.
When you’re ready to actually eat the cake, just take a knife, score around and under the hat and pop it off. You can then cut it into slices and everyone will get a piece of rice krispie treat topped with buttercream along with a piece of cake. Yum!
Ok, on to the tutorial.
There’s also a video close to the end of this post.
This post contains affiliate links. As an Amazon Associate, I earn from qualifying purchases. You can see my policies linked in the website footer.
Supplies Needed for the Party Hat Cake Topper:
- Baked and iced cake. I used an 8″ round cake. Use three layers of cake to make it taller. (Cake recipes I love: Vanilla Bean Cake, Easy Chocolate Cake)
- Buttercream tinted in the colors you want (Here’s my buttercream recipe: Vanilla Buttercream)
- Prepared Rice Krispie Treat Mixture plus Wilton Candy Melts (see notes below)
- Long wooden dowel that’s sharpened on one end
- Silicone funnel (to help you form the hat) You could probably use a plastic one as well, but the one above was the perfect size and worked great for me.
- Small round circle cutter and edible marker (if making polka dots on your hat)
- Star tips (I used a Wilton 21) It’s good to have a few of these.
- Wilton 2D tip for the base and top of the hat, plus the border on the bottom of the cake
- Piping bags
Making the Edible Party Hat Cake Topper:
First you want to mix up your rice krispie treat mixture. I just used the original rice krispie treat recipe, but I added one extra thing.
Here’s how I made mine:
- 3 tablespoons of butter
- 4 cups of mini marshamallows
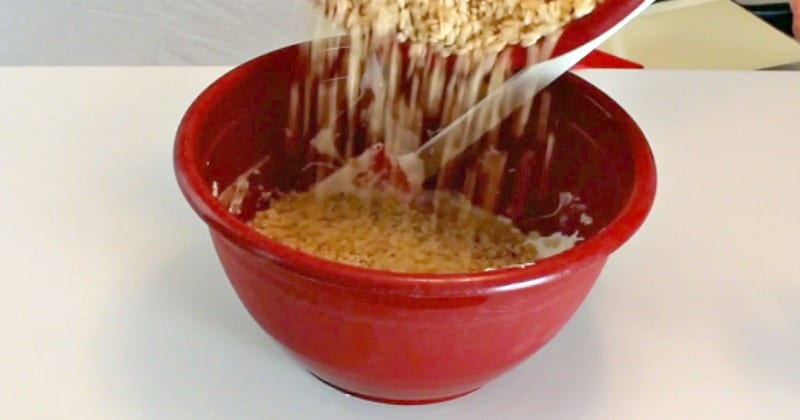
- 6 cups of rice krispies
I melted the butter and marshmallows in the microwave. Do this in intervals because marshmallows can burn quickly. Once it’s melted, you want to add in ¼ to a ½ cup of melted Wilton candy melts. Mix it all up well.
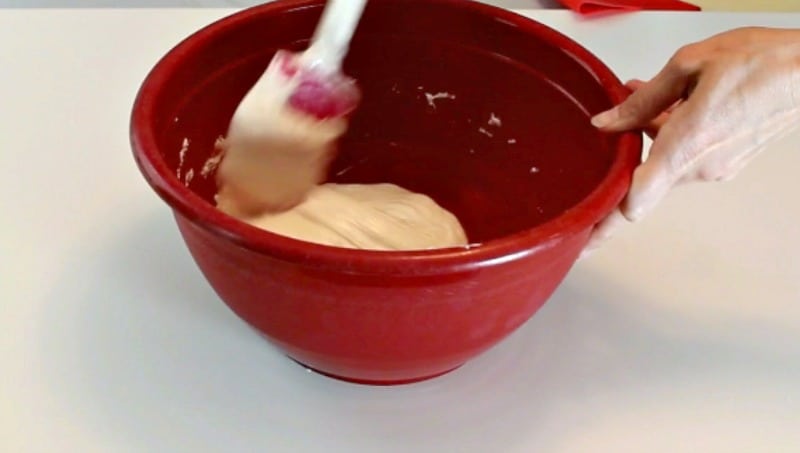
Now, you don’t HAVE to add in the melted candy melts, but it really helps to give it a little more firmness, so the hat will stay together a little easier.
You could also add in a little melted chocolate if you wanted to.
Next I added in the rice krispies. I added half and mixed that in and then added the other half. You’re gonna have to use your hands to mix this because a spoon just isn’t going to cut it.
Go and get a kid, they’ll easily do the mixing for you. Kids love sticky stuff…just actually watch them wash their hands first…they’ll tell you they washed them, but uh no…just no.
By the way, either spray your hands (or the kiddo’s hands) with some non-stick spray or just coat in a bit of shortening. It helps with the stickiness.
Once you’ve got it all mixed up, spray your funnel with some non-stick spray, grab handfuls of the rice krispie treat mixture and push it into your funnel. Pack it in as good as you can get it.
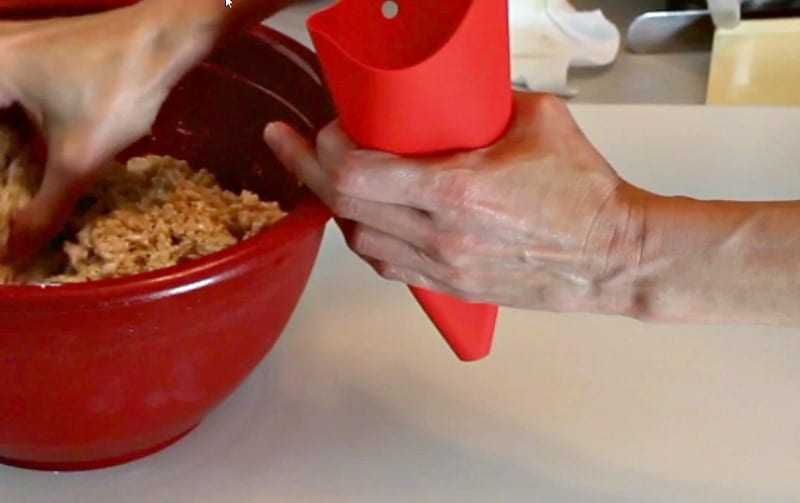
Once you get it packed down in your funnel really well, just make sure the rice krispies at the opening (which will be the bottom of your hat) are somewhat flat.
Just place it on top of some wax paper to set up while you work on your cake.
Putting the cake together:
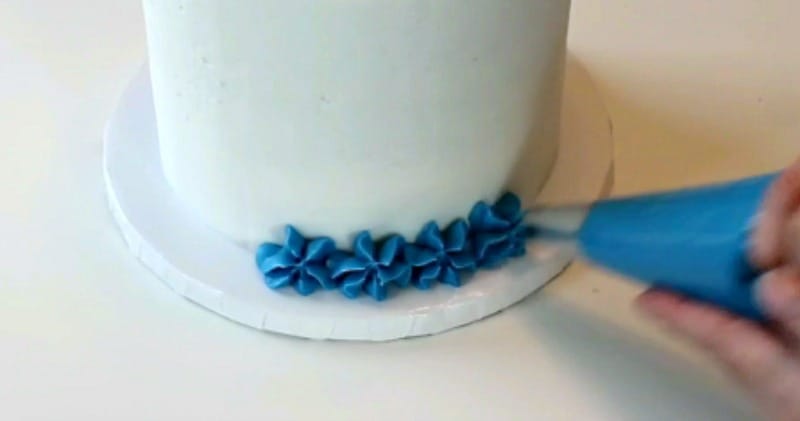
For the cake, I went really simple. I just iced it with white buttercream and used the Wilton 2D tip to pipe some large stars around the base as a border. Simple, right?
Once you feel like your hat is firmed up, it’s time to add it to the cake and decorate it. I just let my hat set up for about 30 minutes or so.
Take your hat out of the funnel. It should just come right out, since you sprayed it with cooking spray.
To add polka dots, I took a small circle cutter (the 1 inch circle cutter) held that against the hat and drew around them with an edible marker. This will give you a guide when piping.
Do you ever do something and after it’s done, you realized you just made something harder than it should have been and then you feel dumb? Ok, this is one of those times. I used the edible marker to draw around the inside of the circle cutter to give myself a guide, but it was a pain working from the inside of the cutter. So….it’s probably much easier if you draw around the outside of the cutter if you can.
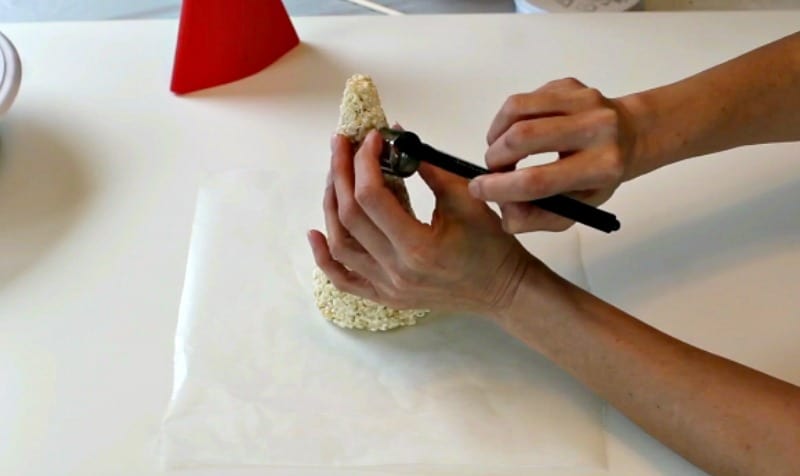
I then just touched up any areas of the circles that I needed touched up. It doesn’t need to be perfect. You’re not going to see this in the finished product.
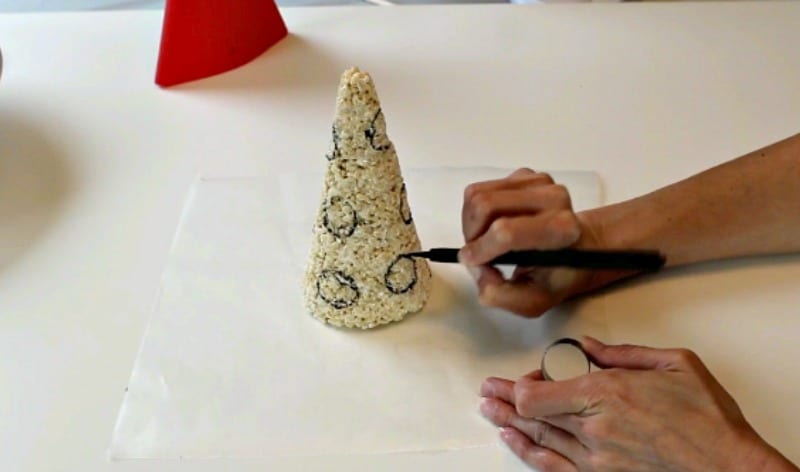
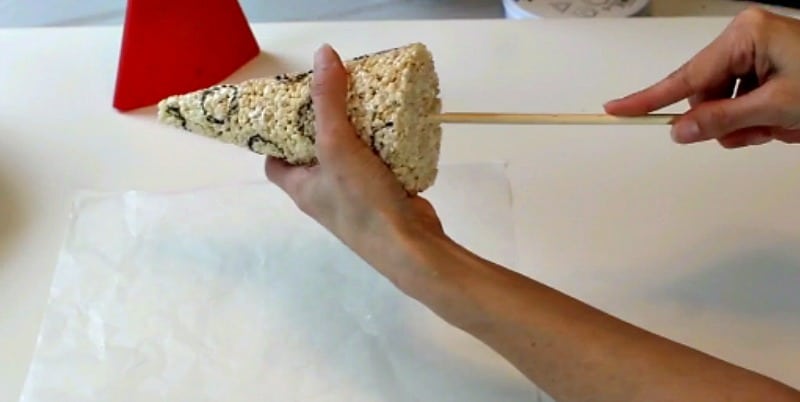
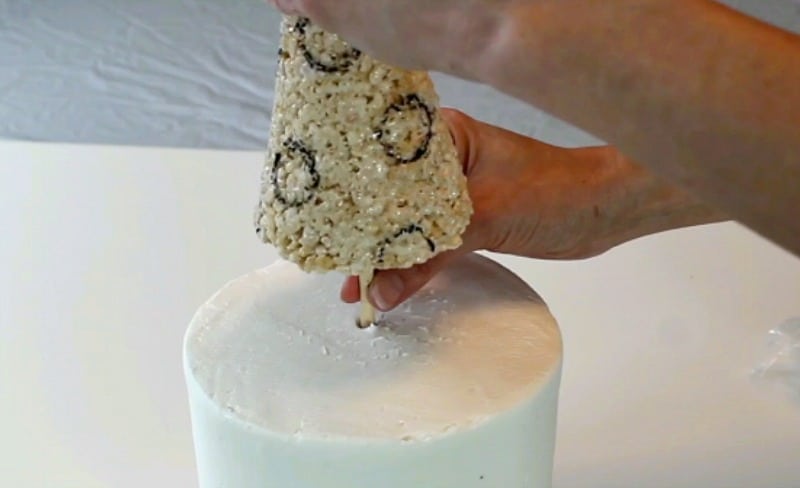
After you’ve added the circle guides where you want them, now take a dowel rod and sharpen one end of it. You’ll want to wash that end off a bit to make sure it’s clean after sharpening it.
Insert the sharp end into the bottom of the hat using a twisting motion.
Now just add it to your cake. If the dowel is too long, take it out, trim it, and then reinsert it. It’s helpful to check the height of your cake before you try to insert it.
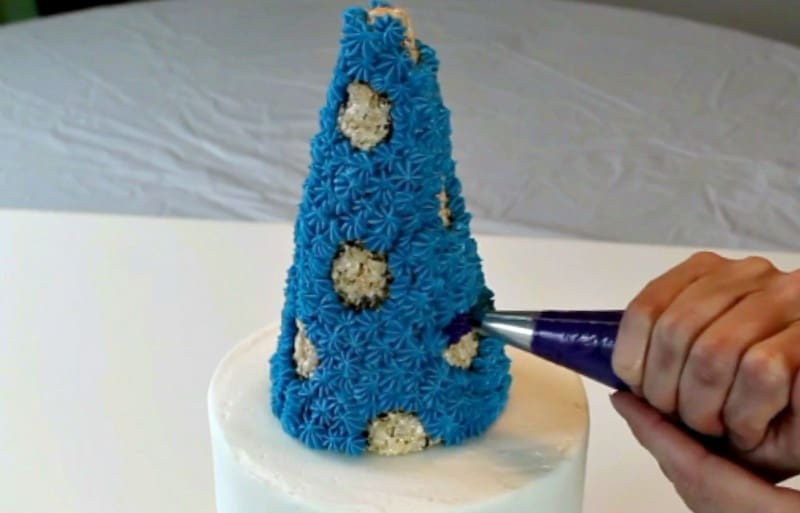
Now it’s time for some buttercream piping.
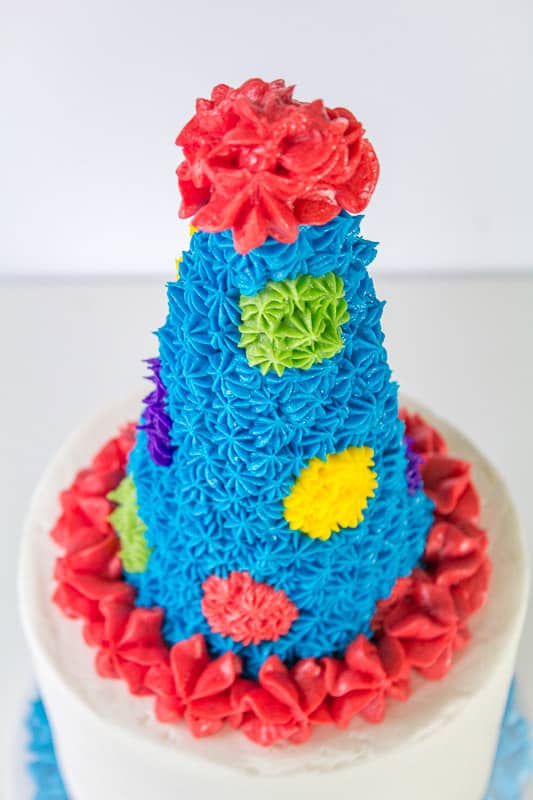
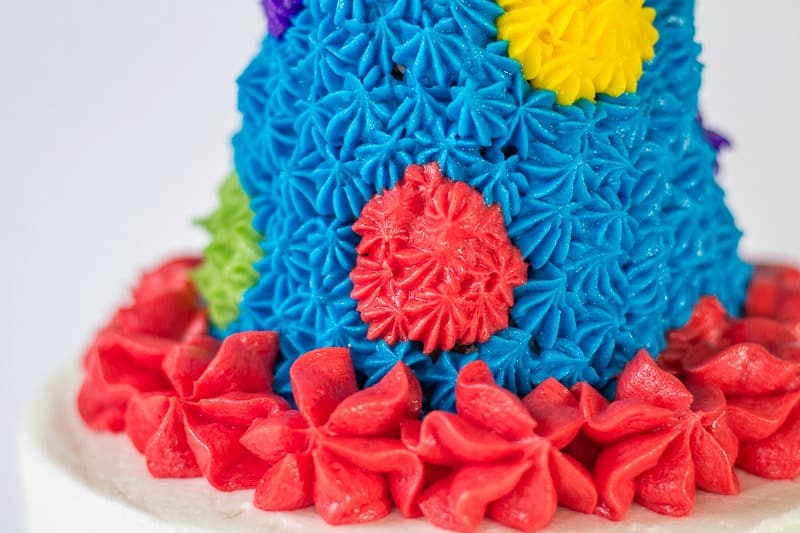
I went with blue for the majority of the hat, but of course you can go with any color you want.
Just use your star tip and and pipe blue all over the hat except for the circles you drew and the very top of the hat. Once you’ve got the blue all piped, go in and pipe inside the polka dots with your other colors.
I went with purple:
Yellow:
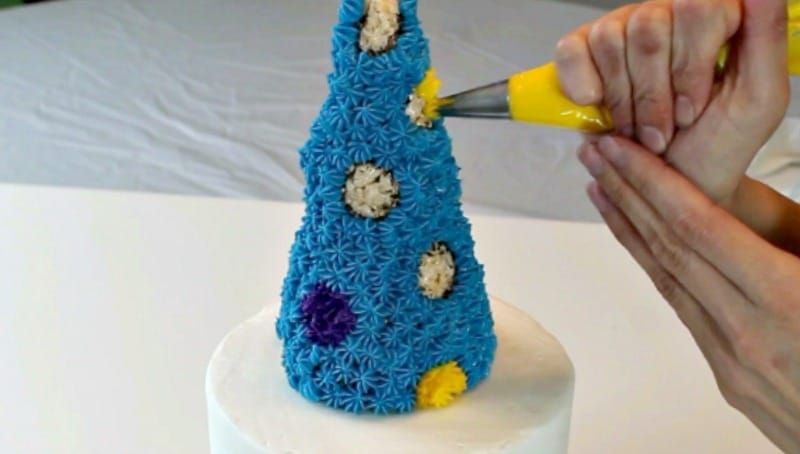
Green:
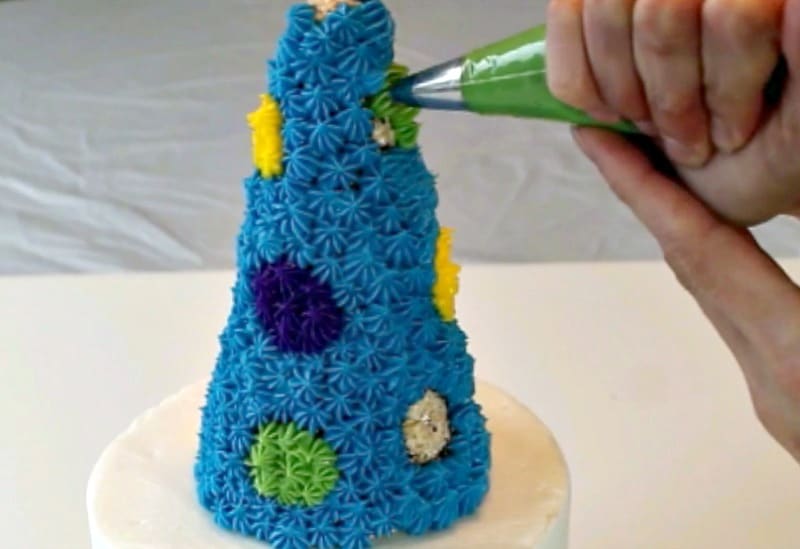
And Red:
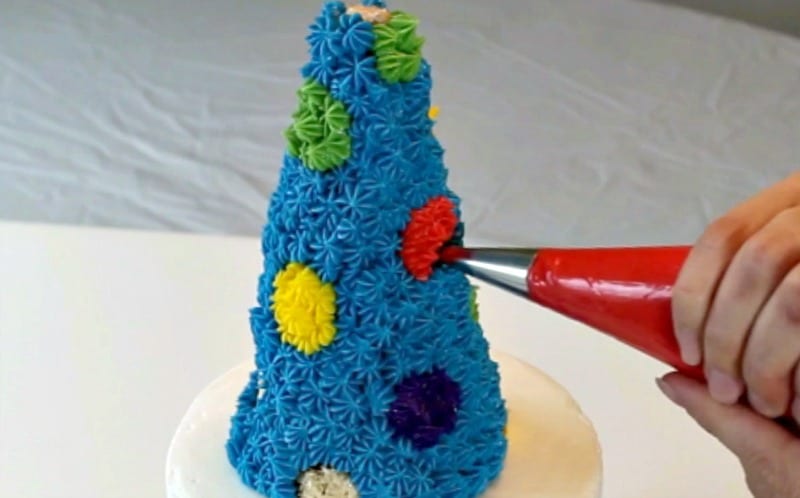
All of the rice krispie treats should be covered at this point.
Now take the red and using a tip 2D, pipe swirls on the very top of your hat.
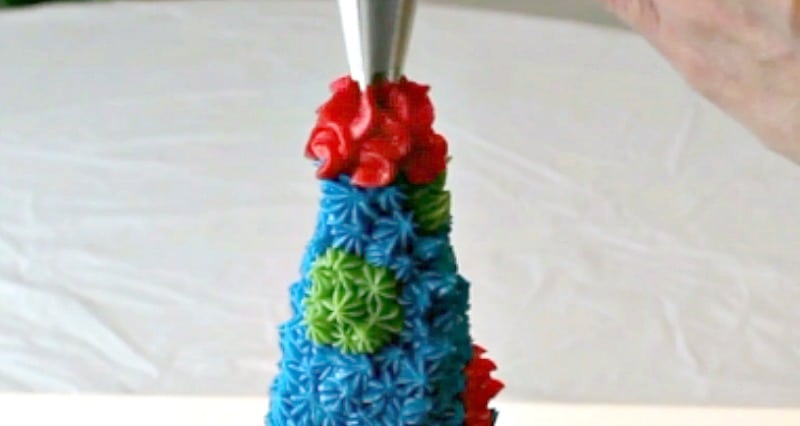
Go along the bottom with a tip 2D and add in some large stars for the base of the hat.

Check out the video with all the steps below:
Ok, what do you think? I think it’s really cute and every single part of it (except the dowel) is edible. Pretty cool, right?
Don’t Forget to Pin it for Later!
Leave a Reply