
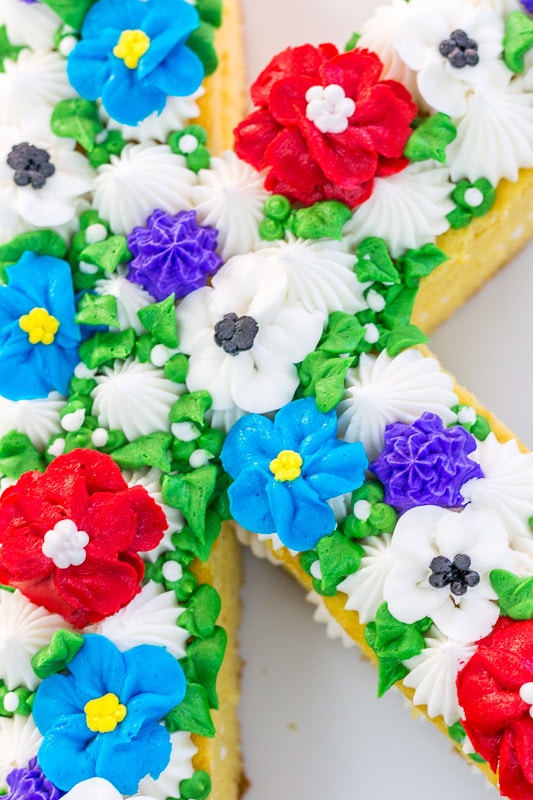
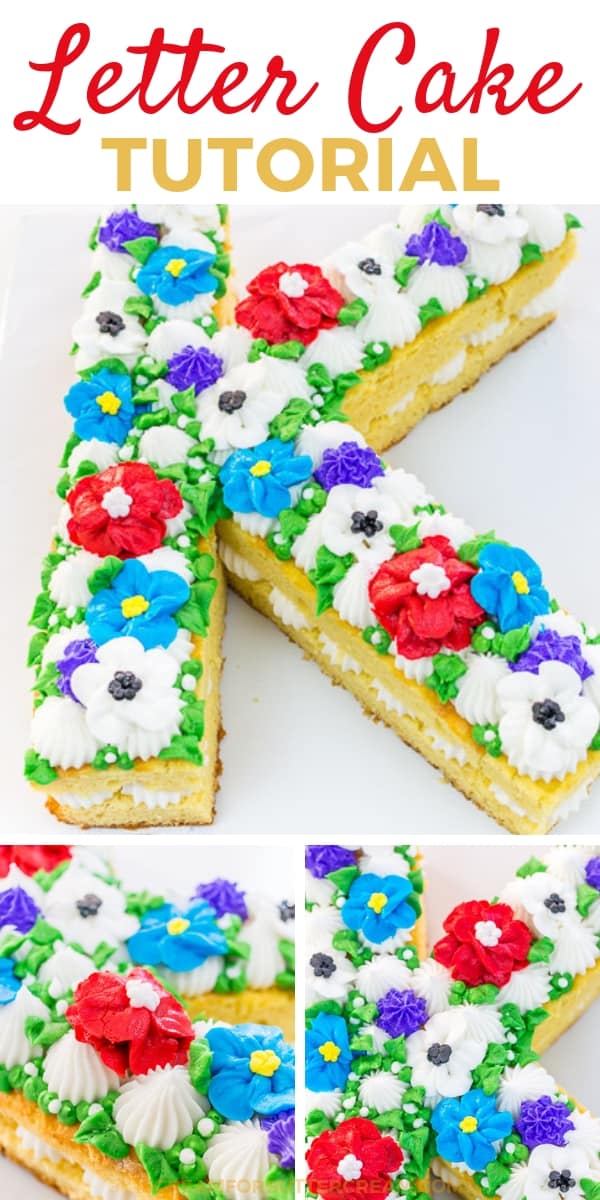
Have you seen the cream tart cakes? A simple google search and it’ll bring up tons of them. They’re number or letter cakes and they are just beautiful. They’re actually not made of cake, but of a shortbread-like cookie. It’s layered with piped frosting and then topped with either piped flowers, real flowers, fruit, candy or pretty much anything else you can think of. For this post, I decided to make an actual cake version of the cream tart cookie cake…The Floral Initial Cake (Cream Tart Style).
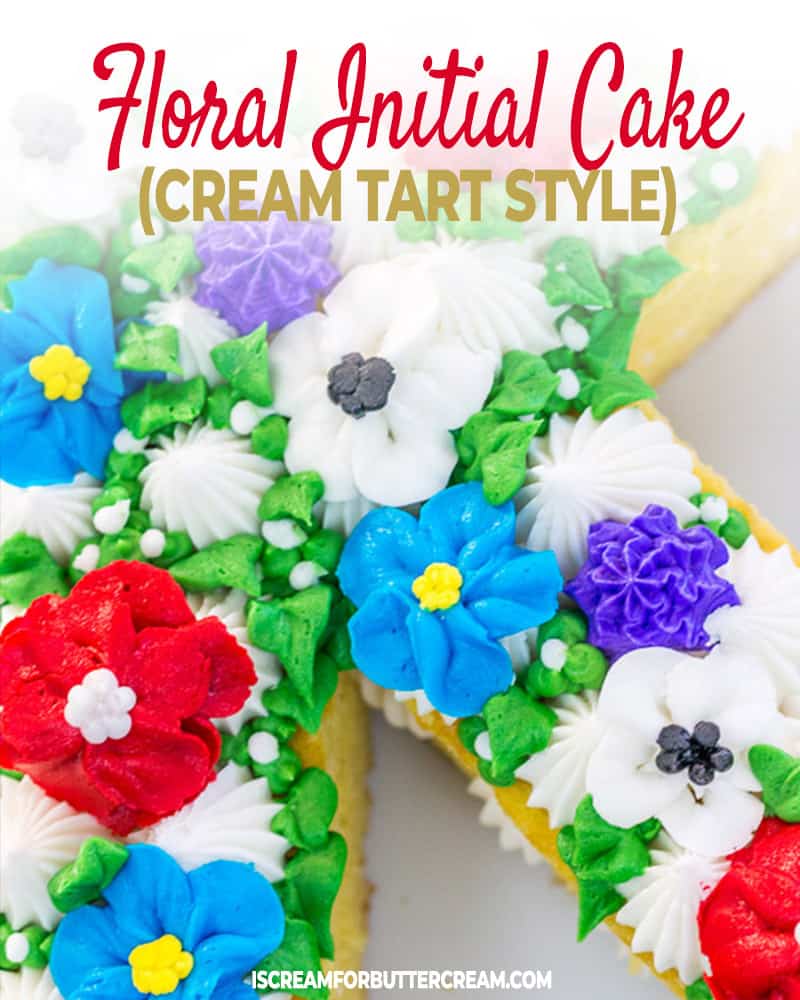
I really think this one is so much fun because you can basically make any letter or number you’d like and top it with what ever color flowers you like.
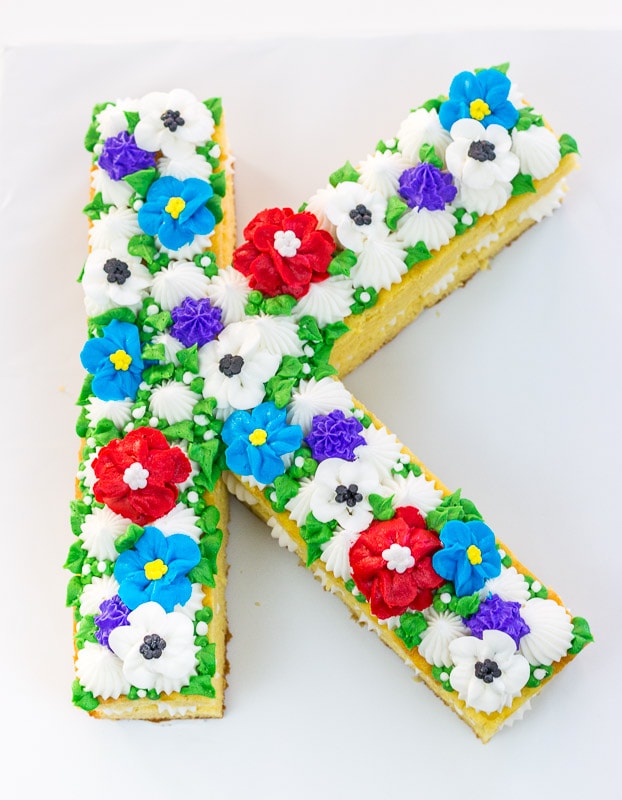
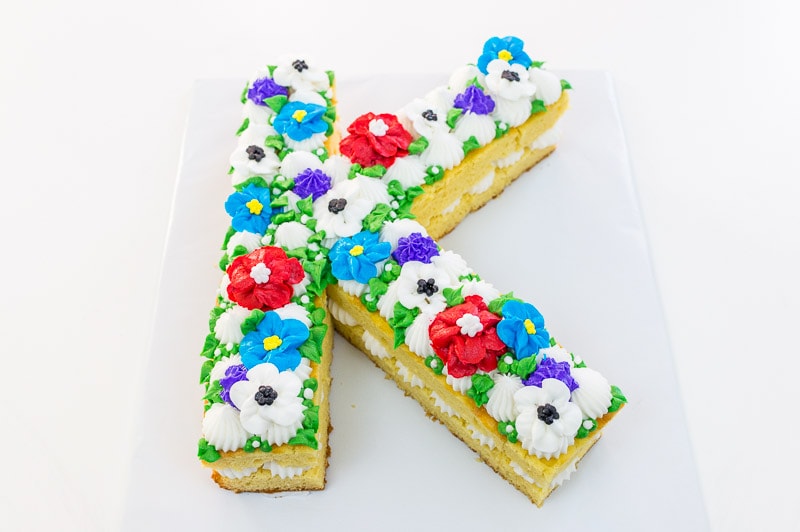
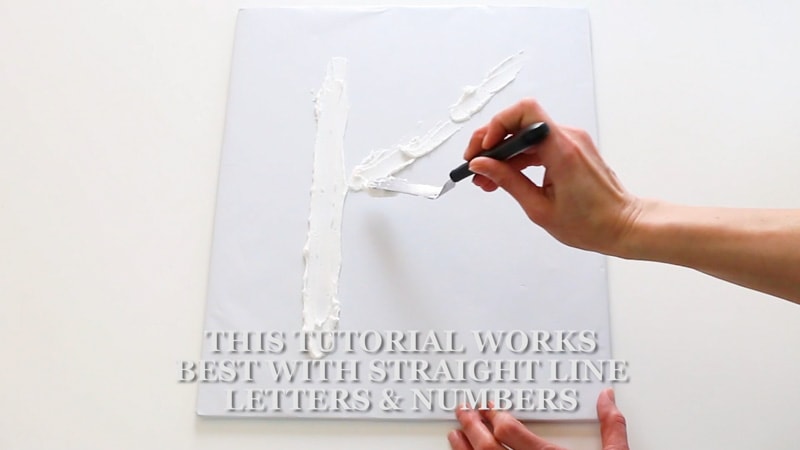
Now, I just used my own initial, but obviously you’ll use what letter or number you’d like. However, this tutorial works best with straight line letters or numbers.
I’ve added some screenshots of the process below and an explanation of why I cut the cake into rectangles instead of just using a template to cut around the shape. (Hint: This way it doesn’t waste as much cake and it’s easier to move the smaller pieces around and stack.)

So just peruse the screenshots and then close to the bottom of the post, there is a video that will show the whole process.
Another important thing to note. You’ll want to eat this cake the same day you put it together, because the sides of the cake is open to the air and it could dry out.
Ok, let’s get to the tutorial.
This post contains affiliate links. As an Amazon Associate, I earn from qualifying purchases. You can see my policies linked in the website footer.
Supplies Needed to Make the Floral Initial Cake:
- Baked 13×9 inch cake – You can use a cake mix or here is my vanilla cake recipe: Vanilla Bean Cake Recipe
- Buttercream – You can find my buttercream recipe here: Vanilla Bean Buttercream (To make it pipe-able, replace at least half of the butter with shortening.) I used: White, Black, Green, Blue, Purple, Yellow and Red
- Flower Nail
- Piping Bags
- Wax Paper (cut out small squares to use for your buttercream flowers)
- For the Blue Flowers: Petal Icing Tip #103 and Petal Icing Tip #2
- For the White Flowers: Petal Icing Tip #102 and Round Icing Tip #4
- For the Purple Flowers: Open Star Icing Tip #21
- For the Red Flowers: Petal Icing Tip #104 and Round Icing Tip #5
- Large Cake Board
- Knife
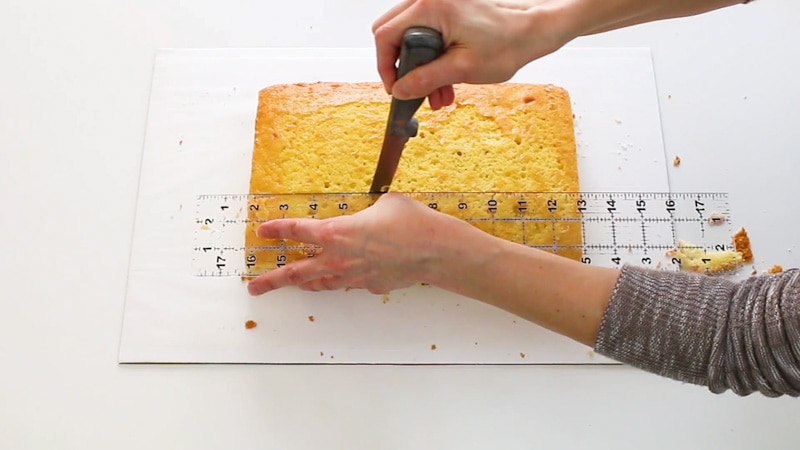
- Large Ruler (For cutting the cake into equal sections.) I like this one: Acrylic Ruler
- Cake Leveler
- Icing Tip #6B or 8B (for piping on the cake – between the layers.)
- For the Berries: Round Tip #5
- For the Leaves: Leaf Icing Tips #67 or #352
Making the Floral Initial Cake:
First you want to bake your cake. I was making a ‘K’ and figured that a 13×9 inch cake would be enough. You may need more depending on your letter or number.
Once your cake is baked, you’ll want to set it aside and work on your buttercream flowers.
Making the Flowers:
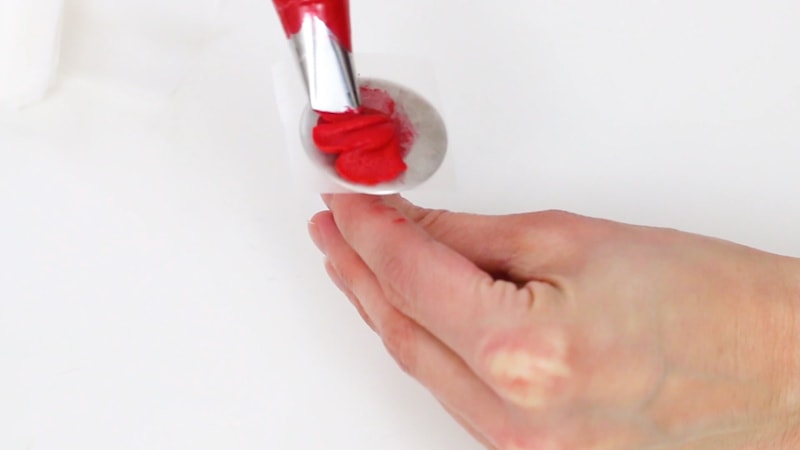
Cut yourself a bunch of wax paper squares to use for piping the flowers.
Add a little buttercream to your flower nail and pop on a wax paper square.
The main thing about making the flowers is when you’re using the petal tip to pipe, you want the thin edge of the tip to be facing out. This makes the edges of the buttercream petals thinner.
Once you’ve piped the flower, take it (along with the wax paper square) and set it to the side. You’ll want to chill these until you’re ready to add to the cake.
Ok onto making the flowers: Remember, you can always refer back to the list of supplies to see the icing tip numbers and the video close to the bottom of this post to see it being piped.
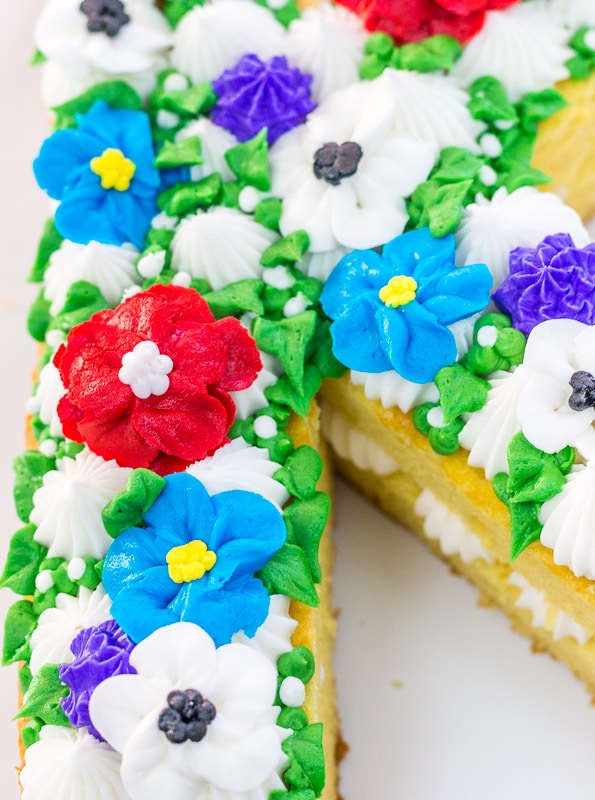
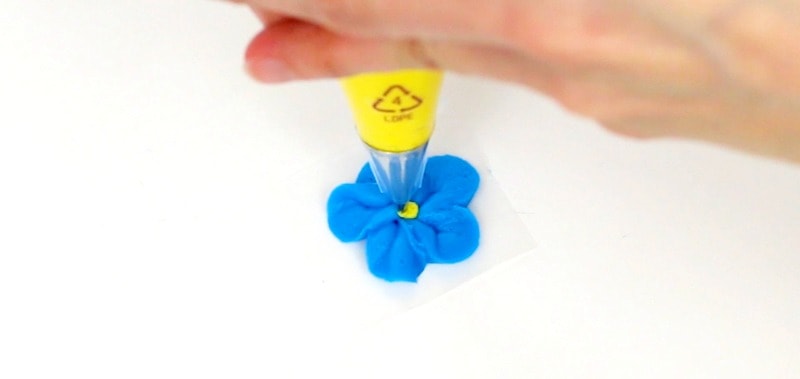
Making the Blue Flowers:
For the blue flowers, you’ll need to pipe five petals and then pipe yellow dots in the center.
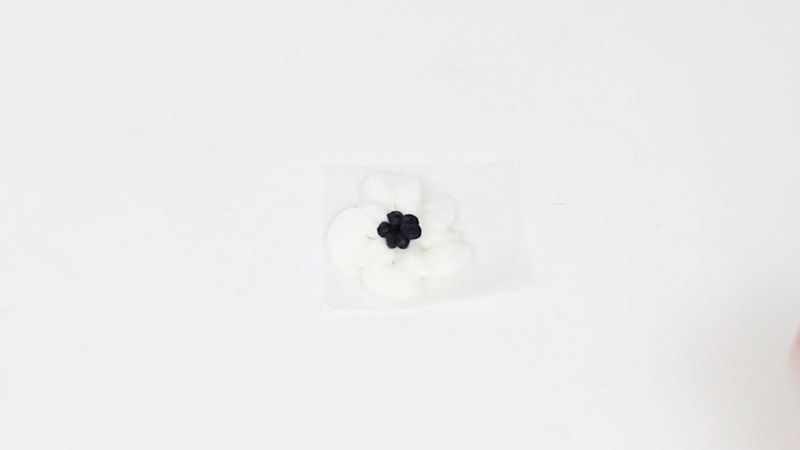
Making the White Flowers:
For the white flowers, you’ll do the same thing as the blue ones and pipe five petals and then some dots in the middle.
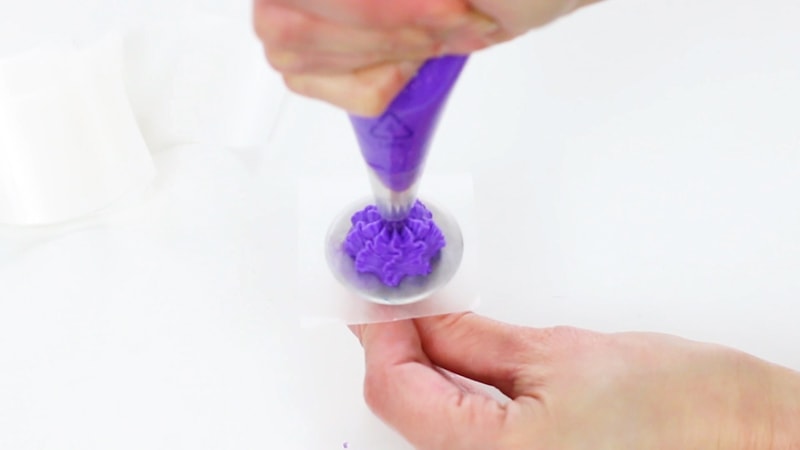
Making the Purple Flowers:
Ok, these are insanely easy. Just hold your piping bag straight down, squeeze and go up and down as you squeeze, so you get a ruffled look to it.
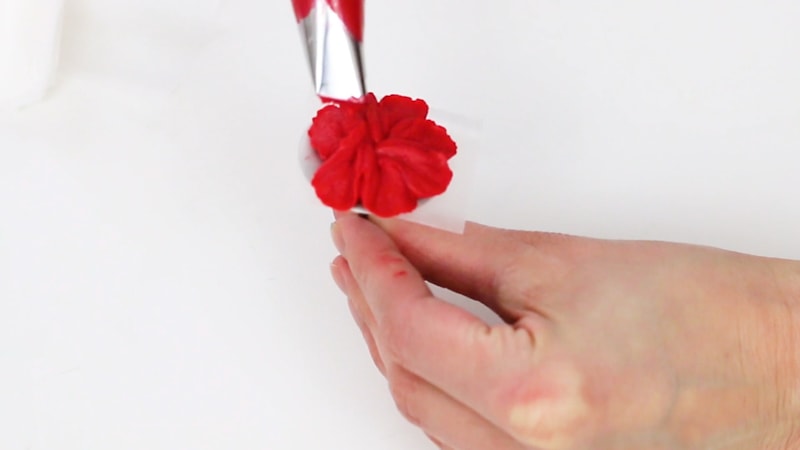
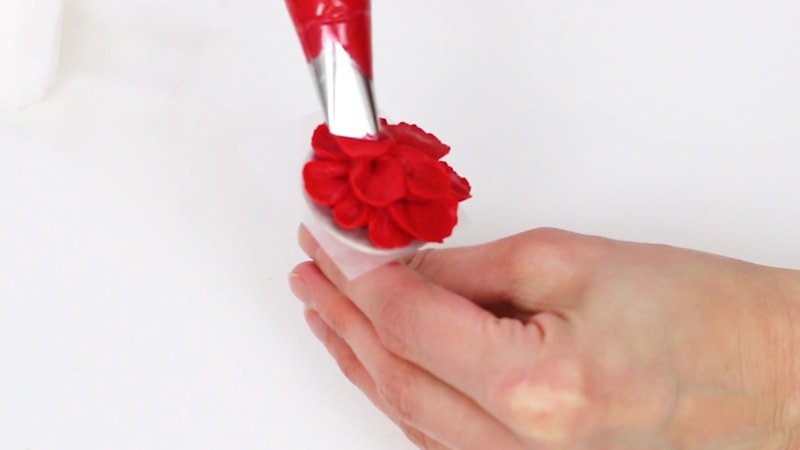
The Red Flower:
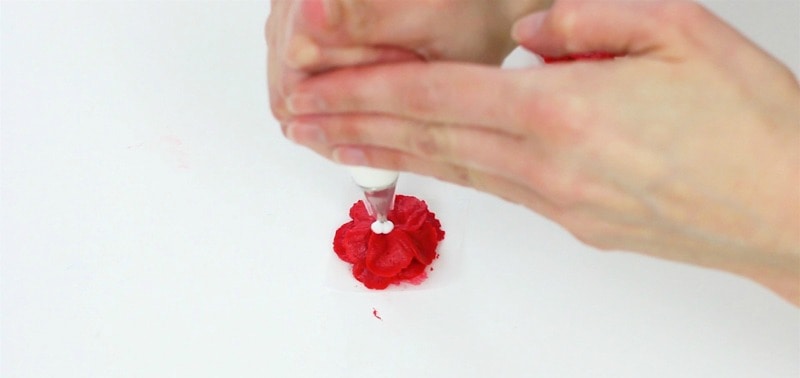
These are very similar to the blue and the white flowers. You just want to make as many petals as you can on the first row and then go over that with about five smaller petals.
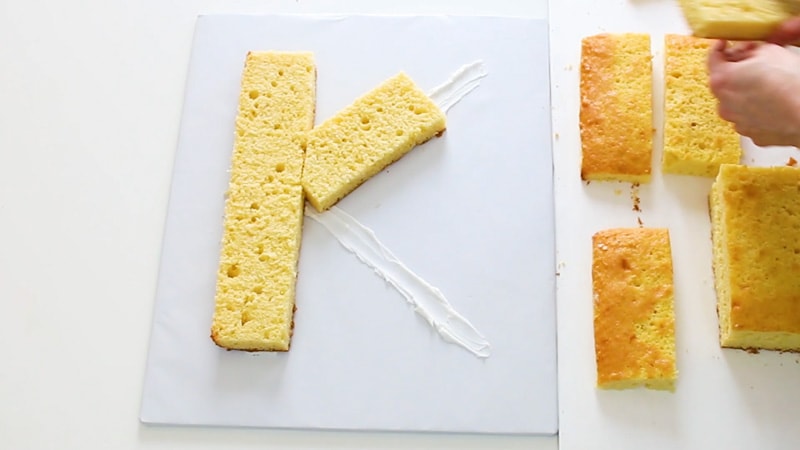
Cutting the cake:
Ok, now you’ll take your cake and cut it into equal parts. I cut mine into long rectangles. Yes, I could have just cut around a template of a letter or number, but by cutting it into rectangles, I actually didn’t waste as much cake.
Plus, trying to move a large letter and stack one layer of cake onto another in that shape, would have been a disaster.
If you’ve got a letter or number that is curvy, you may have to either cut your pieces of cake smaller, or use a template to cut around.
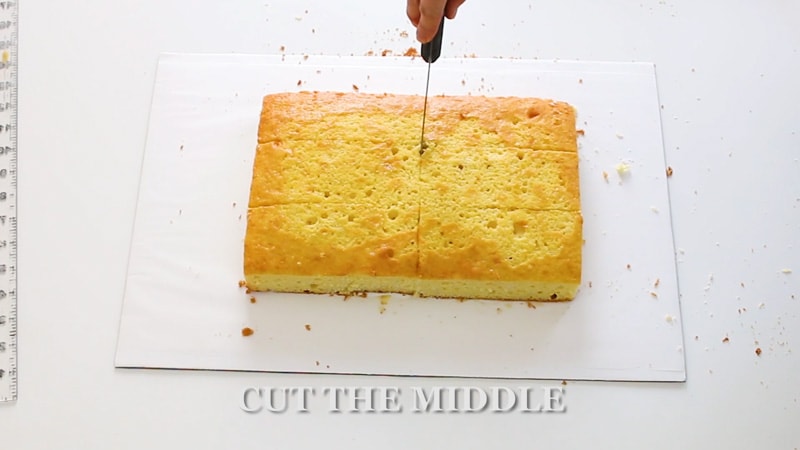
Once you’ve cut it into equal sections, you’ll need to cut the whole thing into two layers. I just used my handy Wilton leveler for that.
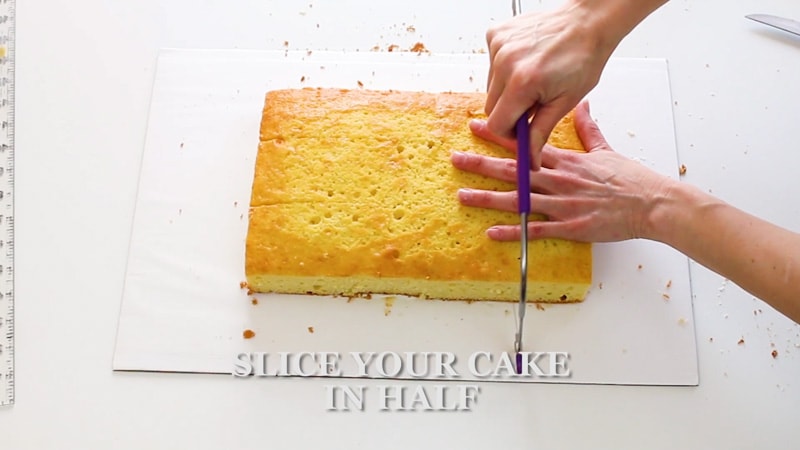
Now just cut the whole thing in half, so you get rectangles. (Remember if you’re making a more curvy letter or number, you’ll probably have to cut them into smaller squares.
Ok, now you’ll want to grab your cake board…I just covered my cake board with [easyazon_link identifier=”B0000VMBBA” locale=”US” nw=”y” nf=”y” tag=”iscreamforbut-20″]Wilton fanci foil[/easyazon_link].
Putting the Floral Initial Cake Together:
Take some buttercream and add it to your cake board in the shape of your letter or number.

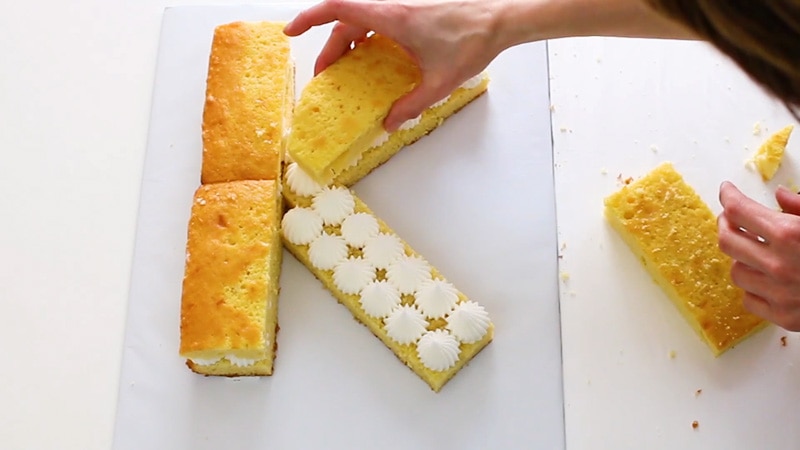
Now that you’ve added your buttercream, you’ll want to add the first layer of cake. You’ll probably need to move things around a bit and trim things as well.
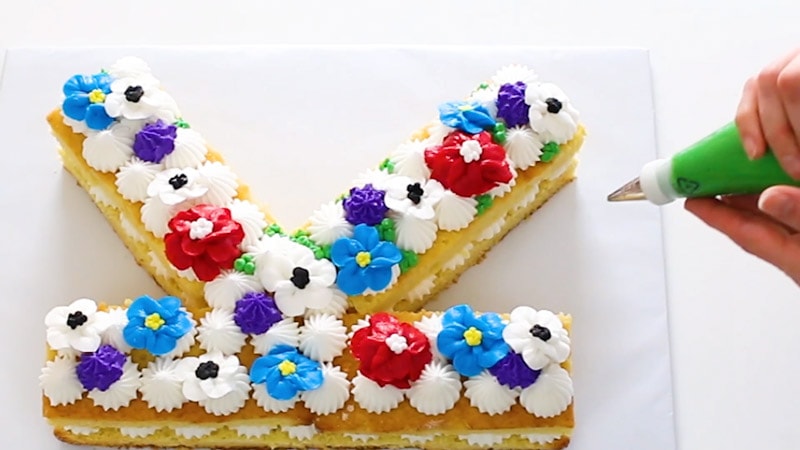
Once you’ve got the first layer of cake on the board, you’ll want to pipe on buttercream dollops.
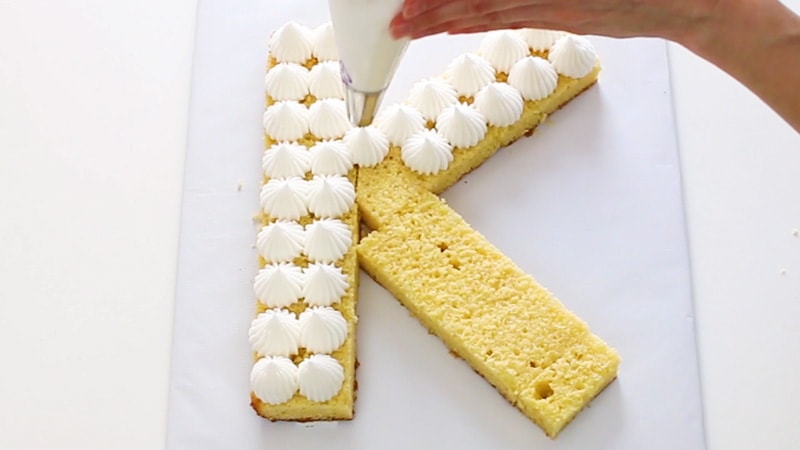
Once you’ve added the buttercream, go ahead and add the second layer of cake.
Now you’ll want to pipe another layer of buttercream dollops.
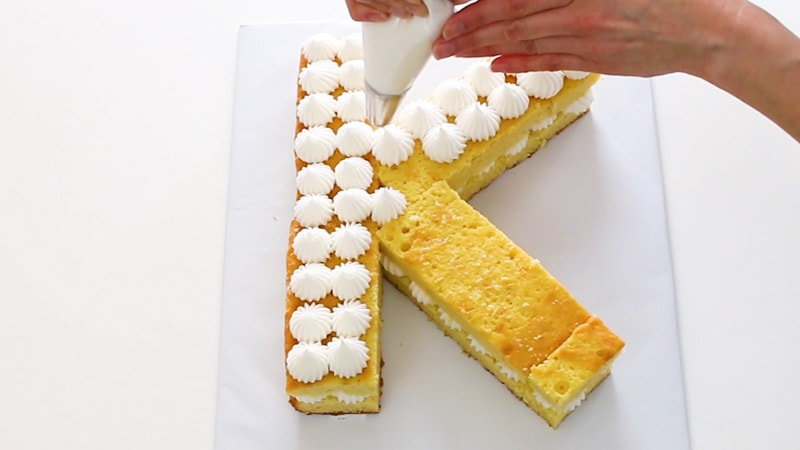
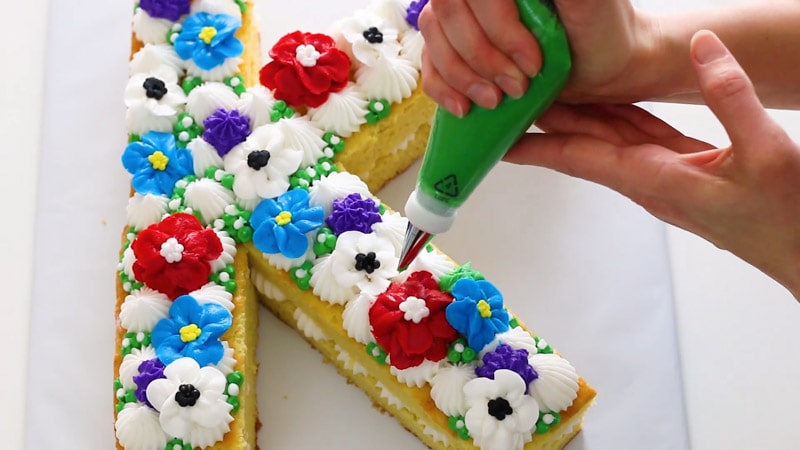
Now you’ll want to grab your buttercream flowers that have been chilled, pull off the wax paper and add them to your cake.
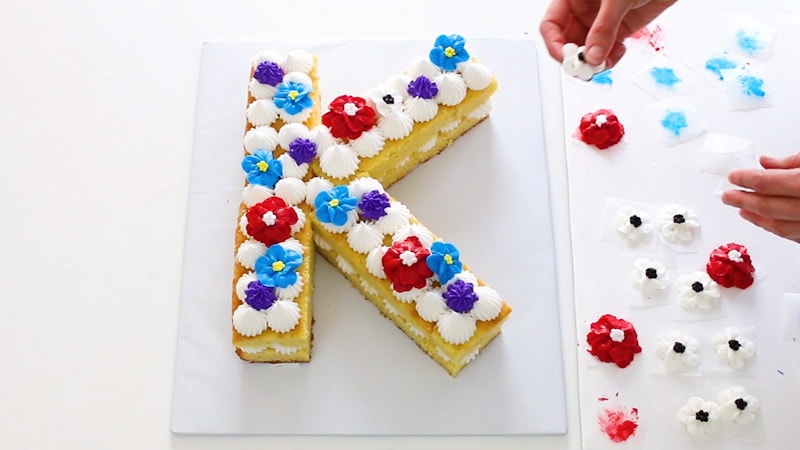
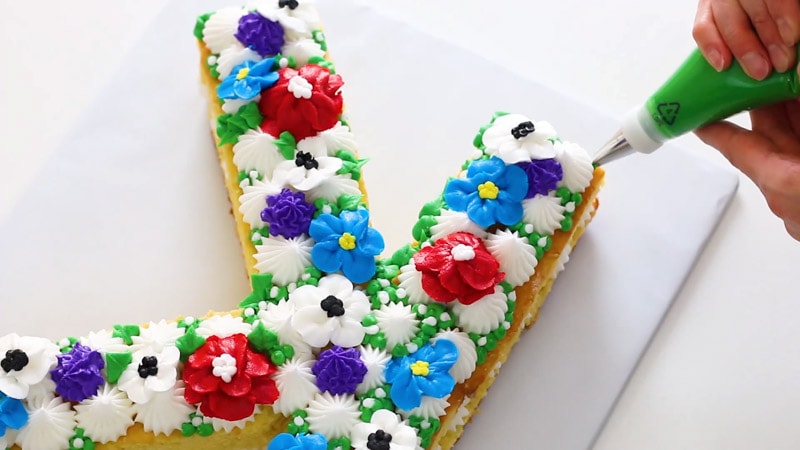
Now grab your green buttercream and piping bag and pipe in some small green berries to fill in any spaces.
You’ll then want to add little white dots to the tops of some of the berries.
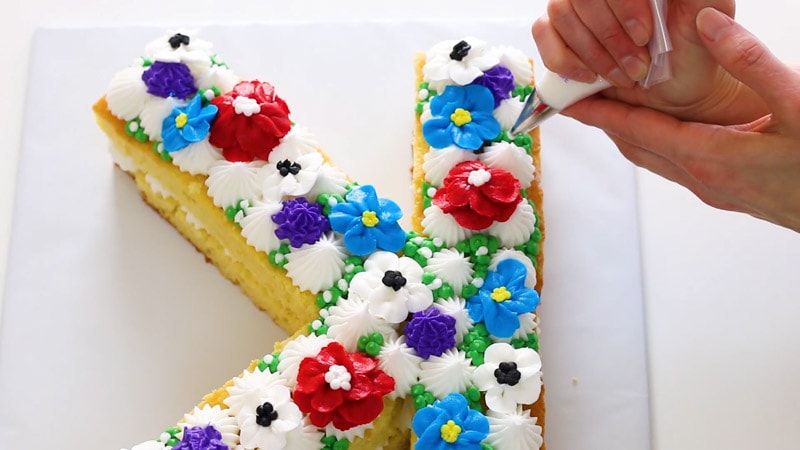
Then go back in and add in some leaves to fill in any spaces.
Check out the video below. It’ll answer a few questions you might have.
Ok, that’s it! Just make sure that you serve this as soon as you can after making it, since the sides of the cake are open to air, it can dry out quicker than usual.
Alright…what do you think? I hope you have fun with this one!
Joan - My Cookie Clinic
Kara Jane, Your tutorial was exceptional and I just love this spring cake … it looks delicious! It would take me hours to make this cake and I have yet to master the flower nail. I hope your Spring is off to a delightful start.
Kara Jane
Thanks, Joan, for the compliment! I think you would probably be much faster at it than you think though. I’m not sure I’ve even mastered the flower nail. But do you know what I find helpful when working with one? A block of Styrofoam. Sounds weird, but sometimes I need to set the flower nail down, but I’ve already half piped something on it, but if I can just push it into a block of styrofoam while I either change my grip on my piping bag or do whatever I need to do, then it’s really helpful. Thanks for the lovely words and I hope you have a wonderful weekend!
Joan - My Cookie Clinic
Another great tip. Thanks, Kara Jane!!