
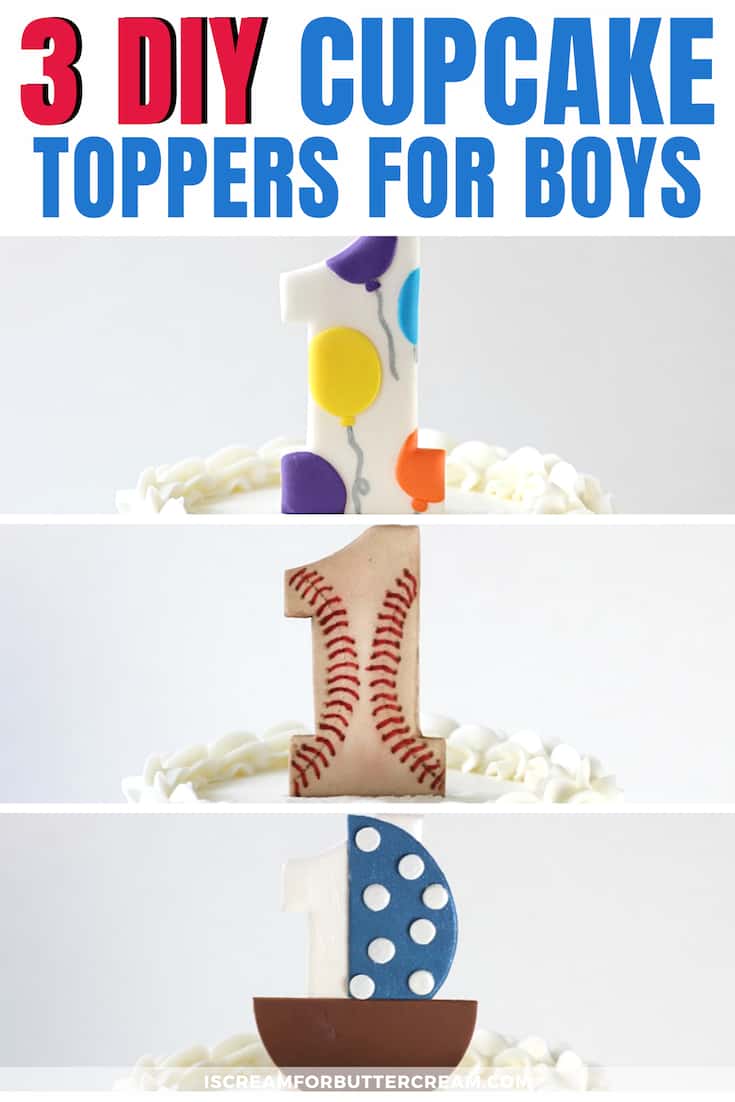
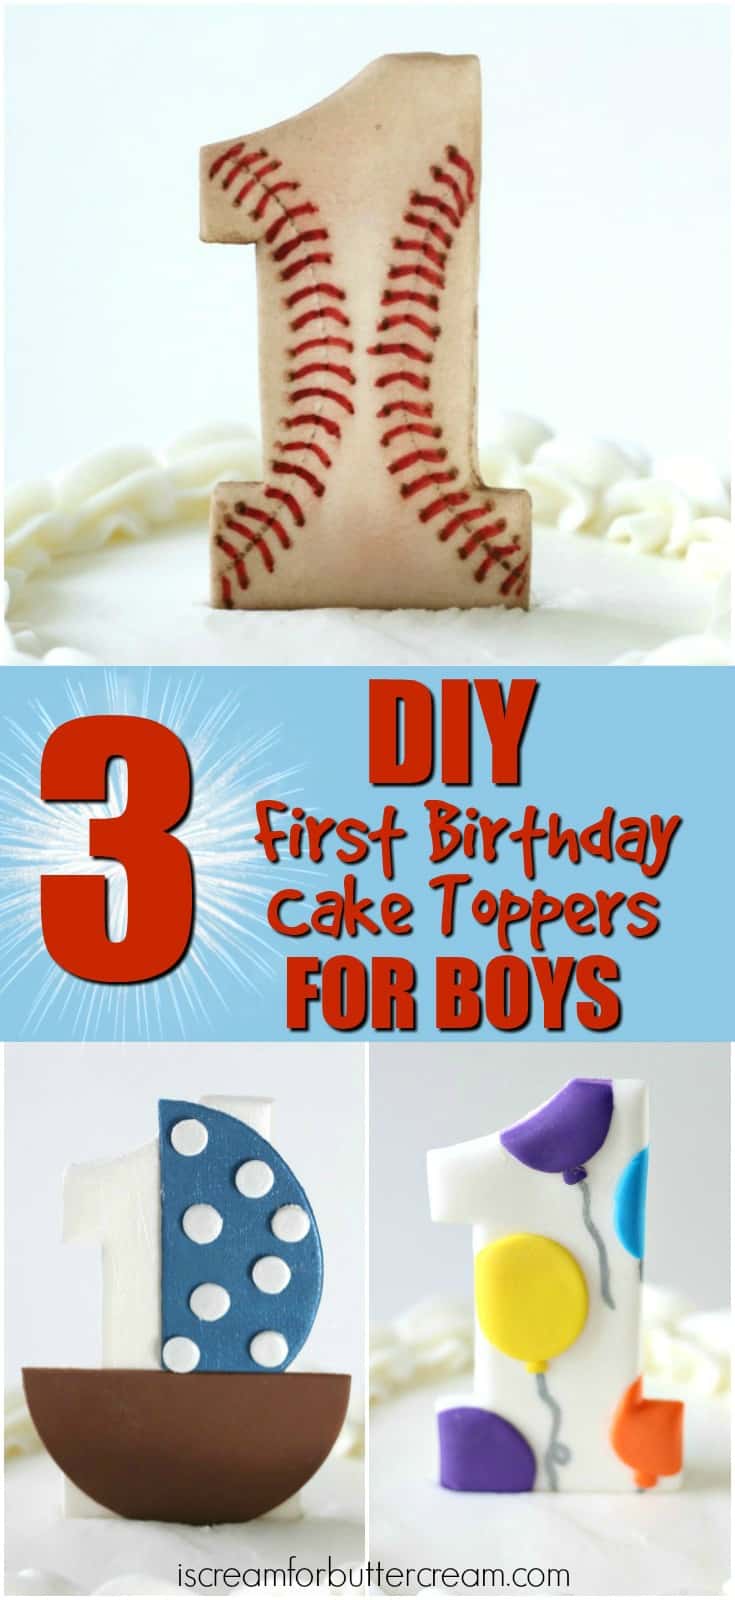
These 3 DIY first birthday cake toppers for boys are such a quick and easy way to decorate a first birthday cake. They’re great because you don’t have to go all crazy on the cake. You can make a simple cake and pop one of these babies on top and you’ve got a cool customized cake.
The other great thing about these is you can make the way ahead of time, so there’s no stressing out at the last minute trying to get a cake together. I am all about not stressing myself out when I don’t have to.
So let’s get starting making these cute toppers. By the way, there’s a video for each one after their description.
Oh and by the way, if you need some tried and true recipes, these are popular here: Favorite Vanilla Bean Cake, Moist White Cake, Chocolate Butter Cake
This post contains affiliate links. As an Amazon Associate, I earn from qualifying purchases. You can see my policies linked in the website footer.
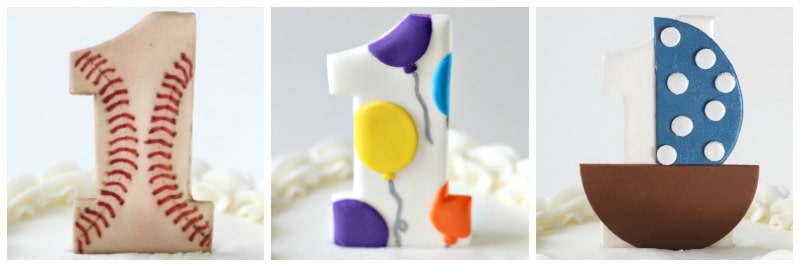
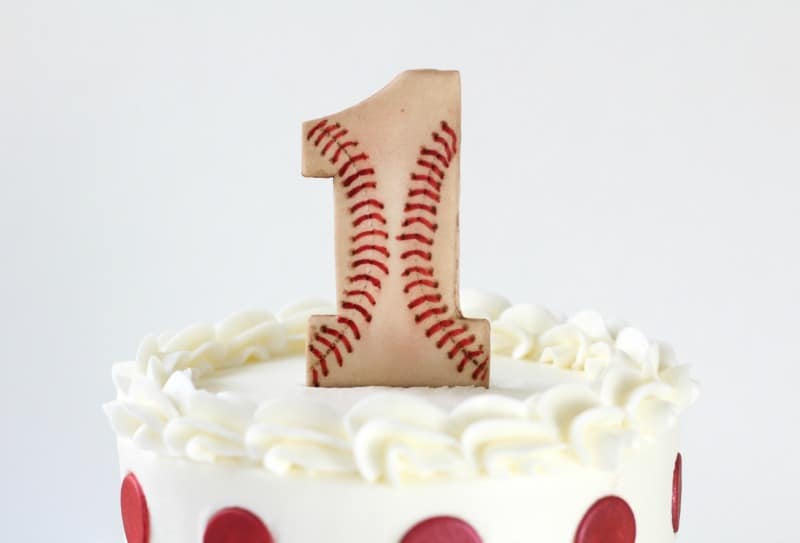
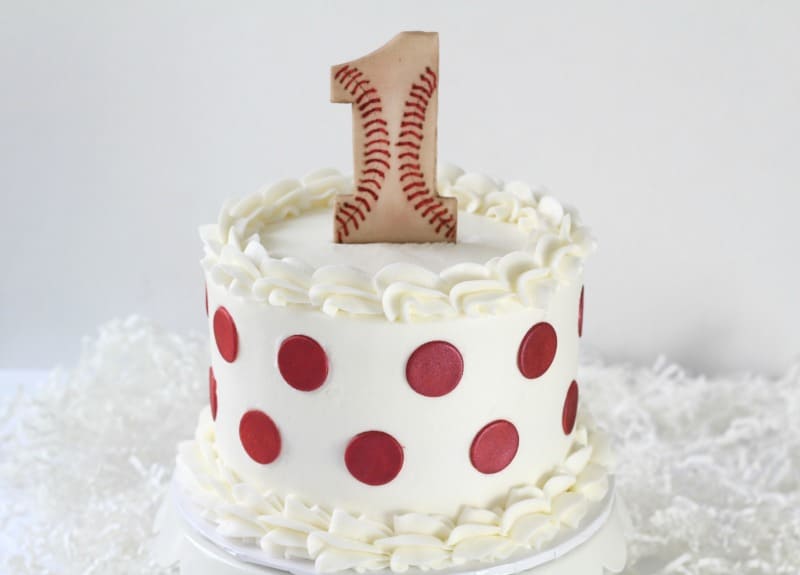
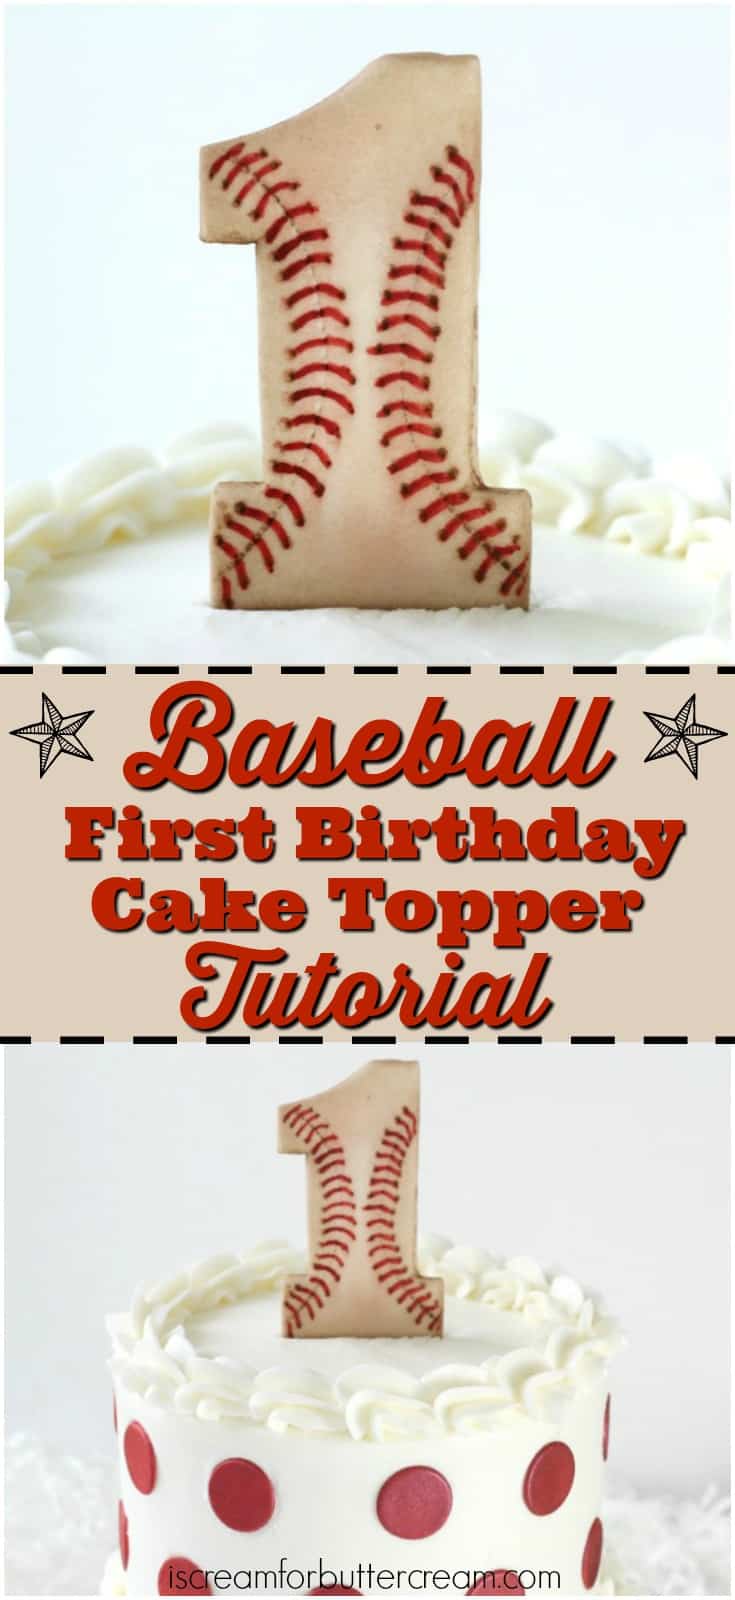
The Baseball Topper:
Supplies you’ll need for the baseball topper:
- A number cutter (used this one) (You can find another option here)
- White fondan
- Red edible petal dust
- Paint brush used only for caking
- Lemon extract or vodka for painting
- Wilton Cutter Embosser (This is the tool that will give you the stitching lines)
- Color Shaper tools (Use the small round one to make the indention where the thread ends.)
- popsicle sticks
Making the Baseball Topper:
(Don’t forget the video below for all the steps.) First you’ll roll out our white fondant. Don’t roll it too thin, it needs a little bulk to it, so it’ll be sturdy.
Cover it with saran wrap and then use the number cutter and press down. You’re using the saran wrap so that the edges will have some curve.
Now let it set up at least over night to dry.
Use a round cookie cutter to score some guidelines and then use the stitching tool to go over those lines, so it’ll look stitched.
Mix your red petal dust with a bit of lemon extract and paint the threads. Now use one of the small round color shaper tools to imprint an indentation where the stitches end.
Take some cocoa powder and dust around the edges to make it look like this baseball has played a hard game.
Once everything is dry, turn your topper face down and attach a popsicle stick with a bit of water and lay a rolled out strip of fondant over that to keep it in place. Let it dry fully before inserting into the cake.
To finish this cake off, I just cut out some fondant circles in white and let them firm up. I then painted them with the red petal dust, let them dry and then attached them to the cake with a bit of buttercream.
Here’s the video for the baseball cake topper:
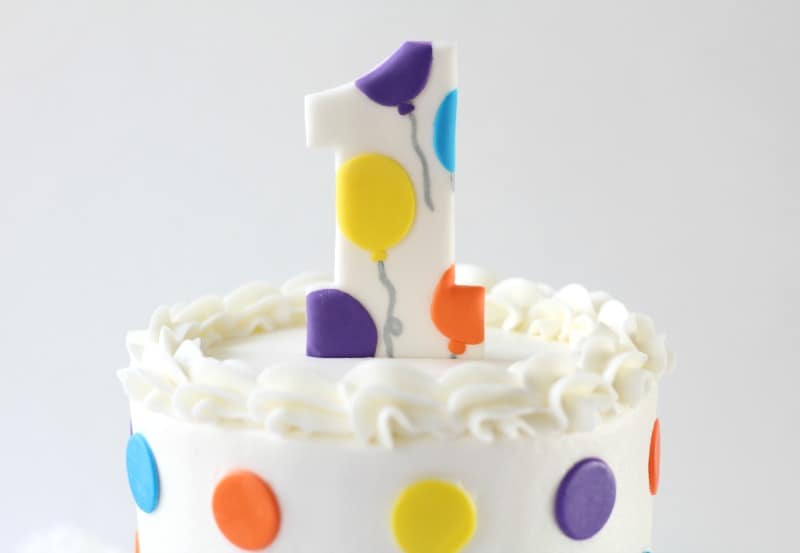
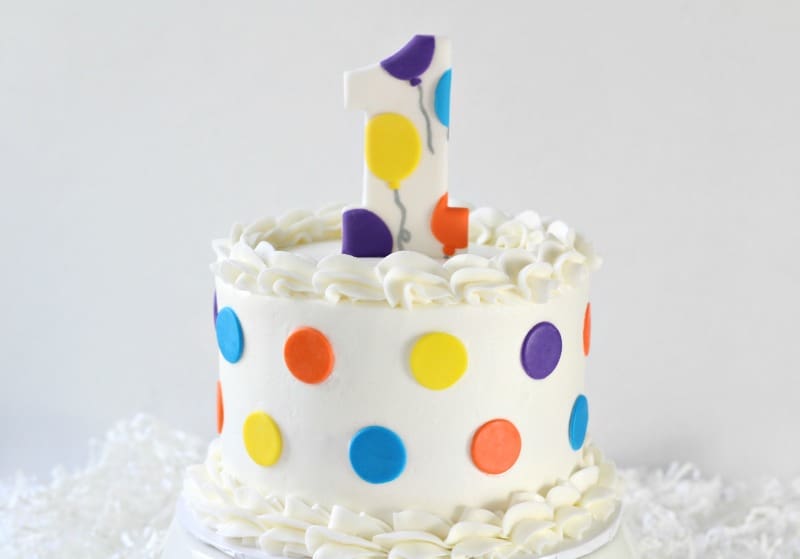
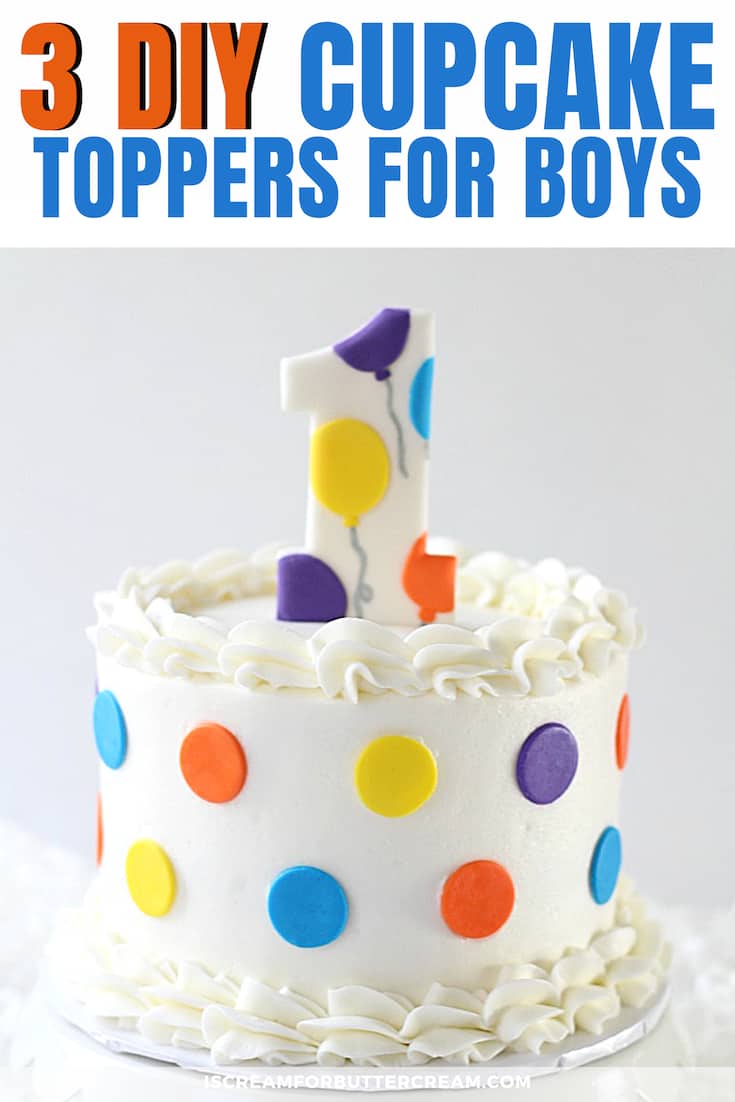
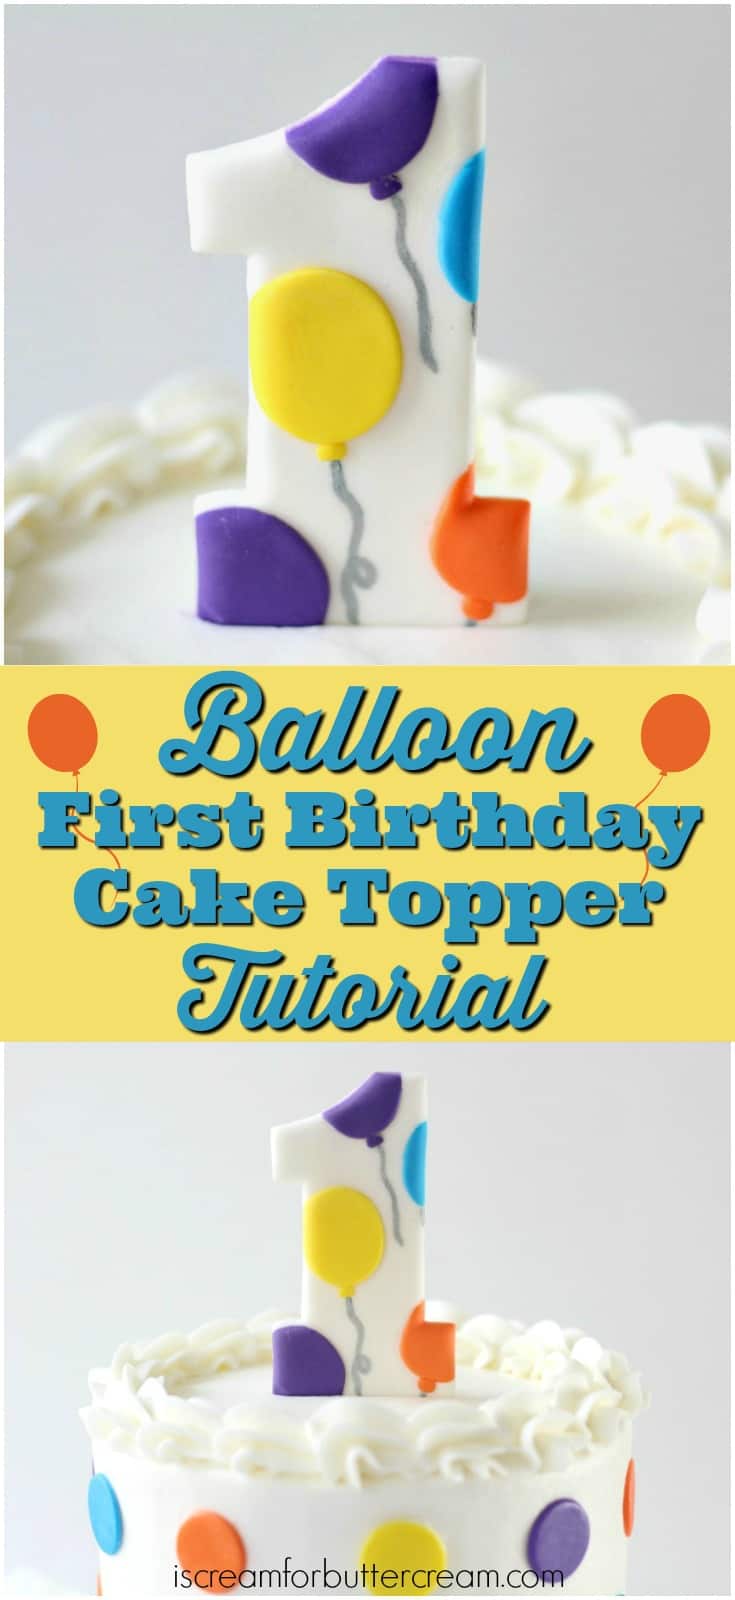
The Balloon Topper:
Supplies you’ll need for the balloon topper:
- A number cutter (used this one) (You can find another option here)
- White fondant
- Silver petal dust
- Paint brush used only for caking
- Lemon extract or vodka for painting
- Small round cutter
- Gel food coloring
- popsicle sticks
Making the Balloon Topper:
(Don’t forget the video below for all the steps.) Before rolling out your fondant to cut out your number, you’ll need to make your balloons.
Mix several different colors of fondant, roll out and then cut with a small circle cutter. To get the semi oval shape, I just bent my circle cutter in just a bit.
Set the balloons aside for a minute and roll out your fondant for the base of the topper. Don’t roll it too thin, because it needs a bit of weight to it, so it’ll be sturdy. Don’t go crazy though. If it’s too thick, it’ll take to long to dry and firm up.
After you’ve rolled out fondant for the base of the number, before cutting it out, attach your balloons in a random pattern with a bit of water.
Add a layer of saran wrap over it all and then press your number cutter down. (You’re using the saran wrap, so when you cut out your number, the edges will have a curve to them.)
Take your silver dust and add a little lemon extract to it. Just paint on some strings for your balloons.
Next roll some tiny fondant balls and add to the base of each balloon with a bit of water.
Once everything is dry, turn your topper face down and attach a popsicle stick with a bit of water and lay a rolled out strip of fondant over that to keep it in place. Let it dry fully before inserting into the cake.
To finish this cake off, I just cut out some fondant circles in each of the colors I had mixed for the balloons. I let them firm up and then attached them to the cake with a bit of buttercream.
Here’s the video for the balloon topper:
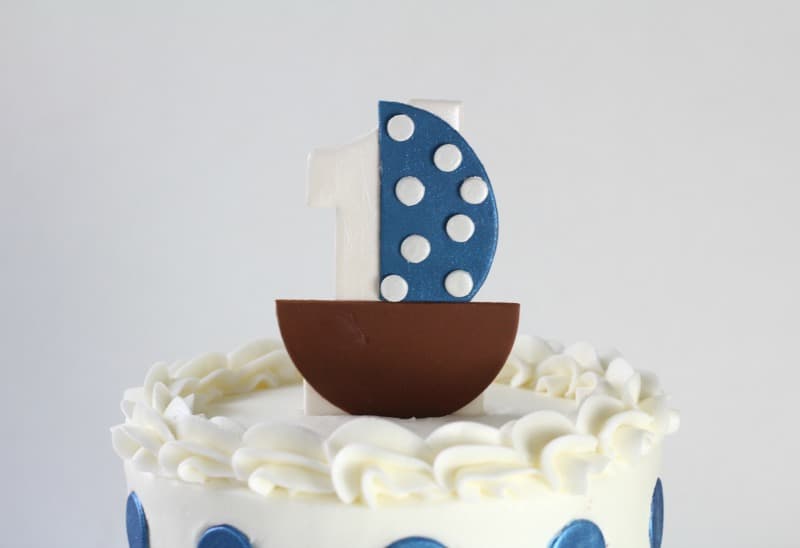
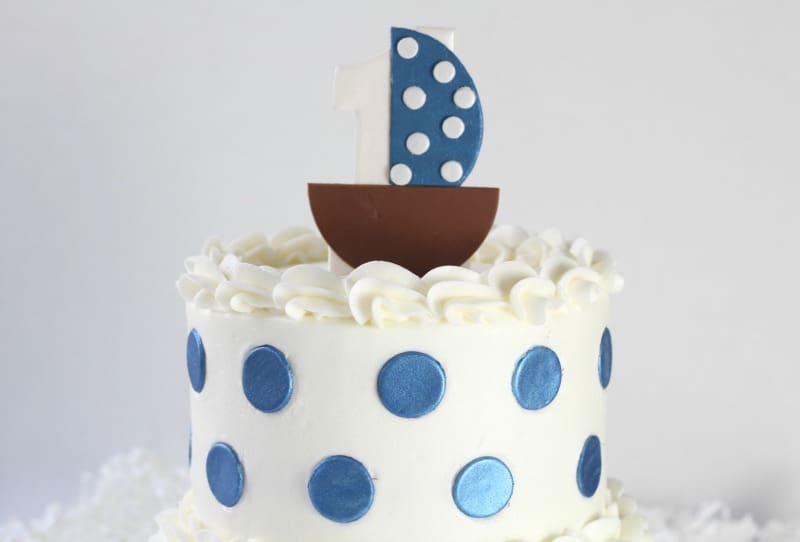
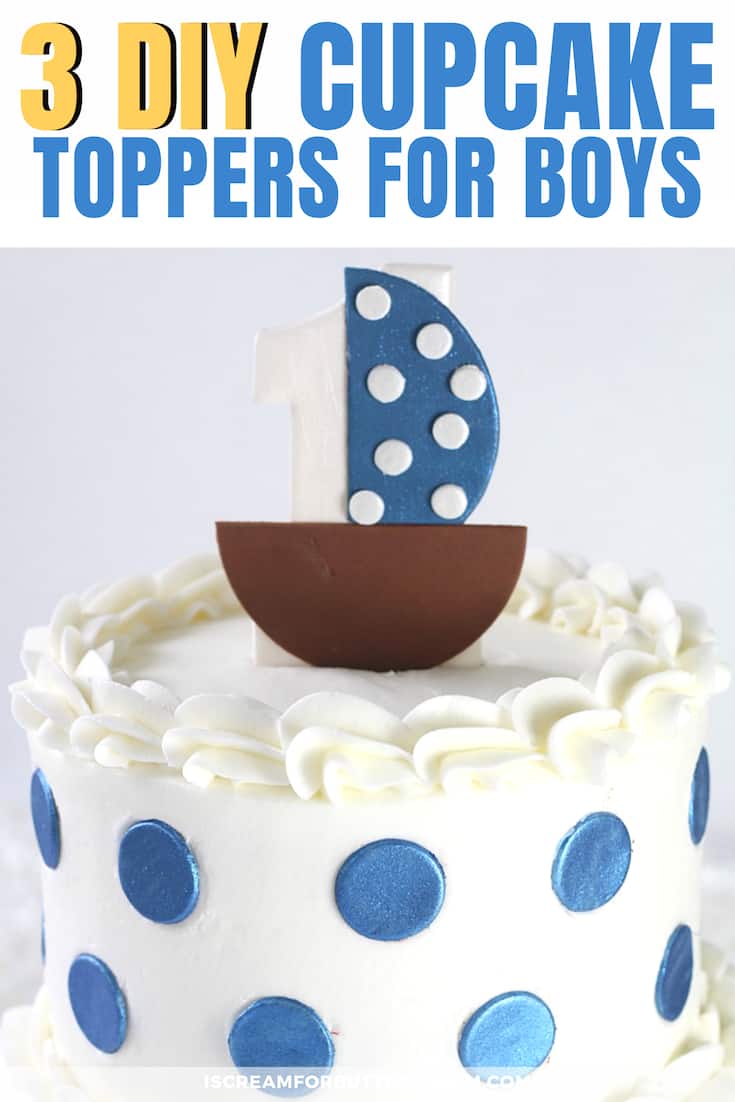
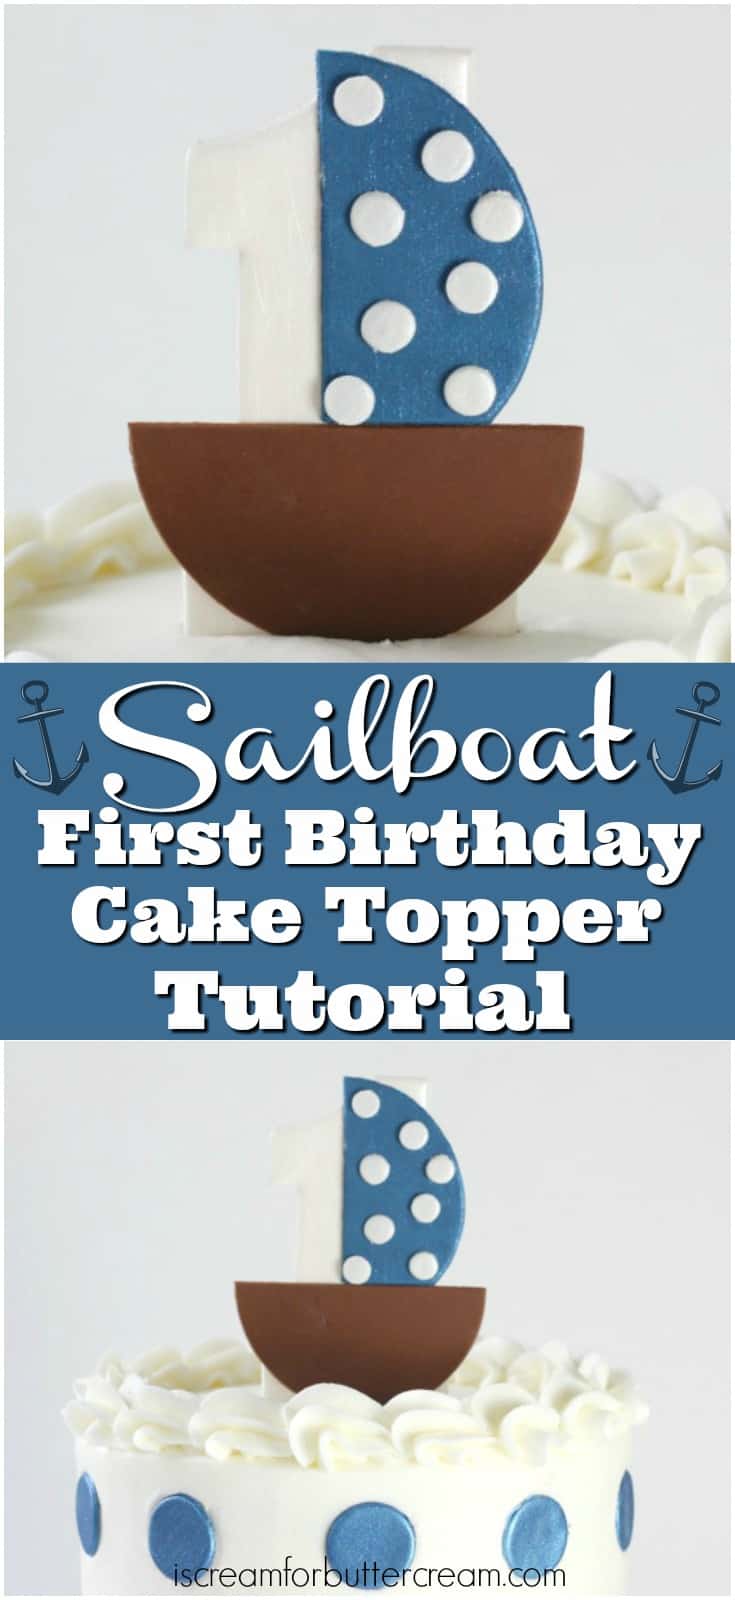
The Sailboat Topper:
Supplies you’ll need for the sailboat topper:
- A number cutter (used this one) (You can find another option here)
- White fondant
- Super pearl dust
- Paint brush used only for caking
- Lemon extract or vodka for painting
- Round cutter set
- Gel food coloring
- popsicle sticks
- Edible blue luster dust
- Wilton white candy melts
Making the Sailboat Topper:
(Don’t forget the video below for all the steps.) Roll out the white fondant for the base and cut out your number. Make sure the fondant has a bit of thickness to it, so it’ll be sturdy. Set it aside to dry overnight.
Mix your gel coloring into some fondant and make a little bit of blue and a little bit of brown.
Roll each out and cut them with a medium sized round cutter. For the boat part, just cut the circle in half and you can dust it with a bit of cocoa powder to give it some dimension.
For the sail, just cut the blue fondant into a circle, cut in half and then cut the bottom straight. This is optional, but you could also mix some blue luster dust with lemon extract and paint it on the sail to really make it sparkle.
Now, roll out a bit more white fondant and cut into small circles. If you don’t have a small enough circle cutter, just use the tip of a circle buttercream tip…that’s what I did.
Next mix your super pearl dust with lemon extract and paint your number and the small dots. This will make them sparkle.
Attach your small circles onto your sail with a bit of water.
Let everything completely dry, preferably overnight. Next add the boat and the sail to your number with a bit of melted candy melts.
Once everything is dry, turn your topper face down and attach a popsicle stick with a bit of water and lay a rolled out strip of fondant over that to keep it in place. Let it dry fully before inserting into the cake.
To finish this cake off, I just cut out some fondant circles in blue. I let them firm up, then mixed more of the blue luster dust and lemon extract and painted the mixture onto the circles. I then attached them to the cake with a bit of buttercream.
And here’s the video for the sailboat topper:
So, there you have it…3 DIY First Birthday Cake Toppers for Boys! They seem do-able, right? If you try one out, I’d love to hear how it went and I’d love to see pictures 😉
Don’t Forget to Pin it for Later!

Leave a Reply