
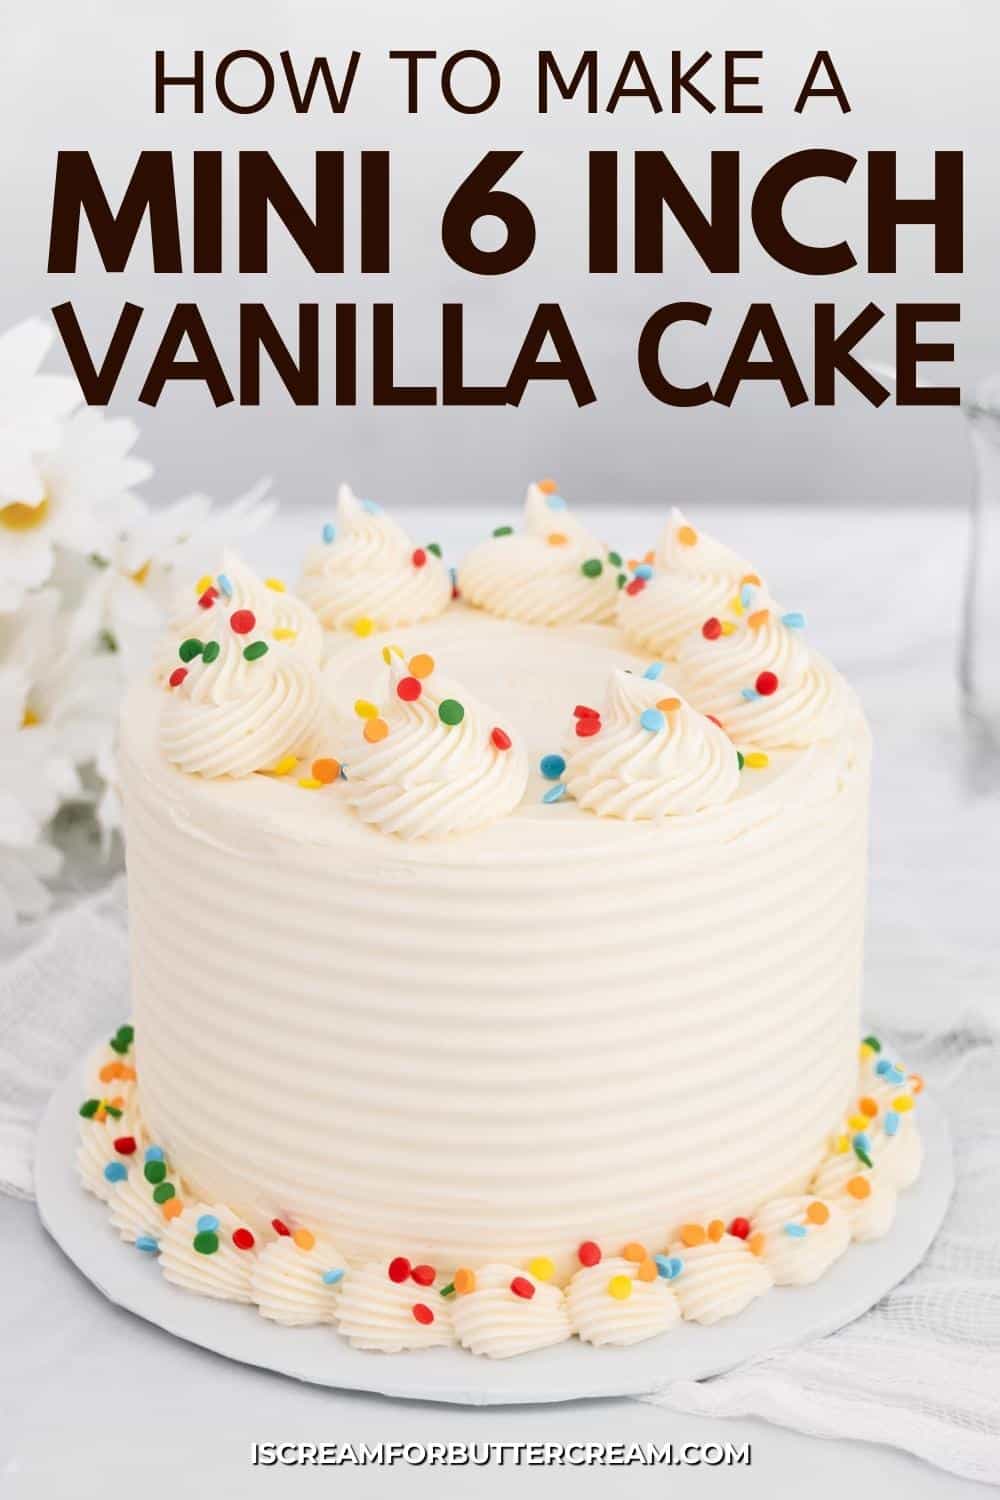
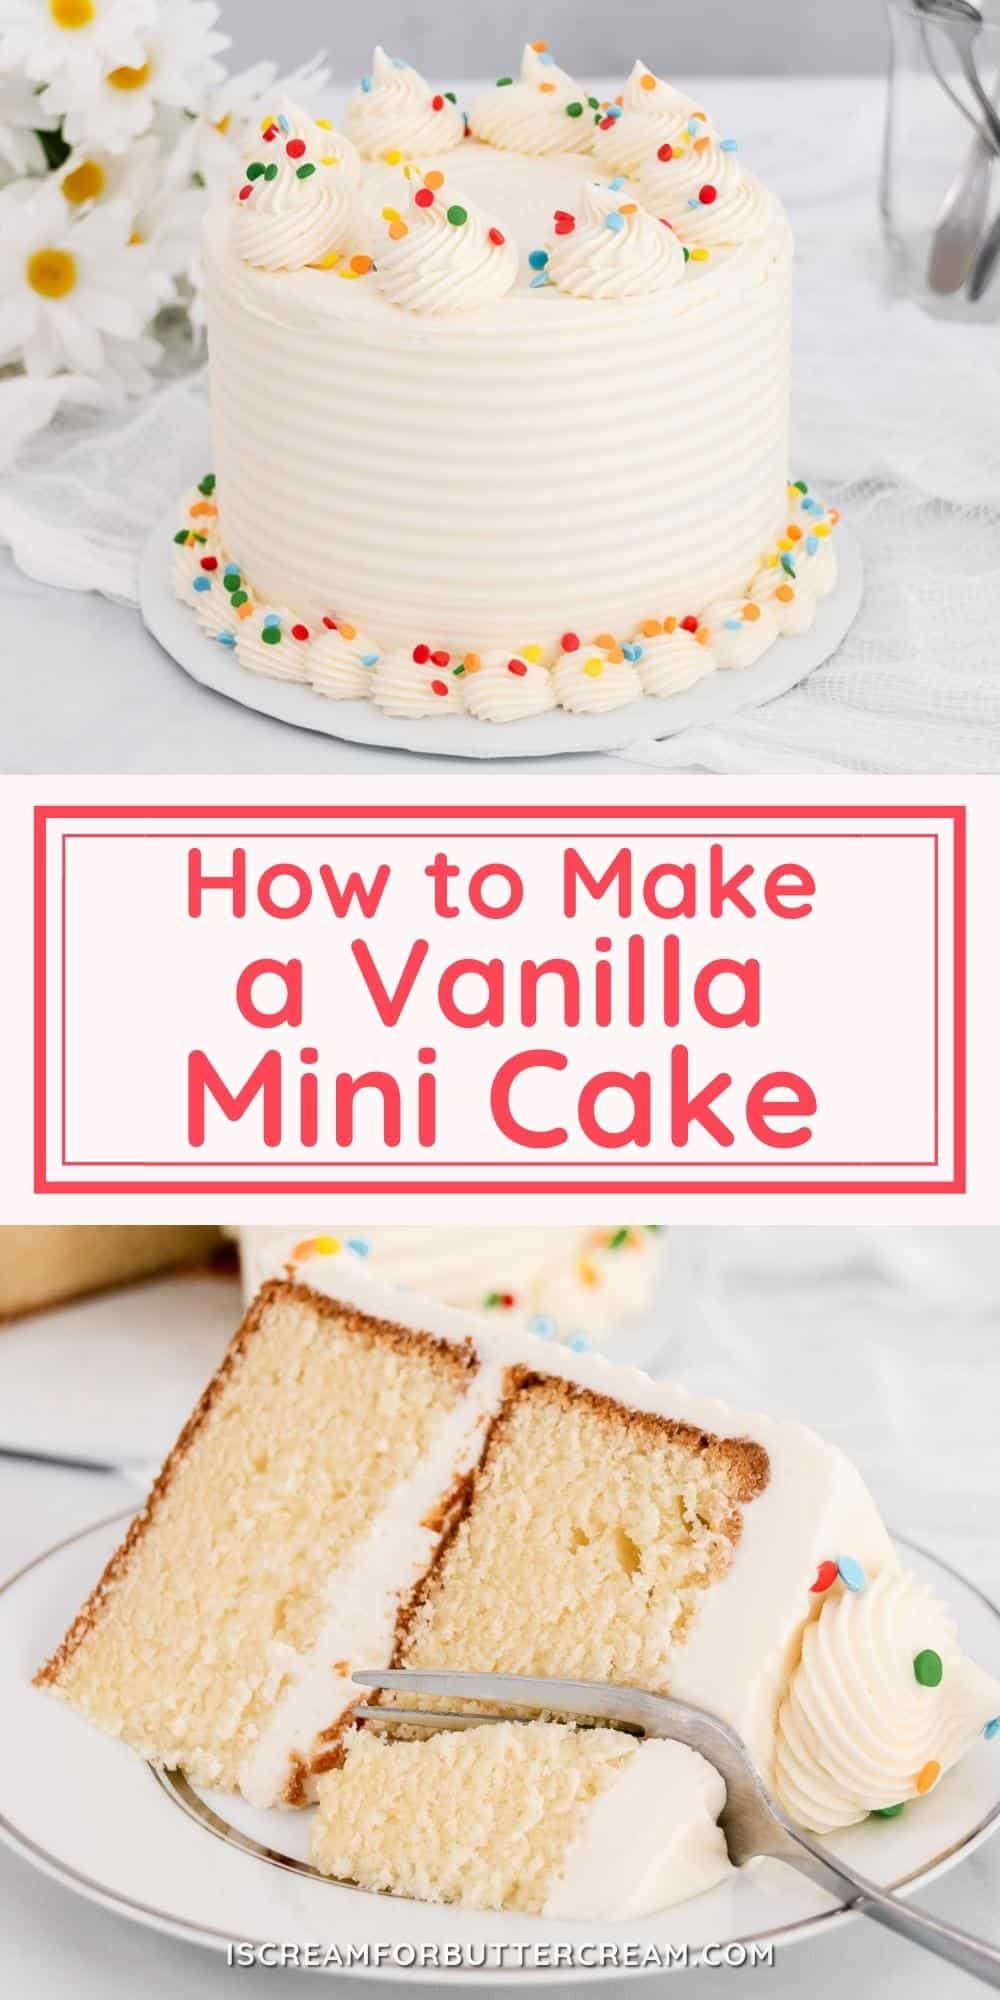
A moist scratch mini 6 inch vanilla cake recipe you can make as a small layer cake for yourself, a small birthday party, a smash cake or even a dessert just for two. Sometimes you just don’t need a large cake.
You might just need a small smash cake or maybe there are only a few people in your household, then this two-layer, 6-inch mini cake is the perfect size.
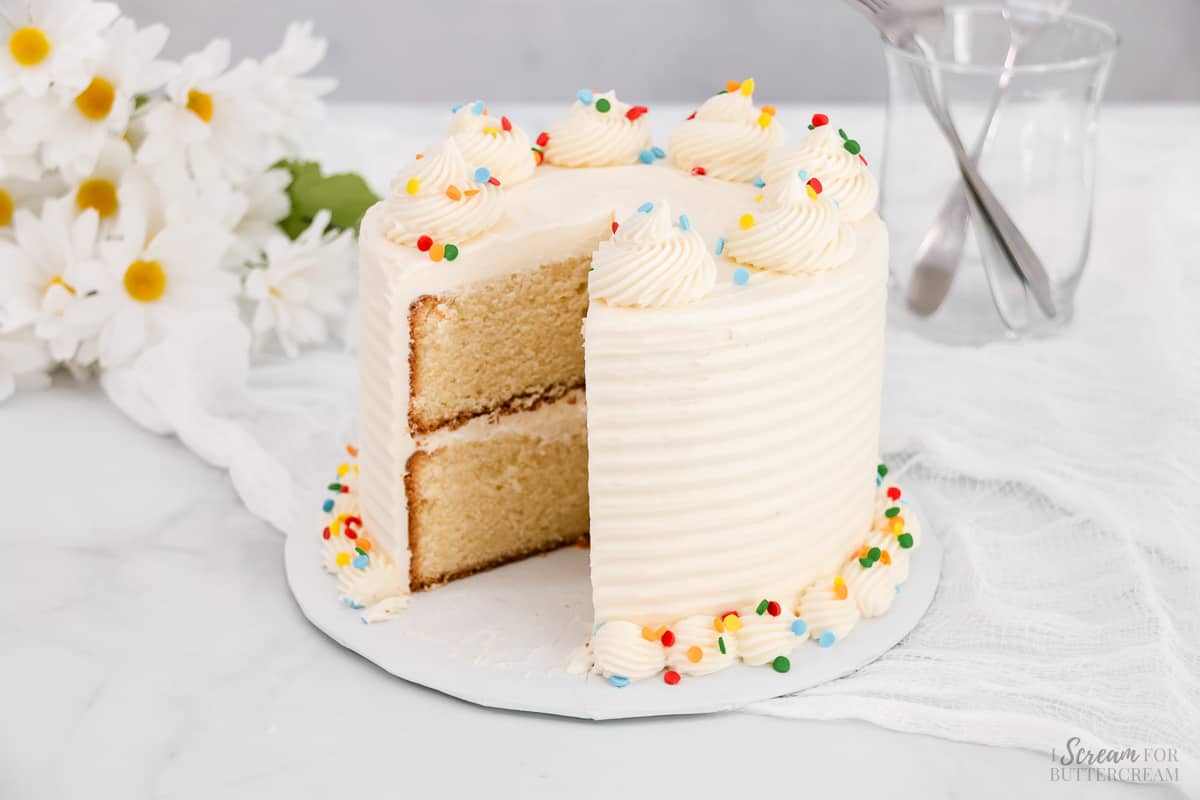
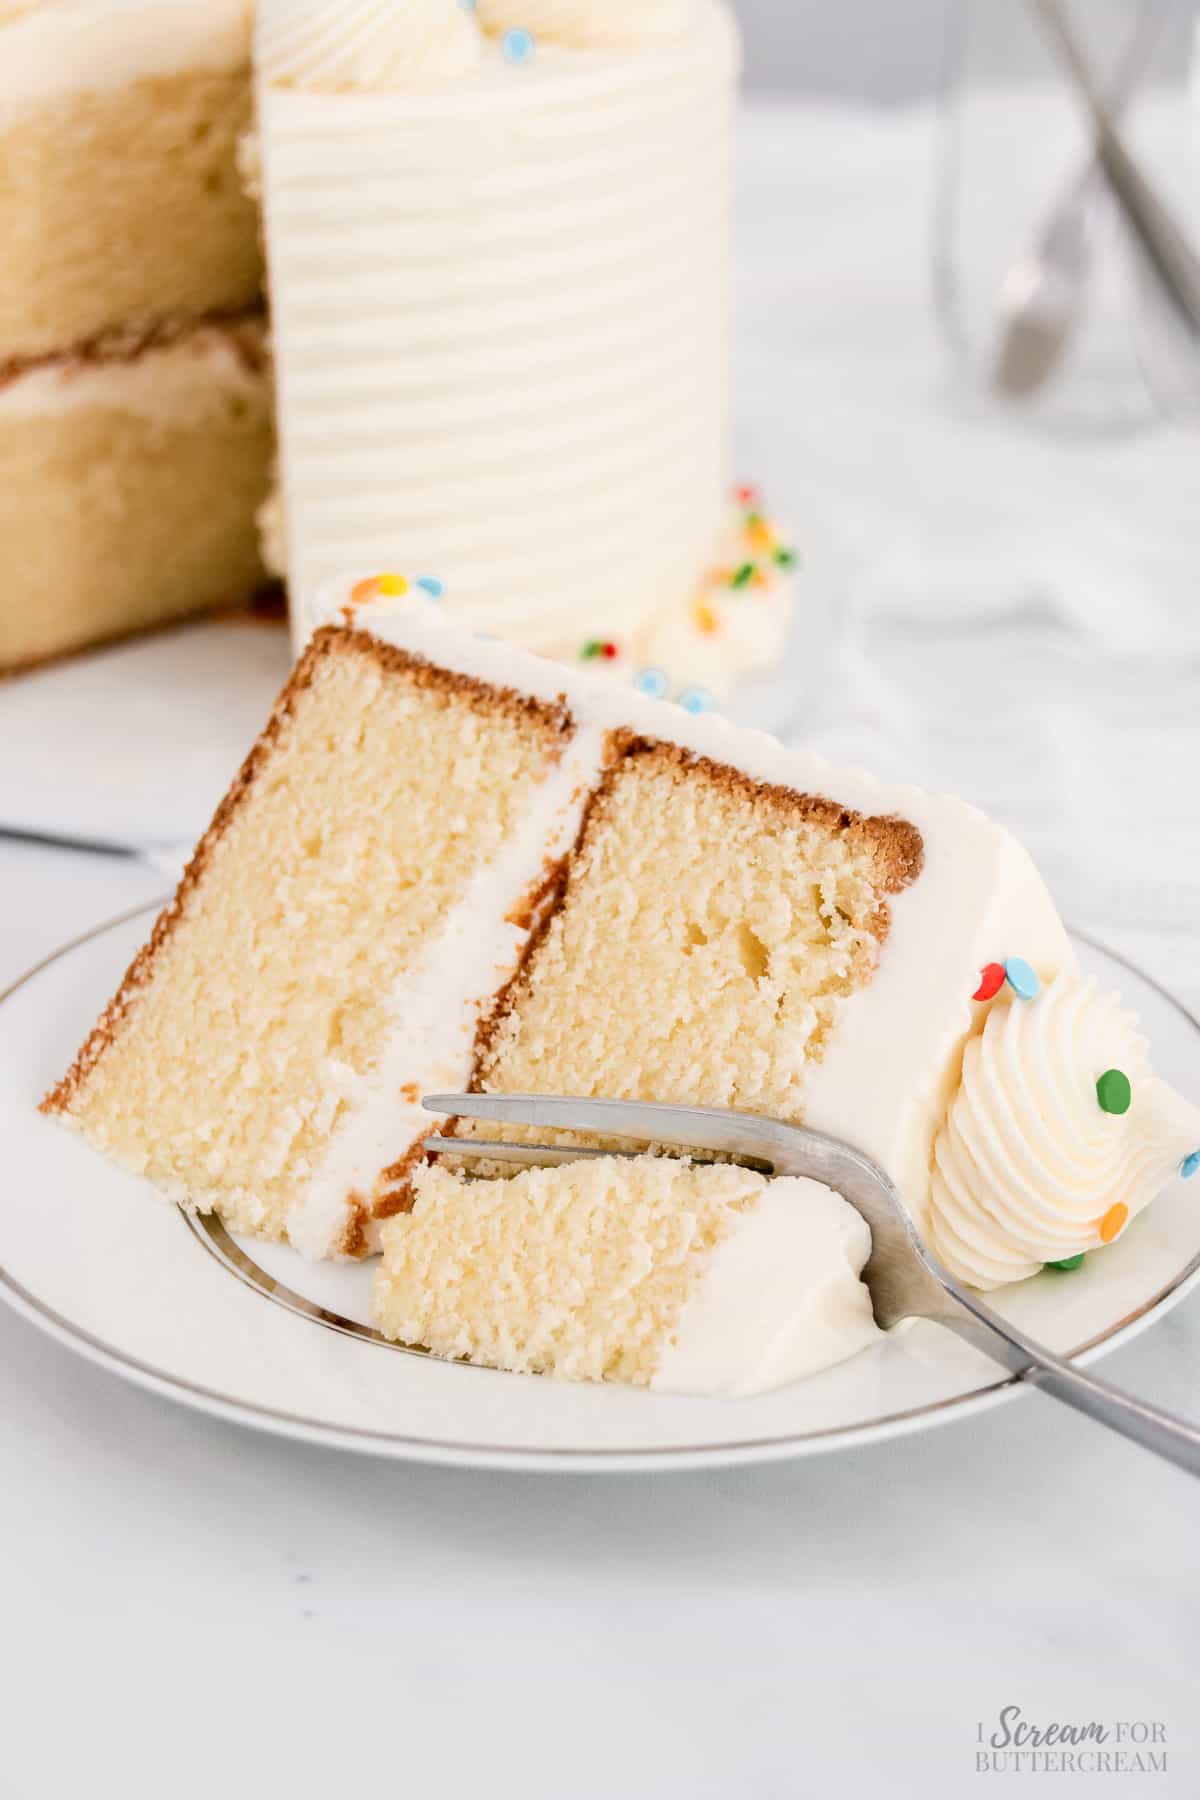
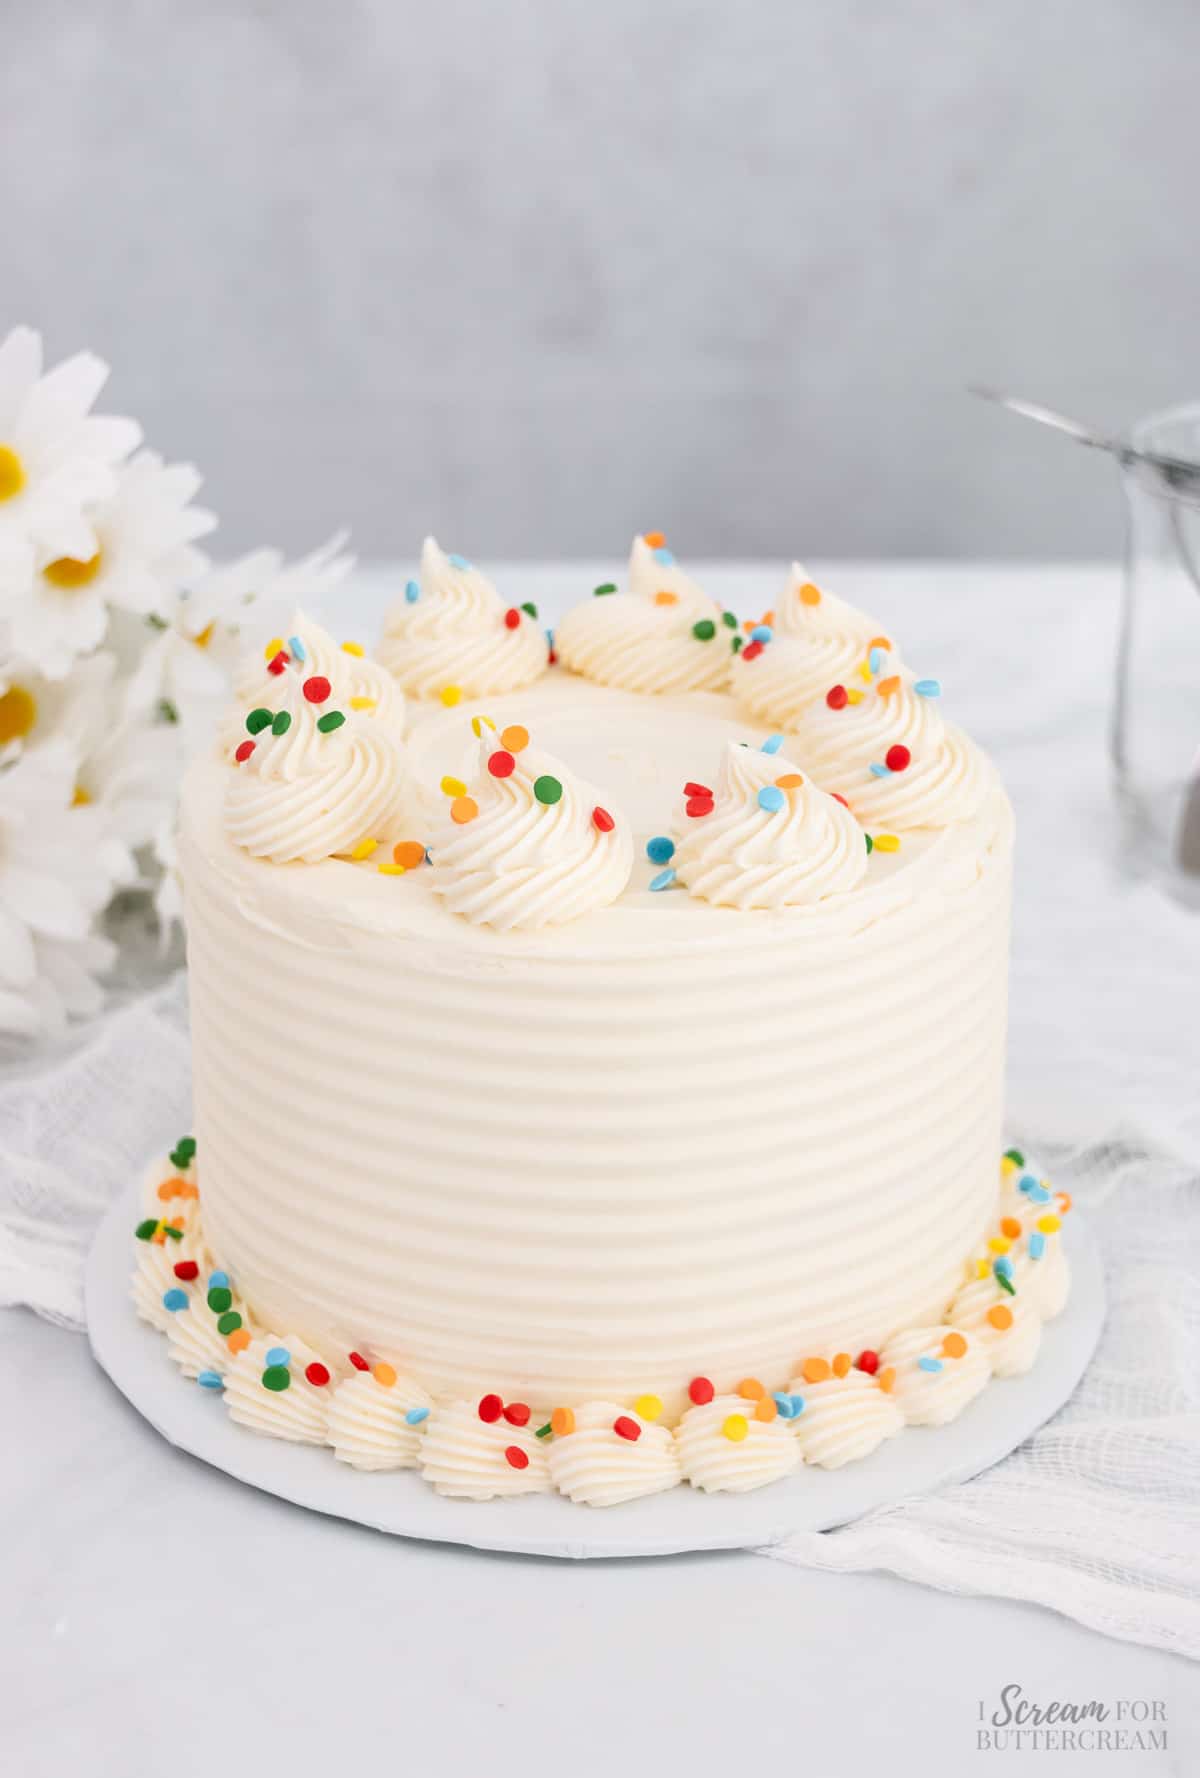
This vanilla mini cake is not only cute, but it’s from scratch, it’s moist and it’s full of vanilla flavor. There are two layers of vanilla cake, then it’s all covered with a rich vanilla buttercream frosting.
You can decorate this mini layer cake any way you like, or you can just leave it plain for an easy dessert.
Hey there! Before you scroll, there’s lot’s of important stuff in the post!…including the FAQ section, which may answer any questions you might have about this recipe. Enjoy!
Jump to:
Ingredient Notes:
Now let's talk about just some of the ingredients that are in the cake and buttercream recipes. (The list of ALL ingredients are in the recipe card below.)
All-purpose flour: This recipe calls for plain all-purpose flour…no worrying about having to get cake flour or any special ingredients. Just make sure when you measure flour, that you spoon it into the measuring cup so that it doesn’t get packed into it. (See more about this in the FAQ section below.)
Unsalted butter: This will be used for both the cake and the buttercream. You’ll want to make sure to let it come to room temperature (don’t microwave it though) before using it.
Sour Cream: This is the star in this vanilla cake. Sour cream in cakes really helps give them a soft texture, makes them super moist and it enhances the taste as well.
Vanilla Extract: Make sure not to skip this as it’s what will give the vanilla cake a nice vanilla flavor. If you have access to vanilla bean paste, that’s even better.

How to make this cake:
Let's talk about how to make this vanilla mini cake. (The detailed instructions are also in the recipe card below.)
Step 1:
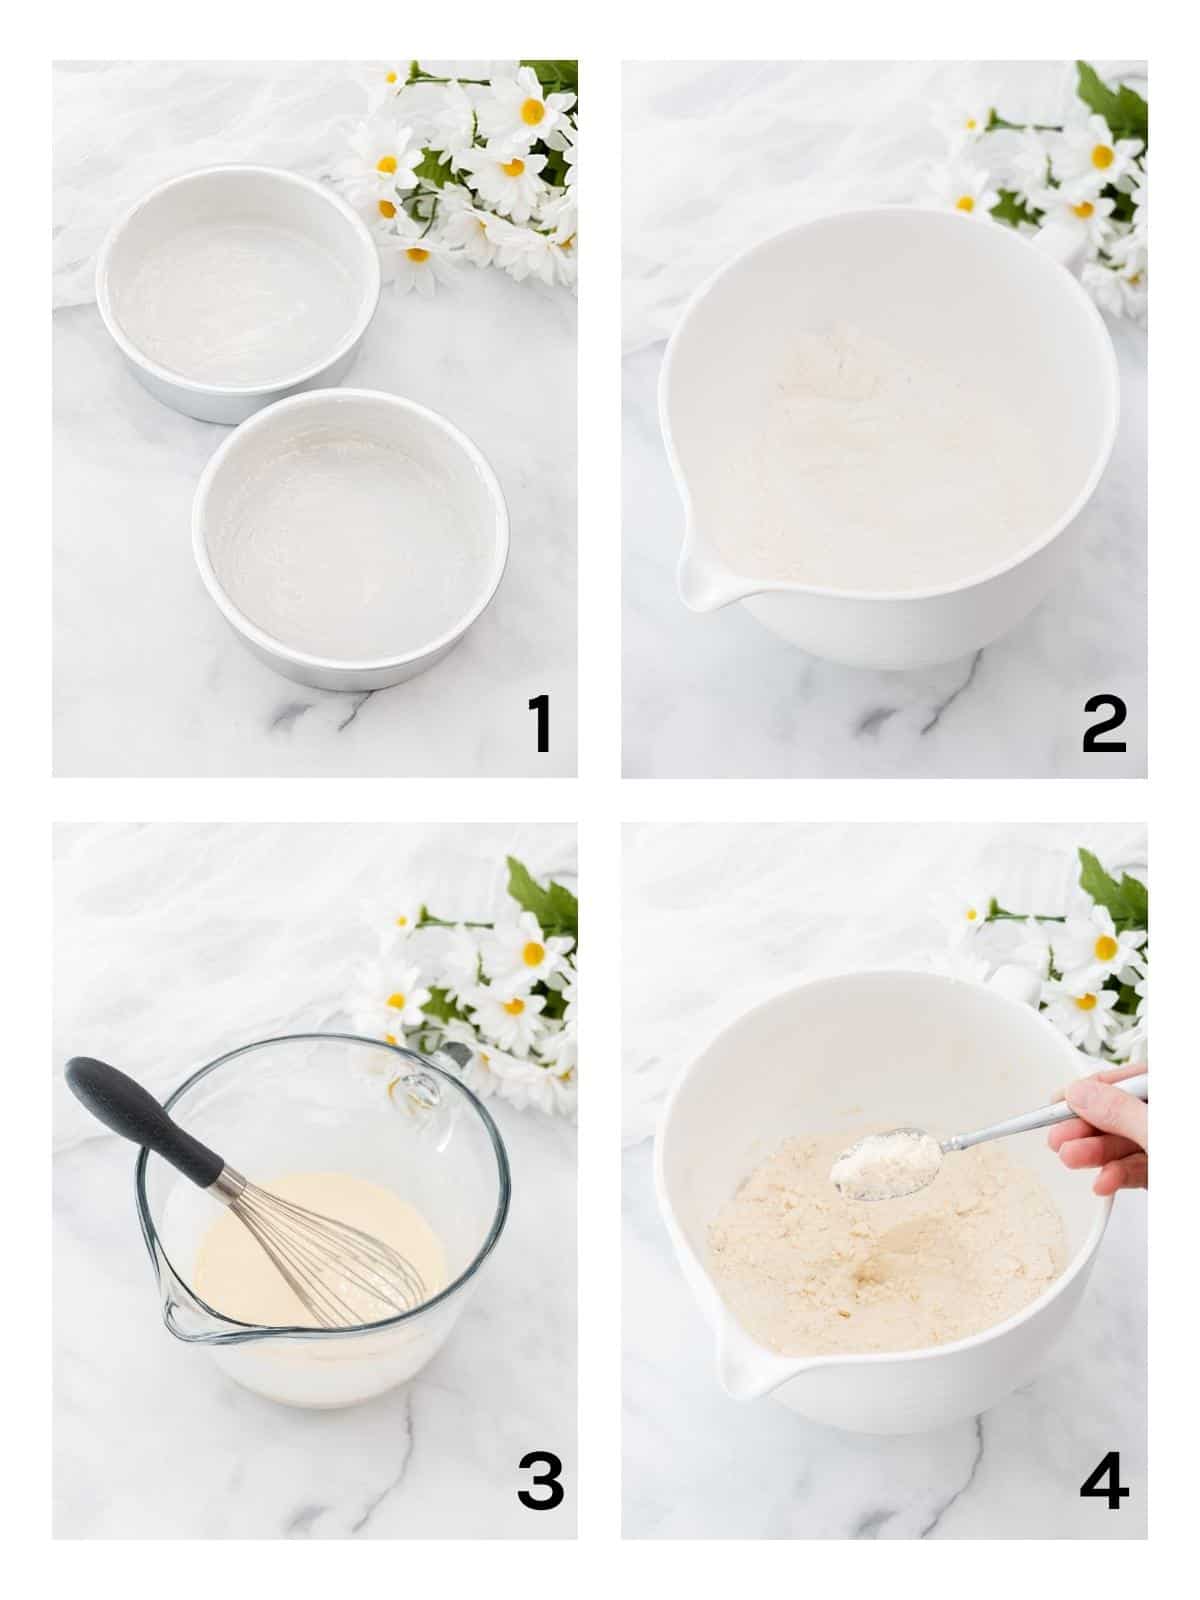
First, you need to preheat the oven to 350 degrees F. Then grease and flour (or spray) two, 6 inch round cake pans that are 2 inches deep.
Make sure that you also set the butter out to come to room temperature on its own. You can cut it into chunks and it will warm up faster.
Step 2:
Next, in a large mixing bowl, add the dry ingredients (flour, sugar, baking powder, and salt) and whisk together.
Step 3:
In another bowl, add the liquid ingredients (oil, eggs, sour cream, milk and vanilla) and whisk together until everything is smooth.
Step 4:
Now, the mixing method for this cake is called the reverse creaming method. You can get a really soft cake by using this and it’s used when there is a high ratio of sugar to flour. I actually find this method easier than the old creaming method.
So, to do this, you’ll add the chunks of butter to the dry mixture and mix with an electric mixer on medium speed while you add the butter in.
Mix until the mixture resembles a coarse, sand-like texture. You basically want the butter to coat the dry mixture.
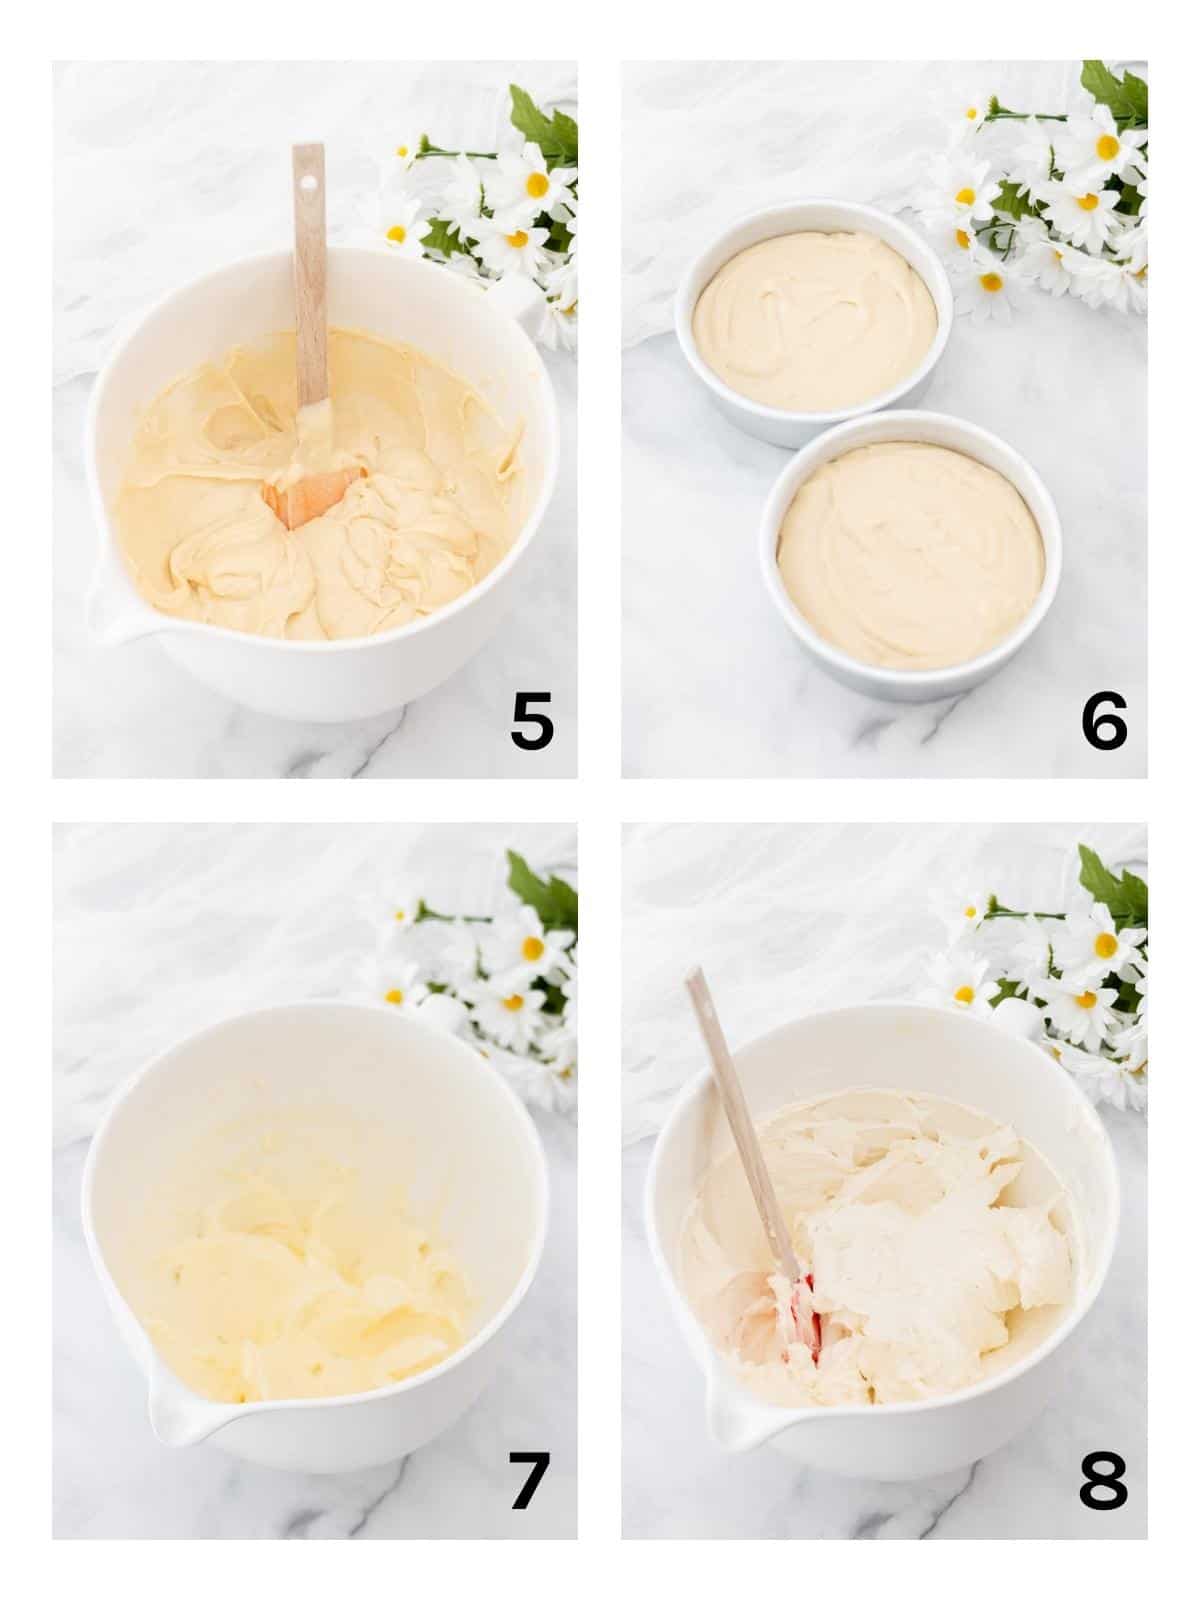
Step 5:
Now add half the liquid to the dry mixture and mix on medium until well combined.
Next, add the second half of the liquid mixture and mix on medium until well combined.
Make sure to scrape down the sides of the bowl and then mix again just until all the ingredients are well incorporated. Be very careful not to over-mix at this point.
Step 6:
Pour the batter into the prepared pans and make sure to smooth it level. Bake at 350 degrees F for approximately 40-45 minutes.
While the cake is baking, make the buttercream.
Step 7:
For the buttercream, cream the butter with an electric mixer on medium speed until it’s super smooth.
Step 8:
Add the confectioner’s, salt, vanilla and 2 tablespoons of milk and mix on low until combined, then on medium to medium-high until well mixed. Make sure to scrape down the sides of the bowl then mix again.
Check the consistency and if it’s too thick add another tablespoon of milk and mix well. Cover well and set aside while the cake cools.
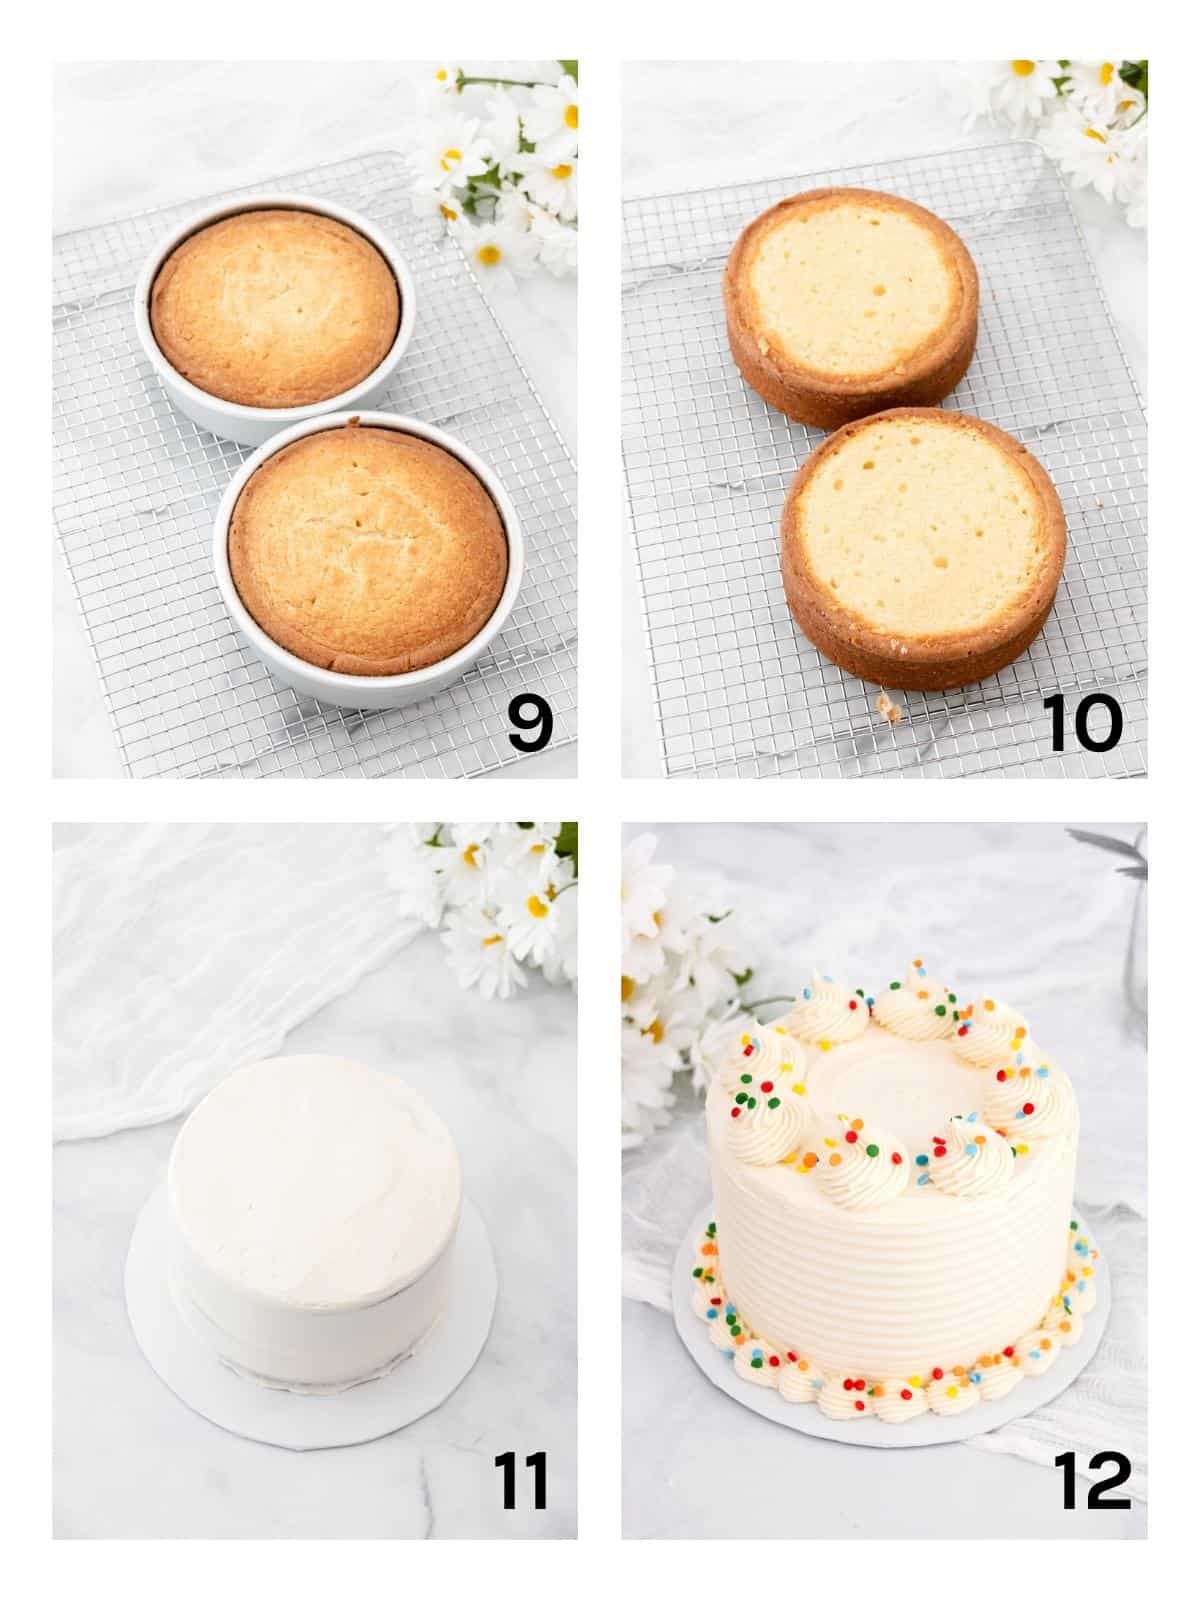
Step 9:
Once the cake layers have baked, cool on a wire rack, in the pans, for about 10-15 minutes.
Step 10:
Now turn the cakes out onto the racks and allow them to cool completely before covering them with buttercream.
The tops of these cake layers will flatten out a bit as they cool, but you can also level the tops with a knife to get them flat in order to decorate.
Step 11:
Add the buttercream to the cooled layered cake.
Step 12:
Pipe decorative borders and add sprinkles if desired.
Tips & FAQs:
Generally, you could probably classify any cake that’s smaller than an 8-inch cake, like a mini cake. This mini cake recipe is for a 6 inch, two-layer cake.
This cake will serve about 8 people. If you cut larger sizes, it will serve less and if you cut thin slices, you will get more servings.
Make sure not to pack the flour down into the measuring cup. Spoon the flour into the cup and level it off, but don’t scoop the flour. Packing too much flour into the measuring cup will end up adding too much flour to the cake batter and will make the cake dry and tough.
Unsalted is always best because you can estimate the proper amount of salt that will be added plus salted butter has a different water content than unsalted.
However, if you’re unable to get unsalted butter, you can use salted butter in the cake and the buttercream, but omit any additional salt that each recipe calls for.
It’s really important to make sure that the butter is at room temperature for both the cake and the buttercream.
Set it out an hour or two before you plan to make the cake. You don’t want to microwave the butter as that will heat it either too much or unevenly and can cause problems with the cake mixing method.
Sour cream is really best here as it makes for a softer texture and really helps give the cake moistness and a good flavor. If you can’t get it, you can substitute it with this plain yogurt.
Make sure and use full-fat yogurt though and not low fat. The fat helps make the cake moist.
Be very careful not to mix the batter for a long time. Scratch cakes should not be mixed for minutes at a time, or they will become dense. Stop mixing once the ingredients are well incorporated.
This cake is done baking when a toothpick inserted into the center of each layer comes out with a few moist crumbs on it or clean, but no raw batter.
This cake can be made ahead of time and frozen if desired. Let the baked cake layers cool completely, then wrap in plastic wrap and foil and place in the freezer for up to a month or two.
To thaw, place the wrapped cake layers on the counter at room temperature and let thaw completely, then remove the wrapping. Once defrosted add buttercream.
This cake can be stored, covered well, at room temperature for 2-3 days. After that, to prolong freshness, it can be stored in the refrigerator, well covered, for another 2-3 days.
That would take some calculating, but there is an 8-inch vanilla layer cake recipe already on the blog if you want to check that out here: Favorite Vanilla Bean Cake
This recipe should work ok for cupcakes, but since it’s a smaller batch, it won’t make a full two dozen. If you’d like a recipe that will make a full batch of vanilla cupcakes, you’ll want to check out this post: Favorite Vanilla Bean Cake (The instructions for making it into cupcakes are in the recipe card on that post.)
This cake is best served at room temperature. If cold, pop a slice in the microwave for about 10-15 seconds.
As an Amazon Associate, I earn from qualifying purchases.
Supplies used for this recipe:
Note About Recipe Measurements: I write recipes using volume (cups) measurements because here in the U.S., this is what people are more familiar with and I don’t want anyone to feel intimidated when baking. For metric/weight measurements, click the ‘metric’ button under the ingredients in the recipe card below. The weights are converted by a program, not me, and it’s just a best guess. I can’t guarantee that weighing the ingredients will produce the exact same results, since I test recipes using volume measurements.
Video:
Recipe

Mini 6 Inch Vanilla Cake Recipe
Ingredients
For the vanilla cake:
- 2 cups all-purpose flour (measured correctly and not packed down into the measuring cup)
- 1 ½ cups granulated sugar
- 2 teaspoons baking powder (make sure your baking powder is in date and not opened more than 6 months ago)
- ½ teaspoon salt
- ¾ cup unsalted butter, room temperature (1 ½ sticks)
- 1 tablespoon vegetable oil (or canola oil)
- 2 large eggs
- ¾ cup sour cream (or plain yogurt)
- ⅓ cup milk
- 2 teaspoons vanilla extract (or vanilla bean paste)
For the vanilla buttercream:
- 1 ½ cups unsalted butter, room temperature (3 sticks)
- 4 ½ cups confectioner's sugar
- pinch of salt
- 2 teaspoons vanilla extract
- 2 tablespoons milk (may add in another tablespoon if needed)
Instructions
For the cake:
- Preheat the oven to 350 degrees F. Grease and flour (or spray) two, 6 inch round cake pans that are 2 inches deep. (Make sure you are using the correct sized pans as this is important. See the notes section below.)
- Set the butter out, cut it into chunks and allow it to come to room temperature. Do not microwave it, it needs to come to room temperature on its own.
- In a large mixing bowl, add the dry ingredients (flour, sugar, baking powder and salt) and whisk together.
- In another bowl, add the liquid ingredients (oil, eggs, sour cream, milk and vanilla) and whisk together until smooth.
- Add the chunks of butter to the dry mixture slowly and mix with an electric mixer on medium speed as you add the butter. Mix until the mixture resembles a coarse, sand-like texture. (To see the texture, watch the video within this post.)
- Add half the liquid mixture to the dry mixture and mix on medium until well combined, only about 30-45 seconds.
- Add the second half of the liquid mixture and mix on medium until well combined, only about 20-30 seconds.
- Scrape down the sides of the bowl and then mix again just until all the ingredients are well incorporated. Be very careful not to over-mix. Do not mix over 20 seconds here. If scratch cake batter is mixed for too long it will cause a dense cake or one that falls in the middle.
- Add the batter to the prepared pans and smooth level. Bake at 350 degrees F for approximately 40-45 minutes (ovens vary). The batter will rise all the way to the top. Make sure you're using the proper sized pans. The cake layers are baked when they are golden brown and a toothpick inserted into the center of each layer comes out with a few moist crumbs on it, or clean, but not raw batter.
- Cool on a wire rack, in the pans, for about 10-15 minutes, then turn the cakes out onto the racks and allow them to cool completely before covering with buttercream.The tops of these cake layers will flatten out as they cool, but the tops can be leveled with a knife if needed in order to decorate.
For the buttercream:
- In a large mixing bowl, cream the butter with an electric mixer on medium speed until smooth.
- Scrape down the sides of the bowl and add the confectioner’s, salt, vanilla and 2 tablespoons of milk and mix on low until combined, then on medium to medium-high until well mixed.
- Scrape down the sides of the bowl and mix again.
- Check the consistency. If it’s too thick add another tablespoon of milk and mix well.
- Spread buttercream onto completely cooled cake and decorate as desired.
Notes
- This is a mini cake made in two, 6 inch round cake pans that are two inches deep. If your pans are smaller than 6 inch round pans or are more shallow than 2 inches deep, the batter will overflow. This recipe is specifically for two, 6 inch round pans that are 2 inches deep as stated in the instructions. The batter will rise all the way to the top of the pans, so if the pans are smaller or more shallow, there will be too much batter. Make sure that you’re not using 4 inch pans for this recipe. If you want a vanilla cake recipe for 8 or 9 inch round pans, you can find that recipe at this link: Vanilla Bean Cake Recipe
- Do not mix scratch cake batter for very long. That will cause a dense cake and one that may fall in the center. Once you add the liquid ingredients, only mix until everything is well combined. That’s usually around 20-30 seconds or even less.
- Make sure not to pack the flour down into the measuring cup as that will inadvertently add too much flour and the cake will turn out dry and dense. Spoon the flour into the measuring cup and level it off.
- Make sure that your baking powder is still in date. If it’s older than 6 months, it may not work properly and the cake won’t rise.
- If you’re baking at a high altitude, you will need to make temperature and ingredient adjustments. This isn’t something I can do for you though as I do not live at a high altitude and have no way to test recipes at high altitude.
- Do not open and close the oven door multiple times when a cake is baking…and definitely don’t slam the oven door shut. The cake will fall and come out dense.
- If you need more tips or help, make sure to watch the video and read the FAQ section within this post.
Nutrition
How to Share
I’d love for you to share this recipe link or tag it, but please do not share screenshots or copy/paste the recipe to social media as the content and photographs are copyright protected and we (bloggers) work really hard on our content. Sharing the link, tagging us on socials and pinning it is super appreciated though!
Other posts you might like:
Don’t forget to pin it below!
Madison
My cakes overflowed then collapsed 🫠 what did I do wrong?! I’m definitely using 6″ pans that are 2″ deep. I did also use cake strips. Pretty sure I measured it all correctly?!
Kara
Oh my goodness, I’m so sorry they overflowed! The only things I can think of is maybe accidently adding in too much leavening, or maybe the size of the eggs were too large? I’ve seen that happen to people. They used yard eggs or maybe extra large eggs and the batter overflowed the pan.
Eileen Gee
I’m a fairly new baker. I’d like to add a fresh berry filling on top of the buttercream in the center. Any reason this may not work? It’s for a friend’s birthday so I’d like to make it a little special.
By the way, I’ve made your favorite vanilla bean layer cake two or three times. It’s the most delicious vanilla cake I’ve ever eaten. My friends and neighbors think so too.
Thanks for your recipes and instructions. So grateful!
Kara
Hi Eileen, so glad you love the vanilla bean layer cake! Thanks so much for the awesome compliments! So I think the berry filling would be fine as long as it’s not too liquidy. I don’t know if that’s a word, but I’m sure you’ll get what I mean. I would probably try to add the fruit filling as close as you can to the event though as it can eventually just slide right off the top, depending on how much is added. Hope this helps!
Ashley
I am wanting to make a smash cake for my daughter’s first birthday. She is allergic to eggs. I have found that I can substitute 1 tsp baking soda + 1 tbsp vinegar for the first egg, and 1/4 cup plain yogurt for every egg after the first egg in almost any cake recipe. I see that this recipe has sour cream and baking powder, is there any reason why my method of replacing eggs wouldn’t work in this recipe due to these ingredients? Should I still add the sour cream or not since I’m using yogurt already, or even maybe I could use the sour cream instead of the yogurt? I really want to make this recipe (slightly altered of course) for her birthday. I understand by altering the recipe this way it won’t taste exactly the same but I just want to make sure that it will still turn out a decent cake and cook correctly if you have any ideas. Thank you!
Kara
Hi Ashley, I honestly don’t know if that would work. I just don’t have any experience baking without eggs and have just not experimented with it that much. If you have time, you could perhaps just experiment by making only half the recipe and using only one pan and see if it turns out. If it doesn’t work, at least you’d know ahead of time and you’d only be out the ingredients for the half batch. It might also be helpful to google ‘sour cream vanilla cake without eggs’ and see if there is a similar recipe that pops up and then maybe compare the ingredient amounts to it. (Just remember to account for the fact that this one is made in 6-inch pans and another recipe might be made in 8-inch pans so there would be some math involved.) But, that might point you in the right direction. I’m so sorry I can’t be more help! I don’t want to steer you into the wrong direction and I just don’t have experience baking without eggs.
Zolei Y.
Hello,
I would like to make a 8×2 cake how would everything be measured?
Kara
Hi there, if you would like to make this cake in two, 8 inch round cake pans, I have that version here: https://iscreamforbuttercream.com/favorite-vanilla-bean-cake/
Hope this helps!
Amanda
I have a 6 inch found cake pan but it’s 3 inches tall. Can I use that? I think it will still work as it simply just has more room but would like to hear your thoughts before I try.
Kara
Hi Amanda, yes that pan should work just fine! Just watch it a little closer when baking. Sometimes when the pan is a little taller, it can start browning the cake a bit quicker, so maybe start checking it a little earlier. Hope this helps!
Pam
Hi, I would like to use a 6 inch and a 4 inch pan so I can tier them. How would I adjust the ingredients, and/or cooking time?
Kara
Hi Pam, it depends on how many layers per tier you would like. If two layers per tier, then just make one recipe batch and fill the two 6-inch pans and bake. That would be your bottom tier. For the top, 4-inch round tier, for two layers, I’d still go ahead and mix up a full batch and just have a bit of batter left over. It won’t be much. The reason is that if you adjust the ingredients down further, the calculations become difficult and the amounts become a little weird and hard to measure. Plus sometimes the cake doesn’t come out correctly when adjusted down too much, so I would just go with a full batch.
Now, if you just want to make just one layer of the 6-inch cake and one layer of the 4-inch cake (so only 1 layer per tier), then just make a full batch of the recipe. Fill each pan 2/3 of the way up and once full, you should have only a small amount of batter left. The four inch pan cake will probably bake up quicker, but I don’t have an exact time, since I haven’t tried it, so just start watching it closer about 10 minutes early. You can make cupcakes out of the left over batter if you want, or just dispose of it. There won’t be much batter left over, so it’s not wasting much of it at all.
Hope that helps and reach out if you have more questions.
Nina
I made this cake for my son’s second birthday and it turned out great! I followed the recipe exactly except I used almond extract in the frosting instead of vanilla. It came out great! I did have to bake it an extra 10 minutes for it to cook all the way through, but the texture and consistent were perfect. I will be keeping this recipe to make more cakes in the future. Thank you!
Kara
That’s great Nina! So glad it turned out and that you loved it!
K
It tastes great, but I couldn’t get it to cook all the way through. Ended up losing half the cake to a raw center and burnt outsides.
Kara
Hi there, so sorry you had trouble with this one. That sounds like the temperature was too hot. Maybe the temp was accidently set too hot or perhaps the oven might be off a little. If not and if you wanted to try it again, just try lowering the temp to maybe 325 degrees F. and bake for a bit longer and that should fix that issue.
Ann
Made this and absolutely loved it! Moist and the layers were nice and thick. I love the small size, and would also like to make a chocolate version. How much cocoa powder would I need to add and would I need to adjust any of the other ingredients as well?
Kara
Hi Ann, so glad you loved this cake! I have a chocolate version of this on the website. Here’s a link for you: https://iscreamforbuttercream.com/mini-6-inch-chocolate-cake-recipe-tutorial/
I hope you love it and thanks for the great review!
Jill
Just made this cake for my baby’s 2nd birthday and it was perfect! I used the Fat Dido’s brand cake pans and lowered the temp to 325° per the brand’s instructions – it needed closer to 50 mins to fully bake. I got compliments on both the cake and frosting and I can’t stop eating it!
Kara
Hi Jill, this is so awesome to hear! I’m so glad everyone loved it and thank you for adding in the instructions for those pans and how long it took to bake. That will be super helpful to others as well. Thank you for the great review!
Lana
So excited to make this cake. What are the calories per slice?
Kara
Hi Lana! I hope you enjoy it! You can find the nutritional information in the recipe card. Just hit the “Jump to Recipe” button. At the top of the card, you’ll see the number of slices and the estimated calories. Please keep in mind, if you cut smaller slices, the calorie count will be lower. Please note that the nutritional values are approximate, as they’re calculated using a software tool and I can’t guarantee that it’s 100% accurate.
Deb
I had a problem getting the cake done in the middle. The outside was well done, almost burnt and the inside was not done. It seemed like too much batter. Next time I think I will use 3 pans or upsize to 8 inch so it bakes more evenly. We trimmed the outside off and froze it and frosted as usual!
Kara
Hi Deb, hmmm that is really interesting. I’m not sure why it would do that. How deep are your 6 inch pans? Are they at least 2 inches deep? Also, you could lower the temp a bit as well. Maybe your oven runs a little hot and that could cause the outside to bake faster than the inside can keep up with. If you do try it in 8 inch pans, just know that the batter will not be very deep, so it will take less time to bake it.
Editing to add: If you bake again in the 6 inch pans, try baking at 325 degrees F instead of 350F and baking a bit longer. Also, make sure they pans are at least 2 inches tall. That’s standard, but stating here just in case.
Ben
I’m making this recipe with my 5th grade students. Do you know the total carb count of just the cake itself without the frosting? Thank you!
Kara
Hi Ben, unfortunately I don’t know for sure. My program automatically calculates it with all the ingredients combined. I did however add my nutritional stats into AI and asked it if it could calculate it for me and it said that per slice, it would be about 62 carbs without the frosting. I really have no idea if that’s accurate though, but maybe it’s close?
Adam
Both my cakes stuck to the pan despite using nonstick spray and letting them cool in the pans for 15 minutes.
Any guesses as to why?
Kara
Hi Adam, I haven’t had a lot of luck using non-stick spray. Some cakes will still stick to the pans using that and especially more delicate cakes will. I find that greasing the pans with vegetable shortening and flouring the pans has worked better for me. It’s kind of a pain, but the cakes don’t stick as badly when I do that. Also, if you want to stick with the spray, I’d spray it first, but then add a parchment paper round on the bottom of the pan. I do that as well and it works.