• Skip to primary navigation
  • Skip to main content
  • Skip to primary sidebar
I Scream for Buttercream
  • Blog
    • Subscribe for Free
    • Exclusive Content for VIPs
  • Visit the Shop!
    • The Cake Blueprint
  • Recipes
    • Cakes
    • Frostings/Fillings
    • Cupcakes
    • Cake Pops
    • Other Sweets
  • Cake Decorating
  • Cake Baking Tips
  • About Kara
  • FAQs
    • Contact Me
    • Terms and Conditions
      • Privacy Policy
      • Advertising Disclosures
      • Cookie Policy
      • Food Safety, Allergy & Nutrition Disclaimers
    • Accessibility Statement
menu icon
go to homepage
subscribe
search icon
Homepage link
  • Blog
    • Subscribe for Free!
    • Exclusive Content for VIPs
  • Visit the Shop!
    • The Cake Blueprint
  • Recipes
    • Cakes
    • Frostings/Fillings
    • Cupcakes
    • Cake Pops
    • Other Sweets
  • Cake Decorating
  • Cake Baking Tips
  • About Kara
  • FAQs
    • Contact Me
    • Terms and Conditions
      • Privacy Policy
      • Advertising Disclosures
      • Cookie Policy
      • Food Safety, Allergy & Nutrition Disclaimers
    • Accessibility Statement
×
Home » Blog » Cupcake Decorating

Mini Chocolate Sails

Updated: Jan 3, 2021 · Published: Jan 19, 2017 by Kara · This post may contain affiliate links · This blog generates income via ads

  • Email
  • Facebook

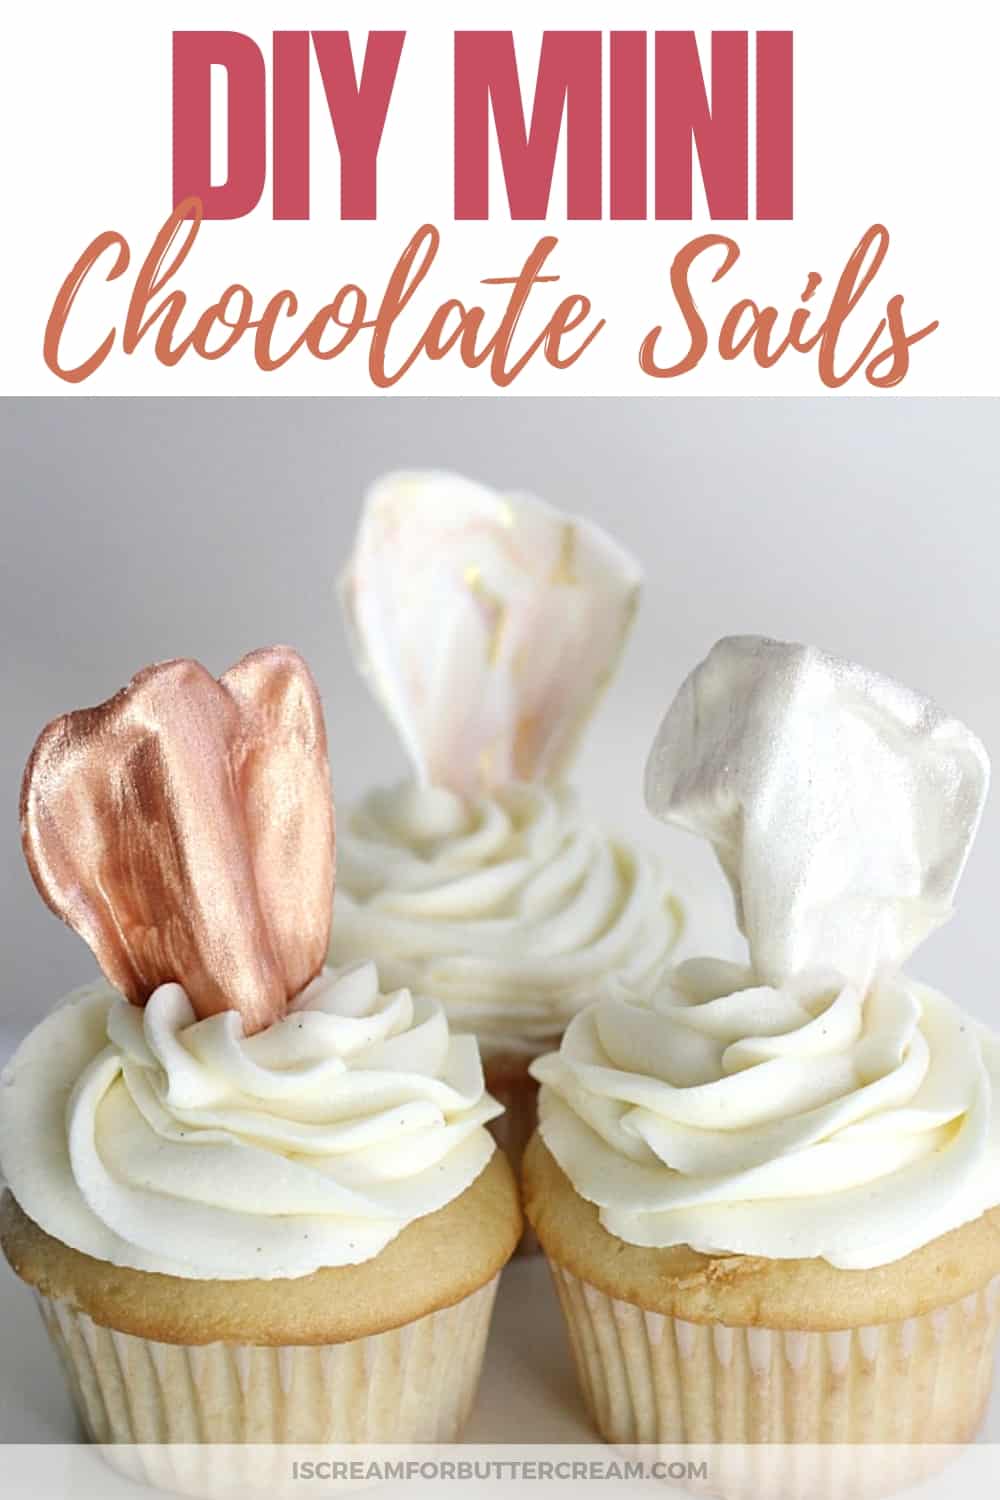
I’ve been seeing a lot of chocolate sails around pinterest. They’re usually large chocolate pieces sticking out of the top of cakes. I think they’re cute and they’re not really too difficult to pull off. They’re just a little delicate. I thought, wouldn’t it be cute to make mini chocolate sails for cupcakes!

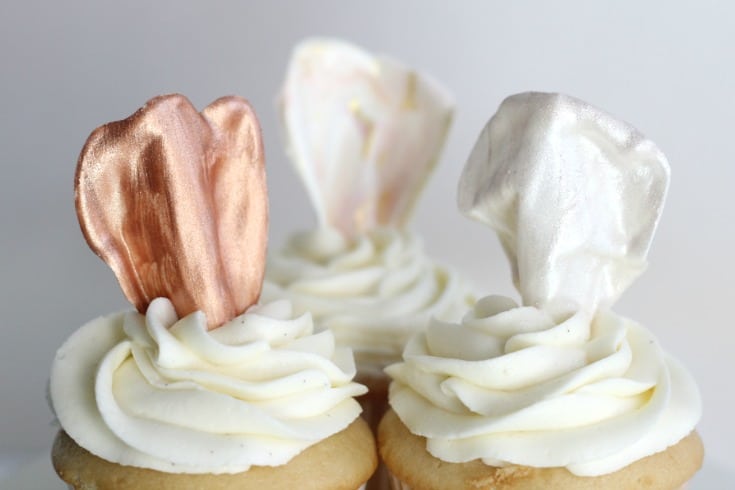
So, I’m a big fan of metallics (or really any kind of anything that’s shiny and glittery), so in true ‘Kara form’ I decided to give my sails a lil’ somethin’ special. I covered them in edible metallic!

Mini Chocolate Sails

I couldn’t just decide on one though. I had to have three different options. (By the way, there’s a video close to the end of this post that will show you exactly how to make them.)

This post contains affiliate links. As an Amazon Associate, I earn from qualifying purchases. You can see my policies linked in the website footer.

Items you’ll need for the mini chocolate sails:

  • Bright White Candy Melts
  • Candy gel color (for the marbled chocolate sails)
  • Small Icing Spatula
  • Edible Copper Sparkle Dust
  • Edible Silver or Super Pearl Dust
  • Edible gold dust
  • Paint brushes used only for food
  • Vodka or Lemon Extract (for painting the sails)
  • Paper clips or small binder clips
  • Wax paper or parchment paper cut into small rectangles
  • Baked Cupcakes
  • Buttercream

The Marbled Mini Chocolate Sail:

Marbled Mini Chocolate Sail

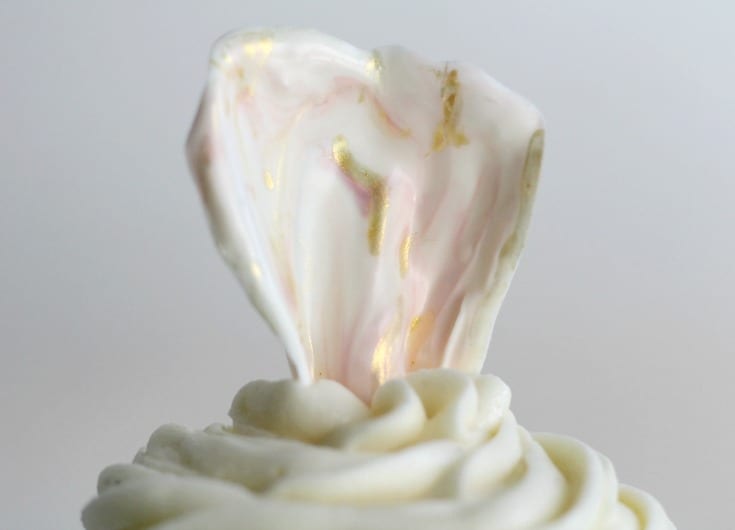
For the marbled sails, I just spread a little of the melted candy melts on a rectangle of wax paper. I then took a toothpick and add a little of the red candy gel coloring, took my small spatula and smeared it around.

I took the bottom of the wax paper square, crimped it and attached it together with a paper clip. You can also use a small binder clip.

I popped them into the fridge for about five minutes and then pulled the wax paper off the sails. These are delicate, so go slow.

I then added some lemon extract to edible gold dust and painted it on in small random areas.

Don’t forget to check out the video at the end of this post to see how they’re made!

The Copper and Silver Chocolate Sails:

Copper Mini Chocolate Sail

Silver Mini Chocolate Sails

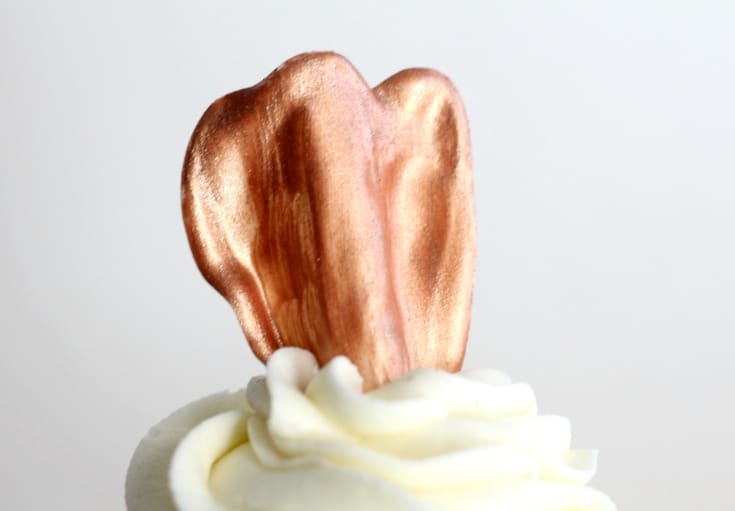
These are the same process as the marbled chocolate sails except you’ll just use plain white candy melts.

Once you’ve separated the sail from the wax paper, add some lemon extract or vodka to the petal dust and paint onto your sails.

You’ll want to do several coats.

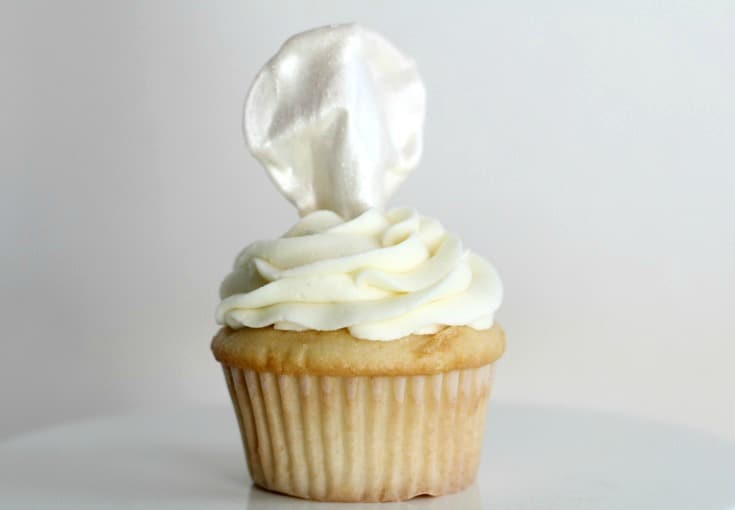
Set aside to dry and then just insert into the buttercream on your cupcakes.

Mini Chocolate Sails close up view

It’s best to keep these chilled so the buttercream can stay firm to hold up the chocolate sails.

Here’s the video that will show you all the steps.

So, try them out and tell me what you think!

DON’T FORGET TO PIN IT FOR LATER!

Mini Chocolate Sails New Pin

FREE: 7 Quick & Easy Tips to Make Your Cakes Look Professional

Ready to start making cakes that look amazing?

Grab this FREE guide with quick and easy tips to make your cakes actually look like a professional made them, so you can start showing them off!

See our privacy policy here.

Almost done! Make sure to check your email to confirm! Your download will be in that email.

There was an error submitting your subscription. Please try again.

Powered by Kit
« Chocolate Heart Cake Ball Cake with Pourable Ganache Recipe
Tips for Cake Boards »
  • Email
  • Facebook

Filed Under: Cupcake Decorating Tagged With: birthday cakes

Reader Interactions

Leave a Reply Cancel reply

Your email address will not be published. Required fields are marked *

Recipe Rating


Primary Sidebar

  • Facebook
  • Instagram
  • Pinterest
  • YouTube

Hey there, I’m Kara!

Hi, I'm so glad you're here! Cake shows up at our most important and happiest moments in life, like birthdays, weddings, baby showers and holidays. It's also for those everyday moments...it makes them even better. Put simply, cake just makes us happy! I love trying out new cake flavor combinations and decorating ideas. Have a look around and I bet you can find a cake recipe or tutorial for any of life's big moments and those everyday moments too. Click here if you want to learn more about me!

FREE GUIDE: 7 Easy Tips to Get Professional Looking Cakes!

Even if you've never baked or decorated a cake before!

Grab the FREE guide plus get email updates & see behind the scenes fun each week.

    We won't send you spam. Unsubscribe at any time.

    Built with Kit
    • Let’s Make a Cake!
    • Blog
    • Privacy Policy
    • Cookie Policy
    • Terms and Conditions
    • Advertising Disclosures

    Copyright © 2025 ·