
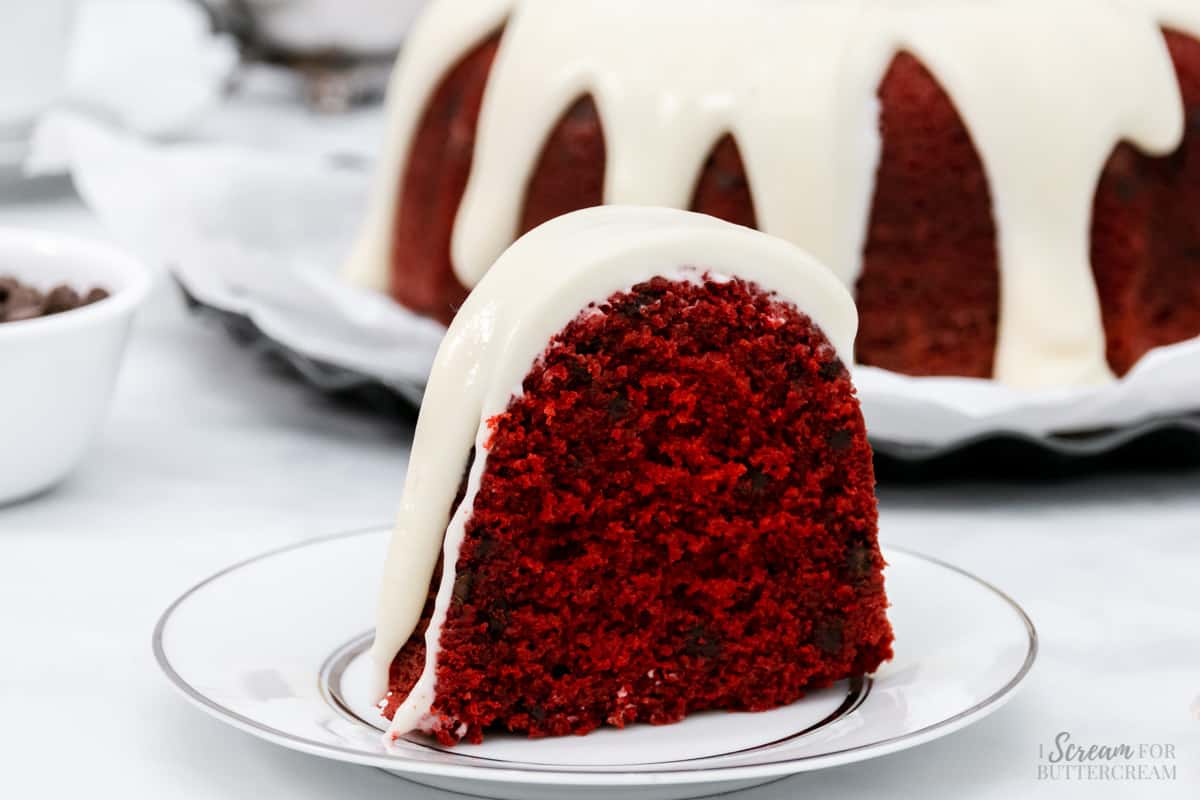
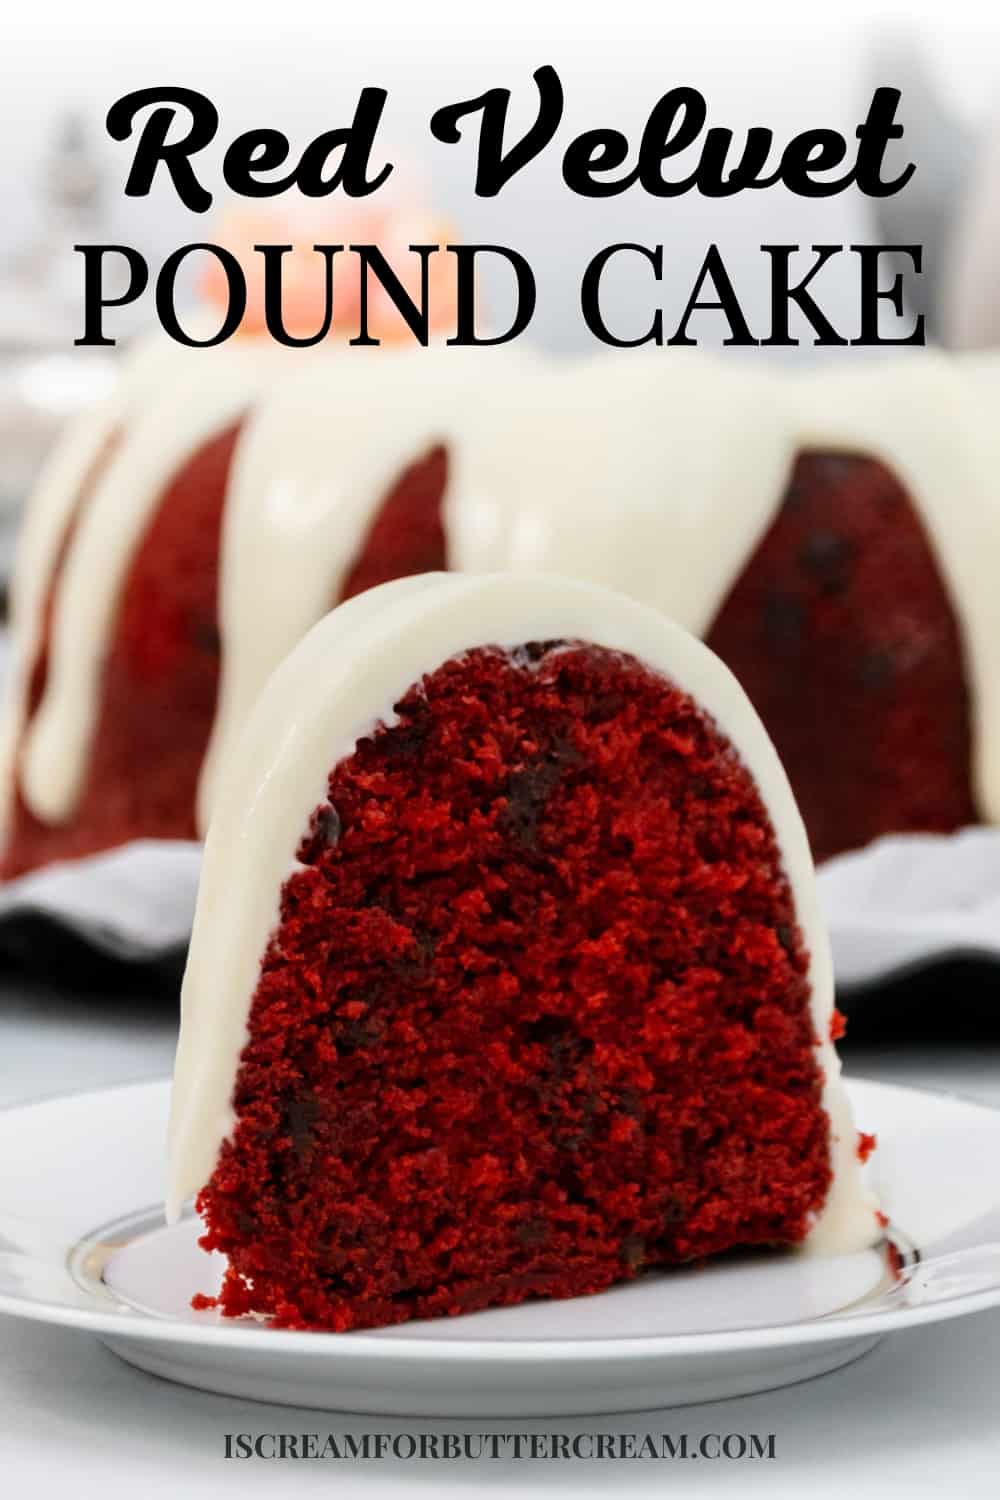
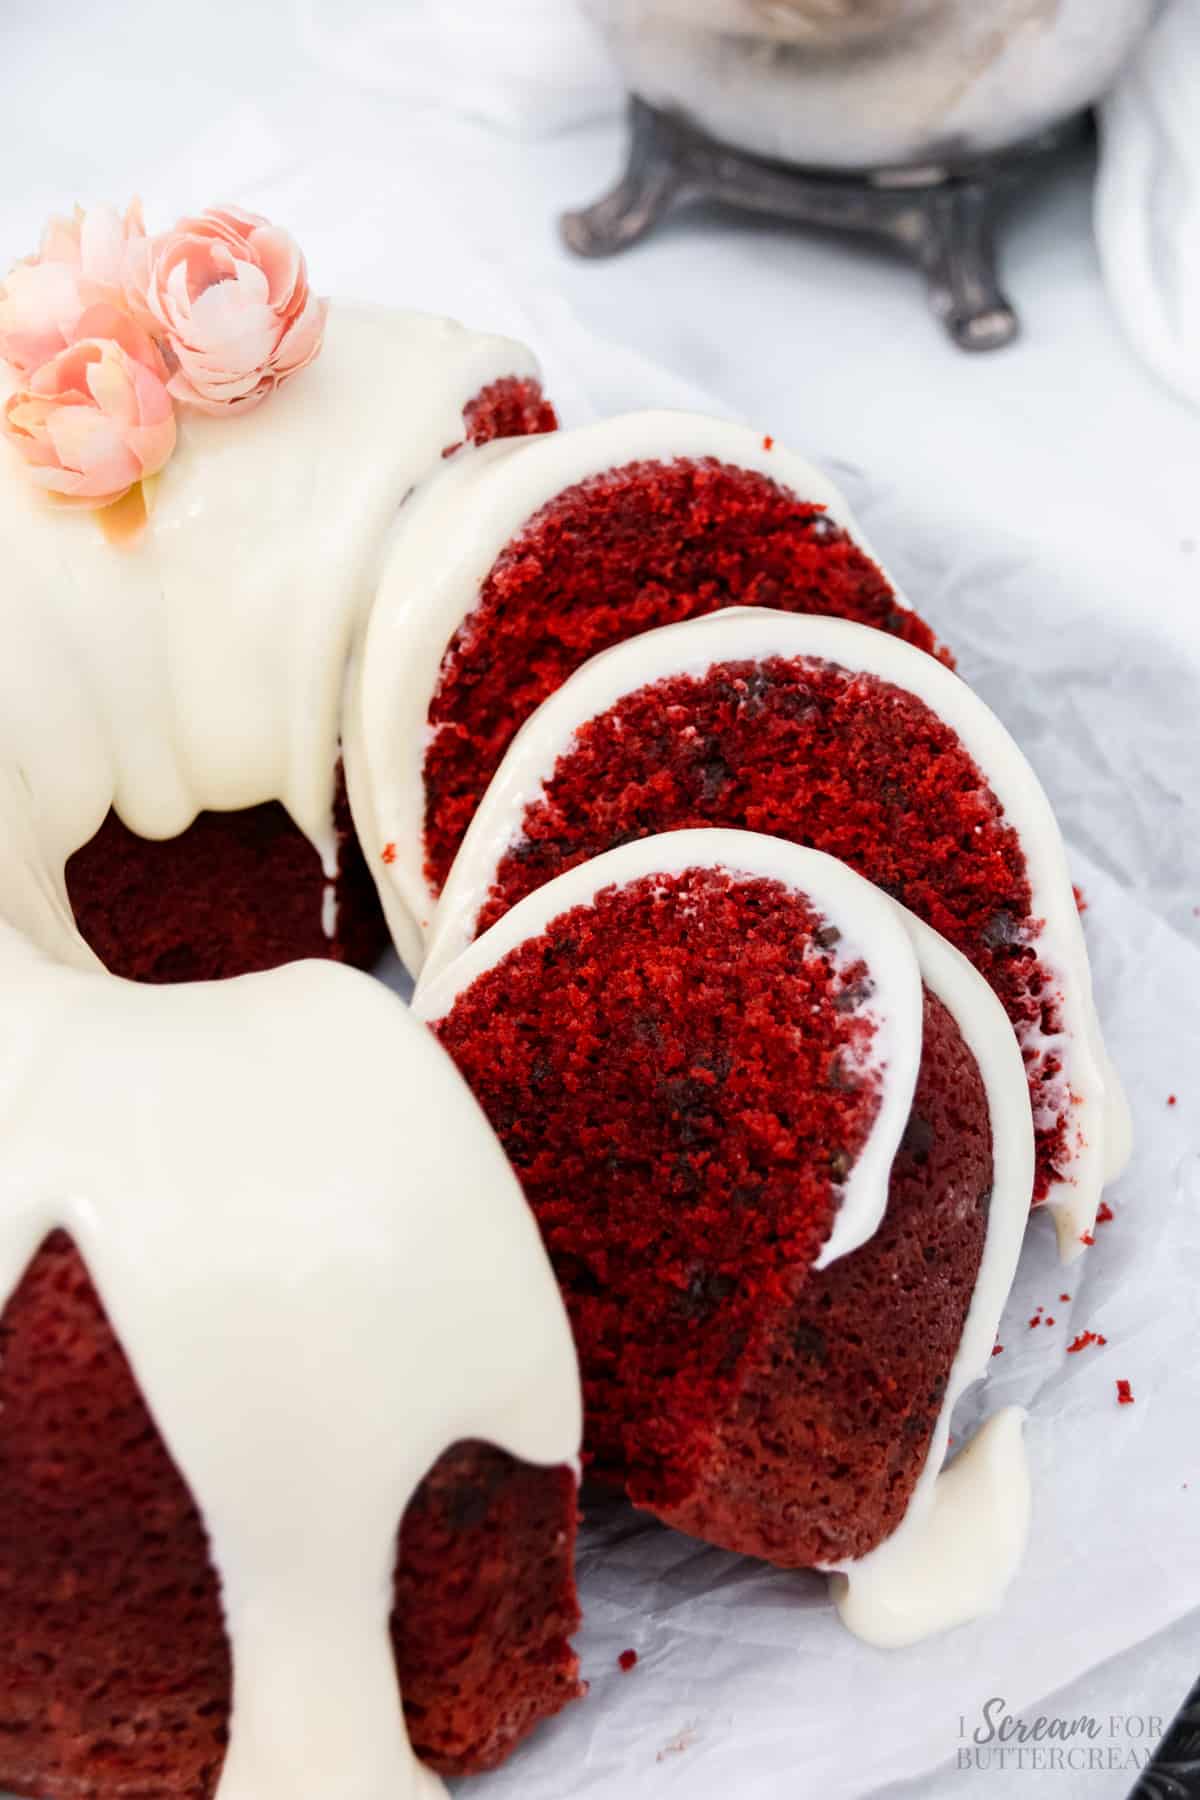
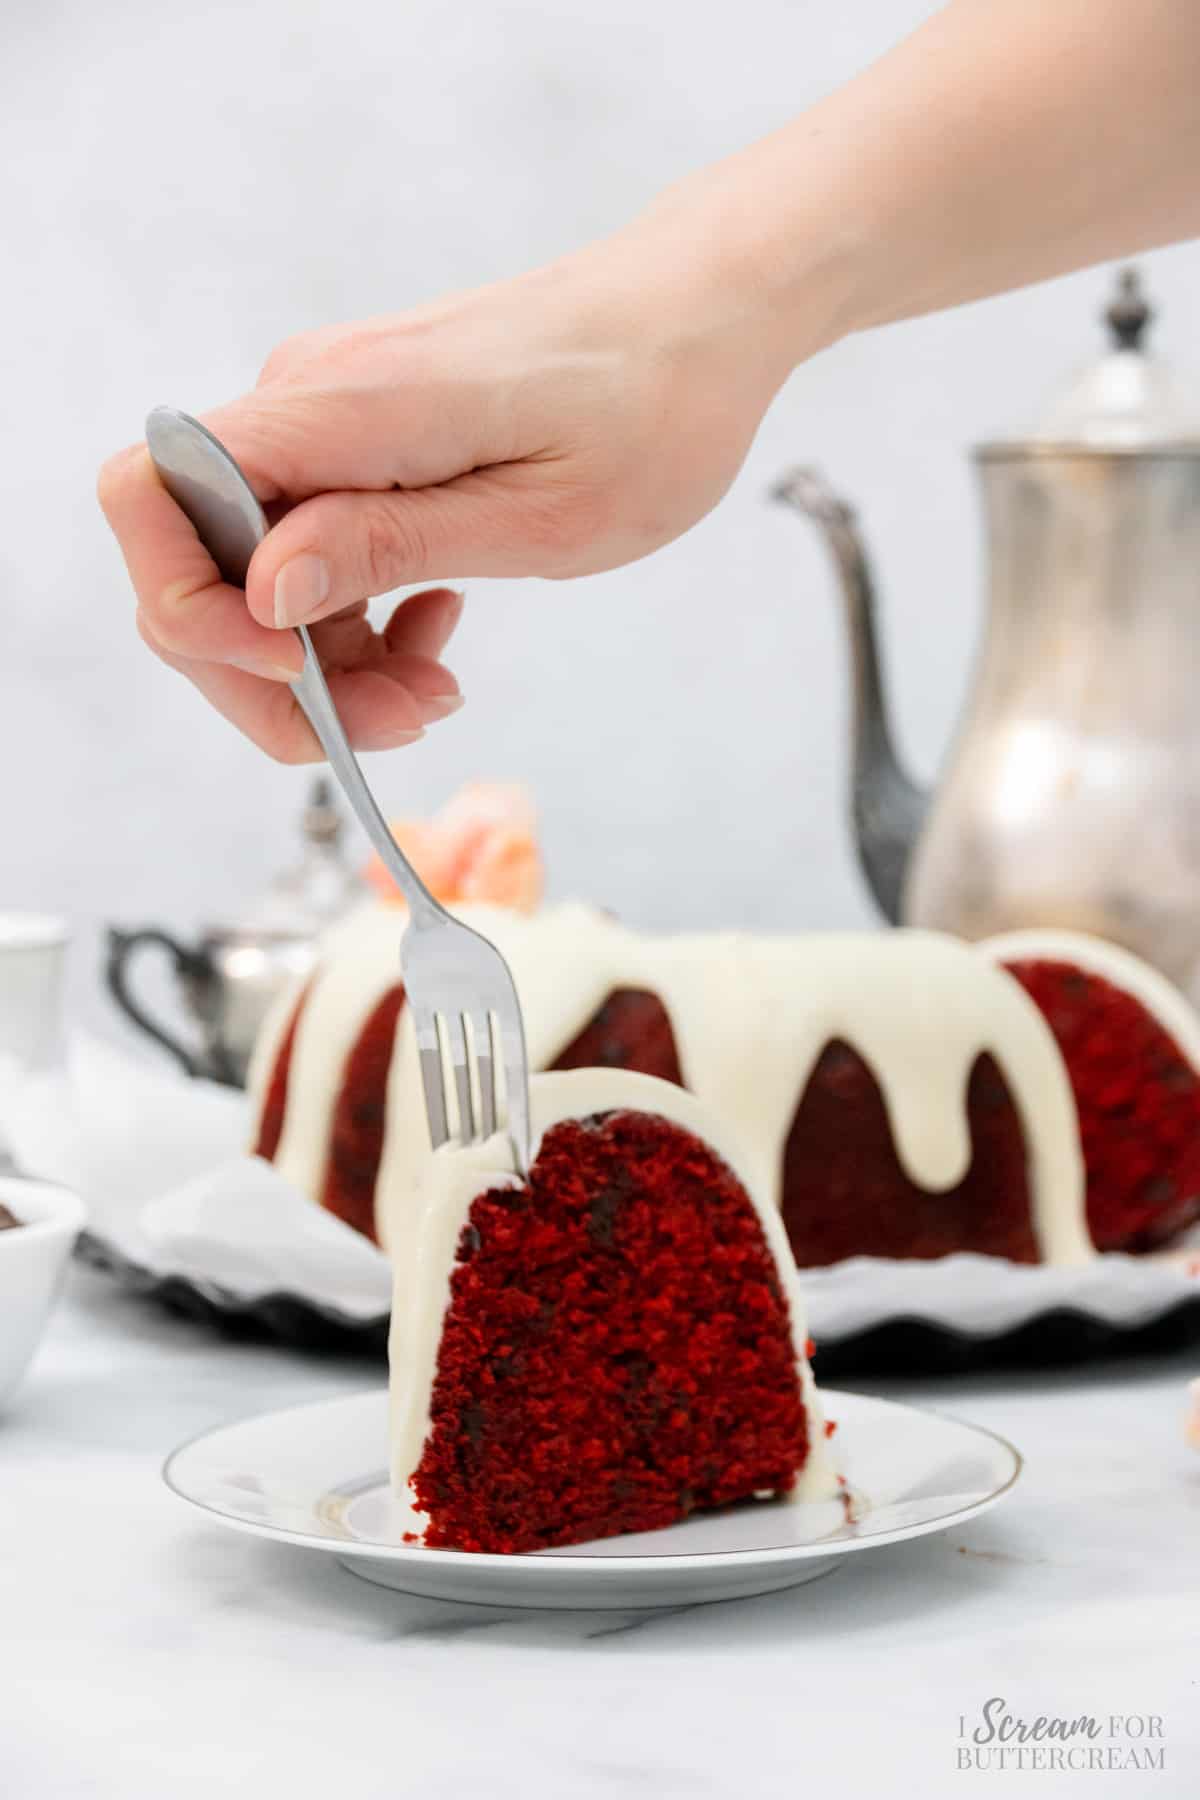
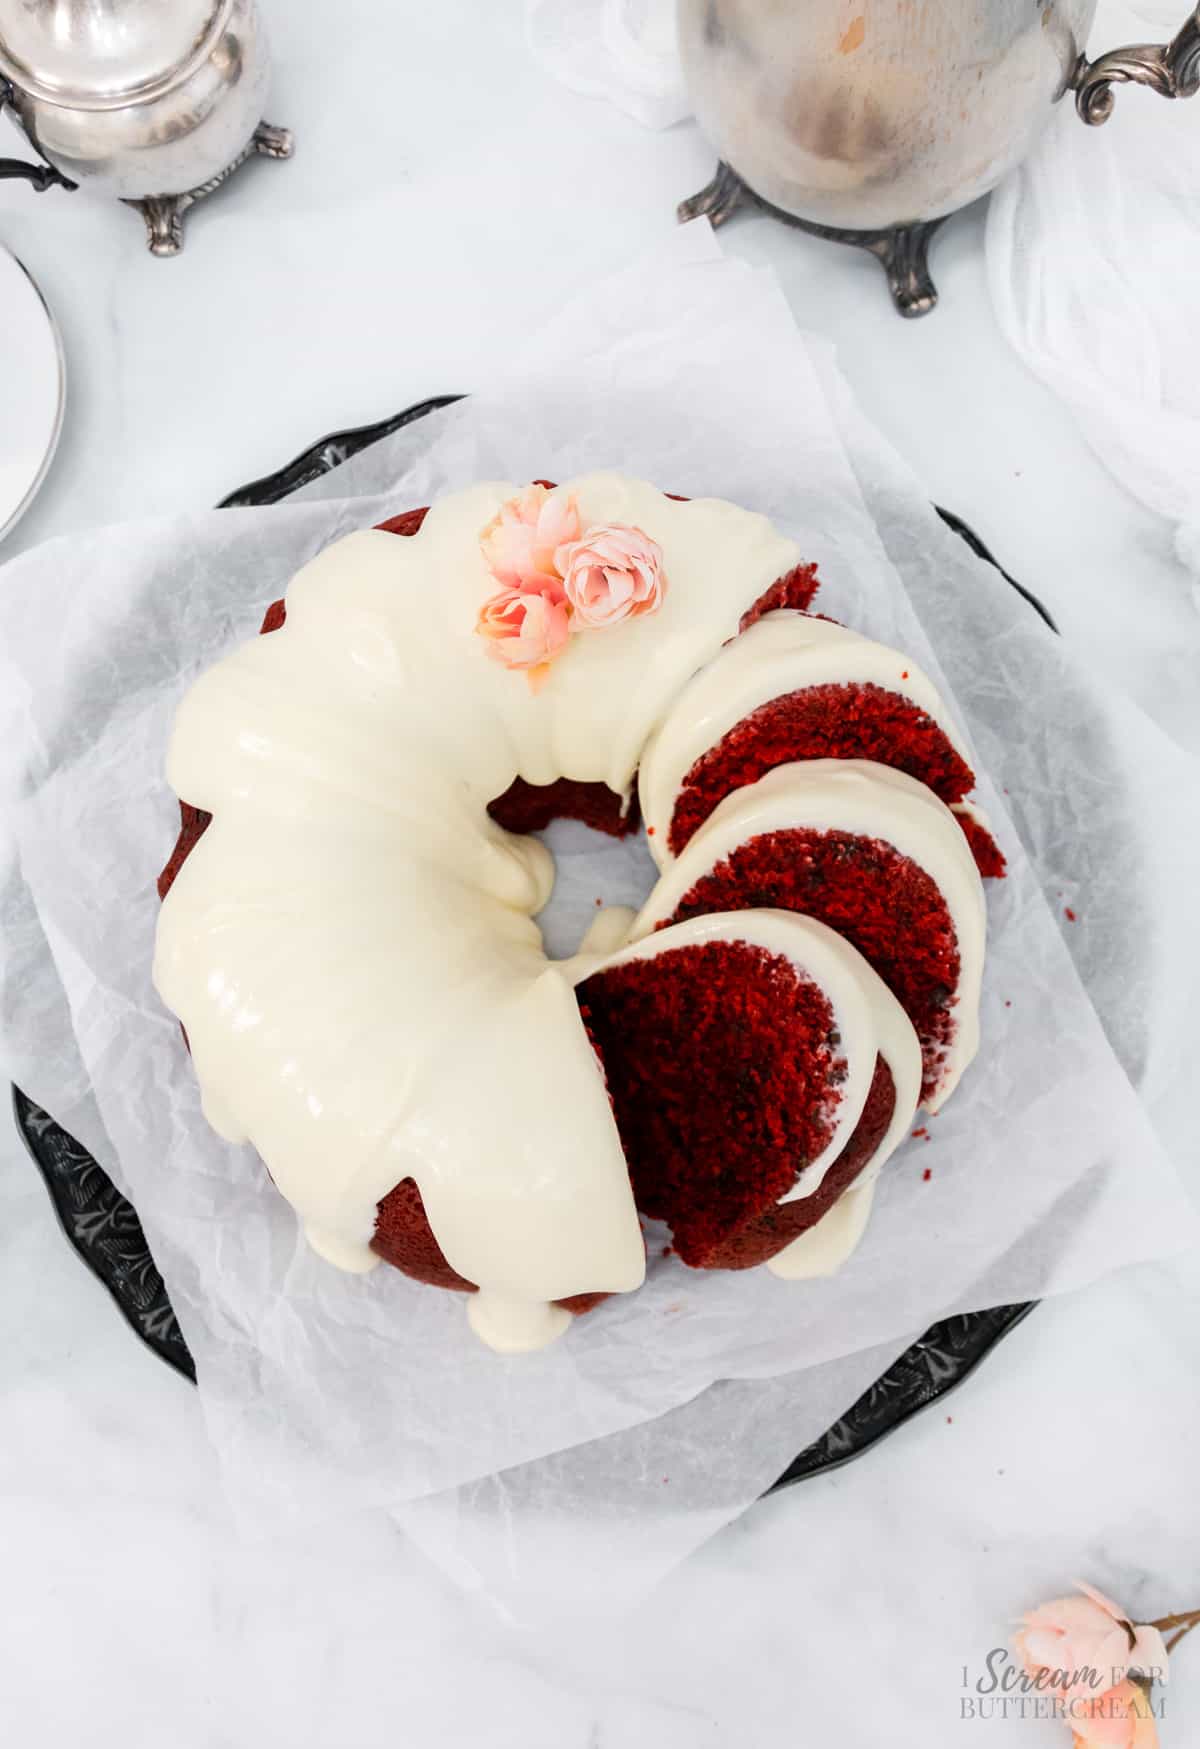
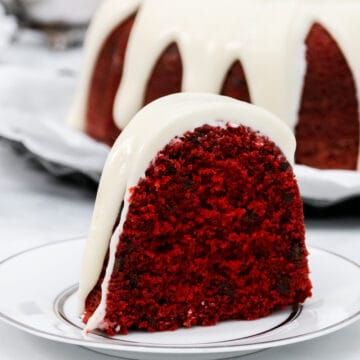
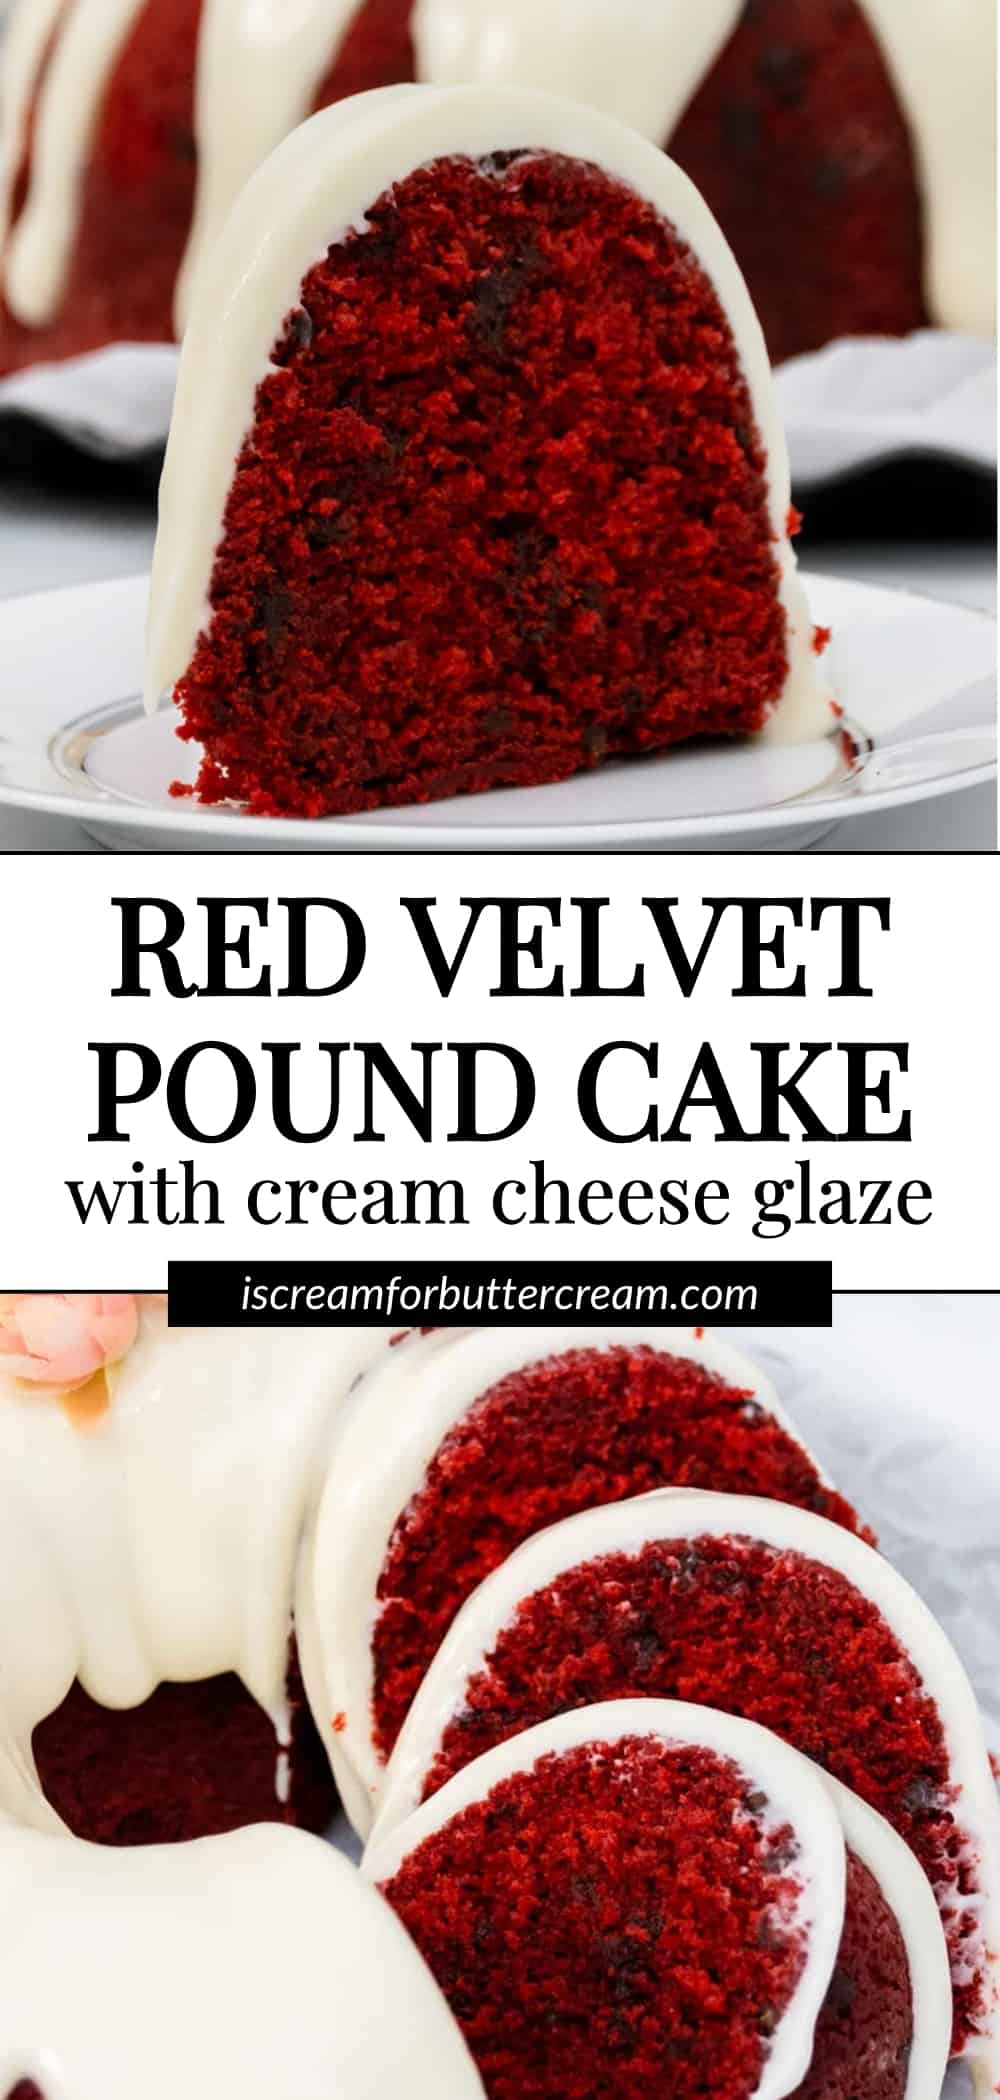
A super moist red velvet pound (bundt) cake made from scratch with mini chocolate chips to add fun, all covered in a delicious cream cheese glaze
This cake is easy to make, and full of that red velvet taste everyone loves. The mini chocolate chips are optional, but add a nice touch of chocolate flavor.
Hey there! Before you scroll, there’s lot’s of important stuff in the post!…including the FAQ section, which may answer any questions you might have about this recipe. Enjoy!
Jump to:
What’s great about this cake:
- Super moist southern red velvet cake with mini chocolate chips for added texture and flavor.
- Delicious cream cheese glaze perfectly complements the flavor and richness of the cake.
- Easy-to-follow instructions to get a moist and flavorful result.
- Added buttermilk, vinegar, and red gel food coloring enhances both the taste and beautiful red color of the cake.
- Perfect for birthdays and holidays.
Why is this called a pound cake?
I’ve decided to call this cake a ‘pound cake’ because generally, that’s what people think of when they see a bundt cake.
I do realize that technically an old-fashioned pound cake has a pound each of flour, sugar, butter, and eggs, but now the term is just used more loosely and a cake that’s made in a bundt pan and that is potentially a little more dense than a fluffy layer cake, is sometimes just called a pound cake.
It’s definitely okay to call this a pound cake or a bundt cake…or just a good cake!
Main ingredient notes:
(The printable list of all ingredients are in the recipe card below.)
All-purpose flour: In this recipe, you won’t have to use any fancy flour as it only calls for all-purpose flour.
Unsweetened natural cocoa powder (not Dutch-process cocoa): This recipe calls for a bit of natural cocoa powder. The reason this recipe says ‘not Dutch-process cocoa’ is that Dutch-process cocoa is non-acidic and this recipe calls for baking soda, so the acid left in natural cocoa powder is needed.
For more information on the different types of cocoa powders and how they’re used, see this post: Which Cocoa Powder Do I Use?
Buttermilk: A red velvet cake usually calls for buttermilk and this one is no different in that respect. The buttermilk will add a yummy taste and a soft texture to the cake and it won’t make the cake actually taste like buttermilk, I promise.
Vinegar: Yes I know this seems like a weird ingredient for a cake, but it’s usually combined with buttermilk and baking soda in velvet cakes. These all add a bit of flavor and tang and help give the cake a soft texture.
Red food coloring: The best type of food coloring to use is gel food coloring. There are many brands and you can even get a ‘no taste’ red food coloring if you’re super sensitive to the bitter taste that some red food coloring can have.
The worst type of food coloring to use is the liquid drops you can get in the baking aisle at a grocery store. It’s diluted and you’ll have to add a ton of it just to get some color.
Here are some options for red gel food coloring:
- ChefMaster Liqua-gel food coloring in Red
- Americolor Soft Gel Paste food coloring in Red
- ChefMaster Liqua-gel food coloring in Super Red
- ChefMaster Liqua-gel food coloring in Christmas Red
- Americolor Soft Gel Paste food coloring in Super Red
- Wilton gel food coloring in No Taste Red
Unsalted butter: This recipe calls for unsalted butter. In my opinion, unsalted butter is best for baking because you can control the amount of salt added. Make sure to check out the FAQ section for questions.
Mini chocolate chips: This ingredient is optional, but I think it adds a nice touch of chocolate taste and mini chips bake up much better than full-size chocolate chips that tend to sink in the batter when baking.

How to make this cake:
(The exact, printable instructions are in the recipe card below.)
Step 1:
Make sure to preheat oven to 325 degrees F and grease and flour at least a 9-inch sized (or similar sized) bundt pan.
Step 2:
Combine the flour, sugar, baking soda, baking powder, cocoa powder and salt in a large mixing bowl. Whisk and set aside.
Next, combine the buttermilk, oil, vinegar, vanilla, eggs and food coloring . Mix well with a whisk and set aside.
Step 3:
Now, turn the mixer on low speed and add the butter chunks slowly to the dry ingredients. Mix on medium to medium-high until all the flour is coated with the butter and the mixture is crumbly with a sand-like texture.
Step 4:
To the crumble mixture, pour in about half of the liquid mixture. Mix on medium speed until just combined, then pour the last of the liquid mixture and mix on medium speed again until well combined.
Step 5:
Pour the batter into the prepared pan and bake for approximately 50 minutes.
Step 6:
Set on a wire rack to cool in the pan for no less than 45 minutes, then turn the cake out onto the rack and let cool out of the pan completely before adding glaze.
Note About How I Write Recipes: I write recipes using volume (cups) measurements because here in the U.S., this is what people are more familiar with and I don’t want anyone to feel intimidated when baking. For metric measurements, click the ‘metric’ button under the ingredients in the recipe card below. The weights are converted by a program, not me, and it’s just a best guess. Please note that because I develop recipes using volume measurements, I can’t guarantee that weighing the ingredients will produce the exact same results.
Recipe
Red Velvet Pound Cake with Cream Cheese Glaze
Ingredients
For the cake:
- 2 ¾ cups all-purpose flour
- 2 cups sugar
- ½ teaspoon baking soda
- 1 ½ teaspoons baking powder
- ¼ cup unsweetened natural cocoa powder (not Dutch process cocoa-see FAQs in post)
- ½ teaspoon salt
- 1 ½ cups buttermilk
- 2 tablespoons vegetable oil
- 1 teaspoon vinegar
- 2 teaspoons vanilla extract
- 4 large eggs
- 1 ½ tablespoons red gel food coloring (can use up to 2 tablespoons or 1 ounce if needed)
- 1 cup unsalted butter, room temperature (not too warm) and cut into chunks (2 sticks)
- 1 cup mini chocolate chips (optional)
For the glaze:
- ½ cup unsalted butter, room temperature (1 stick)
- 8 oz cream cheese, room temperature (1 package)
- 3 cups confectioner’s sugar
- 3 tablespoons milk or cream (can use up to 4 tablespoons)
- 1 teaspoon vanilla extract
Instructions
For the cake:
- Preheat oven to 325 degrees F.
- Grease and flour at least a 9-inch (or similar sized) bundt pan. Make sure to grease and flour the pan very well as this cake is super moist and will stick if the pan isn't prepared well.
- Combine the flour, sugar, baking soda, baking powder, cocoa powder and salt in a large mixing bowl. Whisk well and set aside.
- In another bowl, combine the buttermilk, oil, vinegar, vanilla, eggs and food coloring. Whisk well and set aside.
- Take the dry mixture, turn the mixer on low and add the butter slowly to the dry ingredients. Mix on medium to medium-high until all the flour is coated with the butter and the mixture is crumbly with a sand-like texture.
- Pour in about half of the liquid mixture. Mix on medium speed until just combined. Only about 30 seconds.
- Pour the last of the liquid mixture and mix on medium speed again until well combined. Be careful not to over-mix the batter. Only mix until everything is combined.
- Scrape the sides of the bowl and mix again for only about 10 to 15 seconds.
- Add the mini chocolate chips if desired and stir in by hand.
- Pour into the prepared pan and bake for approximately 50 minutes. A toothpick inserted into the cake will come out with a few moist crumbs on it, or clean, but no raw batter.
- Set the baked cake on a wire rack to cool in the pan for no less than 45 minutes, then turn the cake out onto the rack and let the cake cool out of the pan completely before adding the glaze. Make sure to let the cake sit in the pan, on a rack for about 45 minutes before trying to remove it from the pan as the cake is very moist and will stick to the pan if if it's still very warm.
- See the notes section for best ways to store this cake, serve it and for more questions.
For the glaze:
- In a mixing bowl, mix the butter and cream cheese well with an electric mixer on medium to medium-high speed until smooth.
- Add the confectioner's sugar, vanilla and two tablespoons of milk. Mix well.
- If the glaze is too thick, add milk by the teaspoonful, mixing after each addition and checking the consistency. Add only a small amount at a time. If it's too thin, it will run off the cake and pool around the bottom.
- Once the desired consistency is reached and the cake is cooled, spoon on the glaze, or use a piping bag or squeeze bottle to drizzle it onto the cake.
Notes
Nutrition
How to Share
I’d love for you to share this recipe link or tag it, but please do not share screenshots or copy/paste the recipe to social media as the content and photographs are copyright protected and we (bloggers) work really hard on our content. Sharing the link, tagging us on socials and pinning it is super appreciated though!
Tips & FAQs:
No, a red velvet cake generally includes a small amount of cocoa powder in it that gives it just a hint of chocolate flavor, but not enough to be considered a chocolate cake either.
The vinegar reacts with the small amount of cocoa powder and the other acidic ingredients like buttermilk to help make the cake moist and tender and helps give it a slightly reddish tint, which is then helped out by adding red food coloring.
The vinegar really is necessary for this cake and you'll just want to use regular white vinegar. Adding vinegar will introduce more acids into the cake, which will react with the other acidic ingredients and help to provide a tender cake texture.
Cocoa powder reacts with the other acidic ingredients to help make this cake moist and it gives it just a slight hint of light chocolate flavor, which is the hallmark of a red velvet cake. It also helps give the cake a hint of color, a sort of jump-start at getting that deep red color.
For this recipe, you want to use unsweetened natural cocoa powder, not Dutch cocoa powder. The reason is that Dutch cocoa powder is nonacidic and you need the acid from the regular cocoa powder to interact with the other ingredients.
You really want to use real buttermilk for this cake. It makes a huge difference in the taste, the moistness, and the texture of the cake.
For best results, you'll want to use unsalted butter, that way you can predict the amount of salt that's added to the recipe. If you can't get unsalted butter, you can substitute with salted, but omit any additional salt the recipe calls for.
Do not use the liquid kind that you can find in the baking aisle. To get enough color, you'd have to add way too much of it. You'll need a concentrated food dye like gel food coloring.
You can find them at craft stores or on Amazon. I like Chefmaster, Americolor super red, or Wilton no taste red. I have provided links to these in the ingredient section of the post above and below the recipe card.
Sure! The cake won't be super red, but it will still taste good.
You may have used liquid food coloring and not gel food coloring, or you may not have used enough food coloring.
No, you don't have to add them. Personally, I add them because I love the small bits of chocolate in this cake, but it's not necessary.
You can, but the full-sized chocolate chips tend to sink a little while the cake is baking. To help combat this, you could try chopping up the full-sized chips in a food processor a bit before adding them to the cake batter.
I have not tested this recipe out as a layer cake, but it should work just fine if you use two, eight-inch round cake pans. You will need to bake it for a shorter amount of time, maybe around 40 minutes. Just check with a toothpick inserted into the middle. It should come out with a few moist crumbs on it.
Now, if you want a red velvet cake recipe that was specifically written as a layer cake that is light and fluffy, then you'll want to check this recipe out here: Sour Cream Red Velvet Cake
You'll also want to use another frosting instead of a glaze if making it into a layer cake. You can try this buttercream here: Cream Cheese Buttercream
If the cream cheese is added to this cake, then it must be stored, covered well, in the refrigerator. It can last, stored in the fridge for 5-6 days.
This cake (like many cakes) is best served at room temperature, so to eat leftovers, add a slice to a plate and heat in the microwave for only a few seconds to take the chill off, or just cut a slice, set on a plate and allow it to come closer to room temperature on its own.
This cake should be just fine if frozen correctly. Wrap the unglazed cake in plastic wrap, then in foil to prevent freezer burn. This cake can be frozen for up to a month.
To defrost, set the wrapped cake onto the counter and let defrost while still wrapped (about a couple of hours). Once defrosted, take the wrappings off and add the glaze.
Supplies Used for this Cake:
As an Amazon Associate, I earn from qualifying purchases.
- Red gel food coloring: ChefMaster Liqua-gel food coloring in Red, Americolor Soft Gel Paste food coloring in Red, ChefMaster Liqua-gel food coloring in Super Red, ChefMaster Liqua-gel food coloring in Christmas Red, Americolor Soft Gel Paste food coloring in Super Red, or Wilton gel food coloring in No Taste Red
- (The best ever) Bundt Pan
- Mixing bowls
- Whisks
- Silicone spatulas
- Stand mixer or Hand mixer
- Cooling rack
Don’t forget to pin it below!
Shawn
.Should the ingredients be room temperature?
Kara
Hi Shawn, the butter definitely needs to be room temperature, but for the other ingredients…it’s not vital. It’s always good though if all the ingredients are around the same temp so if you have time to set the cold ones out a little before making it then they’ll mix better, but if not, it won’t totally ruin the cake.
Bob West
I made this cake just as the recipe said. It turned out bitter. Not sweet. Very disappointed.
But the glaze was great.
Kara
Hi Bob, the bitterness might have come from the red food coloring. This recipe has two cups of sugar in it so the cake alone should not have come out bitter, but sometimes certain red food coloring will be bitter. I personally like using the gel food coloring because it’s concentrated and it’s not as bitter as some of the others. They do also make some ‘no taste’ red food coloring, so I would try that if you want to try another red velvet cake in the future.
Latasha M.
This red velvet pound cake was delicious and moist. Most definitely a must around the holidays.
Kara
Hi Latasha, so glad you loved it and thank you so much for the great review!