
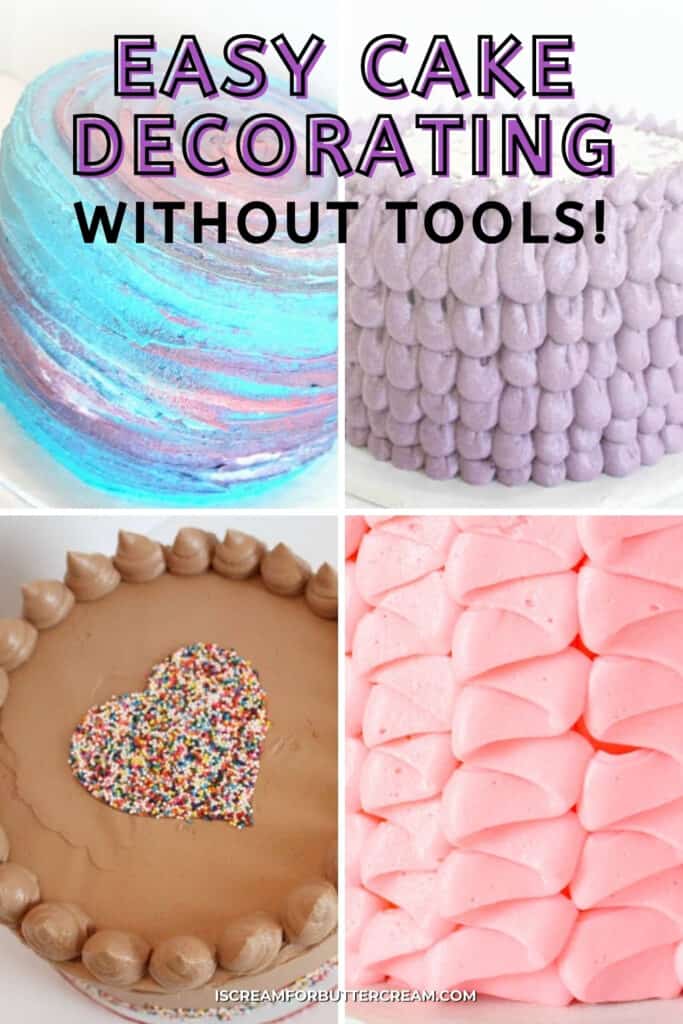
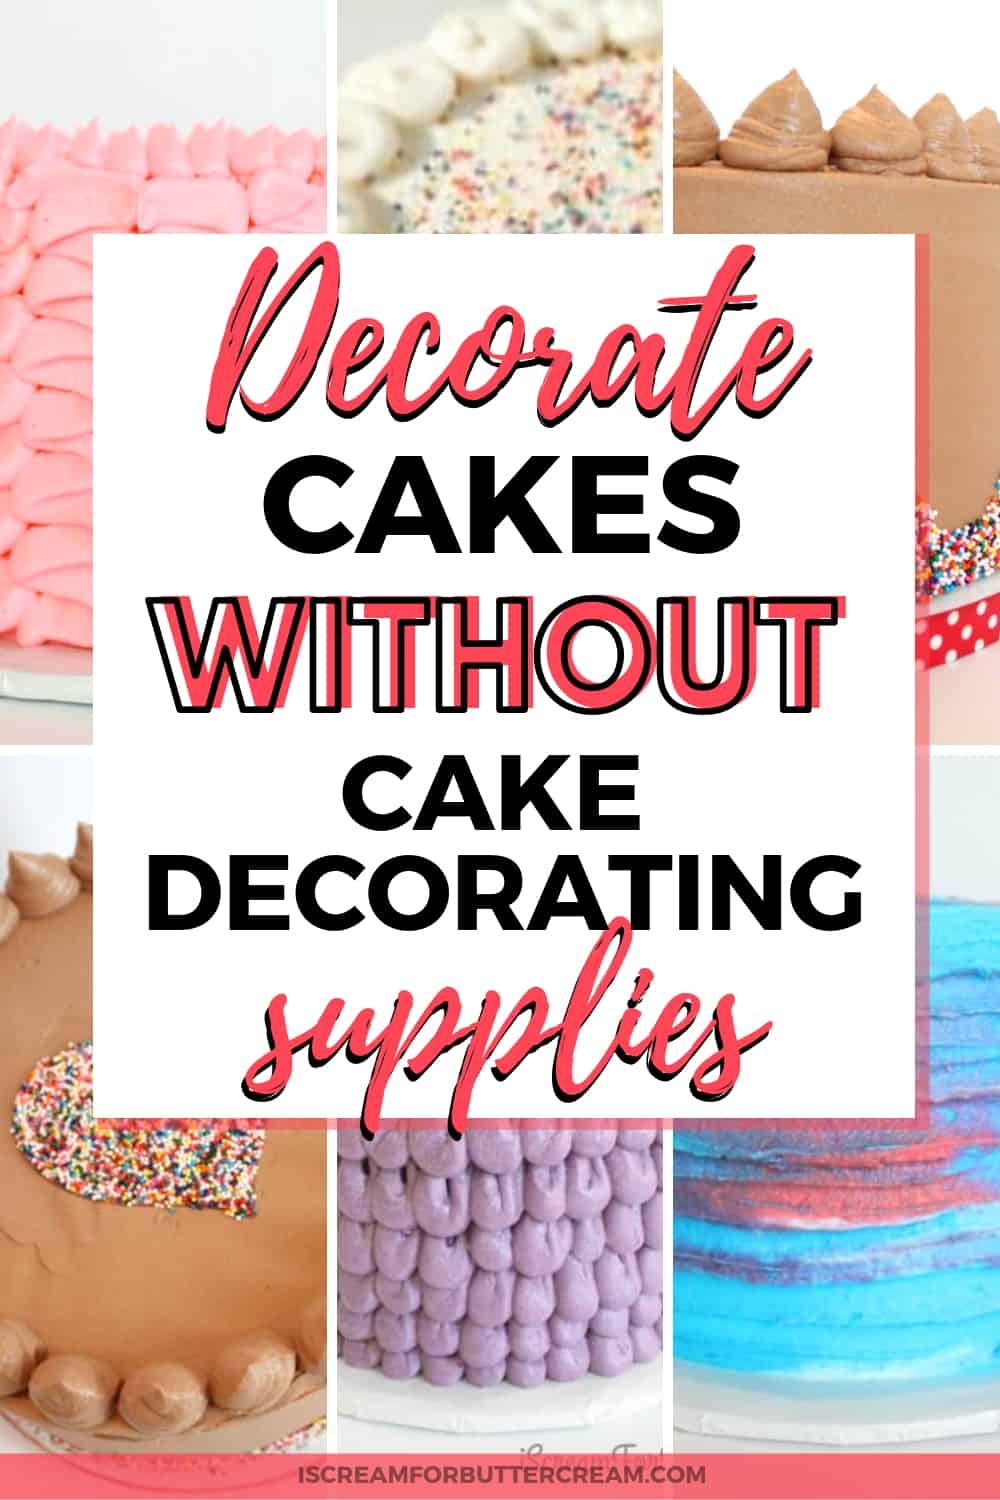
Five easy cake decorating tips you can use to decorating cakes without cake decorating supplies. These cakes are decorated using only the supplies you have on hand.
I’m kind of obsessed with caking tools. I assume most people don’t keep an arsenal of cake decorating supplies in their kitchen like I do. Even if you do, sometimes you just want to work with what you have handy.
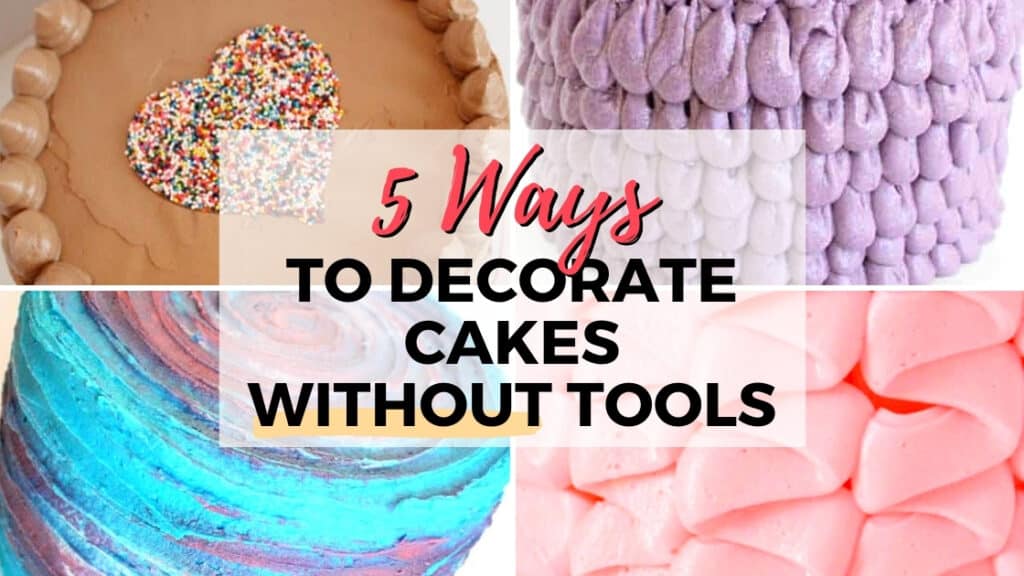
So, I’ve come up with some easy cake decorating ideas, so you can decorate your cakes even if you don’t have any tools.
This post contains affiliate links. As an Amazon Associate, I earn from qualifying purchases. You can see my policies linked in the website footer.
Jump to:
Supplies You’ll Need:
- A baked layer cake (You can find a super delicious vanilla cake here and a really good chocolate cake here.)
- Frosting (I used my favorite vanilla bean buttercream. You can find the recipe here.)
- Large knife (you can use the straight, back side of a large knife to smooth the icing if you don’t have an icing spatula)
- Gallon size freezer bags (you can use quart size, you’ll just have to refill it with icing more often.) Also, you really need to use ‘freezer bags’ and not the regular bags. Those are just not tough enough and you’ll end up with an icing blowout. Take my word for it 😉
- Sprinkles (If you don’t have them, don’t panic. Another option is cookie crumbs)
- Food Coloring (If you don’t have this either, it’s okay. All of these cakes will still look great)
- A teaspoon
- A cookie cutter
- Vacuum cleaner (because sprinkles be goin’ crazy)
The vanilla bakery-style cake:
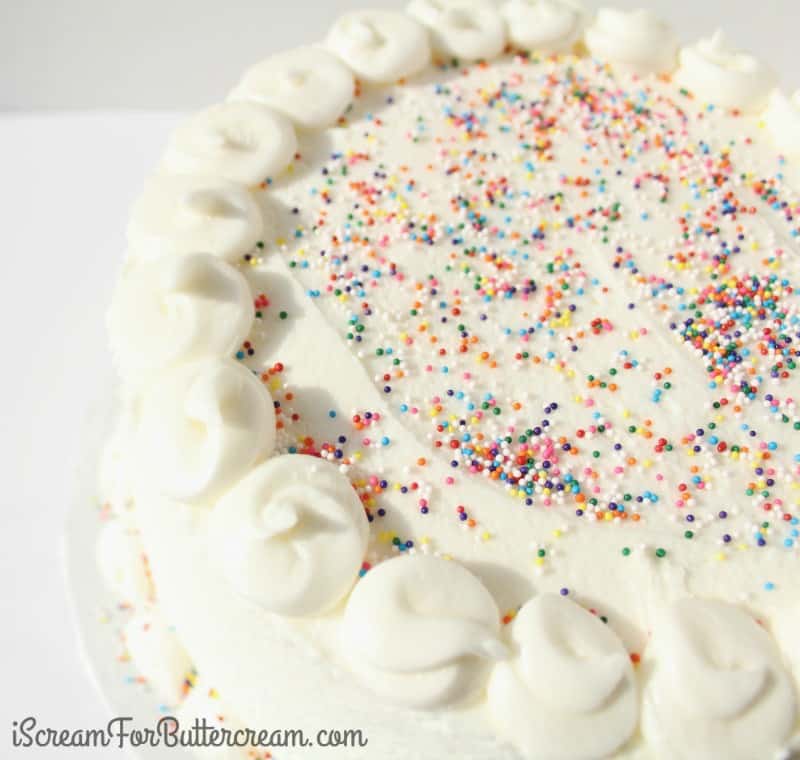
I think this one is the easiest and quickest of the bunch. You can use food coloring to color your buttercream, or just leave it white like I did.
The first step is to ice your cake. If you don’t have an icing spatula, you can use the back, straight edge of a large knife to smooth your buttercream and then clean up the bottom of your cake plate with a paper towel.

Next, take a freezer bag and fill it with your icing. Push the icing into one corner and twist the bag. Cut off the corner of your freezer bag.
Squeeze out a bit of icing and make sure you have cut off enough of the freezer bag.

Squeeze out small dots around the bottom edge of the cake.

Squeeze out swirls around the top border.

Add some sprinkles to the top and voila!
The pleated cake:

For this cake, you want to start with your iced cake. Take a very clean ruler or long knife and score vertical lines all the around to give you a piping guide.

Fill your ziplock freezer bag and snip off the corner like we did for the bakery style cake above.
Before you start piping your zigzags, make sure the top seam of your ziplock is up and the bottom seam is down. You don’t want them flat (horizontal to the cake).
Now just pipe zigzags all the way up in between each line that you scored. You’re just moving your piping bag from left to right.
Don’t stop until you get to the top of the cake.

Next, pipe small dots around the top edge of your cake for the border.
You can then add some sprinkles to the top or candles. I left mine simple.
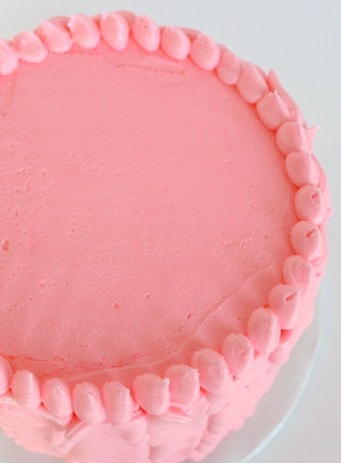
The Ruffle Cake:

Start with your iced cake. It doesn’t have to be pretty. We’re going to cover it up with ruffles.

Next, fill your ziplock freezer bag with icing and snip off the corner. Before you start piping, make sure the freezer bag seams are at the top and bottom. You’ll be piping individual ruffles. Each little ruffle is like a closed ‘U’ shape.
Pipe one and move to the right and pipe the next one. Start at the bottom and do a row all around the base. Then you’ll start on the row above that.
Pipe your ‘U’ directly above the one below and overlap a bit so that the bottom of the ‘U’ is covering the pointed part of the ruffle below it. At this point, it’s not going to look super pretty, but just keep going.

Once you’ve gone all around the cake and it’s covered in ruffles, pipe some dots around the top. I also sprinkled some white and clear sprinkles on the top.
The Textured Watercolor Cake:
I love this one because it’s hard to mess up. You can use whatever colors you want and with the texture we create on the cake, you don’t have to worry about getting your buttercream smooth and there’s absolutely no piping at all with this one.
First mix up about four different colors of icing. One of the colors will be your base coat, so make enough of that one to ice your entire cake.
Remember, this color will be the predominant color you’ll see.
Now take that base color and ice your cake. Don’t even try to make the icing look pretty at this point.
You want to put a lot on because some will be taken off during the smoothing and texturing and you don’t want your cake peeking through.

Don’t let your base layer crust over and don’t put it in the fridge right now. This layer needs to stay smooth and workable for the next step.
Now take your other colors you mixed and just glob them onto the cake in random patterns. Don’t forget the top. It won’t look pretty at this point. Don’t panic.

Take your icing spatula, or large knife and smooth around the sides and the top. You don’t need to worry about getting it super smooth. We’ll be texturing it in the next step.

Take a teaspoon, preferably one that’s more pointed at the tip. Use the tip of the spoon (the back of the spoon facing the cake) and drag it around the cake.
Start at the bottom, go around and then when you meet back to where you started, angle it up and keep going around.
You’ll need to wipe off the spoon frequently, or the buttercream will build up on the spoon and form large clumps.
Do a swirl on the top of the cake with the end of the spoon. When you’ve textured the cake, go back over some of the spots where the icing clumped up and texture those areas until you like what you see.
It’ll end up like this:


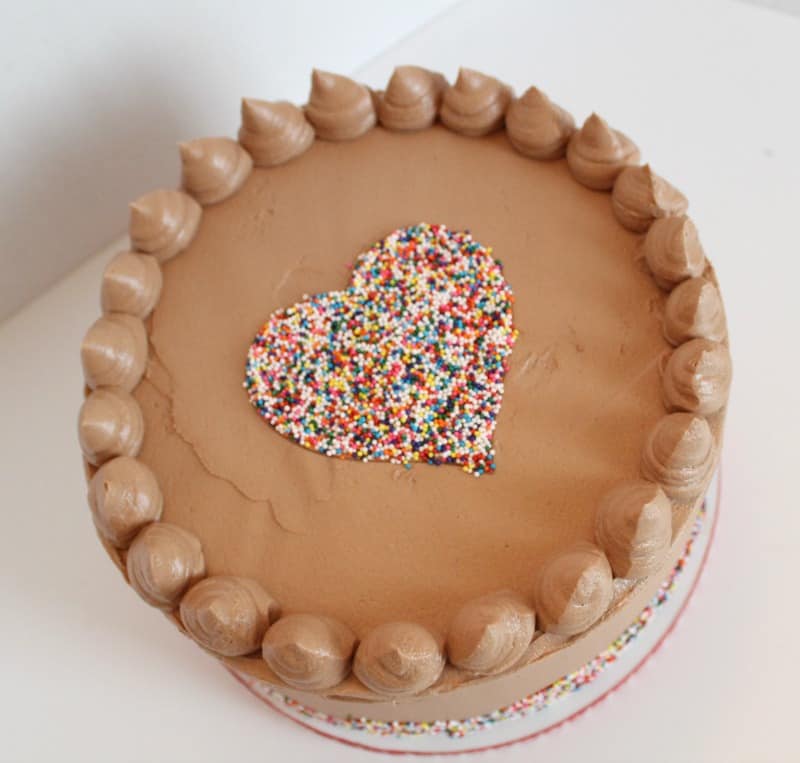
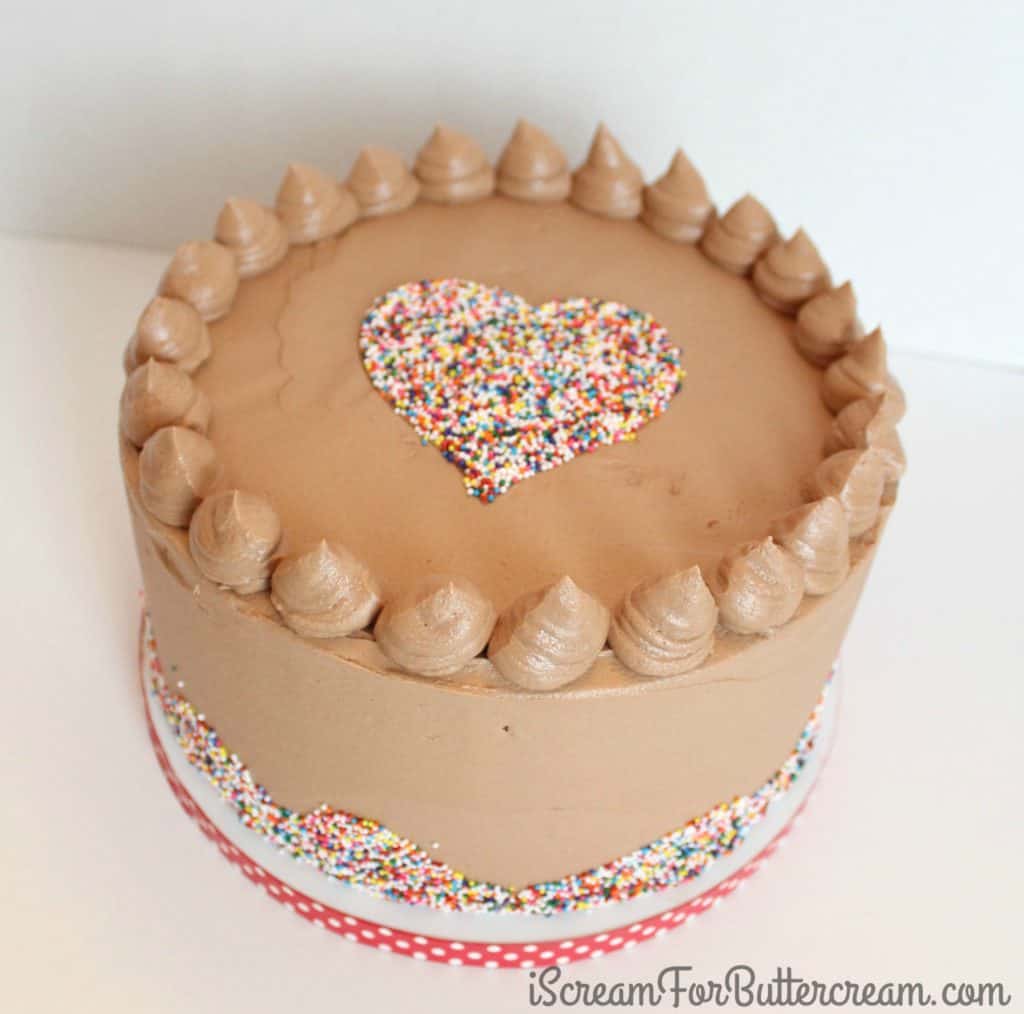
The Sprinkle Cake:
I used chocolate buttercream on this one, but you can use any color. You’ll need a cookie cutter…any shape you want. I think someone’s initials would be super cute.
First ice your cake.

Here comes the really messy part. Pour your sprinkles into a bowl. Grab handfuls of sprinkles and push them lightly onto the base of the cake. Just make it a random pattern. Sprinkles will go everywhere.
I stood over the sink for this one with the cake balanced on one hand and grabbing sprinkles with the other.
After you’ve added the sprinkles, you can clean off the cake board with a pastry brush or paper towel.

Grab a cookie cutter and place it on the top of your cake where you want your design. I used a teaspoon to put sprinkles inside my cutter and then I patted them down very lightly with the back of my spoon.

Pull off the cookie cutter by lifting it straight up and off the cake. There may be a few rogue sprinkles, but you can brush those off with a pastry brush, or get a little buttercream on the end of the spoon and barely touch those sprinkles…they’ll stick to the spoon.
Now you can put some buttercream in a freezer bag, cut the corner and pipe some large dollops around the top of the cake.
Hold the piping bag straight over the top, not quite touching the cake. Squeeze the bag and let the dollop build, then stop squeezing and lift the bag up.
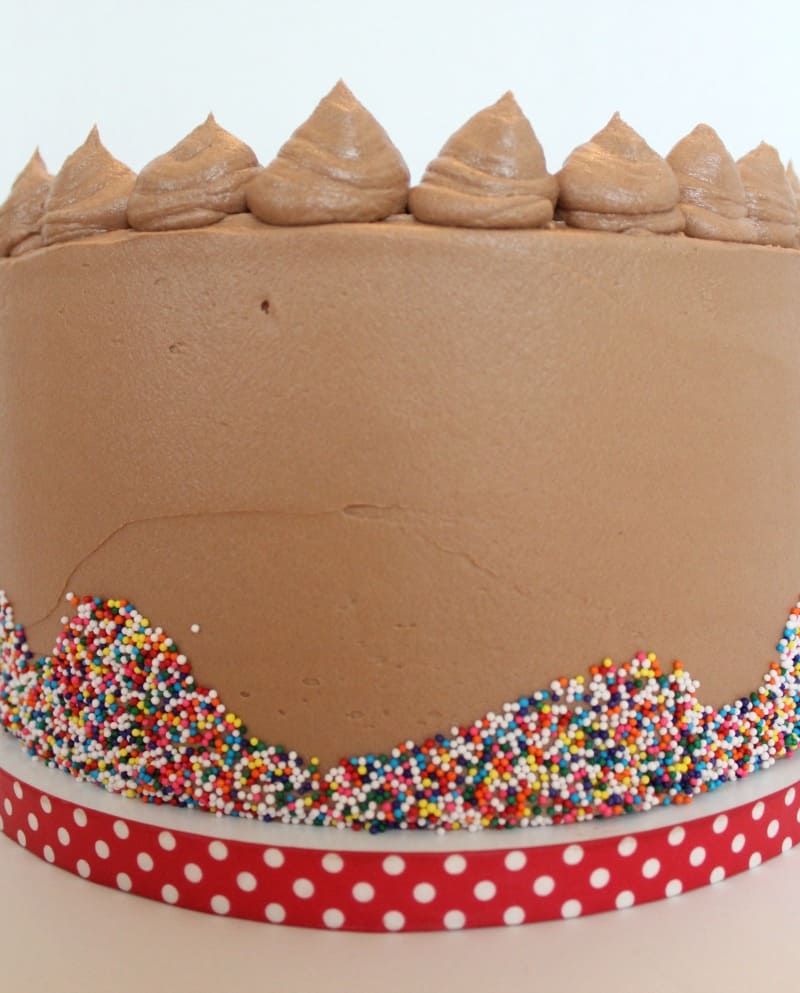
You can pipe a pearl border or just leave it plain. I like the buttercream dollops because, well, there’s nothin’ wrong with extra icing on your cake, right?
There you have it! Five ways you can decorate cakes with absolutely no cake decorating supplies. There are so many options here. You can use techniques from each of these and create your own versions. Have fun!
Other Posts You Might Like:
Don’t Forget to Pin it for Later!

Jennifer
This is great! I’m just learning to decorate, these will be some fun things to try! 🙂
Kara Jane
Thanks and glad I could help! I like trying to figure out how I can use what I have instead of buying tons of cake decorating supplies. That really cuts into the pocketbook, ya know?
Debbie
I’ll have a great time 🥰❤❤
Debbie
That’s true I love her designs
NickHarry456
Actually I want to decorate my cake but i can’t. This post help me a lot. Thank you so much for helping me. keep sharing such types of information. I really appreciate you.
Kara Jane
Oh I’m so glad it helped!
Millie David
Thanks Kara for sharing this post. I have just shared it with one of my friend.
margretta
now i am able to decorate my cake thanks.