
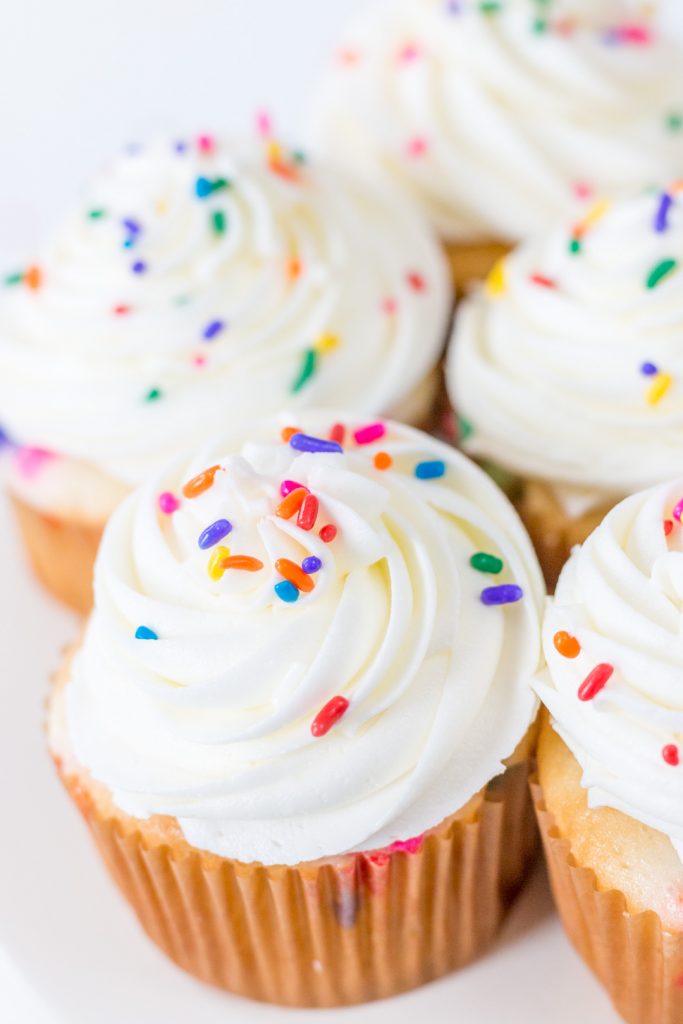
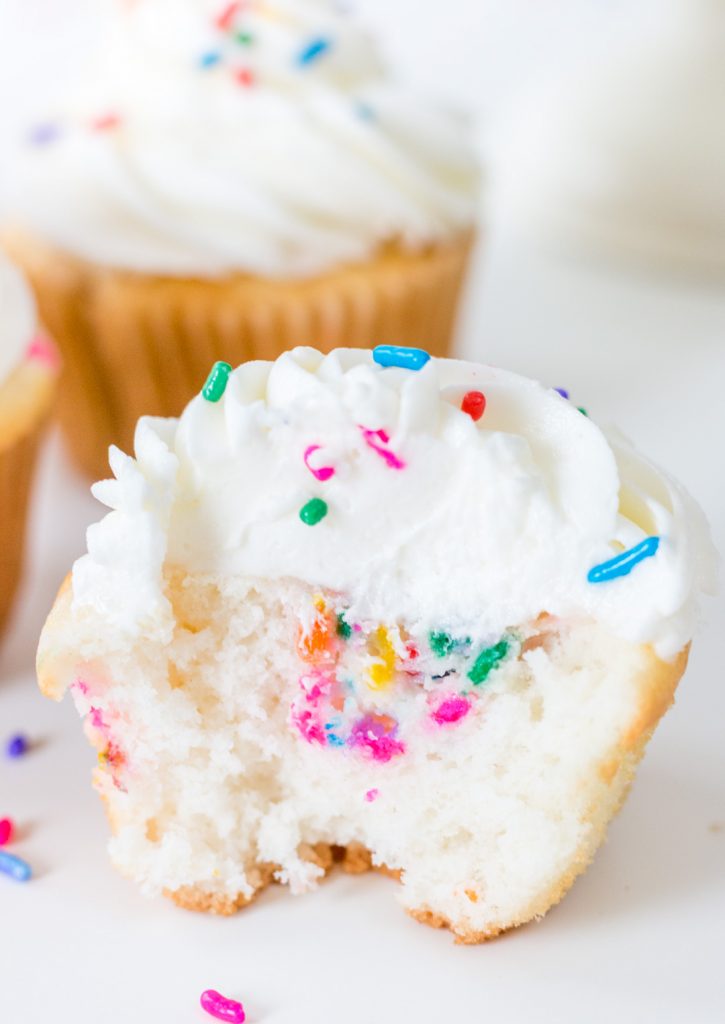
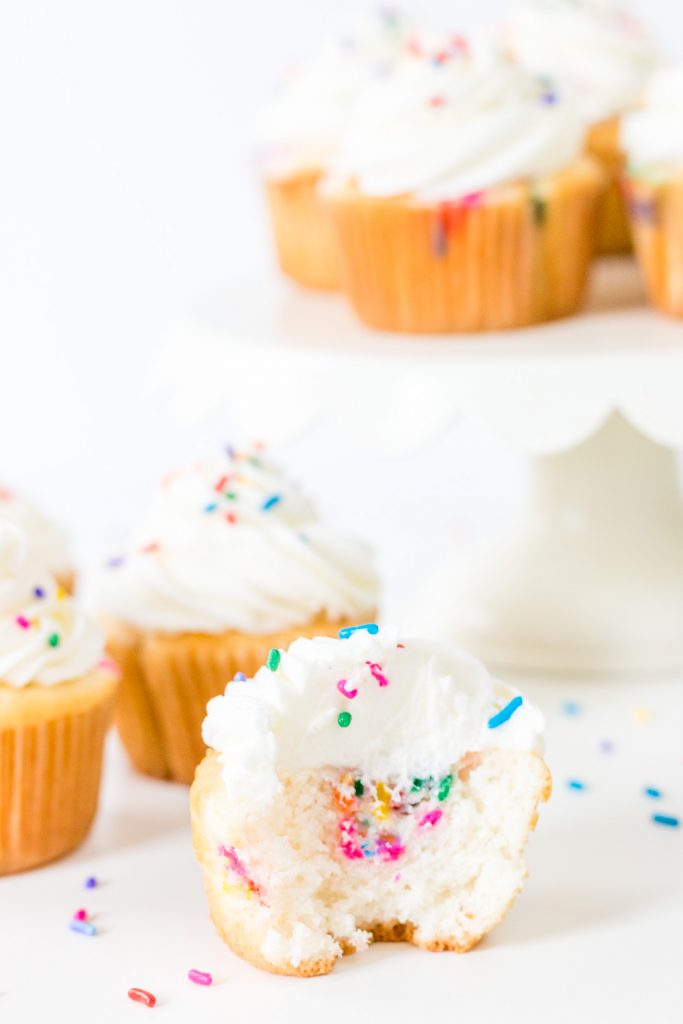
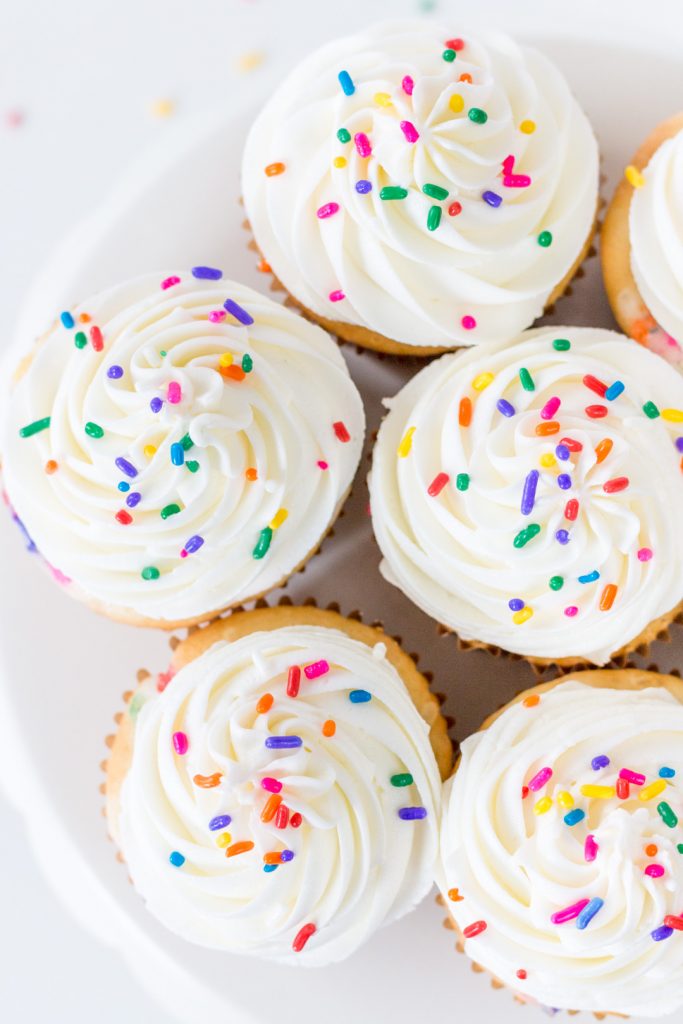
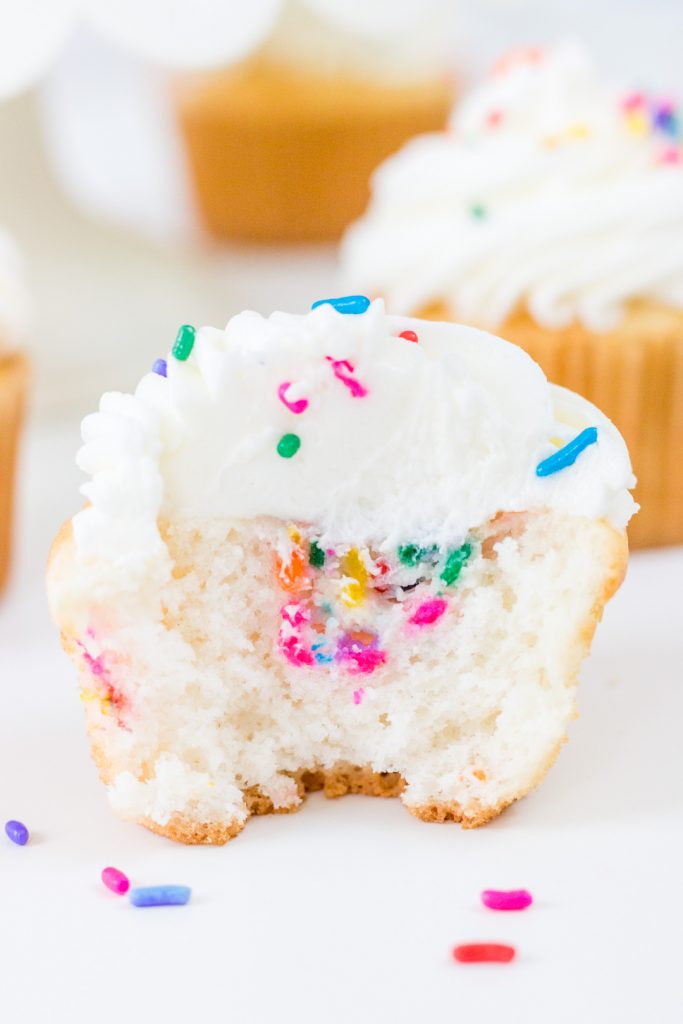
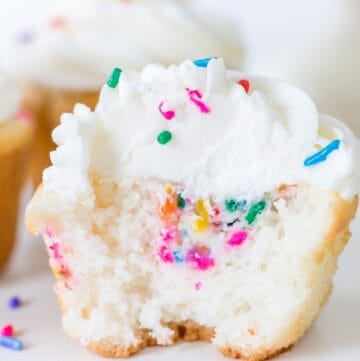
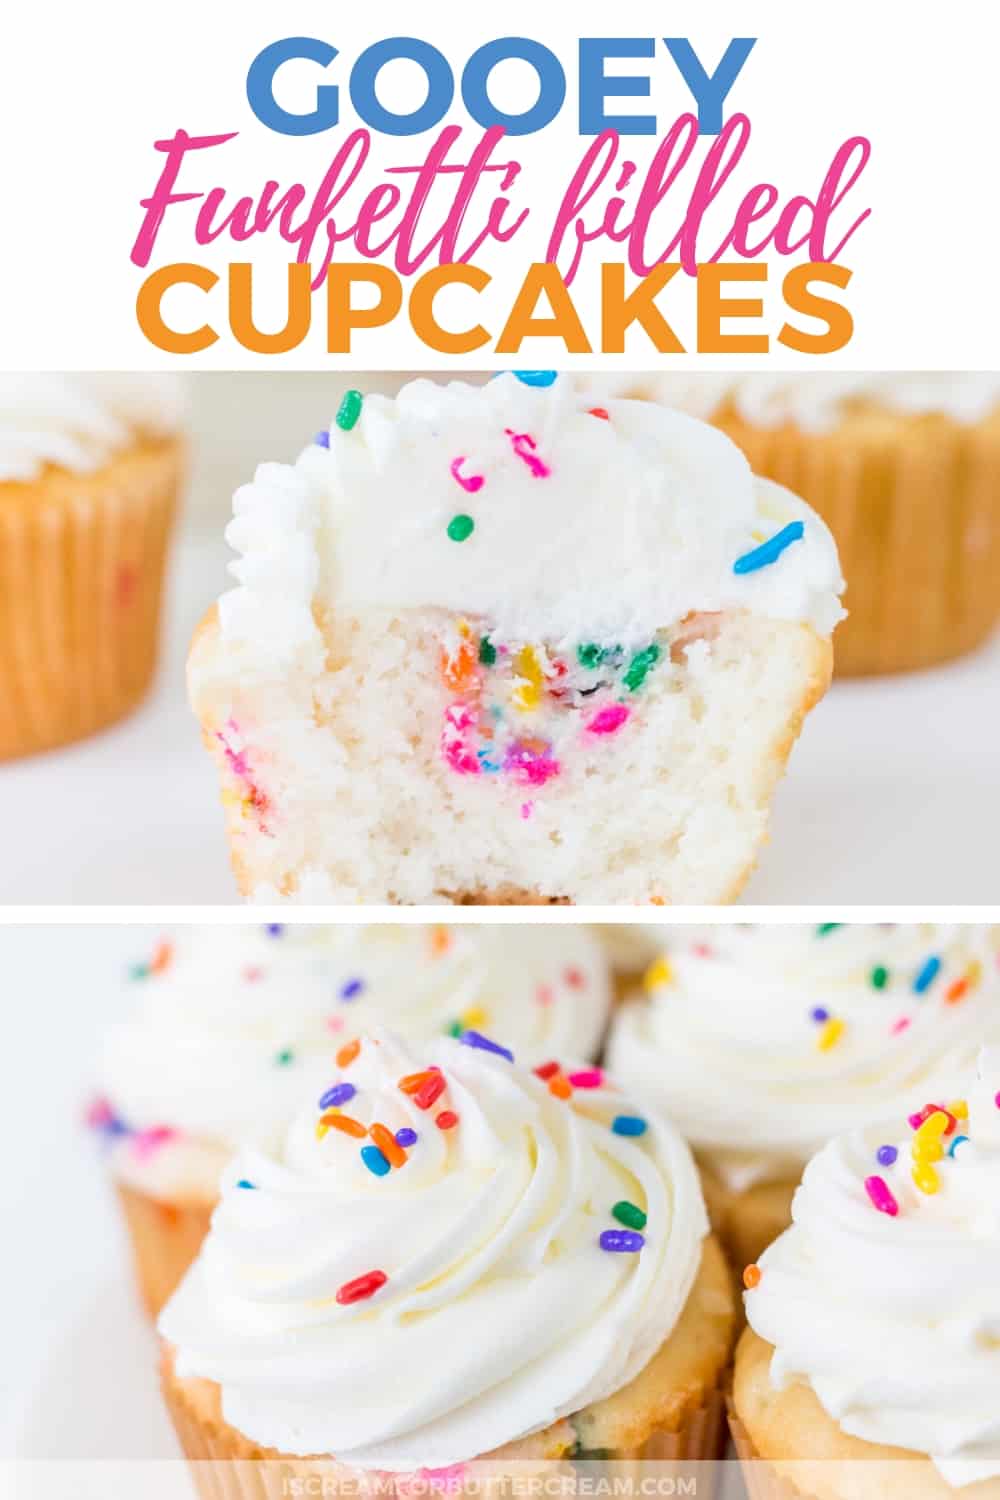
A fluffy white cupcake with a gooey funfetti filled center. These funfetti filled cupcakes are a fun and different take on the classic funfetti cake.
What is the happiest cake ever? (Cake that’s in my tummy.) Ok that’s not really the answer. The answer is funfetti cake. Yep funfetti cake is the happiest cake…well at least I think it is.
I wanted to do something a little different than your average funfetti cake, so I came up with these gooey funfetti filled cupcakes cuz funfetti just makes me happy.
The ‘gooey’ part is a little pocket of cream cheese funfetti filling right in the center of each cupcake. It’s super easy to do and it doesn’t take anything fancy to do it. You’ll just be dropping the filling onto the cupcake batter and the cake will just bake up around it. Easy peasy.
As for the cake itself, it’s super easy too. For this post, I just went with a white cake mix, but you could always make a scratch cake. Here’s my vanilla cake recipe: Favorite Vanilla Cake
If you’d like a truly white scratch cake, you can grab that recipe here: Moist White Cake
I topped these cupcakes with vanilla buttercream and added a few extra sprinkles, cuz sprinkles make everything better. You can grab my buttercream recipe here: Vanilla Buttercream
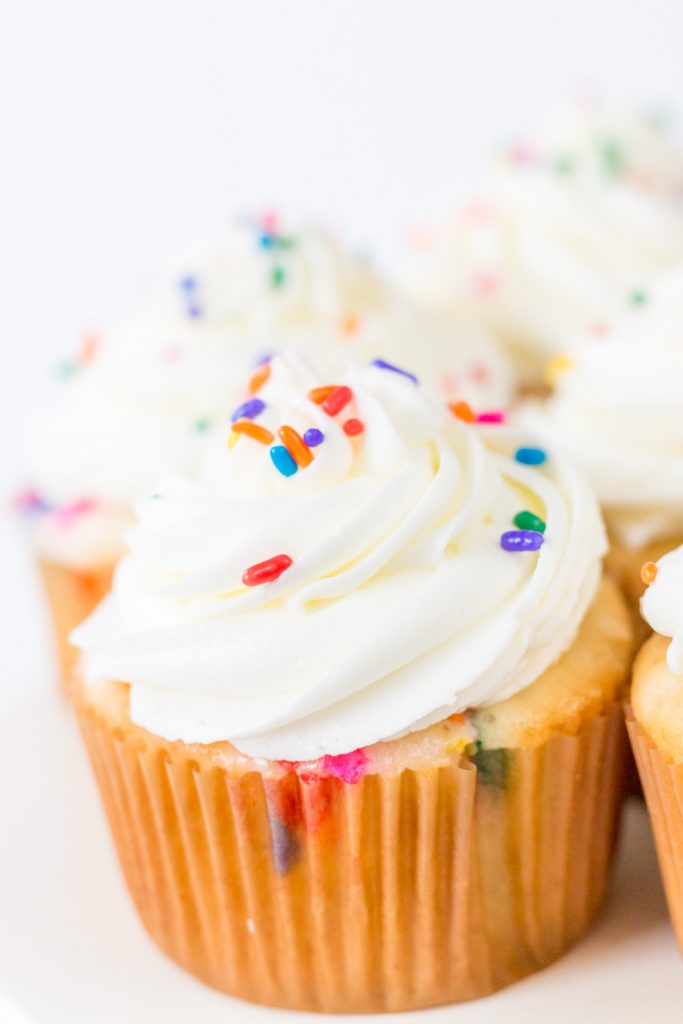
If you want your buttercream to be super white, so that the sprinkles really stand out, you’ll want to check out my recipe for bright white buttercream here: Bright White Heat Stable Buttercream
They great thing about these is that they’re actually pretty versatile. You can go with a box mix, scratch mix and even change up the cake and icing flavors…so many choices.
Ok let’s get to the recipe:
Recipe
Gooey Funfetti Filled Cupcakes
Ingredients
For the Cream Cheese Funfetti Filling
- 1 8 oz package cream cheese
- ⅓ cup sugar
- 1 large egg
- ¼ cup rainbow jimmies
For the cupcakes:
- 1 box White Cake Mix (I used Duncan Hines) (Or just make your cupcakes from scratch)
- 1 cup water
- ⅓ cup oil
- 3 large egg whites
Topping: Find Buttercream Recipes on the blog or links in this post
Instructions
- Preheat oven to 350 degrees and add cupcake liners to two cupcake pans.
For the filling:
- Add the cream cheese, sugar and egg to a bowl and mix well. Stir in the rainbow jimmies. Chill in the fridge just while you mix up the cupcake batter.
For the cupcakes:
- Add the cake mix, water, oil and egg whites into a bowl and mix.
- Add two tablespoons of cake batter to each cupcake liner.
- Add one tablespoon of the filling mixture to the top of the cake batter in each cupcake liner.
- Bake at 350 for about 18 minutes. Cool completely before frosting with buttercream.
Video
Notes
Nutrition
How to Share
I’d love for you to share this recipe link or tag it, but please do not share screenshots or copy/paste the recipe to social media as the content and photographs are copyright protected and we (bloggers) work really hard on our content. Sharing the link, tagging us on socials and pinning it is super appreciated though!
This post contains affiliate links. As an Amazon Associate, I earn from qualifying purchases. You can see my policies linked in the website footer.
Items & Tools Used:
Don’t Forget to Pin it for Later!

Tiya
Hello,
Can these be made ahead and frozen? Does the cream cheese filling texture change?
Thanks!
Kara Jane
Hi there, I haven’t tried freezing these. They might actually work though…I’ve heard of people freezing cheesecakes successfully. Although I must admit I’ve never actually done that myself.
Tiya
Thanks! How long can they be stored in refrigerator? I am guessing they can’t be left at room temperature.
Kara Jane
Yeah I agree, I wouldn’t leave them out of the fridge because of the cream cheese. I’m thinking they will probably last (covered) about five days or so. Cupcakes tend to dry out faster than layer cakes and the fridge can dry out cake as well, so the first day or two will be the best. Just make sure they are covered well. Also before serving, set them out on the counter for maybe 15 minutes or so, so that they can get closer to room temp and the middle has a chance to soften a bit.