
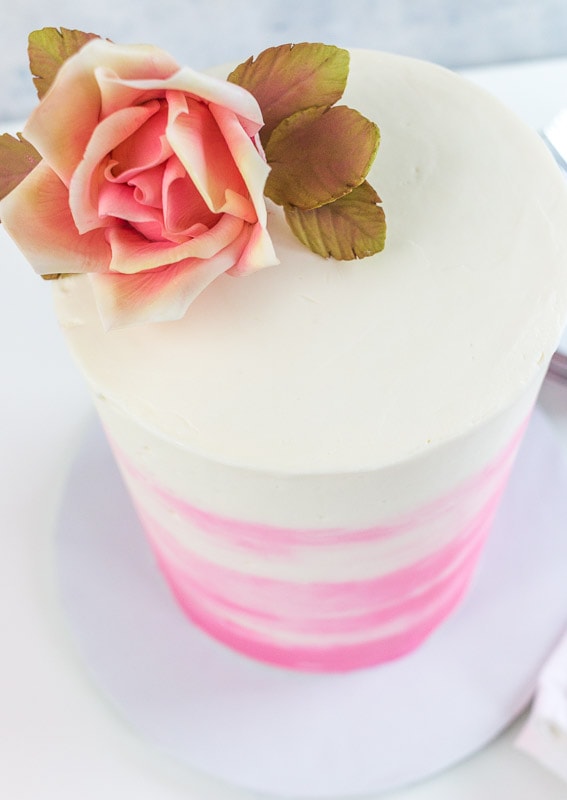
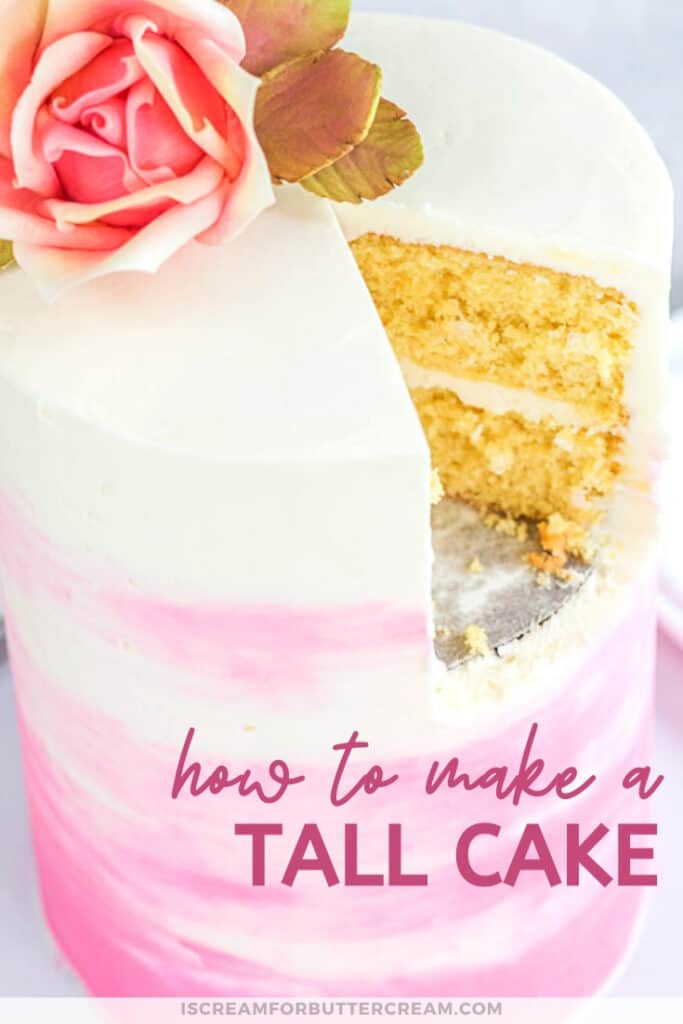
I LOVE a nice tall cake. It just looks elegant and stately. Can a cake look stately? Anyway, I’m a big fan of the tall cake, but there are a few tricks and tips to know about before you make one. You could have a disaster on your hands if not done correctly, so I thought I’d put together my tips and tricks on how to make a tall cake (or as some call it, a double barrel cake).
There are a multitude of ways to make a tall cake, but the number one thing to remember is that you need to have a support system in place.
In this post, I wanted to give you plenty of details. I’ve got some screenshots of how I put this cake together, but you can also watch the video toward the end of this post to see it actually being made.
Oh and if you want to get ALL my tips on how to stack tiered cake (with different sized tiers), then you’ll want to see this post here.
As an Amazon Associate, I earn from qualifying purchases.
Supplies Needed to Make a Tall Cake:
- Cake Layers (Anywhere from 4 to 6 layers – we’ll talk about this in a bit.) I used 6″ round cake layers – Here’s my favorite cake recipe: Favorite Vanilla Bean Cake Recipe
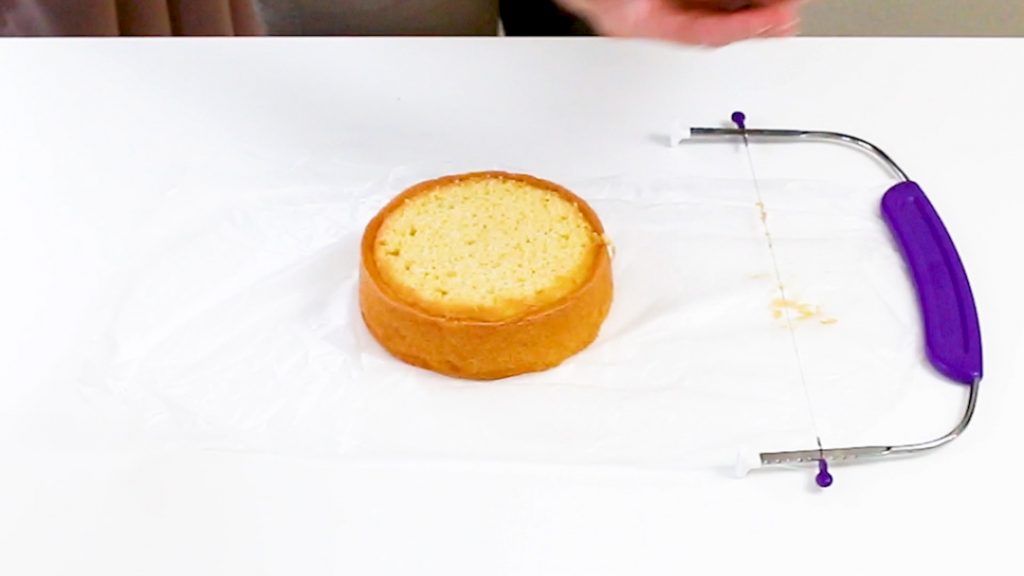
- Cake Leveler
- Cake Base (A few inches larger than your cake layers – I like foam boards)
- Cake Rounds (The same size as your cake layers)
- White candy melts (For attaching the cake boards)
- Cake Turn Table
- Buttercream (You can grab my buttercream recipe here: Vanilla Bean Buttercream Recipe)
- Icing Spatulas
- Mini Level
- Wax Paper
- Icing Smoother (You’ll need a tall one) Here are a few options: Tall Plastic Icing Smoother, Tall Metal Icing Smoother
- Dowels for stacking the cake layers. I love using Poly Dowels. For the link to the official poly dowels, click here: Poly-Dowels Here are some other options for plastic ‘cuttable’ dowels.
- Center wooden dowel (The dowel that goes all the way through the cake and into the cake base. This is really just a tall wooden dowel that you can probably get at any craft store.)
- Pencil sharpener (for sharpening the center dowel)
- Edible marker (for marking the dowels) The Americolor brand seems to last a long time for me.
- Knife (for trimming the cake)
- Hot water (for smoothing the buttercream if you use the metal smoother)
- Optional: Gumpaste Rose – Here is my tutorial on that: How to Make a Large Gumpaste Rose
Options for Making a Tall Cake:
Ok, the most important thing about making a tall cake is that you MUST have support in your cake. By ‘support’, I mean doweling inside.
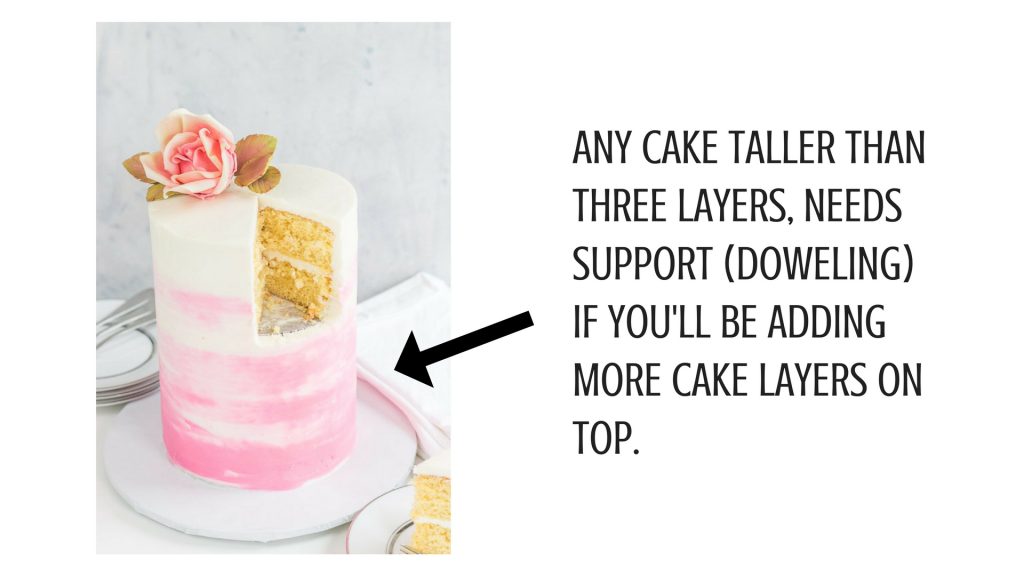
Any cake that will be taller than three layers, needs to have support if you’ll be adding more cake layers on top. Sometimes you can get away with four layers, but honestly, I don’t test it.
The reason is that the cake gets too heavy. It could just collapse on itself, the weight of the cake could cause buttercream ridges, or you could have cake layers that slide on you.
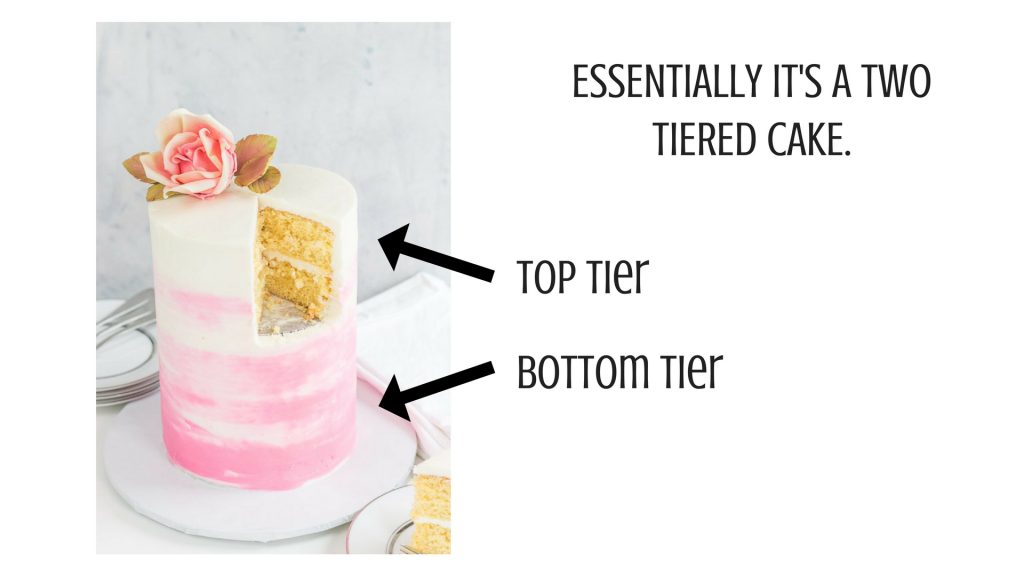
A tall cake is really just a two tiered cake. The top and bottom tiers just happen to be the same size. So if someone is paying you to make a tall cake, make sure to charge accordingly. It’s not really ‘one’ cake, it’s basically two in one.
Ok, let’s talk about options for making tall cakes:
First Option for Making a Tall Cake:
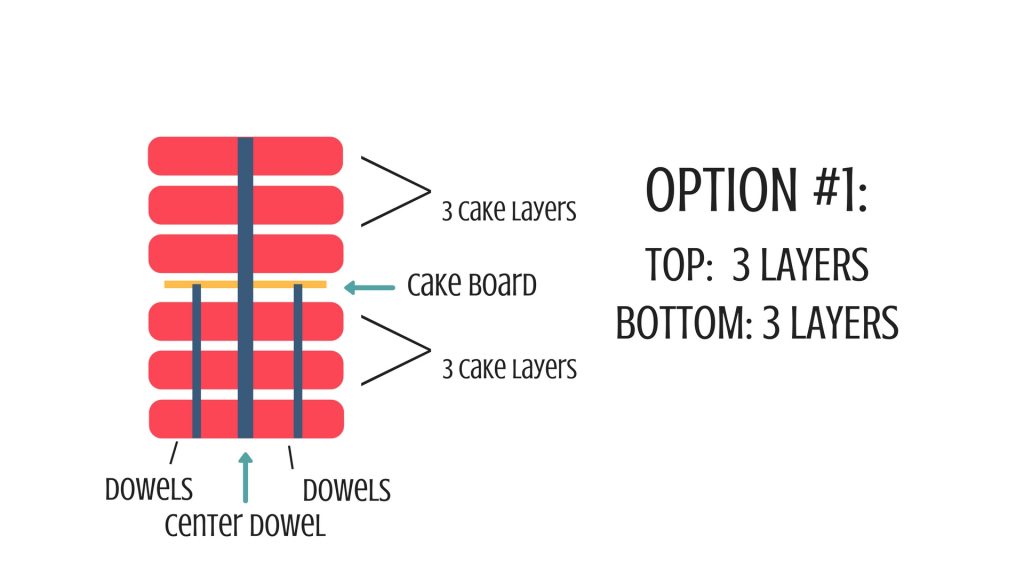
The first option is to use three layers of cake for the bottom tier and three layers for the top tier. Between the tiers, you’ll need a slightly smaller cake board and dowels for support in the bottom tier.
Second Option for Making a Tall Cake:
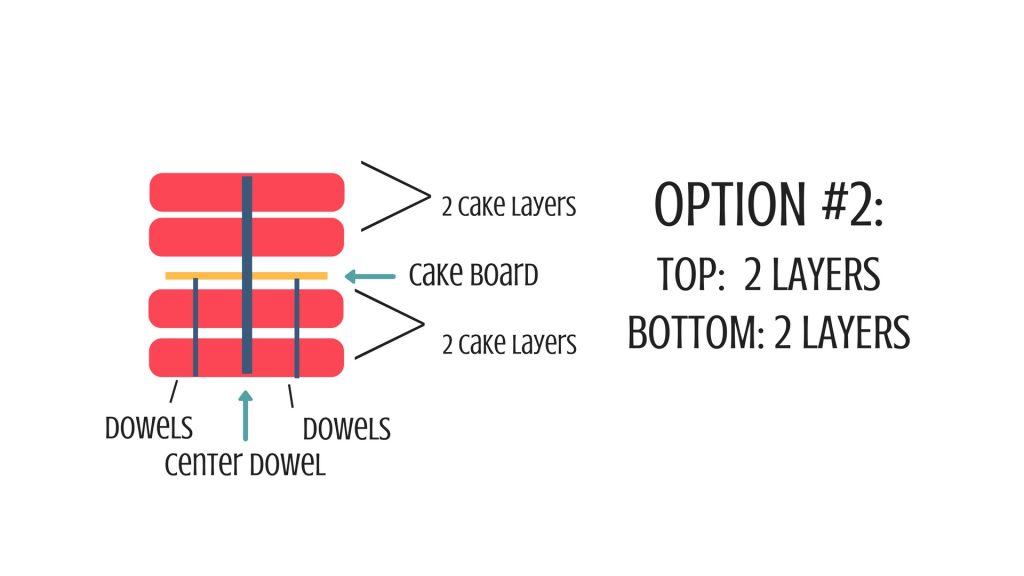
The second option is to use two layers of cake for the bottom tier and two layers for the top tier. You’ll add the slightly smaller cake board in between the cake tiers and the dowels in the bottom tier. This option will give you a shorter cake than the first option.
Third Option for Making a Tall Cake:
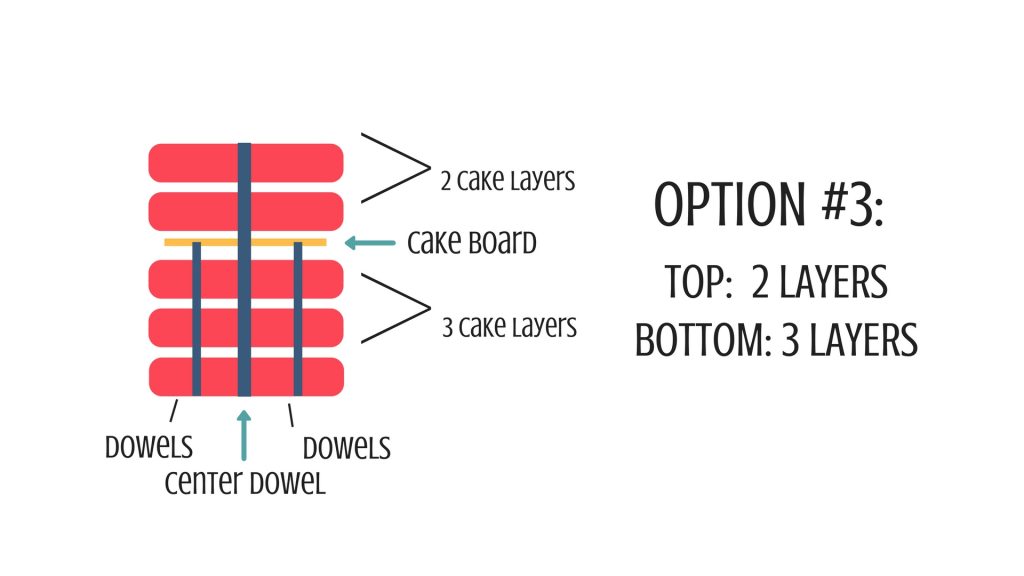
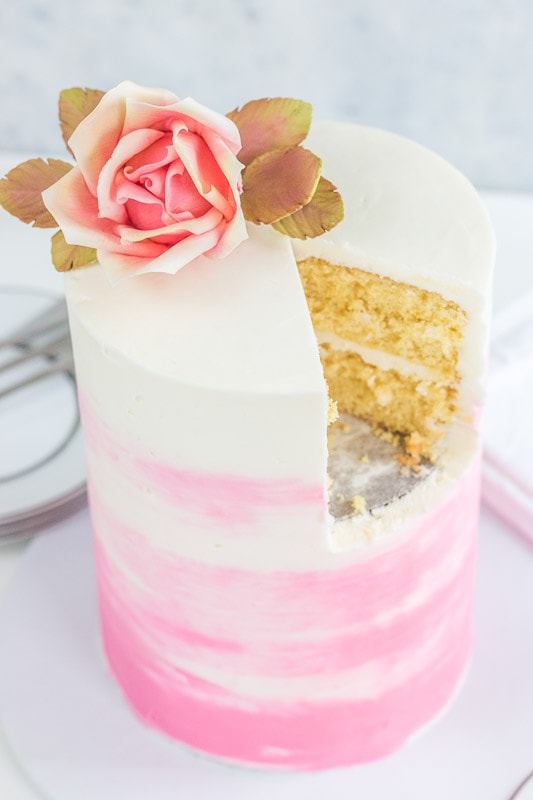
This is the option that I chose. I used three cake layers on the bottom tier and two on the top tier with a cake board in the center and dowels in the bottom tier. I went with this option because four layers of cake didn’t seem tall enough for me, but six layers of cake was looking way too tall for a 6″ round cake.
Ok, so now you’ve got some options to think about. Let’s get to actually building the cake.
Making the Tall Cake:
Don’t forget, if you’d rather watch the video rather than read all the steps, just scroll on down close to the bottom of the post to catch the video.
First you want to make sure you’ve leveled your cake layers. You definitely want them to be as level as possible, to prevent any accidents or them moving around on you later.
Take your large foam core cake base and cover it with fanci foil, or whatever your favorite method of covering a cake board is. If you want to see more options and all my cake board tips, you can see those here: Tips for Cake Boards
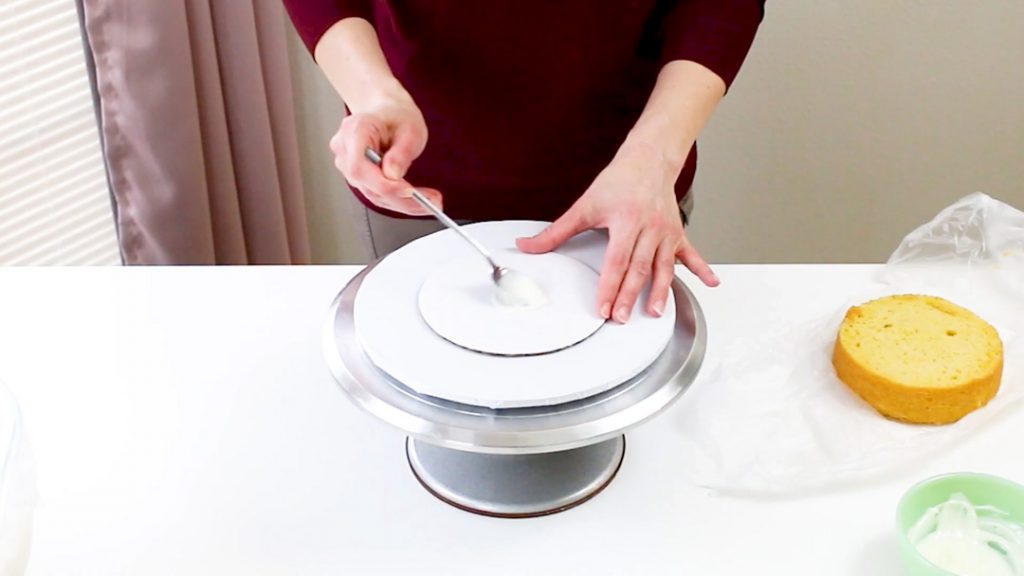
Now, set your cake base on your turn table and add some melted white candy melts to the middle. This will help you attach the bottom cake board, so it doesn’t move around.
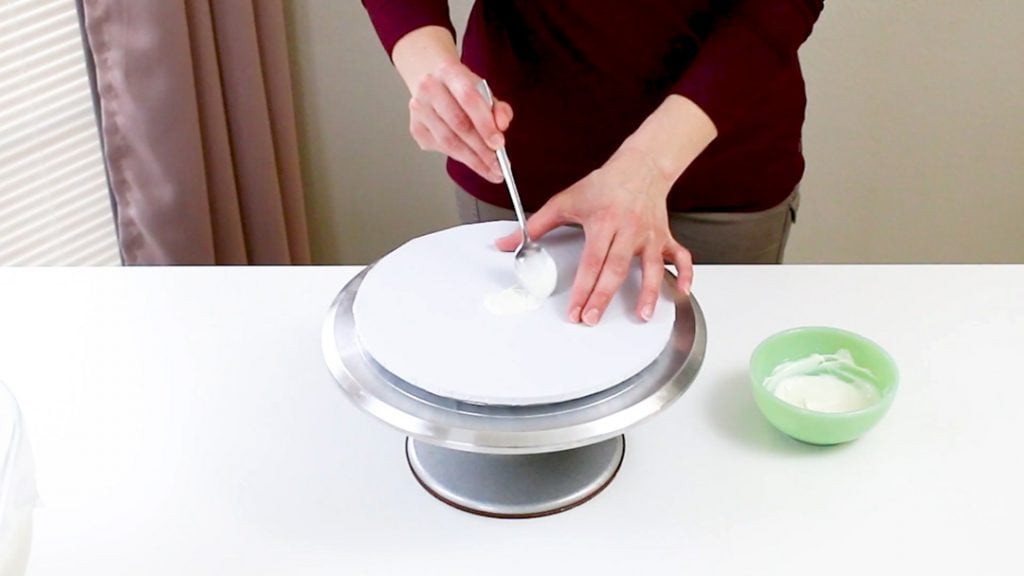
Now you want to add a cake board to the cake base. You need to make sure the cake board is the same size as your cake layers. I used 6 inch cake layers and a 6 inch cake board here. Make sure to let it set up a bit, so it’s good and sturdy. You can even pop it in the fridge for a few minutes if you want.
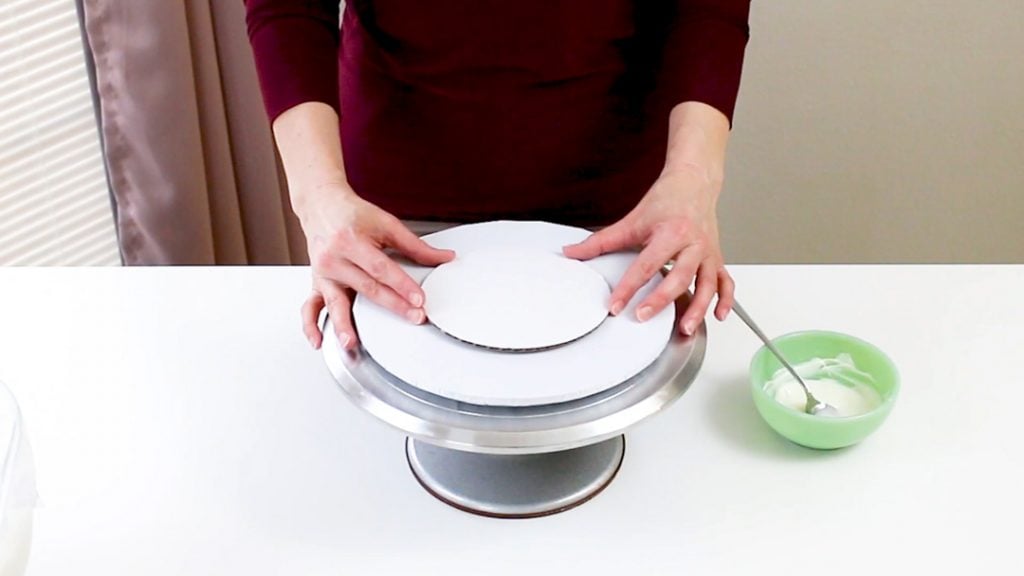
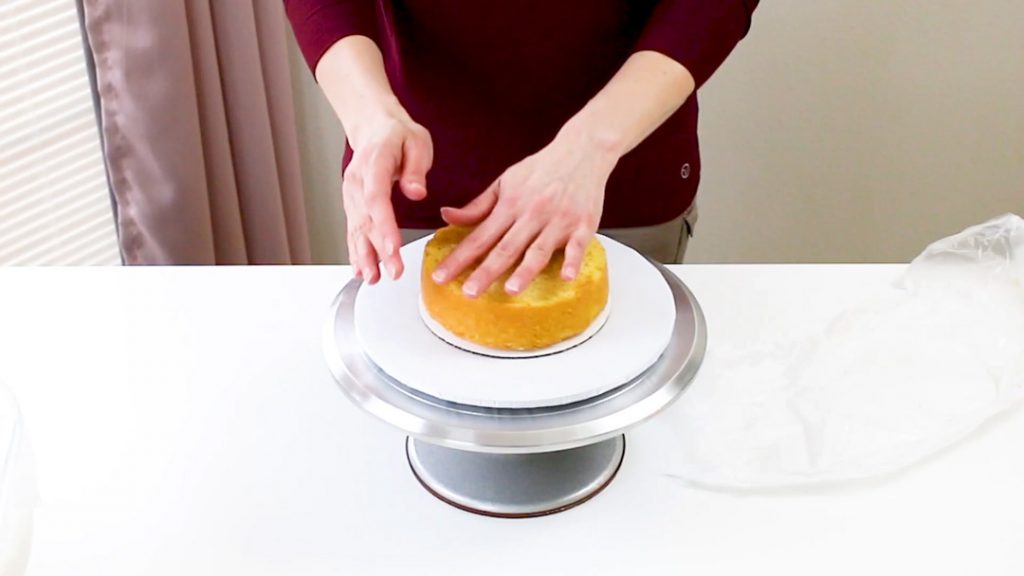
I like to go ahead and add just a bit of the melted candy melts to that board so the bottom layer of cake is stuck well onto the board. Some people like to use buttercream for this, but that just hasn’t worked well for me.
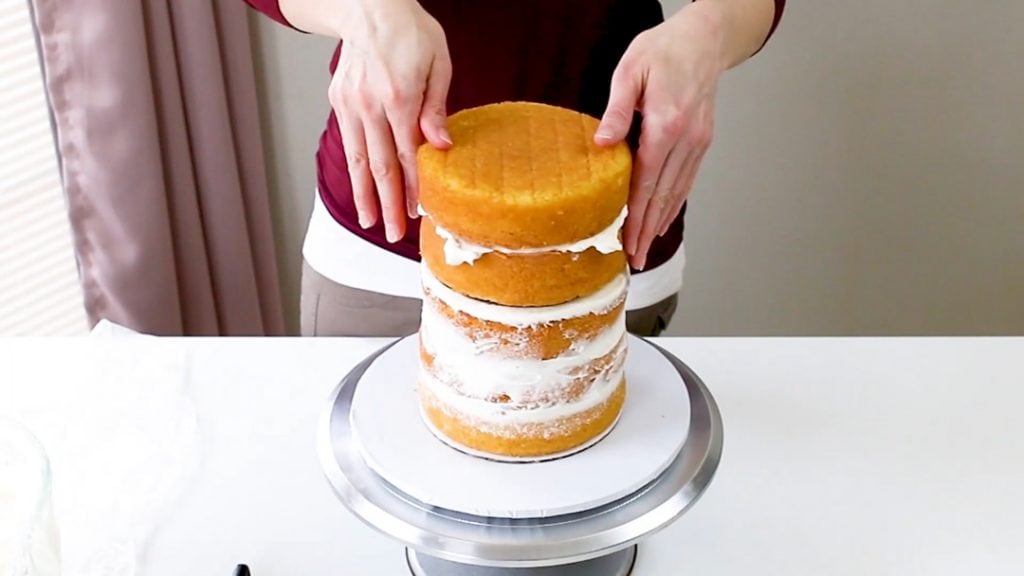
Then go ahead and add the first cake layer.
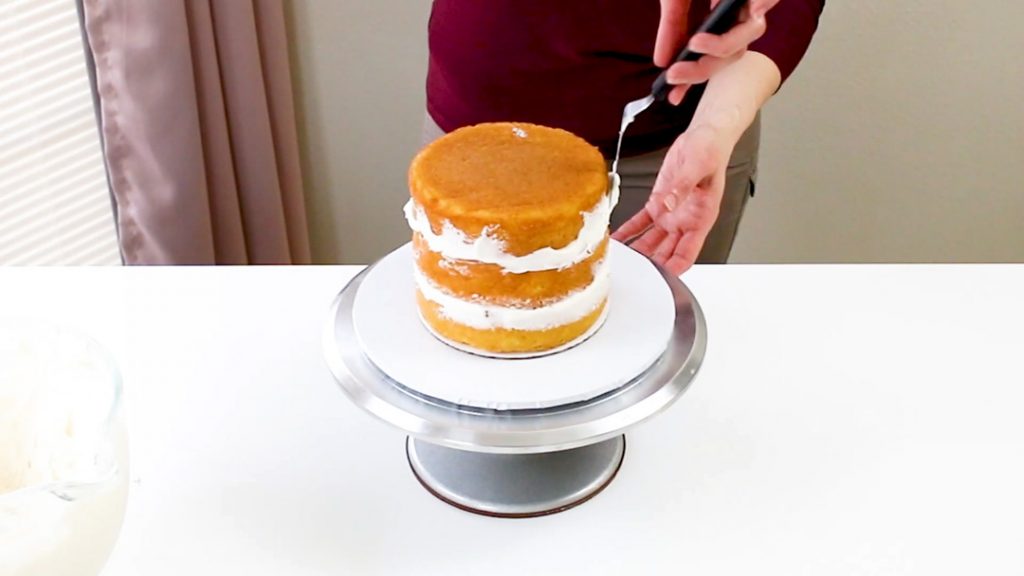
Add buttercream and your other cake layers until you get the bottom tier as tall as you need it. (Remember, don’t go higher than three tiers.)
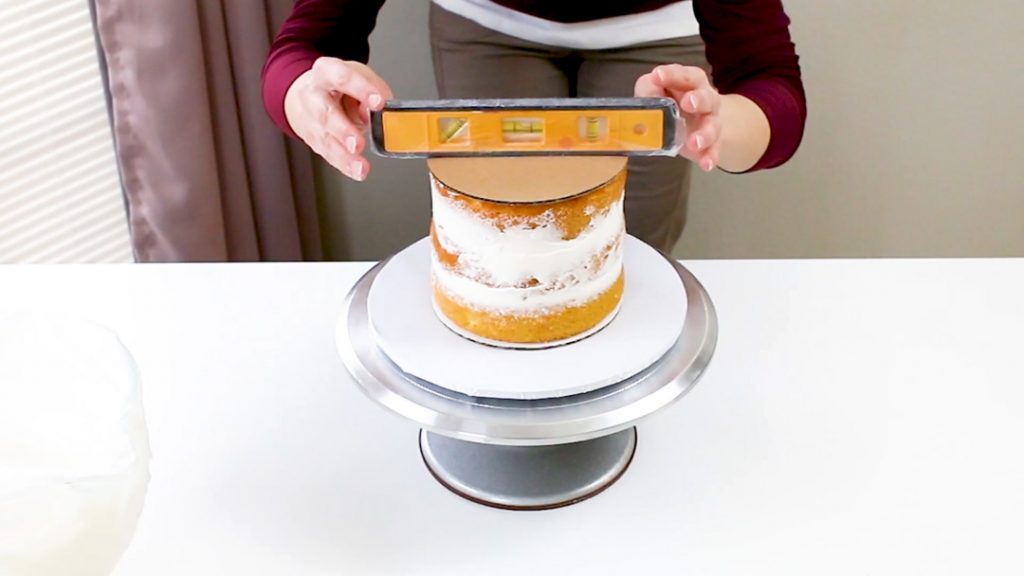
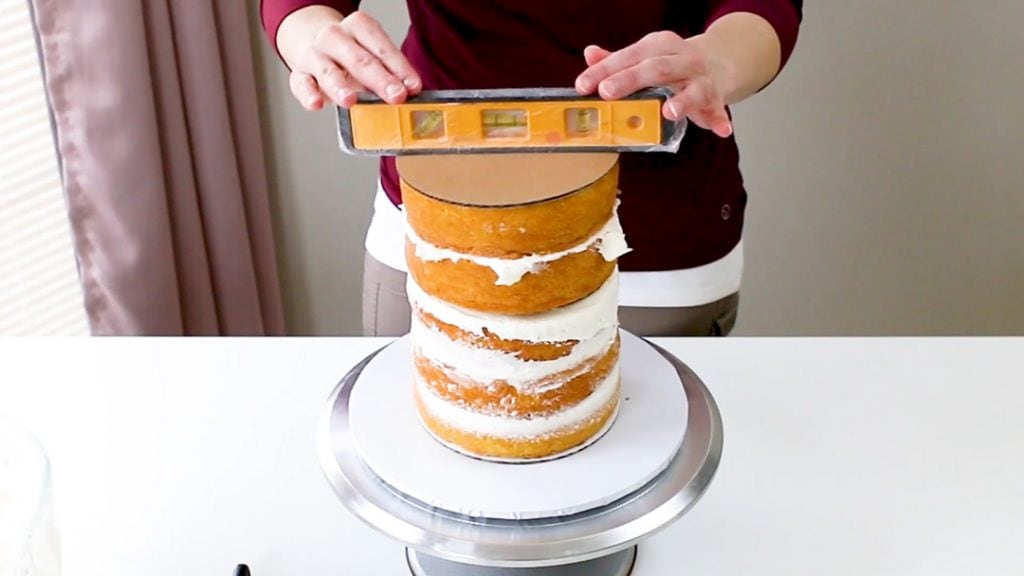
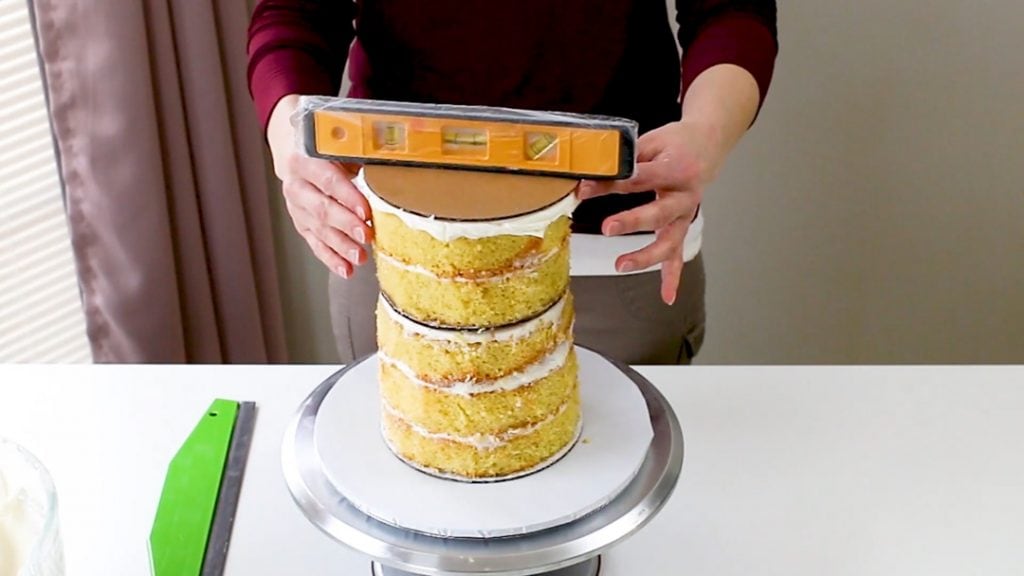
Pop another cake board on top and use your level to make sure the bottom tier is mostly level. If it’s not, just push down on the board a bit to level it out.
Once it’s mostly level, take that cake board off the top and add some buttercream.

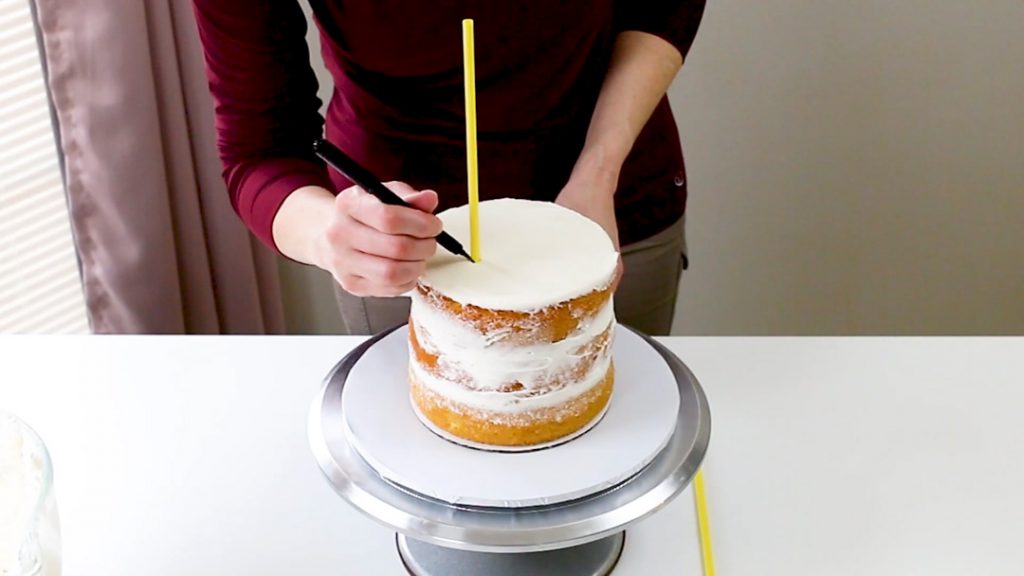
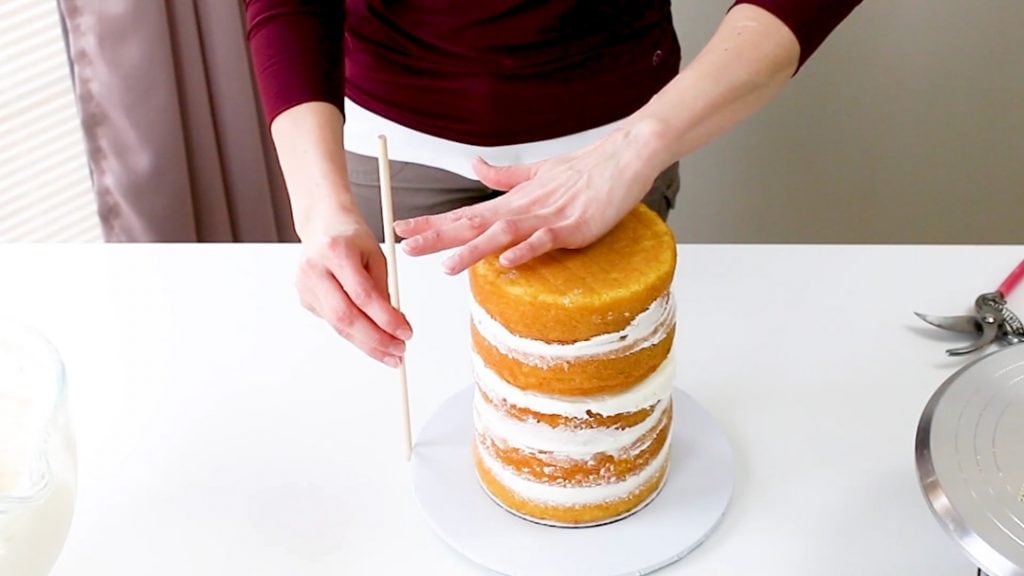
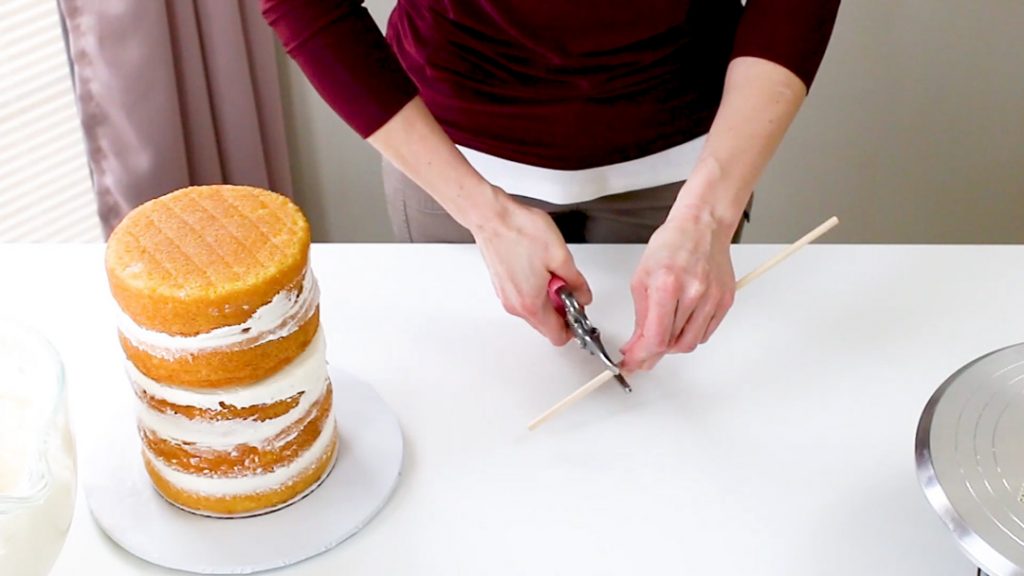
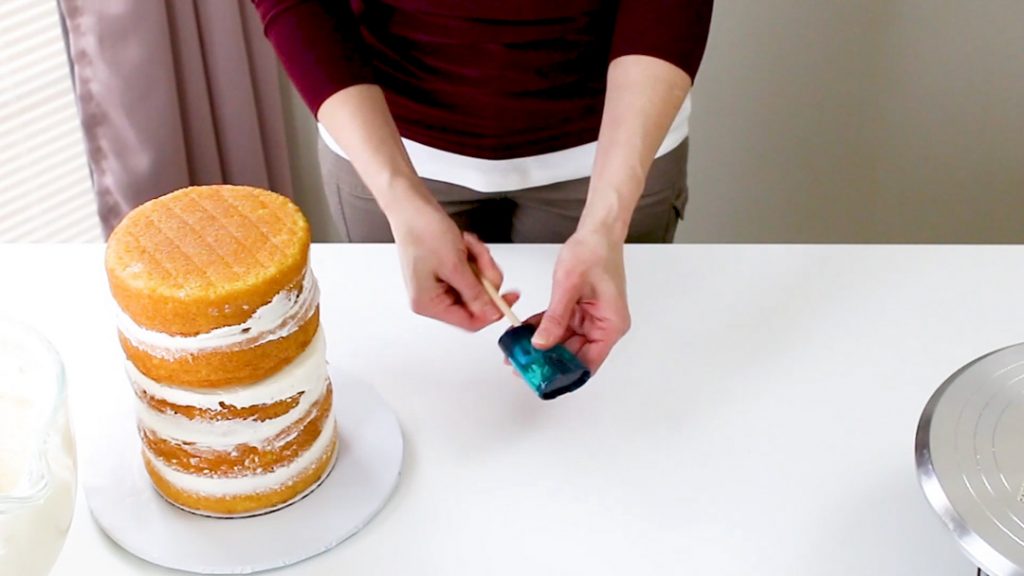
Now take one of the plastic dowels, insert it into the cake tier and then mark the top with an edible marker. If you’d like to use wooden dowels, feel free to do that. You could also use bubble tea straws as well. Just make sure they are heavy plastic and not the flimsy straws. Regular straws will not do the trick.
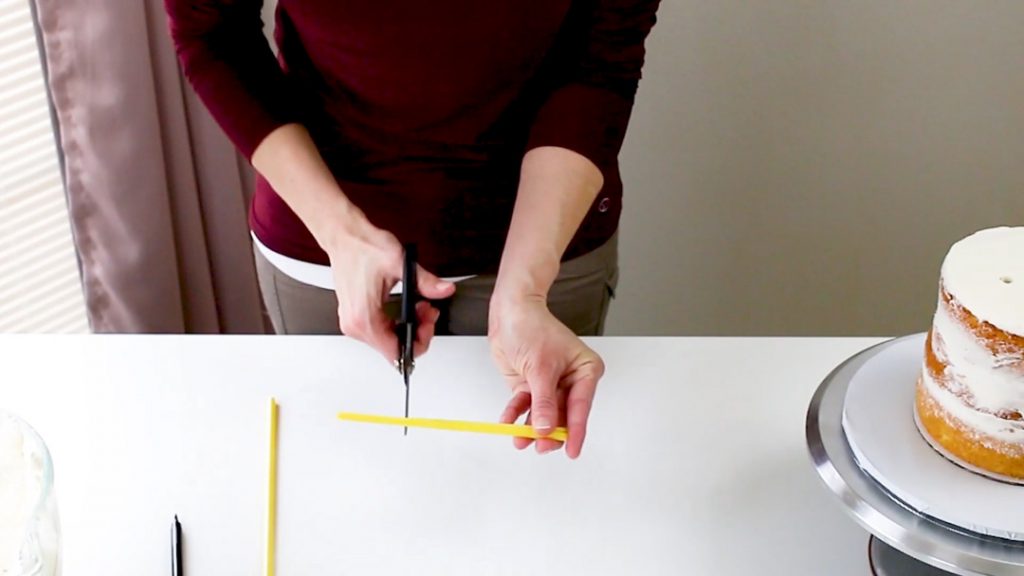
Once you’ve marked the dowel, twist it while pulling it out of the cake. You’ll need to cut your other dowels the same height. I cut all my dowels the same height and then insert them because I find this gives me a more level cake, rather than just cutting the dowels while they’re inside the bottom cake tier.
I used 4 dowels for the 6 inch round cake.
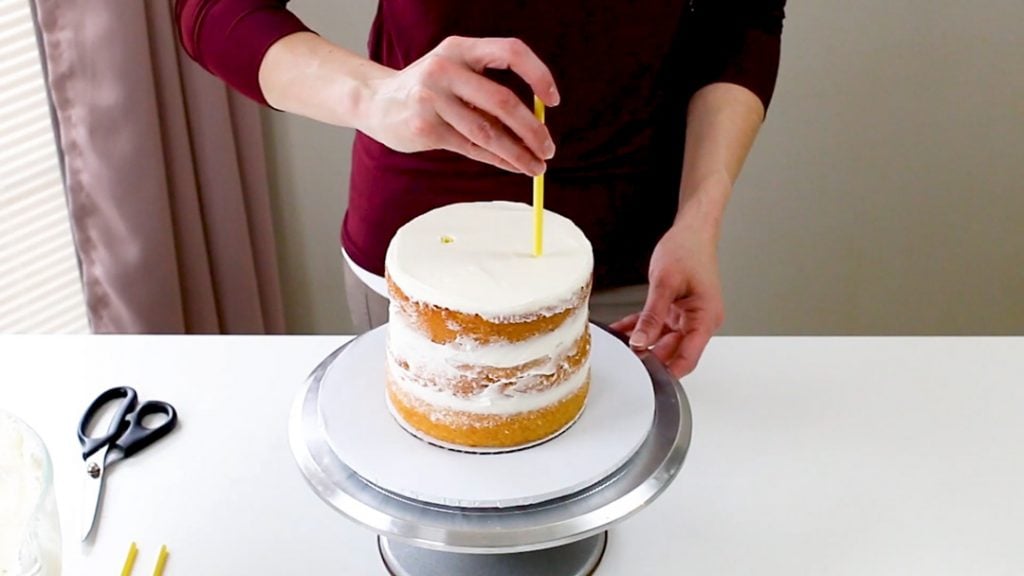
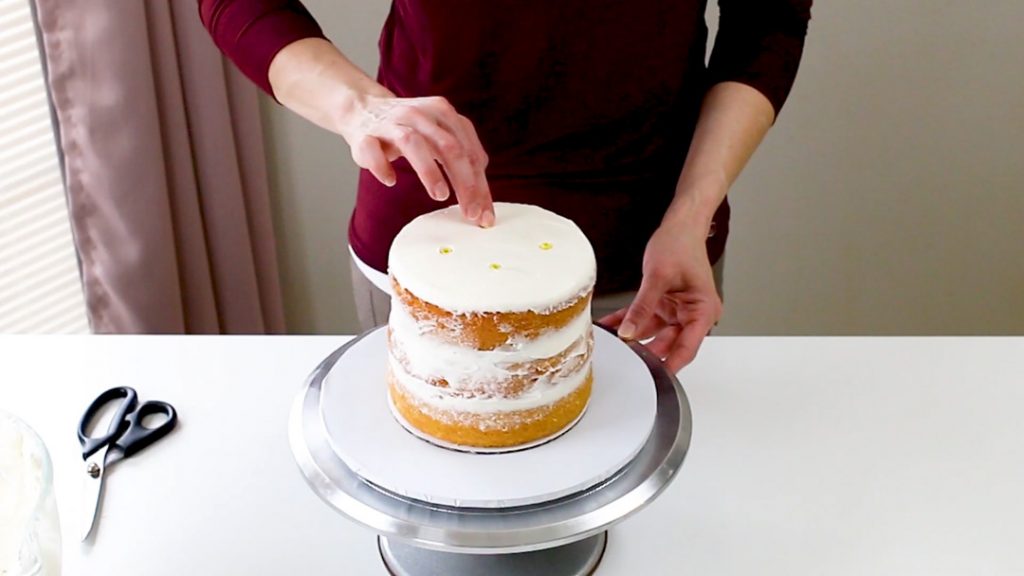
Now insert the dowels into the bottom tier. Leave the very middle space empty though because you’ll need to add in a center dowel later.
Now you’ll need to grab a cake board the same size as your cake layers, however you’ll need to trim it down a bit…maybe about a half inch trimmed off around it.
You need this board to be a bit smaller, so it doesn’t stick out when you ice the entire thing.
Now just pop your trimmed cake board on top of your bottom tier.
Now use your mini level to check it. Make adjustments if it’s off.
Add a bit of melted white candy melts so the next layer of cake sticks to the board. Some people like to use buttercream for this, but I like using the candy melts because it seems sturdier.
Now just add on your cake layers to the height you want. (Remember, don’t go over three.) I added only two layers for this top tier, since the cake was getting super tall.
Now, make sure the cake is level and adjust if necessary.
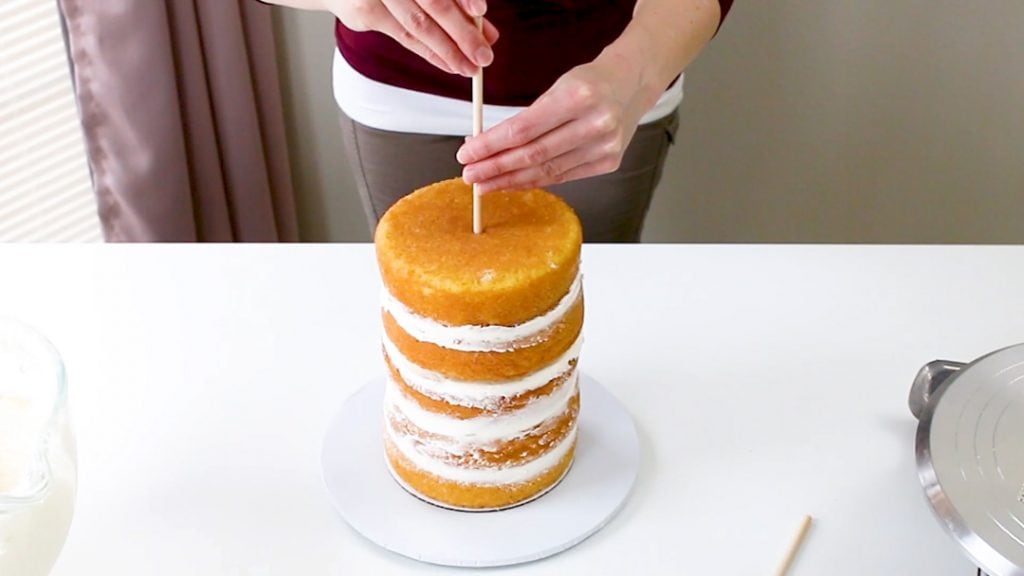
Now you need to measure the height of your cake so you can cut your center dowel. You want to include the height of your foam core cake base because the dowel needs to go all the way through that as well (not just through the cake).
Yes, I know I’m very scientific using my hand to measure. 😉
It’s also okay if the center dowel is slightly shorter…you just don’t want it taller than the cake.
Now cut your dowel and then sharpen one end of it. Then just wash it off.
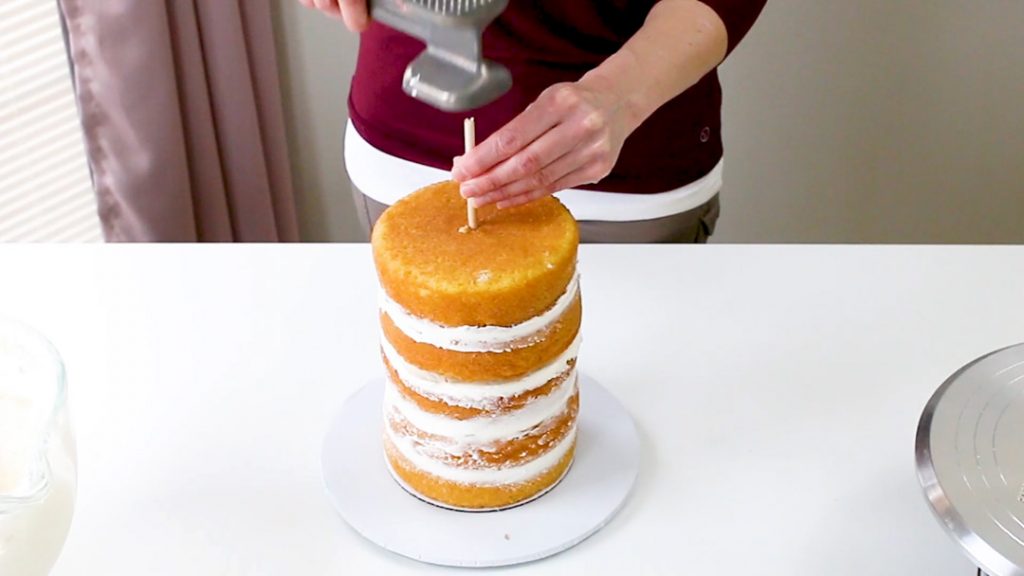
Now just push it (or hammer it) through the whole cake (even the board in the middle) and down into the cake base. Go all the way down into the bottom of the cake base.
Use the cut off dowel piece to help hammer it all the way through.
Yes I’m using a meat mallet…I couldn’t find my hammer. Hey, it works, right?
Alright, now I like to chill the cake, just for a bit, so it’ll be sturdy when I trim it. So, just pop the cake in the fridge for maybe 15 – 20 minutes or so.
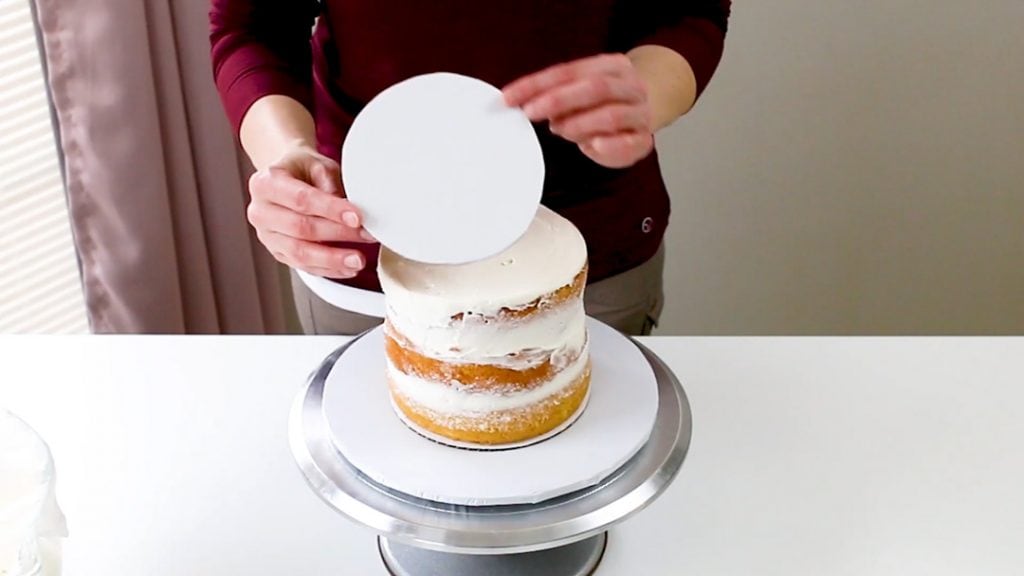
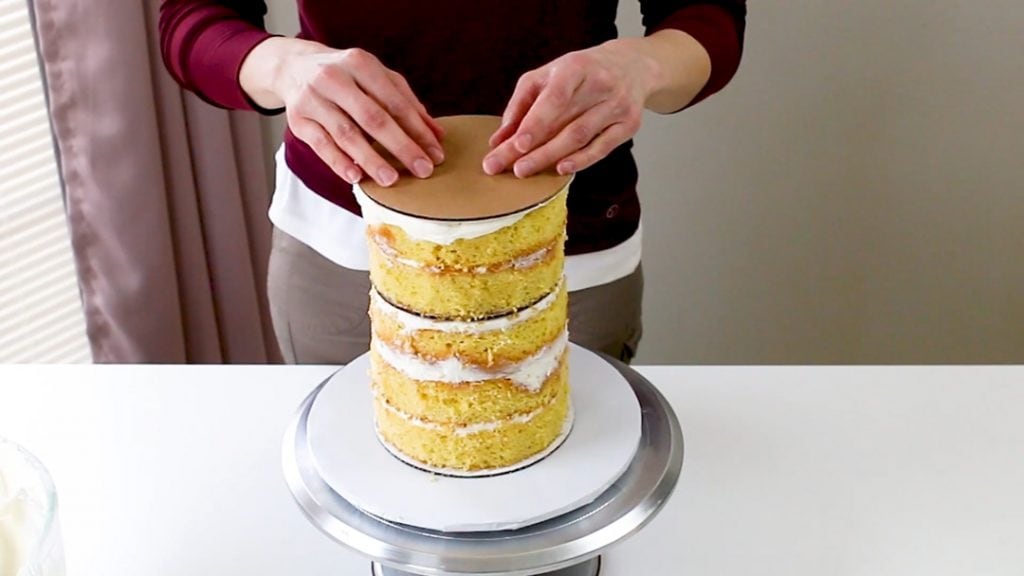
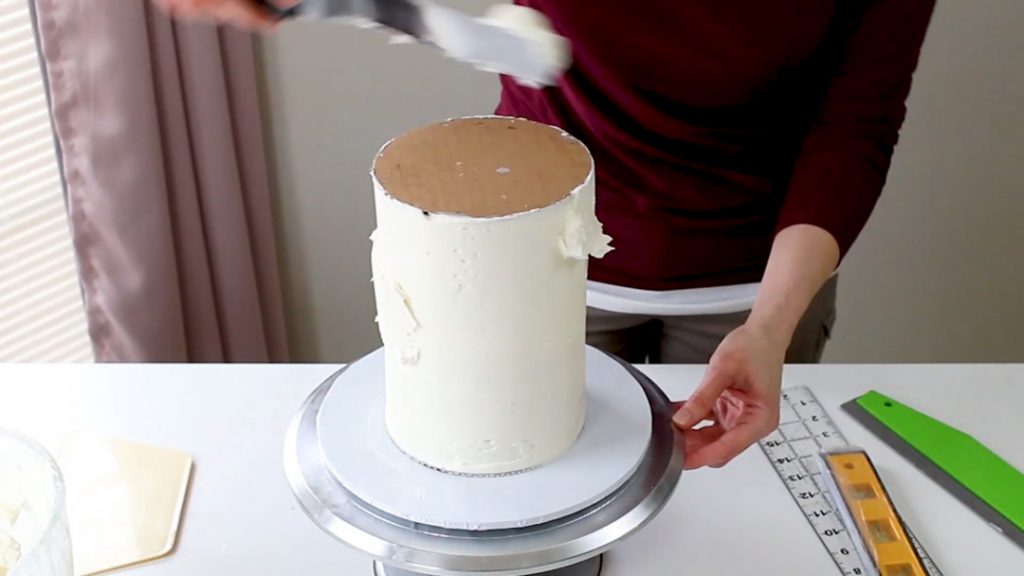
After it’s chilled a bit, you’ll want to add a cake board to the top of your cake, just to check and see how much you’ll need to trim. You don’t want any cake peaking out when you go to smooth the buttercream later.
Just use the bottom and top of the cake board plus your buttercream smoother to check which parts of the cake will need to be trimmed. This may make more sense when you get to the video.
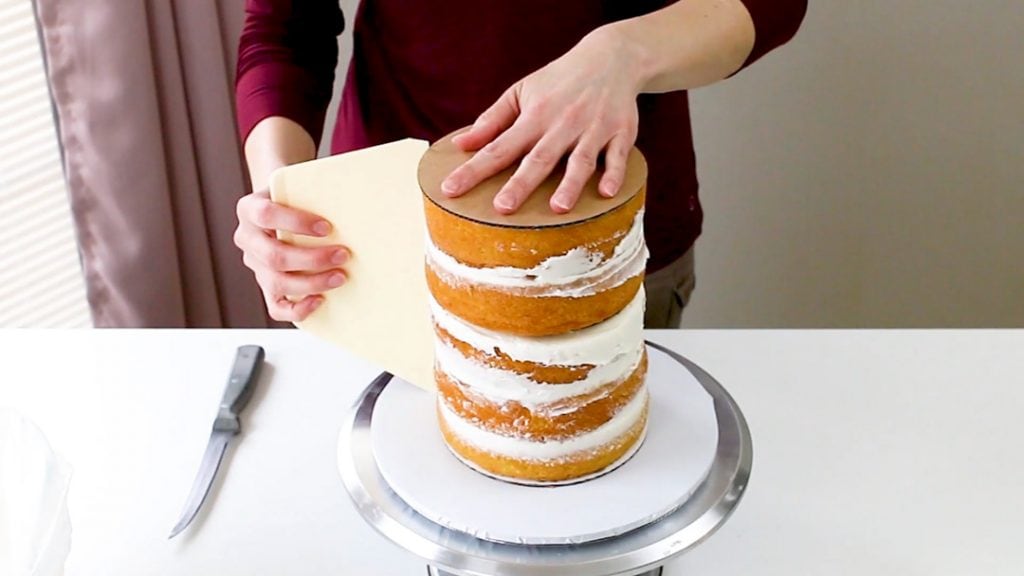
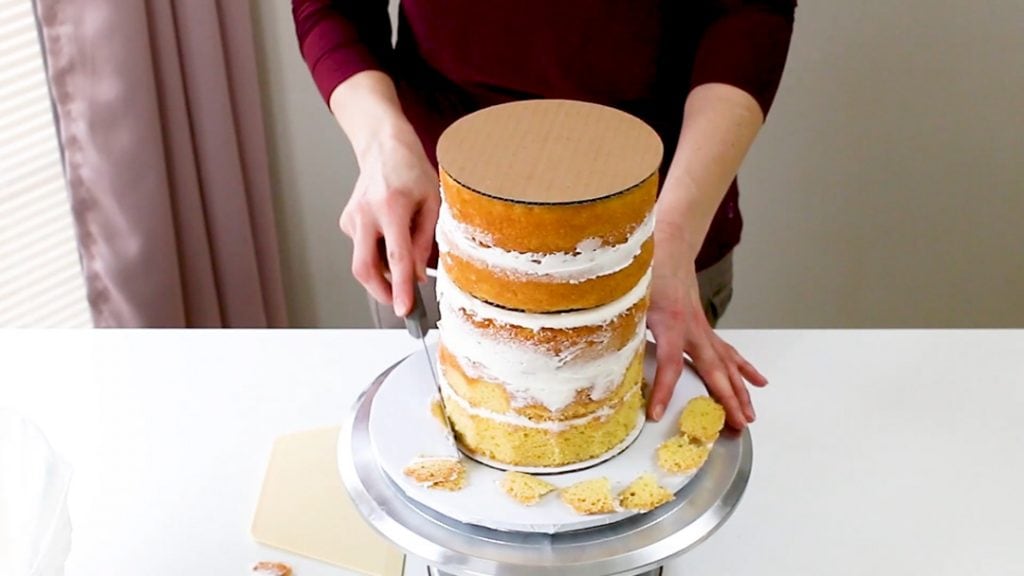
Now just trim around the cake. You’ll be using the top and bottom cake board as a guide when smoothing your buttercream, so any cake that is sticking out past those or any where near there, will need to be trimmed off.
You may not have to trim as much as I did…I tend to trim a lot off because I like a lot of buttercream and I just don’t want to take any chances that any of the cake will show through. Technically, you could probably use a larger cake board, but since I was making 6″ round cakes, 7″ cake boards are hard to find in my area. But trimming works too.
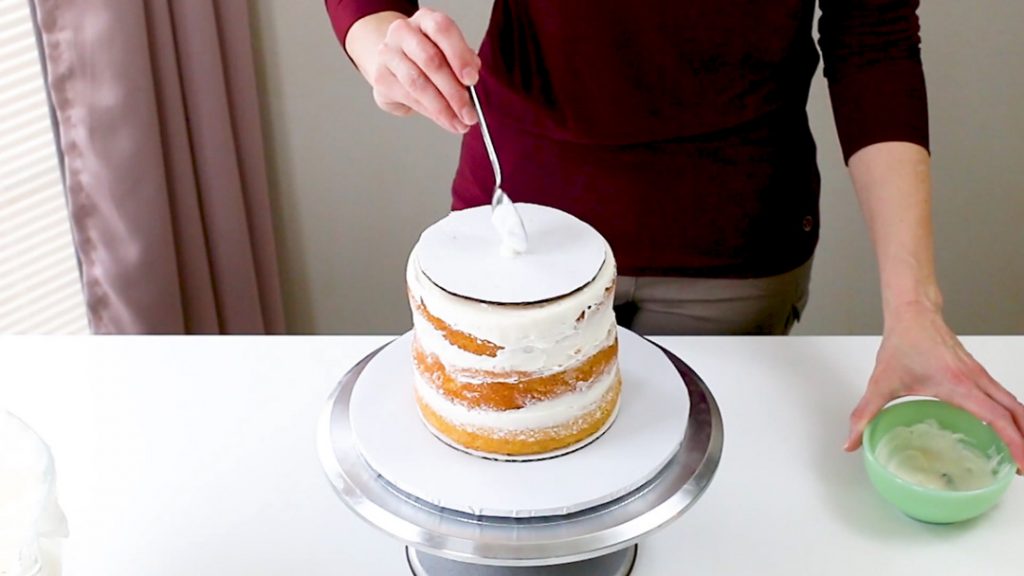
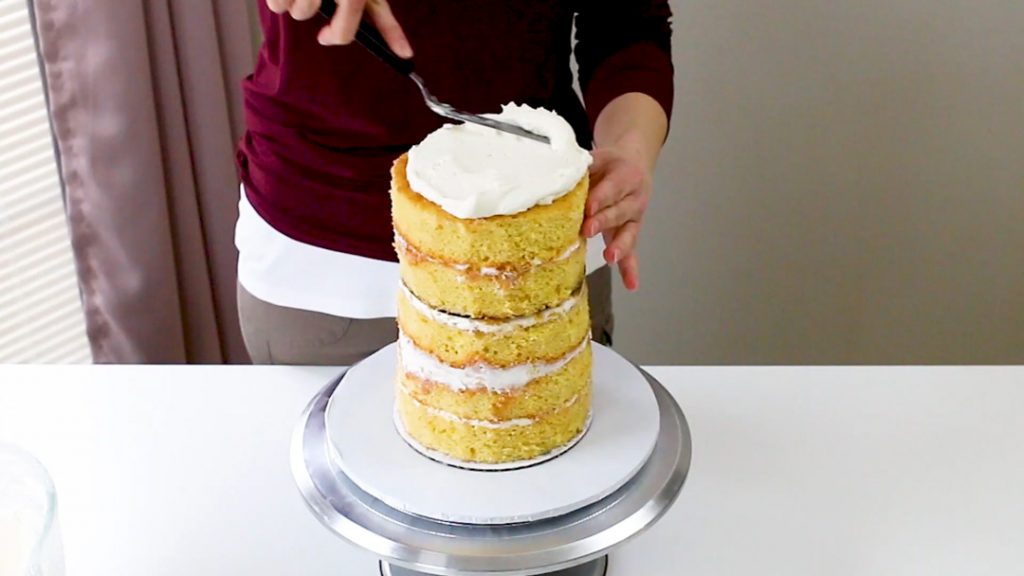
Once it’s trimmed up, add buttercream to the top and level it out.
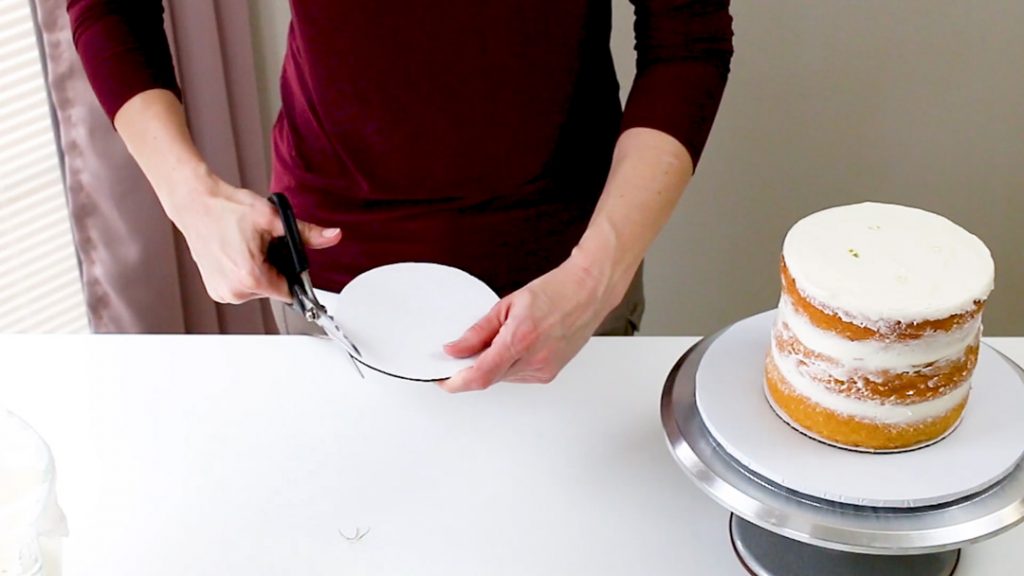
Now you’ll want to take another cake board (the same size of the cake layers you baked and the same size as your bottom cake board) and add some wax paper to it.
I just trace around the cake board onto the wax paper and cut out the circle. Stick the circle of wax paper onto the cake board with a bit of buttercream. (This top piece is going to be your icing guide.) This will make it easy to get a sharp icing edge.
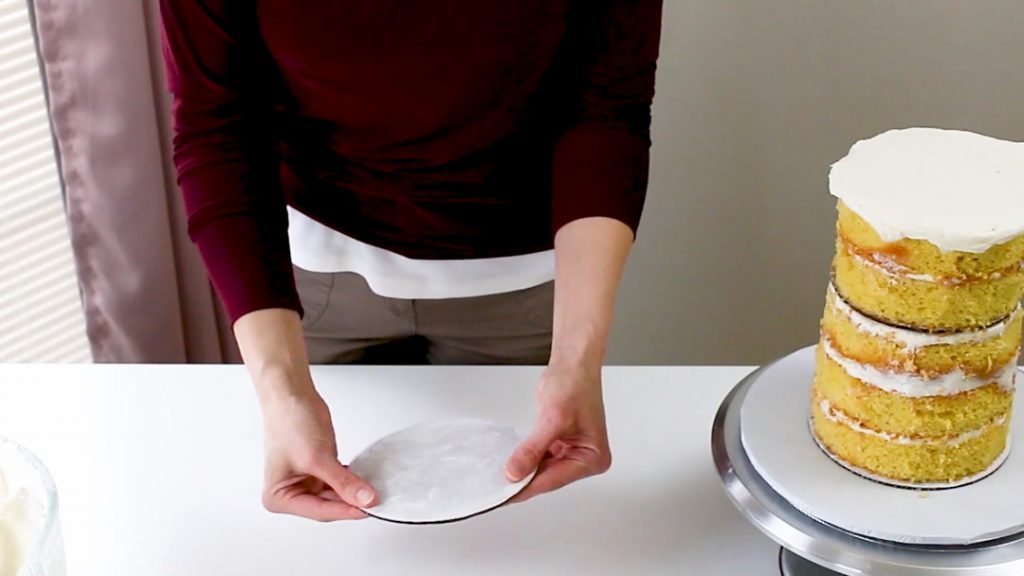
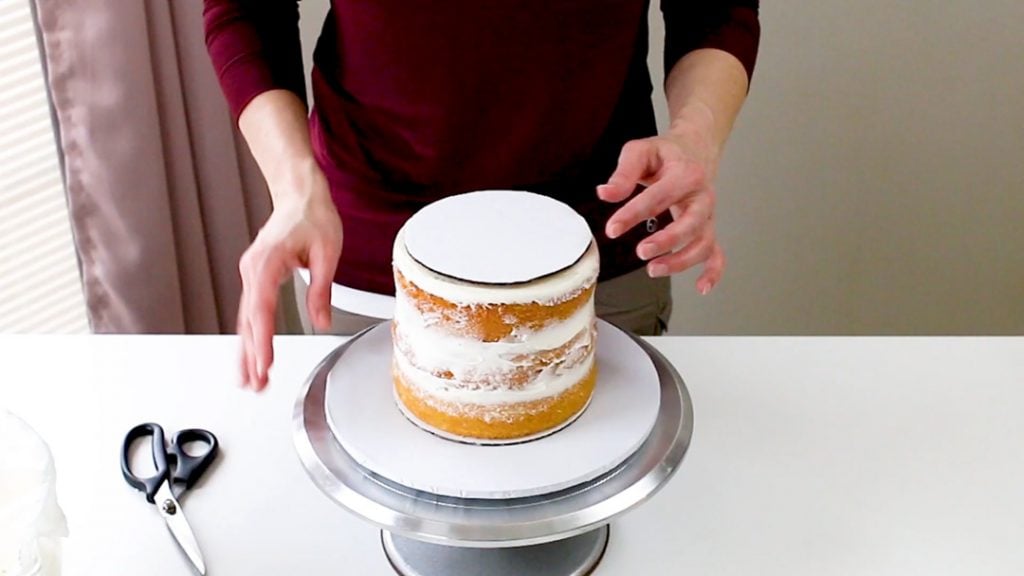
Pop it onto the top of the cake.
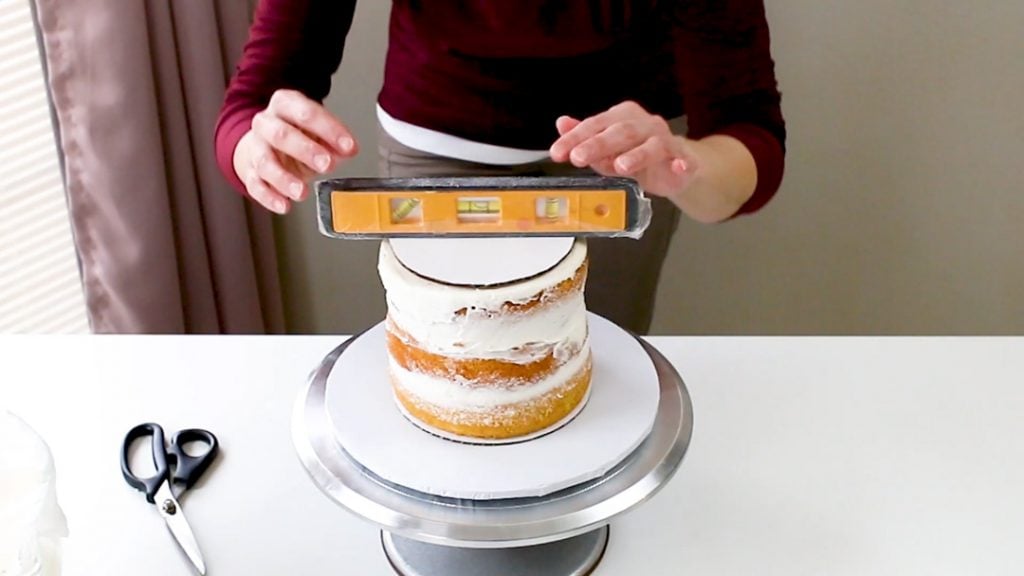
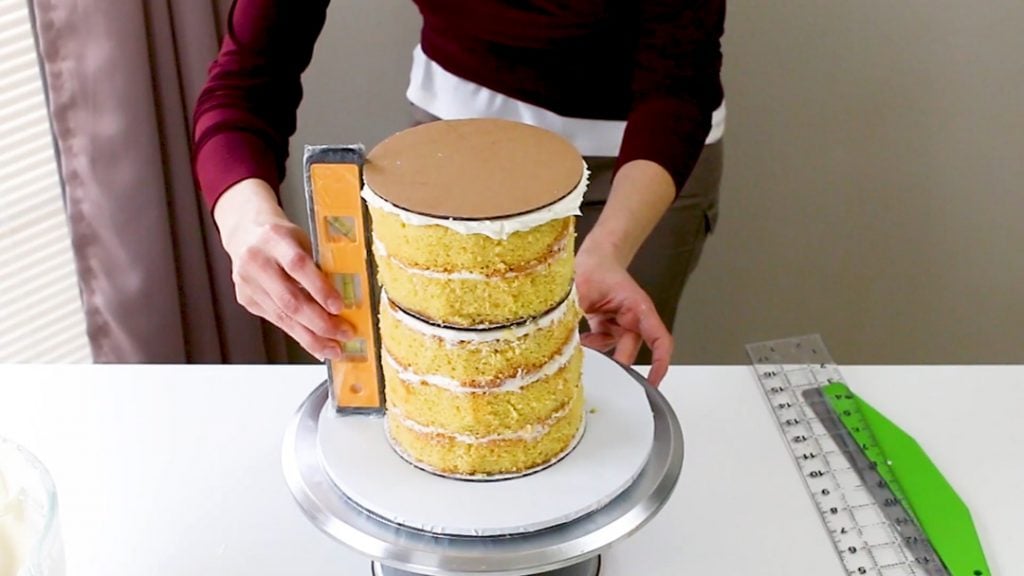
Use your mini level to level the top and you’ll also want the make sure the sides are level as well.
At this point, you can re-chill your cake for another 10-15 minutes or so to firm it up. (Don’t leave it in the fridge too terribly long because it’ll dry it out.)
Alright, once it’s chilled just a bit, it’s time to add your buttercream. Just start by adding it all with a large icing spatula.

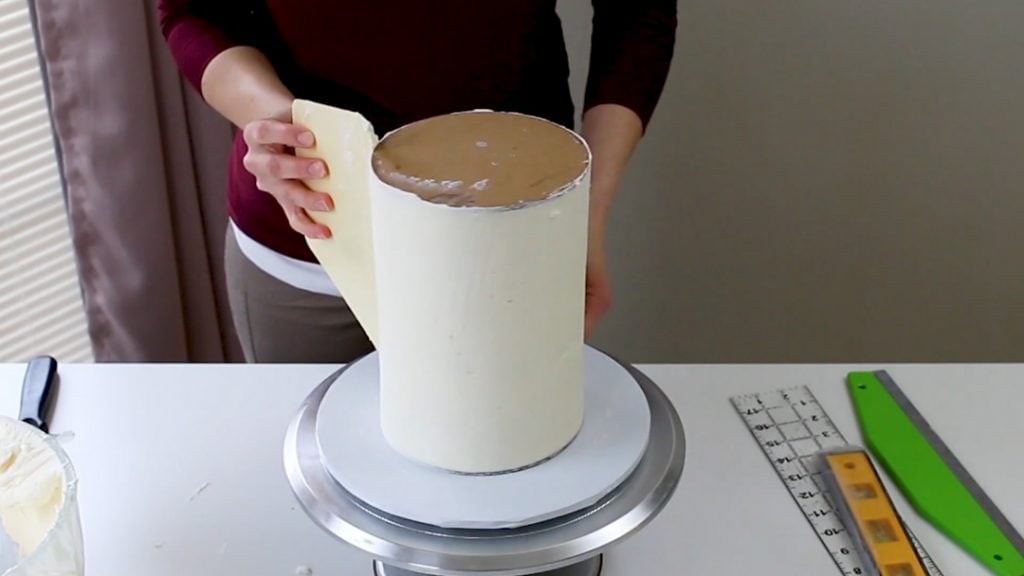
One it’s all added, start smoothing it with your buttercream smoother.
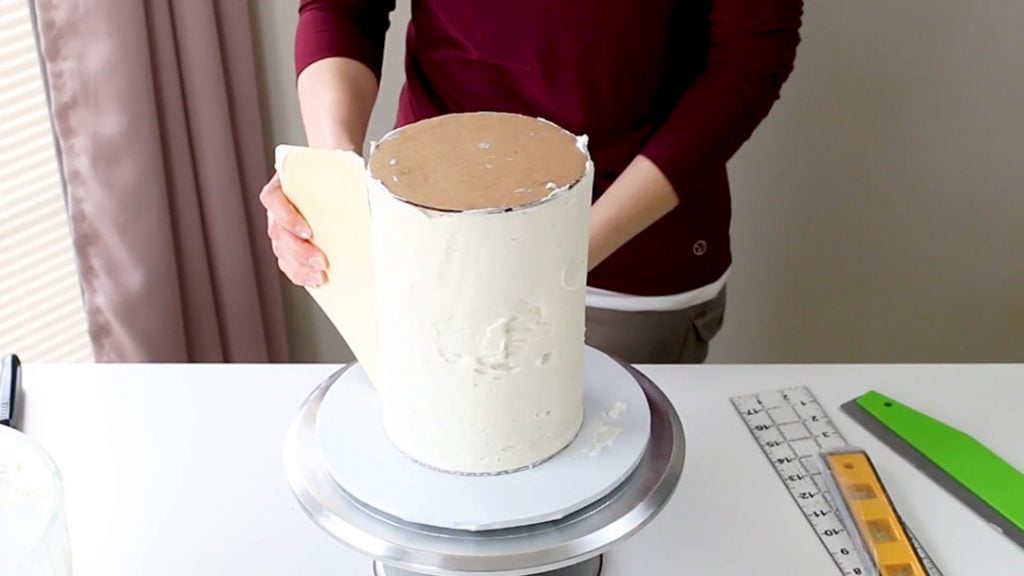
Add more buttercream to any holes you see and then smooth again. You may need to do this process a couple times.
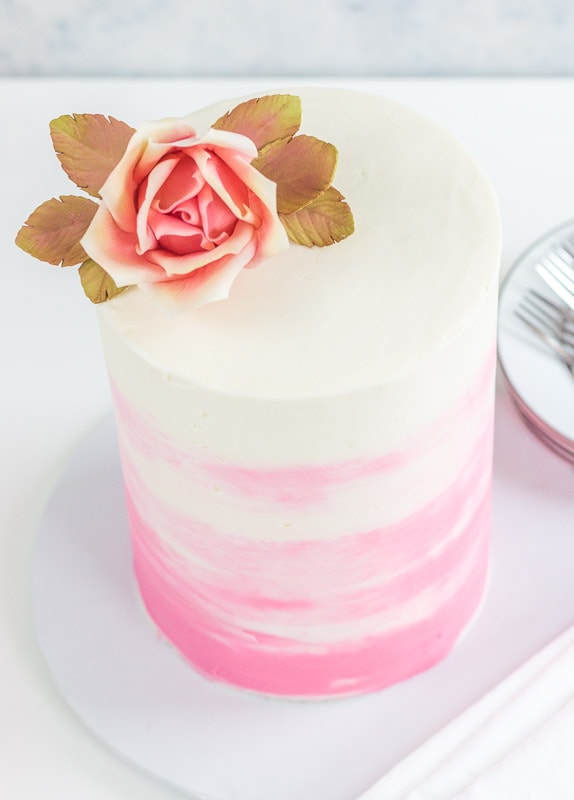
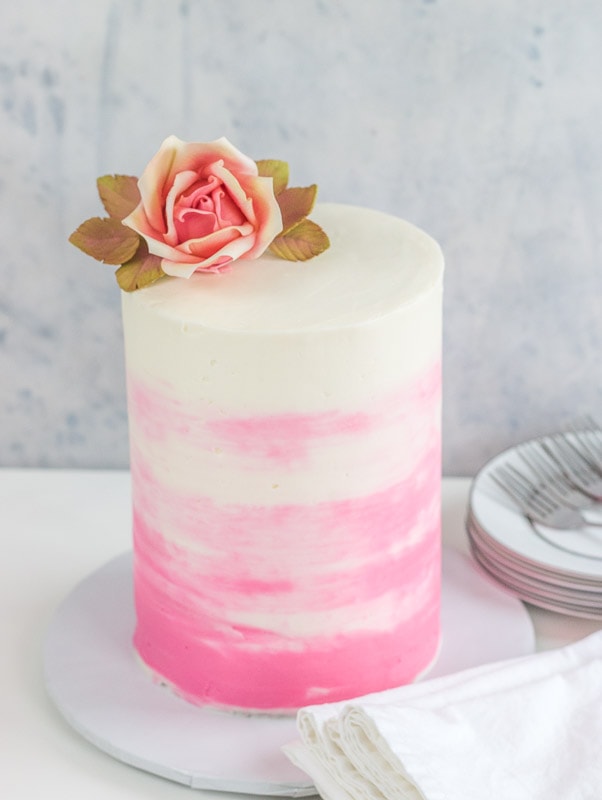
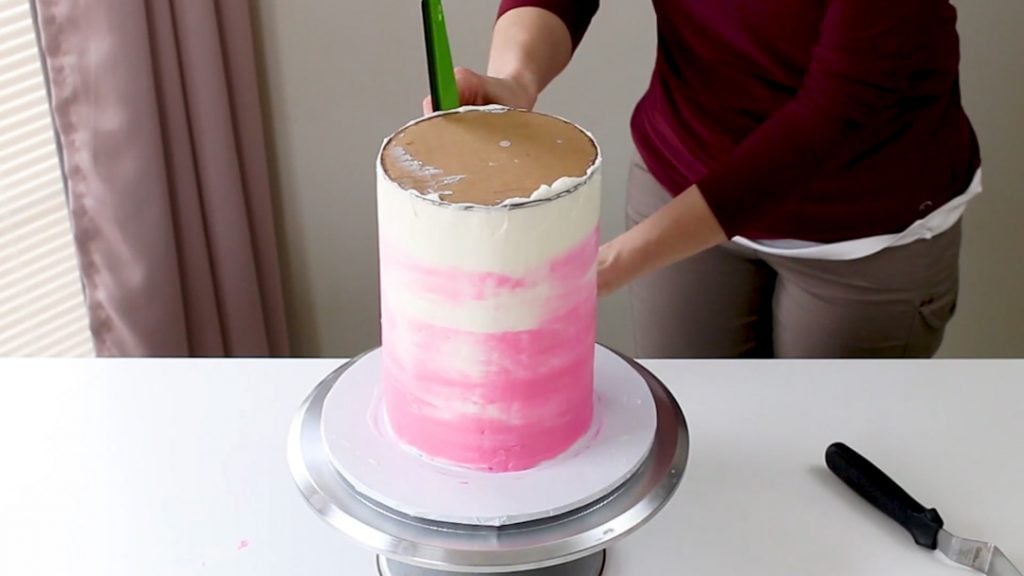
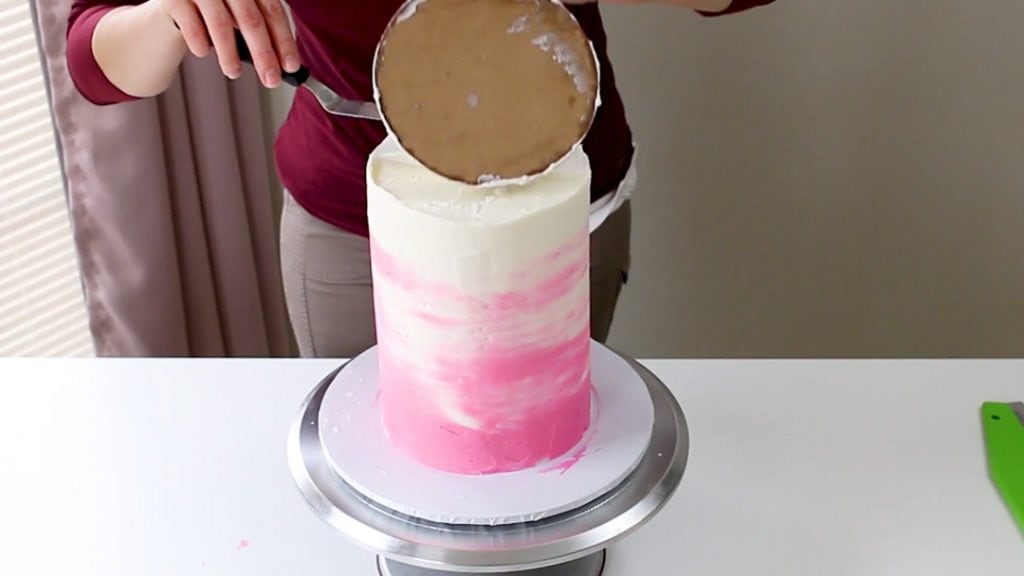
To get the watercolor look, add more white buttercream on the top and pink on the bottom.

Now use your buttercream smoother to smooth around it.
Once you get it as smooth as you’d like. Pop it in the fridge for about 10 -15 minutes so the buttercream firms up a bit.
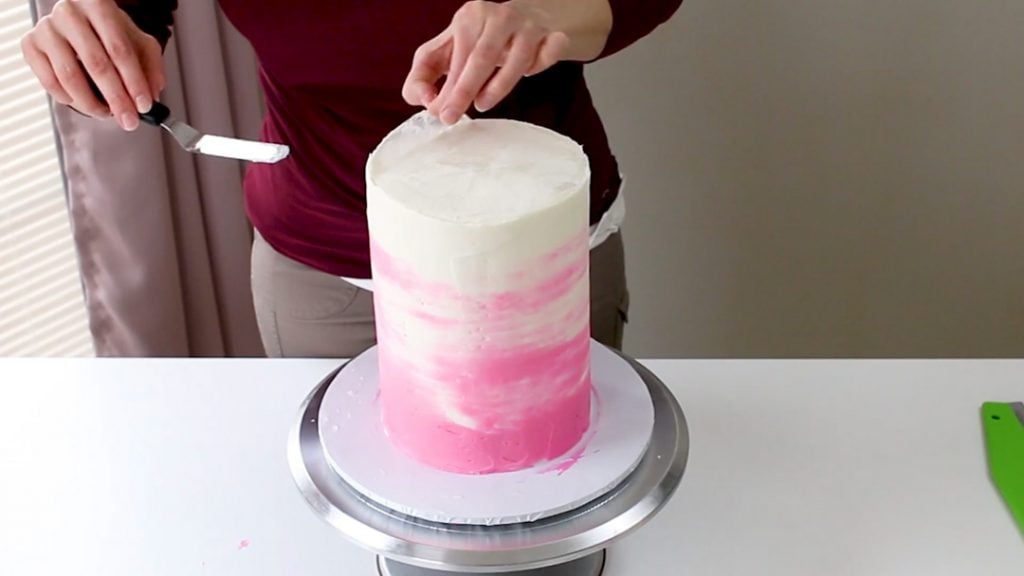
Now take your smaller icing spatula, dunk it in very hot water, dry it off and insert it around the bottom of the cardboard round on top of the cake. You’ll need to do this a little at a time, heating your spatula with the water and drying it off. You want to slowly loosen that top cake board.
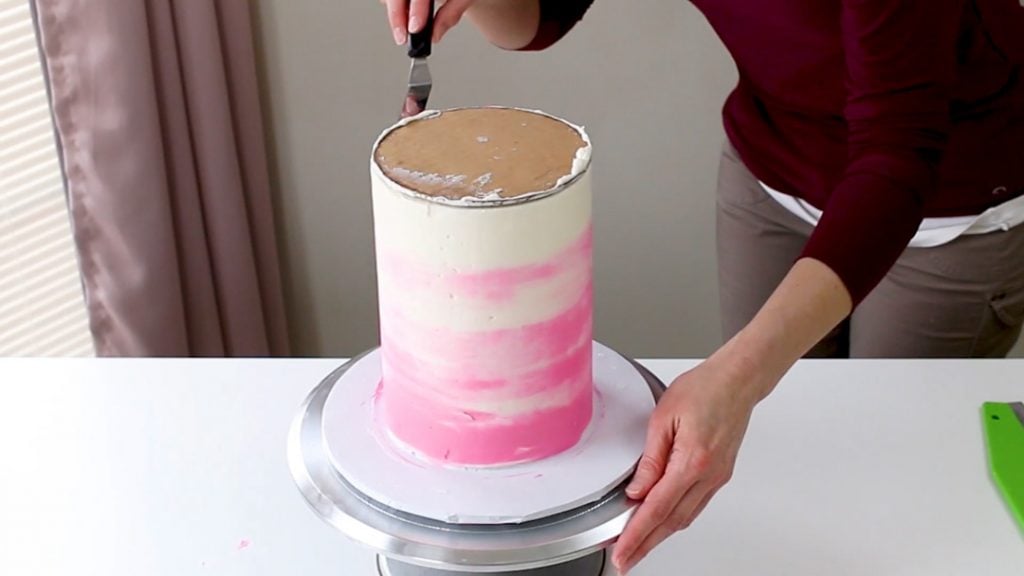
Once it’s loose enough, just pop it off and make sure you get the wax paper off as well.
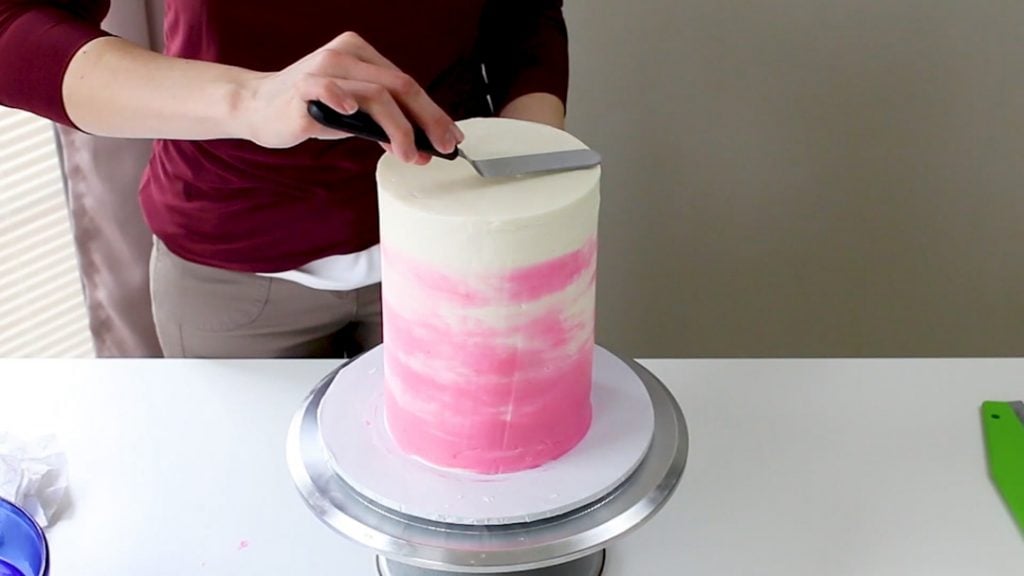
Now you’ll need to smooth the top. You can do this one of two ways. If you’ve used a buttercream that has shortening in it (a crusting buttercream) you can use the Viva paper towel method. Just set the paper towel down over the top and just smooth the top out with your hand very lightly.
If your buttercream is made from butter, you can use the hot spatula method. Just dip your icing spatula in really hot water, dry it off and then use it to smooth over the top of your cake.
With either method, just make sure not to go out to the edge of the cake, or this could mess up your sharp edge.
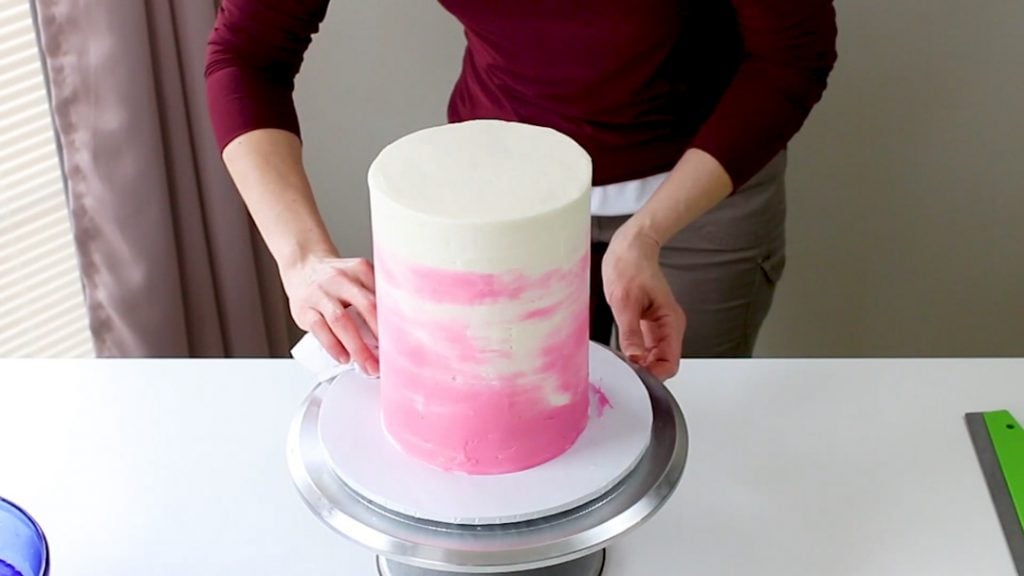
Now just make sure to clean off your cake base.
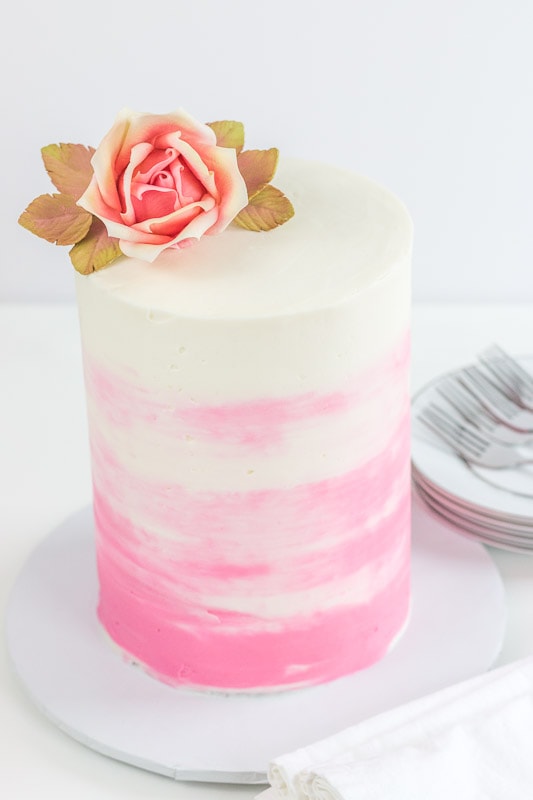
Now you can add the cake topper of your choice, or you can even add some pretty gumpaste flowers. I decided just to add one of my large gumpaste roses. You can catch that tutorial here: How to Make a Large Gumpaste Rose
To cut this cake, you’ll cut it like it’s two tiers. Just dig into the top tier first, then take the cake board off and cut and serve the bottom tier.
Alright…there you have it! Now you’ve made a impressive tall cake!
Video for Making a Tall Cake:
Ok, just let me know if you’ve got any questions. You can always leave me a comment below.
Don’t forget to pin it below!

Lucy
Hi Kara
Beautiful cake, quick question, I’m going to make 10 inc tall drip cake,how many sponges would I need to get to this height cake?
Kara
Ok, editing my comment from what I posted earlier. I reread your question and I misunderstood it. If you want it 10 inches tall, then just figure out how many inches tall each layer is. Generally, they’re like 1.5-2 inches tall, so that might be around 5-6 layers. Hope this helps.
Lucy
Thankyou x
Mary Anne
Hi Kara thank you so much for the tutorial the cake-board between the layers of cake is that cardboard? Mary Anne
Kara
Yes, the board between the layers is a cardboard cake round.
Mary Anne
Thank you ❤️
Carmen
Hi there! Thanks for such a detailed tutorial! I second that you are a great teacher! I have a question: how far in advance can I make a tall 6 inch cake? do you ever freeze them ?
Carmen
Kara
Hi Carmen, thanks for your kind words. 🙂 So I make cakes in advance all the time. I don’t stack them yet though. I just bake the cake layers and then freeze them. I stack (or build) the cake after they’ve defrosted. I do have a post all about making cakes in advance that may help. It’s not specific to tall cakes, but it talks about the different options. Here’s the link: https://iscreamforbuttercream.com/how-far-in-advance-can-i-bake-a-cake/
I think if you wanted to stack the cake, then freeze it, it would probably work okay as long as you covered it very well before freezing it and then set it out to defrost before you started decorating it. My general rule of thumb though is that if I’m not going to be serving the cake in about three days, then I freeze the cake layers, then thaw and decorate closer to the event time. I hope this helps. 🙂
Maryann
Thank you so much for your amazing tutorial..
I have a hard time figuring servings/cake tier sizes..
I have a wedding cake two tier for 30ppl but want the tiers to be a bit taller not squatty… suggestions please!!
Thank you
Mare
Kara
If you made a tall cake with two 6-inch round tiers stacked…that probably wouldn’t be enough servings. If you did it with two 8 inch round stacked tiers that would be plenty, but might look pretty bulky. You could go with an 8-inch tier on the bottom and a 6-inch on the top and that would work well.
Maryann
Thank you Kara, would you do each tier 3 layers?
Mare
Kara
It would depend. If the bottom tier is an 8-inch and the top is a 6-inch, then I’d do three layers for each tier. If both tiers are the same (meaning just one tall cake), then it will depend on how tall you want the cake. For 6-inch tiers, it may look tall enough just doing one tier as two layers and one tier as 3, but with two, 8-inch tiers, it may not look tall enough, so might have to go with three layers each tier…that would make for a pretty large cake, but the wider the cake, the more layers you need to make it actually look tall. Hope that makes sense.
Erika
If I made a cake with 2 cake layers and a buttercream filling for the bottom layer and a one 6 inch round on the top (with a 4” fondant baby on top) would it make sense to use bubble tea or smoothie straws for supports and a cake board under the 6 inch?
Kara
If the cake is just three layers, then you normally wouldn’t need a cake board between the layers or support. The only thing to consider is if the fondant baby will be heavy. If it will be heavy, you could add a cake board under that top cake layer with a couple of bubble tea straws under it to hold up that top layer, or you could add a cake board directly under the fondant baby to keep it from putting a lot of pressure on the top layer.
Tooba
hi it was a really detailed video, I just want to know did you make a hole in the cake board you put between the layers? and if not then was it easy or difficult for the dowell to pass through?
Thanks
Kara
Tooba, I can’t remember if I made a hole in that board, but I doubt I did. I really never do. I just sharpen one end of the dowel and push it through. Sometimes I use a little hammer, but I generally don’t have trouble getting it through. There are cardboard cake boards that you can buy that have holes in the middle though. I’ve used those before as well.
Nomchin Banga
Hi Kara,
Thank you for the detailed post!! I am planning to make a three tier cake, each tier will be 3-layer 8” cake. Do you think it will look good?
I have a few more questions and would be very grateful if you could help with them.
1. I was planning on completing each tier fully and then assembling them. Can I freeze individual tiers? Will it make the texture of buttercream weird once it defrosts? I was hoping to stack the frozen cakes so I don’t destroy them when stacking. I would be adding the final decorations and outer layer of butter cream after stacking.
2. How can I prevent cakeboards from removing most of the top buttercream when it is being cut? Last time my cake oats came off with almost all the frosting and even little bit of cake.
Kara
Hi there. I’m not sure if I’m understanding what size of cake you’re planning to make, but it sounds like you said three tiers with three cake layers each? Are you stacking all three tiers on top of each other? If so, that would be a very large, very tall cake. I personally wouldn’t make one that large and tall, but it’s totally up to you. As far as freezing tiers, that should work just fine as long as they’re covered with plastic wrap and foil very well. It shouldn’t mess with the buttercream texture if you’re using American buttercream…I’m not sure about Swiss Meringue buttercream.
As far as stacking frozen cakes, I’ve never done that so I couldn’t say whether that would work or not. I usually work with room-temperature cakes. I’ve always had trouble decorating cold and/or frozen cakes because condensation forms as they defrost and it’s always caused air bubbles to form under the buttercream. Some people do like to decroate cakes cold and/or frozen, but I don’t do that. If you want to know what my process is and why I normally decorating room-temp cakes, I have a post on that. Here’s the link in case you’d like to see it: https://iscreamforbuttercream.com/should-i-refrigerate-my-cake-before-decorating/
For removing cake boards and the icing sticking, that’s something that’s just going to happensoemtimes and I don’t really know of a way to really prevent that. Sometimes I’ve added a sprinkling of confectioners sugar before I stack the next cake, but that doesn’t always help enough. You do want the board to stick a little though because that helps keep the cake stable and the tiers sliding around (along with dowel support).
I hope this helped at least a little!
Cheryl
you didn’t cut holes in your cake cardboards, would the cakes get all messed up when you add the centre dowel through the middle?
Kara
Some boards have a hole in the middle already and some don’t. I generally don’t worry about it because sharpening one end of the dowel works just fine and it doesn’t mess it up. 🙂
Natalie
Hi! Sorry if I missed where you may have answered this already but for the cake you’ve made here, approximately how many servings did it yield? Thank you 🙂
Kara
This cake is 6 inches round and basically two tiers (although the tiers are the same size), so you’ll treat it like two tiers when it’s cut. You cut the top half and serve, then the bottom half and serve. I’d say it’s probably around 16-20 small servings.
Shasta
did you do a crumb coat and put cake in the refrigerator, prior to your pink? great video! just had that question
Kara
No, I don’t think I chilled it before adding the pink. You need the pink to sort of meld into the white and if the white is firm, then it probably wouldn’t work as well. And plus, I usually don’t chill my cakes anyway during the decorating process. I mean I might need to on occasion to firm something up like for 15-20 minutes, but not much longer than that as it can cause condensation between the icing layers and that can cause other problems. So, basically I wouldn’t if I were doing the marbled look since I’d want both colors to sort of meld together. I hope that makes sense!
Jeanmarie
Hi there! Excellent tutorial! Could I do a 6 layer cake with a cake board in between the 2nd and 3rd layer and in between the 4th and 5th layer? I am thinking of making an 8” round cake
Kara
So like a board every two layers to basically get three tiers? That would probably work just fine, just make sure to add proper supports like dowels under each board. Also, it’s probably best to use the center dowel to keep it sturdy as this would be a large cake. Hope this helps!
Jeanmarie
Awesome! Yes, 3 tiers. It think it will allow for easier cutting and better serving sizes. Will make sure to support correctly. Thank you so much for your response!
p.s. your vanilla bean cake is the best and always gets raves!
Kara
Yay! So glad you love that cake! Let me know how it all turns out!
Nora Aslanian
hello, great post! some questions; how tall is the cake? how tall is each tier? you mentioned 6 inch, it’s the diameter, yes?
you mentioned that you freeze the cake, defrosting doesn’t change the flavor or texture of the cake?
thank you in advance ❤️
Kara
Hi Nora, For this cake, I used 6-inch round cake pans. That’s the diameter of the cake pans. Each layer of cake was 1 1/2 – 2 inches thick. The pans are 2 inches deep, so the cake layers bake up slightly lower than that that. If I remember correctly, there were 5 layers so that would be around 10 or so inches tall total with the buttercream.
I do freeze cake layers. If you do it correctly, it won’t change the flavor or texture. I’ve never had it change the texture or flavor but I am careful to cover them well with plastic wrap and with foil. I do have a method that I use to freeze them if you’d like to check it out, here’s the link to that post: https://iscreamforbuttercream.com/freezing-cakes-and-cupcakes/
Hope this helps!
Charlotte
Hi,
Happy New Year. I have been asked to make a drip style cake to feed approx. 50 – what size cake should I base it on? I was thinking of making 2 7 or 8 inch cakes and stacking them – would that be enough servings?
Hope that makes sense!
Thanks so much ☺️
Kara
Hi Charlotte, to serve 50 people, that would need to be around two, 9-10 inch cakes. That’s a very wide base and would make for a massive block of a cake stacking them on top of each other and because it’s such a wide base, it may not look as tall and slender as you’d like. Personally, I’d make either two taller cakes using 6 inch cakes (two of them stacked on each other to make one tall cake each) or I’d just make a tiered cake that was maybe 10 inches on the bottom and 8 inches on the top. That one wouldn’t be a tall (double barrel) cake, but it would serve 50. Here’s a handy chart you can view on Wilton’s website that goes over the serving amounts of each size of cake and that might help you get a better feel for what you should make. https://blog.wilton.com/cake-baking-serving-guide/
Hope this helps!