
Have Questions or Need More Details?
Don't forget to check out the Tips & FAQ section in the post!
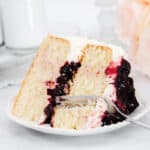
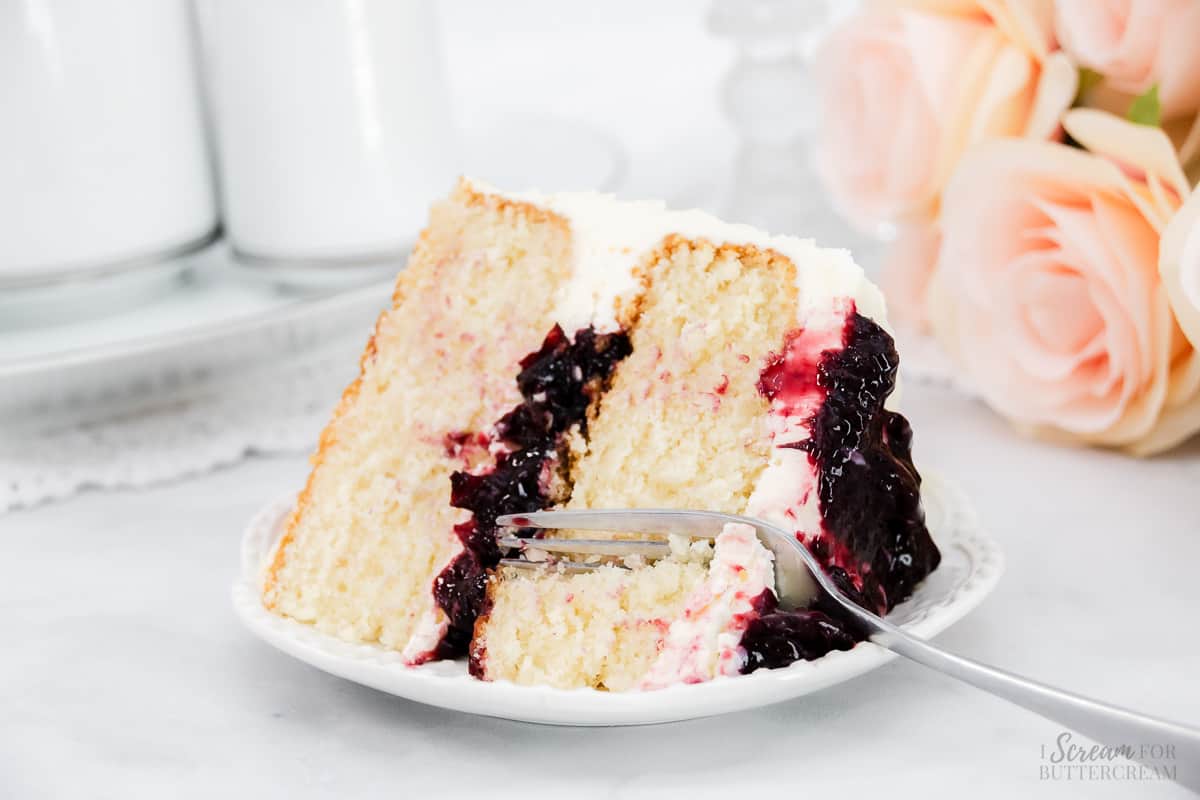
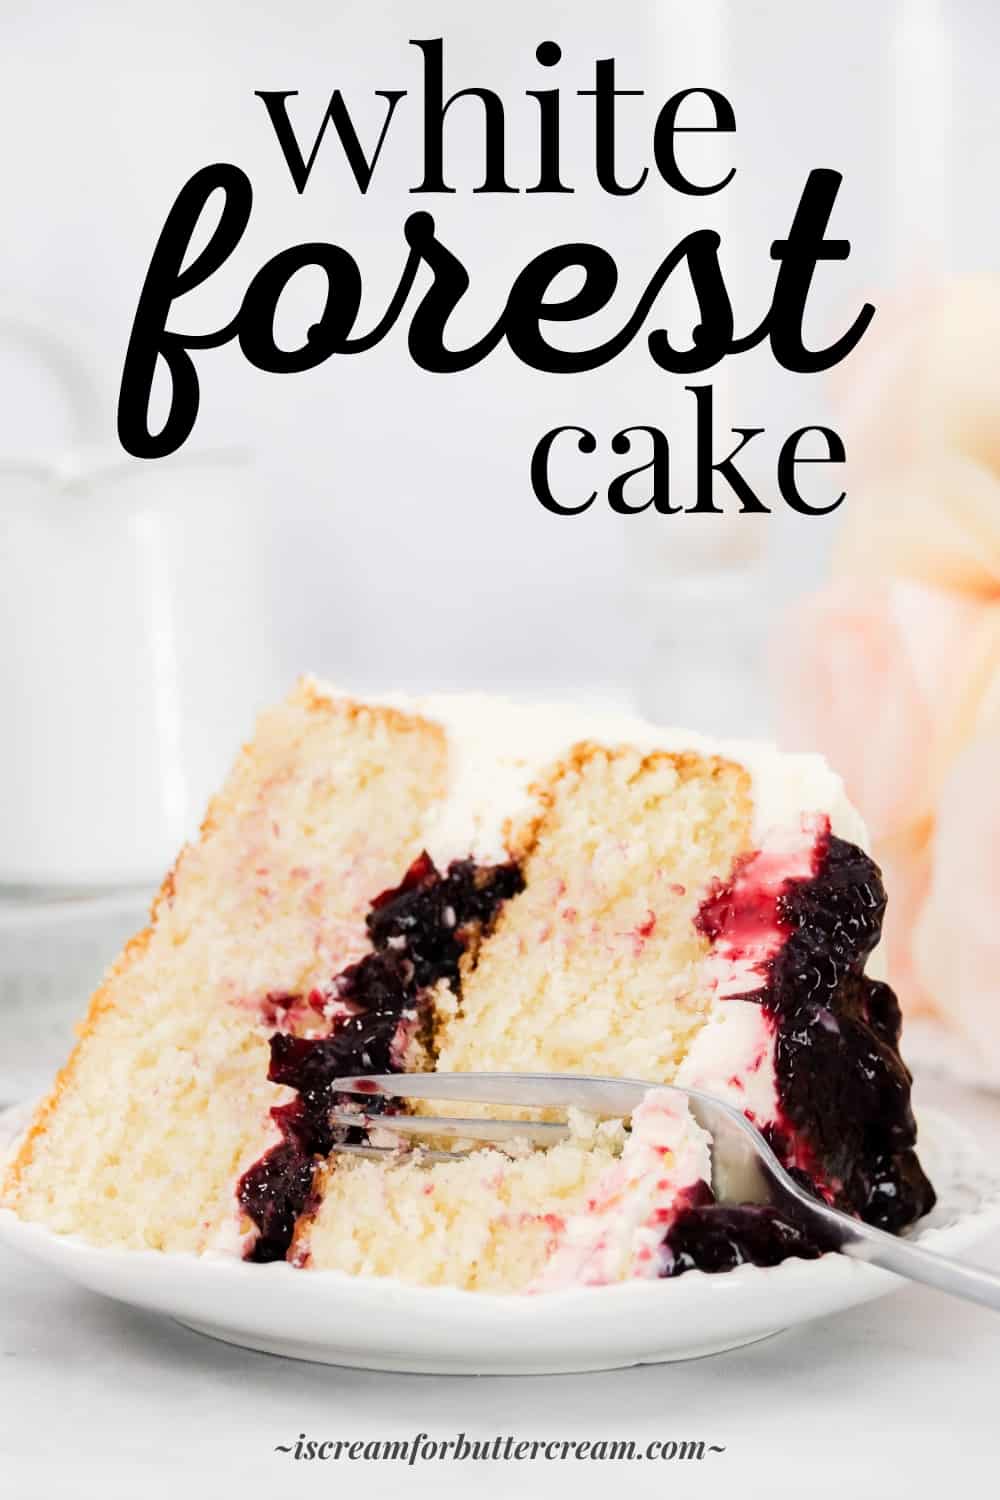
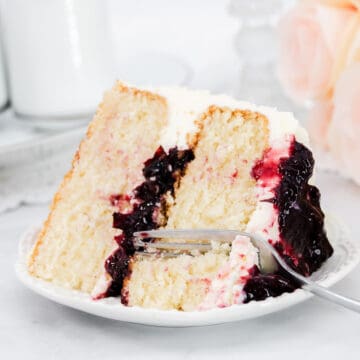
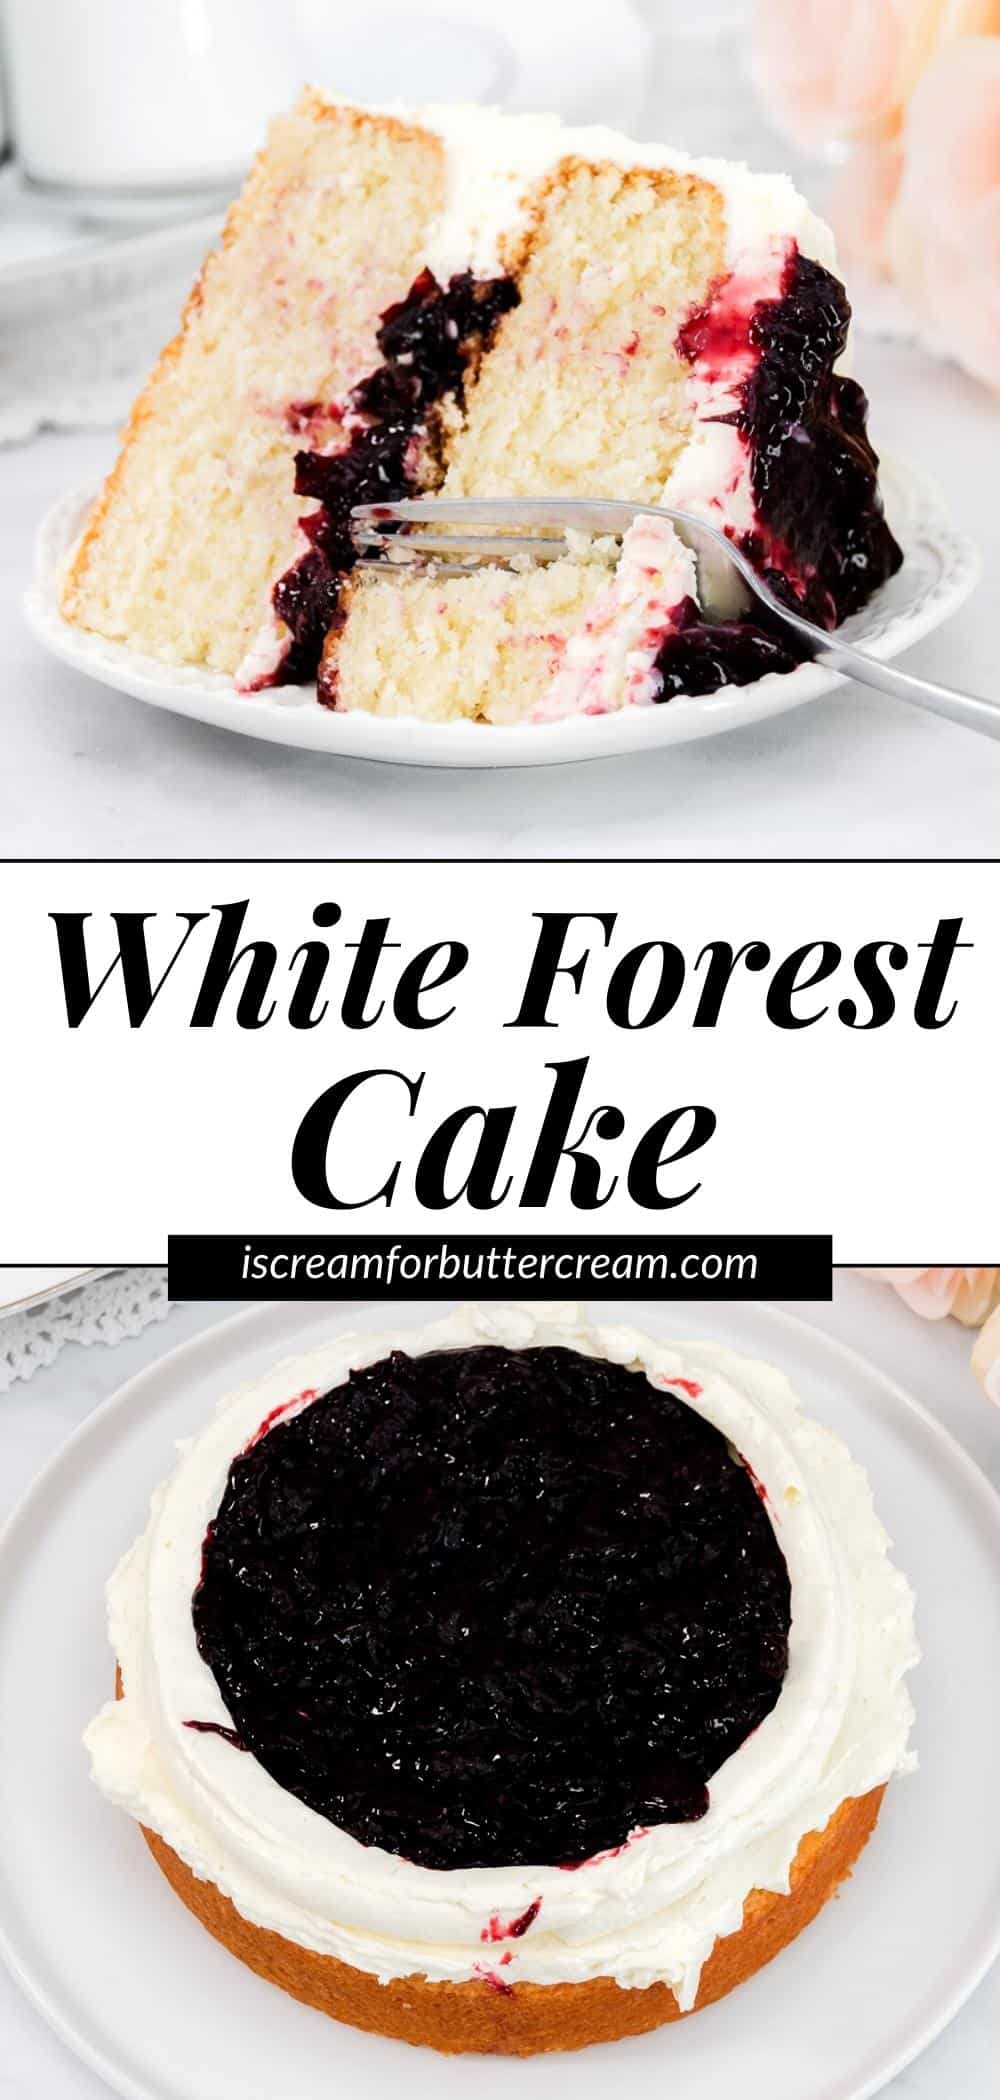
White forest cake is an elegant looking cake that has a whipped frosting and white chocolate ganache covering a moist white cake filled with delectable cherry filling.
This cake just looks amazing and it’s perfect for a special occasion or even just to treat yourself.
Hey there! Before you scroll, there’s lot’s of important stuff in the post!…including the FAQ section, which may answer any questions you might have about this recipe. Enjoy!
This cake is easy, but it does take a bit of time to prepare, but the end product is so worth it as you’ll get an amazing looking, homemade white forest cake.
Similar to a traditional black forest cake, except that the cake isn’t chocolate and is instead a moist white cake, but still includes the delicious cherry filling and the whipped buttercream.
Ingredient notes:
Now let's talk a little about just some of the ingredients in this cake. (The printable list of all ingredients are in the printable recipe card below.)
Frozen cherries: This recipe calls for frozen cherries because they’re just convenient. There are a lot of steps to make this cake, so it helps to start with frozen pitted cherries. Just make sure they’re defrosted and drained before making the filling.
All-purpose flour: You can use regular flour here, so there’s no need to go out and buy any fancy cake flour to make this cake.
Vegetable shortening: This is used in the cake recipe as it makes the cake very moist and soft and it keeps it white in color instead of using butter.
Sour cream: I love using sour cream in cake recipes because it gives the cake a nice texture and makes it moist.
Clear vanilla extract: This is the extract to use when you need vanilla flavor, but don’t want to add any additional color to the cake or frosting. They’ll remain white but will still have a vanilla flavor to them.
Egg whites: Using only egg whites will help keep this cake white in color.
Unsalted butter: You’ll use this for the whipped buttercream. It makes it rich and creamy.
Heavy cream: This is the same as whipping cream, but not whipped cream. It’s a heavy cream and you’ll whip it along with the other frosting ingredients to get a nice whipped buttercream. You’ll also use this to make the white chocolate ganache.
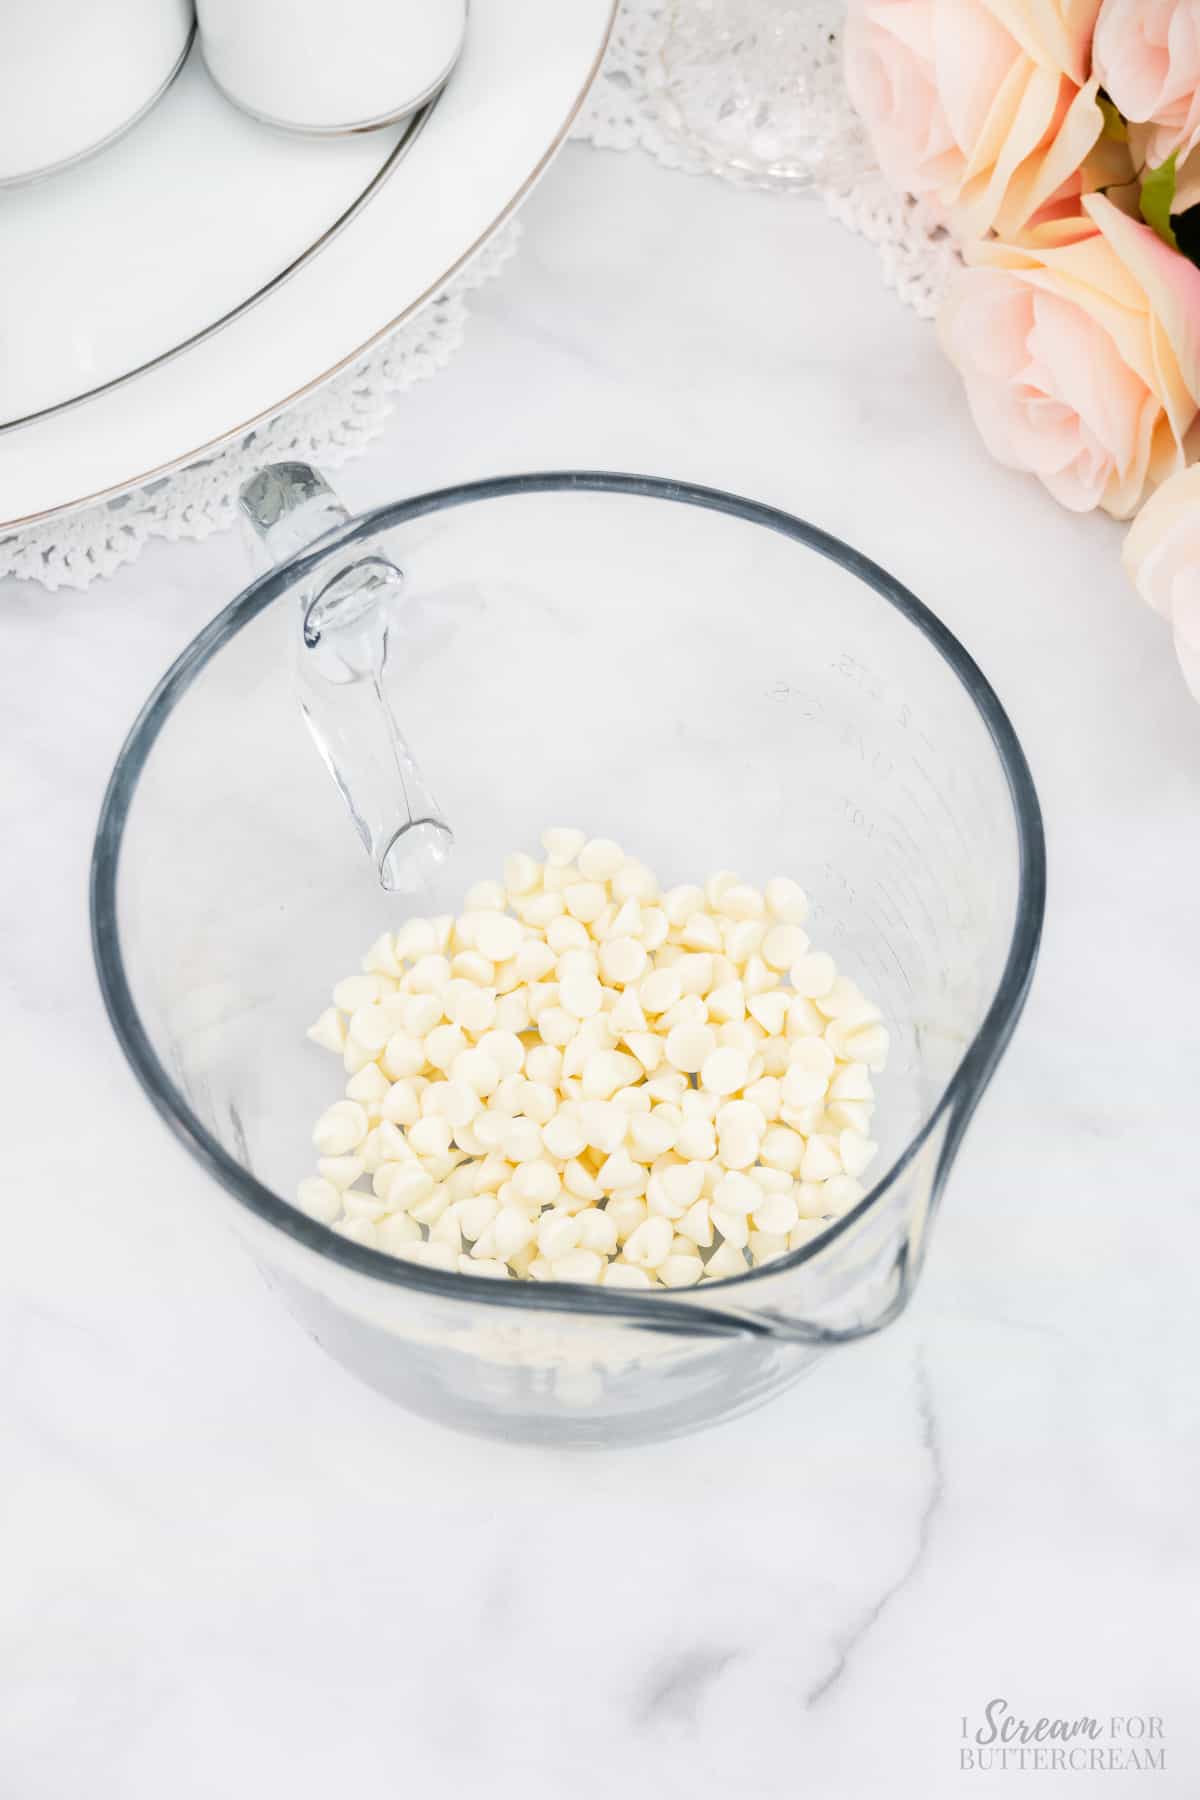
White chocolate chips: This is optional, but if you want a nice finishing touch to the cake, you can add the white ganache drip. It’s very easy to make and does add a lot of flavor.
(Make sure to check out the FAQ section below in this post for ingredient and substitution questions.)

How to make this cake:
Let's talk about how to make a white forest cake. (The printable instructions are in the recipe card below.)
Step 1 – Make the cherry filling:
The first step is to make the cherry filling. This will need to chill before the cake is put together.
Add the cherries and the sugar to a medium saucepan and heat on medium heat. Heat until the sugar dissolves, then bring to a low boil and reduce the heat. You may want to mash the cherries a little with a potato masher.
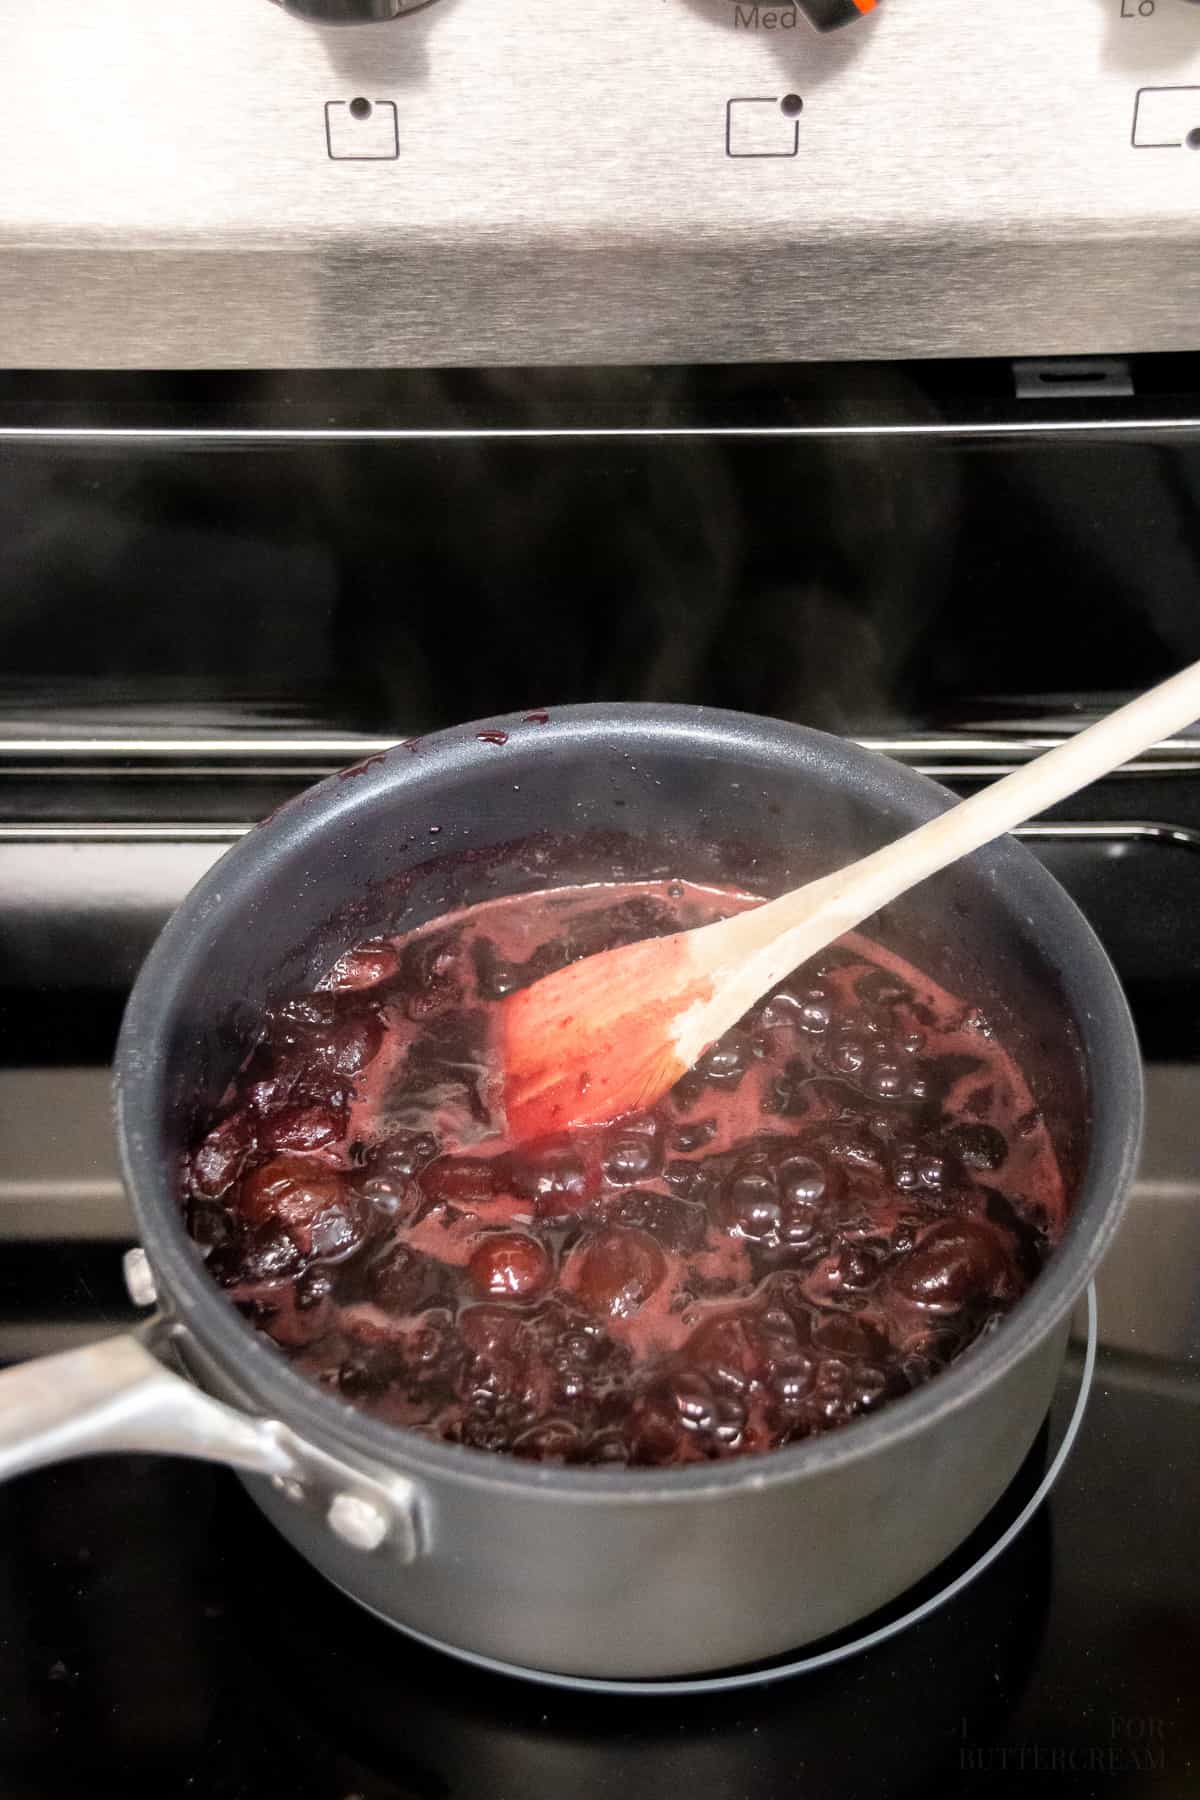
Simmer it uncovered for about 10 minutes until it’s thickened. Watch it closely and stir frequently.
Next, add the warm water and cornstarch to a small bowl or a shaker and mix it up very well until there are no clumps.
Add it to the cherry mixture and it will thicken up really quickly. Remove it from the heat, then add the almond extract and stir.
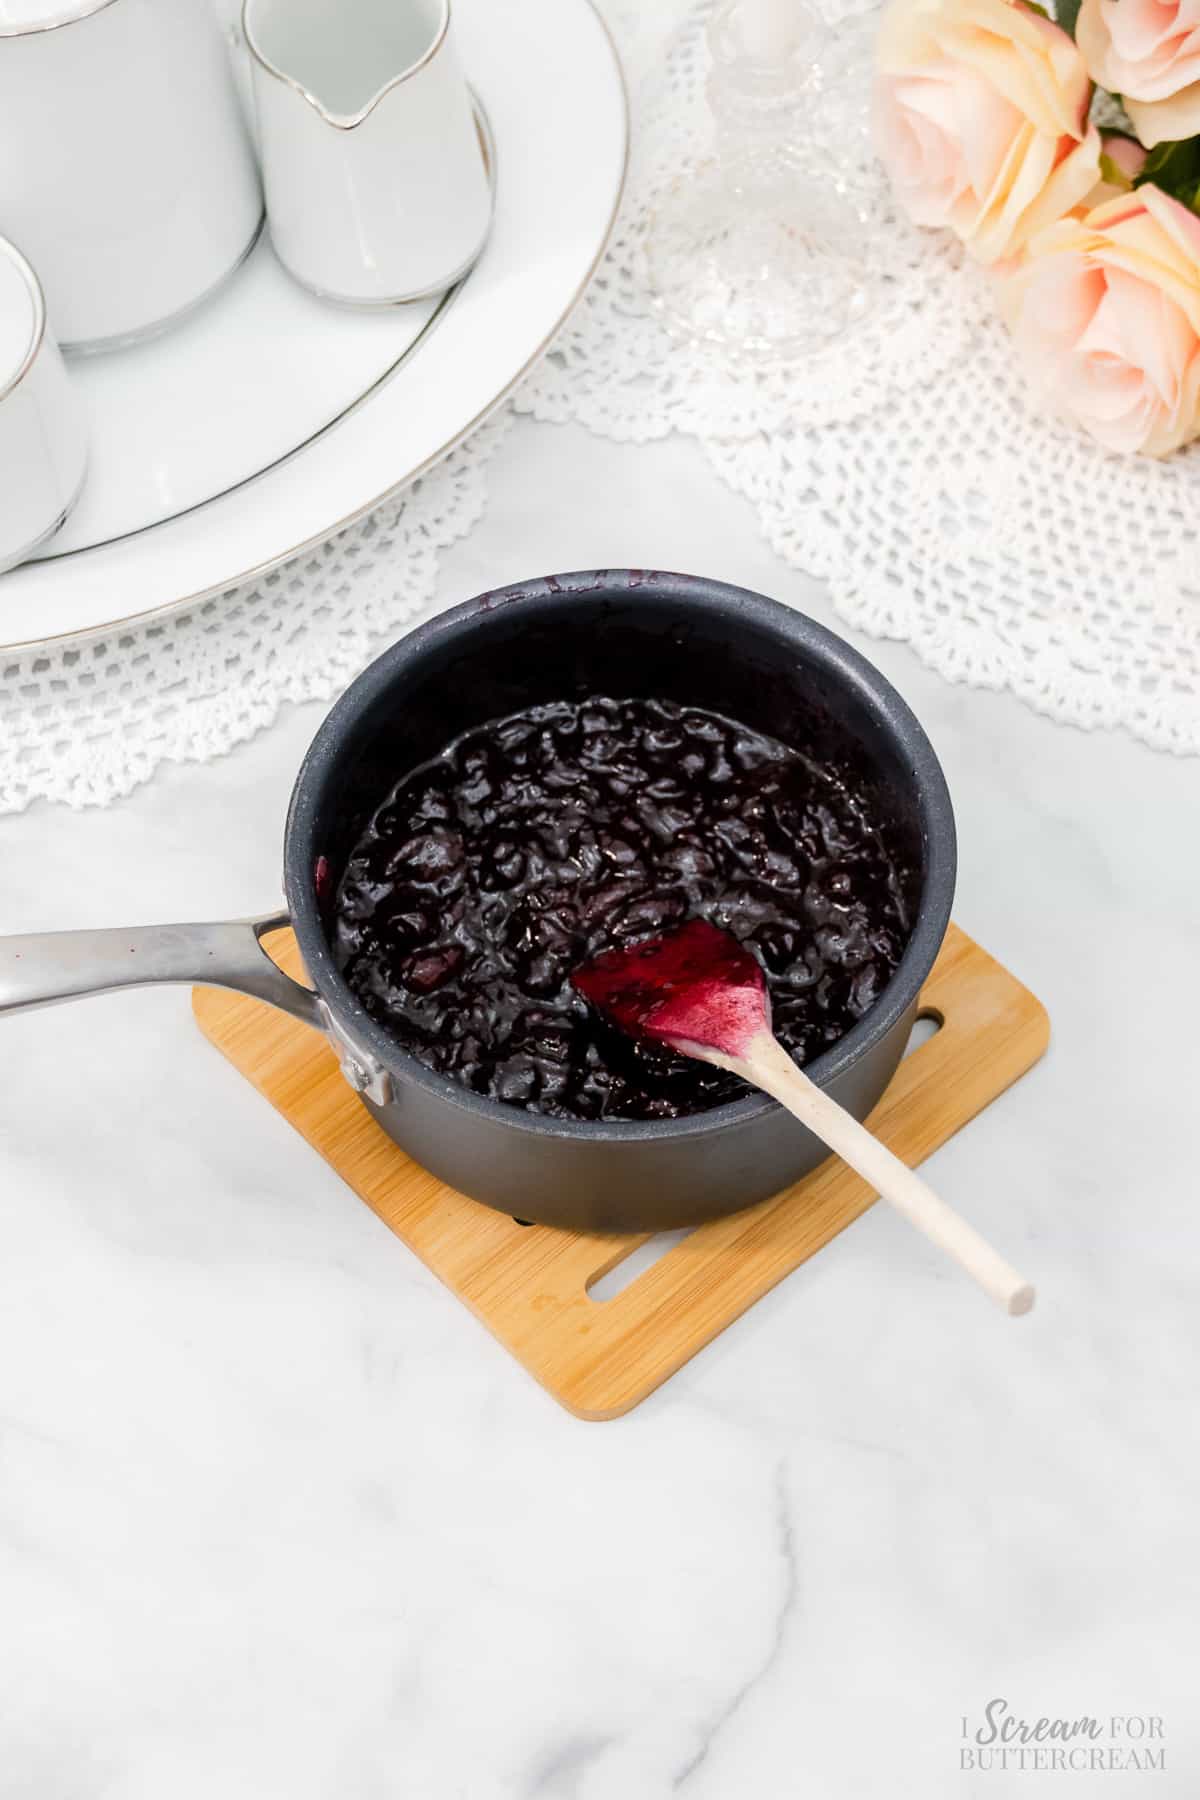
You’ll need to cover it and store it in the fridge to chill while you make the rest of the recipes.
Step 2 – Make the cake:
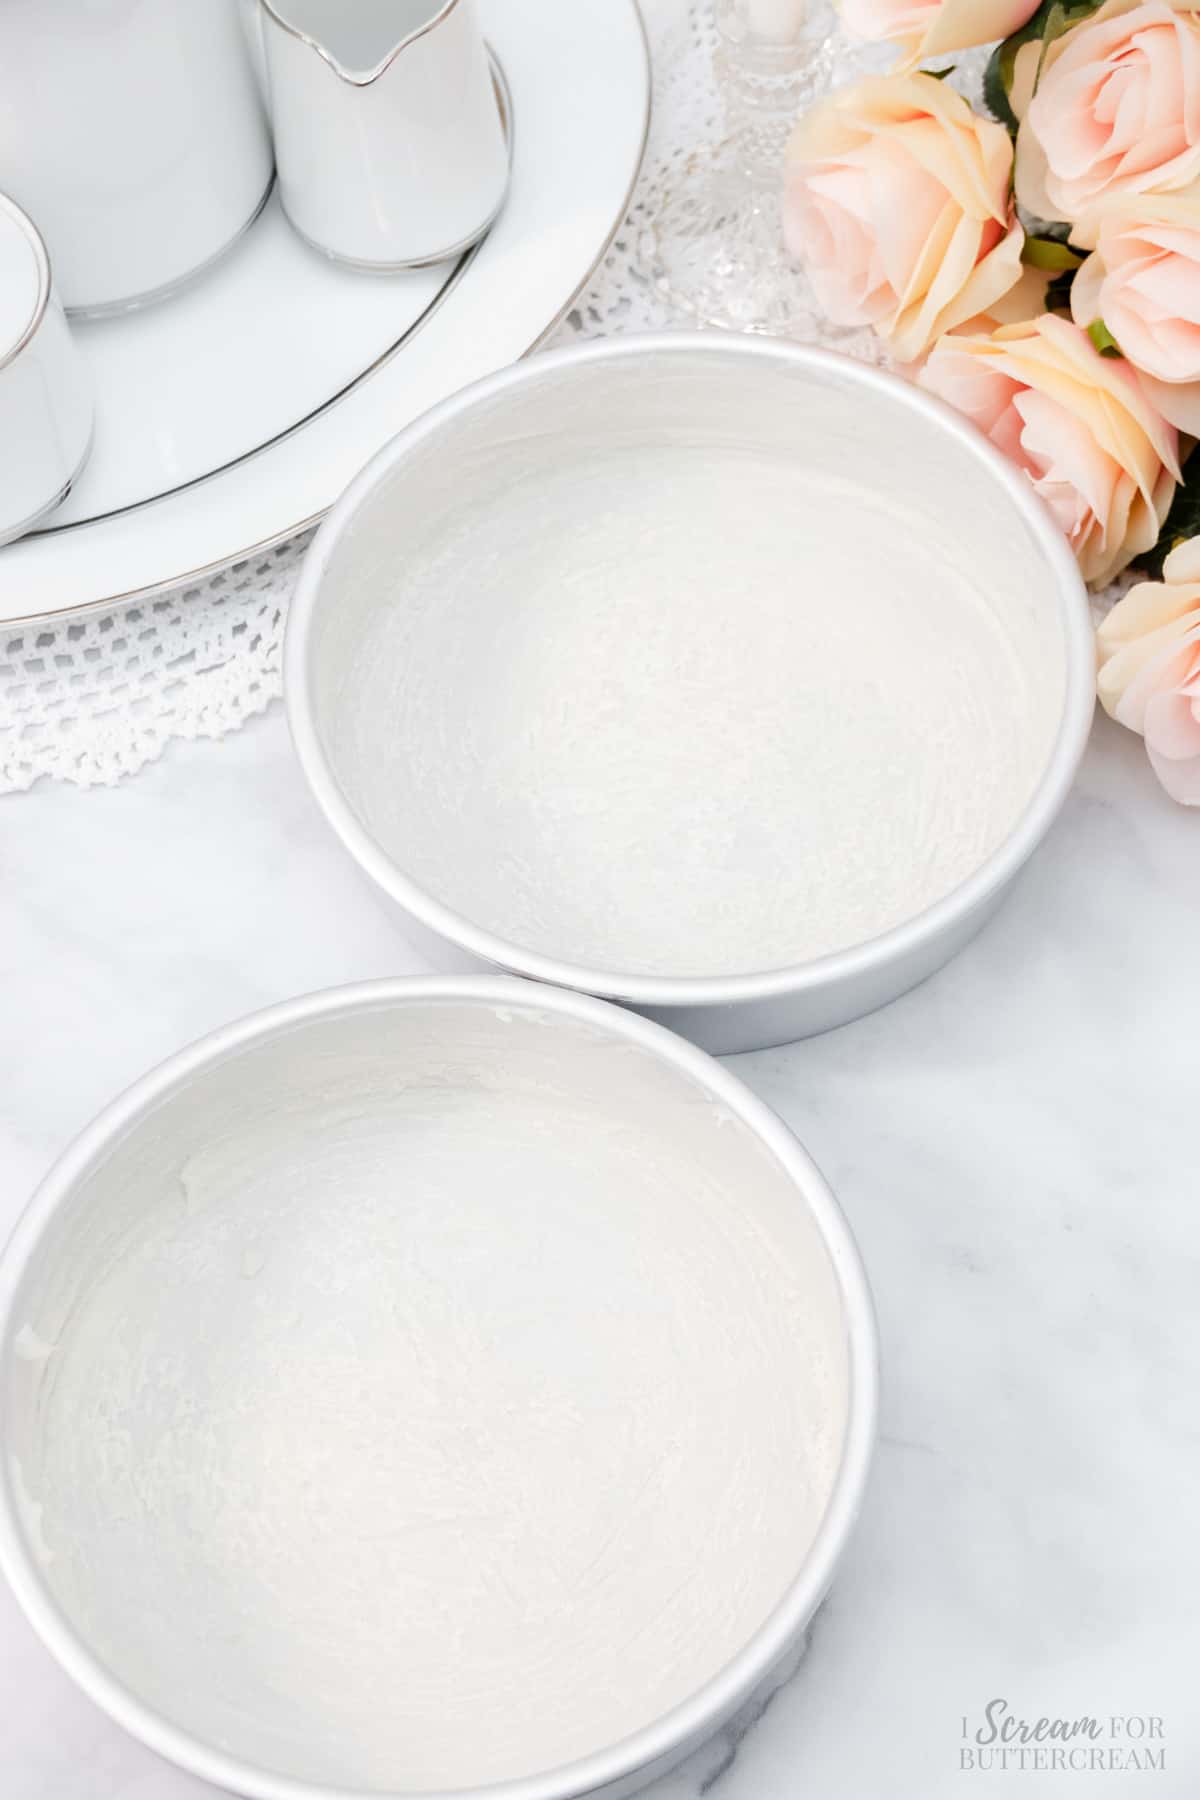
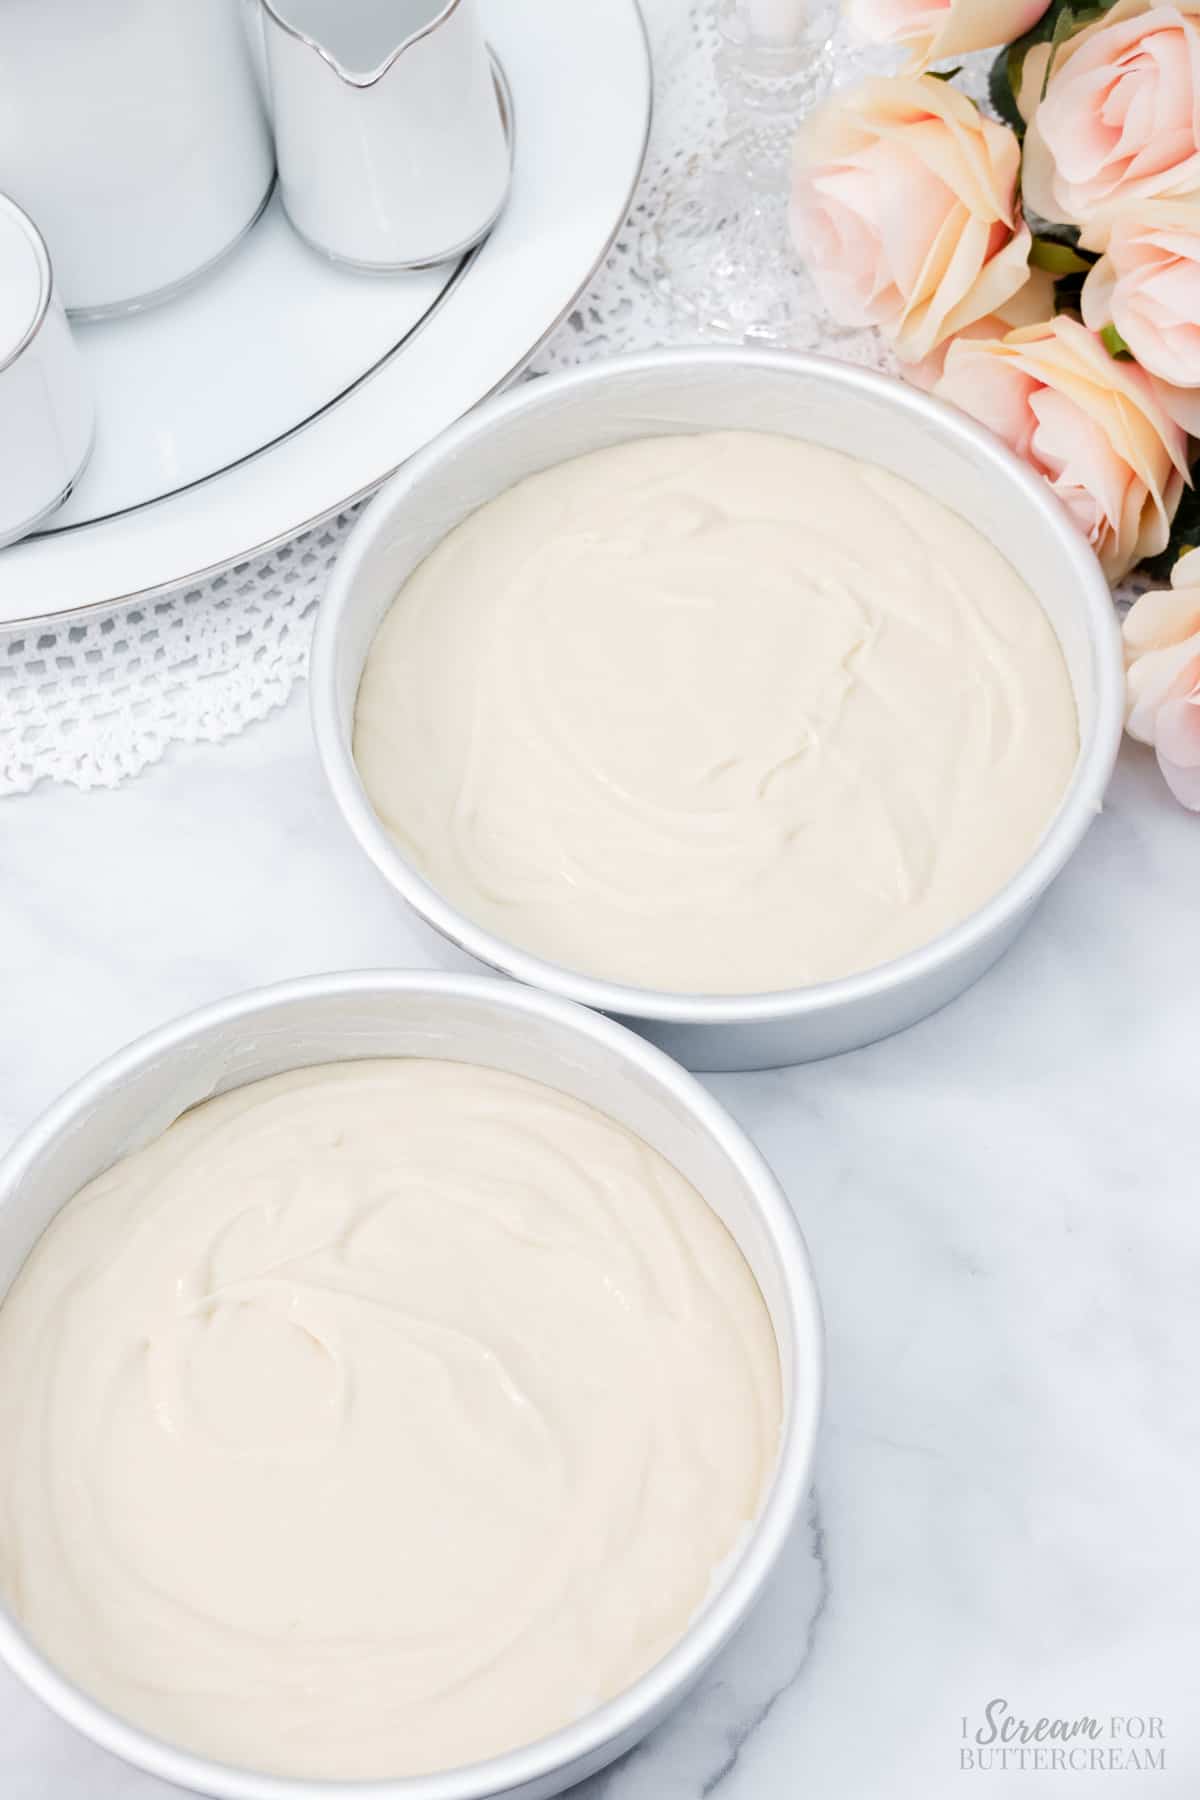
First, make sure to preheat the oven to 325 degrees F and grease and flour two, 8-inch round cake pans.
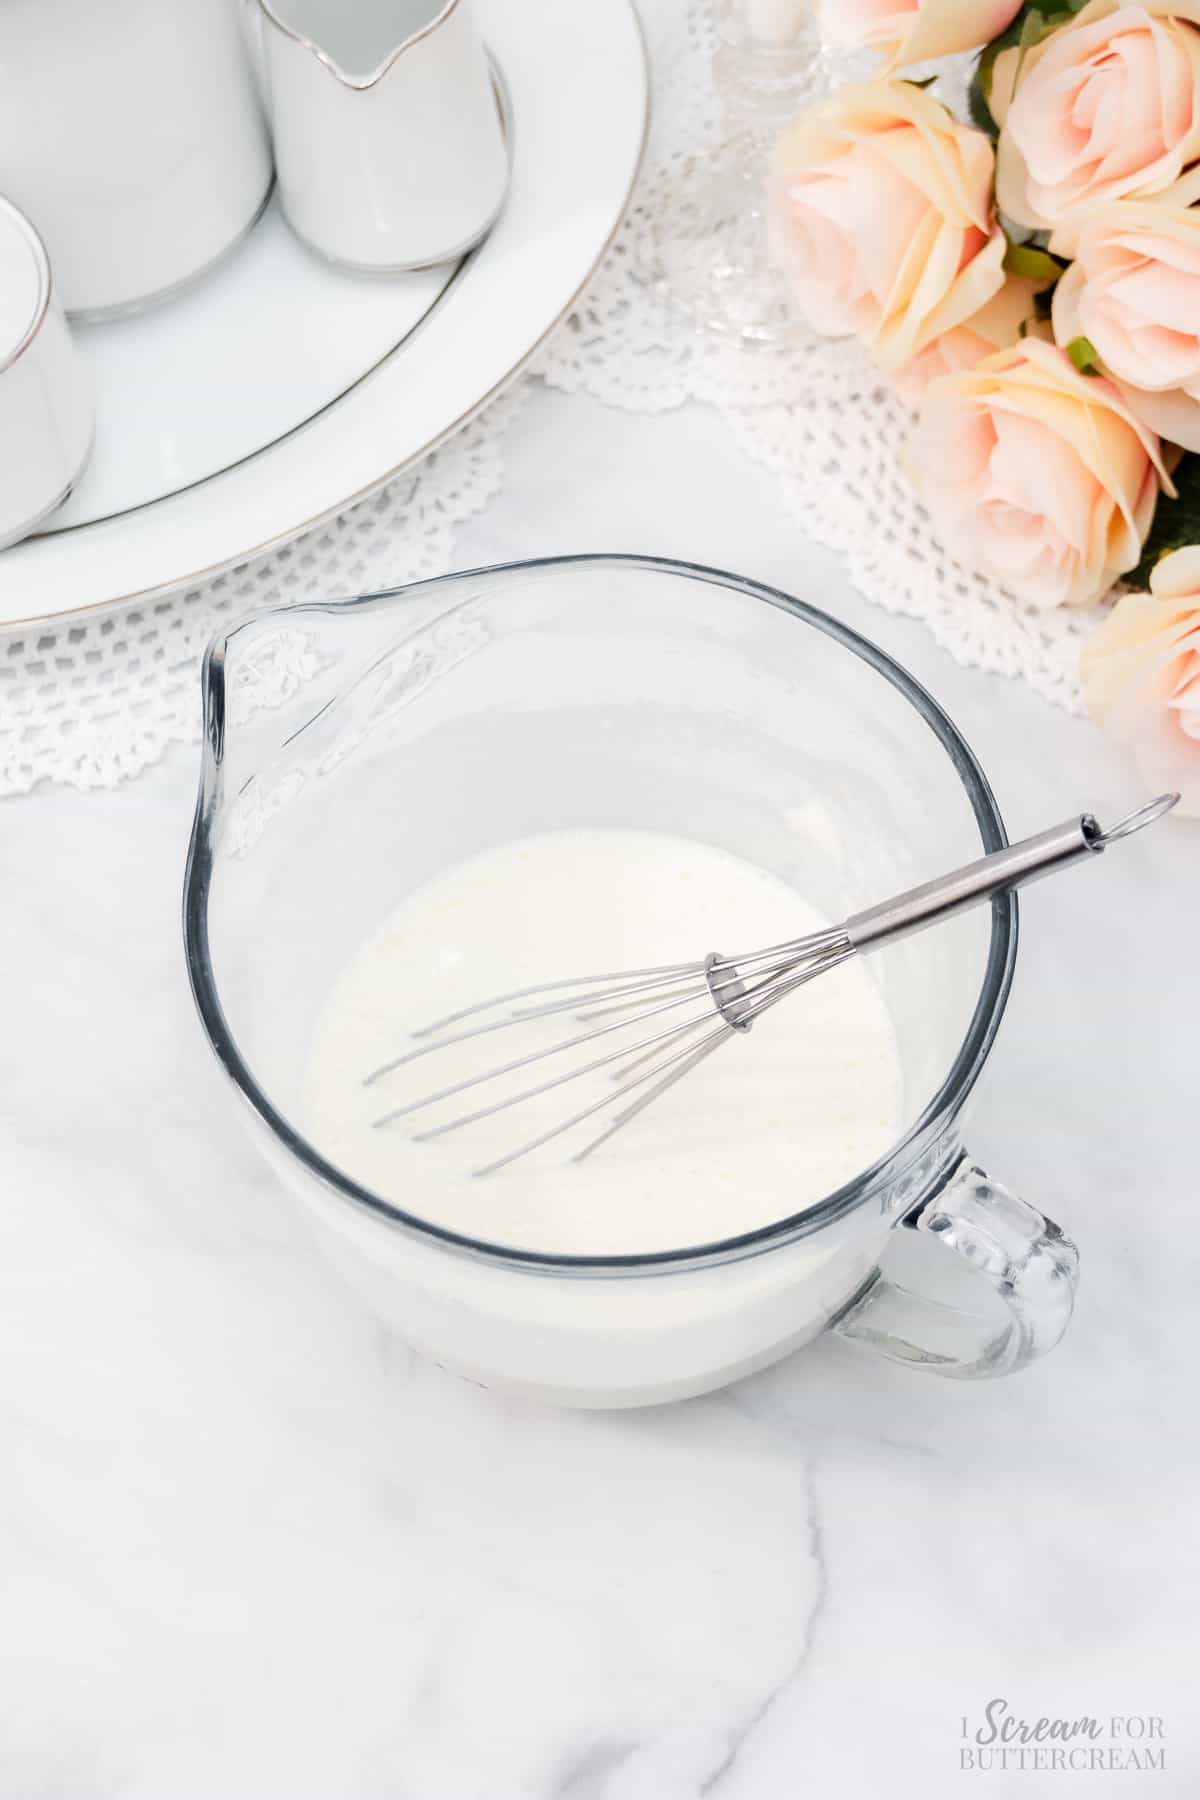
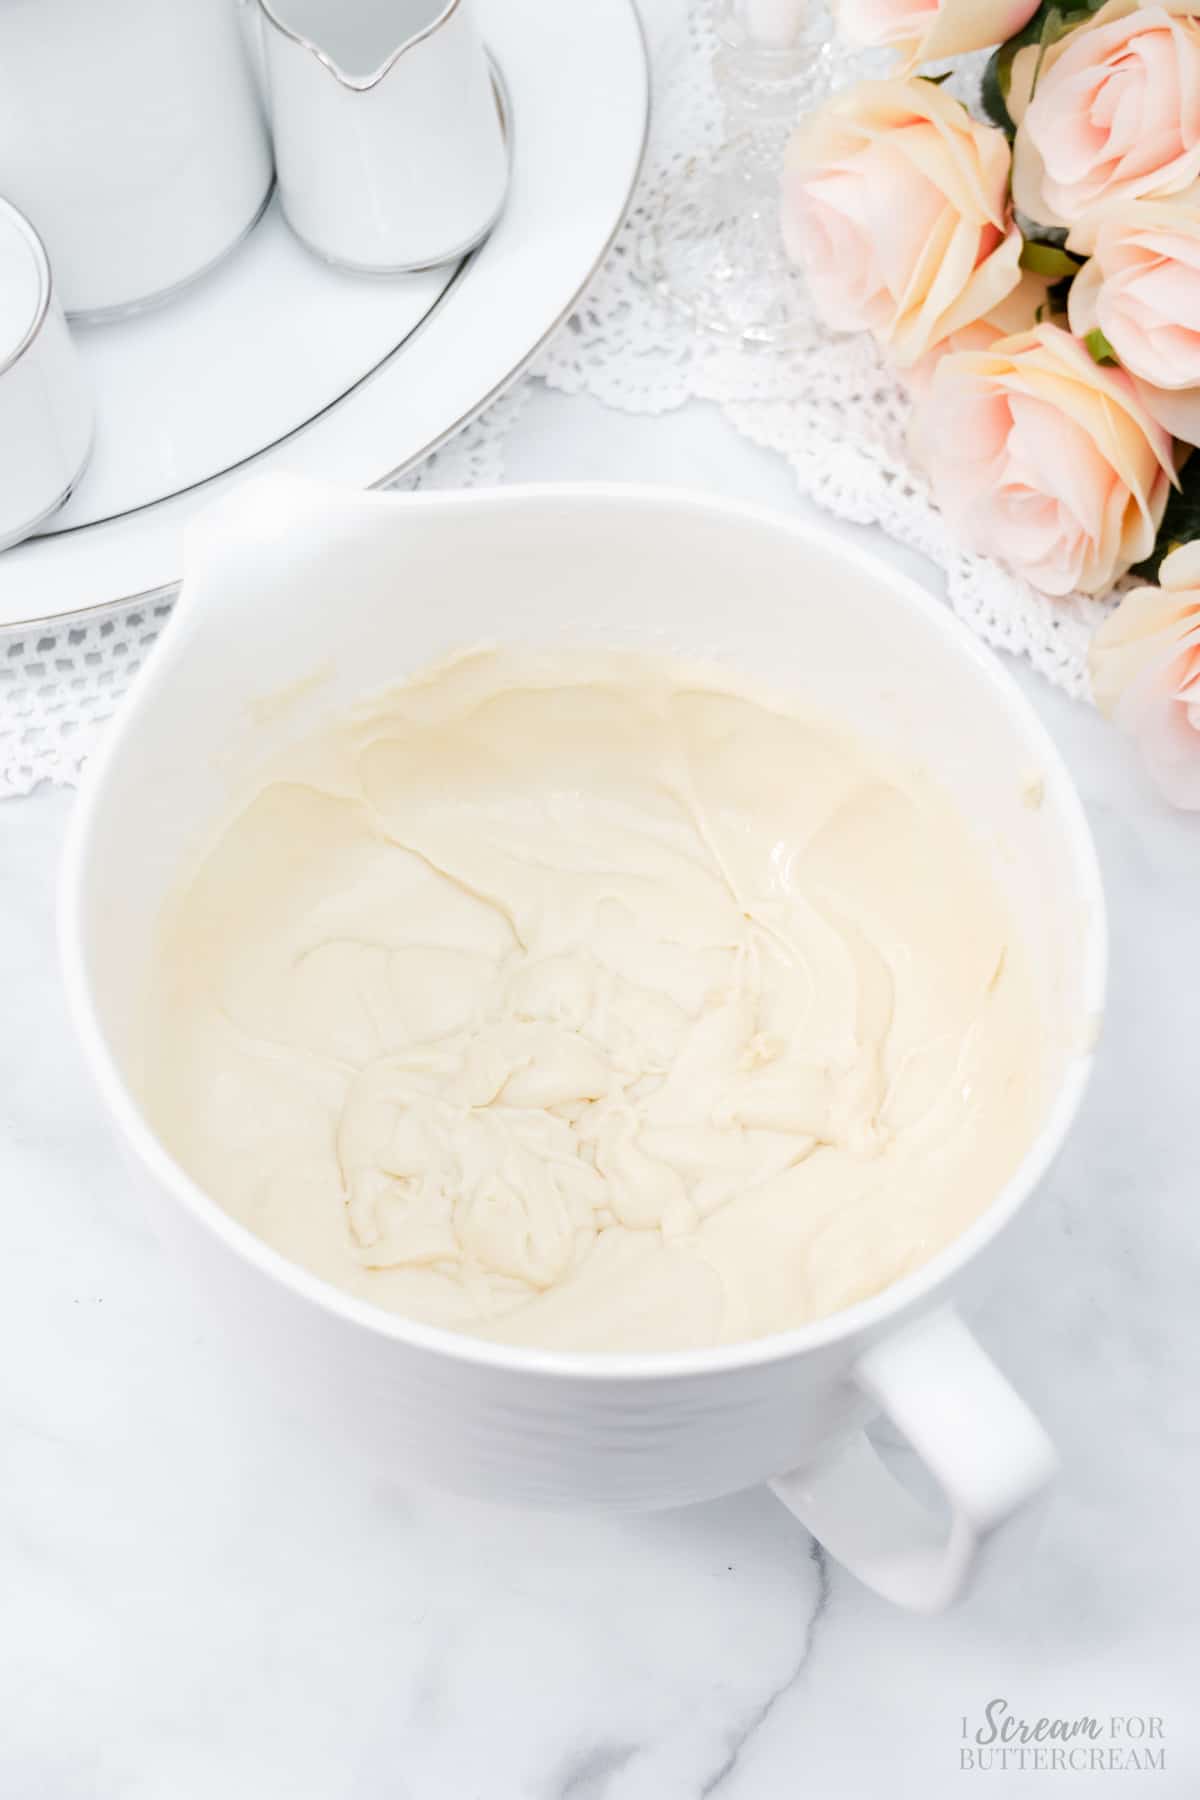
In a bowl, add the sour cream, milk, vanilla extract, almond emulsion and egg whites, then mix until smooth.
In another larger mixing bowl, add the flour, sugar, baking soda, baking powder and salt and mix well.
Now, you want to add the shortening and the butter to the flour mixture, but add it in chunks at a time, mixing after each addition. Do this until all the shortening and butter have been added and mix until the flour looks like sand.
Next, add in half the liquid ingredients, mix, then the second half and mix again. Make sure not to mix too long as this causes a dense and dry cake.
Pour the cake batter into the prepared cake pans and bake at 325 degrees F for 40-45 minutes.
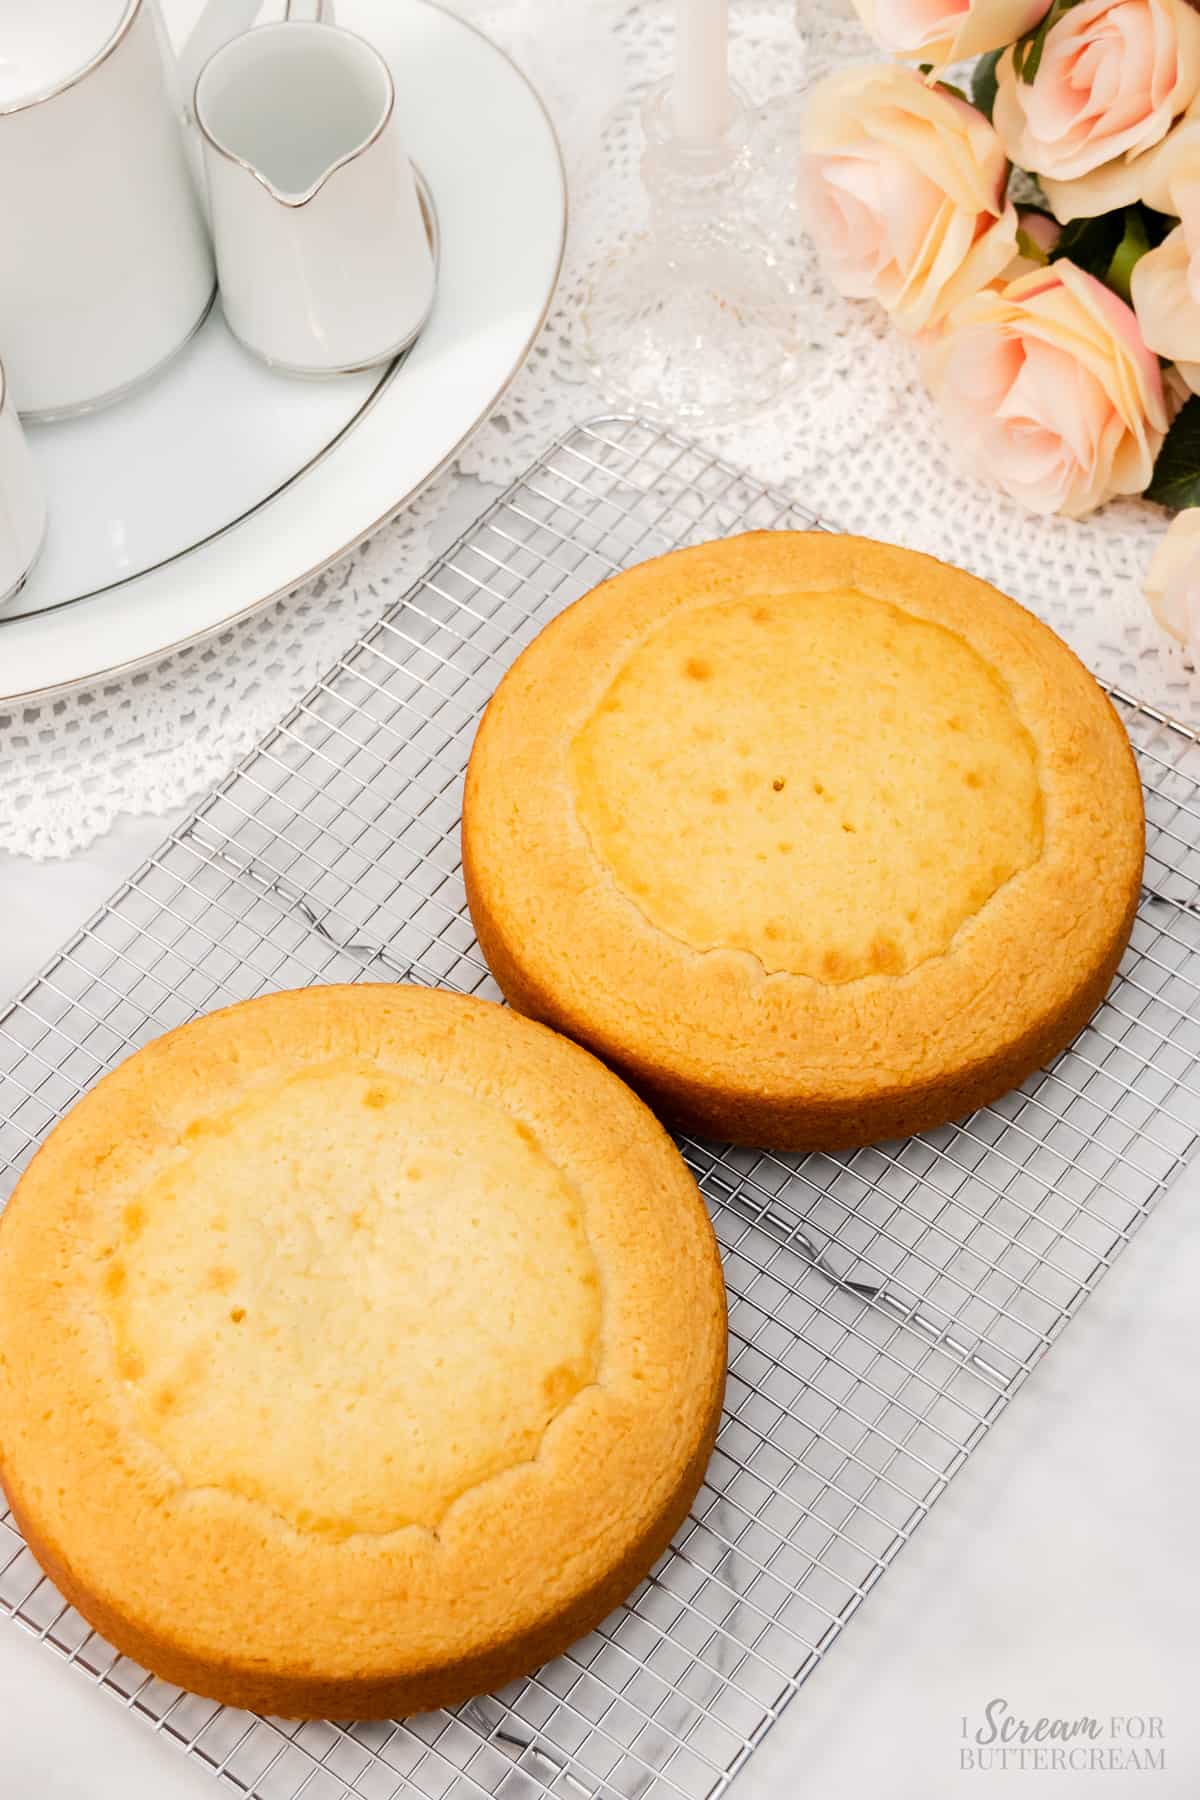
Use a toothpick to test. Just insert it into the center of each cake layer and it should come out with a few moist crumbs on it or clean.

Now, take the cake layers out of the oven and set them on cooling racks for about 10 minutes, then turn the cake layers out of the pans and let them cool completely on the cooling racks before assembling.
Step 3 – Make the whipped buttercream:
Make sure that the butter is at room temperature and that the heavy cream isn’t super cold.
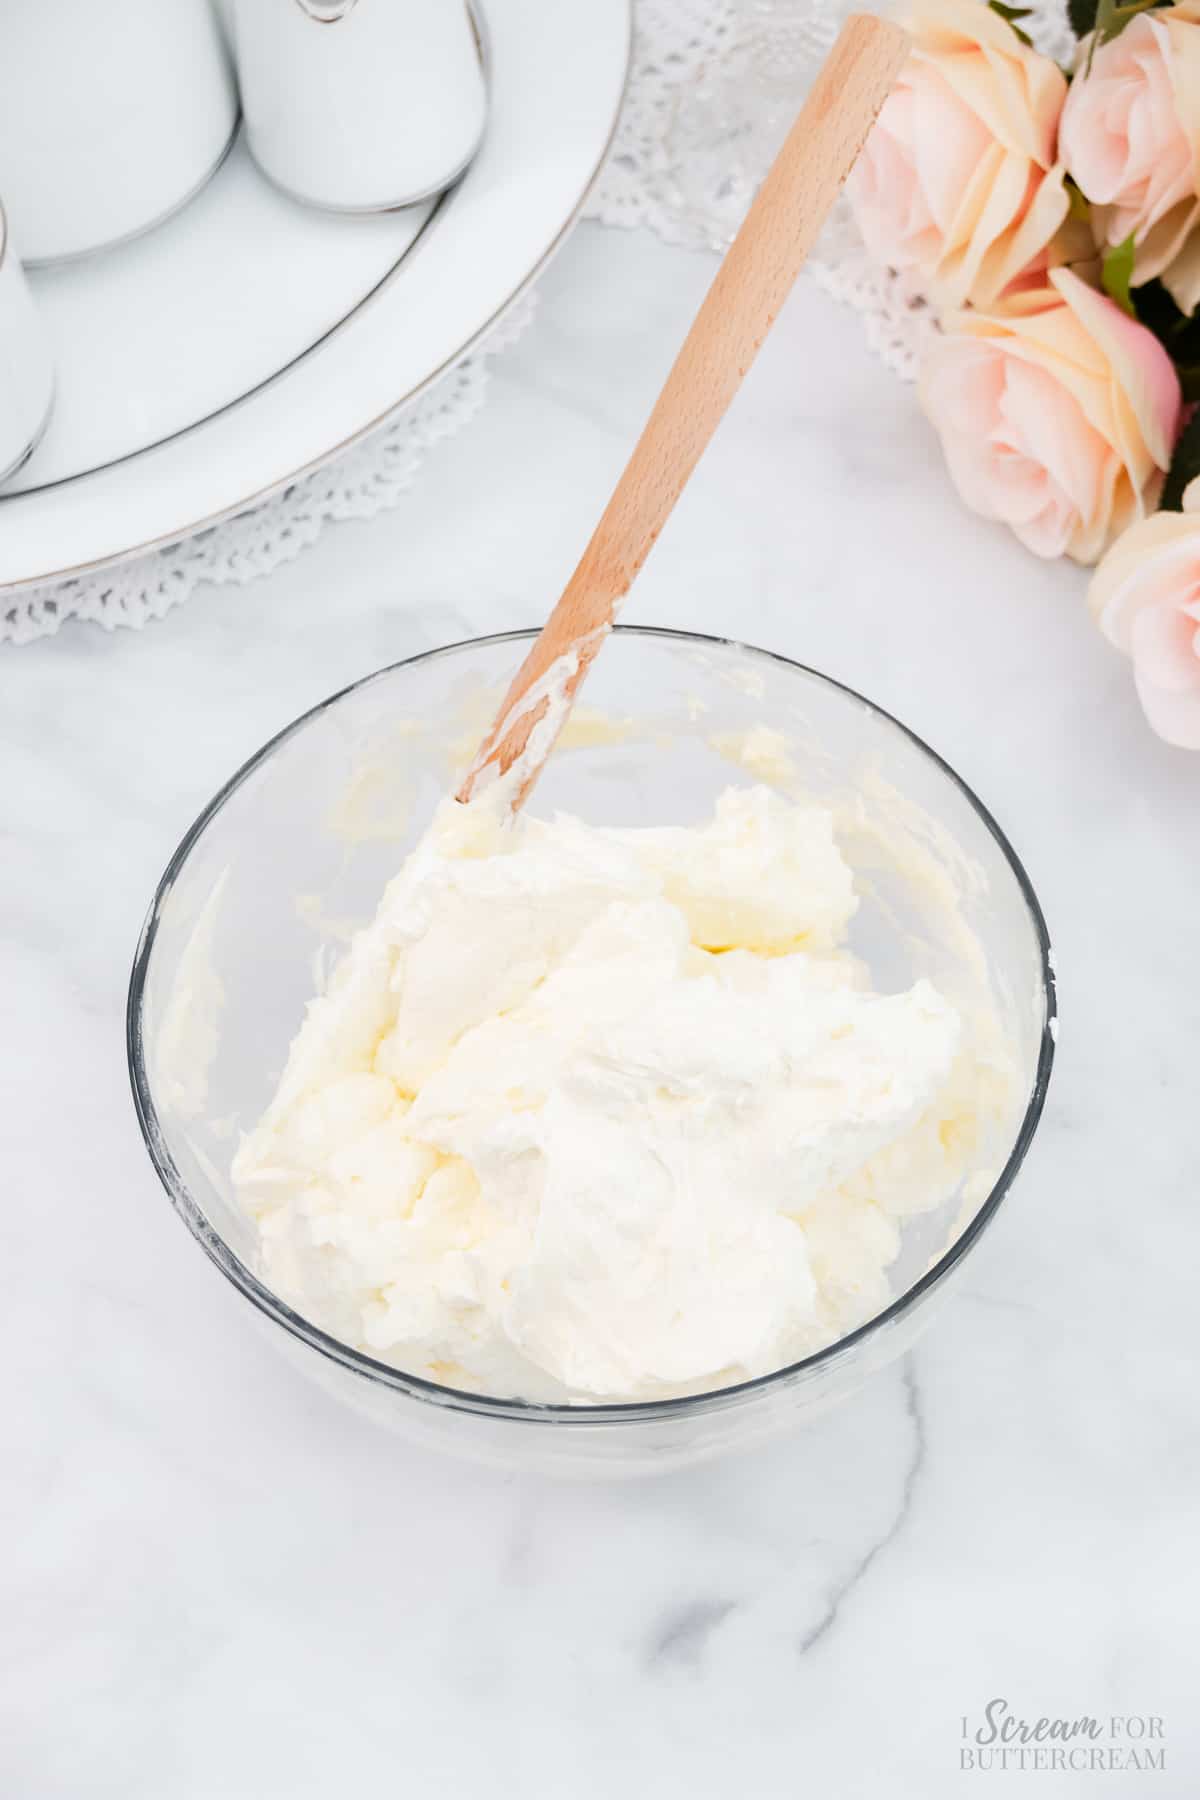
Now, add the butter to a large mixing bowl and mix with an electric mixer until it’s smooth.

Next, make sure to sift the confectioner’s sugar and add it to the butter along with the vanilla, salt and only half of the heavy cream.
Mix it on medium speed until everything is smooth and scrape down the sides and the bottom of the bowl and mix again.
Now, add the second half of the heavy cream and mix again. You may need to scrape down the sides and the bottom of the bowl and mix again.
Now, turn the mixer on high and whip everything for about 4-5 minutes until the buttercream is light and fluffy.
Cover and set aside until ready to assemble.
Step 4 – Make the white chocolate ganache:
Make this early on so it can set up. Add the white chocolate chips to a medium-sized bowl and set aside.
Add the cream to a small saucepan and heat it until it almost comes to a boil.
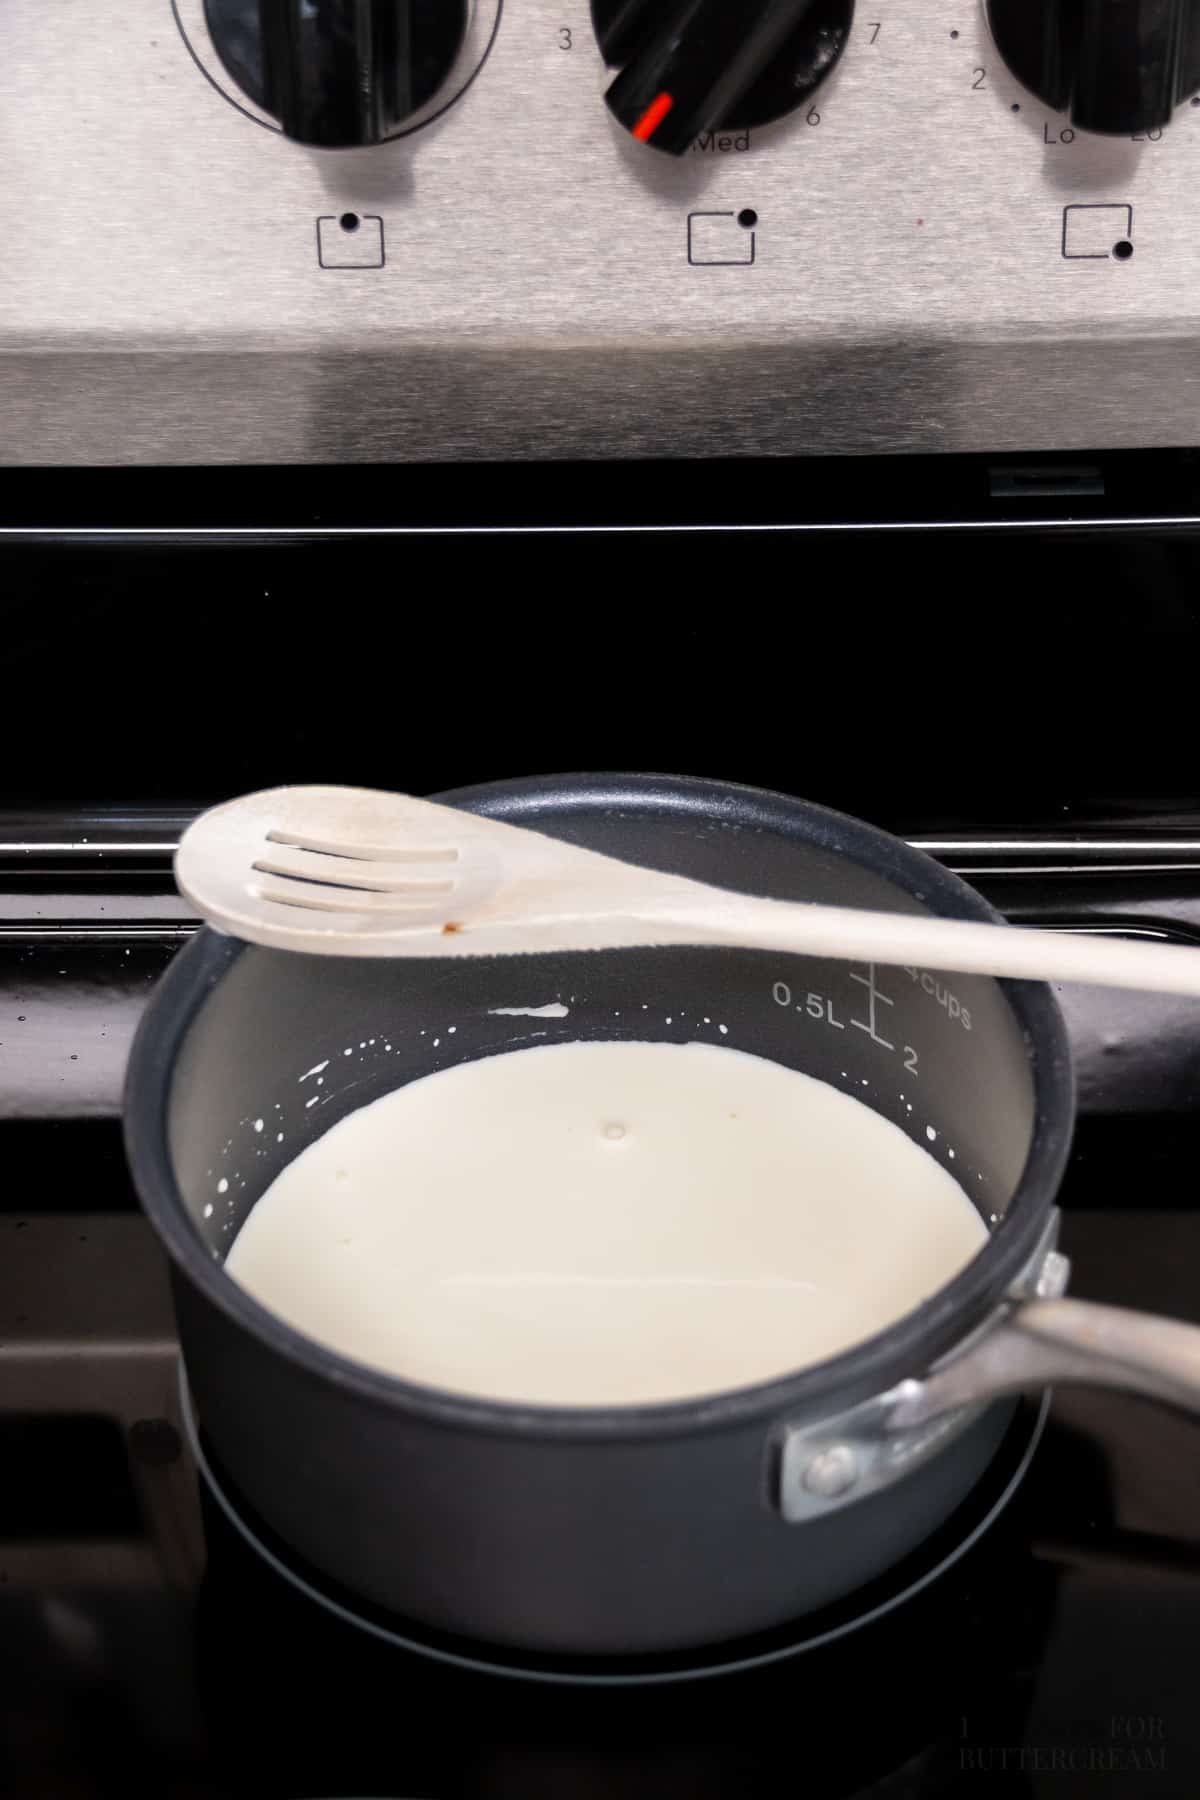
Pour the cream over the white chocolate chips and let it settle for about 10 minutes before you stir it.
After that, stir it until smooth. If there are still clumps, microwave it for about 20 seconds and mix again.
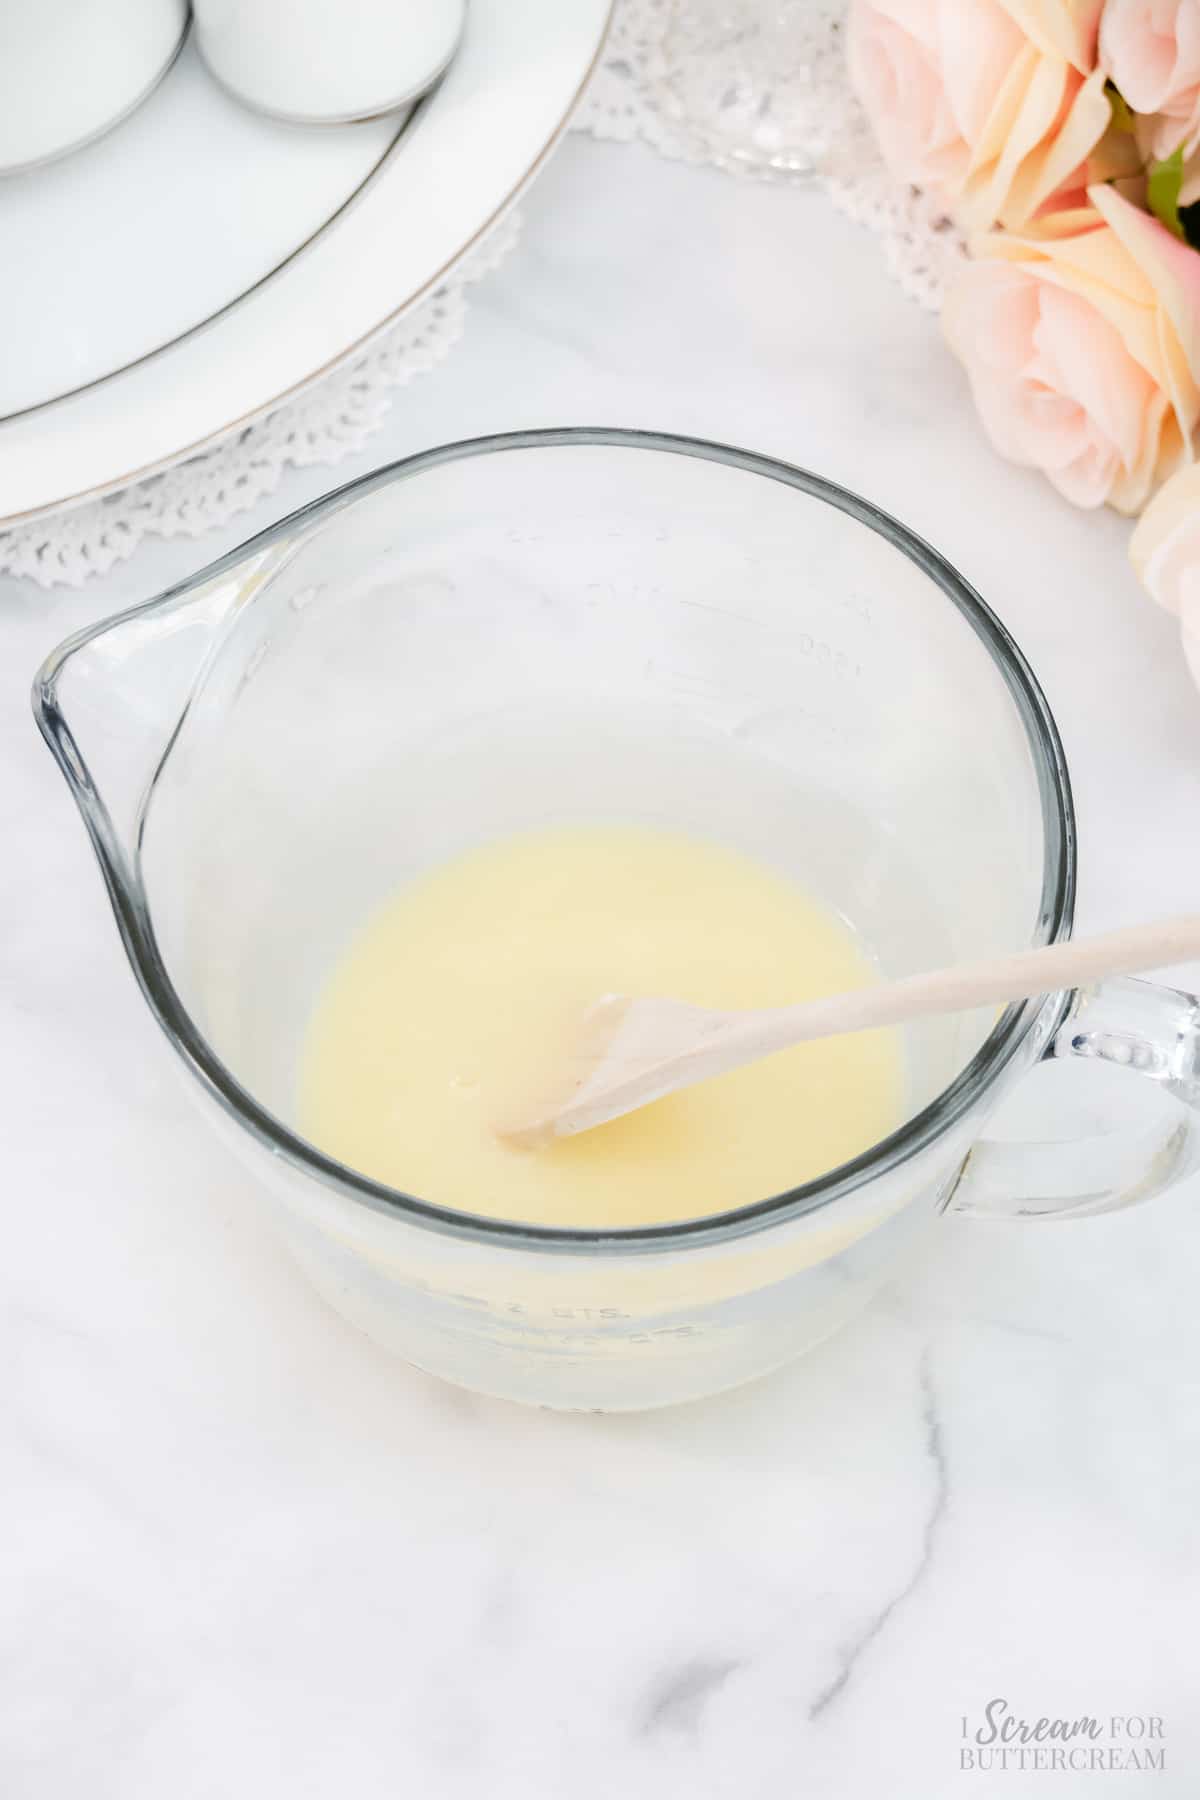
Set this to the side to cool down, or place into the fridge to cool down until it reaches drip consistency.
Step 5 – Assemble the cake:
Now it’s time to assemble this cake. Make sure everything is cooled first though.
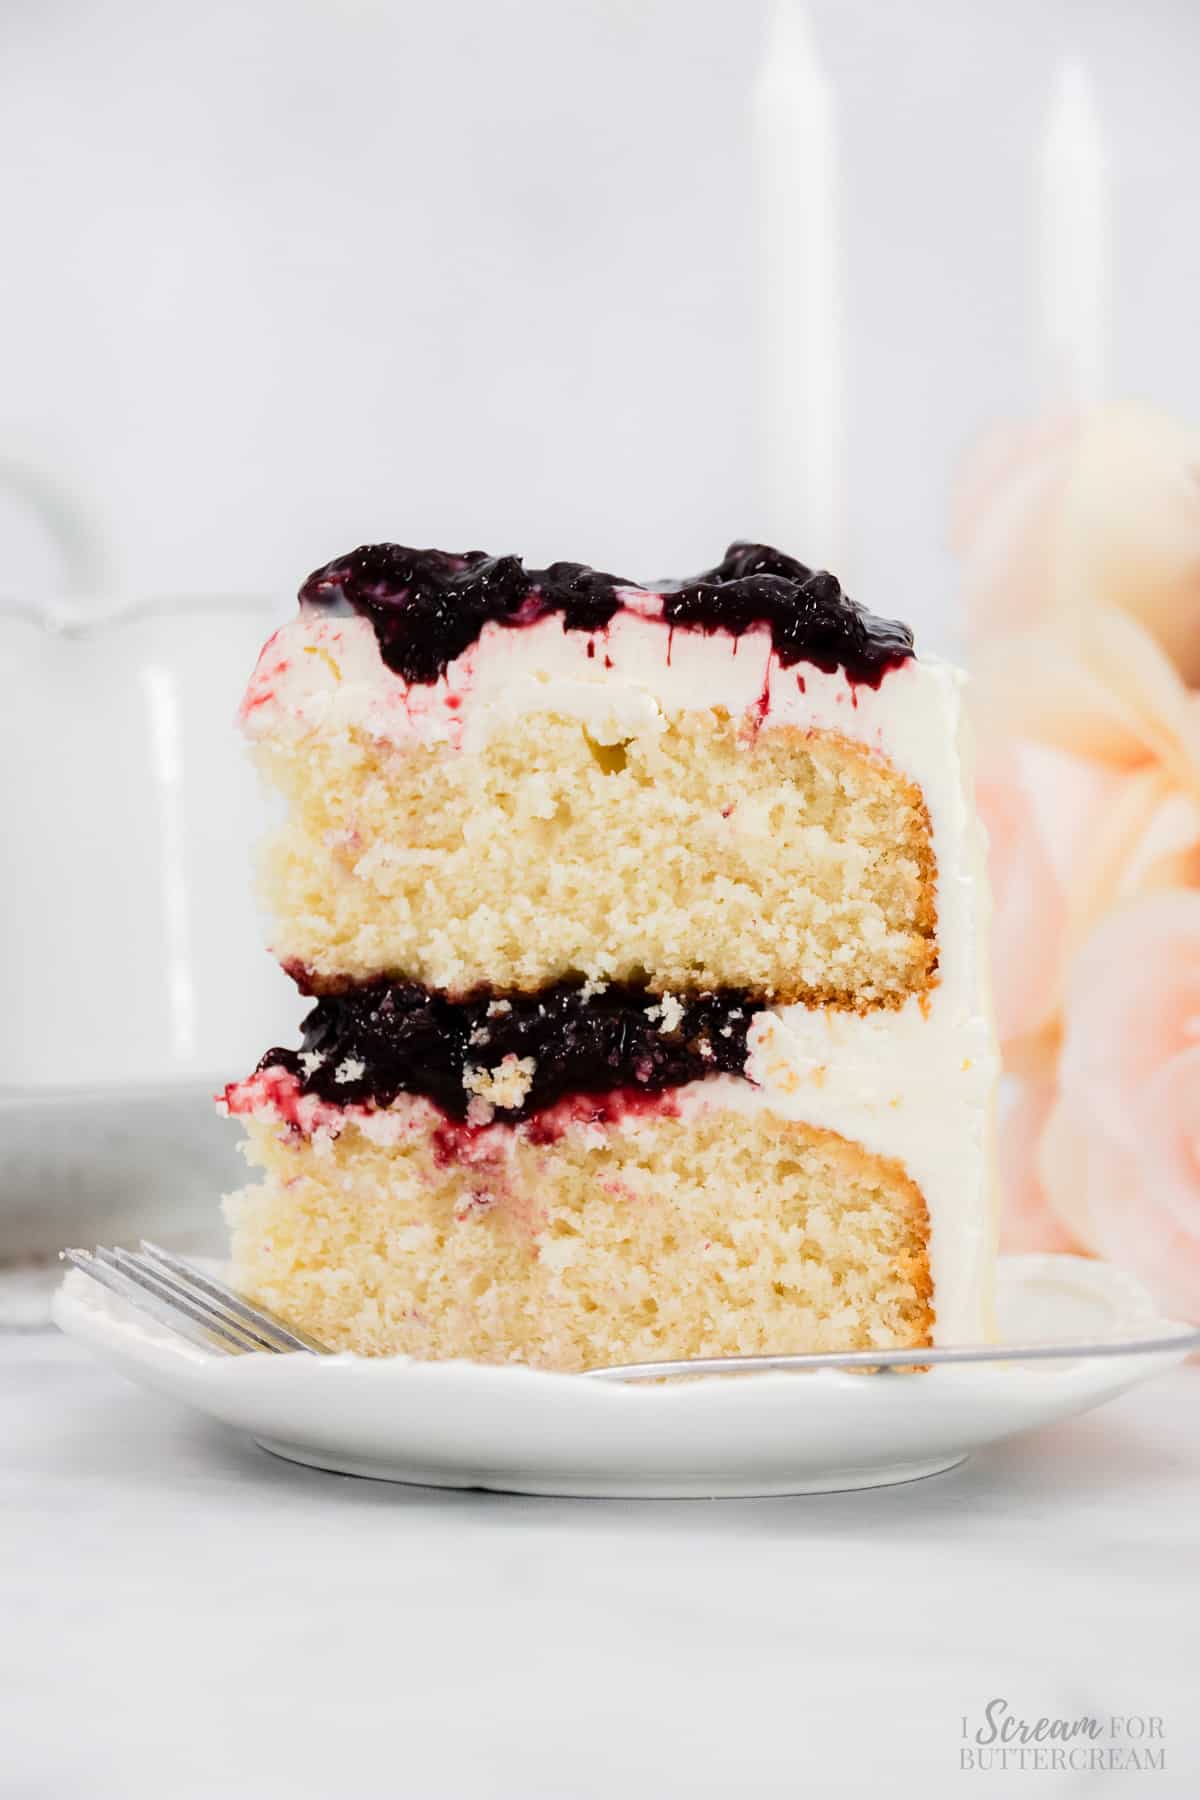
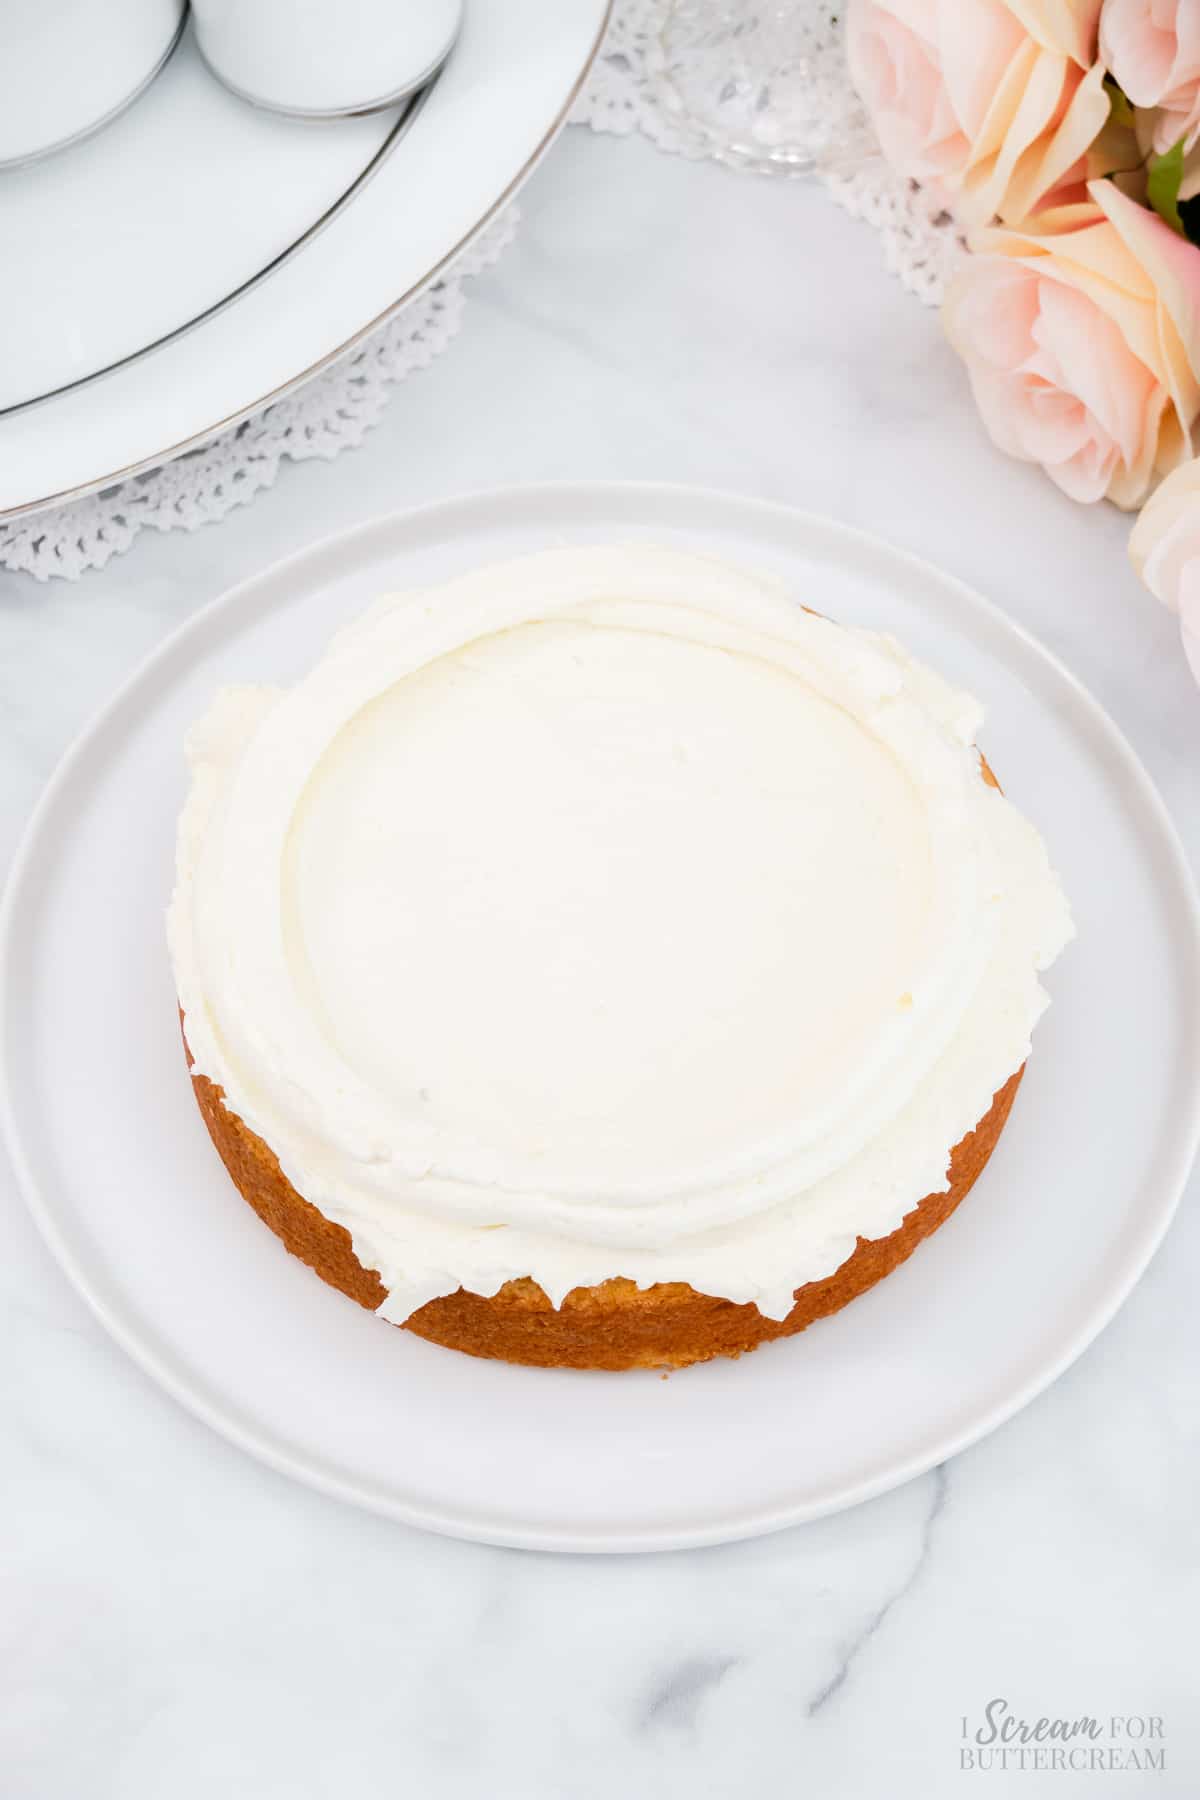
First, add a layer of cake onto a cake plate, then add a layer of the whipped buttercream. It’s also good to pipe an icing dam around the inside perimeter of the cake to keep the filling from coming out. (You can see this in the video below.)
Next, add about ⅔ of the cooled cherry filling to that layer. Keep it inside the icing dam.
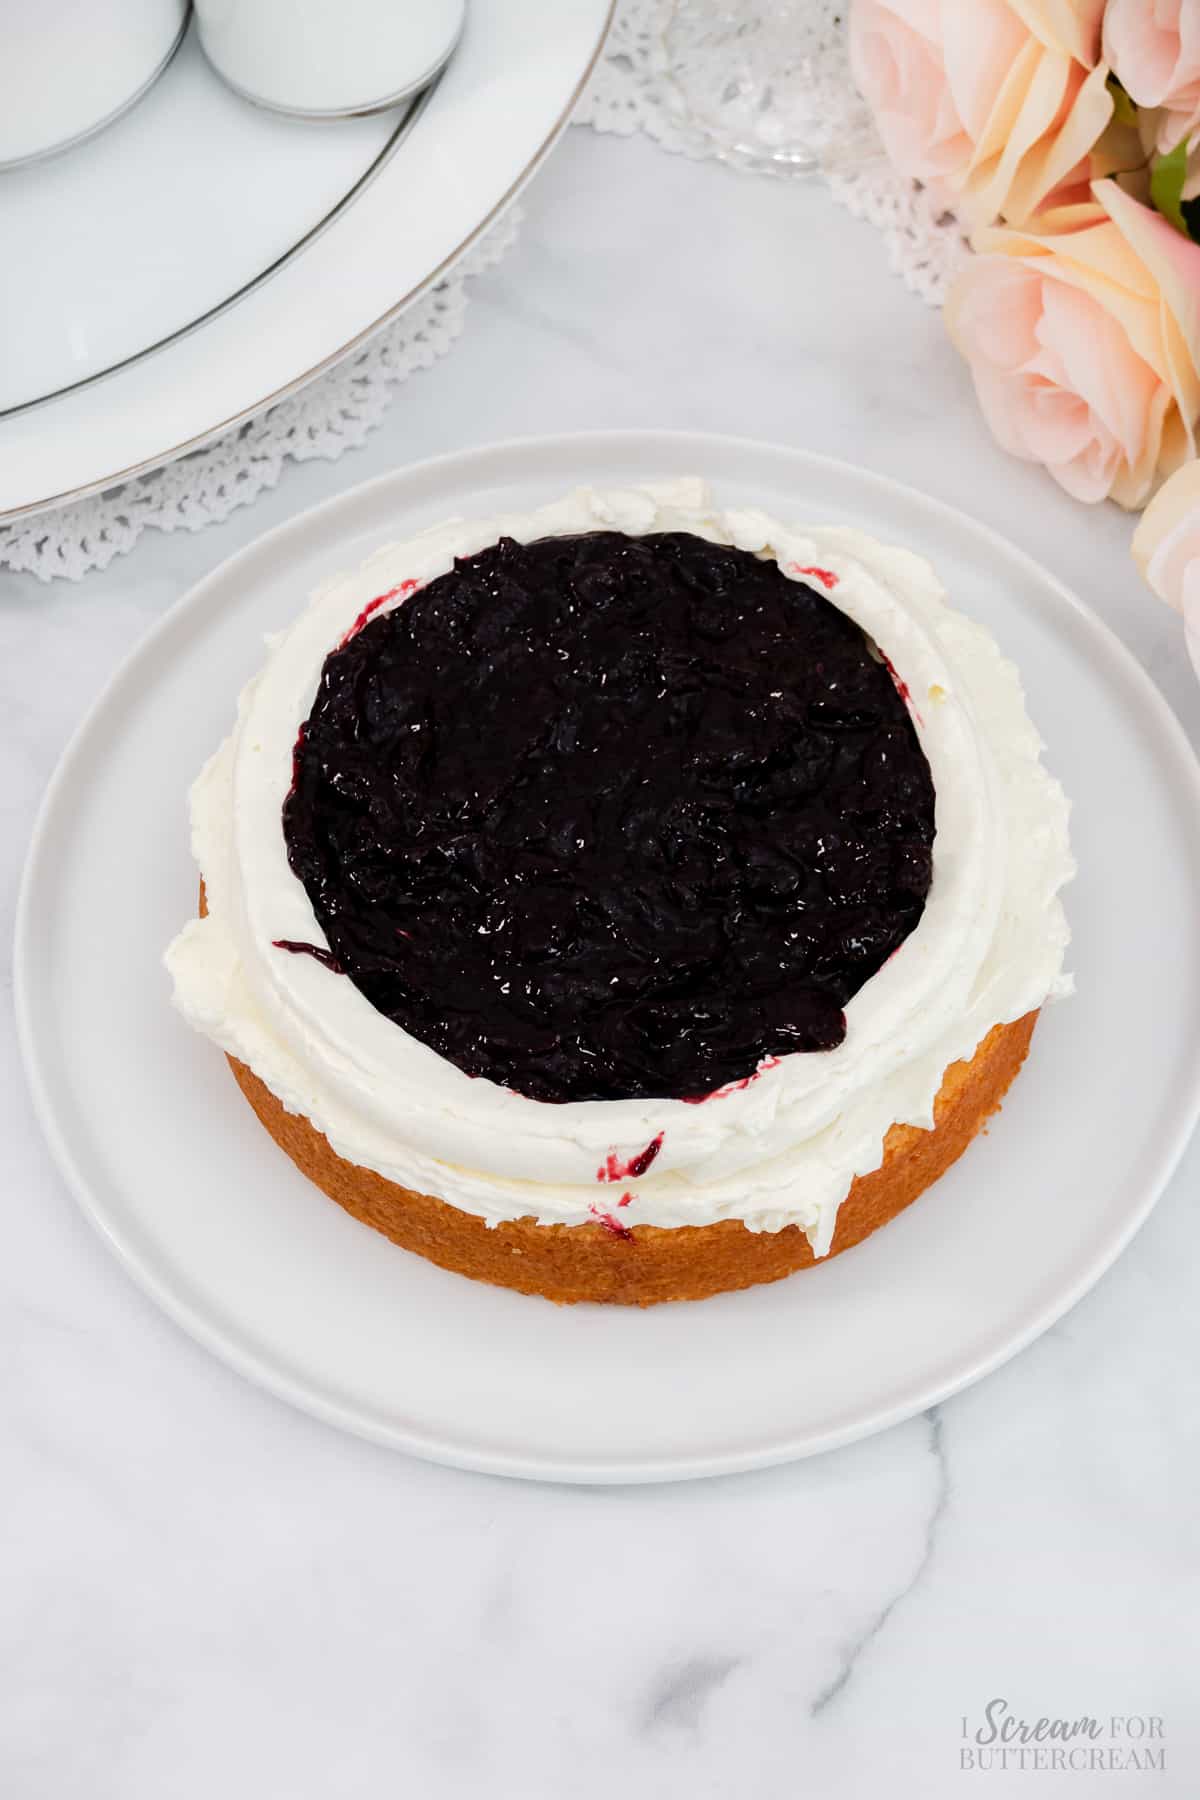
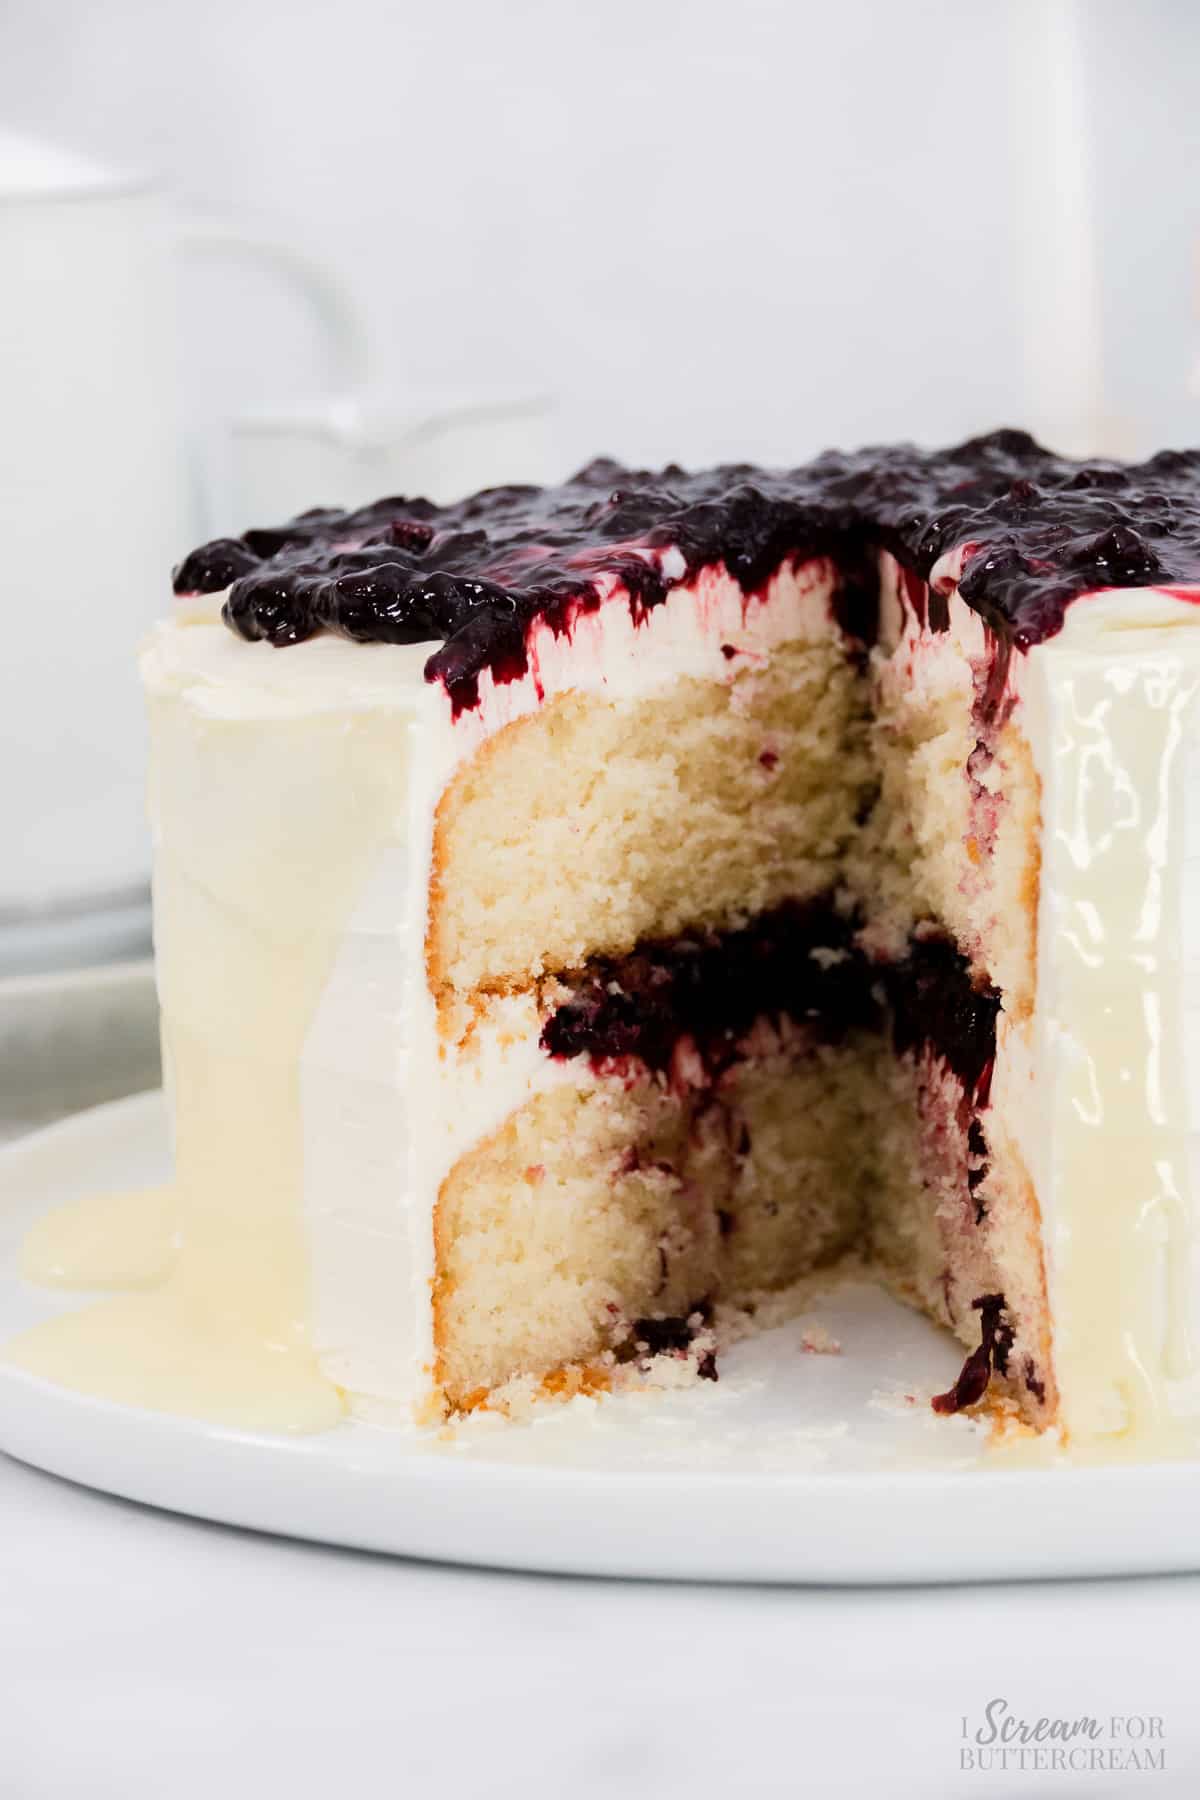
Place another layer of cake on top of it, then cover the top and sides of the cake with whipped buttercream.
Place the cake in the fridge for about 20 minutes or so as it needs to be chilled before adding the ganache.
Once chilled, spoon the ganache over the sides of the cake and add some to the top and spread evenly. Let the cake chill again for another 20 minutes or so.
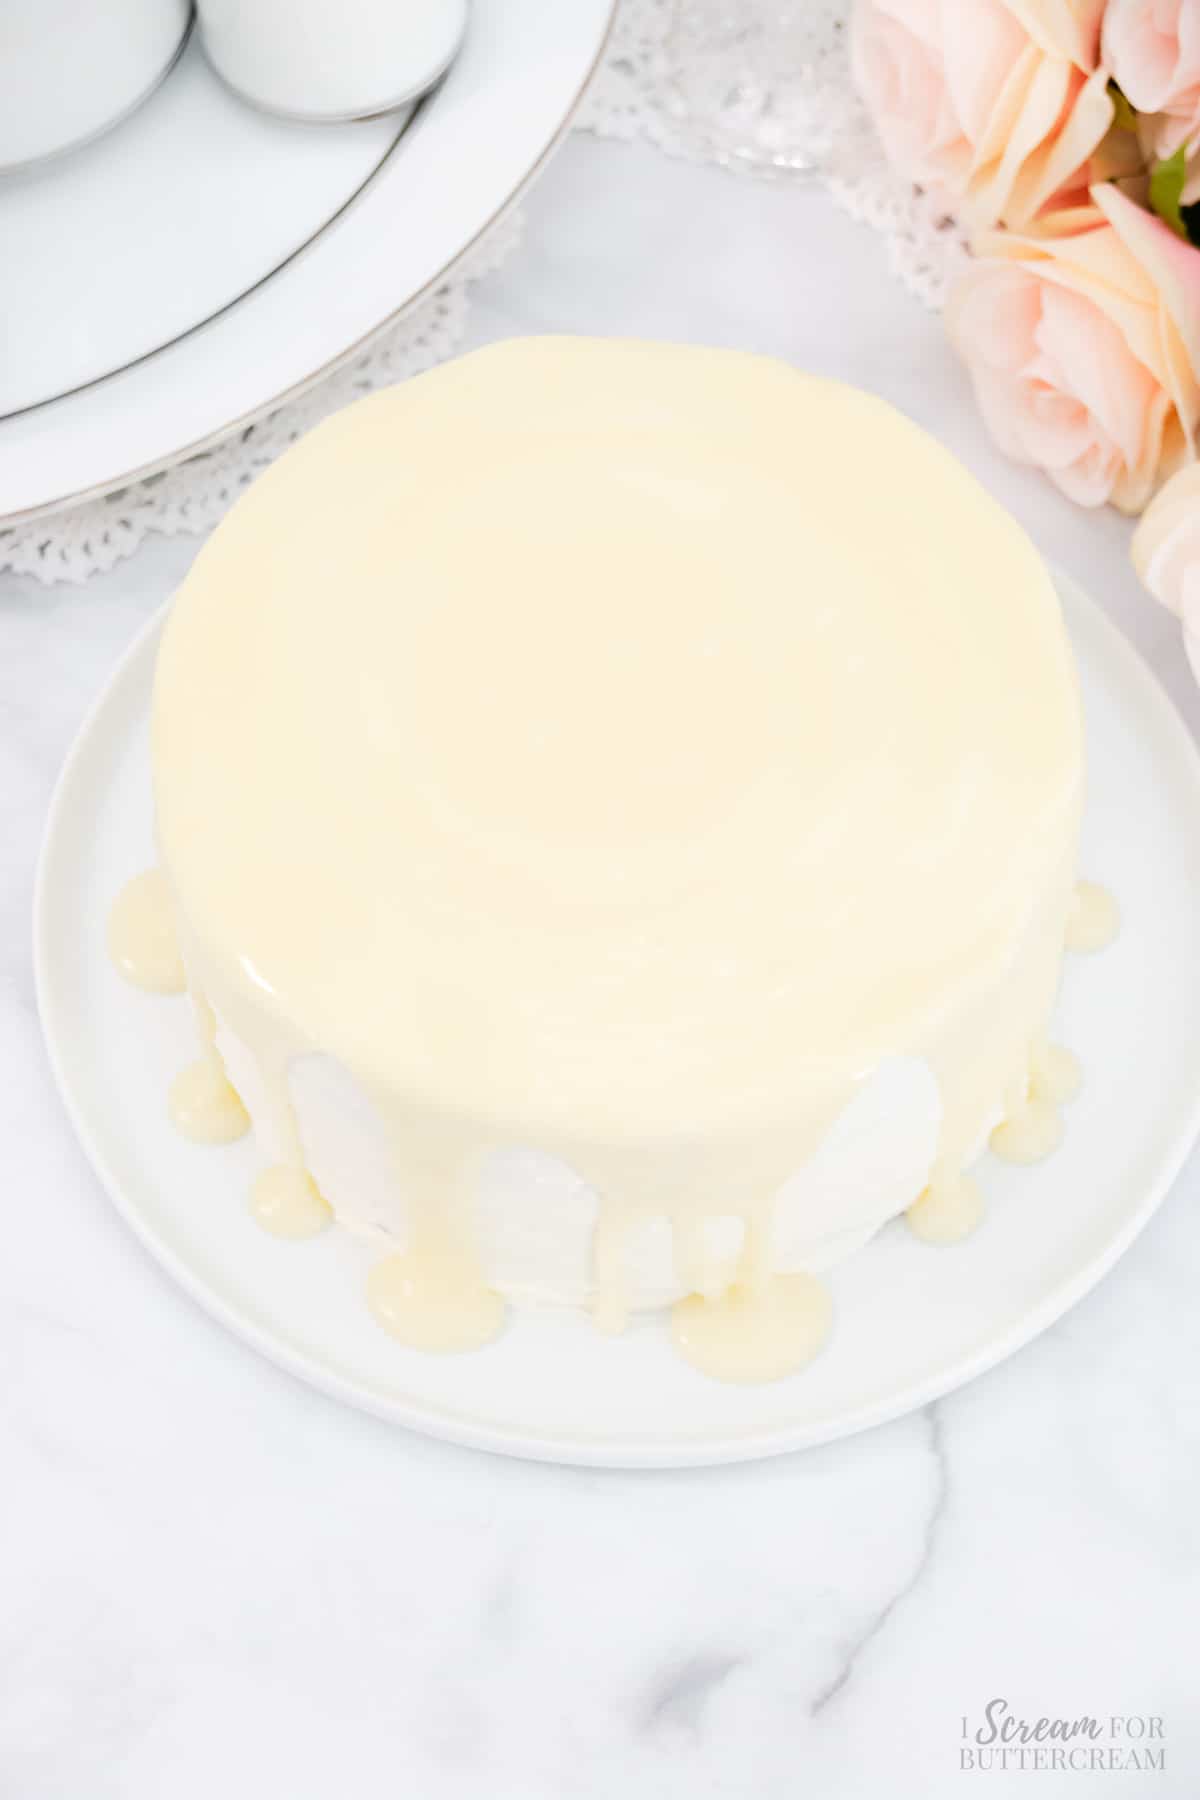
Last, add the last of the cooled cherry filling to the top of the cake and feel free to add a buttercream border if desired.
This cake is best eaten around room temperature but should be stored covered and in the refrigerator.
(image)
(Remember that the instructions will also be in the printable recipe card below.)
Tips & FAQs:
A white forest cake is usually made of moist white cake with a cherry filling between the layers. It’s also usually covered in whipped frosting and sometimes white chocolate ganache.
White forest cake is made with moist white cake, vanilla whipped frosting and white chocolate ganache, but black forest cake is a chocolate cake with cherry filling, chocolate frosting (and sometimes whipped vanilla frosting) and chocolate ganache.
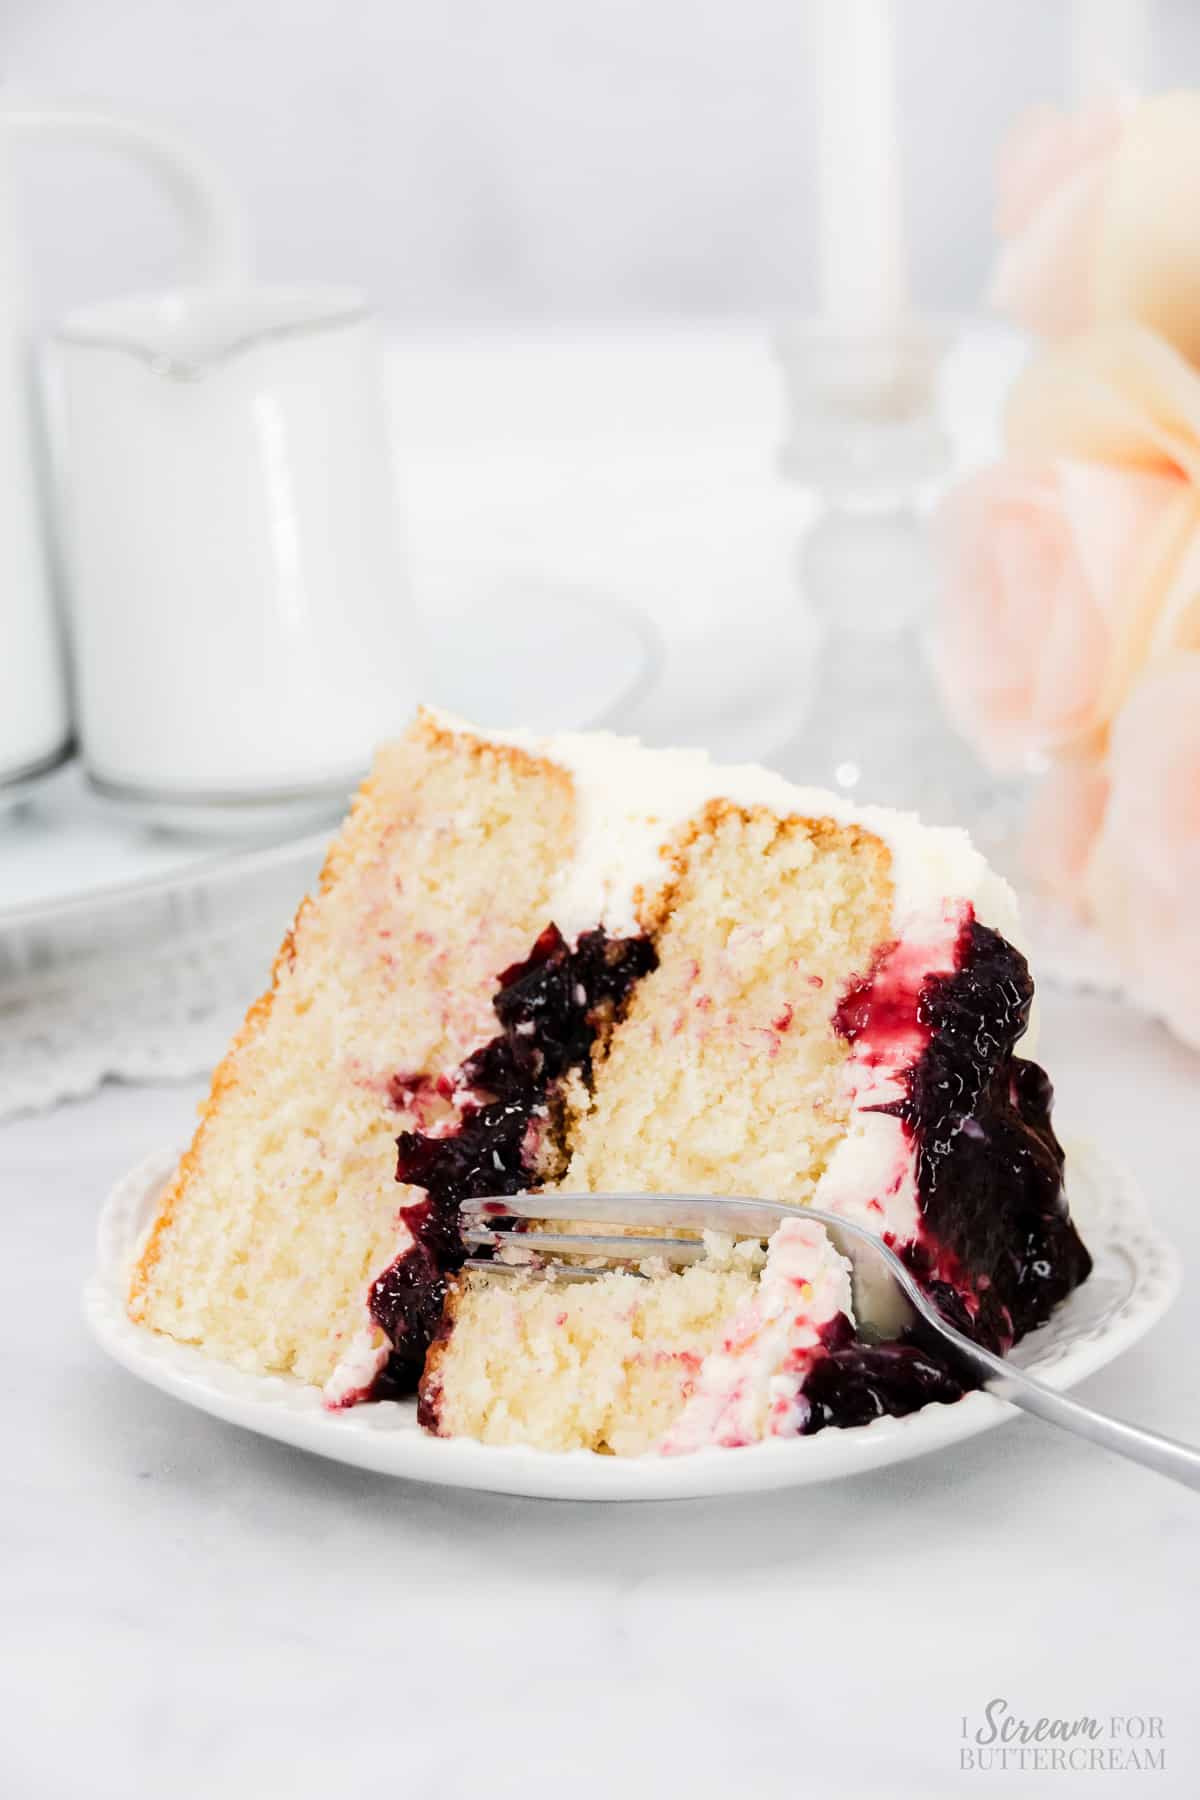
This cake tastes like a moist white vanilla cake with a tart and sweet cherry filling. It’s covered in a soft whipped vanilla buttercream with the added sweet topping of white chocolate ganache.
Maybe, although I haven’t to tested this recipe out with fresh cherries. If you do use fresh cherries, make sure they are pitted.
No, you can omit that if you don’t like it or don’t have it. The flavoring just goes well with cherries.
Make sure that you don’t pack the flour down into the measuring cup when it’s measured. Spoon the flour into the measuring cup and level it off, but don’t scoop the flour with the measuring cup as that can end up adding too much flour to the batter and will make the cake dry and/or dense.
No, lard is from animal fat and vegetable shortening is from vegetables.
Vegetable shortening is what makes this cake moist and gives it a white color. I have not tried this recipe using only butter. Vegetable shortening and butter do not sub out quite evenly, but they’re close.
If you’d rather use a butter cake and don’t mind if the cake is more of a yellow color, then check out this recipe here: Vanilla Bean Cake
You can use plain full-fat yogurt if you can’t get sour cream or don’t have any handy.
Yes, clear just helps the cake retain its white color.
This recipe calls for egg whites because that will help the cake retain its white color, but if you don’t mind if the cake has a more yellow color to it, then feel free to use 3 full eggs in place of the egg whites. Do not, however, use 6 whole eggs.
Yes, you can use salted butter instead, but just omit the salt that the recipe calls for so too much isn’t added.
It’s really best if you can as that will help the whipped buttercream get really fluffy.
Heavy cream is a heavier milk with more fat. It’s also sometimes called whipping cream, but that’s not the same as whipped cream or cool whip. Whipped cream and cool whip will not work in place of heavy cream as those are already whipped.
No, the ganache is optional.
Be very careful not to mix cake batter too long. Only mix until the ingredients are well combined. Mixing for too long will make the cake come out rubbery, dry and it may sink in the middle.
This cake is done baking when a toothpick inserted into the center of each layer comes out with a few moist crumbs on it or clean, but no raw batter.
It’s very important to make sure everything has cooled down before assembling the cake.
The cake layers can be made ahead of time and frozen if desired. Let the baked cake cool completely, then wrap the layers in plastic wrap and foil and place them in the freezer for up to a month.
To thaw, place the wrapped cake layers on the counter at room temperature and let thaw completely, then remove the wrapping. Once defrosted, add frosting.
This cake should be stored covered in the refrigerator and can last up to 5 days.
This cake is best served close to room temperature. If the cake is cold, set it out to come closer to room temperature for about 20-30 minutes before serving. It’s not recommended to microwave slices as that will completely melt the whipped buttercream.
The cake is firm enough for stacking. You will need to assess what type of weather the cake will be in (hot or cool) to decide whether it will be cool enough to add filling and whipped topping to it though.
As an Amazon Associate, I earn from qualifying purchases.
Video:
coming soon…
Note About Recipe Measurements: I write recipes using volume (cups) measurements because here in the U.S., this is what people are more familiar with and I don’t want anyone to feel intimidated when baking. For metric/weight measurements, click the ‘metric’ button under the ingredients in the recipe card below. The weights are converted by a program, not me, and it’s just a best guess. I can’t guarantee that weighing the ingredients will produce the exact same results, since I test recipes using volume measurements.
Recipe
White Forest Cake (A Moist White Cake with Cherry Filling)
Ingredients
For the cherry filling:
- 3 cups thawed pitted frozen cherries, drained
- ⅓ cup sugar
- ¼ teaspoon almond emulsion or extract (optional)
- 3 tablespoons warm water
- 1 ½ tablespoons cornstarch
For the cake:
- 2 ½ cups all-purpose flour (measured correctly-see FAQ section for questions)
- 2 cups sugar
- ½ teaspoon baking soda
- 1 ½ teaspoon baking powder
- 1 teaspoon salt
- ⅔ cup vegetable shortening (like Crisco)
- ¼ cup unsalted butter, room temperature
- 1 cup sour cream (full-fat, not low-fat)
- ½ cup milk (whole milk is best)
- 2 teaspoons clear vanilla extract (use regular vanilla if you don't have clear)
- ½ teaspoon almond emulsion or extract (optional)
- 6 large egg whites, room temperature
For the whipped buttercream:
- 1 ½ cups unsalted butter, room temperature (3 sticks)
- 4 cups confectioners sugar, sifted after measuring
- 1 teaspoon clear vanilla extract (or regular vanilla extract)
- pinch of salt
- 1 cup heavy cream, not super cold (This is also called whipping cream, but not cool whip or whipped cream-see FAQ section in the post for questions)
For the white chocolate ganache drip: (optional)
- ½ cup heavy cream (not whipped cream or cool whip)
- 1 cup white chocolate chips
Instructions
For the cherry filling:
- Make the cherry filling first so that it can chill while the cake is baking.
- Add the cherries and sugar to a medium saucepan and heat on medium heat until the sugar dissolves. Stir periodically.
- Once the sugar has dissolved, bring the mixture to a low boil, then reduce the heat and simmer uncovered for about 10 minutes until it's thickened. You may also want to take a wooden spoon or a potato masher and mash up the cherries once they begin to soften. You'll also want to stir the mixture periodically. If it feels like it's beginning to stick to the bottom of the pan, turn down the heat a bit.
- After about 10 minutes, add the warm water and cornstarch to a small bowl or a shaker and mix it well until there are no clumps. Add the cornstarch mixture to the cherry mixture in the saucepan and stir while letting it simmer for another minute or until it thickens. This should happen quickly.
- Remove the thickened cherry mixture, add the almond emulsion and stir.
- Pour the mixture into a bowl and let it cool down to almost room temperature, then cover it well with plastic wrap or place into an airtight container, then chill it in the fridge until the cake is ready to be assembled.
- The cherry mixture needs to be chilled before it's added to the cake or it will cause the whipped buttercream to melt or may just run out between the cake layers.
For the cake:
- Preheat the oven to 325 degrees F.
- Grease and flour two 8-inch round (2-inch deep) cake pans.
- In a bowl, mix together the sour cream, milk, vanilla extract, almond emulsion and egg whites.
- Whisk until smooth and set aside.
- In another larger mixing bowl, add the flour, sugar, baking soda, baking powder and salt. Whisk well.
- Slowly add the shortening and butter in chunks to the flour mixture while mixing on medium speed. Mix until the butter and shortening have coated the dry mixture and it has a sandlike texture.
- Add half the liquid mixture and mix until well combined. Just mix until the large clumps are smooth.
- Add the last half of the liquid mixture and mix only until well combined. Be very careful not to mix for very long.
- Scrape down the sides of the bowl and then mix again, only for 10-15 seconds. Be very careful not to mix the cake batter long at this point, or it will cause the cake to sink in the middle or it will cause it to be dense, dry, rubbery, or sink in the middle.
- Pour into the greased and floured cake pans and bake at 325 degrees F for 40-45 minutes. A toothpick inserted into the center of each cake layer should come out with a few moist crumbs on it or clean.
- Remove the cake pans from the oven and set onto cooling racks for 10 minutes, then turn the cake layers out of the pans and cool completely on the cooling racks before assembling.
For the whipped buttercream:
- While the cake is baking, make the whipped buttercream.
- Add the butter to a large mixing bowl and mix with an electric mixer on medium speed until smooth.
- Measure, then sift the confectioner's sugar and add to the butter, then add the vanilla, salt and only half of the heavy cream. Make sure the cream isn't super cold or it will firm up the butter too much while you're mixing.
- Mix on medium speed until smooth and scrape down the sides and the bottom of the bowl.
- Add the second half of the heavy cream and mix again, then scrape down the sides of the bowl.
- Turn the mixer on high and whip for about 4-5 minutes until the buttercream is light and fluffy.
- Feel free to add more cream if needed and re-whip.
- If the buttercream firms up once it's mixed, then the cream was probably too cold and firmed up the butter to much. Just let the buttercream sit out to warm up a little, then re-whip it.
For the white chocolate ganache drip: (optional)
- If using the ganache, make this early in the process as it will need to cool down for a while before using it.
- Add the white chocolate chips to a medium-sized bowl and set aside. (Make sure this is a bowl that can handle hot liquids.)
- Add the cream to a small saucepan and heat on medium to medium-high until it begins to gently simmer. Do not let it boil and watch it closely so that it doesn't scald. It helps to continuously stir it.
- As soon as it looks like it's about to boil, take the pan off the heat source and pour the hot cream over the white chocolate chips.
- Don't stir it yet, just let it sit for about ten minutes and then stir it. Stir it slowly to keep bubbles from forming too much. Stir until it's smooth. You can use a spoon or a whisk if there are chunks.
- If there are still a few chocolate bits that aren't melted, microwave it for about 20 seconds and stir again.
- Set the bowl aside and let it cool until it's drip consistency. (It could take an hour when cooled at room temperature, or if placed in the fridge, it will cool quicker at about 20-30 minutes.)
Timeline and how to assemble:
- (Feel free to check out the video in this post for help.)
- Make sure the cake is chilled or at room temperature. The cherry filling should be chilled, the whipped buttercream should be around room temperature and the ganache should be cooled down and drip consistency.
- Level the tops of the cake layers so that they're flat. Use a knife or a cake leveler.
- Add a layer of cake onto a cake plate.
- Next, add a layer of whipped buttercream. It's also good to pipe a buttercream icing dam just around the inside of the cake layer to keep the cherry filling from squishing out later on. (Just add some whipped buttercream to a piping bag or a ziplock baggie, snip the end off and pipe a circle of frosting just inside the perimeter of the cake layer.)
- Add ⅔ of the cherry filling. Try not to add the filling close to the edges of the cake layer so that it doesn't squish out. Keep it within the icing dam.
- Add the last layer of cake, then cover the top and the entire sides of the cake with the remaining whipped buttercream.
- Before adding the ganache, pop the cake into the fridge and let it chill and firm up for about 20-30 minutes or so.
- Add the ganache drip to the top of the chilled cake and let it drip down the sides a bit. Use a spoon to do this or add the ganache to a squeeze bottle. Just make sure the ganache isn't super hot and that the cake is cold. Also add the ganache to the top of the cake, so that it completely covers the top in addition to dripping down the sides.
- Pop the cake back into the fridge to chill for another 20 minutes or so.
- Lastly, add the remaining ⅓ of the cherry filling onto the top of the cake and feel free to pipe swirls around the top edge of the cake if desired and if you have buttercream left.
- See the notes section for the best ways to store this cake, how to serve it and for more questions.
Notes
Nutrition
How to Share
I’d love for you to share this recipe link or tag it, but please do not share screenshots or copy/paste the recipe to social media as the content and photographs are copyright protected and we (bloggers) work really hard on our content. Sharing the link, tagging us on socials and pinning it is super appreciated though!
Don’t forget to pin it below!
Paula
Can you please put the cherry measurements in grams, as it would make it more accurate than cups (as they’re not fine like flour and sugar). I googled how many grams in one cup of cherries and I got so many different answers.
Thank you in advance
Kara
Hi Paula, under the list of ingredients, just hit the word ‘metric’ and it will automatically convert the measurements to grams and ml measurements. It is just my best guess though, but it should be close.
Sabrina Corera
Hi,
Can we substitute with vegetable oil for vegetable shortening.. if so will it be the same measurements
Kara
Hi Sabrina, it won’t be the exact same amount. I think it would be a slightly less amount. I’m not sure it would turn out well using oil, but if you’d like to try, feel free to do that. I haven’t tried it myself, so I can’t say how much. Shortening works well because it adds moisture and it helps make the texture soft. I’m just not sure using vegetable oil will have the same effect, but it’s worth a try though.
Diana Butt
I’ve made this cake twice now and it’s a beauty to behold!!! Love the subtle but present almond flavour, looks professional, and the taste is satisfying…it’s a real gift to your loved one. I followed the instructions to a tee… which is unusual for me but I’m so glad I did!!
Kara
Thanks for the great review, Diana! I’m so glad you loved it!