
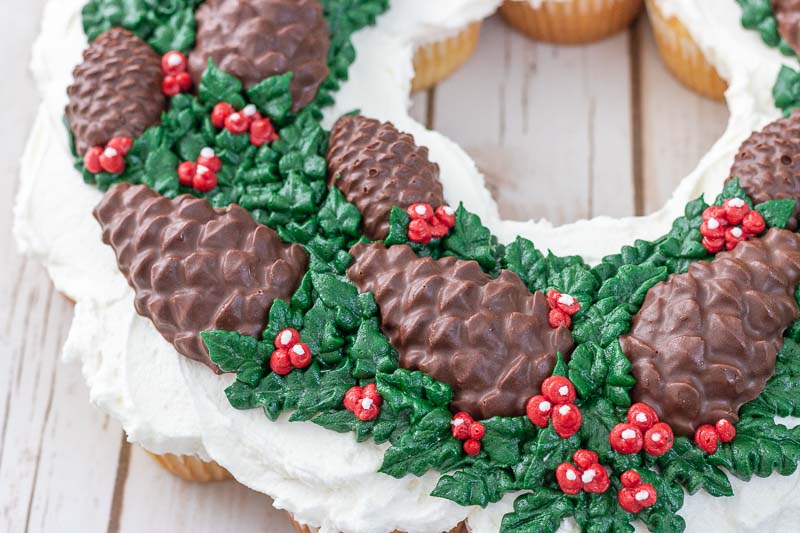
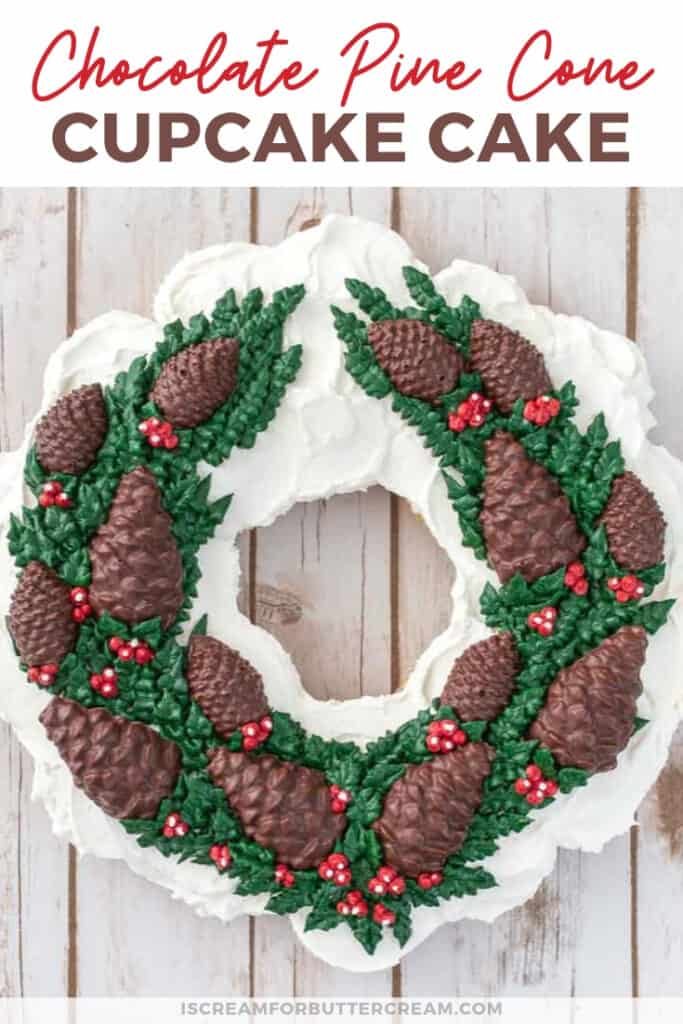
Want something unique for your Christmas dessert this year? This wreath cake is actually a pull apart cupcake cake! It’s also ALL buttercream and that means no fondant. The cool thing? It’s got chocolate pine cones on it!
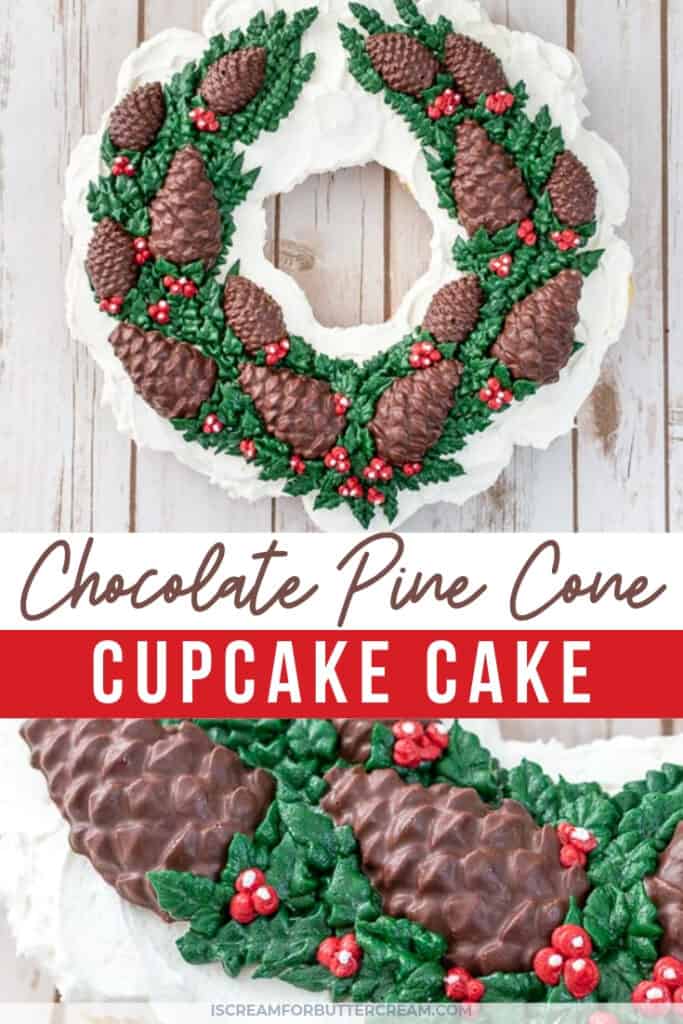
Yep CHOCOLATE PINE CONES! You’ll definitely want to add this one to your holiday baking list.
There are a few things you’ll need to make this cake…namely the pine cone molds. I used two different sizes, but you don’t have to get that fancy. By the way, the molds aren’t expensive at all and I’ve even got links to the ones I purchased in the supply list below.
I used semi-sweet chocolate for my chocolate pine cones, but you can use whatever kind of chocolate you want. You’ll also want to leave yourself a little time to do this as the chocolate pine cones need some time to firm up before unmolding them and adding to the cake.
You’ll also need some piping tips, but we’re not going crazy here. You’ll only need a couple tips (which I’ve listed in the supply list) and I’ll show you the technique on how to get the leaves to look this way.
You’ll really only need to make three colors of buttercream though. I think that’s my least favorite task…coloring buttercream. I don’t know why really, but I wish I could just wiggle my nose like Samantha on Bewitched and the buttercream would just appear all mixed up.
Anyway, you’ll just need some white, green and red buttercream.
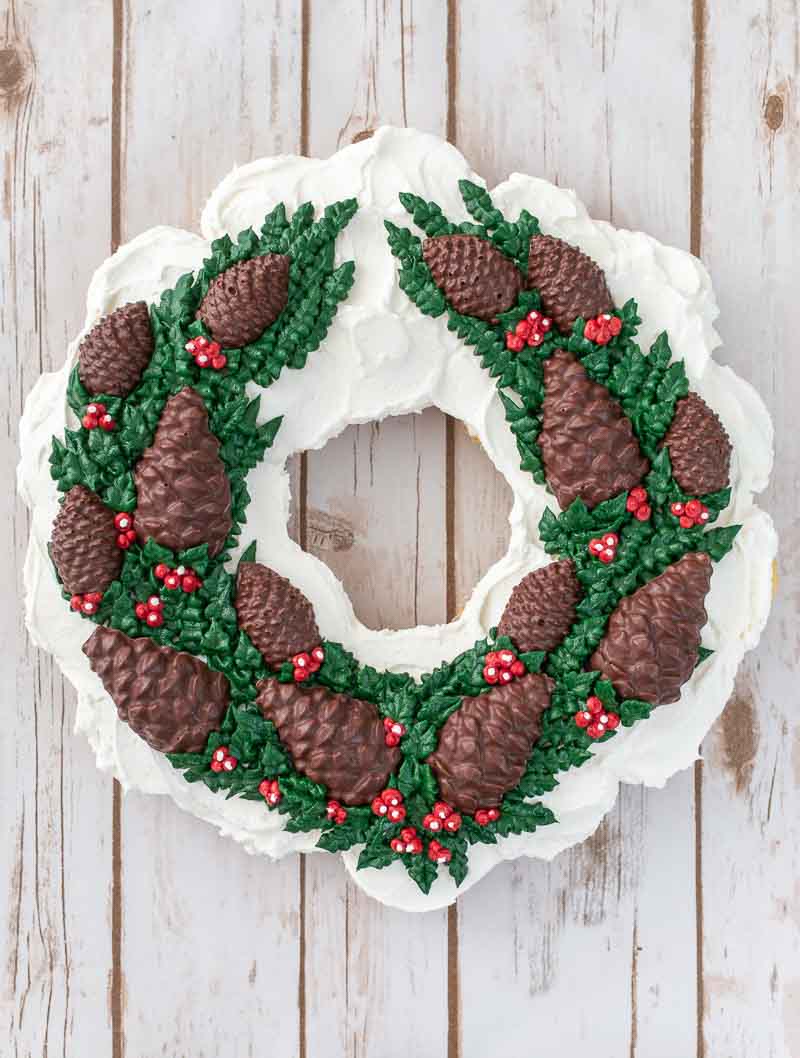
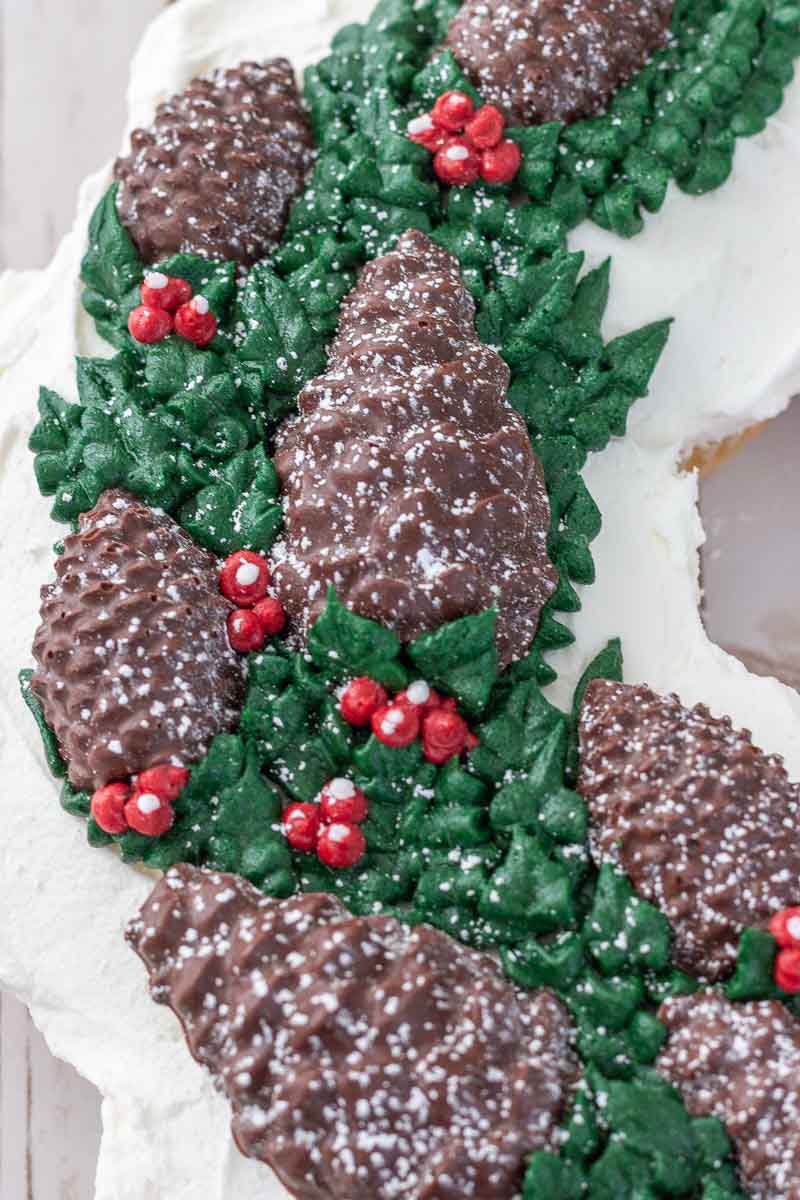
So for this cake you have some options. Once you’re finished you can leave it like it is, or you could sprinkle on some powdered sugar and give it a snowy look.
As is:
or go for a snowy look:
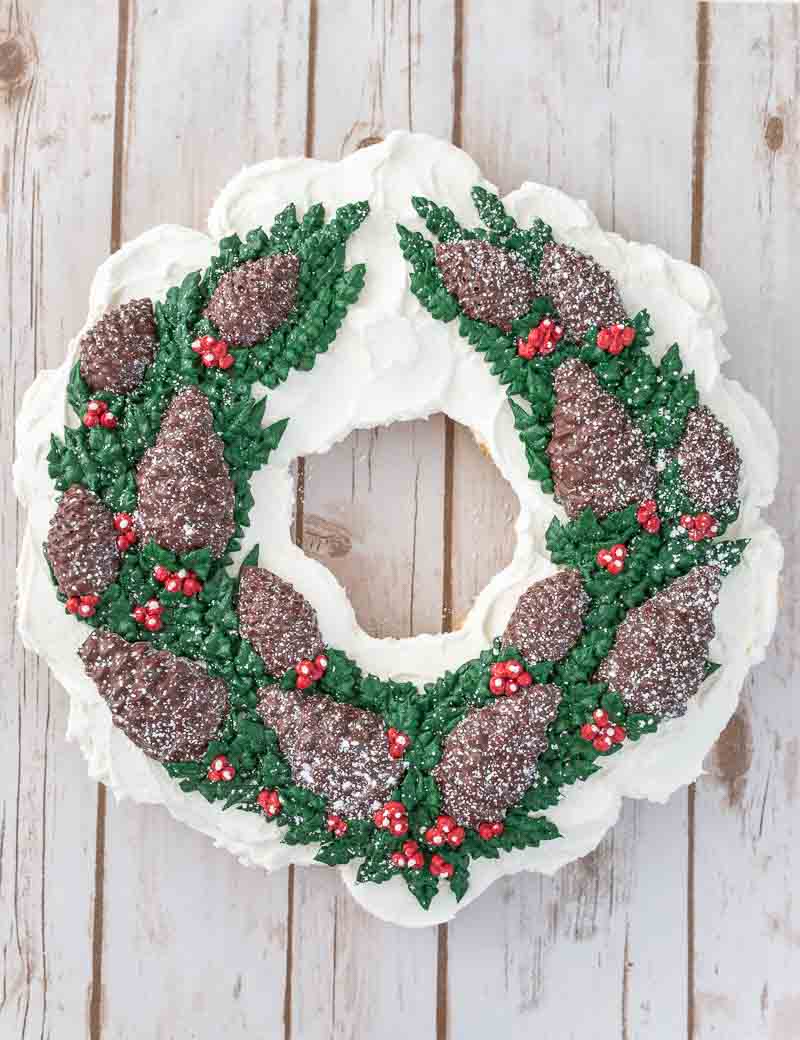
I can’t really decide which I like better. I really love how the powdered sugar looks on the pine cones though.
Alright, let’s actually get to the tutorial now.
As an Amazon Associate, I earn from qualifying purchases.
SUPPLIES NEEDED FOR THE CHOCOLATE PINE CONE WREATH CUPCAKE CAKE:
- About 22 cupcakes (A box cake mix should yield this much, or you can use one recipe of my vanilla bean cake as well.)
- One recipe white buttercream to cover the cupcakes (Here are my recipes: Bright White Buttercream and Vanilla Bean Buttercream) I actually used half butter and half shortening for the buttercream on this cupcake cake.
- Green buttercream (You’ll probably need about a cup and a half to two cups.)
- Red buttercream (You’ll need just a small amount of red.)
- 352 leaf piping tip for the leaves
- Round piping tips:
#5 round tip for the red berries and a #2 round tip for tiny white dots on berries - 12 oz bag semi-sweet chocolate chips
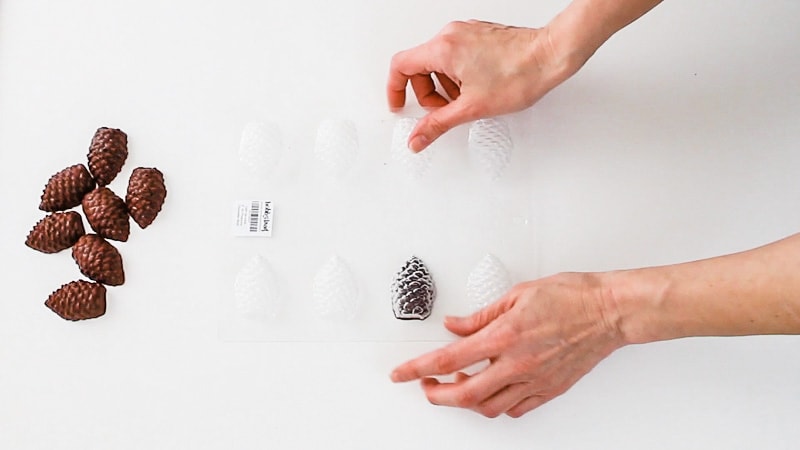
- large pine cone mold
- small pine cone mold
- squeeze bottle (This isn’t mandatory, but it sure makes adding the chocolate to the molds much easier.)
- small icing spatula (For spreading the white buttercream over the cupcakes.)
- Large square foam board or cardboard (For the base of your cupcake cake.)
- Scrapbook paper, contact paper or fanci foil (To cover your cake base.)
- Confectioners sugar and a sifter if you’ll be adding ‘snow’ to your cupcake cake
Let’s get started: (Don’t forget to watch the video toward the end of this post, which will show all the steps as well.)
HOW TO MAKE THE CHOCOLATE PINE CONE WREATH CUPCAKE CAKE:
First you need to make the base for your cupcake cake. I just used a large square piece of foam board, but you could also use a larger piece of cardboard.
You’ll want to cover it with fanci foil, scrapbook paper, wrapping paper or some decorative contact paper to make it pretty.
If you use scrapbook paper, you’ll want to then cover that with clear contact paper to make a barrier. (You can see more cake board ideas and how to cover them here: Tips for Cake Boards)
Now you’ll want to bake all your cupcakes and make sure they’ve cooled. They don’t need to be chilled, just not warm.
Next you’ll want to melt your semi-sweet chocolate.
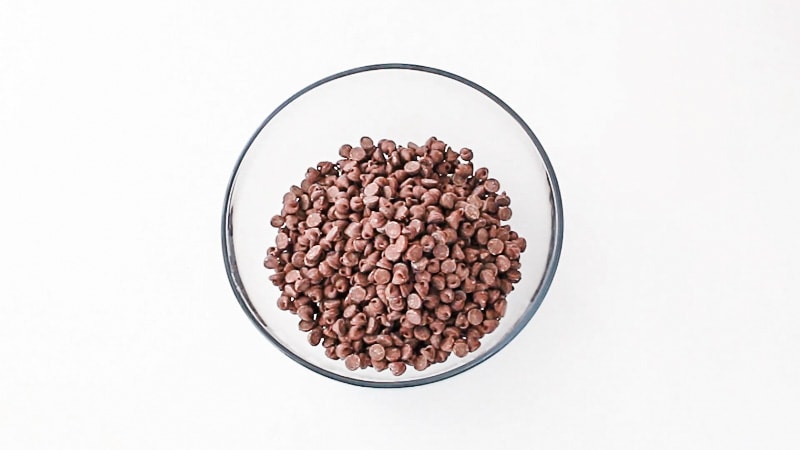
I just melted mine in the microwave at about 20 seconds at a time, stirring between. You may want to add in about a teaspoon of shortening to thin it just a little, but don’t add any more than that, or it won’t firm up enough.
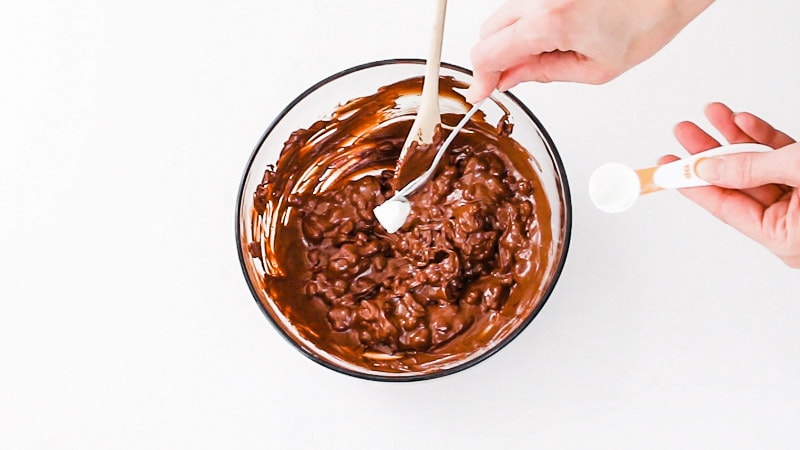
Mix it well until creamy.
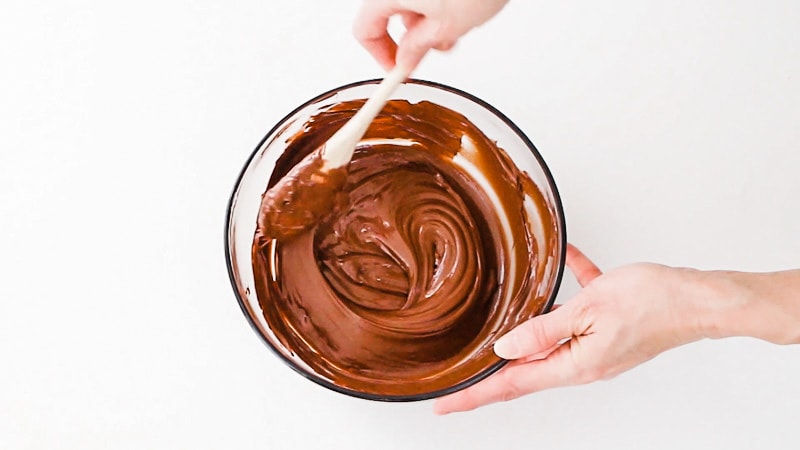
Transfer the chocolate to the squeeze bottle. You don’t HAVE to do this, but it’s much easier to get the chocolate in the molds this way. It’s your choice.
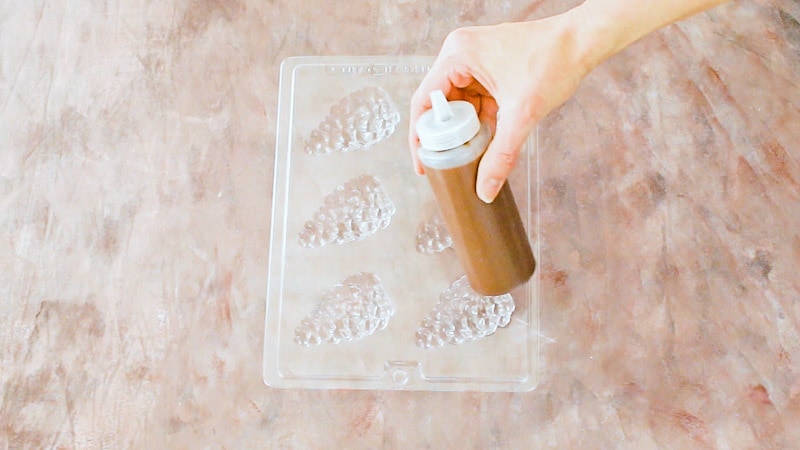
Once you get the melted chocolate into the squeeze bottle (or if you’ll just be spooning it in) just either squeeze it into the molds or use a spoon.
Add the melted chocolate to both the large pinecone mold and the small one.
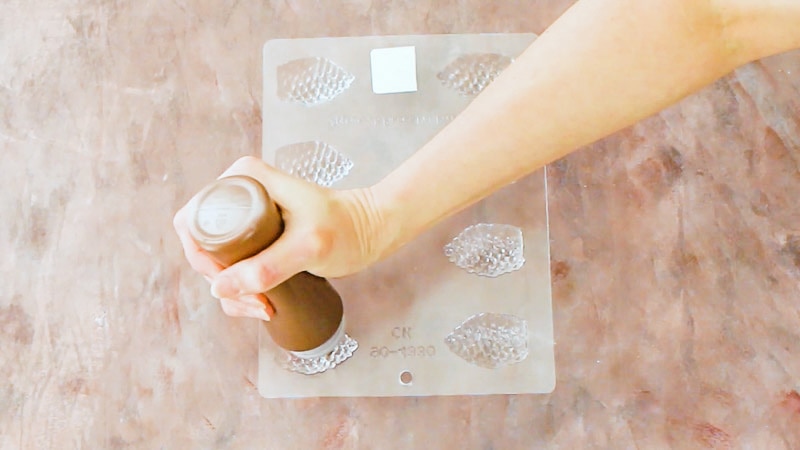
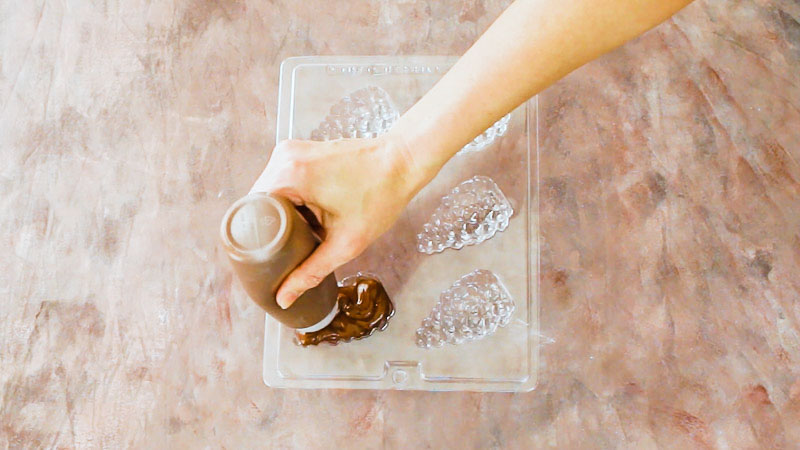
Tap the molds against the table periodically to release any air bubbles.
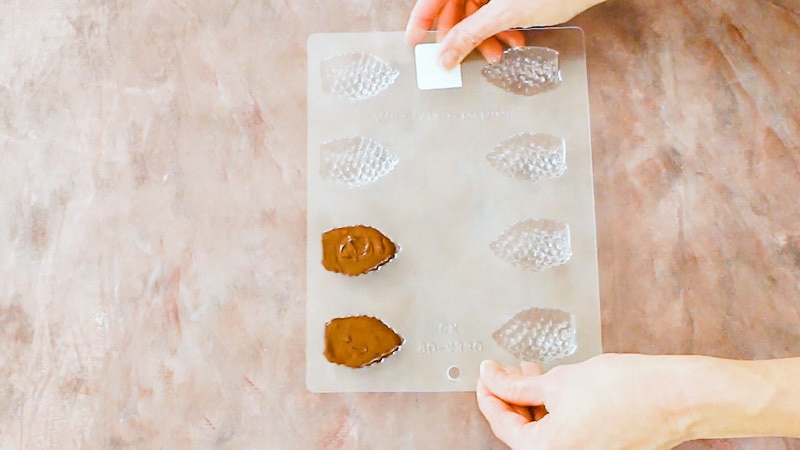
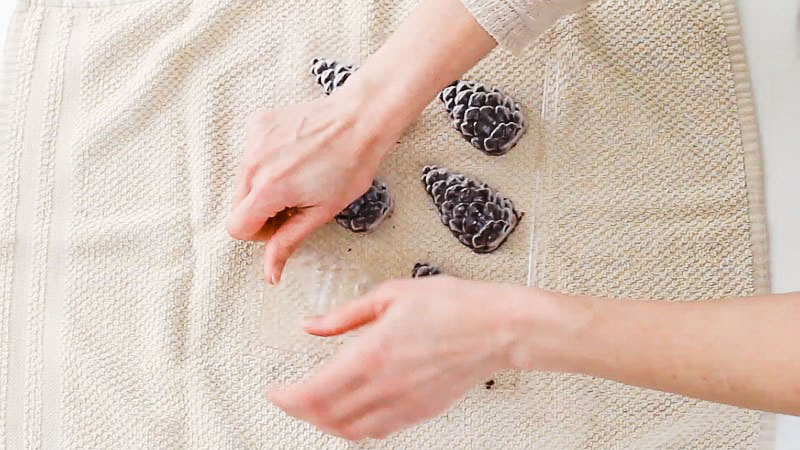
Set the molds in the freezer to chill. You can set them in the fridge, but it’s easier to get them old of the molds if they’re super cold.
The small ones will firm up quicker, but the larger ones can take a bit. Maybe an hour or so. Just work on icing your cupcakes while they’re firming up.
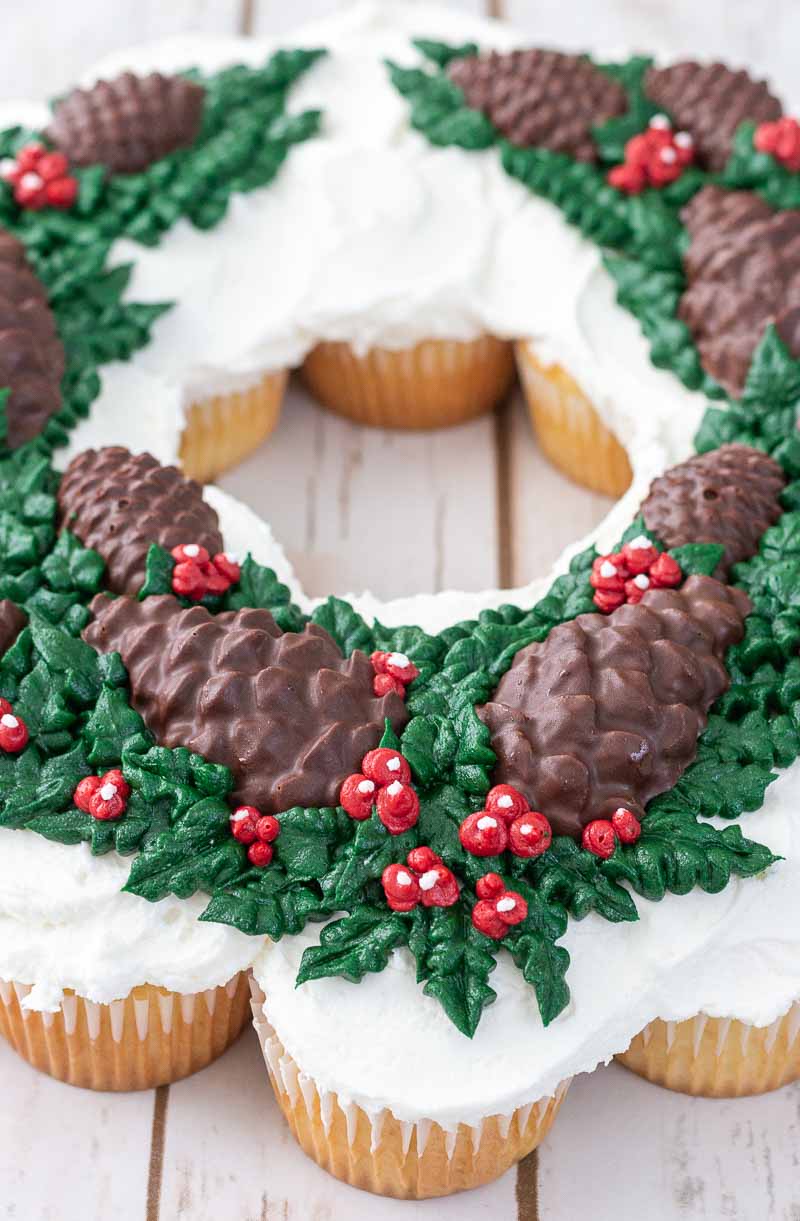
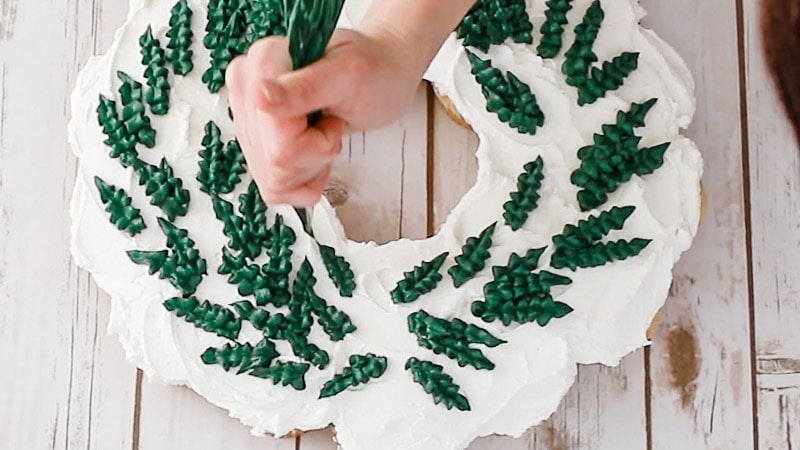
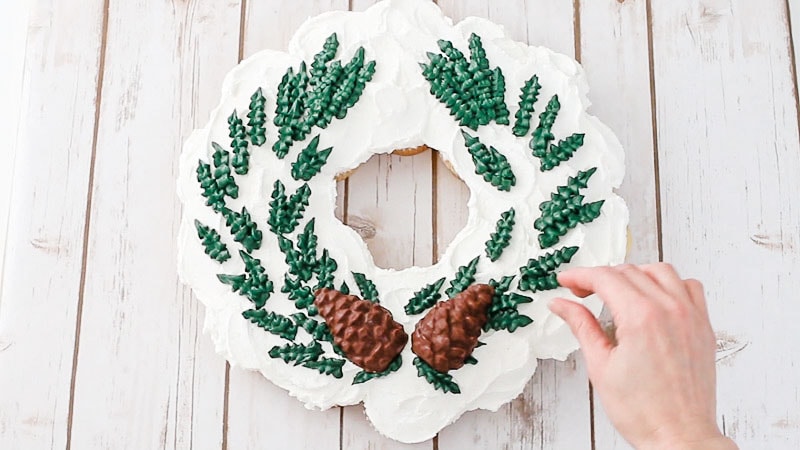
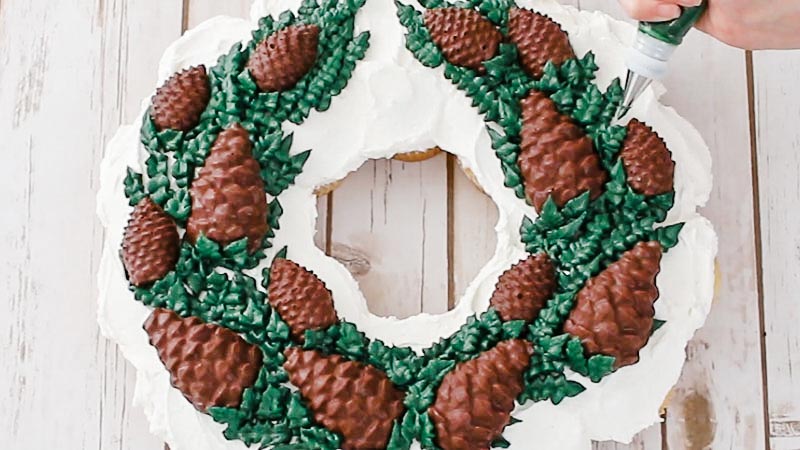
Now just grab all your cupcakes and form them into a wreath shape.
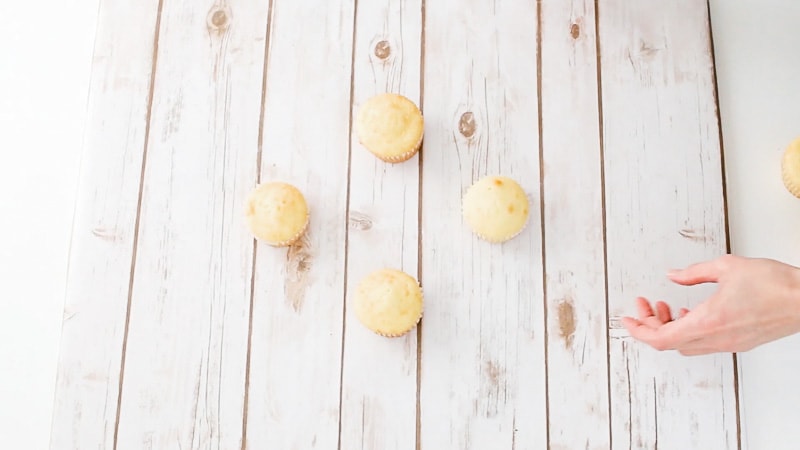
You’ll have to move them around a bit. You’ll want the opening in the middle to be only about five inches or so, otherwise you’ll run out of cupcakes.


Once you’ve got them all set up how you like the, just add the white buttercream. You can add it by tablespoons first, and then take your small icing spatula and smooth.
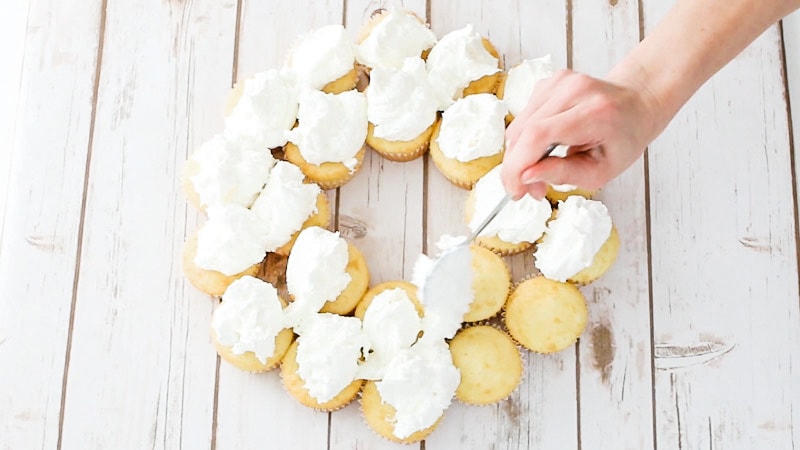
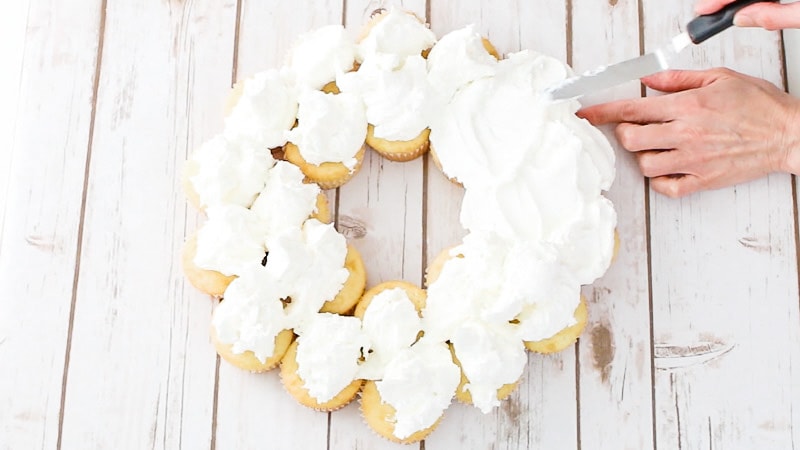
You want a bit of a rough texture, so don’t smooth it completely. I wanted mine to look a little like snow and so I didn’t try to get mine perfect.

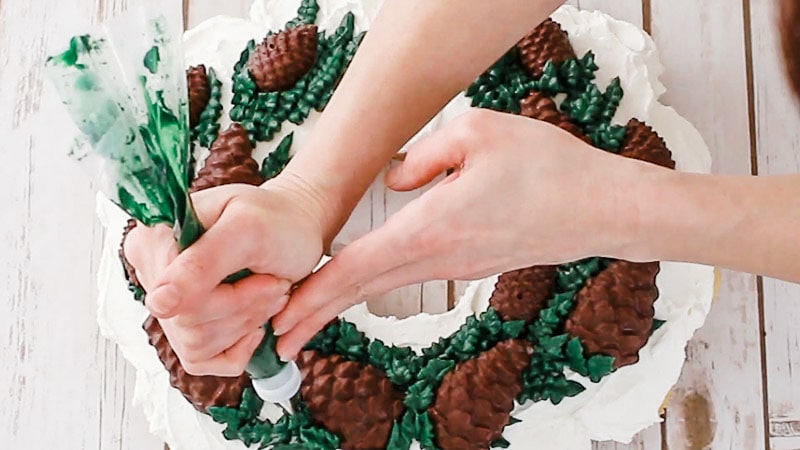
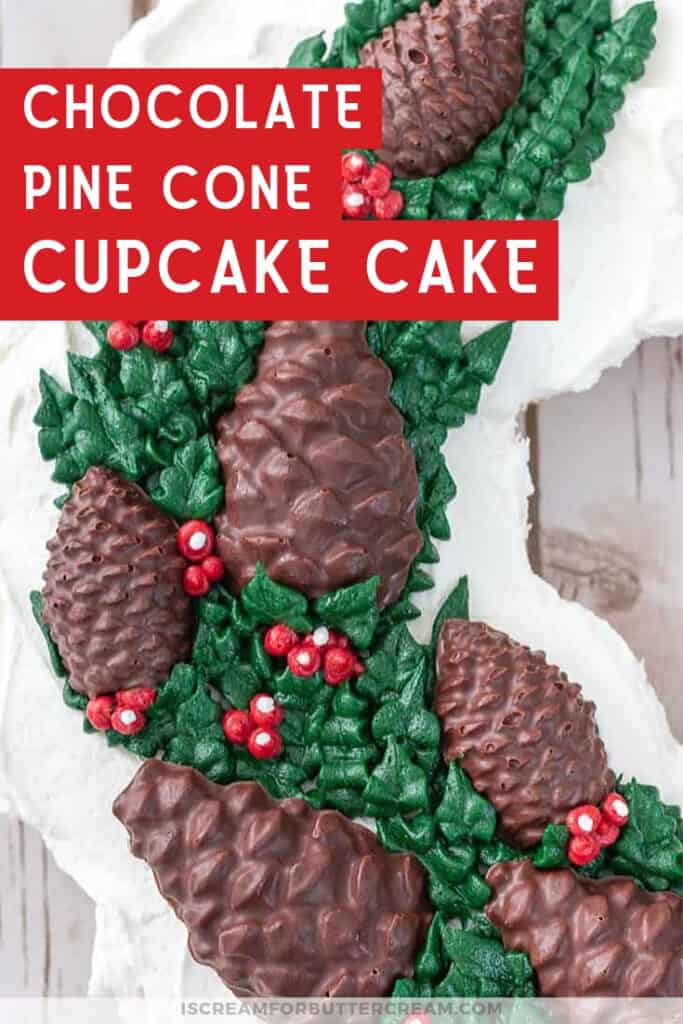
Now you’ll start piping. Add the leaf tip and fill your icing bag with green buttercream. Now here’s where the video comes in handy. There is a method to piping the leaves.
I wanted some long leaf sprigs, but I didn’t want to pipe a ton of tiny little sprigs with a small round tip, so I improvised. You’ll just hold your piping bag with the pointy ends of the leaf tip facing up and down.
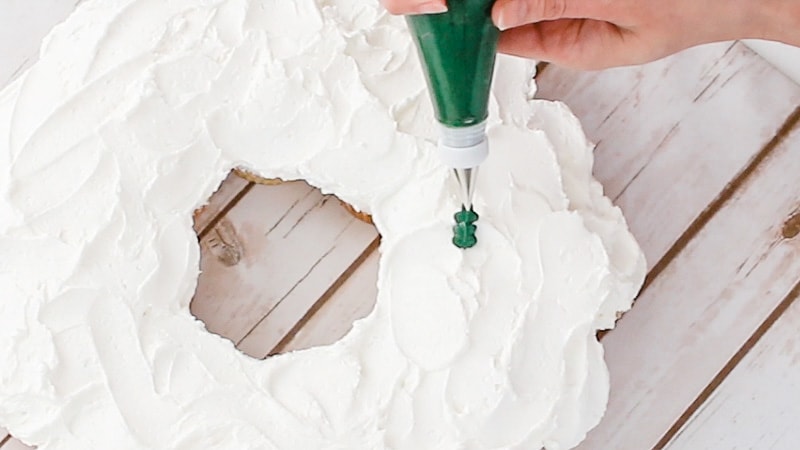
Squeeze and kind of jiggle your hand frontwards and backwards to make it have a ruffly look. You can do a combination of long leaves and short leaves.
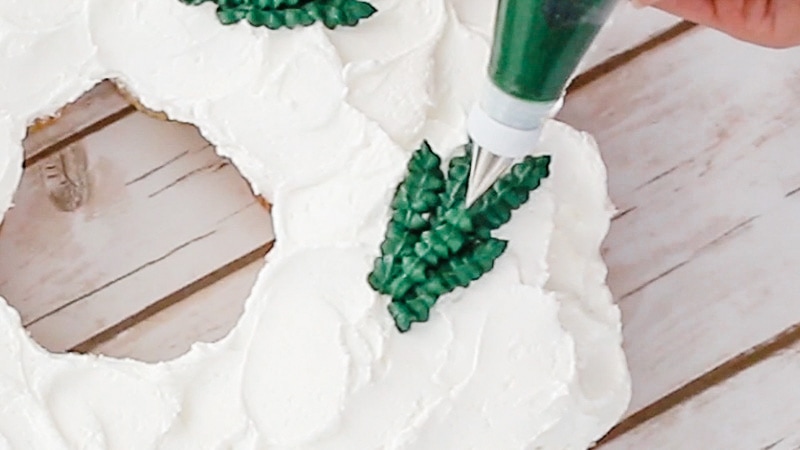
Make sure to start piping your leaves at the top of the wreath, so that when you add them to the bottom, those will overlap the ones you’ve already piped.
You’ll also want to make sure to pipe in just an upwards direction. You’ll want the leaves pointed up and/or away from the bottom of the cake. So you’ll end up turning your cake board around and adjusting it while you pipe.
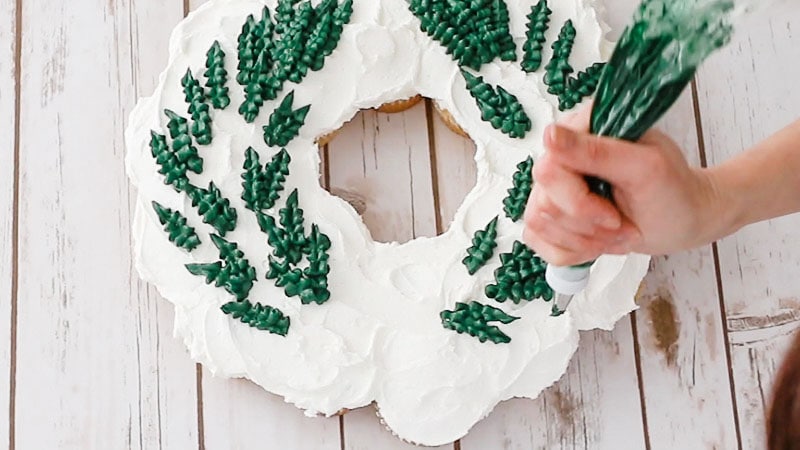
Just do a preliminary round of piped leaves. You don’t have to pipe all the leaves right now, just make a basic shape.
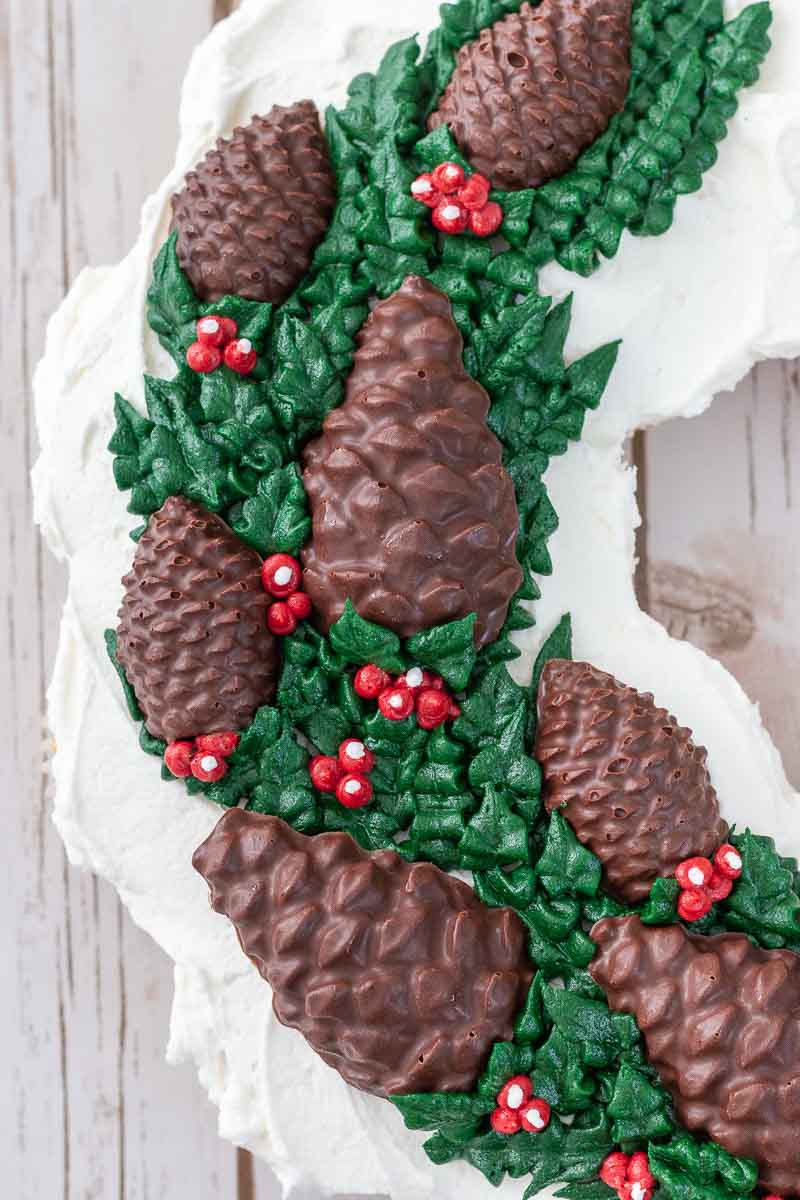
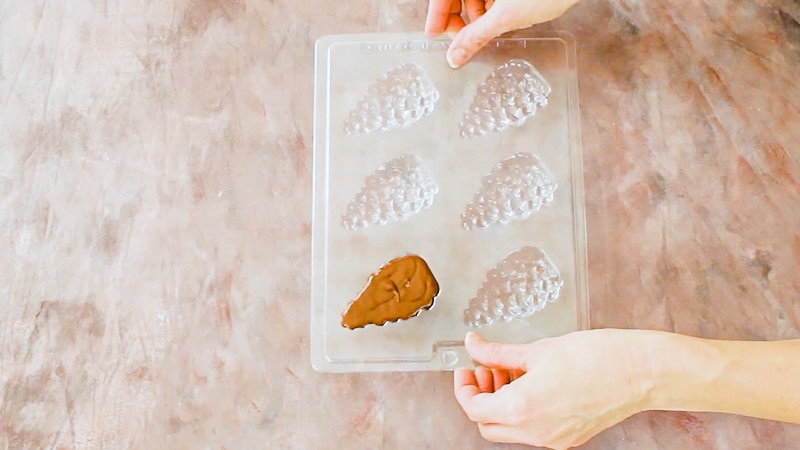
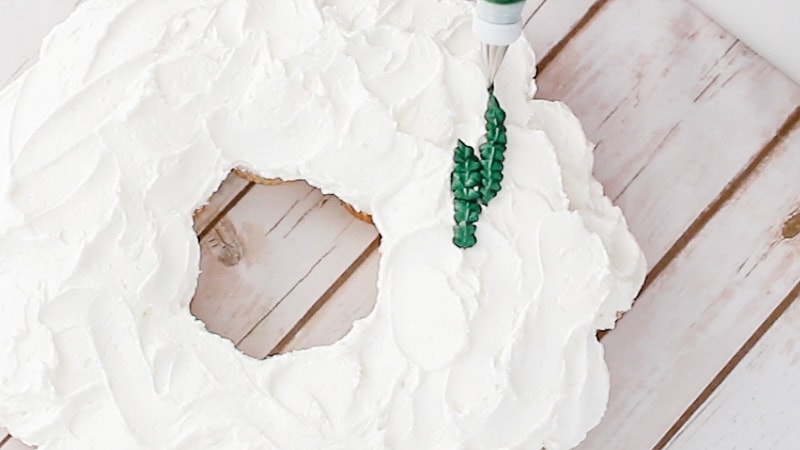
Next you’ll want to pop your chocolate pine cones out of their molds. The little ones are easier to get out, but you may need to push down on the larger molds a bit to get them to pop out. It’s also helpful to lay a towel down under it, so they don’t brake when they pop out.
Now you’ll want to just add those to your wreath. I added them so they sort of fanned out from the bottom middle and up around the sides.
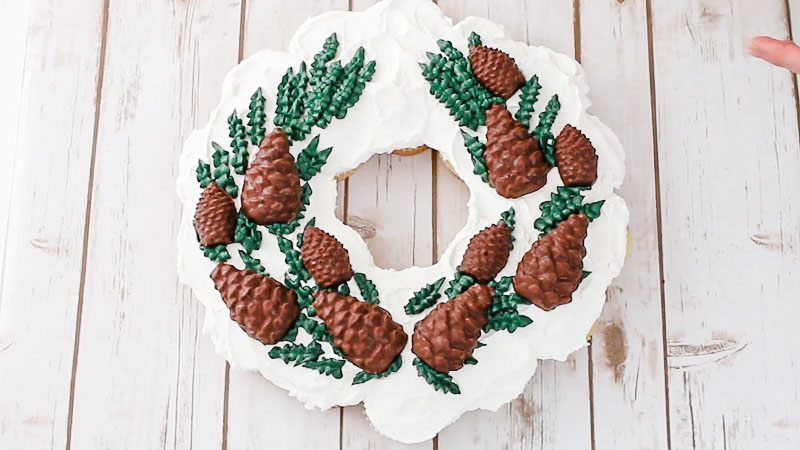
Now just go in and add in more of the piped leaves. Make sure you’re piping in the same direction…from the bottom of the wreath up. Fill in any spaces that need filling.
Next add your berries. I just tried to add them around the bottom of each pine cone and some other random places.
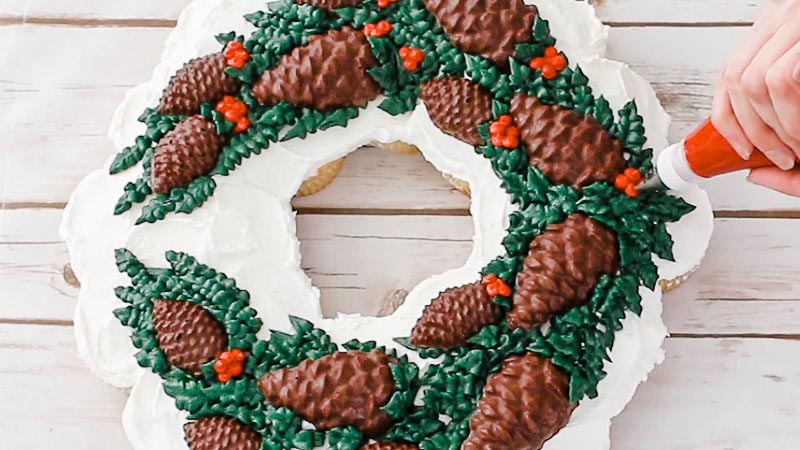
You can then add some tiny little white dots to the top of random berries. This just adds a little dimension.
Last, just go over and find any holes that need filling and fill them with either berries or leaves.
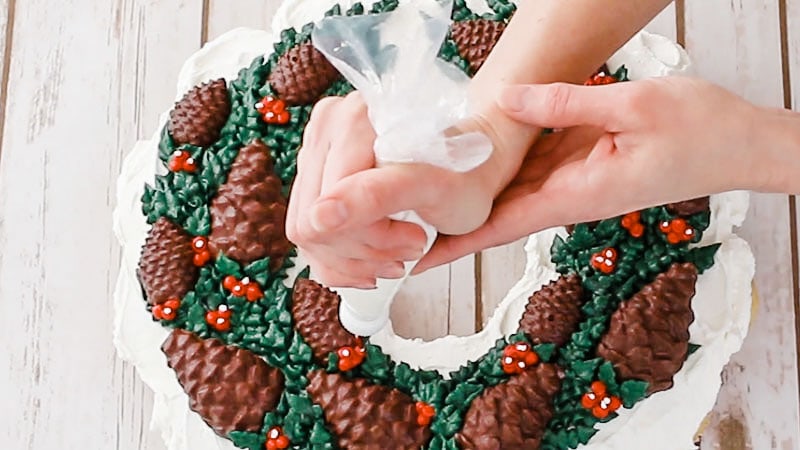
Now take a look and see what you think! Do you like how it turned out? Do you want to add some snow to it?
If so, just sift some confectioner’s sugar over the entire cake. You’ll want to hold the sifter pretty high up, so that you don’t get any larger clumps and so it just gives it a light dusting.
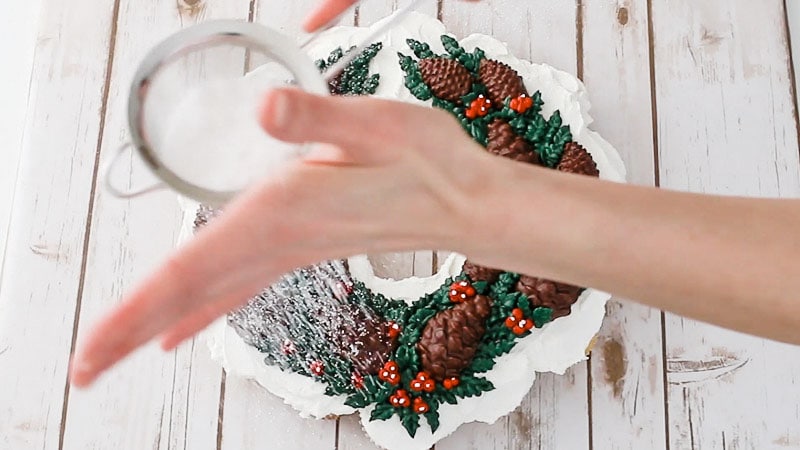
Like I said earlier, I can’t decide which look I like best!
VIDEO FOR THE CHOCOLATE PINE CONE WREATH CUPCAKE CAKE:
Ok, what do you think? It’s pretty right? And you can always change up the design to suit your style, but I really think this is perfect for Christmas.
Don’t Forget to Pin it for Later!
Other Christmas cakes you might like:
Sylvia Earle
Thank you I really like your site and how you have pics, to show us what your creations look like. I am going to try the wreath cake as soon as the pinecone molds arrive, I think I will add Rice Krispies to the chocolate. Maybe even some peanut butter,
Kara Jane
Oh I’m so glad you like the tutorial! I think the rice krispies idea is really clever! You might be careful when adding peanut butter though. If you add too much, you might have trouble getting them out of the molds. You’ve got to get them really good and frozen in order for them to pop out of those molds. Let me know how it all turns out!