Sometimes, you want to make decorations ahead of time to use on a cake later. It really lowers the stress of doing things last minute.
There are a few ways to keep premade fondant decorations soft and pliable for weeks, so they’re ready to use when you go to decorate your cake.
In this post, I talk about why you’d want to keep fondant decorations soft and why you might not want to. I’ll also go through how to do that and my answer some FAQs when working with fondant decorations.
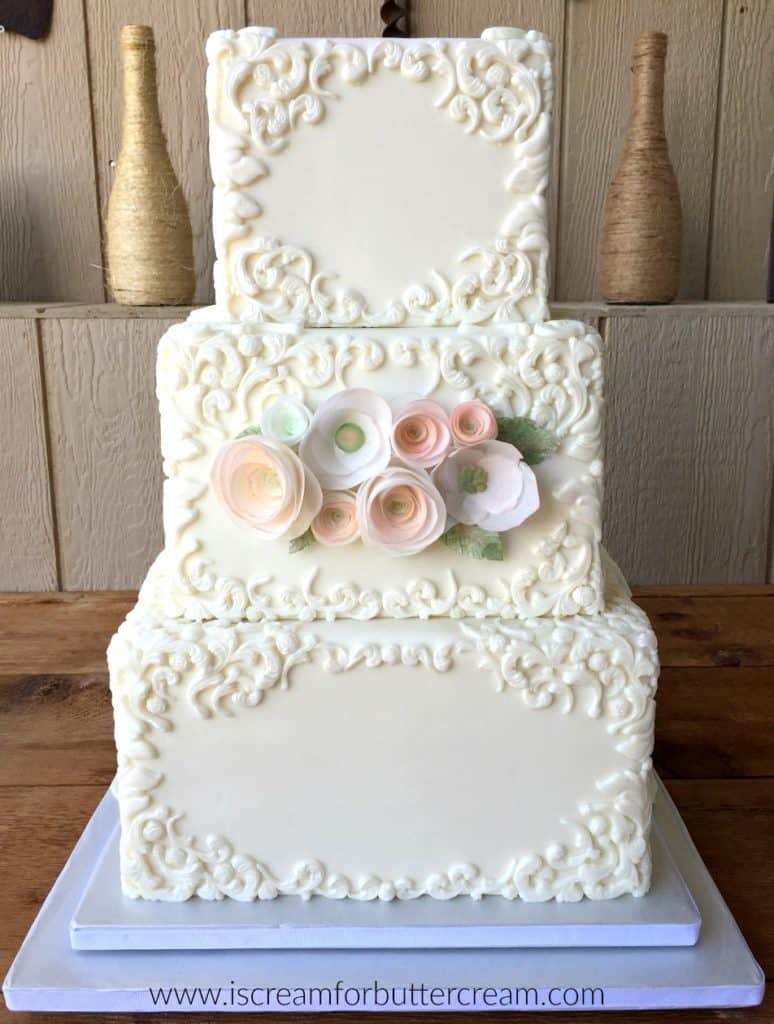
Through trial and error, I’ve figured out ways to make cake decorating easier. For example, awhile back, I was asked to make this cake that included tons of fondant scroll-work on it.
Jump to:
The problem:
Back when I was actively taking cake orders, I got an order for a large wedding cake with tons of scroll-work on it.
I worked a full-time day job and I knew that there was no way I’d be able to mold that many scrolls AND actually get them on the cake in the time I had to do the job.
As an Amazon Associate, I earn from qualifying purchases.
This cake was a two-sided cake, so it was very involved, plus they had ordered cupcakes to go along with it. I needed a plan.
I knew I would have to pre-make most of the fondant items and I had to come up with a way to keep premade fondant decorations soft and pliable for later, because I wouldn’t be able to work with them if they were hardened. So I set out to do some experiments.
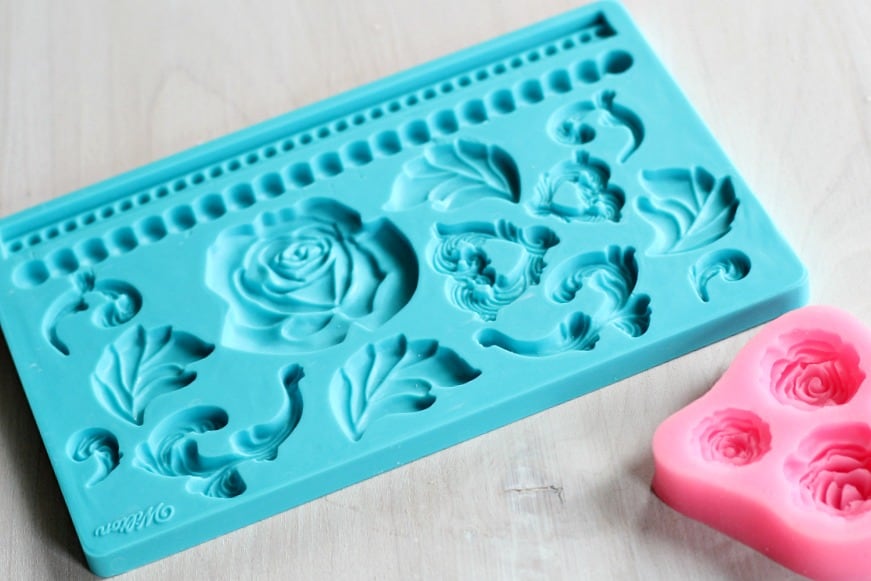
Below are the molds I used to make most of my scrolls and my small roses. You can find a similar scroll mold here. (The Wilton one I used has apparently been discontinued.) You can find the rose mold here.
The experiment:
I thought to use modeling chocolate because it doesn’t harden as much as fondant, but the color of the modeling chocolate was a bit whiter than my fondant and they needed to be the same color. Modeling chocolate also didn’t stay as pliable as I needed it to.
Next I tried creating some fondant scrolls and putting them in a plastic container layered between wax paper and then sealing the container. Well, that didn’t work…they still hardened up too much.
I even tried putting them into ziplock bags and then into a container and that STILL didn’t do the trick. I needed something that would totally seal out any air.
What worked:
Then I had a moment of clarity. My family knows I have a love affair with press-n-seal. I use it for practically everything…to wrapping my cake layers to freeze them, to covering bowls of icing or ganache, to just about anything.
In fact, my youngest step-son said the best thing he could think to get me for Christmas was an econo-sized box of Press-n-Seal.
By the way, you can get my tips for freezing cakes and cupcakes here. It’ll pretty much prove to you how much I love that stuff.
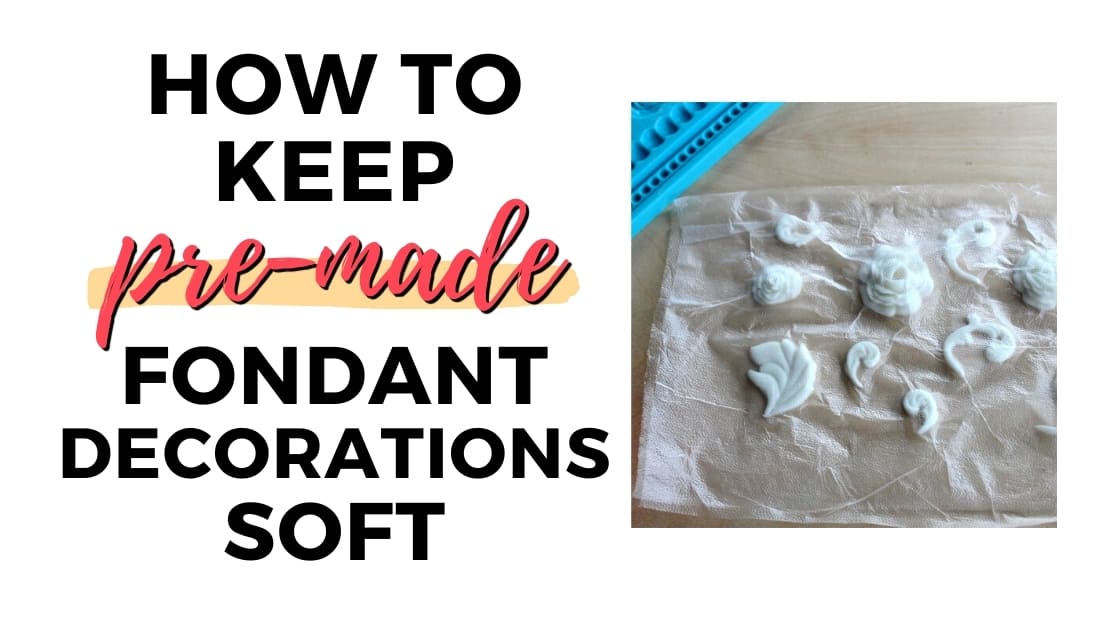
What finally worked was I pulled out a strip of press-n-seal and laid it on the table, sticky side up.

I made enough scrolls to cover half of the rectangle and set them on top of the press-n-seal. I made sure to leave space between each item and enough space at the edges of the press-n-seal.
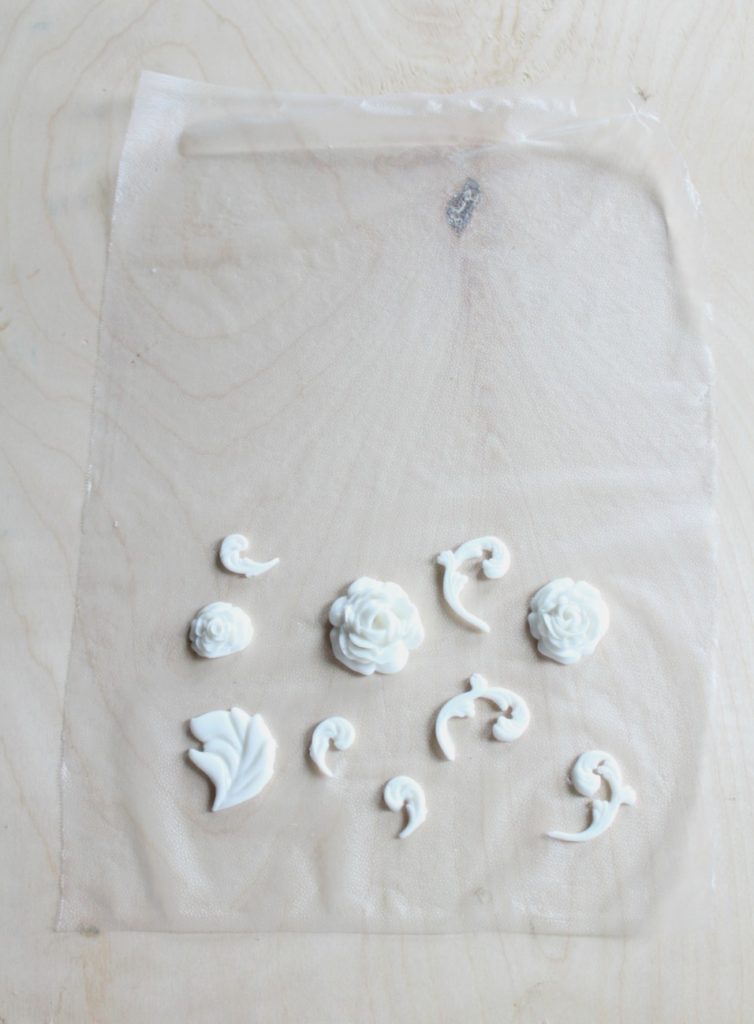
Then I took the other end of the rectangle and folded it over the fondant items.

I took my finger and pressed the top layer of press-n-seal into the bottom layer to stick them together. I did this first between all of the fondant items and then I sealed the edges.
This completely seals off any air from getting to the fondant pieces. You want to be careful not to smash them when you’re sealing around them. The press-n-seal forms a sort of bubble around each piece.

I picked up these little packets and laid them in layers into a plastic container. You can fill up your container with these (as long as they aren’t large, heavy pieces) and then snap a lid on it.
Keep these out of the sun and in a cool area of your house. I have a small closet I use to store my fondant in. You can even freeze them and they’ll be fine.

This totally worked for me! I made them weeks ahead of time and they stayed exactly the same as when I had put them into the container!
The day I put this cake together, all I had to do was pull apart the press-n-seal and attach the scrolls to the cake with a little water. It worked beautifully.

Oh and in case you want to see the back…here ya go…
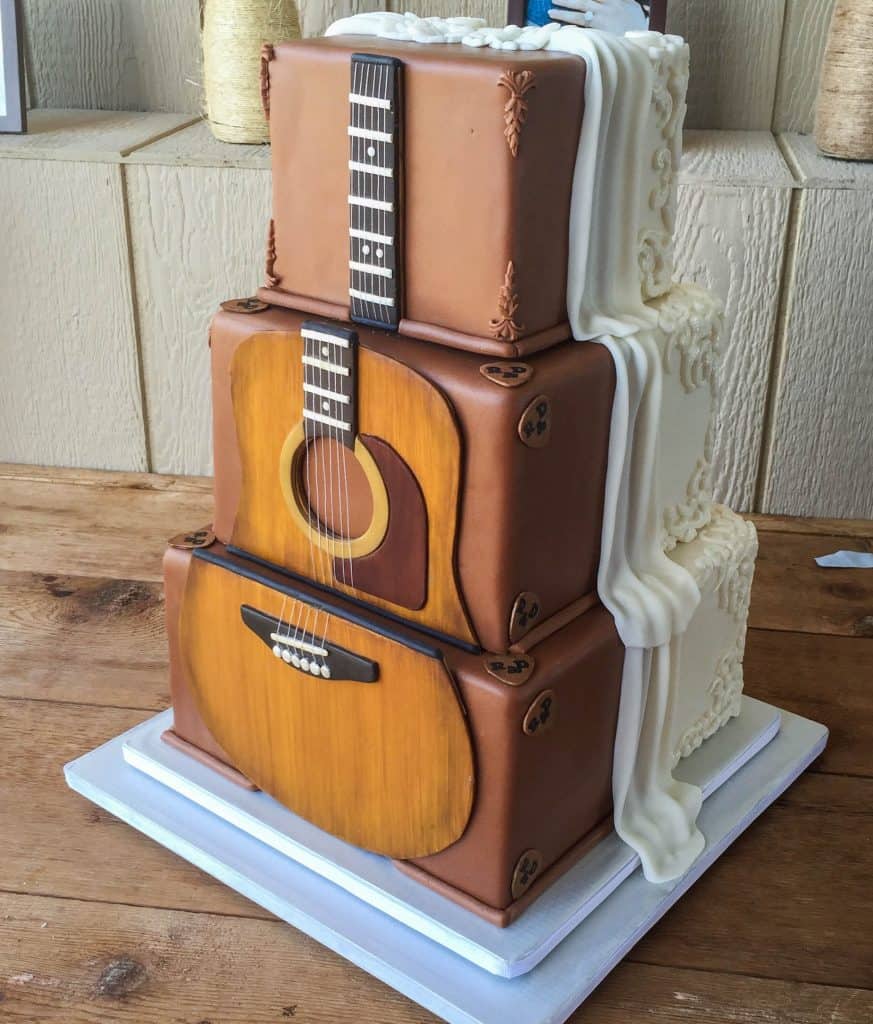
Now, I won’t say this method is perfect for every situation, but it did work for me. If you have decorative items that aren’t textured, this may not work for you.
When you seal around each item, it sort of forms a little bubble around it to keep it safe, but if the press-n-seal gets a little wrinkled under it, you might get a little texture from the press-n-seal imprinted on your items.
If your items are textured and don’t need to be super smooth, it’ll work great for you.
The thing about this method is that it doesn’t just work for scroll work. It can work for a lot of different applications.
You might need to add a plaque to your cake, but you don’t want to make it on decorating day. If you’ve got a round cake, that plaque is going to have to be curved around it.
If it dries flat, well it just won’t look right when you attach it to the cake. You could just dry it on a foam cake dummy the same size of the cake you’ll be making, but what if you don’t have one handy?
This tip might be your best option. Make the plaque, seal it in a press-n-seal pocket to keep it pliable. If you need it to harden up, just slightly so it doesn’t get misshapen when you attach it to your cake, just let it sit out for a bit.
Now let’s go into some FAQs…
What are ways to keep fondant decorations soft?
- You can pre-make fondant decorations and then seal them in press-n-seal wrap as described above.
- Fondant decorations can also be stored in an air tight container to keep them soft, however smaller and thinner decorations may still harden up even in a container. (It’s best to seal them in plastic wrap first as described earlier.)
- You can also store fondant decor in the freezer. It will become firm when frozen, but will soften once it’s defrosted.
How do I keep fondant decorations from drying out?
- Make absolutely sure that you don’t leave them out to air-dry. That is what causes your fondant to dry out and become hard.
- You must keep your decorations in an airtight container.
How do you soften fondant decorations if they’ve gone hard?
You can try microwaving the fondant at 50% and then kneading it between microwaving intervals, but there really is no fail-proof way to soften it back up.
It may never be super smooth after it’s hardened. Just know that if you’re trying to soften small fondant decorations you made, it’s risky to microwave them as fondant melts very quickly and could ruin your design.
Can I freeze fondant decorations to keep them soft?
You absolutely can freeze fondant decorations. You want to make sure that they are well sealed and in an airtight container and you can freeze them for several months.
You can even add your decor to freezer bags and freeze them flat if you have the space. Once they defrost, they’ll be soft and pliable as long as you didn’t let the fondant harden before you froze the decorations.
Also note that when you defrost the fondant decorations, there will be some amount of condensation. So, if you have very intricate designs that are darkly colored, you could potentially have some discoloration.
The most important thing is that you do not touch the decorations while the have condensation on them. That will mess up the texture.
The most important tip:
If you’re making a cake for a very special occasion and you can’t afford for anything to go wrong, then you really want to test out a few of the options above and see what works.
If you want to go with the freezing method, then go ahead and make a small test fondant decoration, freeze it and then defrost it to see how it goes. If it works, then you know what you can do.
If it doesn’t work, then you know that you’ll need to do a little more experimenting, but it sure beats figuring out something didn’t work right when you’re in the middle of decorating a cake.
I really hope these tips help you out in a future project and that you’ll be able to do things in advance. I LOVE saving myself stress and I hope these tips save you stress as well.
Other posts you might like:
- Tips for Making Your First Fondant Cake
- How to Store a Cake
- Common Cake Decorating Terms and What they Mean
Don’t Forget to Pin it for Later!

Karen Marie DeRose
So happy to find your information. I have always enjoyed baking, especially after retirement as a nurse, when it developed into a small business. My “specialty” became cookies decorated for any special occasion, using Royal Icing.
I have volunteered to make 150 cookies for a wedding in July. The bride loves sunflowers and they will be used on the tables. The wedding is in Rhode Island, and I live in Virginia, so they will have to be mailed. I have finally made a Fondant sunflower ? I like, and the design calls for 8 flowers per cookie. Since this is my first venture into Fondant, and since I’m nearing 80, I must get started, but wondering how long the Fondant flowers will last.
Your method of using Press n’Seal (which I also love) seems doable. Thank you so much!
Kara Jane
Hi Karen, I’m so glad you found it helpful! Just remember, if you want those sunflowers to harden up, then you don’t need to wrap them…just leave them on a flat surface in a dark area and they’ll dry and harden. But, if you do want them to remain soft then you can of course do the press-n-seal trick. You could also set them on a flat surface like a large cake board and then cover them with the press-n-seal and then seal around each flower (make a pocket for each one). That would be another option. Also, fondant will last a good while. If you’ll be keeping them pliable (not drying them out), just pay attention to the expiration date on the fondant you’re using and go by that. If you will be drying them out and letting them harden, then they can last a lot longer. I do have another blogger friend who keeps her fondant decorations in the freezer and that helps as well. Ok, I hope I haven’t overwhelmed you will even more to think about! I have to say I’m always impressed with cookie decorators…it’s such intricate work! I’d love to know how it all turns out!
Jen
Hi I’m doing a silhouette cake but my friend wants buttercream frosting not fondant. Would you be able to tell me if gumpaste decorations will melt on buttercream. Thanks
Kara Jane
Hi Jen, you can put fondant or gumpaste on buttercream. Fondant will get a little softer, but shouldn’t entirely melt. Gumpaste will just get harder than fondant would. I hope this helps!
markgates
thanks for sharing this post, I highly appreciate your work and passions
Kara Jane
Thank you! ?
Heather
This tip is going to save me next week! I have to make decorations on Wednesday for a cake that won’t be served until Saturday. I don’t want them to get hard so they can still take shape to the cake. One question here, will storing them in the press – n – seal and placing in air tight container make them sweat or get sticky?
Thank you so much!
Kara Jane
Hey Heather, I didn’t notice any sweating or stickiness. I think if you were to put them in a hot room, they would or if you froze them and then defrosted them they might condensate. I didn’t have a problem with them sweating. If it does though, just let it set for a bit or just lay a paper towel over them to soak up anything, but I think it’ll be fine. I made a ton of those scrolls and they did just fine. You just have to be careful getting them out of the press n seal. I hope everything goes really well!
ziara
hey, i making a peacock cake for a school project soon and i needed to make the feathers ahead and keep them soft. This really helped! Thanks so much!
Kara Jane
Oh yay! I’m so glad it helped and thanks so much for letting me know!
Amanda
Thank you so much for this tip! I am separated from my six year old twins right now because of Covid-19. They requested very specific cupcakes for our “Back Together Again” party when this is all over. With things changing daily around us, we can’t possibly plan when our little party will be. Thanks to you, I can be prepared without compromising their little visions of what Mommy will make them. God bless you and your family.
Kara Jane
Amanda that is so good to hear! I’m so glad I was able to help and I hope you and your twins have a fantastic ‘back together again’ party!
Jolaine Figueroa
This is amazing… would love a tutorial and what type of structural support do you use for the tiers?
Kara Jane
Oh thanks! Yes, I definitely need to put that cake on my tutorial list to write about! On another note, I do actually have a post on how to stack a cake where I list out all the materials I like to use. You can see that one here: https://iscreamforbuttercream.com/how-to-stack-a-cake/
Hope that helps a little!
Valerie
Thank you so much for the tip on press n seal. I need to make lego bricks for my grandsons cake and I was wondering how I was going to be able to keep them from getting hard, thank you, thank you, thank you.
Kara Jane
Oh you’re welcome Valerie! I hope everything works out! 🙂
Toni
Thank you so much on the tips you give. I would be so interested in a tutorial on a two sided cake. The one you did was really cool and different. I really liked it!
Kara Jane
Hi Toni, thanks so much!
Sara
Thank you for sharing your tips, tricks and talents. I was working on a large cake and had just finished the crumb coat, when I received a call my mom was unresponsive and an ambulance had been called. EMS weren’t able to revive her. My world stopped. My husband put a coat of frosting on the cake and delivered it without decoration. I was of no use. I totally understand what you went through.
God Bless
Kara Jane
Oh Sara, that’s awful! Glad your husband was there to at least do something with the cake though. Life just hits you out of nowhere, doesn’t it? My Mom went sort of the same way. She was here one day and then just gone like that. It’s so hard to wrap your head around, much less deal with other stuff going on. Thanks for the comment!
Ludette
Hey thanks so much. I’m extremely stressing right now cos I’ve to make 100 fondant topped cookies and I just wanna make the cut outs ahead of time. You’re a life saver Kara. God bless you
Kara
I definitely know how that feels! I hope this method works well for you. Best of luck with all the cookies!