
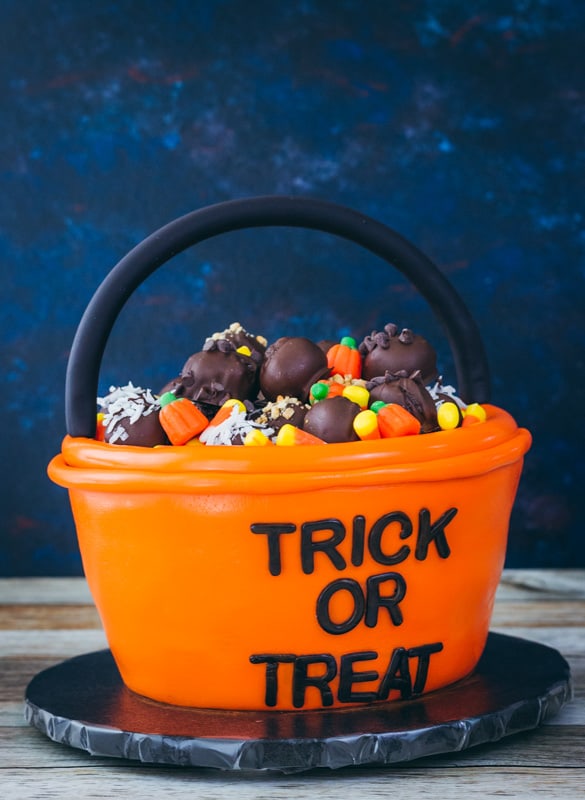
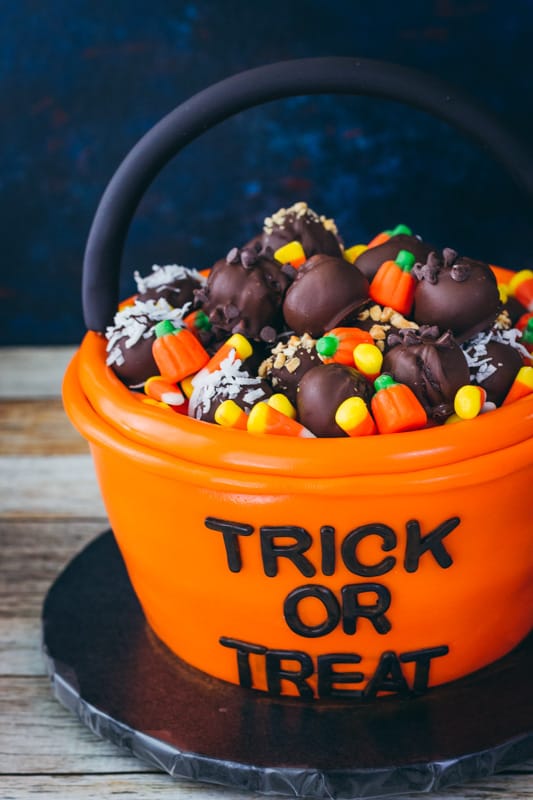
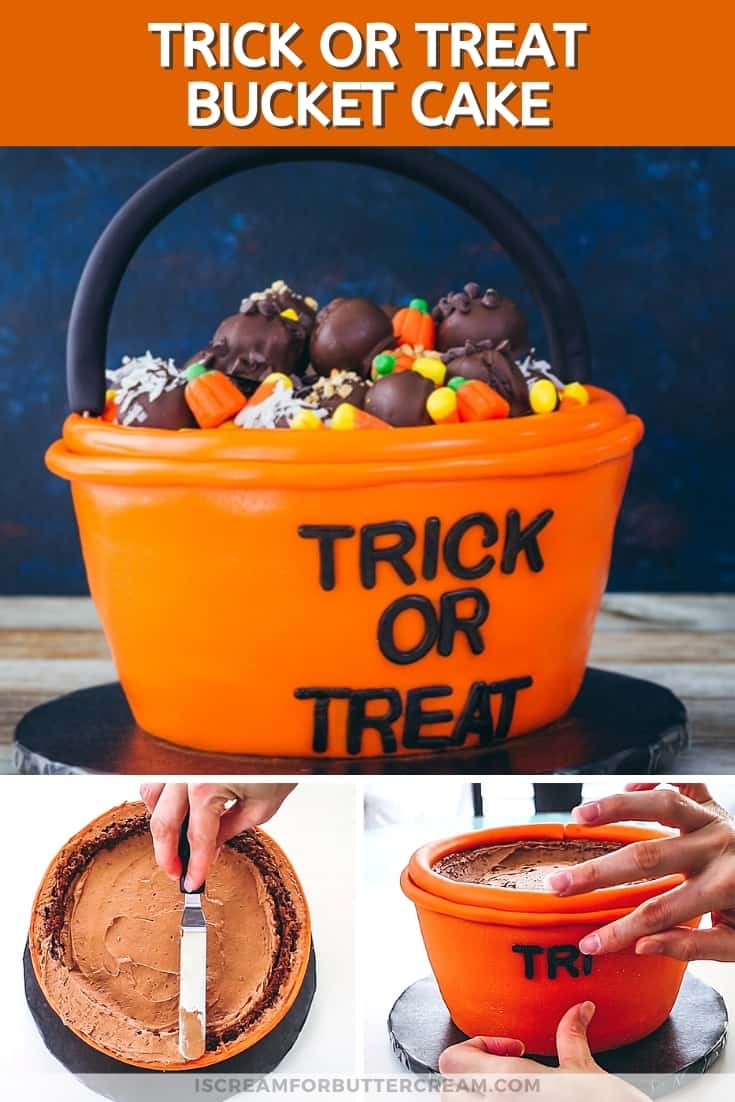
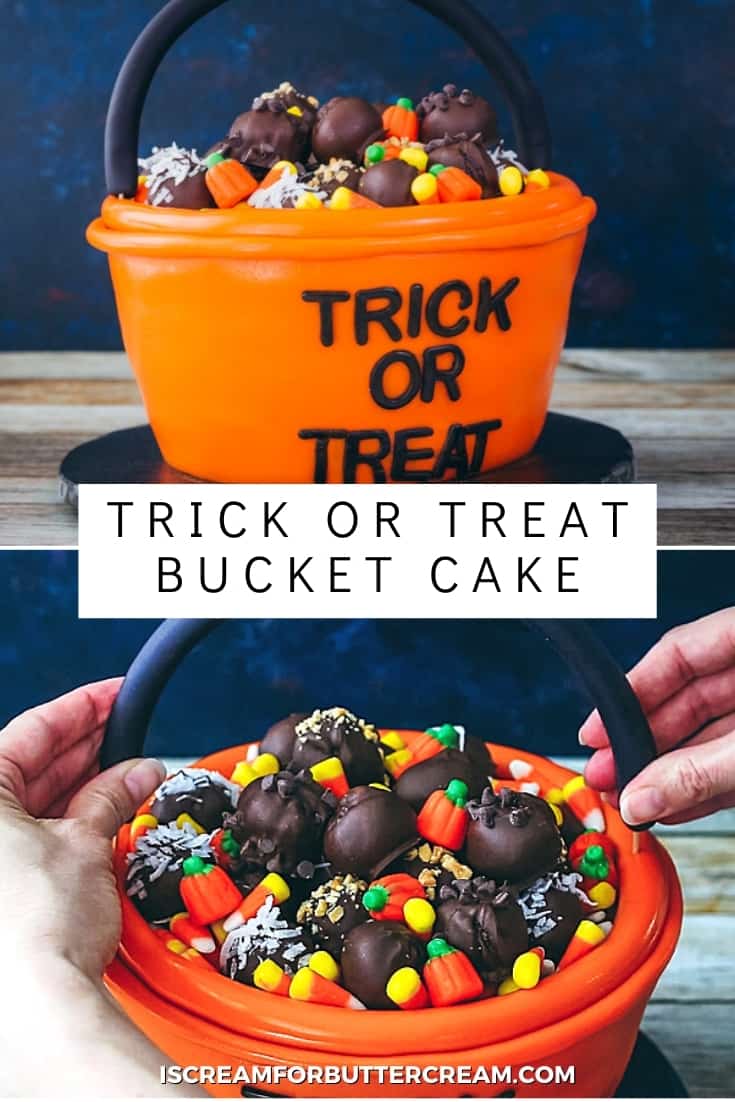
This trick or treat cake is such a cute Halloween cake idea. First, there’s the chocolate trick or treat bucket cake, then it’s all topped off with cake balls and candy corn. This step-by-step cake tutorial shows you all the details on how to make this super cute Halloween cake.
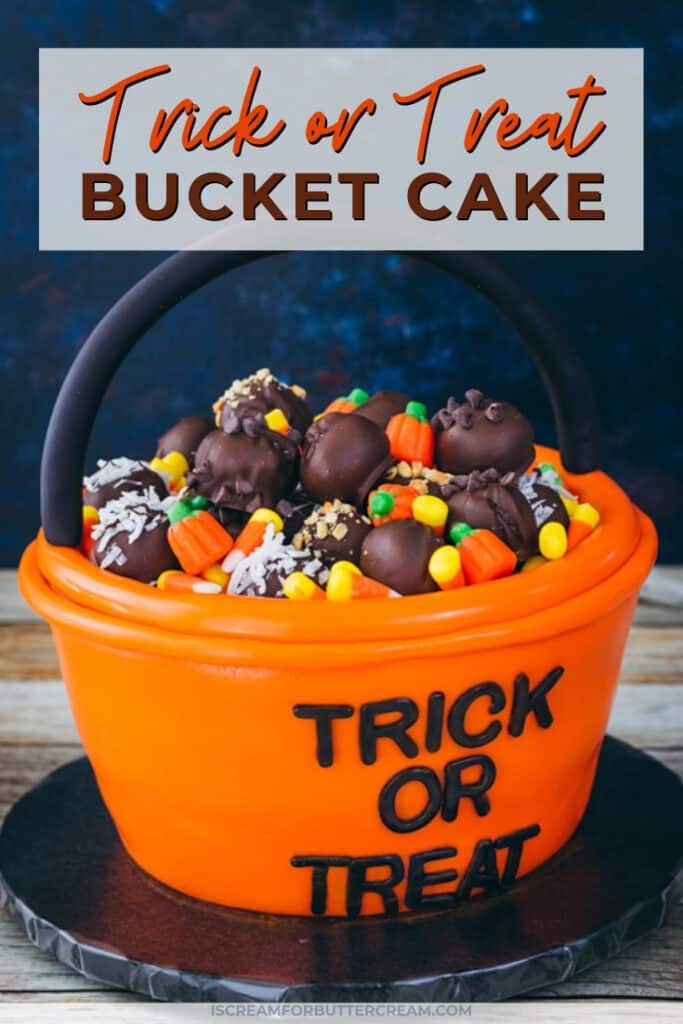
This cake is so fun to make for Halloween and kids are gonna love it.
This cake is also a really easy way to get started working with fondant because you’re just covering the sides of the cake and it really doesn’t have to be perfect either.
You’ll be doing a little cake carving with this one, but not too much. Make sure you keep the cake cut-offs because you won’t be wasting them. You’ll actually use them to make cake balls with and you’ll add them to the top of the cake.
By the way, if you need some tips for carving cake, I’ve got ya covered here.

You’ll probably want to add in a bit of Halloween candy as well to give it an ‘overflowing with candy’ look.
I also think the added handle adds a finishing touch to it, but you’ll definitely want to do this a couple days ahead of time, so it has plenty of time to dry and firm up.

Alright, let’s get to the tutorial now. And don’t forget to check out the video at the end of the written tutorial that will show all the details as well.
As an Amazon Associate, I earn from qualifying purchases.
SUPPLIES NEEDED TO MAKE THE TRICK OR TREAT BUCKET CAKE:
- Cake Base that’s 10 or 12 inches round (Make sure it’s thick and firm enough to hold the weight of the cake…don’t use a thin, flimsy board. I also covered my board with black wrapping paper and then with clear contact paper. You can see how to do that here.)
- 6″ cake round and 8″ cake round
- 3 cake layers
- Buttercream or Ganache
- Icing spatula
- Knife for carving
- Buttercream smoother
- Orange and black fondant
- Letter cutters
- Large fondant roller
- Fondant smoother
- Exacto knife
- Almond bark (for covering the cake balls)
- Misc. toppings for cake balls like mini chocolate chips, melted white chocolate, shredded coconut, chopped peanuts etc.
- Halloween candy (I used candy corn and candy pumpkins)
- Toothpicks
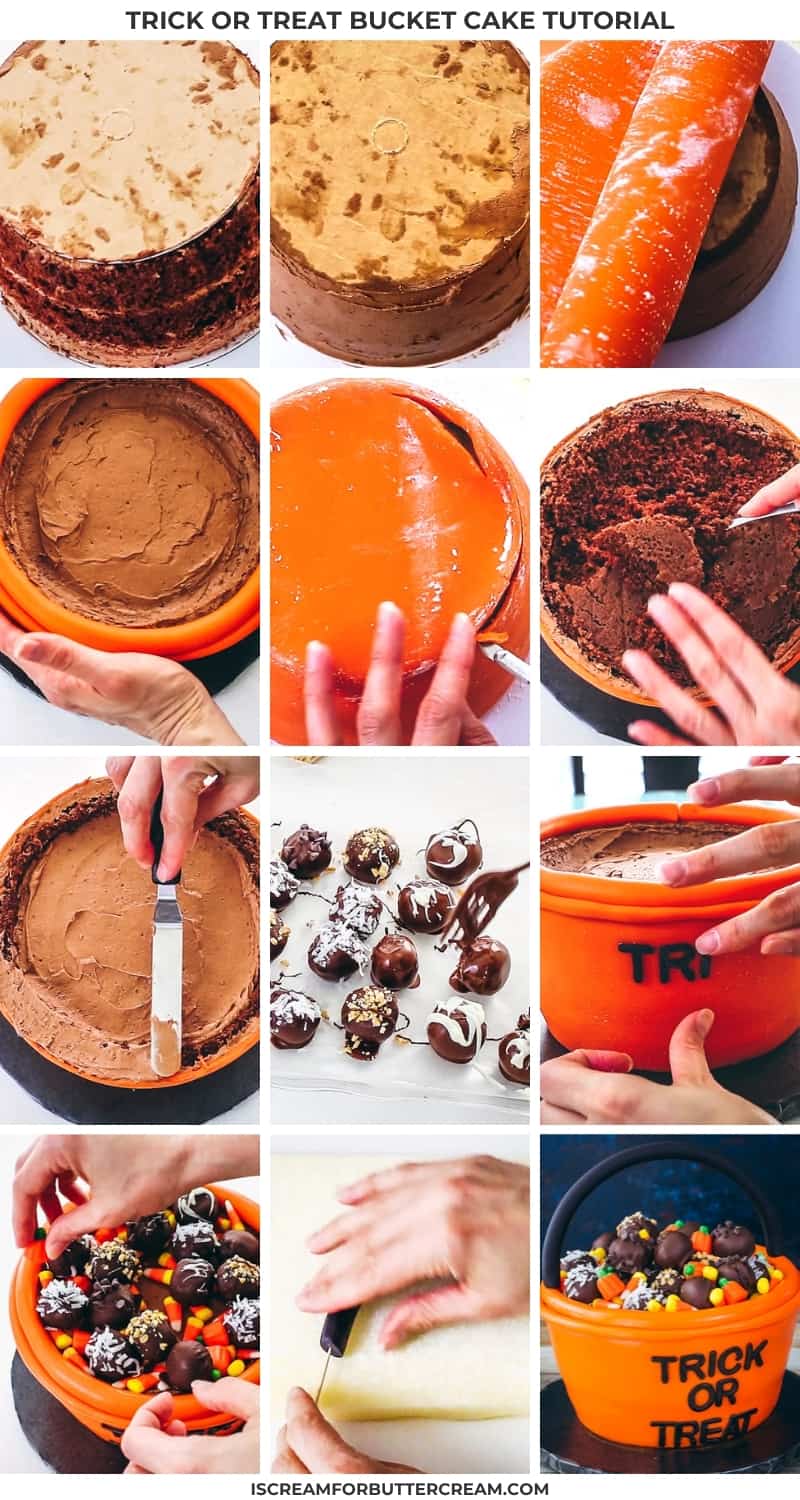
MAKING THE BUCKET HANDLE:
The very first thing you want to do is to make the bucket handle. It needs time to dry completely and firm up.
You can use gumpaste or fondant for the handle, but it’s better if you can use gumpaste, or at least add in some tylose powder to fondant, so it will firm up more.
So, my point is to make the handle several days ahead of time. If you’re traveling with this cake, I would wait to add the handle to it until you’re at the event.
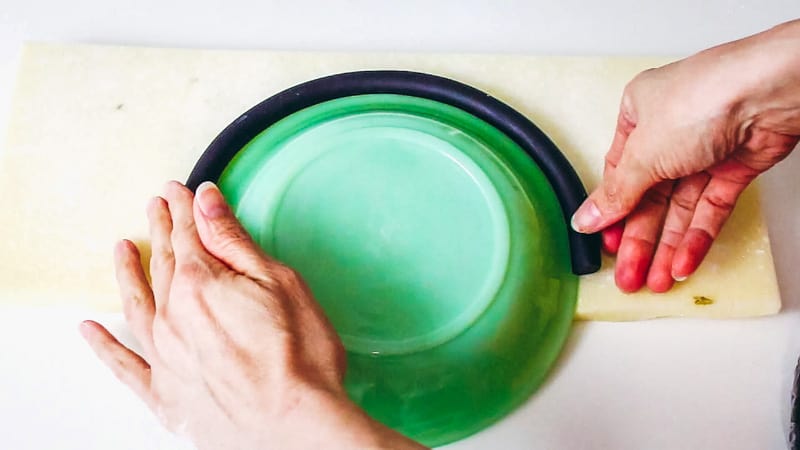
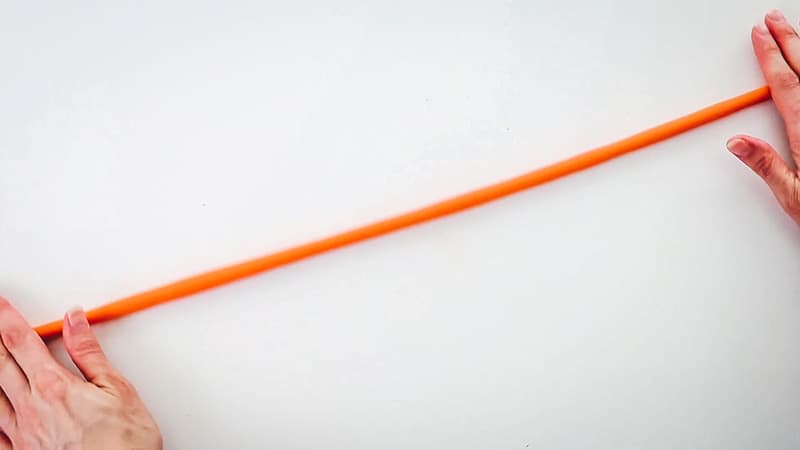
Take your black fondant or gumpaste and roll it into a log. Cut the ends straight across.
Shape it around a small plate, so it has a good curve to it. Make sure that the space between the two ends is about 8″ because that’s about how wide the top of the bucket cake will be.
Oh and it’s handy if you have a piece of foam to dry it on. It dries throughout better that way.
Once you’ve got the fondant shaped, you can add in some toothpicks to the ends.
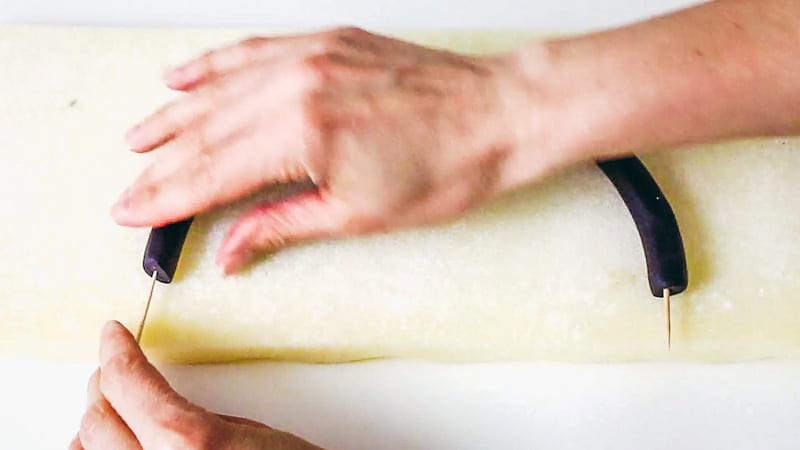
Now just leave it on the foam for a couple days to firm up and dry very very well.
MAKING THE TRICK OR TREAT BUCKET CAKE:
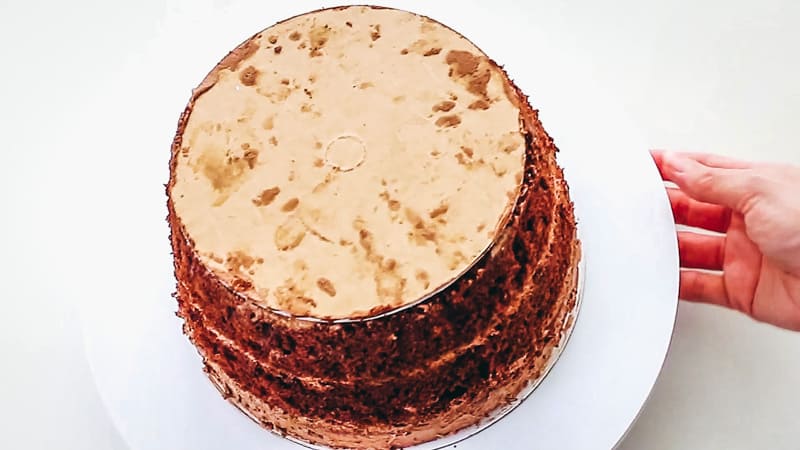
Set down an 8″ cake round and stack and fill three layers of 8″ cakes on it.
Add a small amount of buttercream to the top.
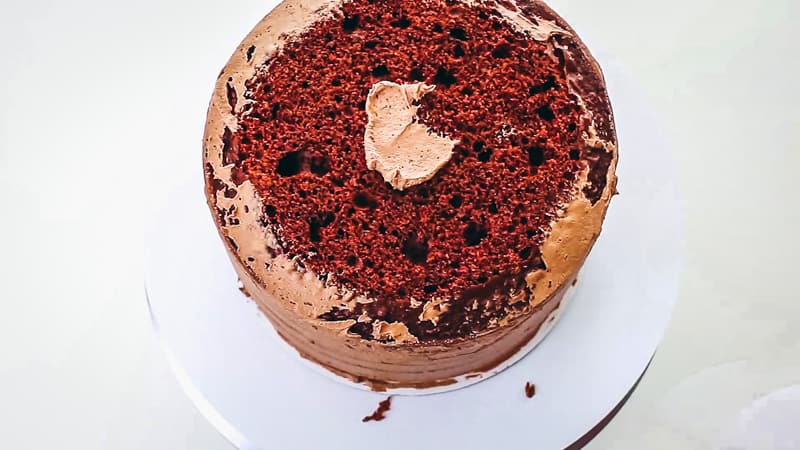
Set a 6″ cake round on top.
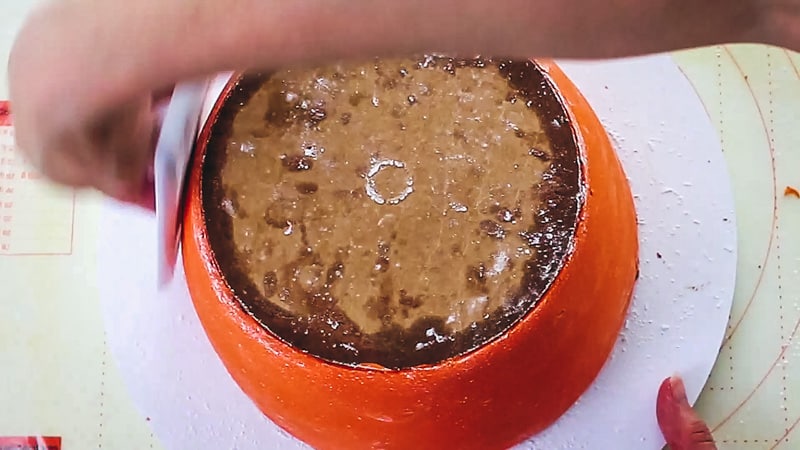
Now you’ll take your large knife and carve off the cake at an angle from the smaller board on top (6″ board) to the larger board on the bottom (the 8″ board)

It’s going to look like this:
Make sure to keep the cake scraps! You’ll use them later.
Now set the cake in the fridge to chill for just a bit.
I don’t like to chill my cakes very much while decorating. The reasons are many, but if you’re interested in why and the problems it could cause, you can check out that post here.
Anyway, you do however want to chill this one for just a bit. Maybe 20-30 minutes. The reason is that you’ve just carved this cake and it’s gonna get real crumbly on you when you go to ice it if you don’t chill it just a bit.
Now cover you cake in buttercream, or you could use ganache as well. I prefer ganache under fondant, but I didn’t have enough chocolate to make it so I went with buttercream.
Remember you’re only covering the sides here. Leave the cake board on the top and one on the bottom.
Do one layer, then another thicker layer and smooth it really well with a buttercream smoother.
Right now, you’re looking at the bucket cake upside down. The small (bottom end) is up. That’s what you want at this point. You’ll flip it over in a bit.
Chill your cake while you roll out fondant. You don’t want to chill it long, just for about 20 minutes or so, so that it’ll firm up a bit for the fondant.
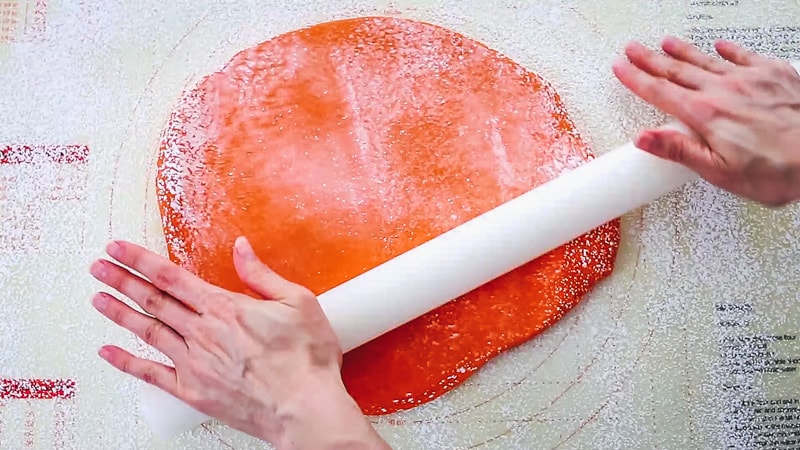
Now just roll out your orange fondant.
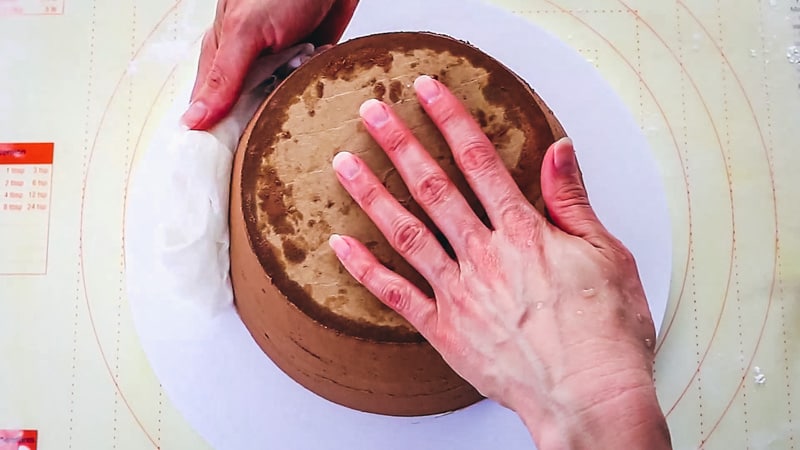
Dampen a paper towel and lightly press onto your cake. This just adds a little moisture so that the fondant will stick to your cake.
Add your fondant over the cake. Leave that cake board on and just lay the fondant over the whole thing.
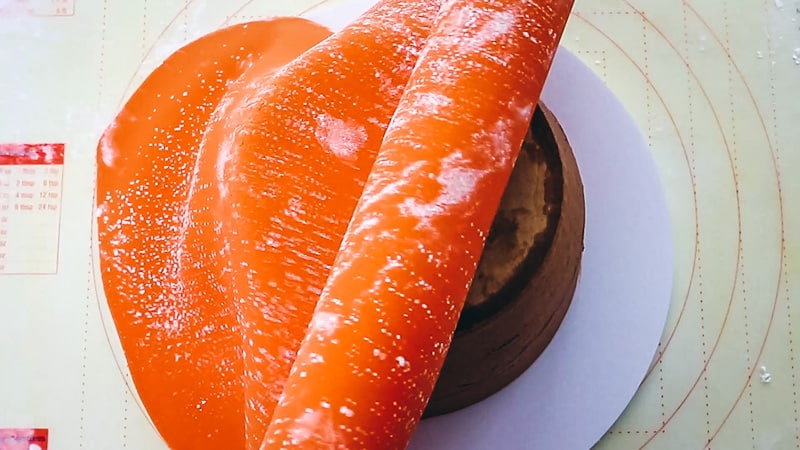
Smooth it around the sides of the cake with your hands first.
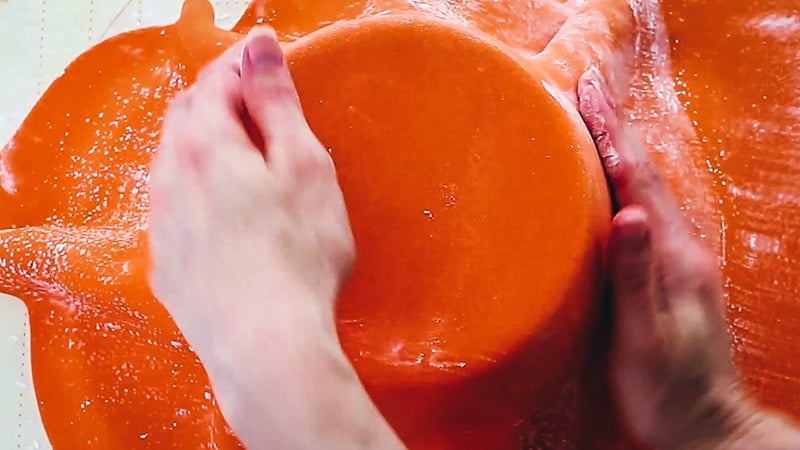
Then cut off the excess fondant.
Now take your fondant smoother and smooth around the cake very well.
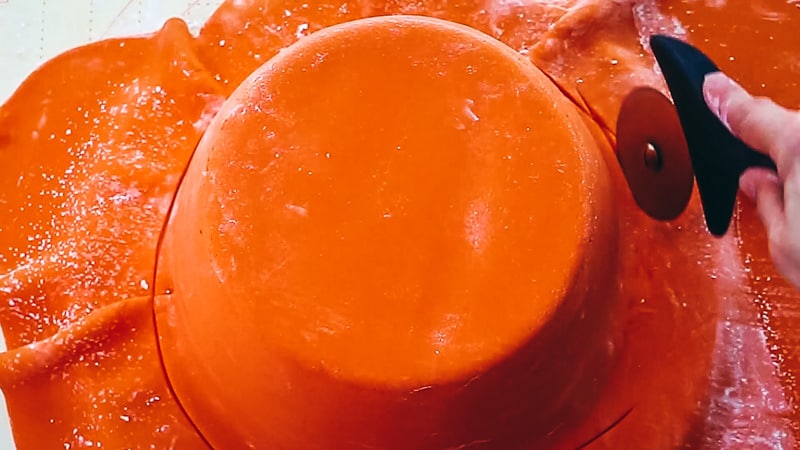
Cut off the excess around the bottom. It’s helpful to use a pizza cutter for this.
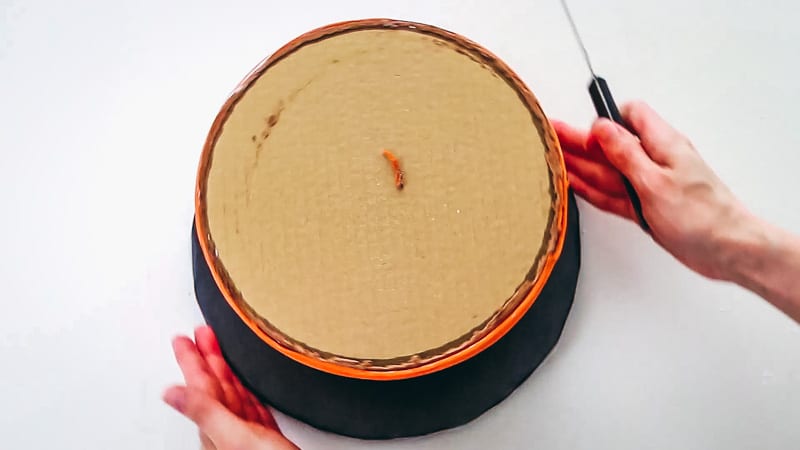
Now take your exacto knife or some other sharp knife and cut off the top around that 6″ cake board.
Keep going around the top, trimming off any excess fondant as you go.
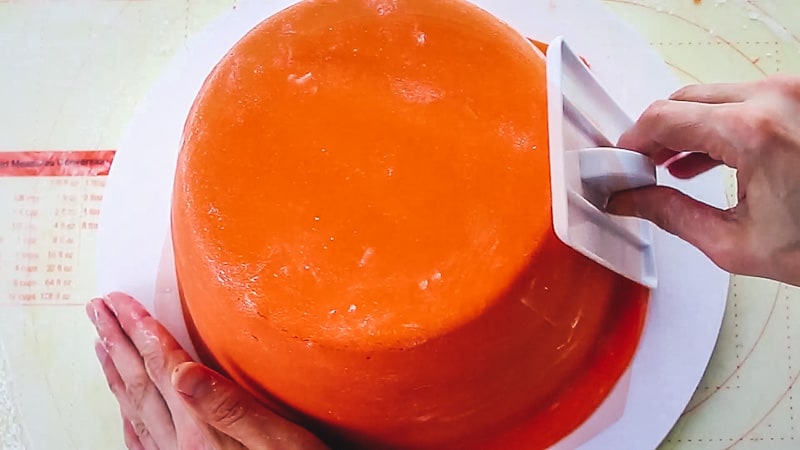
Take your fondant smoother and smooth the fondant around the sides of the cake again.
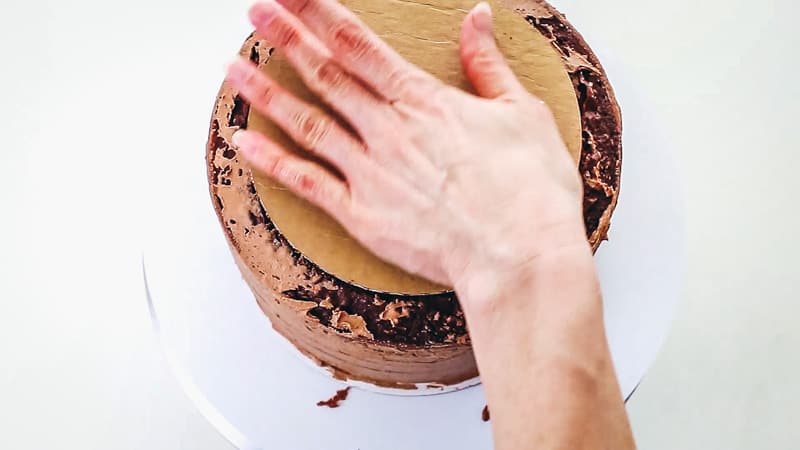
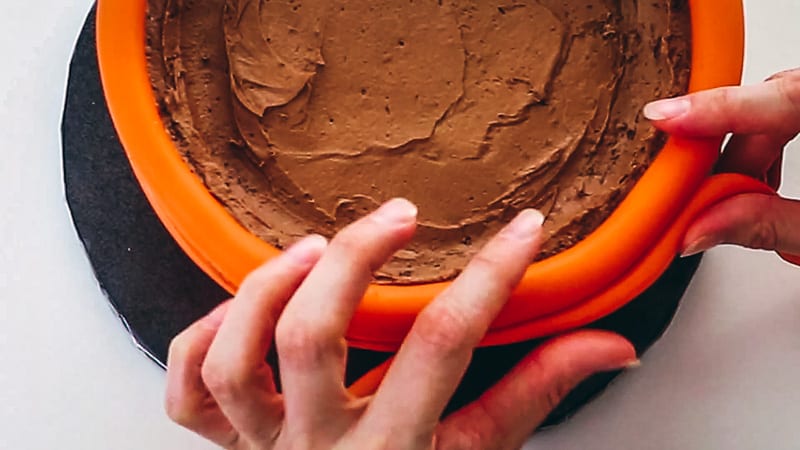
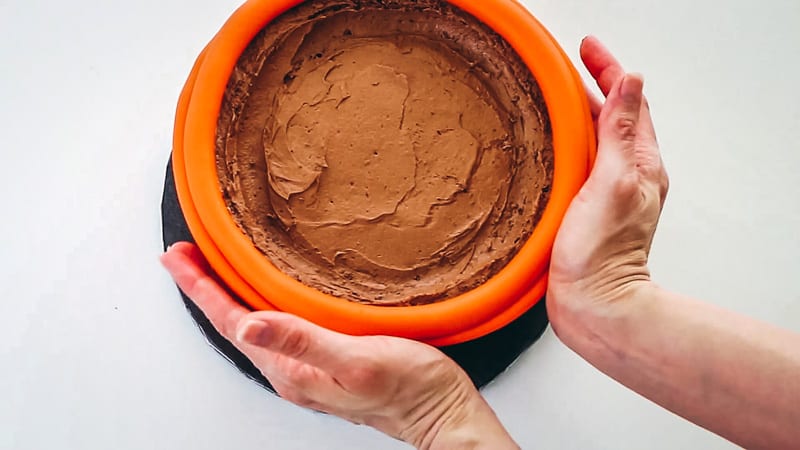
Now add a little melted candy melts onto your final cake board and flip your cake over so that the 6″ cake board (the smaller end of the bucket cake) is attached to the board.
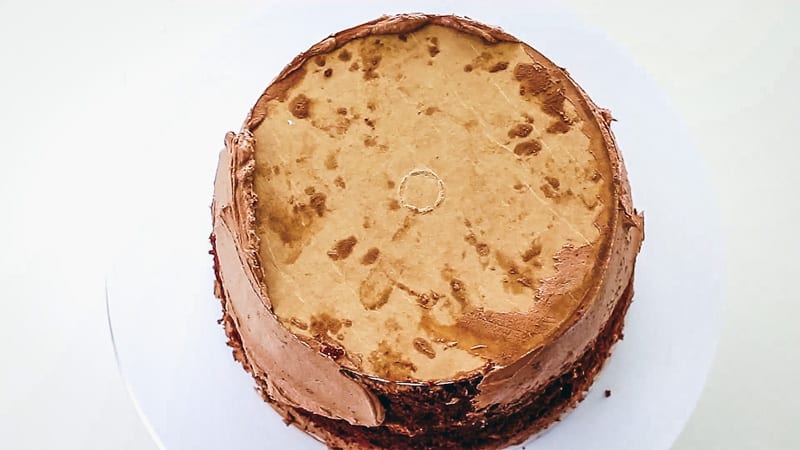
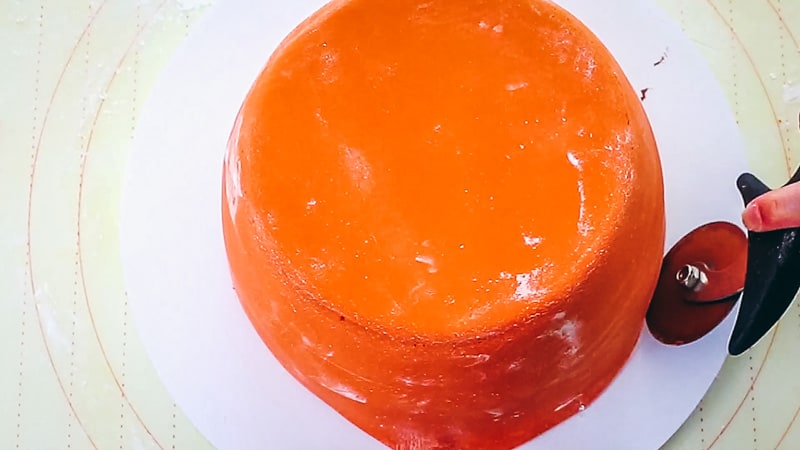
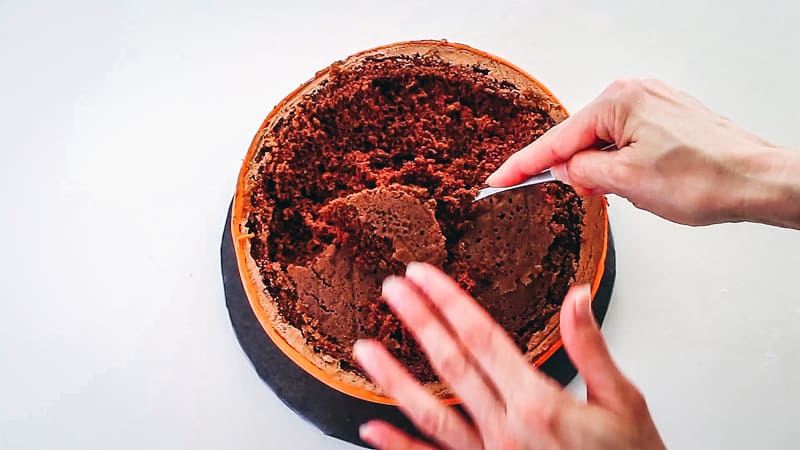
Now take a knife and run it around that top 8″ cake board. You’re going to be taking it off the cake, because you don’t need it on there now.

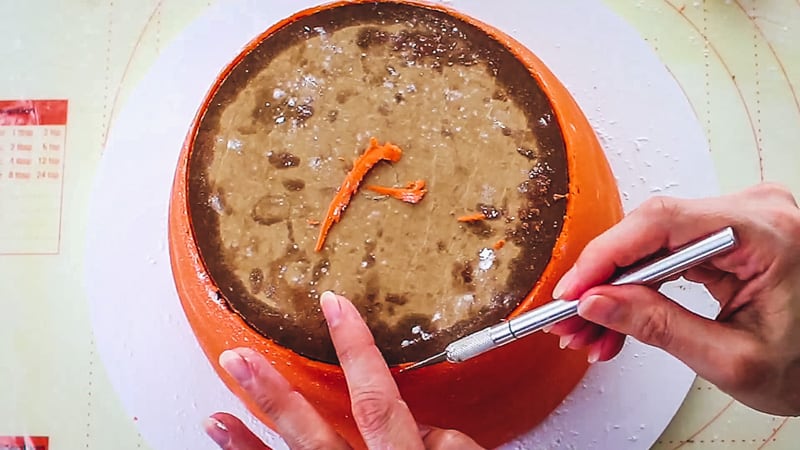
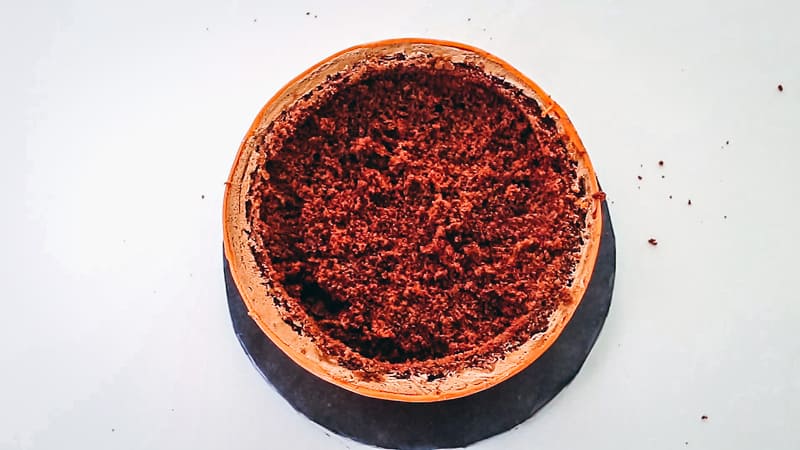
Once that top board is off, take your knife and go in about an inch from the edge of the cake and cut in about an inch.

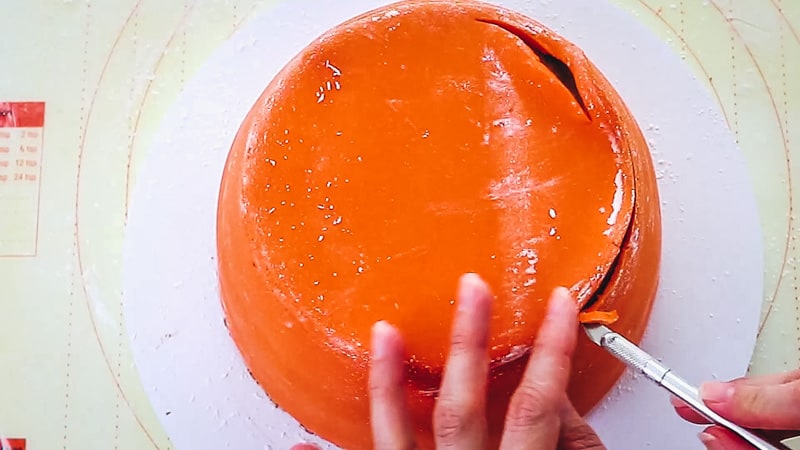
Now carve out the inside of where you just cut, but only about an inch of cake. Make sure to keep the cake cutoffs though, because you’ll use them later in the tutorial.
It should look like the pic below. You only want to dig out about an inch of cake. It will have an inch around the edge of the cake that is taller than the middle of the cake.
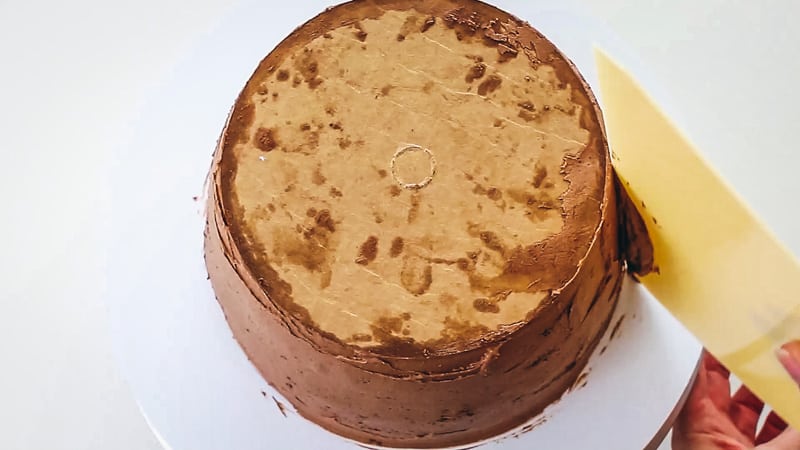
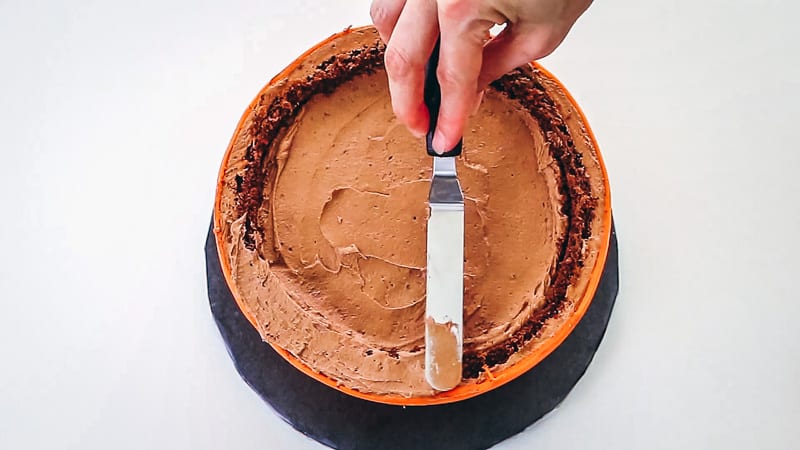
Now cover the top in buttercream. If it crumbles on you, just chill it a bit and thin your buttercream.
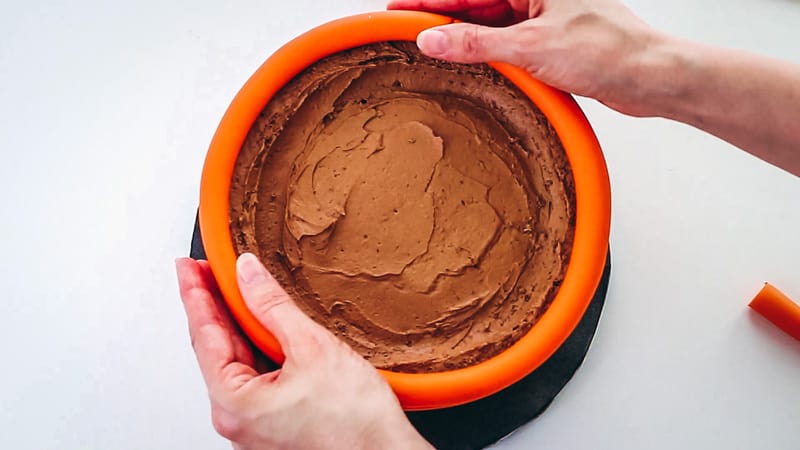
Now roll out a thick log of orange fondant. You’ll want it to be at least 8″ long. Now just wrap this log of fondant around the top edge of your cake (the 1″ taller portion of the cake).
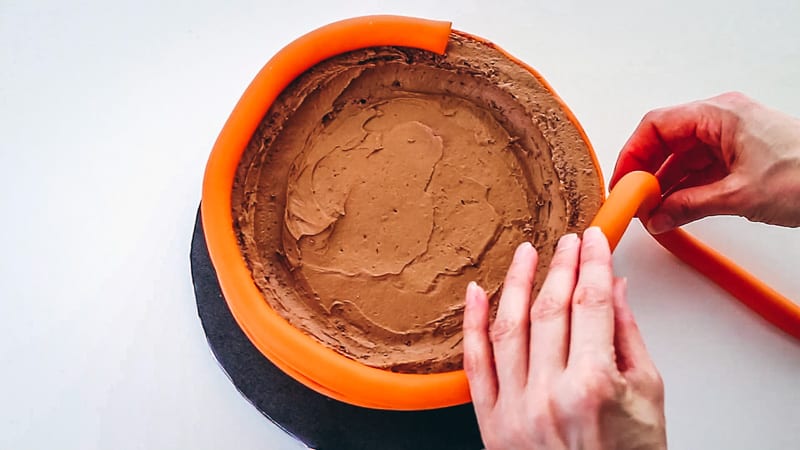
Wrap it all around the top and then trim the ends and attach them to each other with water.
Now roll out a skinny log of orange fondant.
Attach with a bit of water around the top of the bucket cake right under the larger log of orange fondant.
Make sure to smooth everything when you get it attached.
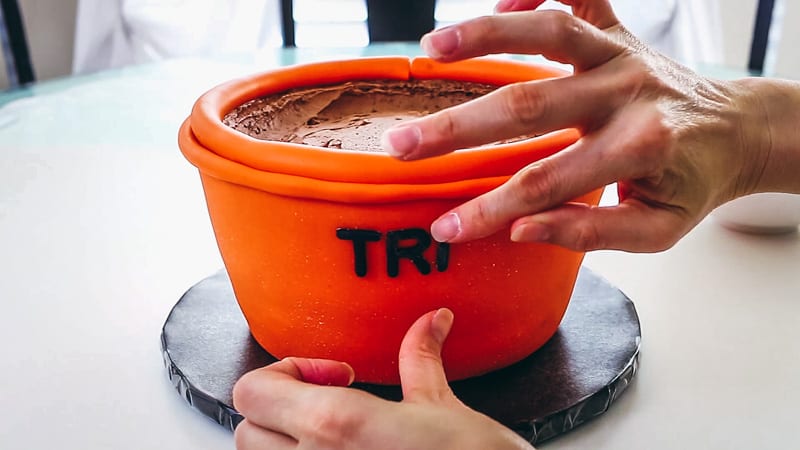
Now roll out black fondant and cut out the letters for Trick or Treat.
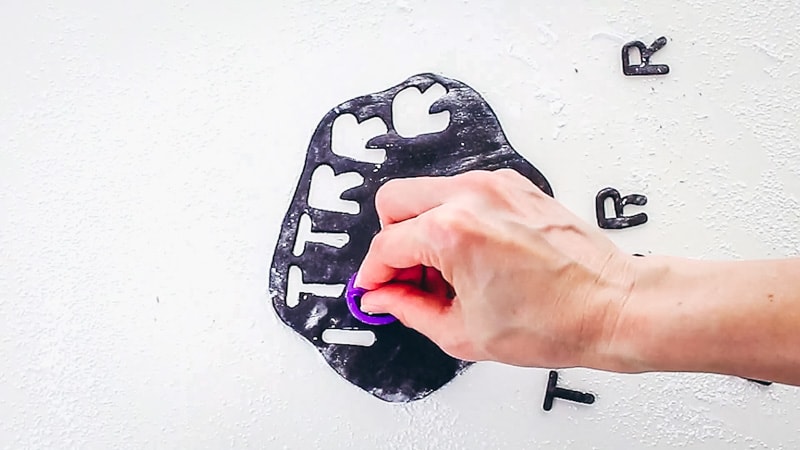
Attach the letters to the cake with water or shortening. I used water but in hindsight, shortening is better because you can move the letters around and adjust them. If you use water, it’s stuck where you put it.
MAKING THE CAKE BALLS:
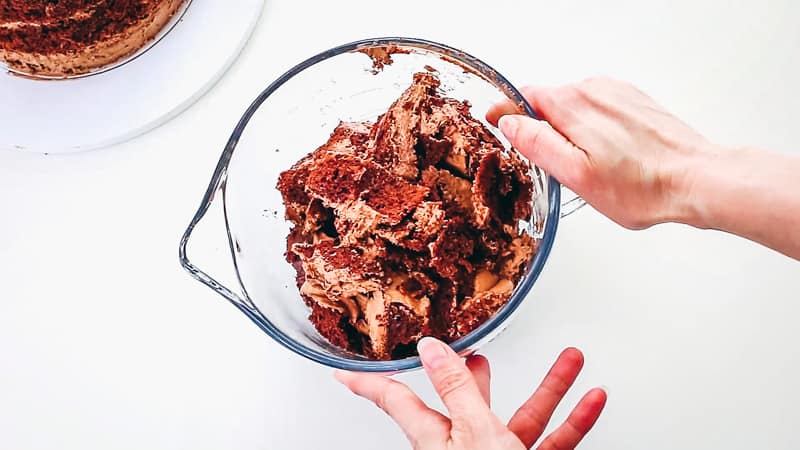
To make the cake balls, take your cake scraps (what you cut off the cake earlier) and add about a tablespoon or two of buttercream and mix up very well.
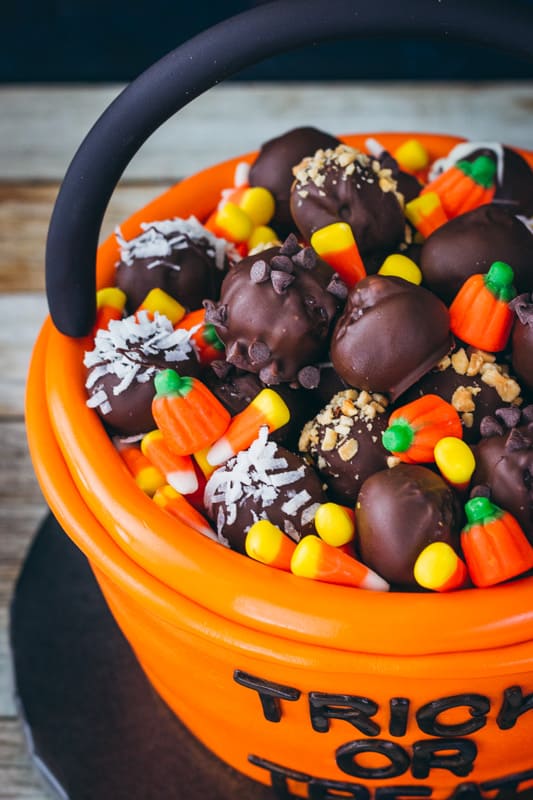
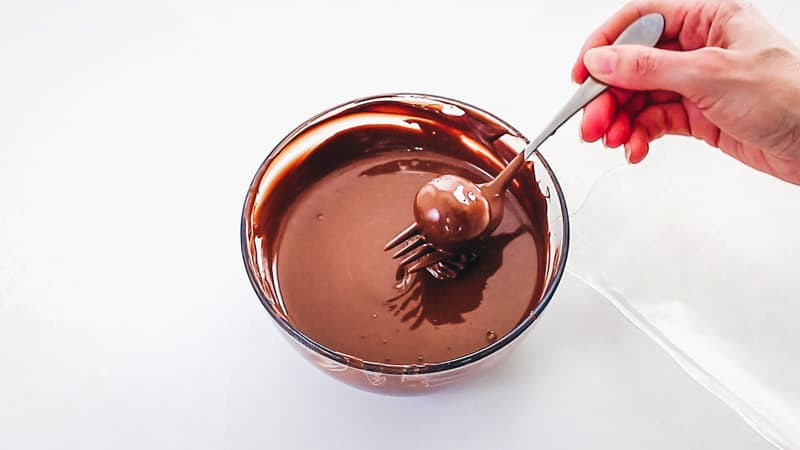
Roll them into balls and then dip them into melted almond bark or chocolate.
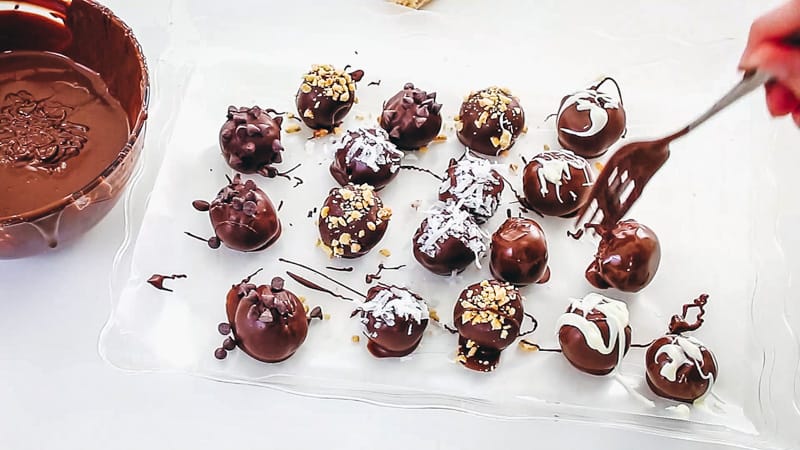
Then you can sprinkle on mini chocolate chips, coconut, chopped nuts, melted white chocolate, or anything else you want to add to them.
Now pop the cake balls in the fridge to chill.
PUTTING THIS CAKE TOGETHER:
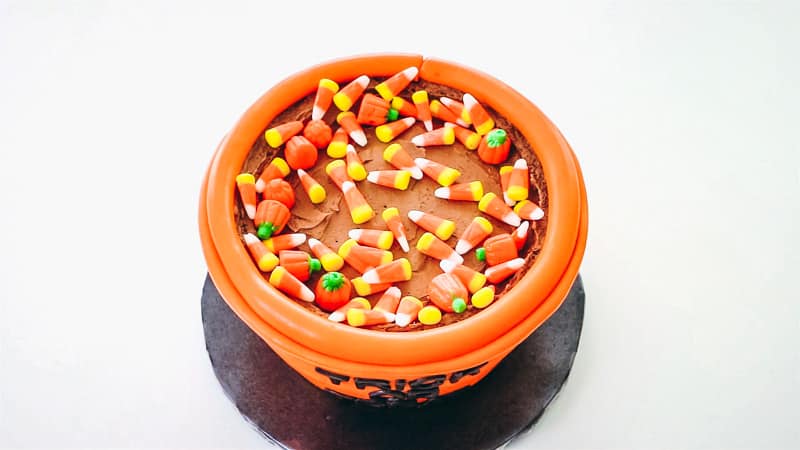
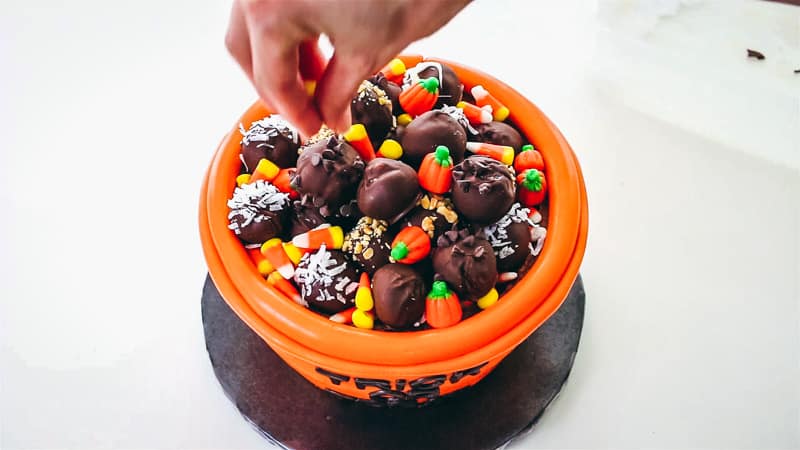
Now add candy corn and/or candy pumpkins to the top of your cake.
Now add in the cake pops.
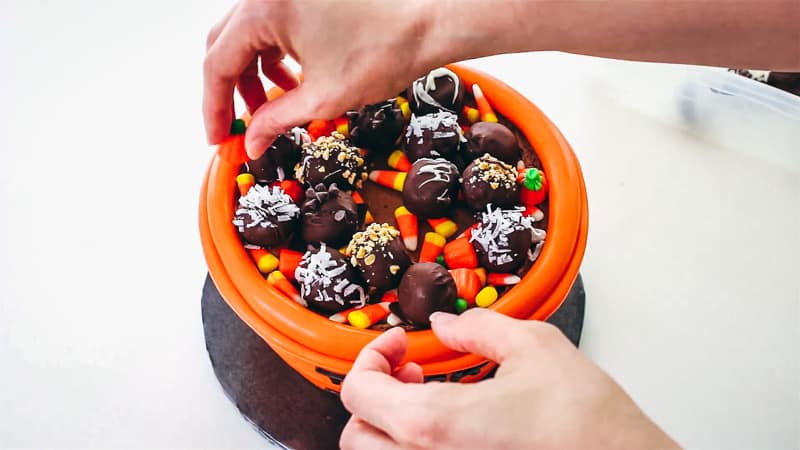
Add in candy corn to any bare spots.
Now just make sure the handle you made at the beginning is completely firm and dry.
Even when you’ve dried it for several days, it’s really best to add it right before your event or part so that it doesn’t have time to droop or bend on you somehow. You never know how humid it will be in a place.
So just take the handle and push the toothpicks into the top sides of the cake.

And now it’s ready for a party!

I hope you have a lot of fun with this one and feel free to change up the look of it and make it your own. 🙂
Don’t forget to pin it below!
Rebecca
I love it! The cake is so cute!!!
Kara Jane
Thanks so much! ?
Adewuyi
Thanks for this amazing tutorial. I enjoyed ever subscribing to your channel. Looking forward to try this out. And oops!! Lest I forget, please I will so much appreciate if you can make a video tutorial on bottled wine too….thanks.
Kara Jane
Thanks so much and I’m so glad you are liking the tutorials. ? I will try to get a wine bottle cake on my to-do list!
Sheila H
Can you give us an idea of how much orange fondant n black fondant you used or started with please?
Kara Jane
Hey Sheila, yes that’s a good question. I should have weighed it and noted the amount, but it completely slipped my mind. I probably used maybe about a pound and a half of the orange fondant. It was about two heaping hand-fulls (not a technical measurement, but that’s my best guess here). You can get a better idea from the video the size and amount of it. For the black fondant, you only need a small amount because the letters don’t need to be thick…so maybe about a palm full of fondant. For the handle, a good handful should do. I’m sorry I’m not too technical on the measurement amounts. I’ll try to keep that in mind next time and start doing a better job at weighing the fondant. I usually just eyeball the measurements and really don’t weigh it…I just sort of guess the amount I need. Anyway I hope this helps at least a little!
Beverly Chester
Do you have a special recipe for the actual chocolate cake used for the inside of the bucket?
Kara Jane
For this cake I had a limited amount of time to get it done, so I just used a chocolate cake mix. That’s not my preference, but it does work. My favorite chocolate cake recipe is here though: https://iscreamforbuttercream.com/chocolate-butter-cake/
Maahi
This cake looks so beautiful and perfectly baked! I will definitely bake this bucket cake on my daughters birthday, she’ll just love it ❤️
Kara Jane
Thanks! I hope she loves it!