
Have Questions or Need More Details?
Don't forget to check out the Tips & FAQ section in the post!
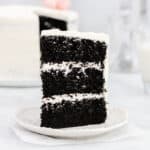
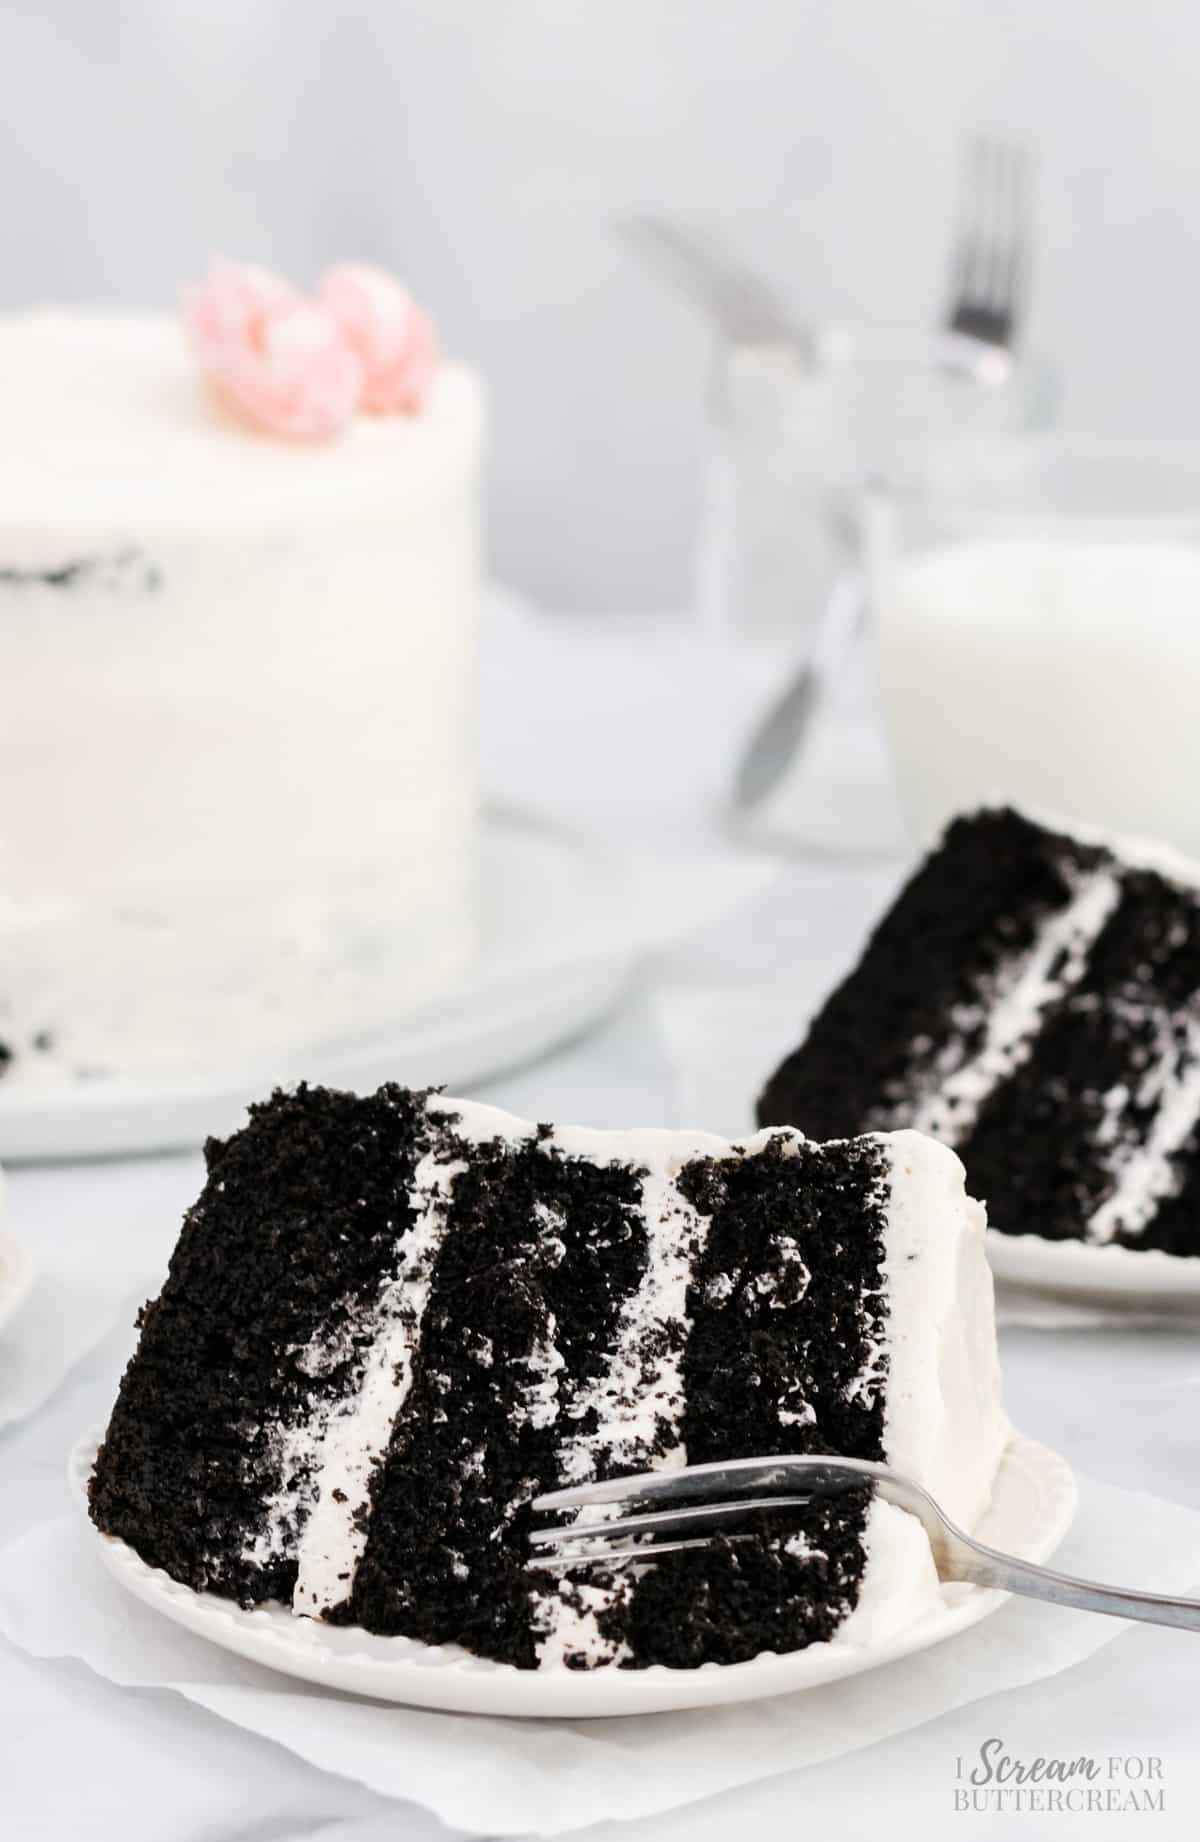
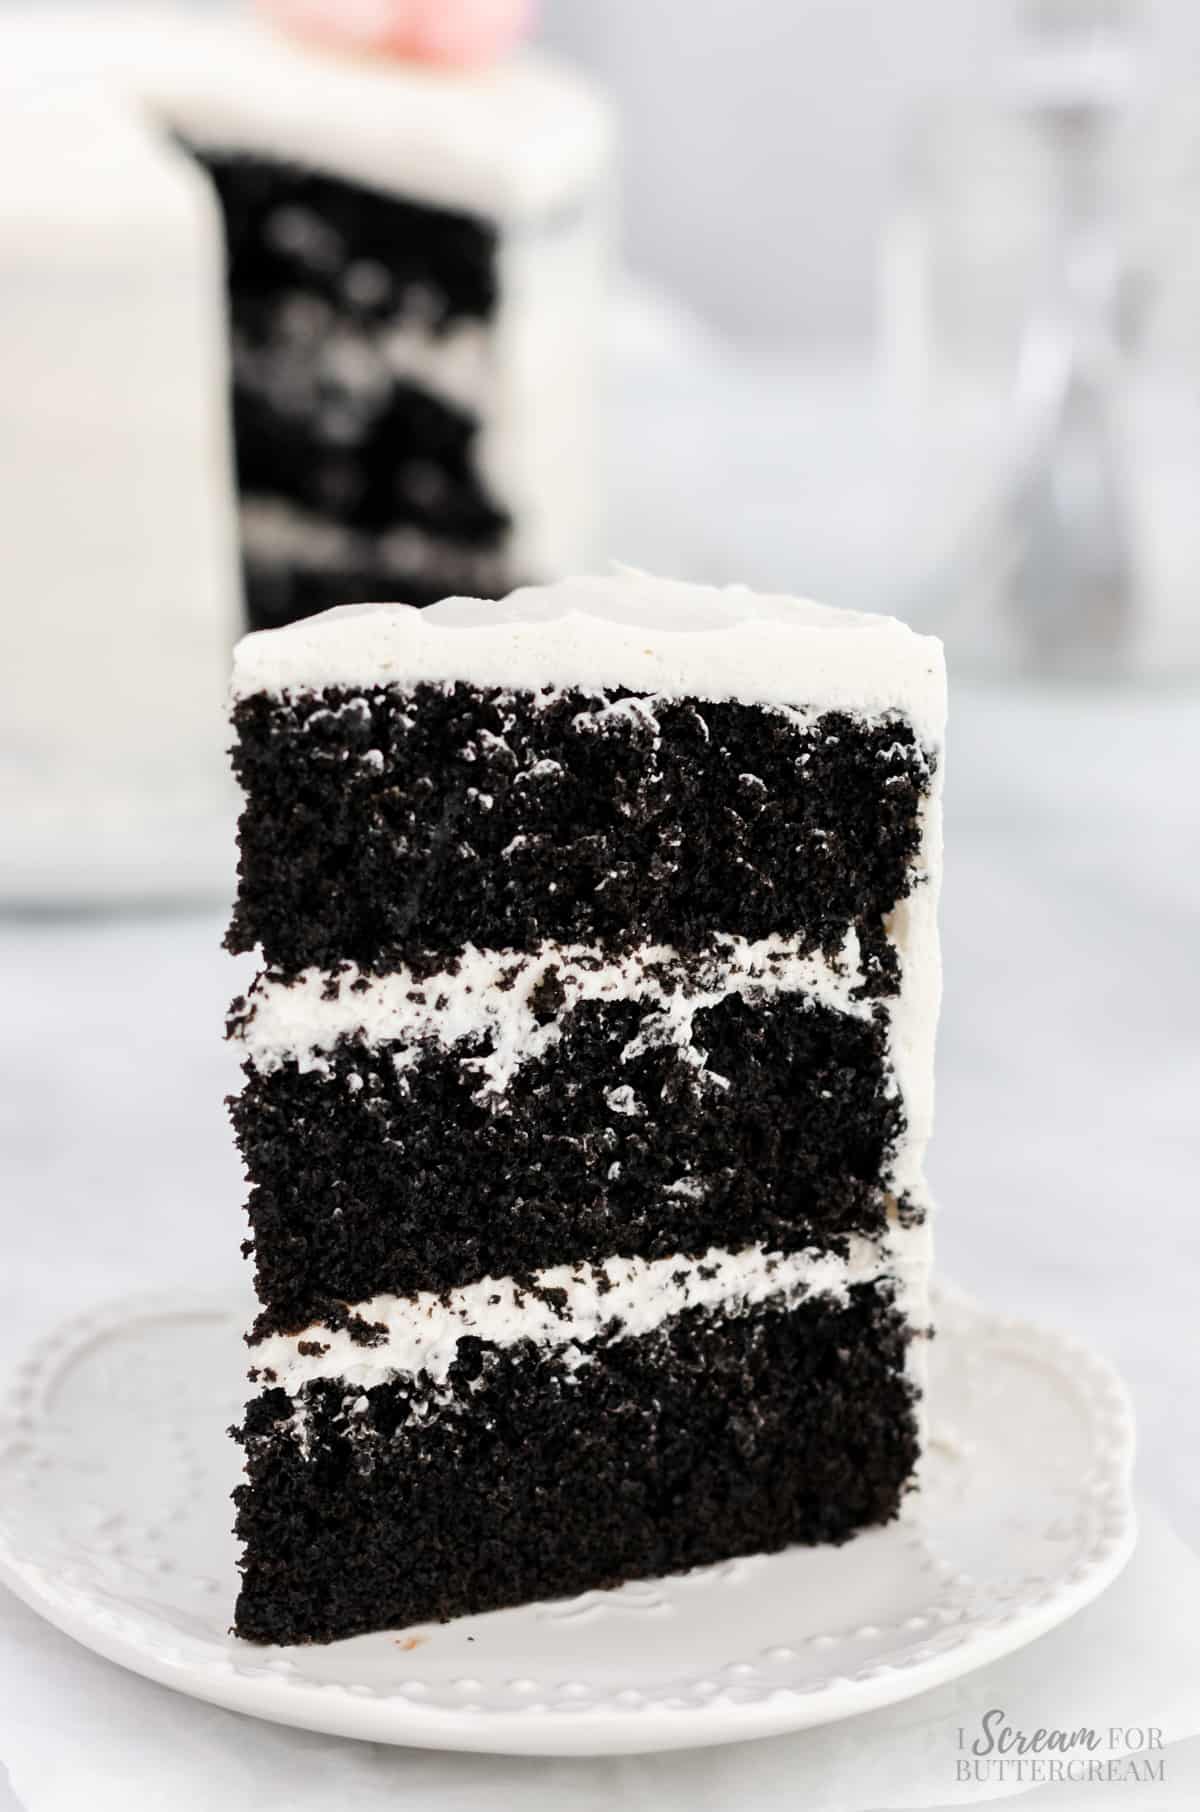
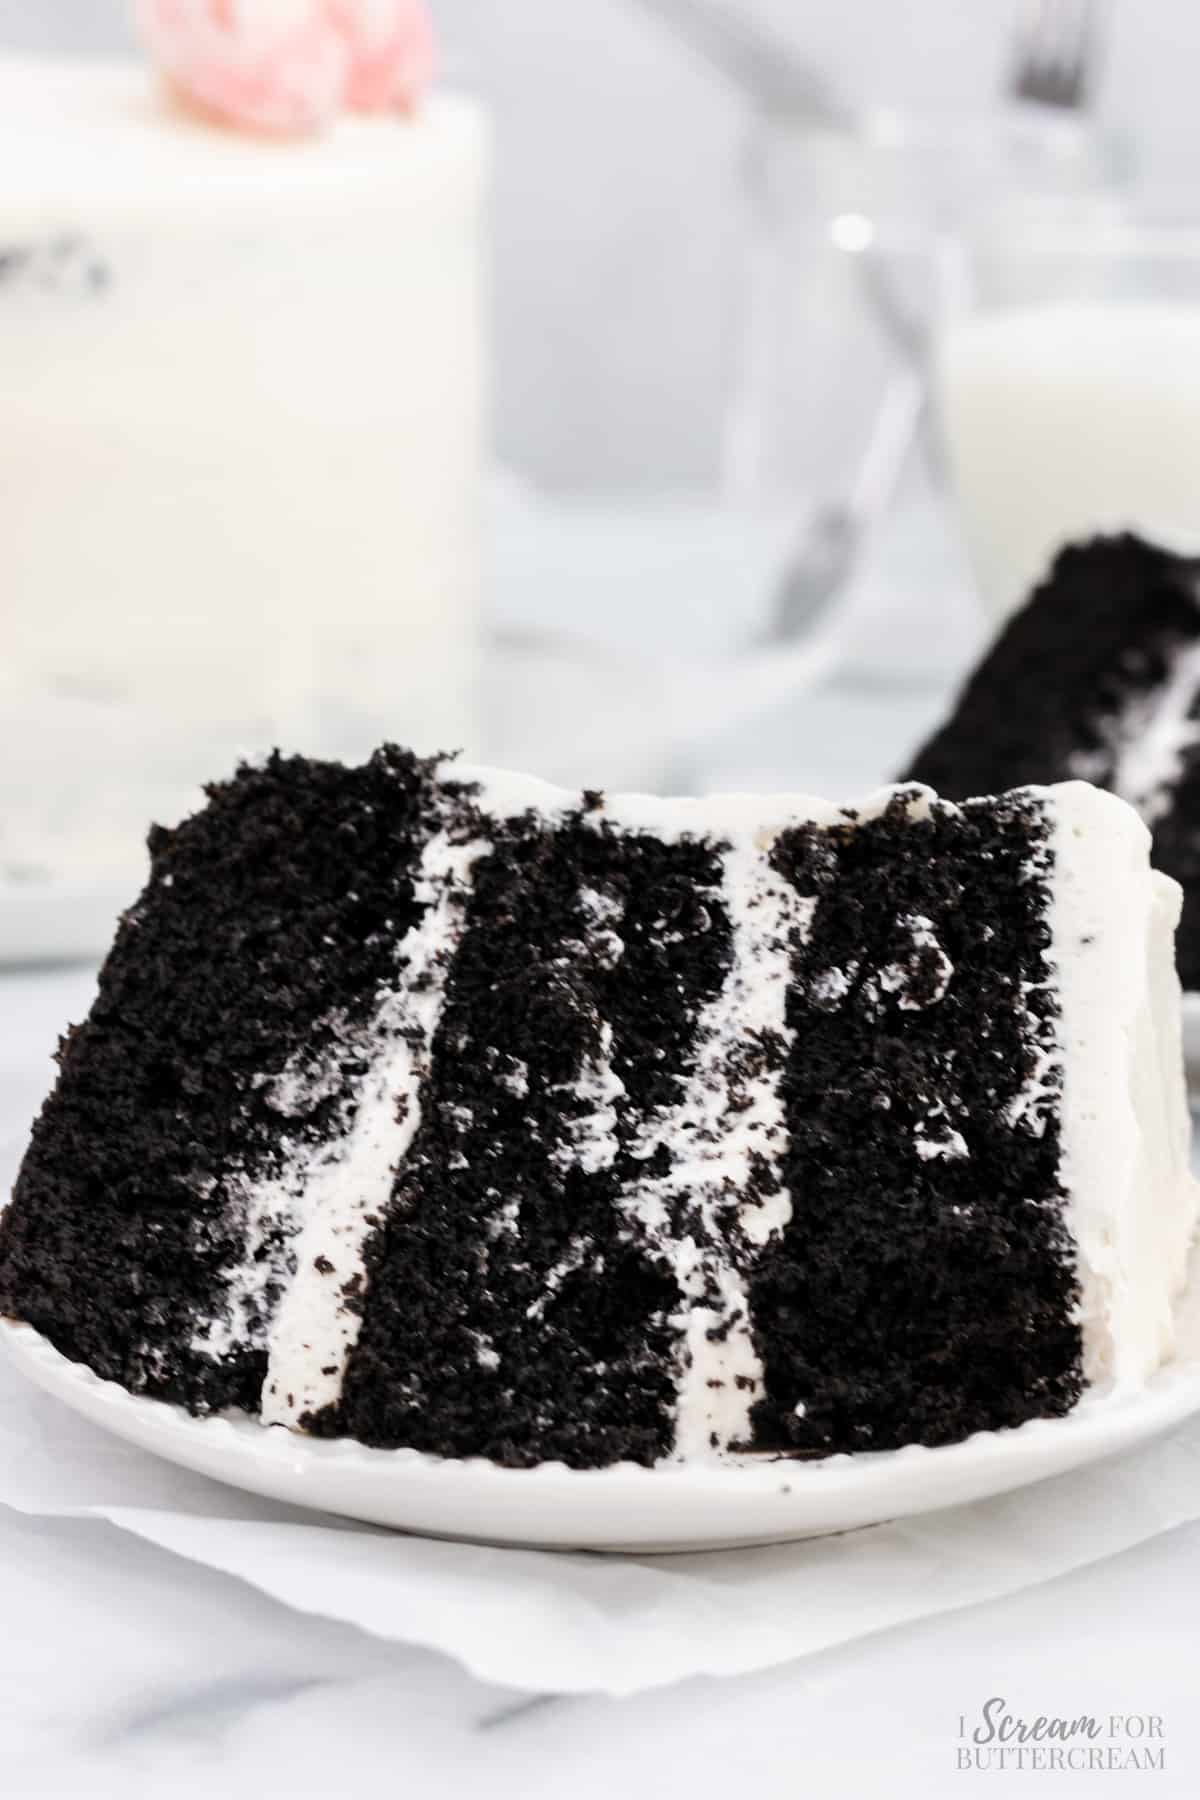
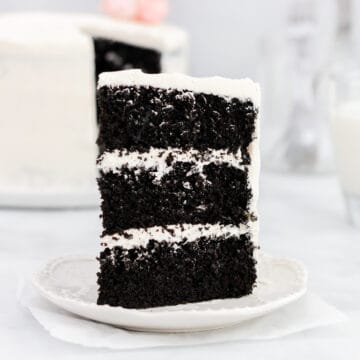
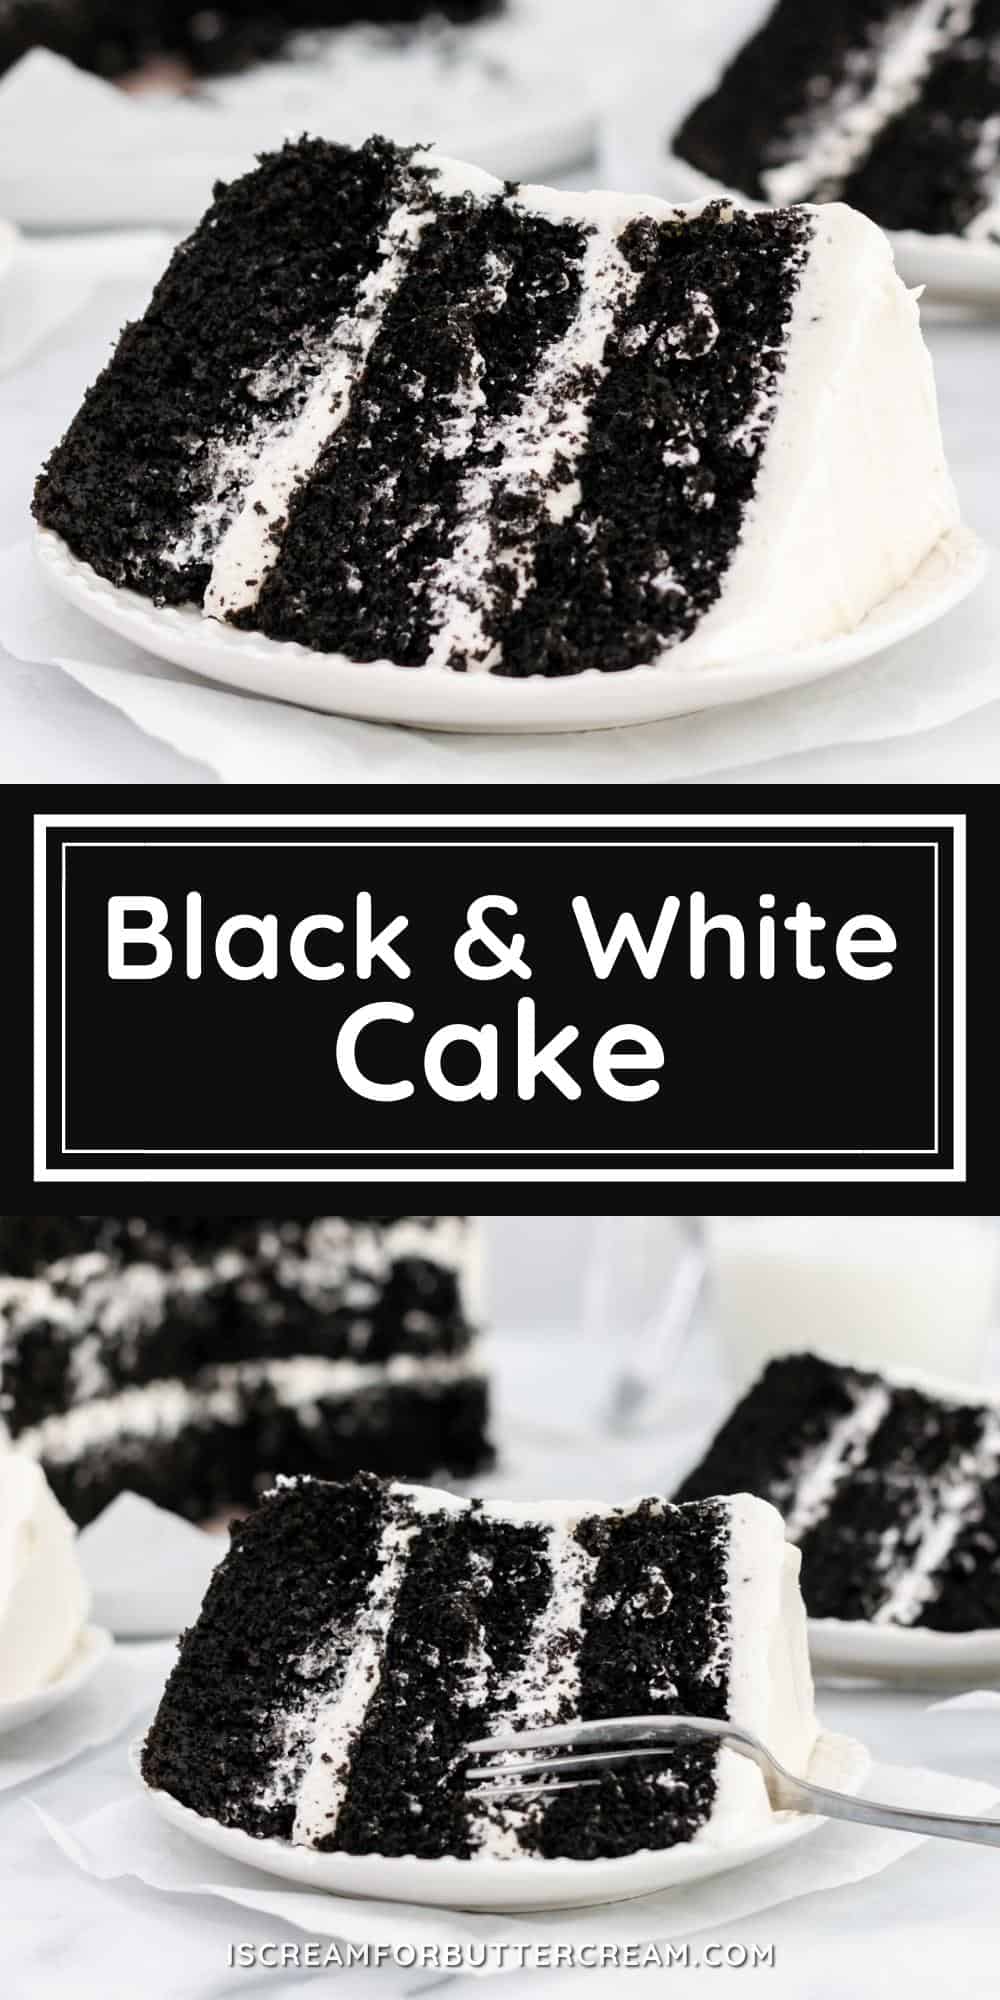
A moist and rich, chocolate cake made with natural and black cocoa powder that’s covered and filled with a fluffy marshmallow frosting to give it that black and white look.
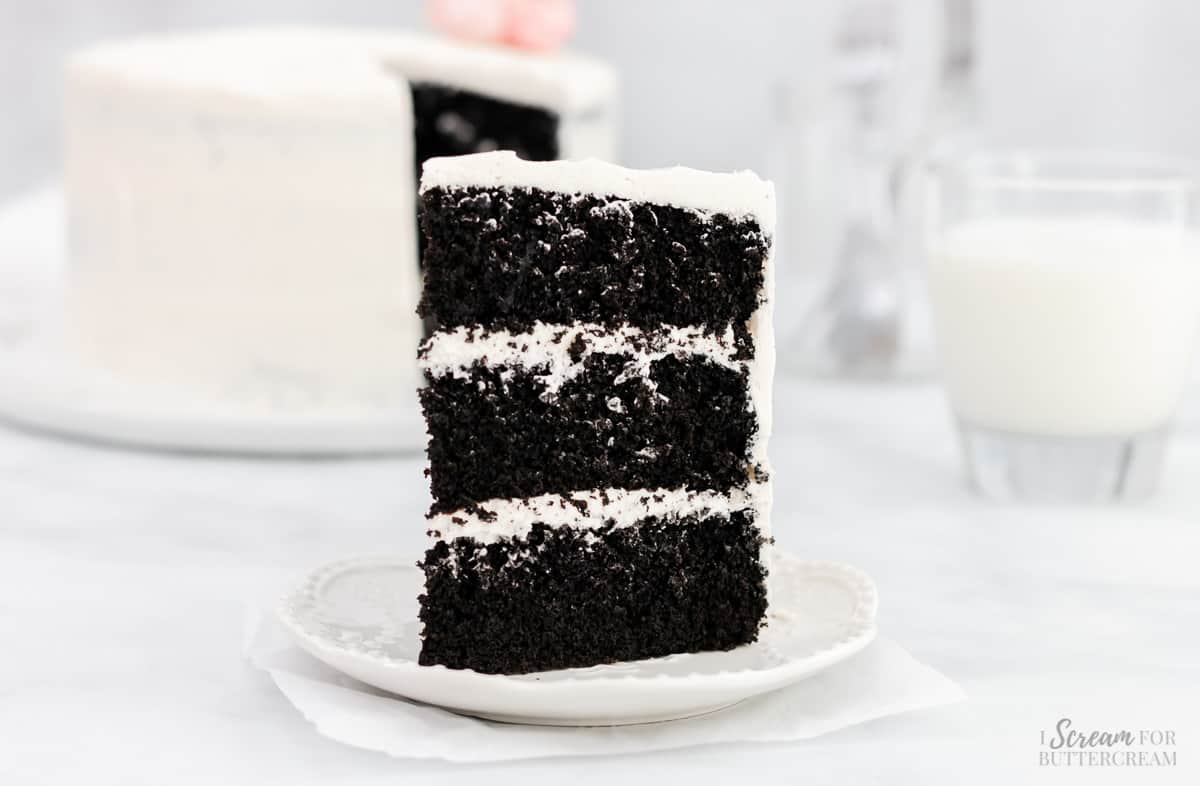
This cake is a three-layer cake. I think using an additional layer really spotlights the black and white effect.
Don’t worry if you don’t have three cake pans though. I’ve got an easy suggestion for you in the recipe card below.
Hey there! Before you scroll, there’s lot’s of important stuff in the post!…including the FAQ section, which may answer any questions you might have about this recipe. Enjoy!
Jump to:
I love this chocolate cake as a birthday cake. I think adding a few tall candles or even a sparkler candle would really look amazing.
You could also add a gold drip, red roses or sprinkles to add some bold pops of color if you wanted.
Ingredient Notes:
Now let's talk a little about the ingredients that are in this cake and frosting. (The list of all ingredients are in the recipe card below.)
Black Cocoa Powder: This recipe calls for black cocoa powder, which isn’t the average cocoa powder you get at the grocery store. It’s basically Dutch-process cocoa powder and is much darker.
Black cocoa powder tastes a bit like Oreos taste…at least to me it does. It’s not bitter and it doesn’t dye your lips or mouth when you eat it.
It’s not particularly chocolatey, so in this recipe, you’ll also add in a bit of natural cocoa powder in order to give it a chocolate boost.
I go into a lot more details about what black cocoa is and where to find it in the FAQ section down below.
Regular Unsweetened Natural Cocoa Powder: This is the average cocoa powder that you’ll find in the grocery store. It’s not Dutch-process cocoa and you’ll add this to give a chocolate boost to the cake.
Light Brown Sugar: I love using brown sugar in chocolate cakes. I just think it adds richness to cakes and gives it a deeper flavor.
Unsalted Butter: In my opinion, it’s best to use unsalted butter for baking, this way you can control how much salt is added to the batter.
Mixing Method Notes:
Let's talk a little about the mixing method. (The exact instructions are in the recipe card below.)
Mixing this cake could not be easier. First, you’ll just add all the dry ingredients to one bowl and the liquid to another (except for the hot coffee or water).
Then add the liquid ingredients to the dry and mix until well combined. After that, add in the hot coffee or water and mix until well combined.
It’s super easy and the only thing that could go wrong is if it’s mixed too long. Just make sure to stop mixing once all the ingredients are well incorporated as mixing for several minutes is too long and will cause a dense cake.
Once the cake is in the oven, you can work on mixing up the white frosting and you’ll be ready to add that once the cake layers have cooled completely.
Tips & FAQs:
Black and white cake is a moist black cake made with black cocoa powder and a creamy white icing.
Black cocoa powder is essentially dutch-process cocoa powder, which means it is non-acidic (unlike natural cocoa powder). It’s black in color, is not bitter and does not taste as fully chocolate as natural cocoa powder.
Black cocoa powder is used in black and white cake and tastes similar to Oreos. It does not have a dark chocolate taste and is not bitter. In general, black cocoa doesn’t taste any more chocolatey than regular cocoa. In fact, regular cocoa powder is added to give the cake a bit more chocolate flavor.
Black cocoa powder can sometimes be found in specialty ingredient stores, or you can purchase it from Amazon here: Black Cocoa Powder
Unsalted butter is best, but if you only have access to salted butter, you can use that, but omit any other salt that the recipe calls for.
This recipe will make enough batter to fill three 8 inch round cake pans. If you split the batter between two pans, it will be too much batter and it will overflow.
If you only have two pans, fill two pans a little over halfway full, then cover and refrigerate the remaining batter until the two cake layers are finished baking.
After cooling the baked cakes for about 10 minutes, remove the cake layers from the pans, clean one of the pans, grease and flour, then add the remaining batter and bake.
This cake is done when a toothpick inserted into the middle of the cake comes out with a few moist crumbs on it or clean.
To get a super white frosting, you can replace one cup of the butter in the frosting with vegetable shortening, or you can still use all butter and just add in a few specks of violet gel food coloring.
Only add a tiny amount and it will cancel out any yellow. This is my preferred method as you still get the yummy taste of an all butter buttercream, but it turns out white.
Also, make sure to whip the buttercream for several minutes as this will lighten it up as well.
Yes, this cake can be made several days in advance or can be baked and frozen.
Yes, the cake layers can be baked and frozen. Wrap each baked and cooled cake layer in plastic wrap, then in foil and place in the freezer for up to a month. Let thaw at room temperature with wrappings on. Once defrosted, remove wrappings and add frosting.
This cake will keep for about a day, covered well at room temperature, then cover and store leftovers in the refrigerator for up to five more days.
This cake is best served at room temperature. To eat leftovers, add a slice to a plate and allow it to come closer to room temperature before eating.
As an Amazon Associate, I earn from qualifying purchases.
Supplies Used for this Cake:
- Black Cocoa Powder
- Vanilla Bean Paste
- Violet Gel Food Coloring (a tiny amount can be used to make the buttercream white. It cancels out the yellow from the butter.)
- Mixing Bowls
- Whisks
- Silicon Spatulas
- Stand Mixer or Hand Mixer
- Round Cake Pans
- Cooling Racks
Recipe
Black and White Cake with Marshmallow Buttercream Frosting
Ingredients
For the cake:
- 2 ½ cups all-purpose flour
- ⅔ cup unsweetened black cocoa powder (this is different than regular cocoa powder, see the FAQ section in post for questions)
- ⅓ cup natural unsweetened cocoa powder (regular unsweetened cocoa, like Hershey's - not dutch cocoa powder – see FAQs in post for questions)
- 2 teaspoons baking powder
- ½ teaspoon baking soda
- 1 teaspoon salt
- 1 cup packed light brown sugar
- 1 ½ cup granulated sugar
- ½ cup unsalted butter, softened (1 stick)
- ⅔ cup vegetable oil
- 2 teaspoon vanilla bean paste or extract
- 1 cup milk
- 3 large eggs
- 1 cup hot coffee (or hot water)
For the buttercream frosting:
- 2 cups unsalted butter, room temperature (4 sticks ) (See notes section about alternative tips to getting super white frosting)
- 1 14 oz jar marshmallow fluff (marshmallow cream) (or may use two 7 oz jars)
- 1 teaspoon clear vanilla extract
- 1 pinch of salt
- 4 cups confectioner's sugar (can use up to 5 cups if needed to thicken)
Instructions
For the cake:
- Preheat oven to 350 degrees. Grease and flour three 8 inch round cake pans. (If you only have two pans, don't try to bake all the batter in only two pans, it's too much.) (Just pour a ⅓ of the batter into each of your two pans, then chill and cover the rest of the batter while the cakes bake. Once they're baked and removed from their pans, clean one of your pans, grease and flour it, then bake the remaining batter in it.)
- In a large mixing bowl, add the flour, cocoa powders, baking powder, baking soda, salt and sugars. Whisk and set aside.
- In another bowl, add the softened butter, oil, vanilla paste or extract, milk and eggs. (Do not add the coffee or hot water yet.) Whisk well.
- Add the liquid ingredients (except for the coffee or hot water) to the dry ingredients and mix with an electric mixer on medium to medium-high until the ingredients are well combined. Be careful not to mix too long or the cake will turn out dense. Stop mixing once the ingredients are well combined.
- Scrape down the sides and bottom of the mixing bowl and add the hot coffee (or water). Mix until well combined.
- Pour into prepared pans and bake for approximately 35-40 minutes. (See above note if you only have two pans.)
- Set on wire racks to cool for about 15 minutes, then turn out the cake layers onto the racks and remove from the pans to cool completely before assembling the cake and adding buttercream frosting.
- Once the cake is cooled, add one layer of cake on a cake plate, then add the buttercream frosting. Continue until all three layers are on the cake plate with two layers of filling. Cover the entire outside of the cake in the buttercream frosting.
For the buttercream frosting:
- In a mixing bowl, add the butter and mix on medium until smooth.
- Add in the marshmallow fluff, vanilla extract and the pinch of salt. Mix on medium until well combined.
- Add in two cups of the confectioner's sugar and mix on medium until smooth.
- Add in the last two cups of confectioner's sugar and mix on medium high for several minutes until light and fluffy.
- Once whipped, if you want it even whiter, see the notes section below for a couple tips.
- If the frosting is a little soft, place in the fridge for about 15-20 minutes or so to firm up a bit before adding to the cake.
Notes
This recipe will make enough batter to fill three 8 inch round cake pans. If you split the batter between two pans, it will be too much batter and it will overflow. If you only have two pans, fill those pans a little over halfway up, then cover and refrigerate the remaining batter until the two cake layers are finished baking. After cooling for about 10 minutes, remove the cake layers from the pans, clean one of the pans, grease and flour, then add the remaining batter and bake. To get a super white frosting, you can replace one cup of the butter in the frosting with vegetable shortening, or you can still use all butter and just add in a few specks of violet gel food coloring. Only add a tiny amount and it will cancel out any yellow. This is my preferred method as you still get the yummy taste of an all butter buttercream, but it turns out white. Also, make sure to whip the buttercream for several minutes as this will lighten it up as well. This cake will keep for about a day, covered well at room temperature, then cover and store leftovers in the refrigerator for up to five more days. To eat, add a slice to a plate allow it to come closer to room temperature on its own. Nutritional values are an estimate. Make sure to check out the TIPS & FAQs for this recipe in the blog post, which may answer questions you may have. *This recipe card may contain affiliate links. As an Amazon Associate, I earn from qualifying purchases.
Nutrition
How to Share
I’d love for you to share this recipe link or tag it, but please do not share screenshots or copy/paste the recipe to social media as the content and photographs are copyright protected and we (bloggers) work really hard on our content. Sharing the link, tagging us on socials and pinning it is super appreciated though!
Other Posts You Might Like:
Don’t forget to pin it below!
Tom
I’m assuming you mean 1 cup of butter (2 sticks) in the frosting, not 2 cups which would be 4 sticks.
Kara Jane
Hey Tom, thanks for catching that typo. I actually do mean 2 cups which is 4 sticks. I’ve corrected it in the post.
Mary
Can this marshmallow buttercream frosting be used for piping?
If not, will it support using a regular buttercream to add a design to the cake?
Thanks! It looks fabulous!
Kara Jane
The marshmallow buttercream is a little soft, so I’m not sure you’d want to pipe with it although you could probably pipe simple rosettes or something. The cake is sturdy enough to hold a firm buttercream with piped designs though. Thanks, Mary!
Amanda
I love, love, love the flavors in this cake! I made it for my birthday and I think it is my new favorite! I did have a little issue with the wet ingredients not blending very well, almost the consistency of cottage cheese when I got it mixed up. Once I got to the hot coffee step, the butter did blend in a little better. However, once the cake baked there were hollows places in the cake like the butter was not fully incorporated. Any suggestions on how to avoid this next time? Because I will definitely be making this cake again!!
Kara
Hi Amanda, so glad you loved this one! It’s one of my favorites too. I was really surprised how much I actually like the black cocoa powder. So, onto your question: Sometimes the liquid ingredients can clump up on you if the temperature of the ingredients is too far apart. Like you said, it doesn’t really have a detrimental effect on the cake, but it can cause the liquid mixture to clump up a bit. What you could do next time is to make sure that the butter isn’t on the hot side. It’s okay if it’s a bit warm, but not hot. Then go ahead and set the eggs out ahead of time and let them come to room temperature. Generally I find that the eggs are the reason for the clumping because they’re so cold and they essentially re-chill the butter and make it clump up a bit. I”m sometimes a lazy baker and don’t set my eggs out far enough ahead of time…I will admit that. It’s not vital, but it can help with the clumping.
So for the hollow places in the cake, the clumping of the liquid ingredients may have contributed to that, but also if cake batter is mixed at too high a speed or a little too long, it can do that as well.
I hope this helps and thanks for the 5 stars!
Nicole
Hi Kara,
Long time fan of your cakes/icings! I’ve made this cake before and it’s exquisite. This time around I want to use this for a cupcake pull-apart cake in the shape of a cross for my daughter’s confirmation. I am looking to make around 30 cupcakes. Would you know if this recipe would be enough/suitable for cupcakes as well? And lastly, the icing is so good and I would like to use this one, do you think it would hold up for piping large rosettes on top? I know you mentioned perhaps it would be okay in a previous post, but wondering if you’ve actually tried this with good results since. Or if I could somehow make this icing a bit stiffer? Any suggestions would be greatly appreciated!
Kara
Hi Nicole, so glad you love the recipes! So for this one, I haven’t tried it as cupcakes, but I have a pretty good idea of how you’ll need to adjust it as I’ve had to adjust some of the other recipes on the site for cupcakes. First, I would knock the liquid content way down. If there’s too much liquid, then the cupcakes will just flatten out or sink down. So I think I would lower the amount of oil to 1/2 cup, then cut the water down to only 1/2 cup, everything else would stay the same (leave the milk the same). Now, I can’t promise it’ll be perfect – without actually testing it, I just can’t be absolutely sure, but I’ve had to adjust recipes enough that I think it should work. Bake them at 350 degrees F and start checking at about 12 minutes or so.
So I also thought about the icing a little more and about how to make it more stable. You could do a couple things. You could lower the amount of marshmallow cream and just go with half a jar instead of a full jar, then add in an extra cup or two of confectioner’s sugar. That should make it a little thicker. If you really wanted to make it more stable, you could replace some of the butter with vegetable shortening. Now, I’ll be honest that it’s just not as good as real butter, but sometimes if it’s really hot outside or you need to pipe with the frosting, it helps. I wouldn’t replace all of the butter, but maybe half with the same amount of vegetable shortening. I think those changed would stabilize it enough to pipe simple rosettes on the cupcakes. I’d say no to actually piping buttercream roses the old fashioned way, but piping rosettes I think should work.
Sorry, I wrote a book here, but let me know if you have any other questions. I’d love to see how it turns out, so feel free to email me a photo!
Nicole
Kara!!!! Thank you so so much! Wow this is greatly appreciated!! You went above and beyond my expectations! Super helpful. I will certainly give it a try and keep my fingers crossed. I think I will reduce the marshmallow and add more sugar as you suggested, I don’t really want to compromise the flavor too much by using some shortening. Will see what happens! Depending on how this comes out, I will share a picture 😉 Many thanks again!
Kara
You’re welcome, Nicole! I’m excited to see how they turn out and I’m crossing my fingers that all the adjustments work!