
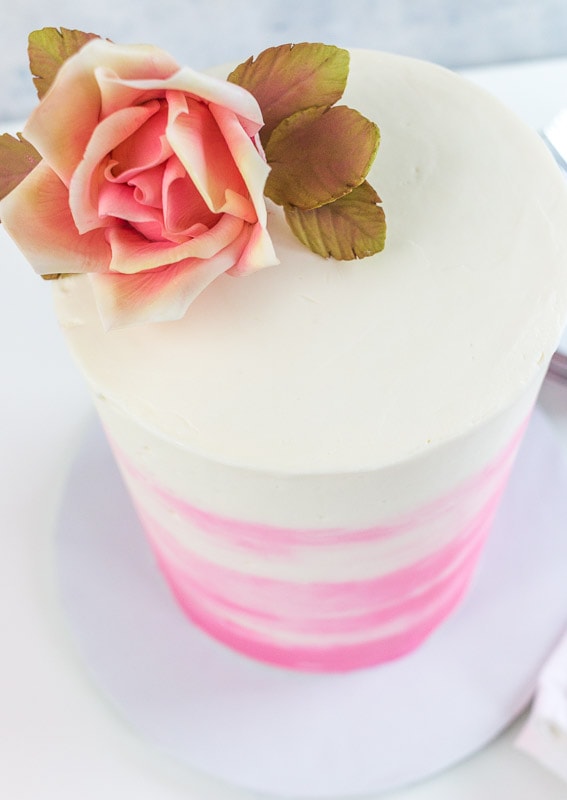
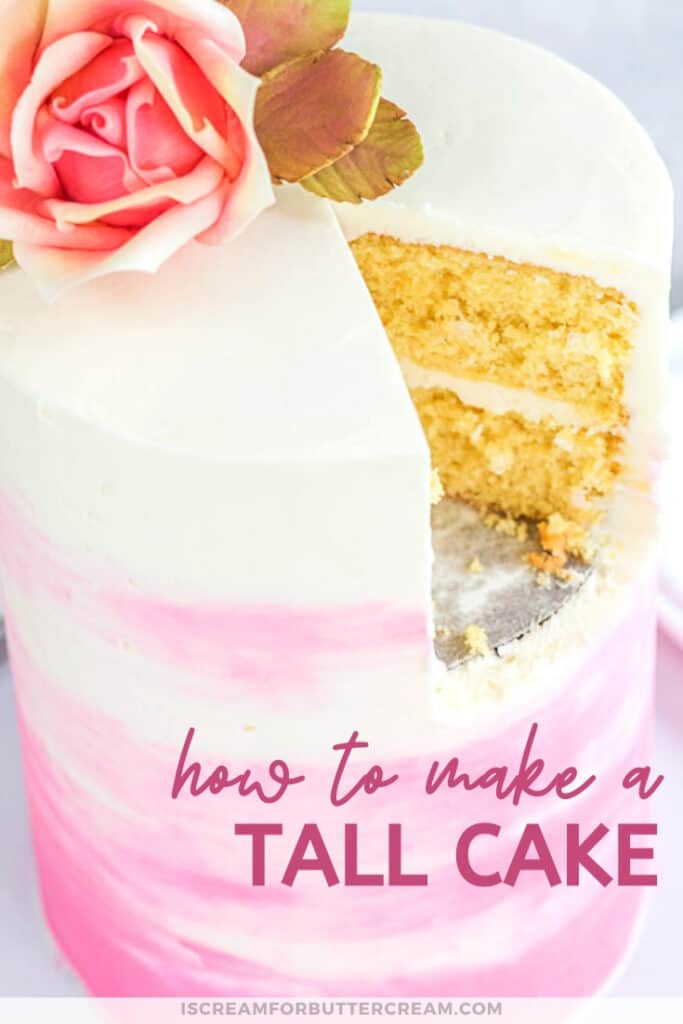
I LOVE a nice tall cake. It just looks elegant and stately. Can a cake look stately? Anyway, I’m a big fan of the tall cake, but there are a few tricks and tips to know about before you make one. You could have a disaster on your hands if not done correctly, so I thought I’d put together my tips and tricks on how to make a tall cake (or as some call it, a double barrel cake).
There are a multitude of ways to make a tall cake, but the number one thing to remember is that you need to have a support system in place.
In this post, I wanted to give you plenty of details. I’ve got some screenshots of how I put this cake together, but you can also watch the video toward the end of this post to see it actually being made.
Oh and if you want to get ALL my tips on how to stack tiered cake (with different sized tiers), then you’ll want to see this post here.
As an Amazon Associate, I earn from qualifying purchases.
Supplies Needed to Make a Tall Cake:
- Cake Layers (Anywhere from 4 to 6 layers – we’ll talk about this in a bit.) I used 6″ round cake layers – Here’s my favorite cake recipe: Favorite Vanilla Bean Cake Recipe
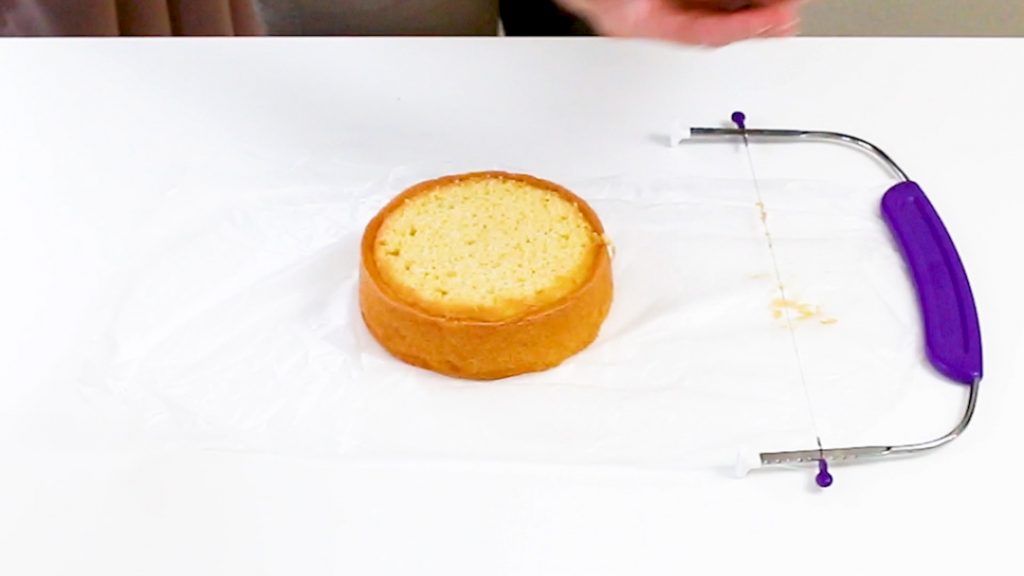
- Cake Leveler
- Cake Base (A few inches larger than your cake layers – I like foam boards)
- Cake Rounds (The same size as your cake layers)
- White candy melts (For attaching the cake boards)
- Cake Turn Table
- Buttercream (You can grab my buttercream recipe here: Vanilla Bean Buttercream Recipe)
- Icing Spatulas
- Mini Level
- Wax Paper
- Icing Smoother (You’ll need a tall one) Here are a few options: Tall Plastic Icing Smoother, Tall Metal Icing Smoother
- Dowels for stacking the cake layers. I love using Poly Dowels. For the link to the official poly dowels, click here: Poly-Dowels Here are some other options for plastic ‘cuttable’ dowels.
- Center wooden dowel (The dowel that goes all the way through the cake and into the cake base. This is really just a tall wooden dowel that you can probably get at any craft store.)
- Pencil sharpener (for sharpening the center dowel)
- Edible marker (for marking the dowels) The Americolor brand seems to last a long time for me.
- Knife (for trimming the cake)
- Hot water (for smoothing the buttercream if you use the metal smoother)
- Optional: Gumpaste Rose – Here is my tutorial on that: How to Make a Large Gumpaste Rose
Options for Making a Tall Cake:
Ok, the most important thing about making a tall cake is that you MUST have support in your cake. By ‘support’, I mean doweling inside.
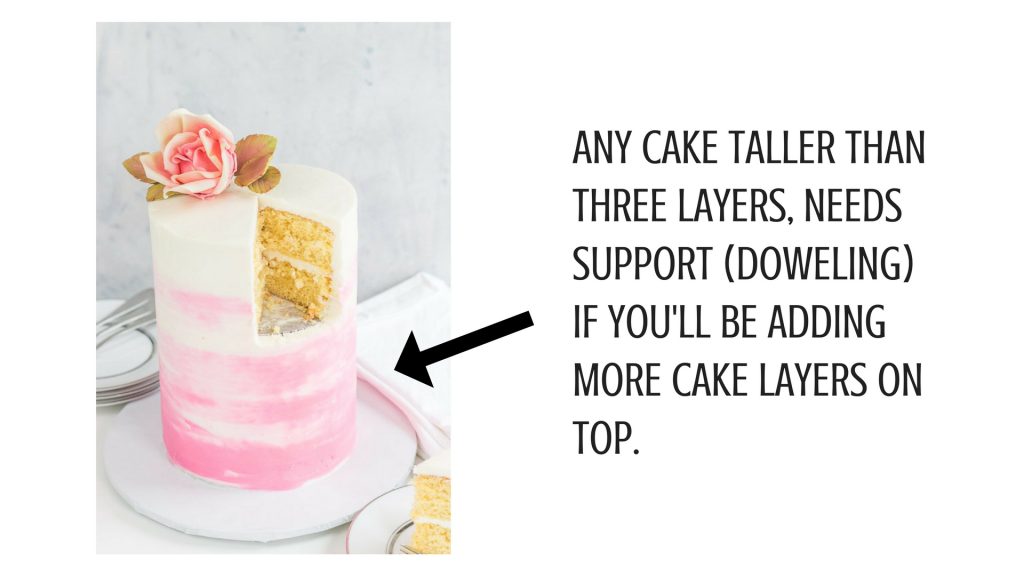
Any cake that will be taller than three layers, needs to have support if you’ll be adding more cake layers on top. Sometimes you can get away with four layers, but honestly, I don’t test it.
The reason is that the cake gets too heavy. It could just collapse on itself, the weight of the cake could cause buttercream ridges, or you could have cake layers that slide on you.
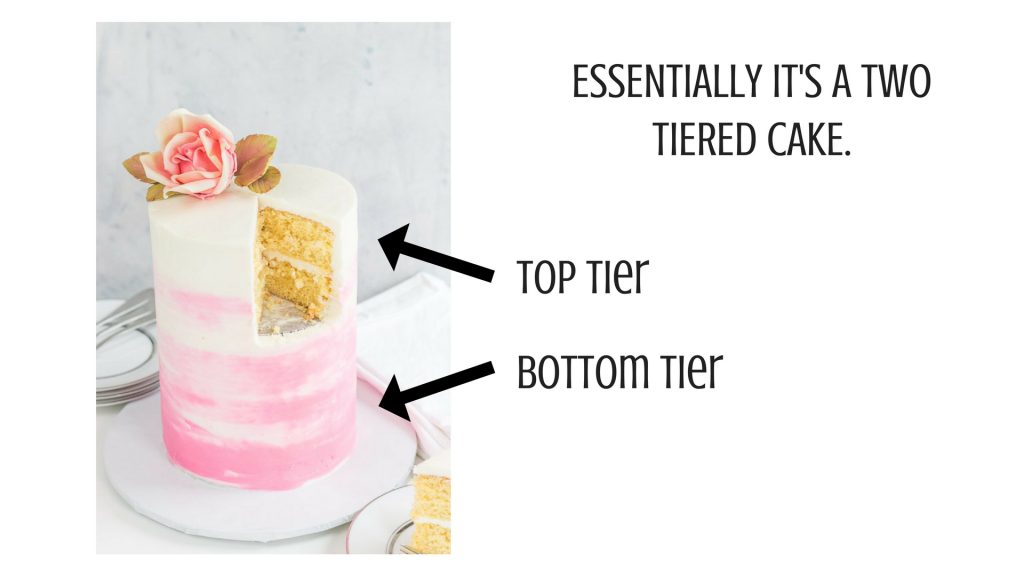
A tall cake is really just a two tiered cake. The top and bottom tiers just happen to be the same size. So if someone is paying you to make a tall cake, make sure to charge accordingly. It’s not really ‘one’ cake, it’s basically two in one.
Ok, let’s talk about options for making tall cakes:
First Option for Making a Tall Cake:
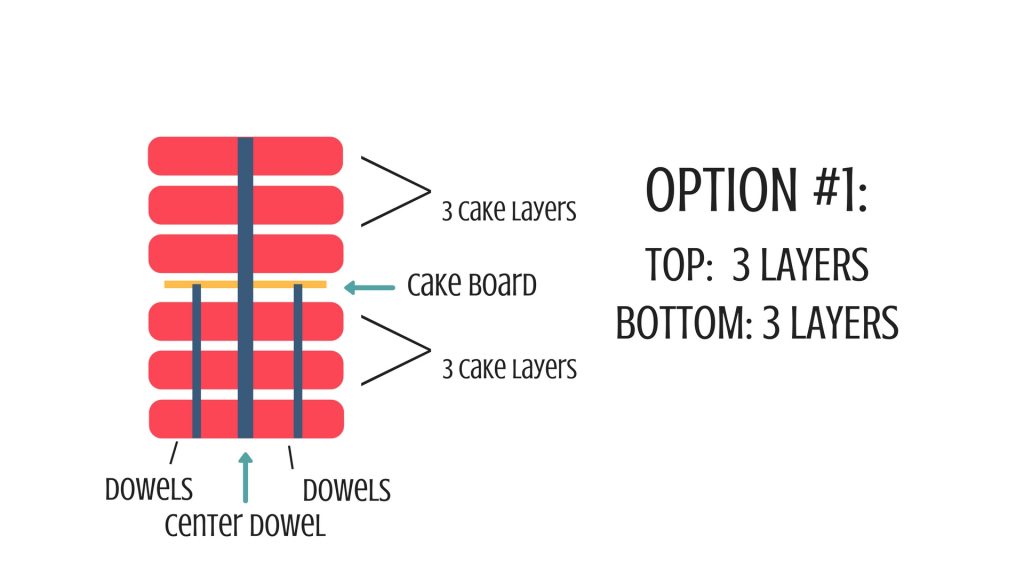
The first option is to use three layers of cake for the bottom tier and three layers for the top tier. Between the tiers, you’ll need a slightly smaller cake board and dowels for support in the bottom tier.
Second Option for Making a Tall Cake:
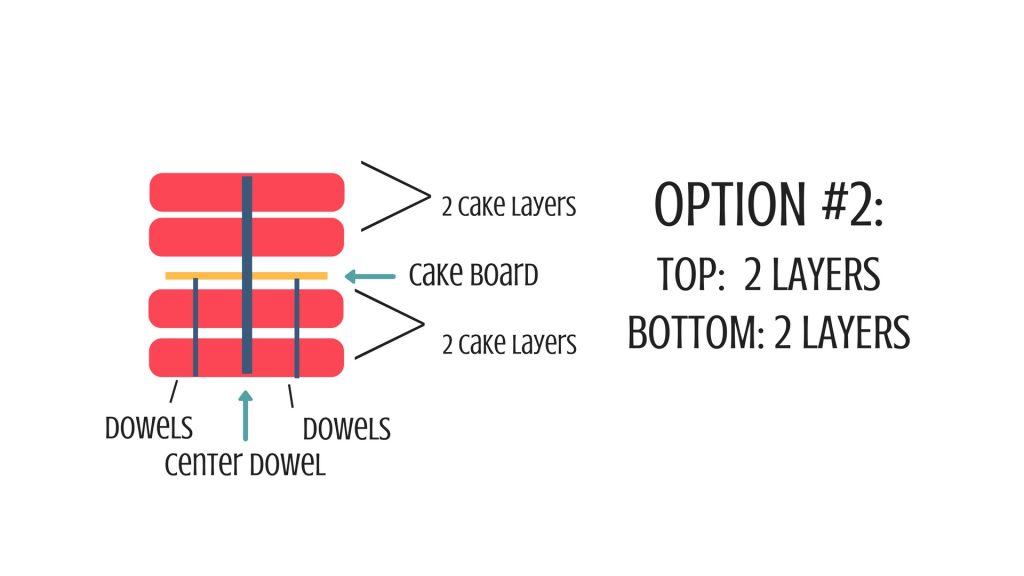
The second option is to use two layers of cake for the bottom tier and two layers for the top tier. You’ll add the slightly smaller cake board in between the cake tiers and the dowels in the bottom tier. This option will give you a shorter cake than the first option.
Third Option for Making a Tall Cake:
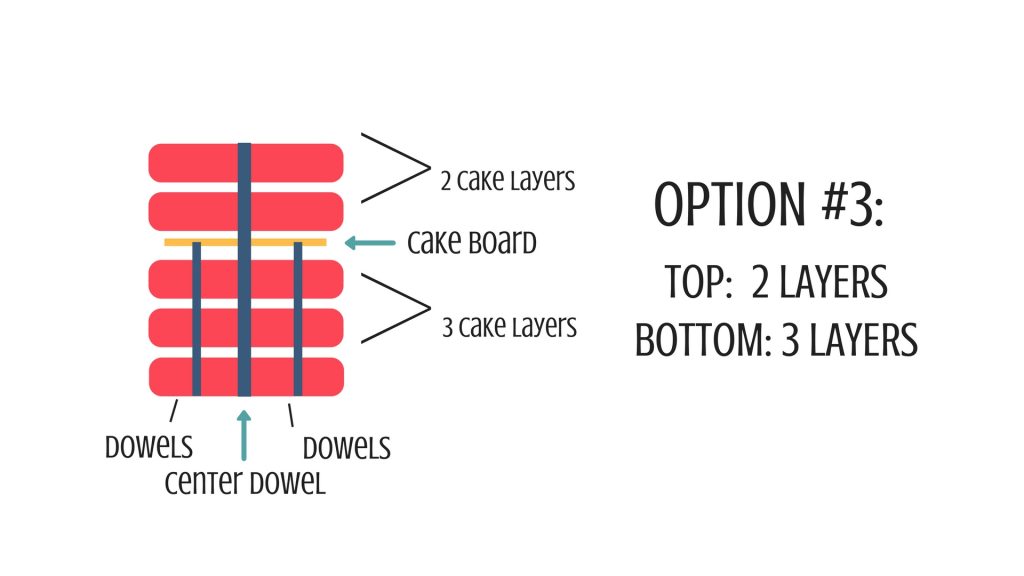
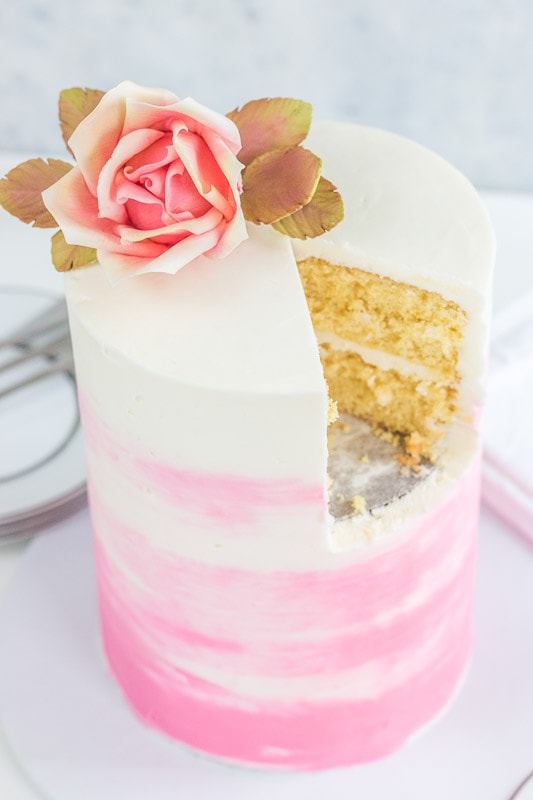
This is the option that I chose. I used three cake layers on the bottom tier and two on the top tier with a cake board in the center and dowels in the bottom tier. I went with this option because four layers of cake didn’t seem tall enough for me, but six layers of cake was looking way too tall for a 6″ round cake.
Ok, so now you’ve got some options to think about. Let’s get to actually building the cake.
Making the Tall Cake:
Don’t forget, if you’d rather watch the video rather than read all the steps, just scroll on down close to the bottom of the post to catch the video.
First you want to make sure you’ve leveled your cake layers. You definitely want them to be as level as possible, to prevent any accidents or them moving around on you later.
Take your large foam core cake base and cover it with fanci foil, or whatever your favorite method of covering a cake board is. If you want to see more options and all my cake board tips, you can see those here: Tips for Cake Boards
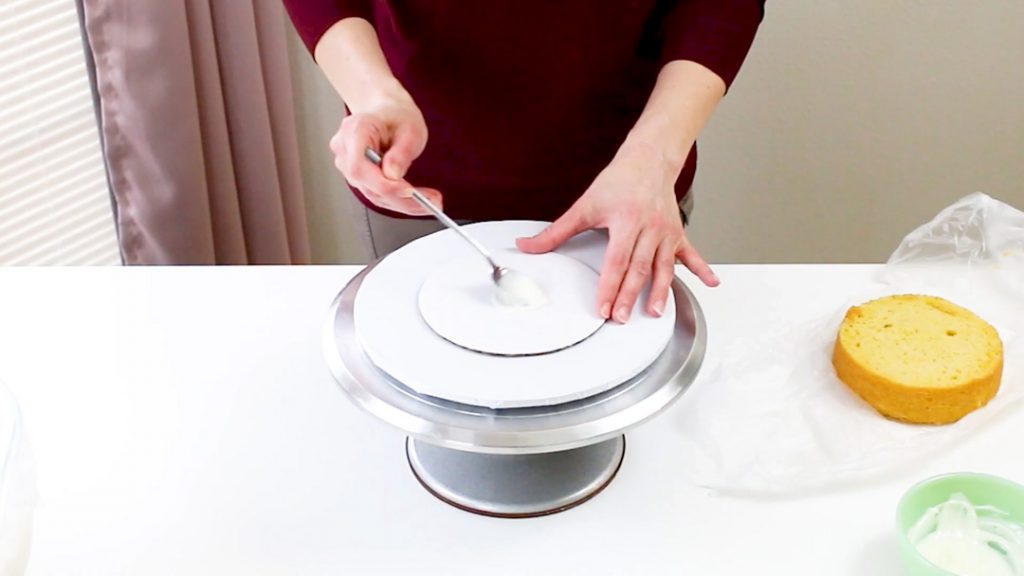
Now, set your cake base on your turn table and add some melted white candy melts to the middle. This will help you attach the bottom cake board, so it doesn’t move around.
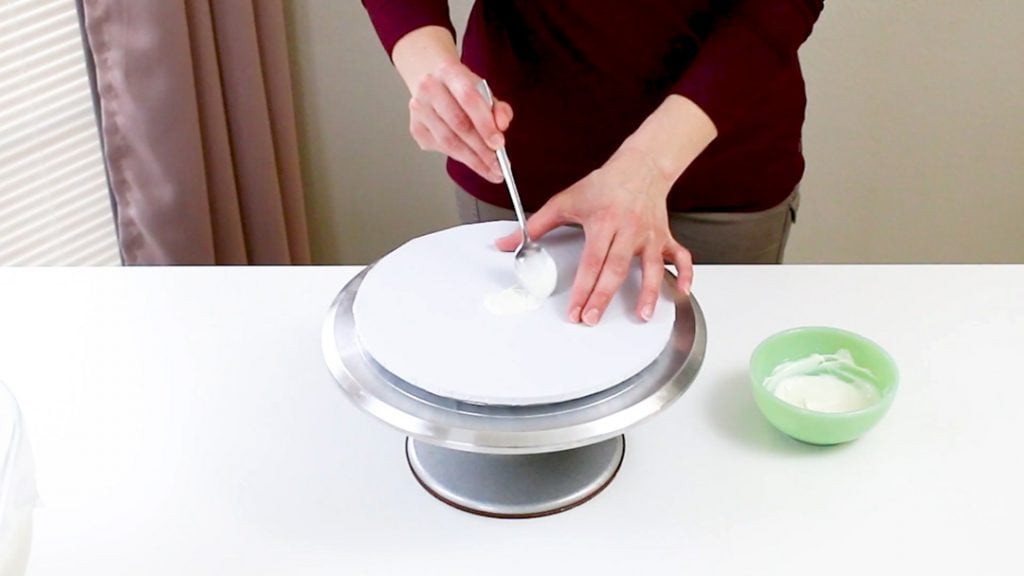
Now you want to add a cake board to the cake base. You need to make sure the cake board is the same size as your cake layers. I used 6 inch cake layers and a 6 inch cake board here. Make sure to let it set up a bit, so it’s good and sturdy. You can even pop it in the fridge for a few minutes if you want.
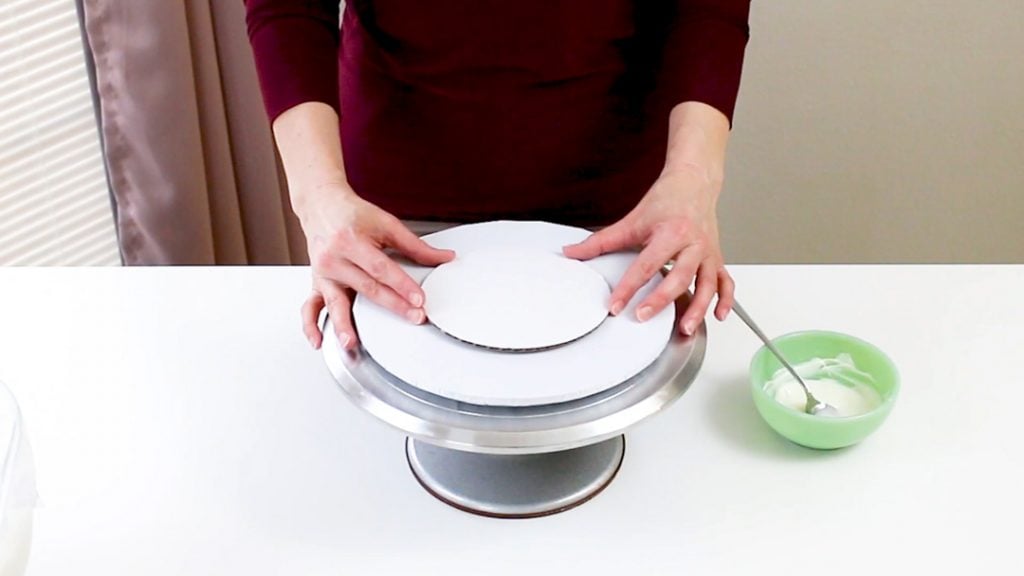
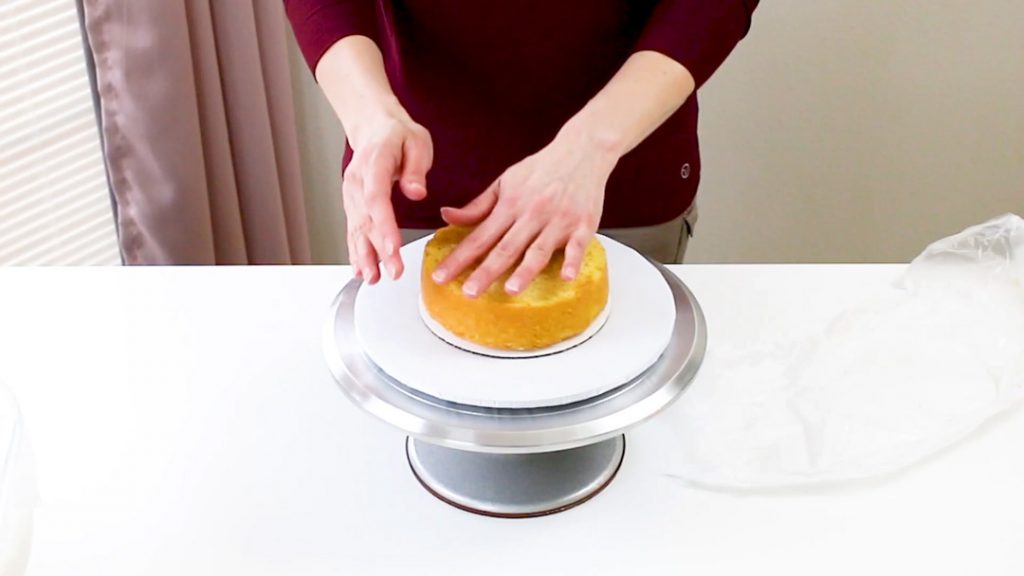
I like to go ahead and add just a bit of the melted candy melts to that board so the bottom layer of cake is stuck well onto the board. Some people like to use buttercream for this, but that just hasn’t worked well for me.
Then go ahead and add the first cake layer.
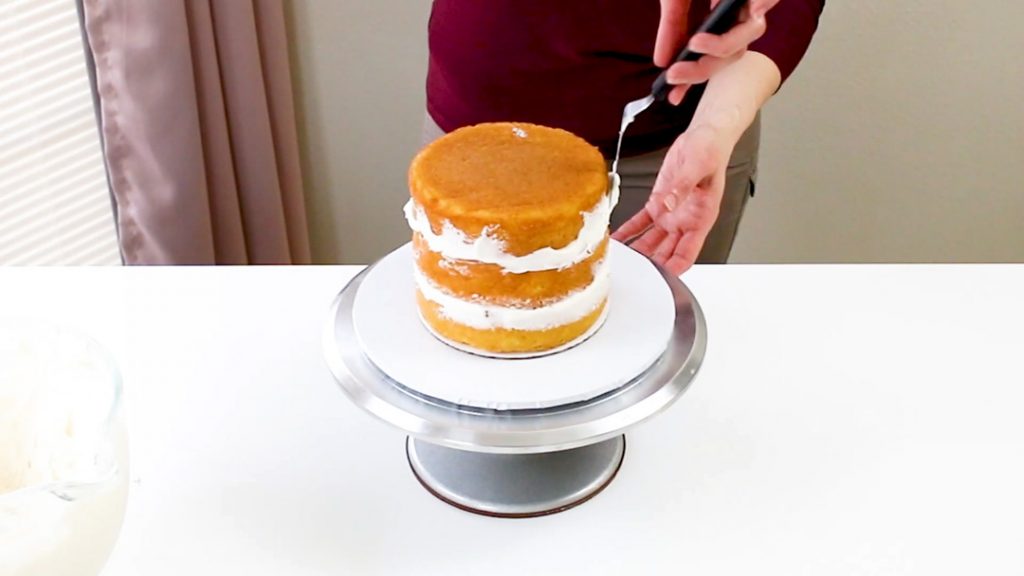
Add buttercream and your other cake layers until you get the bottom tier as tall as you need it. (Remember, don’t go higher than three tiers.)
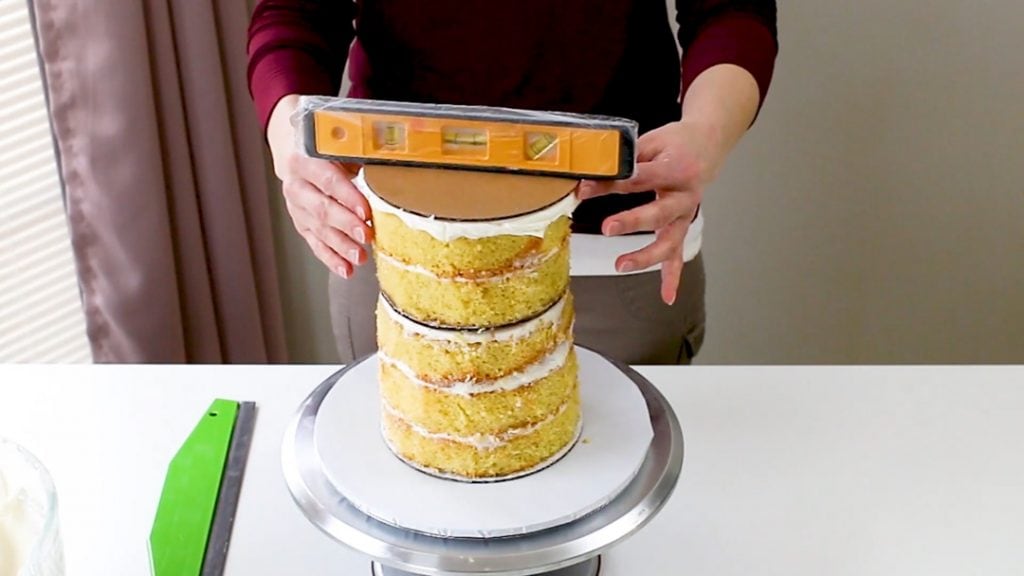
Pop another cake board on top and use your level to make sure the bottom tier is mostly level. If it’s not, just push down on the board a bit to level it out.
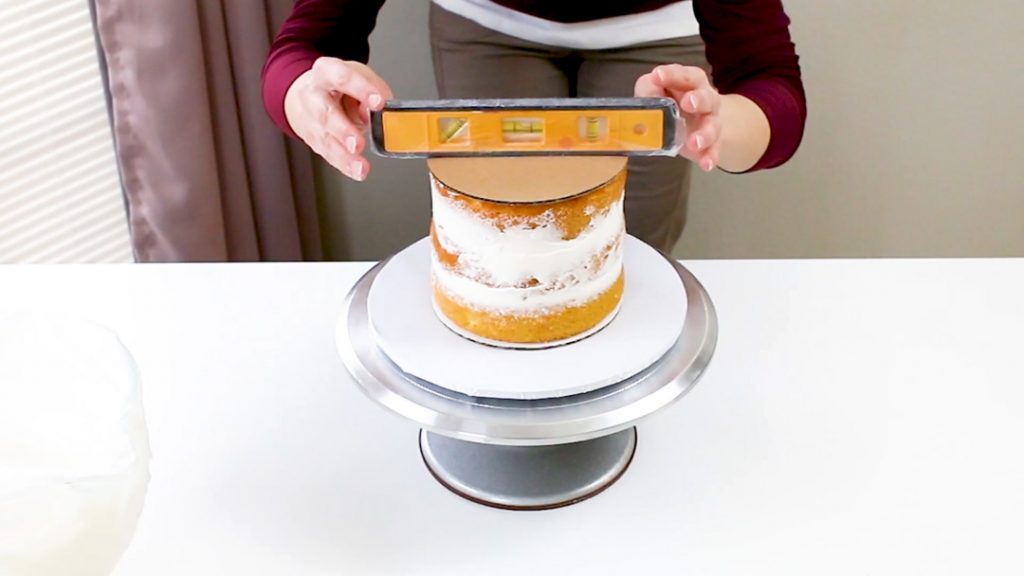
Once it’s mostly level, take that cake board off the top and add some buttercream.

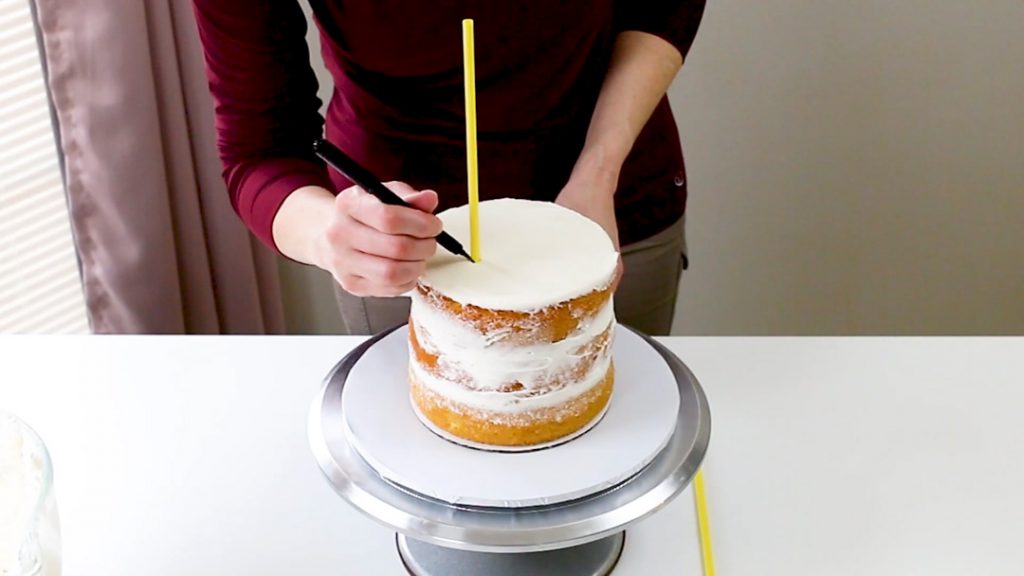
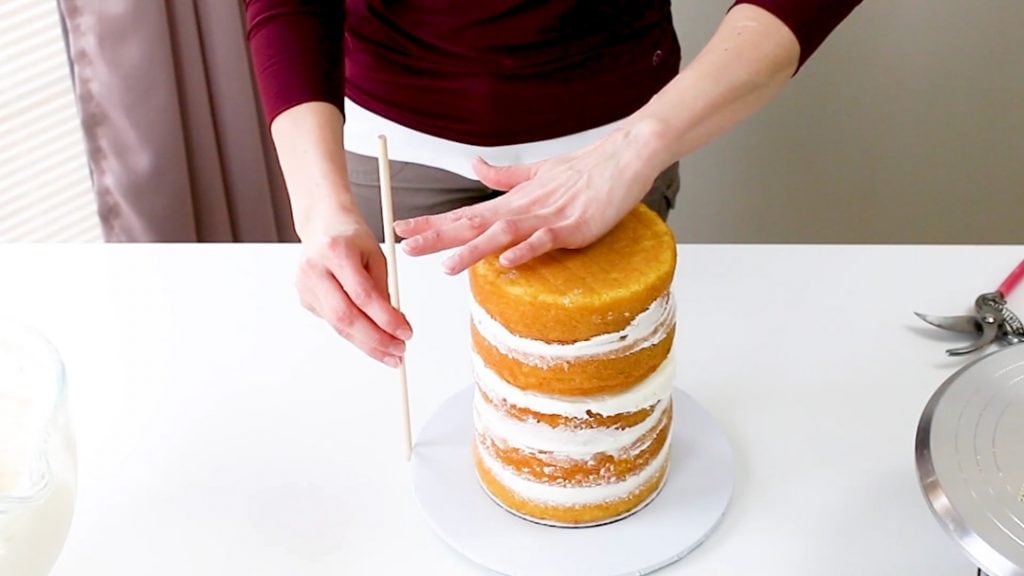
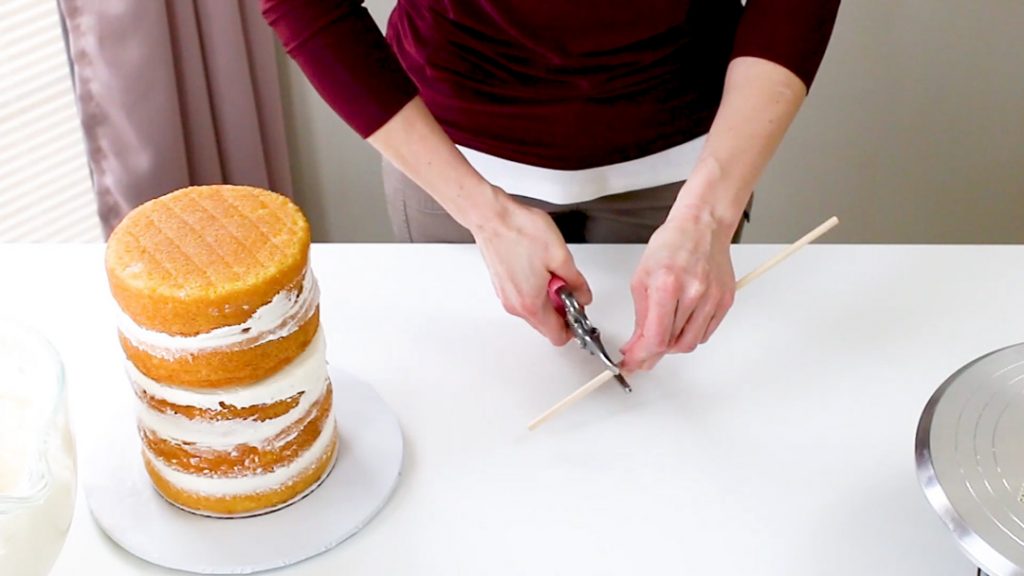
Now take one of the plastic dowels, insert it into the cake tier and then mark the top with an edible marker. If you’d like to use wooden dowels, feel free to do that. You could also use bubble tea straws as well. Just make sure they are heavy plastic and not the flimsy straws. Regular straws will not do the trick.
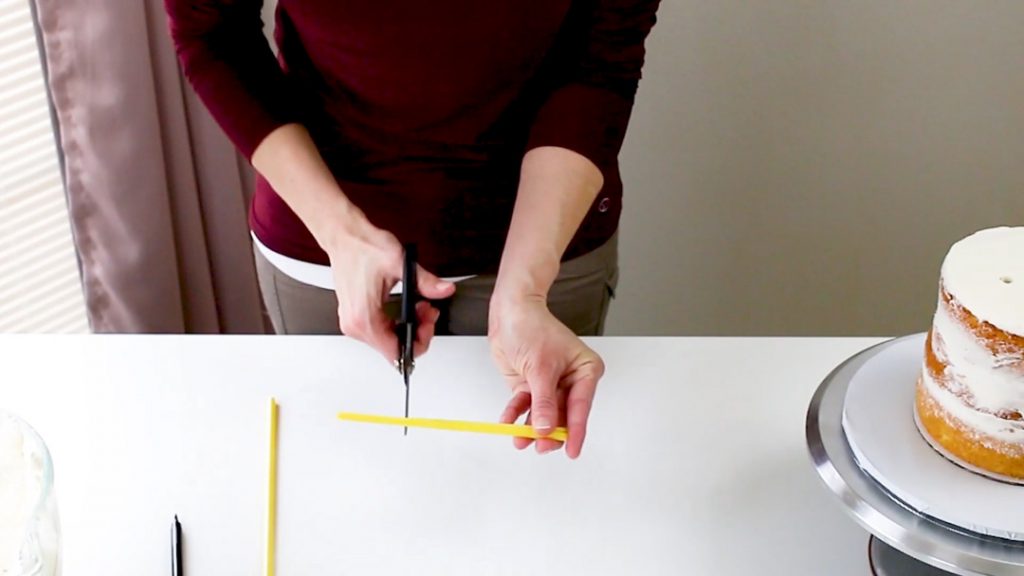
Once you’ve marked the dowel, twist it while pulling it out of the cake. You’ll need to cut your other dowels the same height. I cut all my dowels the same height and then insert them because I find this gives me a more level cake, rather than just cutting the dowels while they’re inside the bottom cake tier.
I used 4 dowels for the 6 inch round cake.
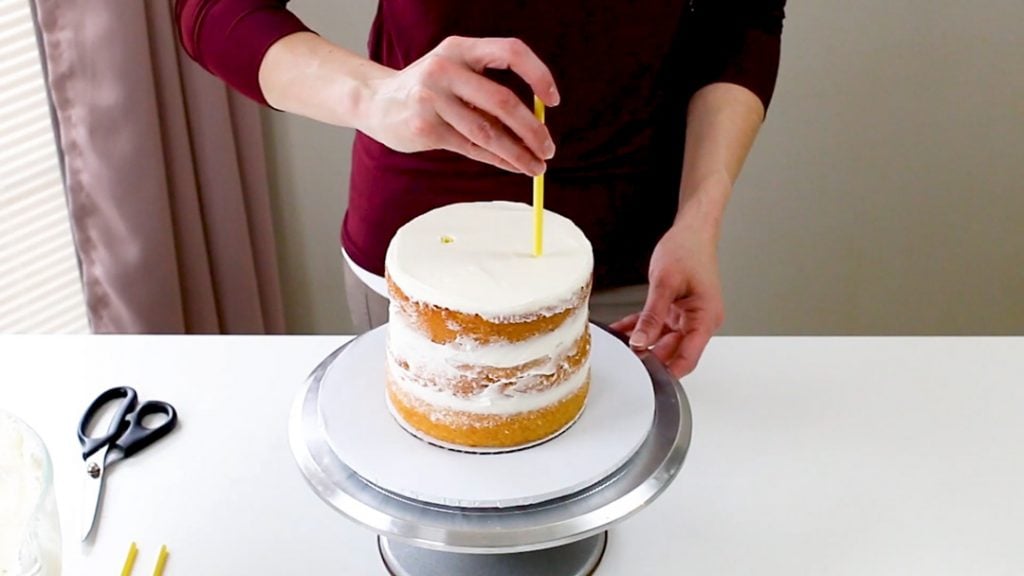
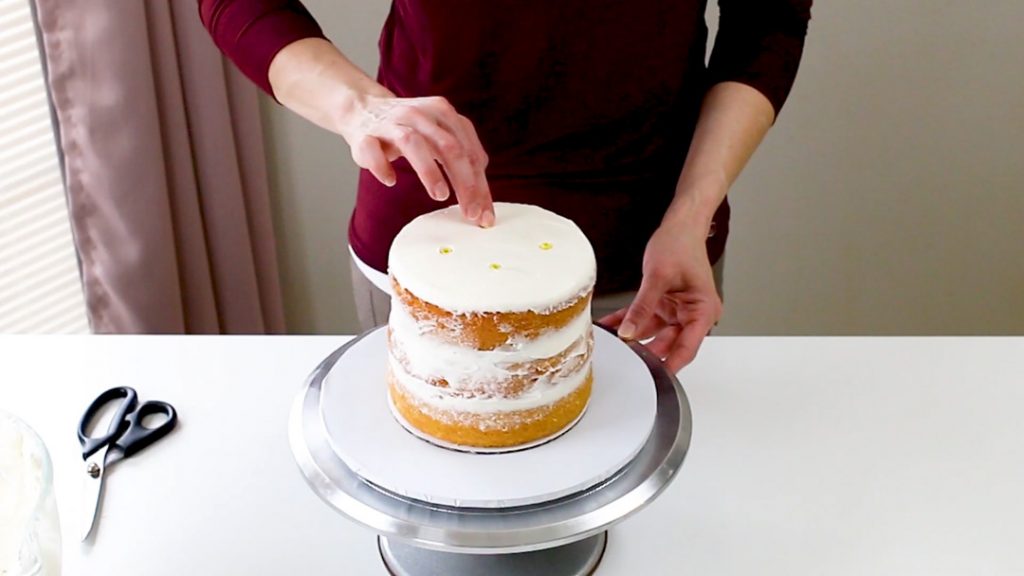
Now insert the dowels into the bottom tier. Leave the very middle space empty though because you’ll need to add in a center dowel later.
Now you’ll need to grab a cake board the same size as your cake layers, however you’ll need to trim it down a bit…maybe about a half inch trimmed off around it.
You need this board to be a bit smaller, so it doesn’t stick out when you ice the entire thing.
Now just pop your trimmed cake board on top of your bottom tier.
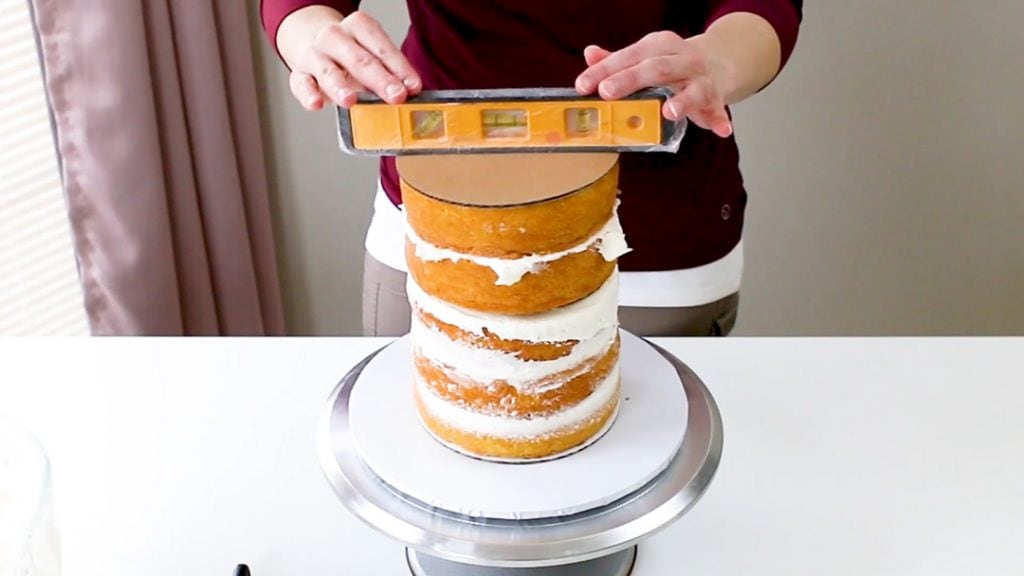
Now use your mini level to check it. Make adjustments if it’s off.
Add a bit of melted white candy melts so the next layer of cake sticks to the board. Some people like to use buttercream for this, but I like using the candy melts because it seems sturdier.
Now just add on your cake layers to the height you want. (Remember, don’t go over three.) I added only two layers for this top tier, since the cake was getting super tall.
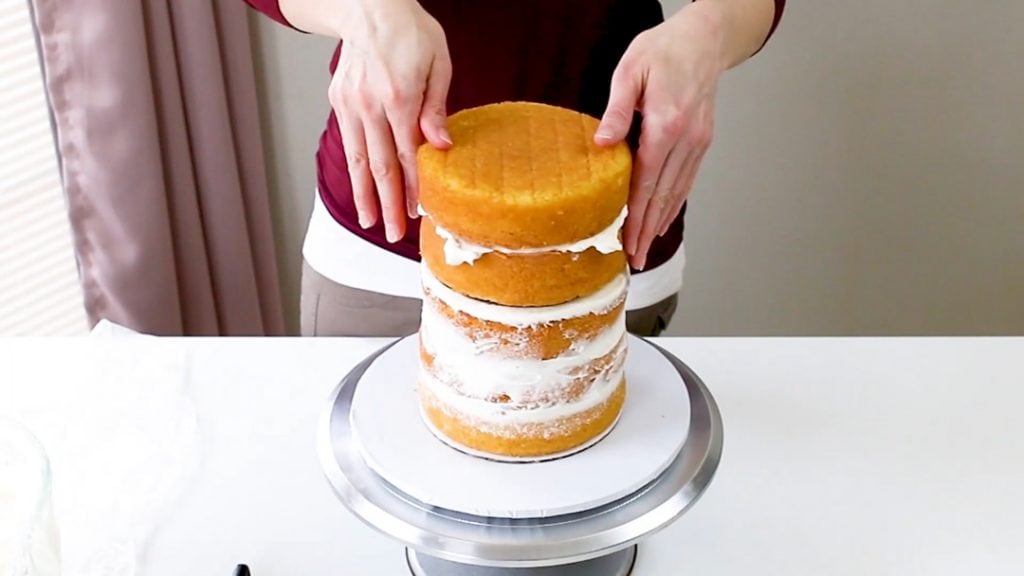
Now, make sure the cake is level and adjust if necessary.
Now you need to measure the height of your cake so you can cut your center dowel. You want to include the height of your foam core cake base because the dowel needs to go all the way through that as well (not just through the cake).
Yes, I know I’m very scientific using my hand to measure. 😉
It’s also okay if the center dowel is slightly shorter…you just don’t want it taller than the cake.
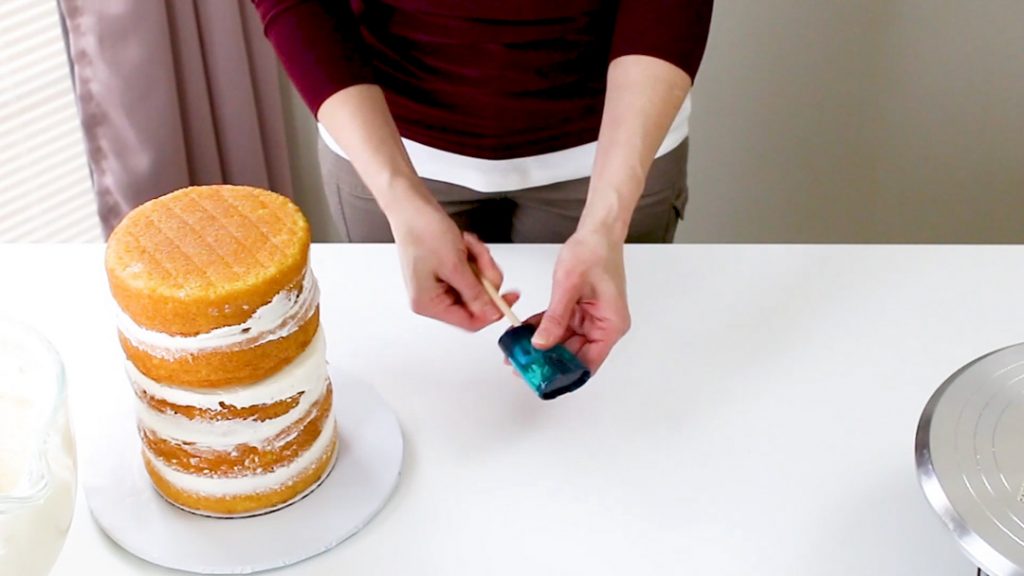
Now cut your dowel and then sharpen one end of it. Then just wash it off.
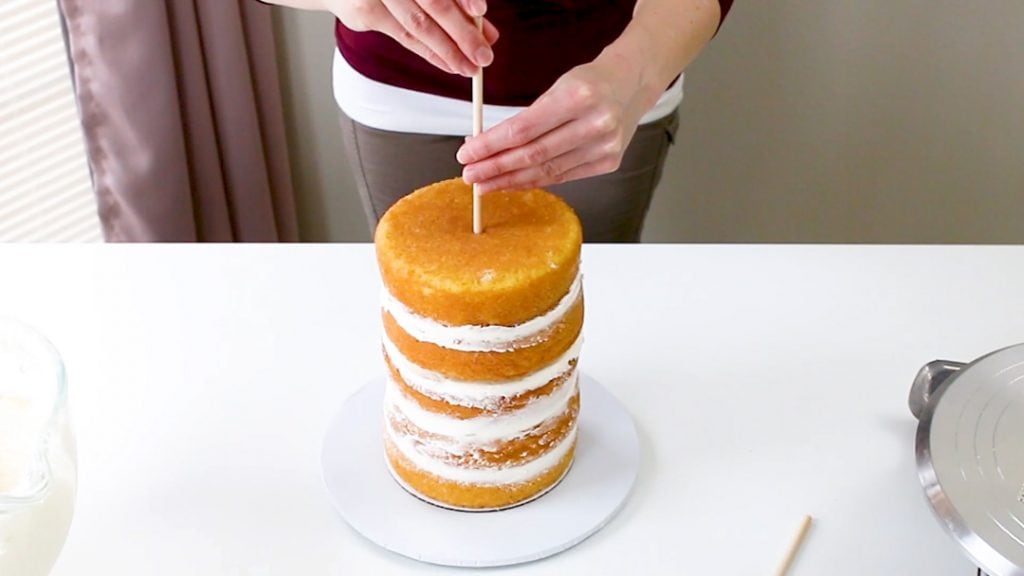
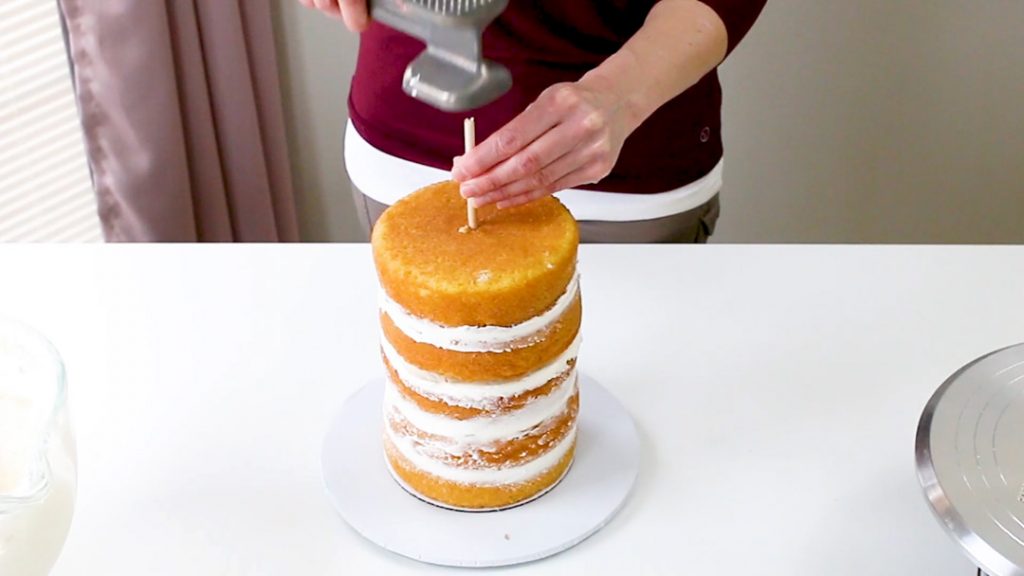
Now just push it (or hammer it) through the whole cake (even the board in the middle) and down into the cake base. Go all the way down into the bottom of the cake base.
Use the cut off dowel piece to help hammer it all the way through.
Yes I’m using a meat mallet…I couldn’t find my hammer. Hey, it works, right?
Alright, now I like to chill the cake, just for a bit, so it’ll be sturdy when I trim it. So, just pop the cake in the fridge for maybe 15 – 20 minutes or so.
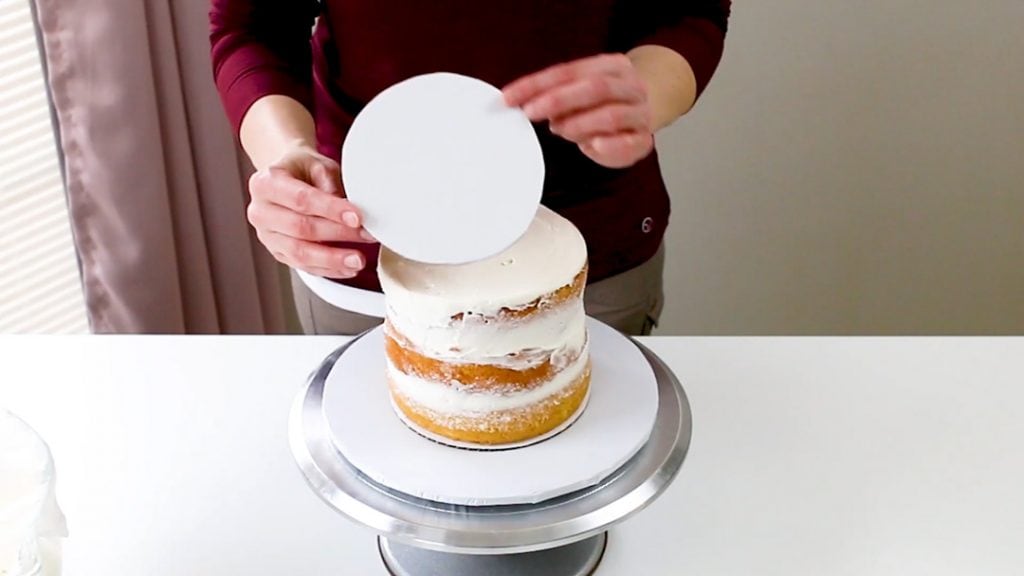
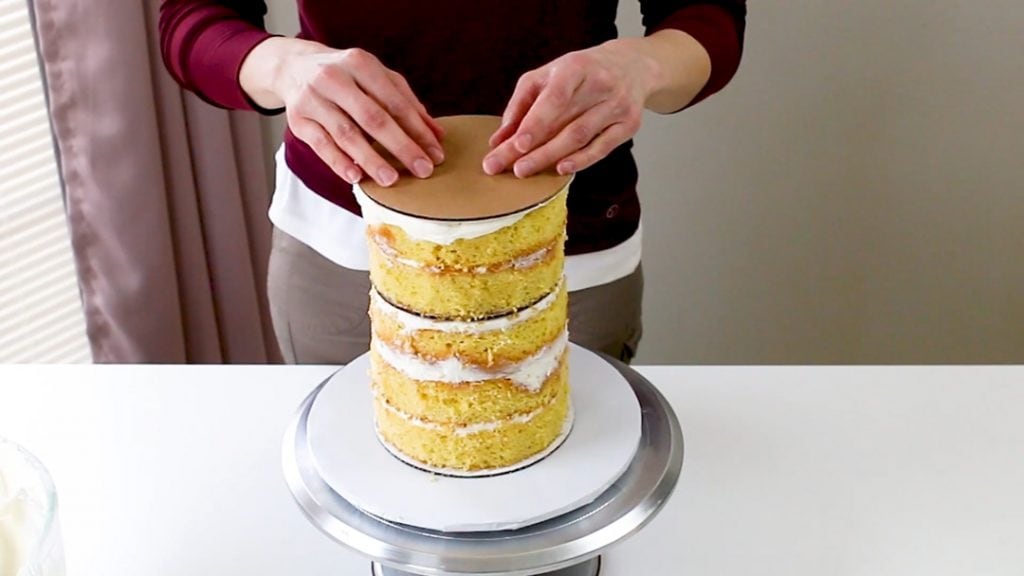
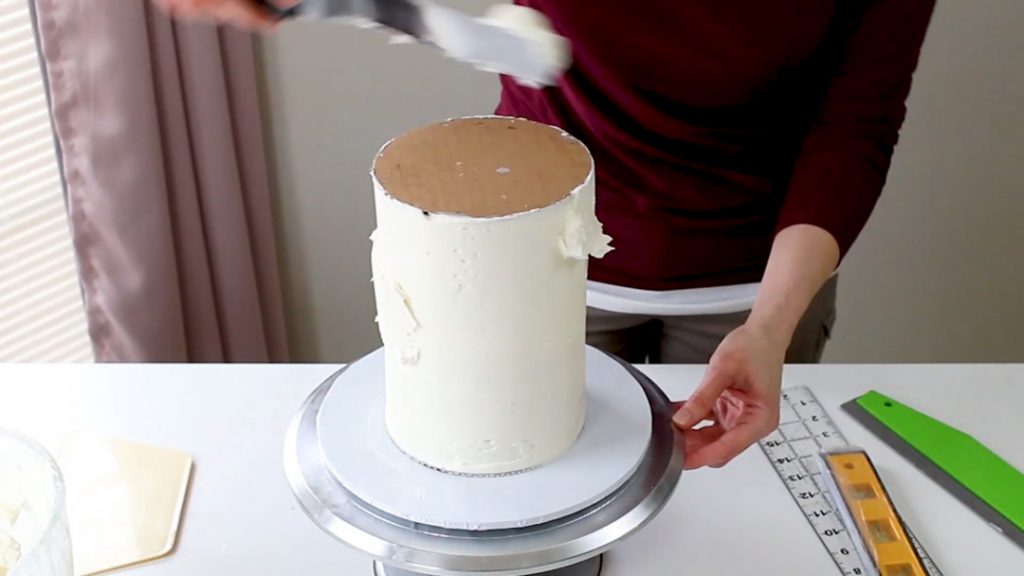
After it’s chilled a bit, you’ll want to add a cake board to the top of your cake, just to check and see how much you’ll need to trim. You don’t want any cake peaking out when you go to smooth the buttercream later.
Just use the bottom and top of the cake board plus your buttercream smoother to check which parts of the cake will need to be trimmed. This may make more sense when you get to the video.
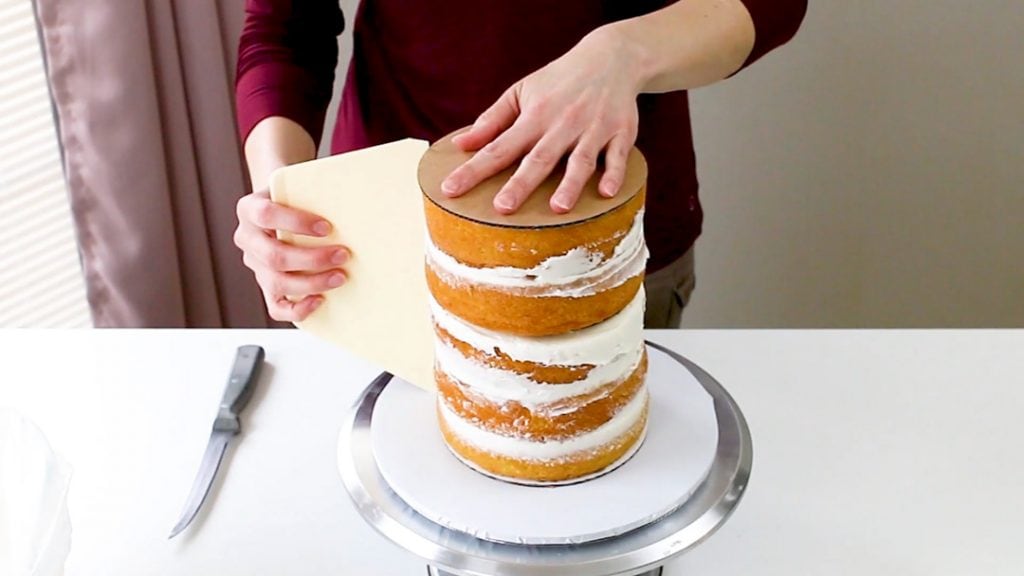
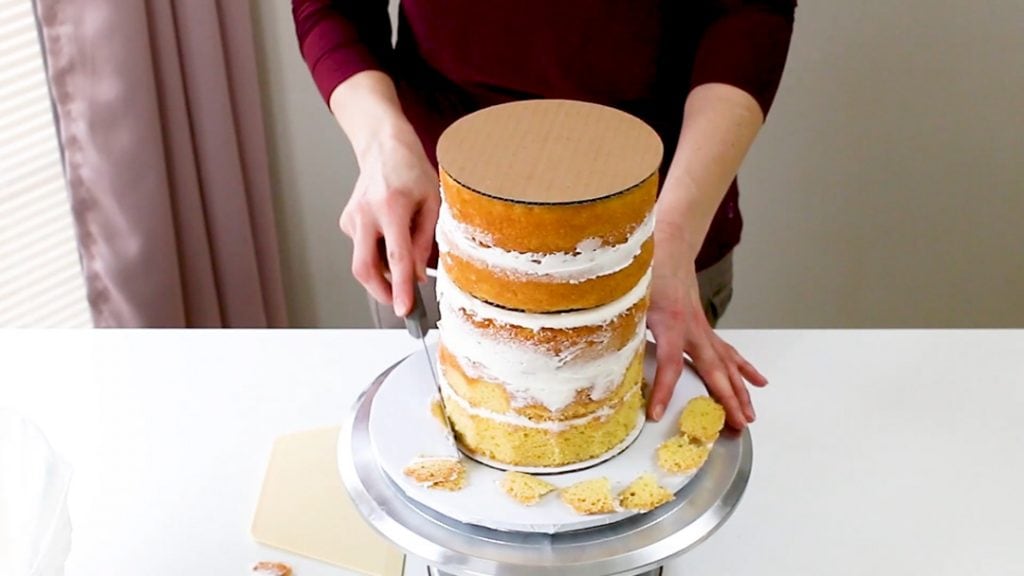
Now just trim around the cake. You’ll be using the top and bottom cake board as a guide when smoothing your buttercream, so any cake that is sticking out past those or any where near there, will need to be trimmed off.
You may not have to trim as much as I did…I tend to trim a lot off because I like a lot of buttercream and I just don’t want to take any chances that any of the cake will show through. Technically, you could probably use a larger cake board, but since I was making 6″ round cakes, 7″ cake boards are hard to find in my area. But trimming works too.
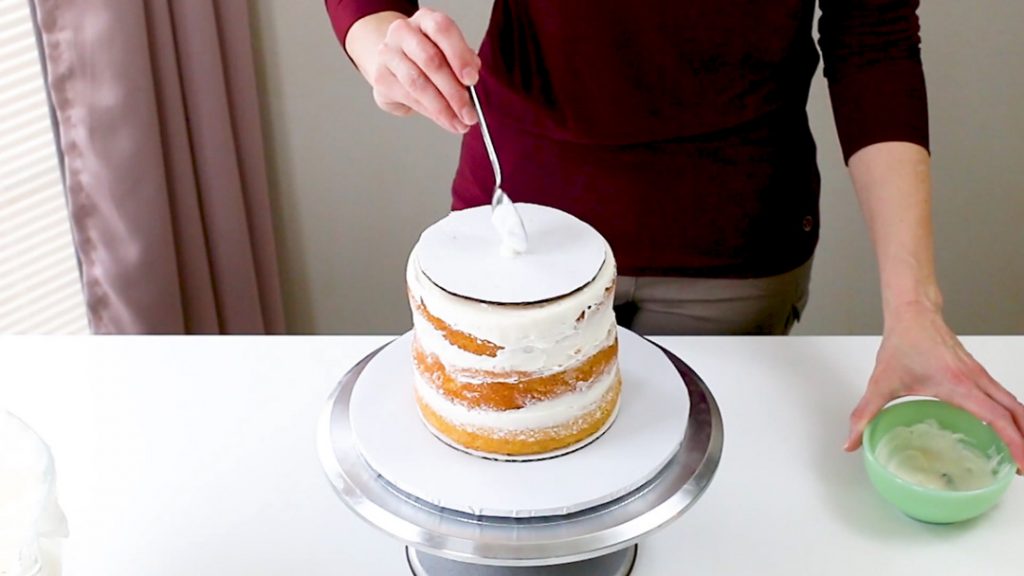
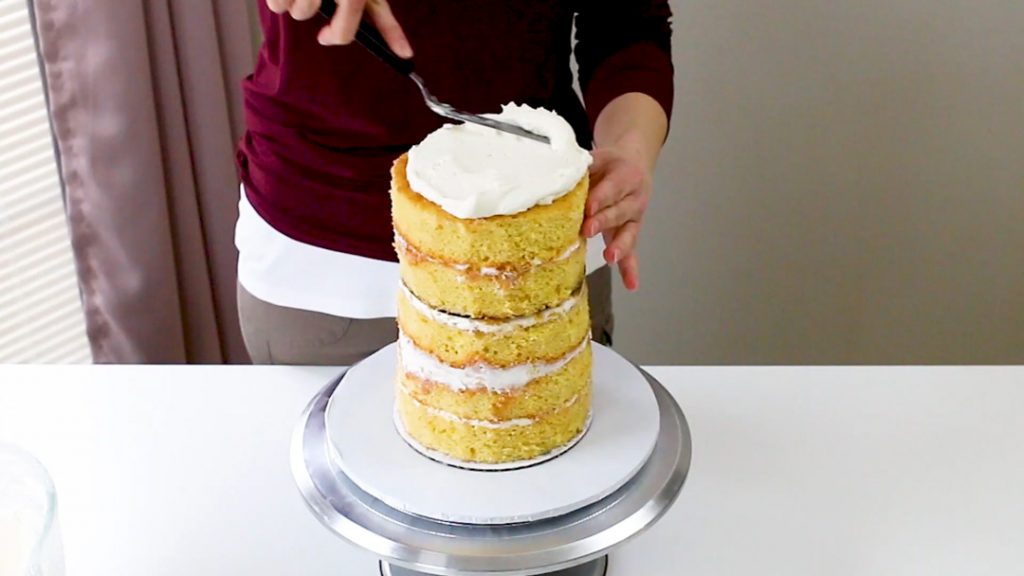
Once it’s trimmed up, add buttercream to the top and level it out.
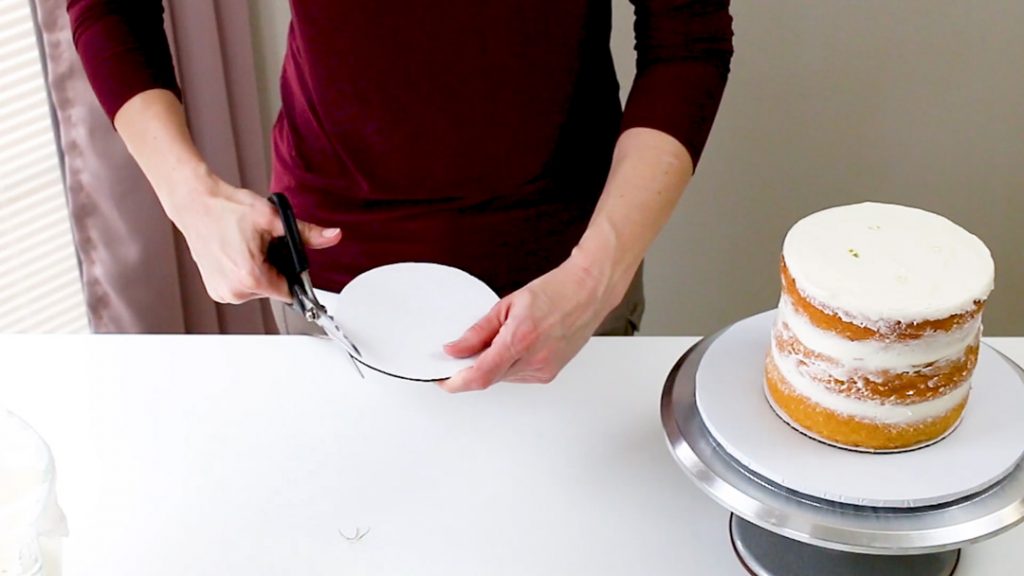
Now you’ll want to take another cake board (the same size of the cake layers you baked and the same size as your bottom cake board) and add some wax paper to it.
I just trace around the cake board onto the wax paper and cut out the circle. Stick the circle of wax paper onto the cake board with a bit of buttercream. (This top piece is going to be your icing guide.) This will make it easy to get a sharp icing edge.
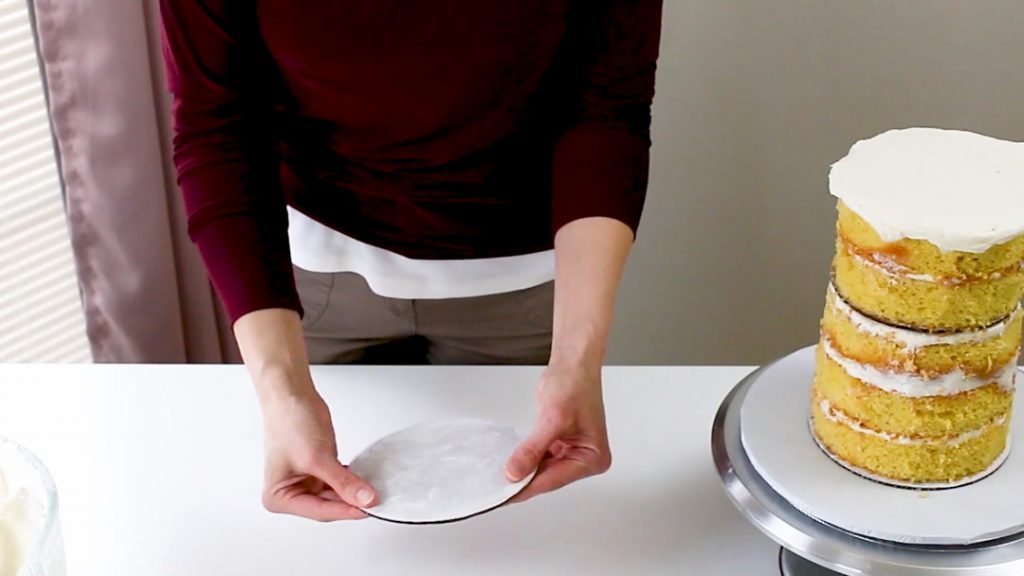
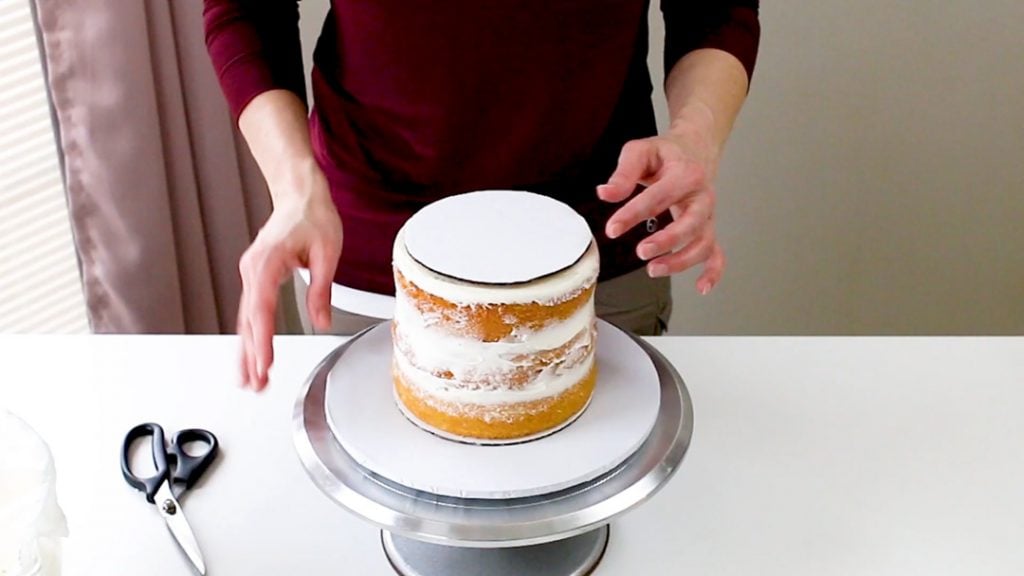
Pop it onto the top of the cake.
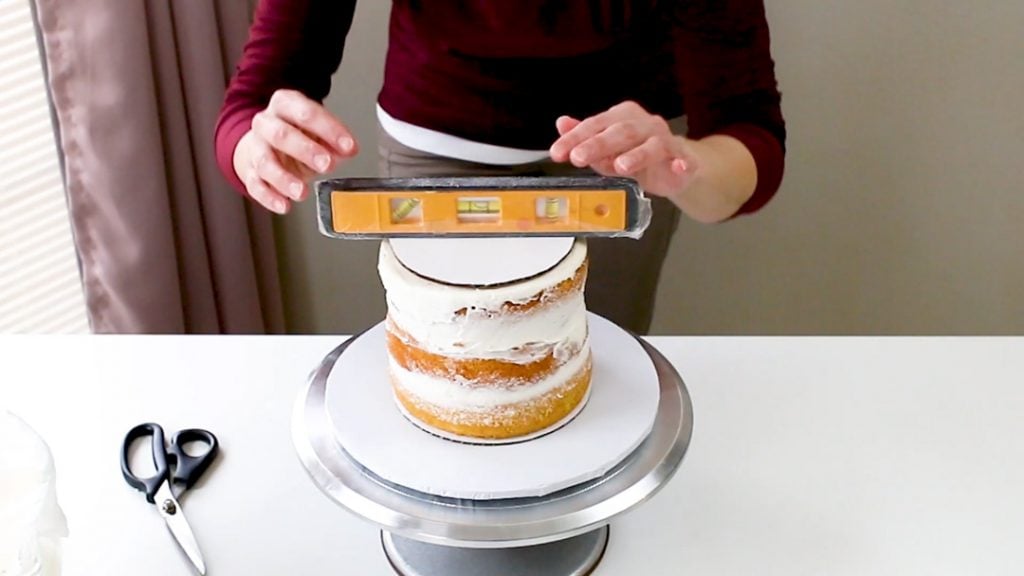
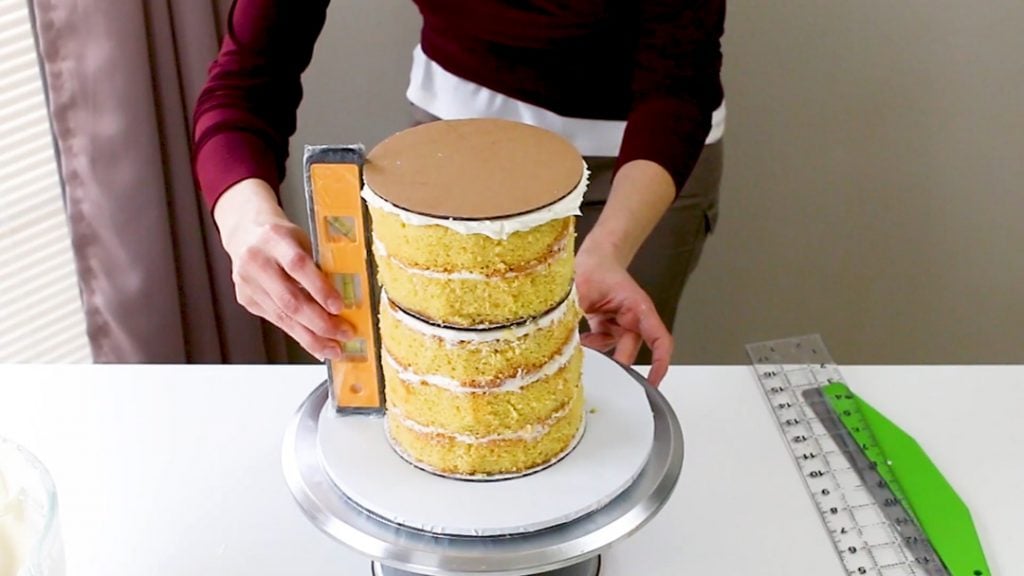
Use your mini level to level the top and you’ll also want the make sure the sides are level as well.
At this point, you can re-chill your cake for another 10-15 minutes or so to firm it up. (Don’t leave it in the fridge too terribly long because it’ll dry it out.)
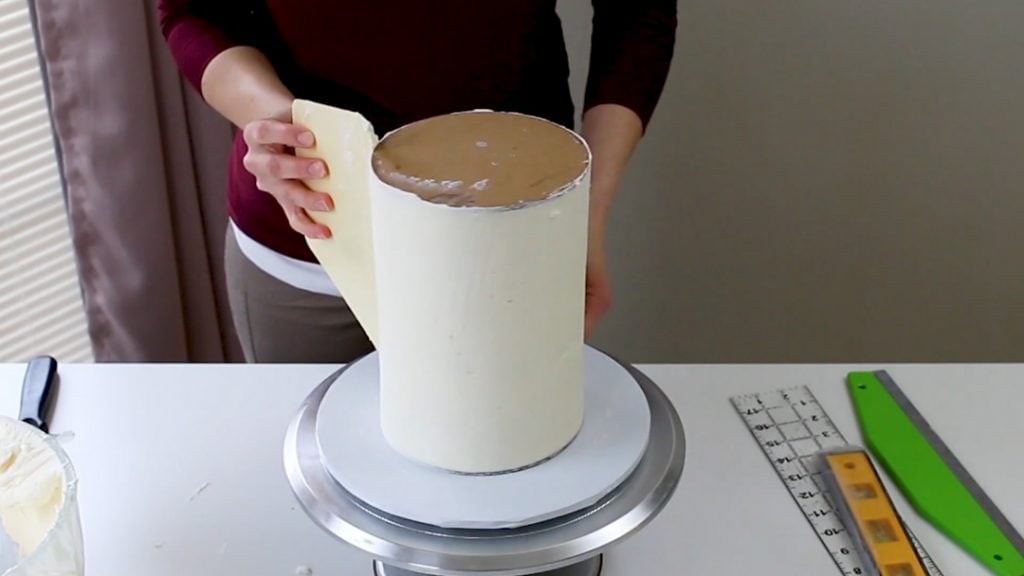
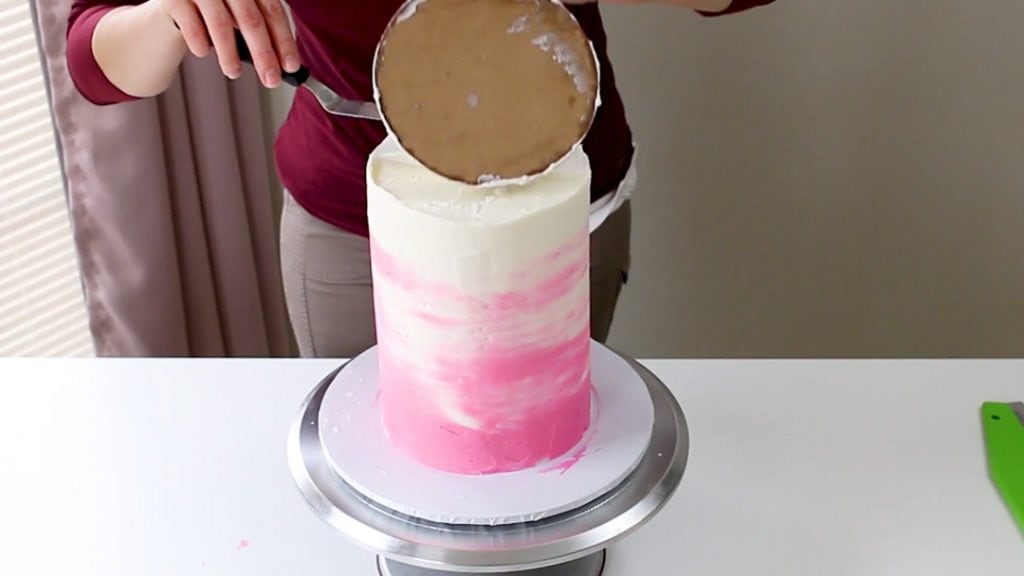
Alright, once it’s chilled just a bit, it’s time to add your buttercream. Just start by adding it all with a large icing spatula.

One it’s all added, start smoothing it with your buttercream smoother.
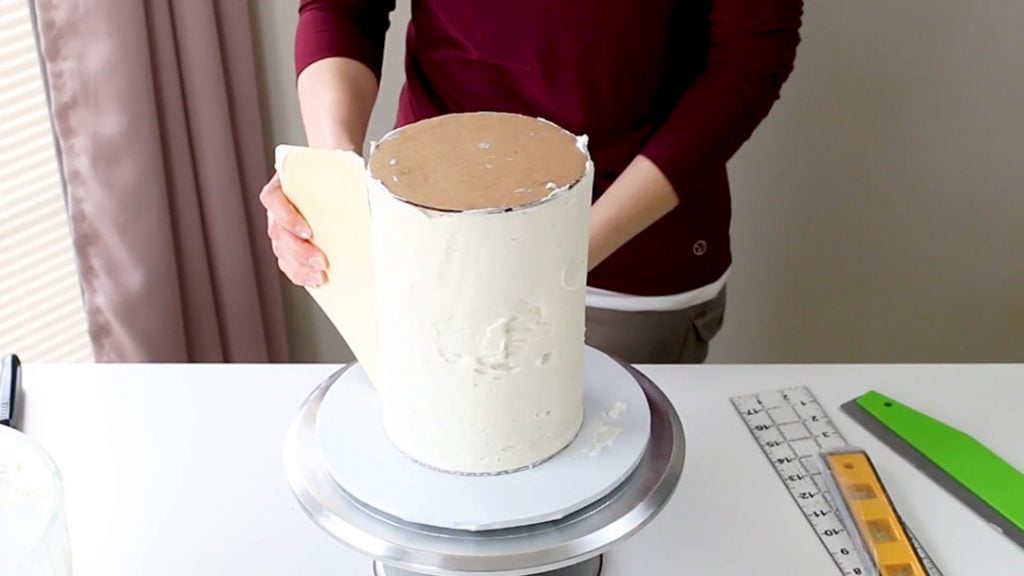
Add more buttercream to any holes you see and then smooth again. You may need to do this process a couple times.
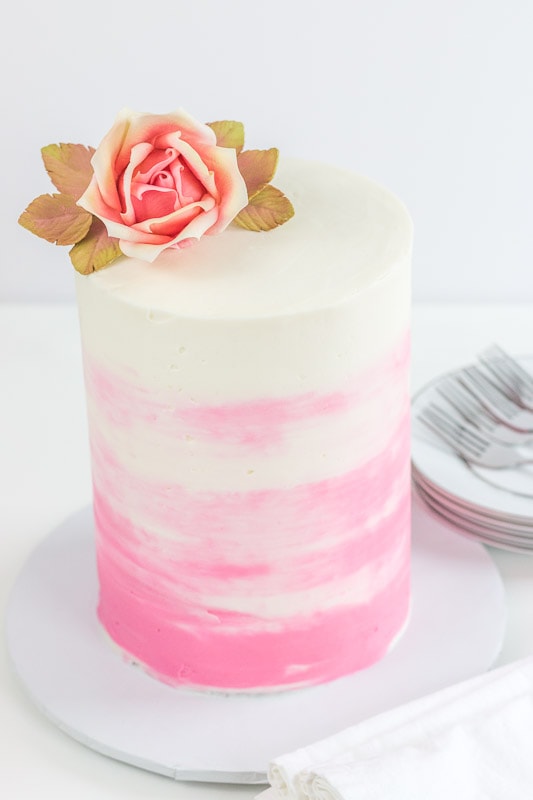
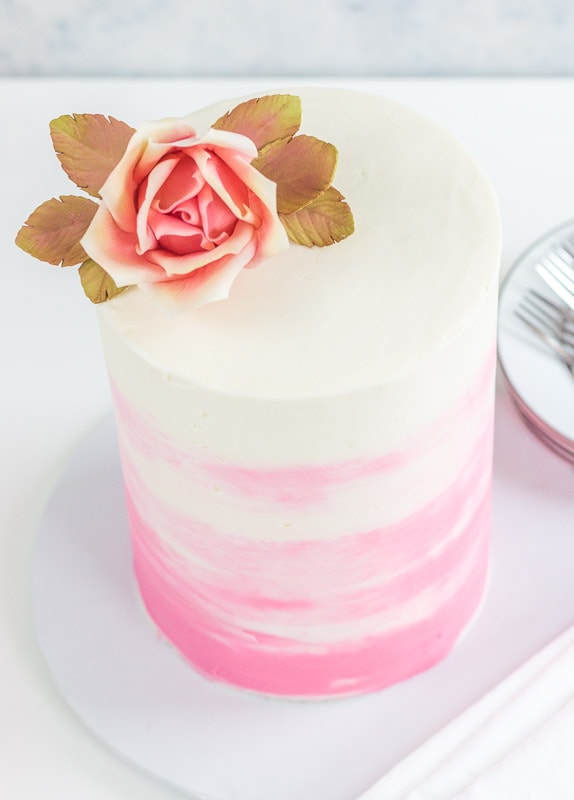
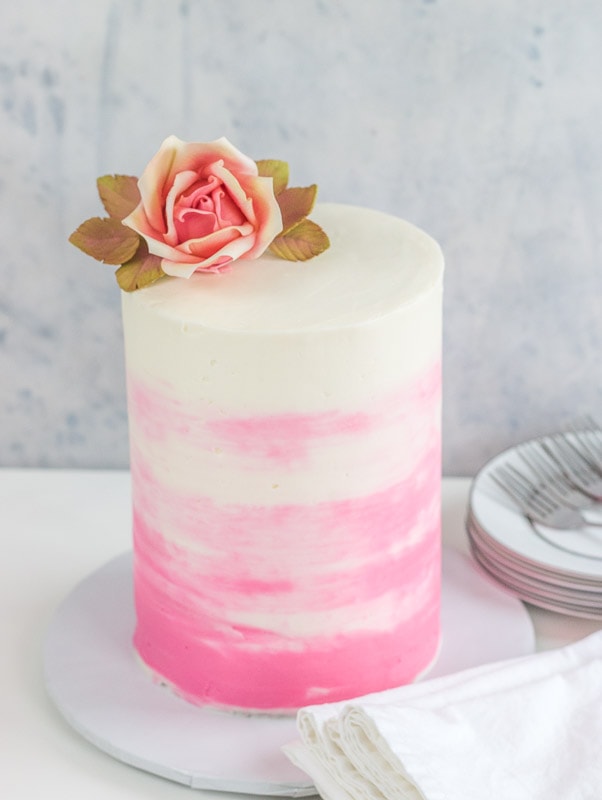
To get the watercolor look, add more white buttercream on the top and pink on the bottom.

Now use your buttercream smoother to smooth around it.
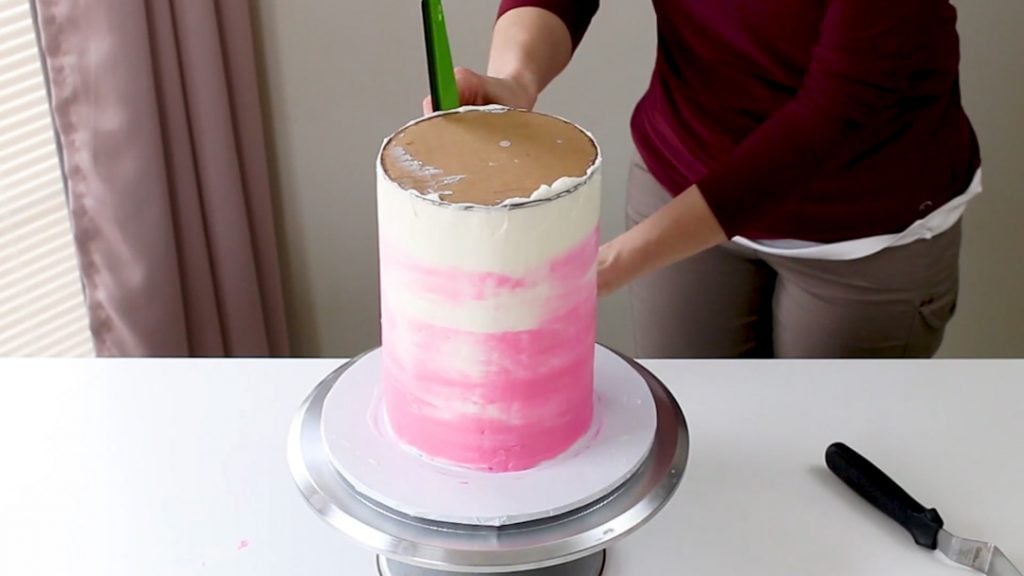
Once you get it as smooth as you’d like. Pop it in the fridge for about 10 -15 minutes so the buttercream firms up a bit.
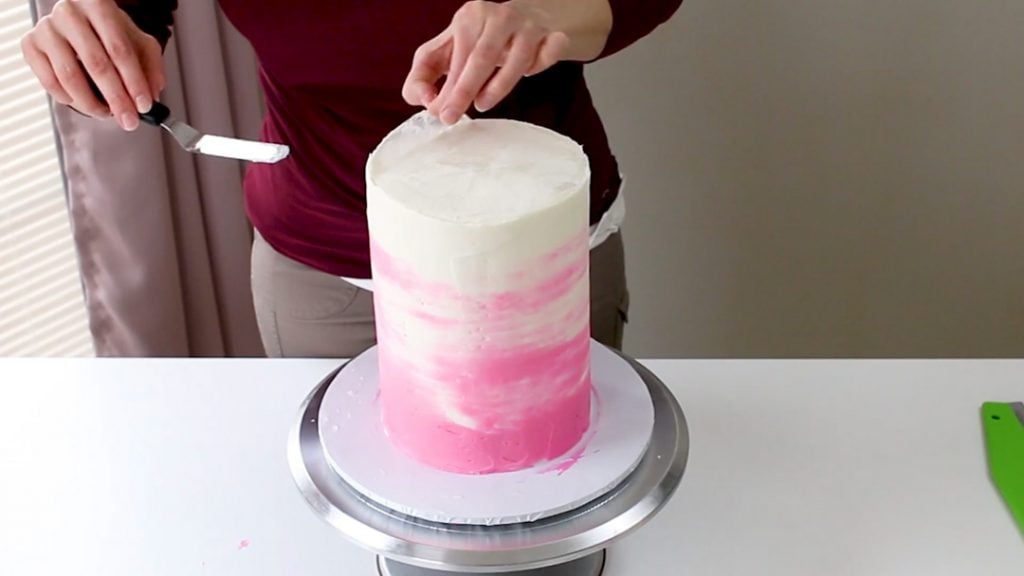
Now take your smaller icing spatula, dunk it in very hot water, dry it off and insert it around the bottom of the cardboard round on top of the cake. You’ll need to do this a little at a time, heating your spatula with the water and drying it off. You want to slowly loosen that top cake board.
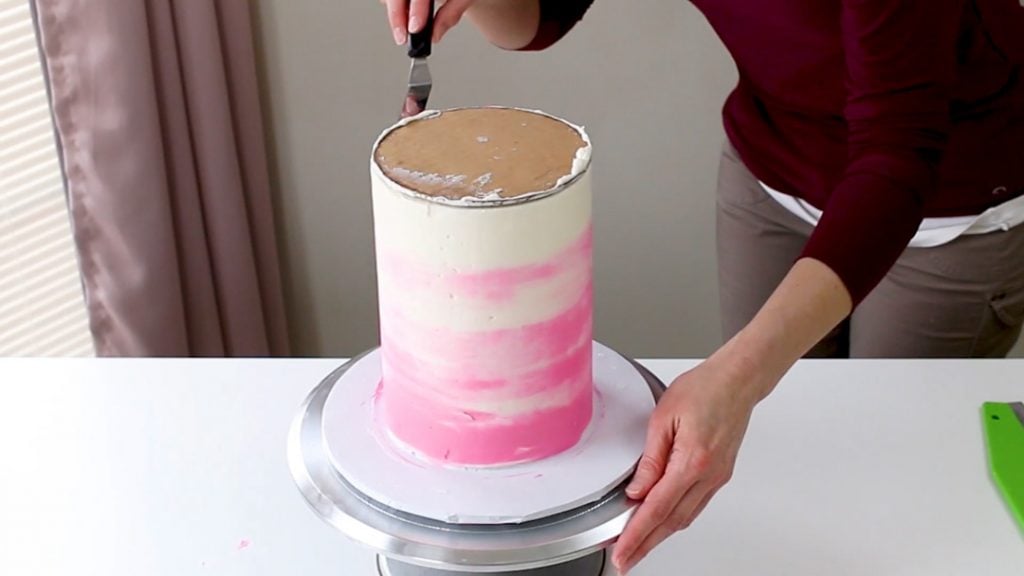
Once it’s loose enough, just pop it off and make sure you get the wax paper off as well.
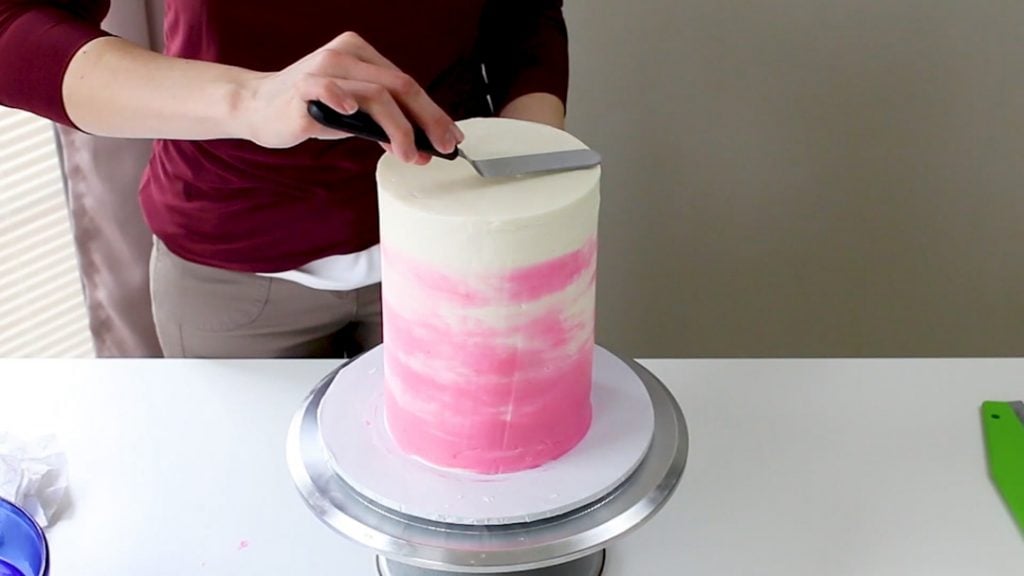
Now you’ll need to smooth the top. You can do this one of two ways. If you’ve used a buttercream that has shortening in it (a crusting buttercream) you can use the Viva paper towel method. Just set the paper towel down over the top and just smooth the top out with your hand very lightly.
If your buttercream is made from butter, you can use the hot spatula method. Just dip your icing spatula in really hot water, dry it off and then use it to smooth over the top of your cake.
With either method, just make sure not to go out to the edge of the cake, or this could mess up your sharp edge.
Now just make sure to clean off your cake base.
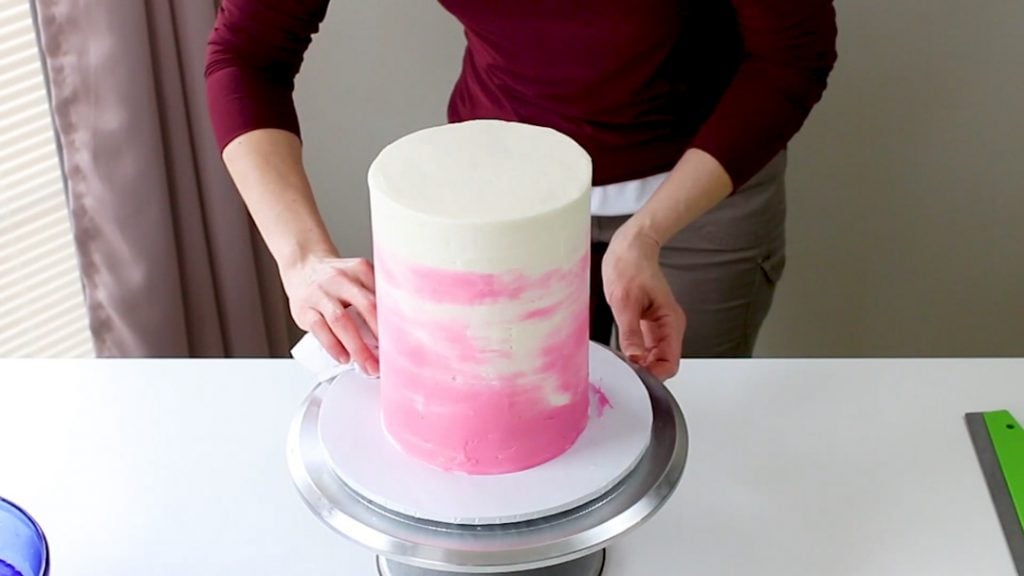
Now you can add the cake topper of your choice, or you can even add some pretty gumpaste flowers. I decided just to add one of my large gumpaste roses. You can catch that tutorial here: How to Make a Large Gumpaste Rose
To cut this cake, you’ll cut it like it’s two tiers. Just dig into the top tier first, then take the cake board off and cut and serve the bottom tier.
Alright…there you have it! Now you’ve made a impressive tall cake!
Video for Making a Tall Cake:
Ok, just let me know if you’ve got any questions. You can always leave me a comment below.
Don’t forget to pin it below!

Samira
Hi thankyou for a great tutorial. It explains everything in detail. I have a few questions:-
1)I am making a stripped 6 in cake how many layers will look good considering I have a 3 1/2 in figure to put on top and meringue and sugar lollipops to go on top.
2) can I put buttercream icing on a ganache covered cake?
Thanks will be eagerly waiting for ur reply.
Kara Jane
Hi Samira, it’s really up to you how tall to make the cake. I’d probably go around 4 cake layers (around 8 inches or so). That’s a little taller than a normal cake, but not so tall that it gets supper unstable. Once you start adding the cake layers together, you can get a better idea of how tall it’ll look.
As far as your next question…are you covering your entire cake in ganache? Do you just mean that there will be a ganache drip and you want to pipe buttercream on top to add the lollipops and meringues etc? If that’s the case, then that should be just fine…people do that a lot.
mikayla
Hi there, I am making a cake for 50 people- do you think 2×3 layer 8inch cakes(stacked to make double barrel will be enough? Is there a better option for this? (eg. 2 tiers.)
Thanks heaps
Kara
Personally, I think 8-inch cake layers look a little chunky or squaty when using them to make extra tall cakes. You need more layers to make it look tall and then it just starts to look like one giant block. That’s only my opinion though. Two ‘tiers’ of 8 inch cakes, probably wouldn’t serve 50 people either…maybe like 40. If they are okay with a tiered cake, I’d go with a 10-inch on bottom and 8-inch tier on top. If they really want a tall cake, you could go with two, 6-inch tiers and then make some cupcakes or a sheet cake to make up the difference in servings. A tall 6-inch round tall cake (2 tiers of 6-inch cake) would only serve about 20 people, so you’d have to make up the difference. Hope this helps.
Samira
Thanks for a prompt reply.
I want to cover the whole cake with ganache before putting buttercream on it for strips as my cake colors are white yellow and grey and the cake is chocolate.
Thanks
Kara Jane
I haven’t tried that. I’ve added a very thin coat of buttercream on a cake and then ganache before (that’s normally what I do when I’m going to cover a cake in fondant), but I’ve never tried ganaching the whole cake first and then adding buttercream. It might work fine as long as the ganache is firm on the outside of the cake. I’ve seen people in forums say they’ve done it, so it might work. I’ve just personally not tried it.
Karina
Great tutorual!!
What size of tall cake would you recommend for approximately 40 to 45 people. Would a 6 inch 6 layer ne enough? I want the cake to have the right proportions (tall:wide), and be enough for my group *leftover is ok). Would an 8 inch by 8 layers be too much? 8 inch by six layer too short (and thus no right proportions)?
Thanks soooo much in advance!
Kara Jane
Hi Karina, I don’t think the 6″ tall cake would be enough. The 8″ cake would probably be around 40 (because you’ll essentially have two cakes staked on top of each other). I think you’re right about the proportions though. You’ll probably need to an another layer or two to an 8″ cake otherwise it may not be tall enough. It’s going to be one very big and very tall cake though!
Karina
Thank you for your reply! Would it be too crazy to shave off around 1 inch after stacking the cake to make it 7 inches wide? That way I’d only add one extra layer? Any tips?
Kara Jane
No that’s not crazy…I’ve done that a number of times!
Karina
Great! Thanks a lot!
Jo
I just want to make a three layer cake. To do this, would i just need a center dowel or would i need to add the two side ones as well. Thank you so much!
Kara Jane
I make three layer cakes all the time and don’t use a center down, or a middle cake board. Unless the cake is super tall, you don’t need the center dowel.
Ann Arjemandfar
Please can you give me some advice. m making an 8″rainbow cake that is 6 and a half inches tall. Im going to put some toppers on the cake. Will i still have to dowel and put a board mid-way? With it being a rainbow cake, it would spoil the effect?
Kara Jane
If the cake layers are thinner layers, then you may not have to put at board in the middle of it.
Aishwarya
Hey I was curious of what the weight of the cake would be?
Kara Jane
Good question. I’m not sure what the weight of this one was. I just can’t remember. I don’t remember it being super heavy though. It would really depend on the type of cake you used and the size. Some of the more dense cakes are heavier, then say a sponge cake or cake mix cake. It would also depend on if you use ganache and/or fondant as those tend to add weight. I’ve made similar sized cakes, but the ones with ganache and fondant are SO much heavier.
Amna
Hi, this post is really helpful! I’ve made a tall 6inch cake and after I finished icing it, I could see one layer starting to buckle ever so slightly. It is fine in the fridge but am worried about when it’s time to cut and out of the fridge. Since the cake is already finished, would you suggest just a centre dowel or extra thinner dowels as well? For reference it is probably the height of your tall 6inch but with 3 thick layers of cake.
Thanks alot!
Kara Jane
Hi there, the center dowel will generally just keep it from toppling over, although if there isn’t a middle board, it may not work 100 percent. If it’s just a cake you’ll be serving at home, it may be okay, but if it’s a cake you’ll be traveling with and it’s already buckling, it may be better to add a middle board with dowels and re-ice. That’s a huge pain, I know, but to make sure it doesn’t fall over, it might be the only way.
Claudia
Hello,
I’m going to attempt this tall cake. I usually make 2 different size cakes. To make the 5 layer cake in your post, Would I double your vanilla bean recipe? Or would I use a 1 and half. If so how do you adjust the baking powder?
Kara Jane
If you’ll be making five 6″ round cake layers, then I’d go ahead and mix up two batches of the recipe. There may be a bit left over for a couple cupcakes, but I’d rather it be that, then not enough and get thin layers.
Spencer
Question- how well do these cakes transport? Would they safely go a few hours Without shifting or no as they start to thaw out from the fridge?
Kara Jane
Hi there, I actually don’t chill my cakes for a long period of time and some I don’t chill at all before transporting them. I’ve transported mine about an hour and a half to two hours away from my home like this a couple times. I think the shifting just depends on how well the cake is supported. It also helps to let the cakes settle before decorating them and therefore they settle less when transported.
Kris
Hi there!
How many people does this particular cake serve?
Kara Jane
This one is two 6″ round layer cakes essentially, so I’d say around 20-25 people for small-ish slices.
Laura Bennett
I am a retired elementary school teacher with the new hobby of cake decorating. YOU are an excellent teacher. I learned everything I need to know to attempt a tall 6″ round cake tomorrow. I am wondering when and how do I remove the 4 dowels from the bottom tier so that serving the cake looks nice instead of messy pieces on the plates of my guests. Thanks for your help,
Laura
Kara Jane
Hi Laura! So glad to have you here and thanks for the compliment about being a good teacher! That means a lot coming from an actual teacher. 🙂 So as far as removing the dowels, the way I’ve always done it is to use needle nose pliers. I have some that I only use for caking. It helps to get a grip on the dowel and then twist it as you’re pulling up on it. Then you can just cut the cake as usual. I hope this helps and I hope you have fun with your new hobby…it’s definitely addicting. 😉
Bunny Salter
‘Hi Kara Jane. I have a question for you…can you use your cream cheese frosting recipe on a tall cake? My granddaughter wants a red velvet cake for her college graduation and cream cheese frosting is traditional. Will your recipe be too soft to draw lines for flower stems and pipe painted-effect flowers using a palette knife?
Kara Jane
It will be a bit softer than regular buttercream. You might be able to add an extra cup of confectioner’s sugar to thicken up the consistency a little though…and you’d definitely want to store it in the fridge. I haven’t tried piping stems or using it as painted flowers though.
Melanie
What size is the cake pan you used for the cake you just did?
Kara Jane
Hi there, it mentions the size I used and all the supplies in the post under the “Supplies Needed” section a little bit down from the top of the post. I used 6 inch cake pans for mine, but you could use any size you want really, just know that the bigger around the cake layers are, the more layers you’ll need to make it look taller.
Nathalie W
Hi Kara Jane,
I love your tutorial!
I made just a 2 tiered ‘tall cake’, at the request of a friend. I made a practice one first as I need to make hers in 2 weeks. I did not use dowels as it’s only 2 tiers and my middle cake board stuck to the buttercream underneath (from the top of the bottom layer of the cake)
Why would that happen?
How do I ensure it doesn’t happen again?
Help please! Thank you so much!
Kara Jane
Hi Nathalie, a two-tiered cake does need dowels in the bottom tier to hold up the top tier. Do you mean two layers of cake and not tiers maybe? If so, you generally don’t need a board between two cake layers. Sometimes when you use a cake board between tiers (or layers if you’re building a tall cake), it will stick to the buttercream below it. I don’t think there’s a good way around that. Some people sprinkle a little powdered sugar or a bit of cornstarch before they set their board down, but that’s not a guarantee that it won’t stick. I hope this helps a little!
Zahraa
Hi
Do you know how tall the cake was?
Kara Jane
It was probably around 9-10 inches tall.
Arin Dickson
Hello!
I am making a tall and tiered cake for my niece’s baby shower. So a combination of your tall cake tutorial, and your how to stack a cake tutorial. The bottom tier will have 3 layers and will be 8″, the top tier 3 layers and 6″. My question is, when doing the buttercream icing, I’m not sure how to add it since for your tall cake it was all one size, and the stacking cake used fondant. Do I add and level the icing on the first tier, then add the second tier and ice it, and just have to smooth out any showing on the top of the bottom layer? Or do you have another recommendation?
Thank you so much!
Kara Jane
Hi Arin, so for the tall cake tutorial, I stacked the tiers first and just iced the whole thing at once because it’s meant to look like one tall cake. But if you do a two-tiered cake with different size tiers, then you won’t do that. They’re each treated like one separate cake and then stacked. So, you’ll need to ice each tier separately before you stack them. Now, I’ve seen people stack and then ice the cakes, but most of the time people completely ice both cakes, chill them a bit to firm them up so they’re easier to handle, and then stack them. You can then add borders around the bottom edges if you want and any finishing touches. I hope this helps!
Megan Williams
So excited to try a tall 6 inch cake for my son’s birthday!! How tall are each of your cake layers typically for the 6 inch? How many cups of batter do you use per pan? Thank you!
Kara Jane
Hi Megan, each cake layer is about 1 1/2 to 2 inches tall. As far as cups of cake batter, I really don’t measure cake batter into cups. I generally just estimate how much I need on a per recipe basis. So I know that one of my recipes will make two, 8 inch round cakes, so if I need three I’ll just make up 1 1/2 recipes. Generally, one cake recipe will make three 6 inch cake layers that are about 1 1/2 inches deep. Hope that made sense? I do have a post where I talk about estimating cake batter that goes into more detail. You can see that here: https://iscreamforbuttercream.com/how-much-cake-batter-do-i-need/
Nicole
Hi Kara!
How much of your vanilla bean buttercream icing should I make for this cake? I will be doing the 3:2 layers-6”. Double or triple the recipe? And about how much should I tint for the watercolor effect?
Thanks in advance!
Kara
I’d probably make two batches of buttercream to be on the safe side. That should give you plenty of icing for filling, coating the outside and for border piping. You can probably tint about a 1/2 cup to 2/3 cup buttercream the dark color. It doesn’t take a lot of it.