
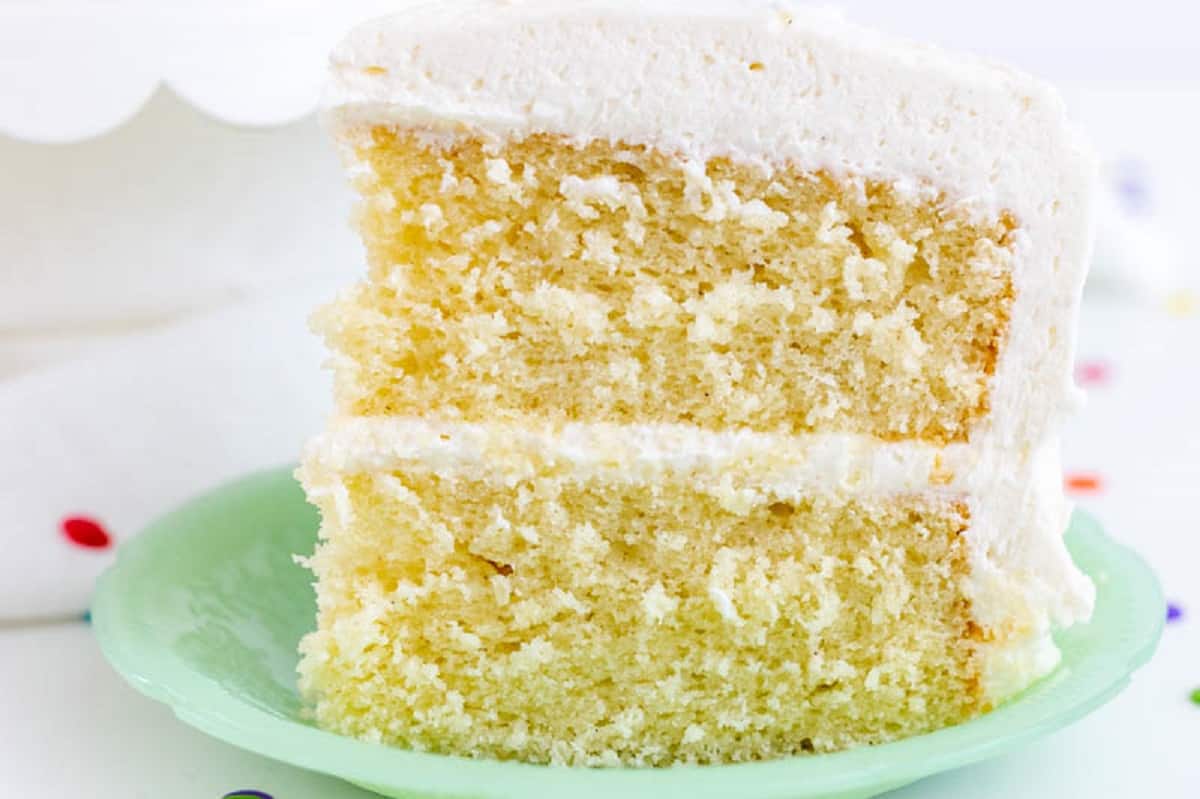
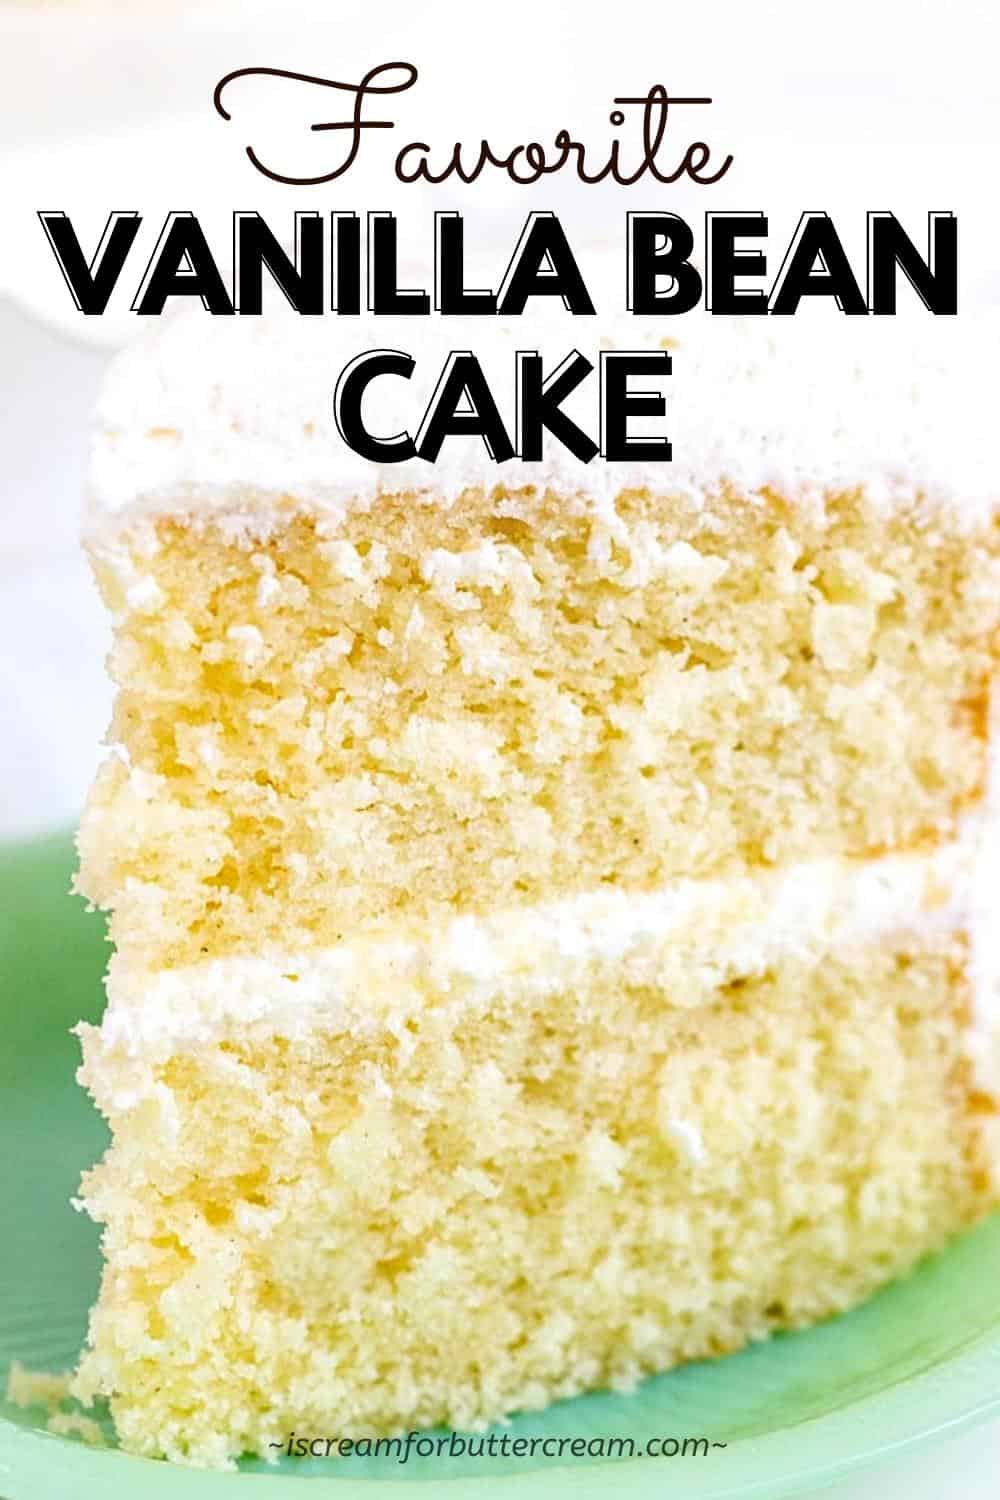
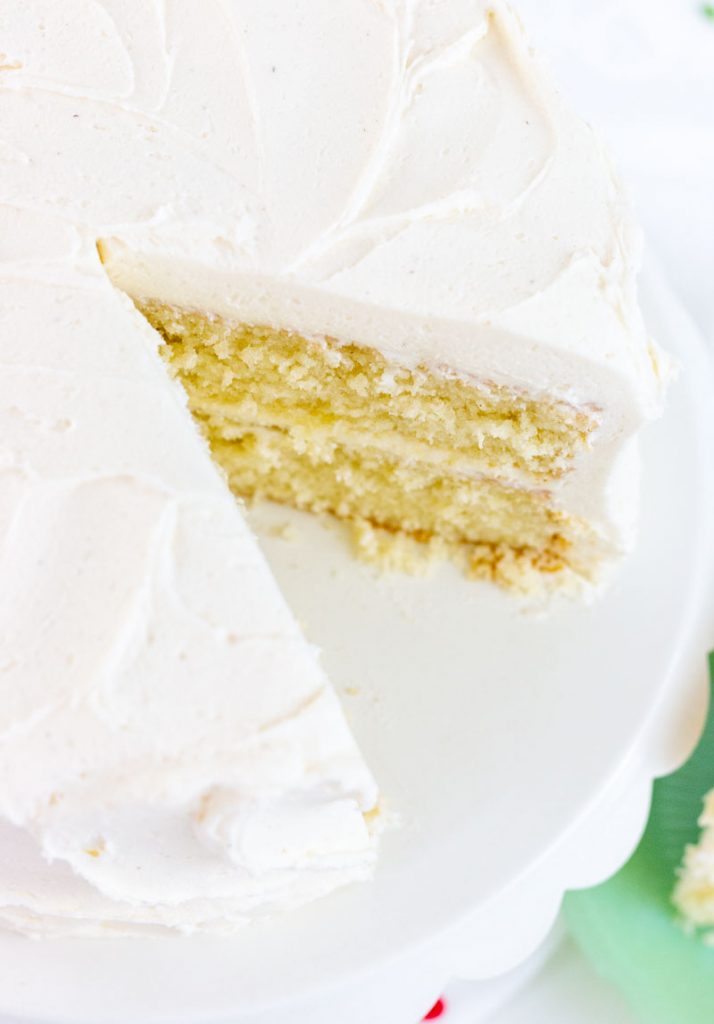
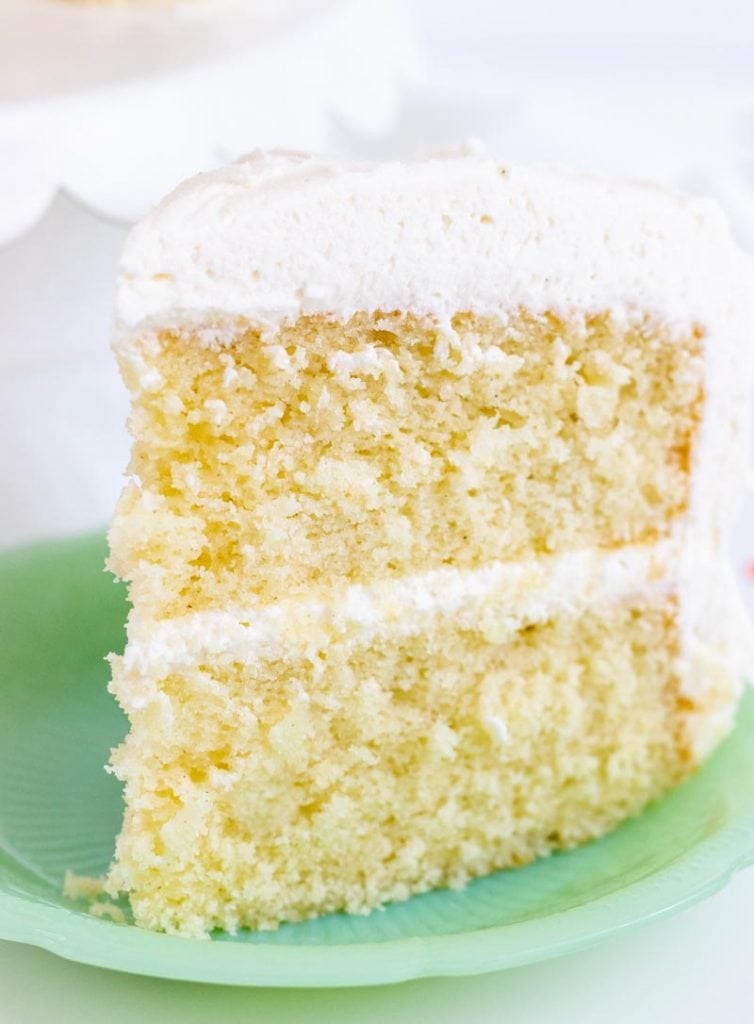
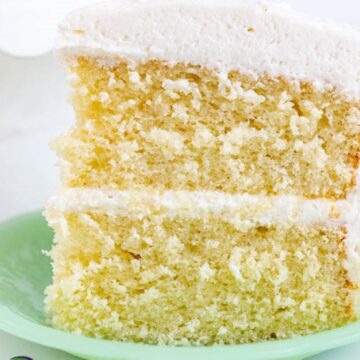
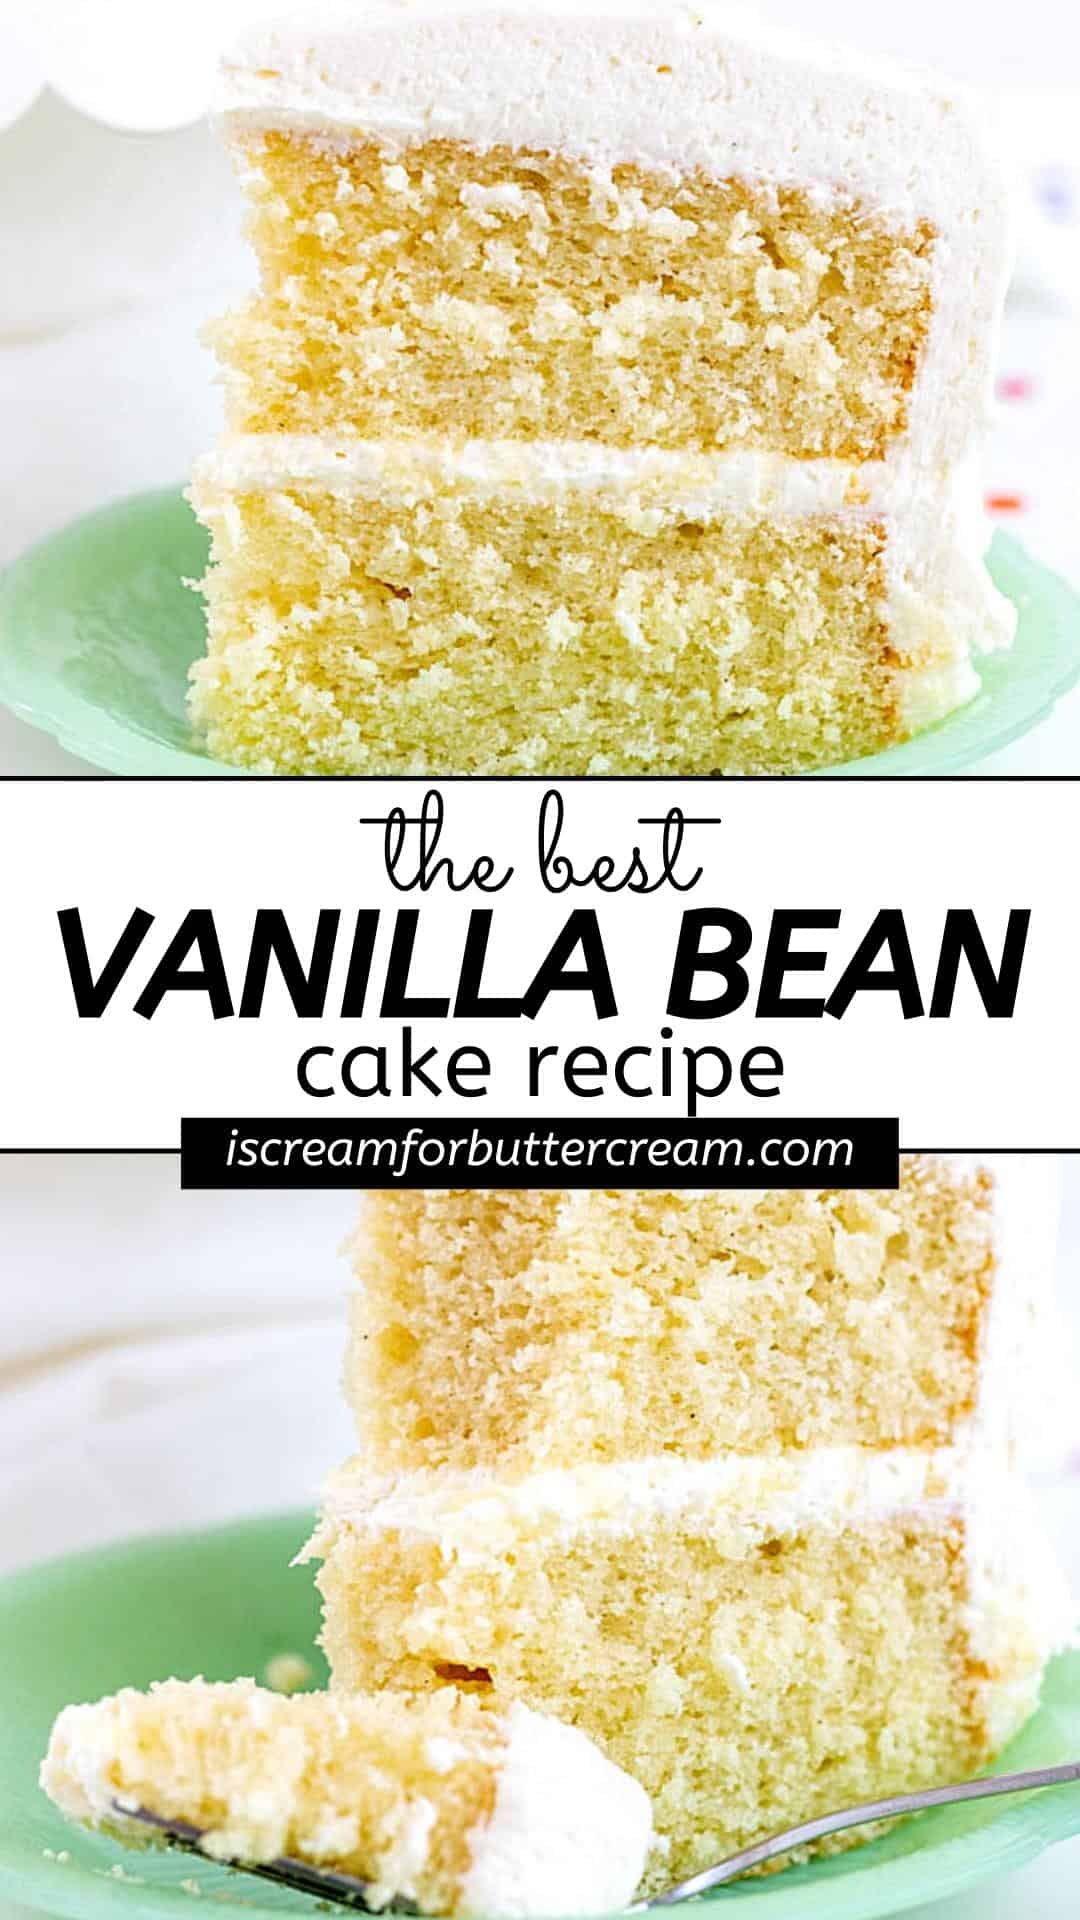
This vanilla bean cake is super moist, full of vanilla flavor, is rich and buttery, made from scratch and covered in buttercream. It’s the best vanilla cake I’ve ever had and I have a feeling it will quickly become your family’s favorite.
When it comes to cake, there is nothing more comforting than a vanilla cake. It’s a classic for a reason. It’s not overpowering in flavor and is perfect for weddings and birthdays.
Hey there! Before you scroll, there’s lot’s of important stuff in the post!…including the FAQ section, which may answer any questions you might have about this recipe. Enjoy!
The good news is that you don’t need a box mix to make a good vanilla cake. This cake is super moist, with just the right amount of sweetness without being too heavy or dense like some scratch cakes can be.
Plus it’s actually pretty easy to make. In my opinion, it’s the absolute best vanilla cake recipe and you won’t want to stop eating it.
I’ve also included a video lower in the post on how to make this layer cake from scratch so that you can follow along step-by-step.
Ingredient Notes:
Now let’s talk a little about just some of the ingredients that are in this vanilla bean cake. (The printable list of all ingredients are in the recipe card below.)
(Make sure to check out the FAQ section below in this post for substitution questions.)
Cake flour: This recipe calls for cake flour instead of all-purpose flour. Using cake flour will give your cake a softer texture. If you can’t get cake flour, make sure to check out the FAQ section lower in this post for a substitute.
Unsalted butter: Butter gives this cake a really nice flavor. It also gives a lot of moisture to the cake.
Sour cream: I love using sour cream in cakes. It really adds to the flavor and gives it a ton of moisture.
Vanilla bean paste: This is the real flavor star of this recipe. Although you can still use vanilla extract, using vanilla bean paste gives it even more flavor. It’s just so good and I urge you to just try it.
Here are a couple of vanilla bean pastes to try:
Sometimes, vanilla pean paste can get a little expensive though, so just know that you can use vanilla extract and it’ll still taste amazing.
Almond baking emulsion: This ingredient is optional, but I think it’s really the secret ingredient to this cake.
Now, just hear me out on the almond emulsion. The recipe only calls for a very small amount and it does NOT taste like ordinary almond extract, which I personally don’t even like.
No, this recipe calls for almond baking emulsion, not almond extract. To me, they taste WAY different.

Even if you think you won’t like anything with almond extract in it…I have one question for you…have you tried it? Sometimes things taste totally different than you expect. I mean I don’t even like almonds, but I like this because to me…it doesn’t taste like almonds.
Here’s my point on the almond emulsion: This recipe only calls for half a teaspoon. That isn’t much and it’s not strong or overpowering at all. All it does is help bring out the flavor of the vanilla bean paste.
When you taste this cake, you don’t really taste an almond flavor. You just know it’s got this full vanilla bean flavor and something a little special that makes you never want to stop eating it.
I’ve personally been told loads of times by people that they don’t what’s in the cake, but they just couldn’t stop eating it.
As always though…if you are allergic to almonds, then don’t use it. If you’ve already tried it and you don’t like it…it’s ok! I won’t be mad at you and you can still make this cake with just vanilla bean paste or extract and it will STILL be awesome.
Vanilla bean buttercream: You’re gonna want to add buttercream to this cake and I have just the one for you. You can find that recipe here: Vanilla Bean Buttercream
How to Make this Cake:
Let’s talk a little about how to make this vanilla bean cake. (The printable instructions are in the recipe card below.)
Step 1:
First, you’ll need to preheat the oven to 350 degrees F. (Now, just know that you’re going to turn the oven temp down to 325 degrees F once you put the cakes in the oven.)
The thought process behind this is to give the cake a boost of heat to help it rise higher, but then to let the temp go lower so that it doesn’t over-brown the bottom and top.
You’ll also want to go ahead and grease and flour two 8-inch round cake pans that are about 2 inches high. (If making cupcakes, make sure and read the notes in the recipe post or the FAQ section lower in this post.)
Step 2:
Now combine the flour, sugar, baking powder, baking soda and salt in a mixing bowl and whisk.
Step 3:
In another bowl, combine the sour cream, milk, oil, vanilla, almond and eggs. Mix well with a whisk and set aside.
Step 4:
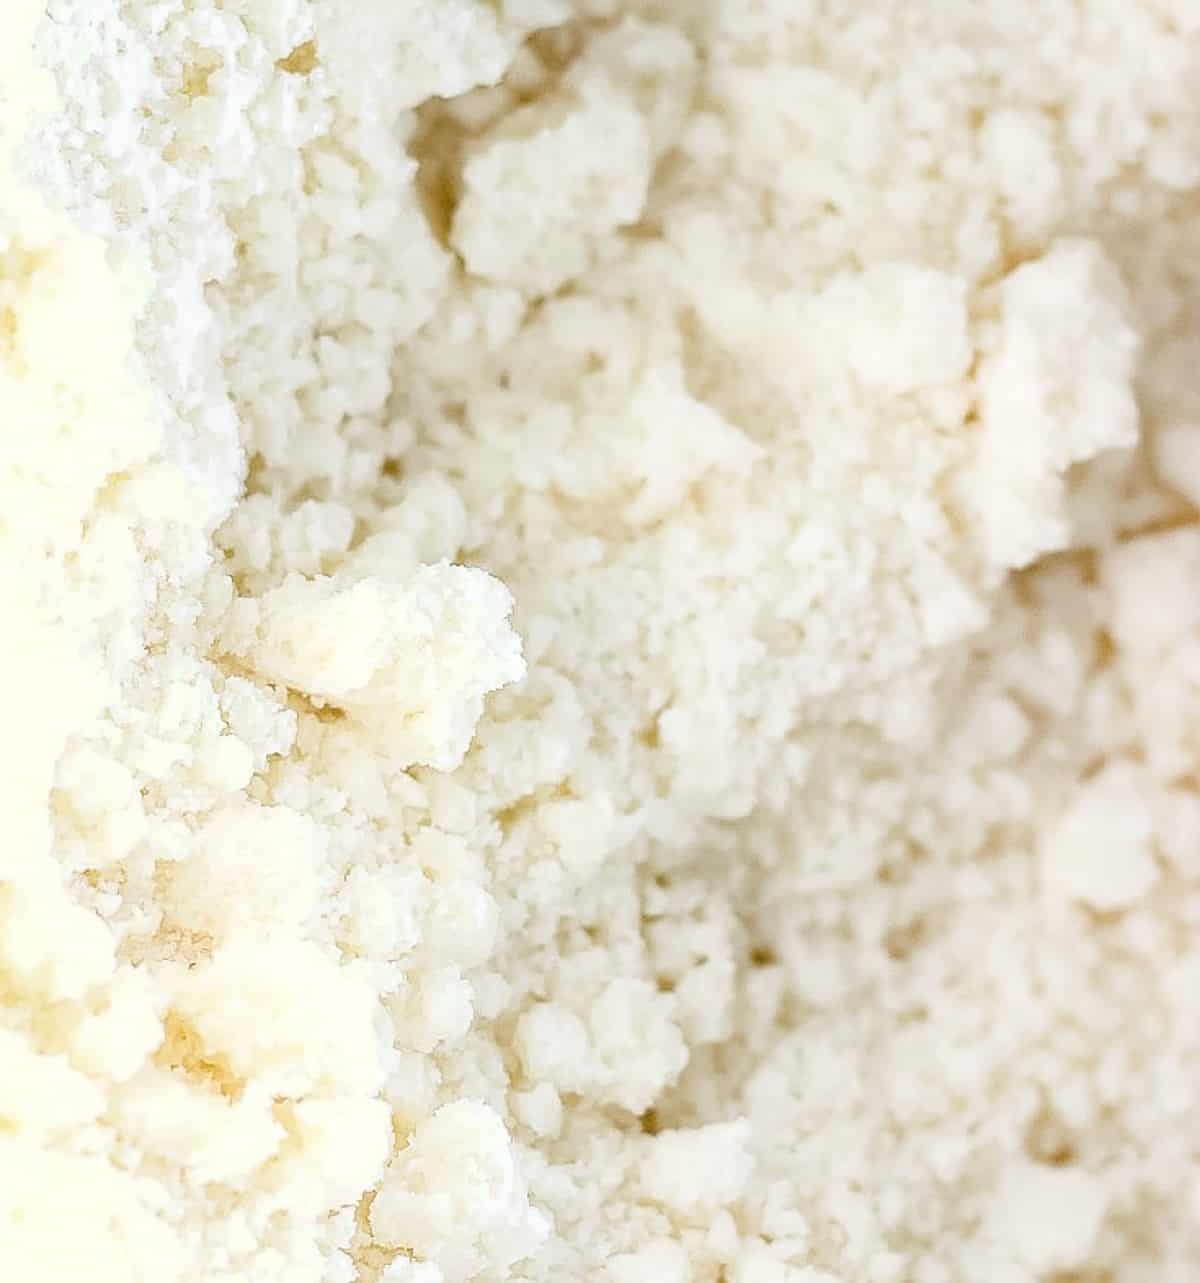
Now cut the butter into chunks. Then, turn the mixer on low and add the butter slowly to your dry ingredients. You’ll just mix on low to medium until all the butter is added, then switch to medium, medium-high and mix until all the flour is coated with the butter and the mixture is crumbly.
You want the mixture to resemble a sand-like texture.
Step 5:
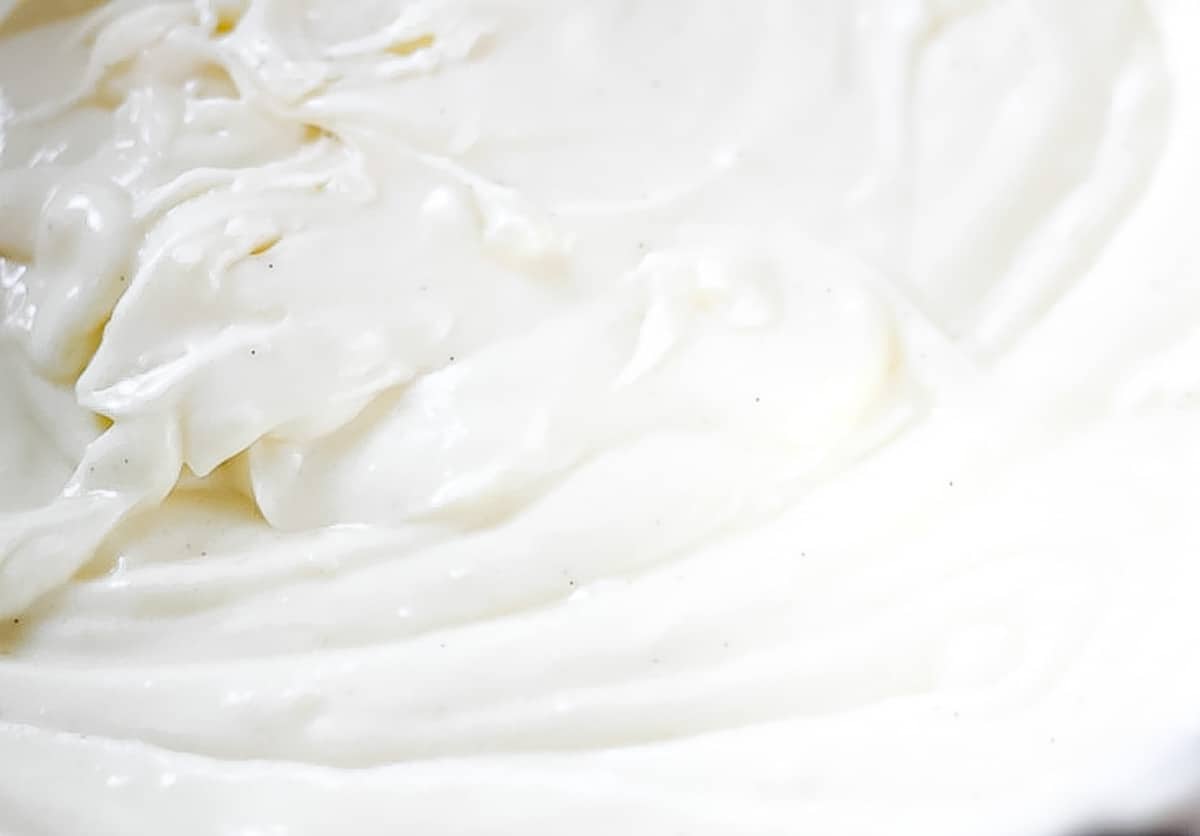
Now pour in about a third of the liquid mixture. Mix that in on low to medium until combined…about 30 seconds to one minute. (Some reverse creaming recipes call for mixing 1-2 minutes at this stage, but be careful about mixing longer than a minute as mixing for too long will cause a dense, rubbery cake.)
Pour the last of the liquid mixture and mix again until well combined. Don’t overmix the batter at this point. Stop mixing once everything is well incorporated.
Use a rubber spatula and scrape the sides of the bowl. Mix again for only about 10 to 15 seconds though.
Step 6:
Pour the cake batter into the prepared pans.
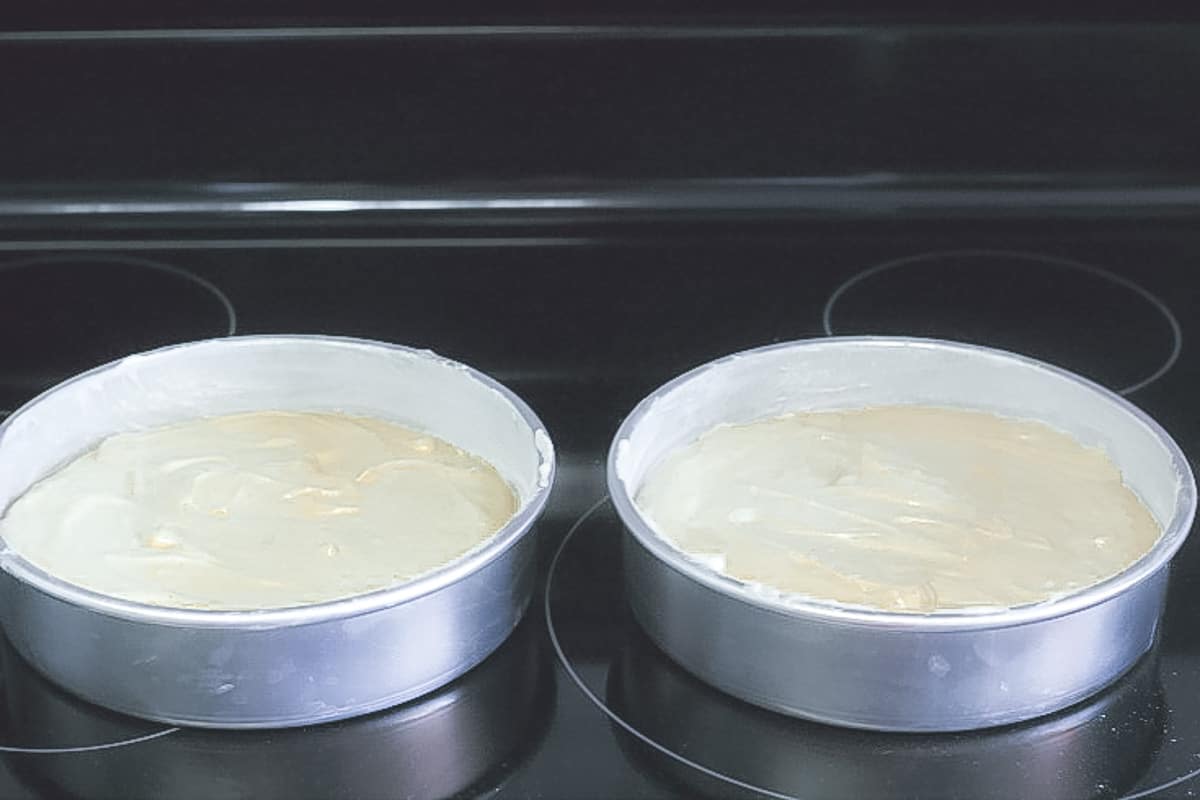
Slide the cakes into the oven and make sure to turn the temperature down to 325 degrees F (unless you’re making these as cupcakes, in which case you’ll want to read the notes below).
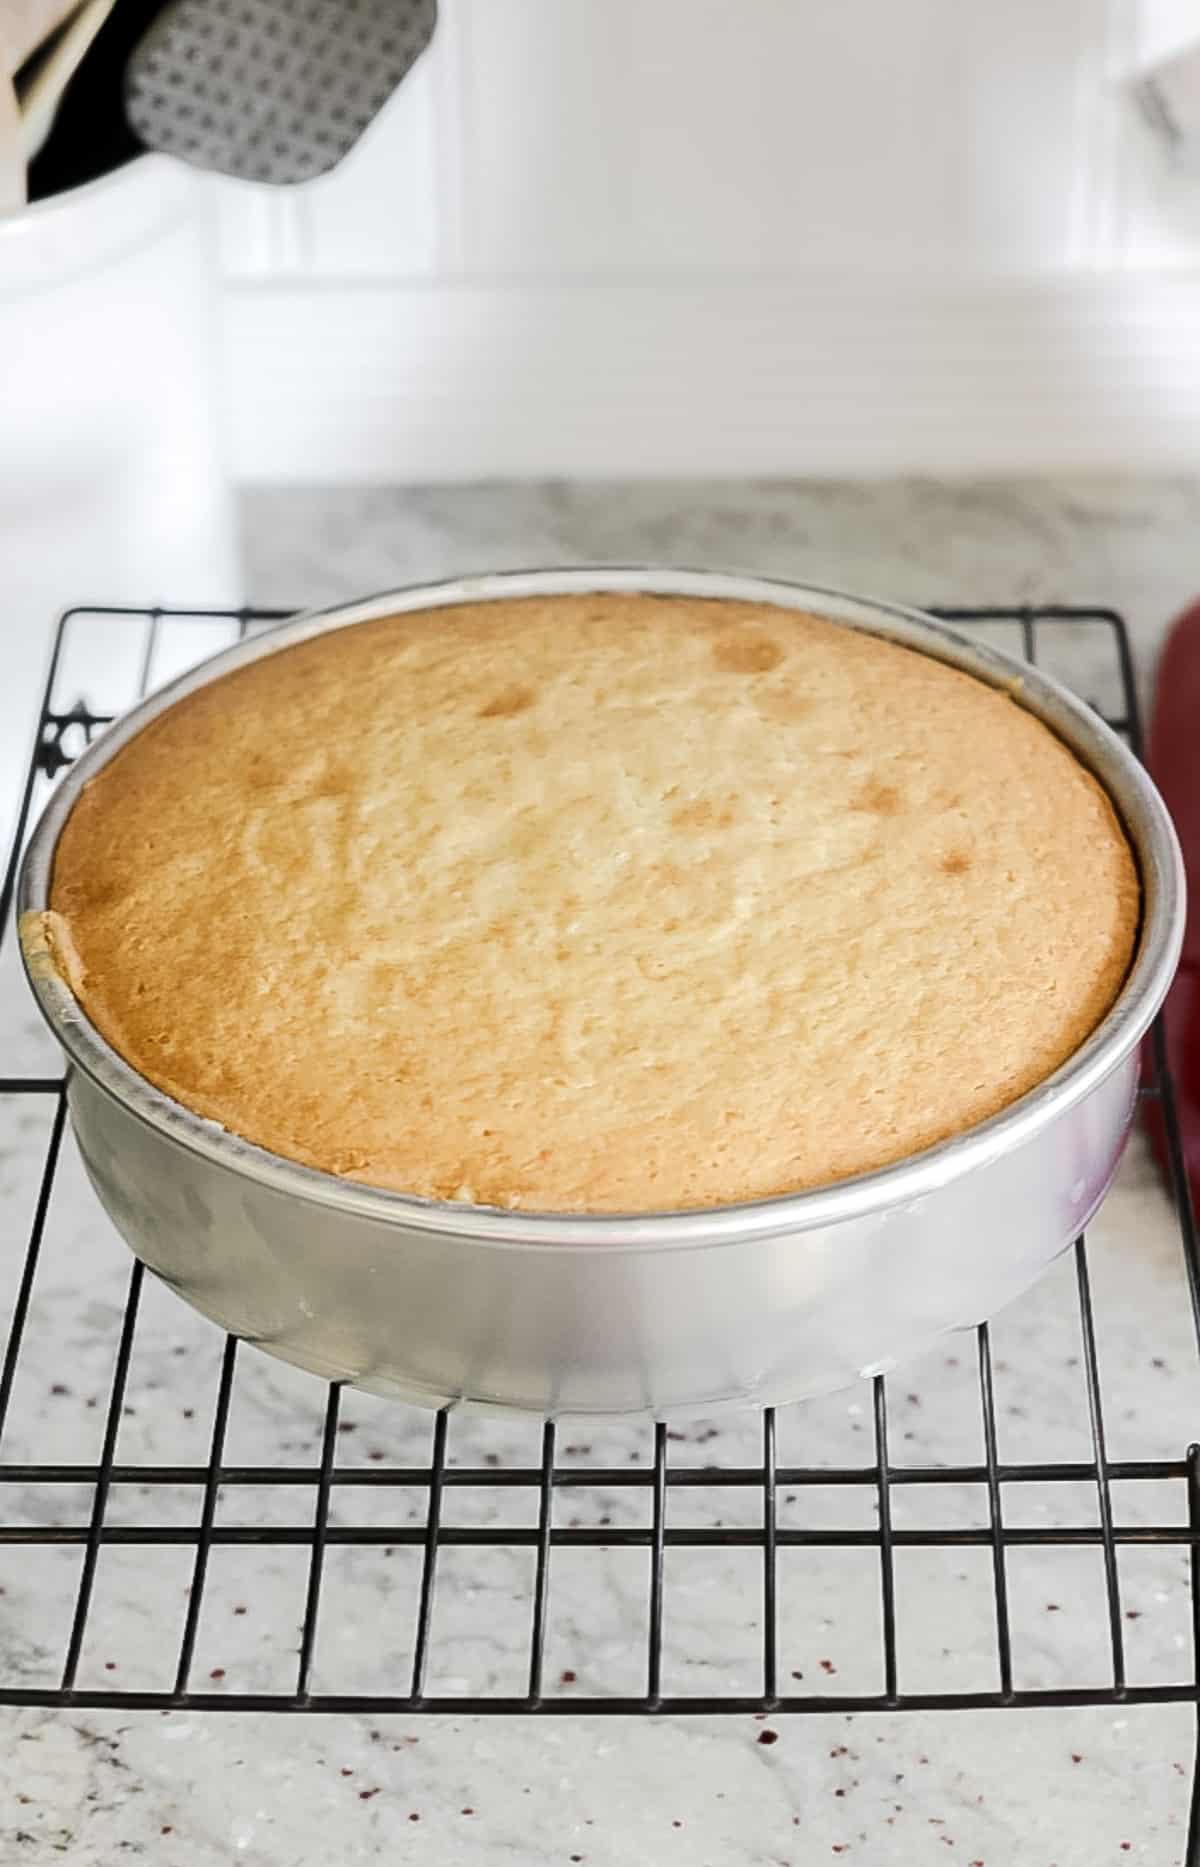
Bake the cake layers at 325 degrees F for approximately 40-45 minutes.
The cakes are done when a toothpick inserted into the center of each cake layer comes out with either a few moist crumbs on it or clean, but now raw batter.
You don’t have to wait until the toothpick comes out clean. Just make sure it doesn’t have raw batter on it.
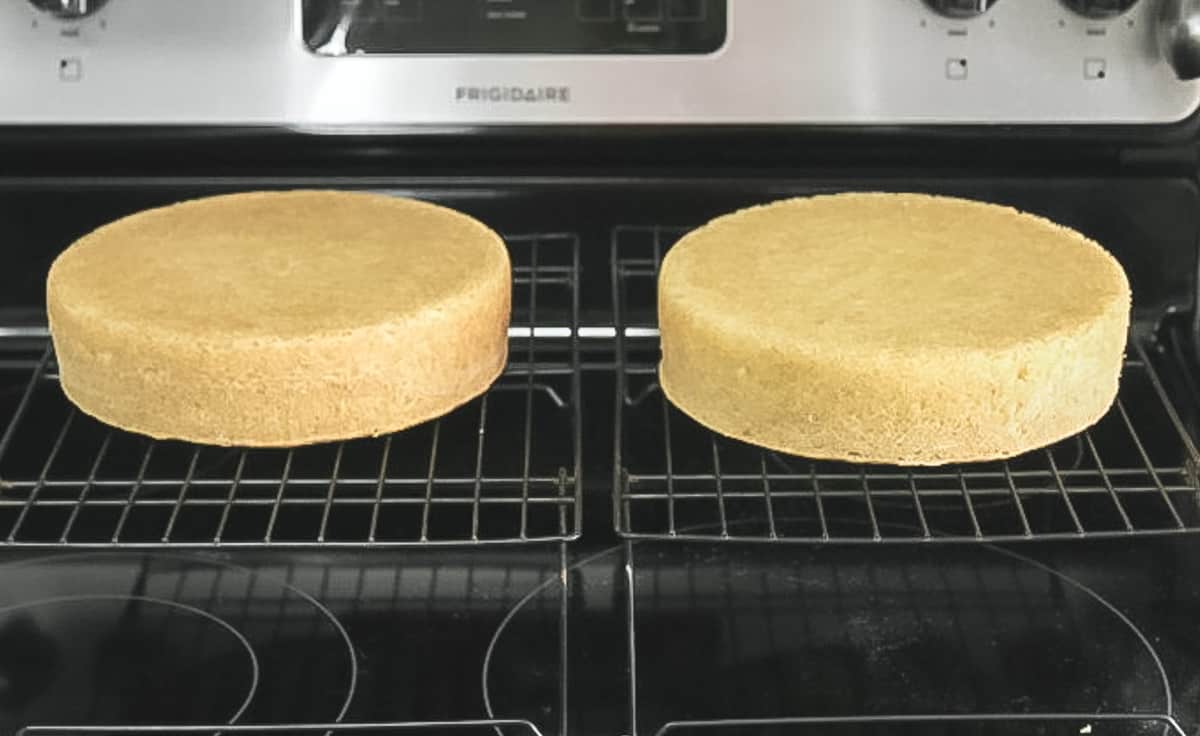
Step 7:
Set the cake layers on wire racks and let them cool for about ten minutes. After they’ve settled for ten minutes, turn the cakes out of the pans and onto the racks.
Let them cool out of the pans completely before adding buttercream frosting or freezing the layers.
See my post on how to freeze cake layers and cupcakes here: How to Freeze Cake & Cupcakes
Step 8:
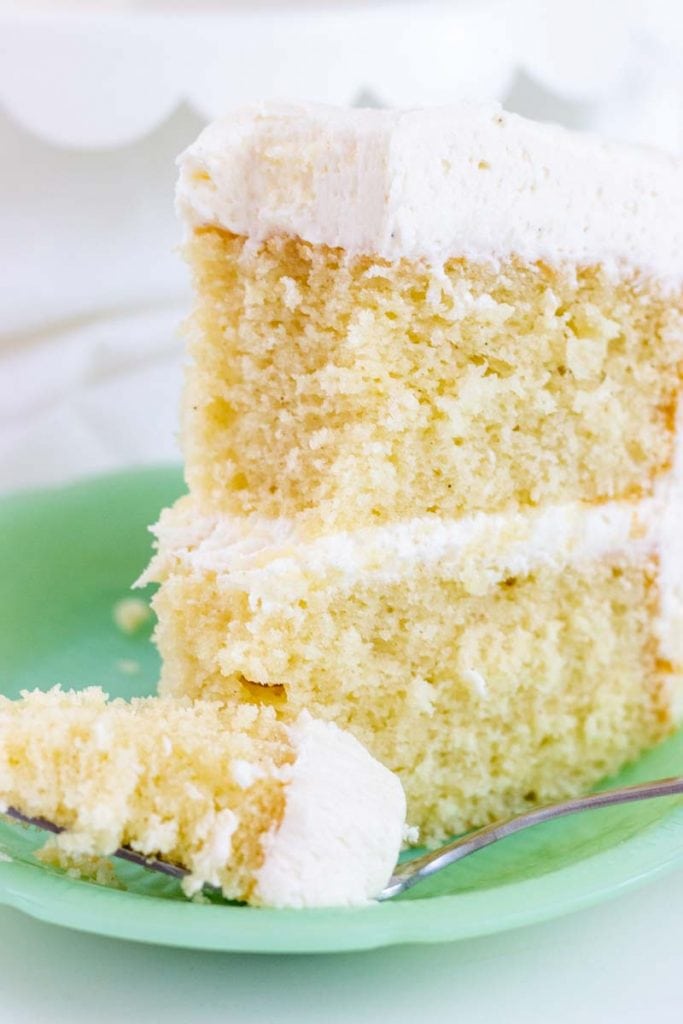
Once the layers are cooled, set one layer on a cake plate or cake platter and add buttercream to the top.
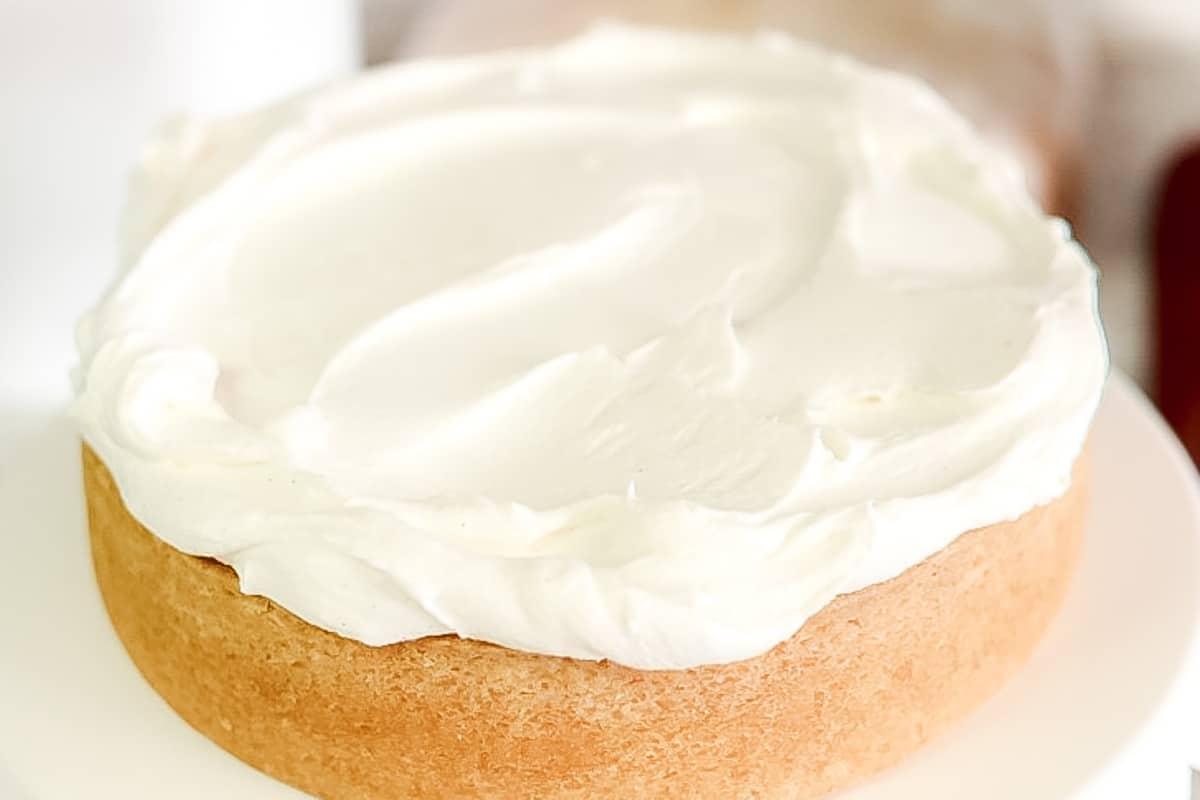
Next, add the second layer and cover the entire cake with buttercream.
You can find my buttercream recipe here: Vanilla Bean Buttercream

Tips & FAQs:
A white cake is usually whiter in color and could use vegetable shortening instead of butter to help get a lighter color cake. The vanilla is also isn’t usually as strong in a white cake as it would be in a vanilla cake.
A vanilla cake usually includes vanilla extract and a vanilla bean cake usually includes vanilla bean paste. Vanilla bean cake usually has a stronger vanilla flavor.
Vanilla bean paste is thicker and uses actual vanilla seeds. Using vanilla bean paste in cakes really pumps up the vanilla flavor.
Here’s a good article from Nielsen-Massey on when to use vanilla bean paste or vanilla extract: When to use Vanilla Bean Paste and Vanilla Extract
You can sometimes get it at craft stores that sell cake decorating supplies, but I generally order mine from Amazon.
Here are some options:
LorAnn Organic Madagascar Vanilla Bean Paste
Native Vanilla Bean Paste
Heilala Vanilla Bean Paste for Baking
Nielsen-Massey Pure Vanilla Bean Paste
Taylor & Colledge Organic Vanilla Bean Paste
Yes you sure can. I think using a good vanilla bean emulsion or paste really pumps up the flavor and can set your cake apart from the rest, but a real vanilla extract will work as well.
Cake flour is different than all-purpose flour and they can’t be substituted for each other in equal amounts. Cake flour will give your cake a more tender texture, so it’s best to use that in this recipe if you can get it.
If you can’t get cake flour, you’ll have to substitute it with all-purpose flour, but you’ll need to make these changes: For every cup of cake flour called for in the recipe, use one cup of all-purpose flour instead and remove two tablespoons of it, then replace that with two tablespoons of cornstarch.
Be careful not to pack the flour down into the measuring cup when you measure it out. That can add too much flour to the batter and cause the cake to be dense and dry. Just spoon the flour into the measuring cup and level it off.
Unsalted butter works best because you can estimate the proper amount of salt that will be added plus salted butter has a different water content than unsalted.
However, if you’re unable to get unsalted butter, you can use salted in the cake and the buttercream, but omit the additional salt that each recipe calls for.
Sour cream is best in this recipe as it helps make a very moist cake and gives a little flavor. If you don’t have access to it, you can use plain yogurt, but use the full-fat yogurt instead of the low-fat or fat-free type.
No, you don’t have to use it, but it’s really a very small amount and it just gives a hint of added flavor. Personally, I think it adds that extra secret ingredient that people just love and it doesn’t actually taste like almonds.
To see an even deeper discussion on why I really like a touch of it in this cake, check out the ingredient section closer to the top of this post.
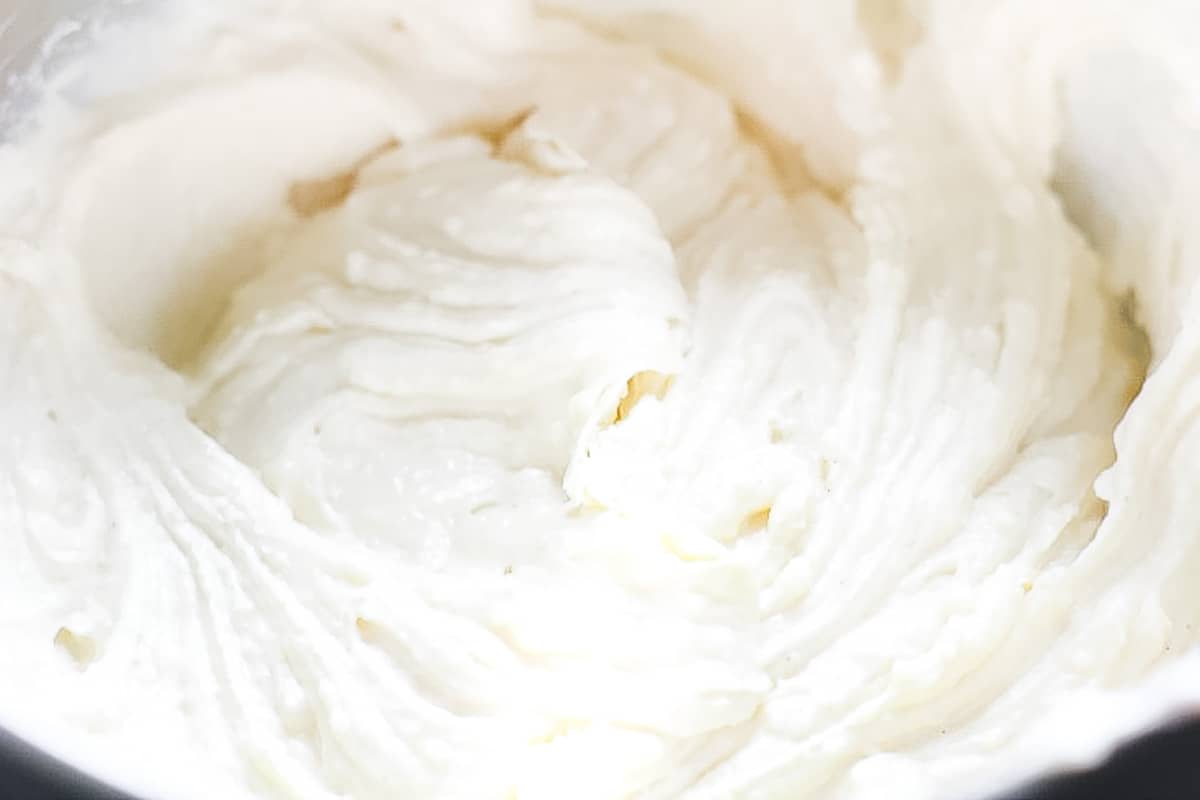
The mixing method for this cake is called the reverse creaming method because instead of creaming the butter with the sugar, you’ll add the butter, in chunks, to the dry mixture which will coat it.
This method helps produce a softer cake and helps reduce the chance of over-mixing which can over-develop the gluten.
This cake is done baking when a toothpick inserted into the center of each layer comes out with a few moist crumbs on it or clean, but no raw batter.
This cake can be made ahead of time and frozen if desired. Let the baked cake cool completely, then wrap in plastic wrap and foil and place in the freezer for up to a month.
To thaw, place the wrapped cake on the counter at room temperature and let thaw completely, then remove the wrapping. Once defrosted, add the glaze.
This cake can be stored covered at room temperature for several days as long as it’s not covered or filled with a perishable frosting.
To prolong freshness, the cake can then be covered and stored in the refrigerator for a few additional days.
Most cakes are best served close to room temperature, especially when made with butter like this one. If the cake is cold, set it out to come closer to room temperature for about 20-30 minutes before serving.
You can also pop a slice in the microwave to warm up a bit.
Yes, but with a few changes. Fill 2 cupcake pans (24 cupcakes) with cupcake liners and fill with batter about ⅔ of the way full. Bake at 350 degrees F (do not turn the temperature down) and bake for about 15-25 minutes depending on the size of your oven. Start checking for doneness at around 12 minutes just to be sure.
You may have a bit of cake batter left over, but you can chill that batter and make the remaining cupcakes when the others have baked.
Yes, this cake works well for stacking as long as you use proper supports as you would stacking any cake.
As an Amazon Associate, I earn from qualifying purchases.
Supplies used for this recipe:
- Magic Line 8-inch round cake pans or Wilton 8-inch round cake pans
- Whisks
- Silicone spatula
- Mixing bowls
- Stand mixer or electric hand-mixer
- Cooling racks
- Vanilla bean paste options: LorAnn Organic Madagascar Vanilla Bean Paste, Native Vanilla Bean Paste, Heilala Vanilla Bean Paste for Baking, Nielsen-Massey Pure Vanilla Bean Paste, Taylor & Colledge Organic Vanilla Bean Paste, Almond emulsion
- Almond baking emulsion
Video:
Note About Recipe Measurements: I write recipes using volume (cups) measurements because here in the U.S., this is what people are more familiar with and I don’t want anyone to feel intimidated when baking. For metric/weight measurements, click the ‘metric’ button under the ingredients in the recipe card below. The weights are converted by a program, not me, and it’s just a best guess. I can’t guarantee that weighing the ingredients will produce the exact same results, since I test recipes using volume measurements.
Recipe
Favorite Vanilla Bean Cake
Ingredients
- 3 cups cake flour (not all-purpose flour, see FAQs in the post for substitutions)
- 2 cups granulated sugar
- 1 ½ teaspoon baking powder
- ½ teaspoon baking soda
- 1 teaspoon salt
- 1 cup unsalted butter, only slightly cooler than room temperature (2 sticks)
- 1 cup sour cream
- ½ cup whole milk
- 1 tablespoon vegetable oil
- 1 tablespoon vanilla bean paste (or vanilla extract)
- ½ teaspoon almond emulsion (optional)
- 3 large eggs
- Vanilla Bean Buttercream (recipe link in the notes section)
Instructions
- Preheat the oven to 350 degrees F. (You will turn the oven temperature down to 325 degrees F once you put the cakes in the oven.)
- Grease and flour two 8" round cake pans. (If making cupcakes, read notes below)
- Combine the flour, sugar, baking powder, baking soda and salt in a large mixing bowl and whisk well. Set aside.
- In another bowl, combine the sour cream, milk, oil, vanilla bean paste, almond extract and eggs. Mix well with a whisk and set aside.
- Cut the almost room-temperature butter into chunks. Turn the mixer on low and slowly add the butter, a bit at a time, to the dry ingredients. Once all the butter has been added, mix on medium to medium-high until all the flour is coated with the butter and the mixture is crumbly. It should have a sand-like texture. If the butter is too warm or if it's mixed for too long, it will form a paste and this will not produce a good cake texture.
- Pour about a third of the liquid mixture. into the dry mixture and mix on low to medium until well combined…about 30 seconds to one minute. (Some reverse creaming recipes call for mixing 1-2 minutes at this stage, but be careful about mixing longer than a minute as mixing for too long will cause a dense cake.)
- Pour the last of the liquid mixture into the dry mixture and mix again until well combined. Don't overmix the batter at this point. Stop mixing once everything is well incorporated, usually no more than about 20-30 seconds.
- Use a silicone spatula to scrape down the sides and bottom of the bowl. Mix again for only about 10 to 15 seconds.
- Pour the cake batter into the prepared pans.
- Slide the cake pans into the oven and turn the oven temp down to 325 degrees F (unless you're making these as cupcakes, in which case you'll want to read the notes below).
- Bake at 325 degrees F for approximately 40-45 minutes. The cakes are done when a toothpick inserted into the center of each layer comes out with a few moist crumbs on it or clean, but no raw batter.
- Set on wire racks to cool for ten minutes, then turn the cakes out onto the racks and let them cool out of the pans completely before adding buttercream frosting.
Notes
Nutrition
How to Share
I’d love for you to share this recipe link or tag it, but please do not share screenshots or copy/paste the recipe to social media as the content and photographs are copyright protected and we (bloggers) work really hard on our content. Sharing the link, tagging us on socials and pinning it is super appreciated though!
Sharon
Hi, how much eggs do you put in the recipe? Thanks. It looks delicious!
Kara Jane
Oh my goodness, I totally missed that! There are three eggs in this recipe. I’m updating the post now. Thanks for that catch!
fem
hi karen if no vanilla bean paste what is second option? thanks!
Kara Jane
Hi, you can just use regular vanilla extract and that works fine. You can use the same amount that’s called for in the recipe.
corinna
Hi, can this recipe be used for cupcakes too? Thanks, looks yum!
Kara Jane
Hi Corinna, Yes, you can use this recipe for cupcakes. Here are my tips though: Fill the cupcake wrappers to just slightly more than half full, then bake the cupcakes at a straight 350 degrees. (Don’t turn the oven down to 325 like the cake.) It won’t hurt them if you do, they just may not rise as high with a nice pretty dome. Bake them for about 25 minutes on 350. Hope you enjoy them!
Jennifer Lansberry
Hi there, I made the vanilla bean cake and it was amazing. I made it in the 8in pans, was hoping to make it in an 11x15x2 pan, do you have any suggestions as to how much batter to use and how to modify the cooking time? Thanks!
Kara Jane
Hi Jennifer, I’m thinking maybe a recipe and a half might work. I’d set the timer for the same amount of time and just watch it from there although you’ll most likely end up baking it for a bit longer. If you have a heat core or at least a flower nail, use one in the middle of your pan. It’ll help it bake more evenly.
Christina Kyriakidou
Hi just wondering if you can omit the almond emulsion?
Thanks !
Kara Jane
Hi Christina. Yes you can omit the almond emulsion. I really like it because I think it brings out the other flavors, but if you don’t have any or you don’t prefer the taste, just omit it from the recipe. You don’t need to make any adjustments to the other ingredients. The cake will still turn out yummy 😉
Gena
OMG! That looks like taste bud Heaven! I have a question about the vanilla paste. How do you store it? I have never used it before. Thanks
Kara Jane
Hi Gena, I use LorAnn’s vanilla bean paste and I just store it in my pantry. I’ve never refrigerated mine and it’s worked great for me. I haven’t used other brands, but I love the LorAnns. You can use it in place of practically any recipe calling for vanilla extract. Just make sure you shake the bottle up a bit before measuring it out. It’s much thicker than extract.
CMK
I buy this exact vanilla bean paste at Michael’s craft store and always use my 50% off coupon – awesome deal!
Kara Jane
Yes! Good idea!
Kelsey
Hello, do you usually use salted or unsalted butter? Thanks!
Kelsey
and what type of oil do you usually use?
Kara Jane
I use vegetable oil, but you should also be able to use canola oil if that’s what you have on hand.
Kara Jane
I use unsalted butter for baking. 🙂
Christina Kyriakidou
So…complete dummy (mummy brain) moment but after my cakes were in the oven I realised that I didn’t add the milk!!OMG!!! I thought the batter looked thick.. they came out looking nice and moistened but since this is a paid cake gig… what do you think will be the outcome? Would you risk it or remake them??
Kara Jane
Oh no! I have done something similar in the past. It happens to everyone at one time or another. I would try to bake more layers if you have time though. Hope I’m not too late in responding to you!
Melanie
My cake turned out kind of dense is there something I can add on omit the make I more fluffy?
Kara Jane
I haven’t had that happen to me with this recipe, so I wouldn’t add or take out anything. I do have some tips for you though. Follow the mixing method exactly and make sure the butter is just barely cooler than room temp. Also make sure to not overbeat the batter as this can sometimes make the cake come out dense. Another thing is to check and make sure your baking powder is fresh. Let me know if you have any questions. 🙂
Jean
I had the same problem with density. The inside of the cake doesnt look like the flakey fluffy cake look in the photos. It looks more like soft white bread however the taste is amazing. The butter took forever to break up and it had stood at room temp for some time. I baked for 40 minutes. Should it maybe take the full 45 minutes?
Kara Jane
Hi Jean, The cake should come out less dense than that. You did use cake flour and not all purpose flour, right? Overmixing will make it come out more dense as well. The butter temp should be slightly cooler than room temp and when mixed with the flour mixture, it should resemble a sand-like texture. If the butter is too cold, it won’t incorporate well, but if it’s too soft and warm, then it could possibly make the cake too dense. Another thing that could have happened is possibly overmixing once you’ve got all the ingredients together. You just want to mix until it’s all incorporated. You don’t want to mix it for a couple minutes…not saying that’s what you did, but just throwing some things out there. 😉 Perhaps it needed more baking, I can’t be sure though unless I see it. To test for doneness, you could use the toothpick method. It should have a few soft crumbs on the toothpick when you pull it out. I hope this helps some.
Jean
Thank you for the response Kara: I did use cake flour and I mixed no more than 30 seconds to incorporate the ingredients. You make an interesting point with the butter. I had a hard time getting the butter blended with the flour It was, I thought, not soft enough but maybe I have to cut it in smaller pieces before adding to the flour? I wish I could upload a photo of the cake to you. I baked it for 40 minutes. Perhaps I should go to the 45 minutes suggested in the recipe next time. The flavor was absolutely luscious. I just want to perfect it and get the correct density.
Kara Jane
Jean, yes definitely cut up the butter into pieces. I usually cut each stick into about eight pieces. That’s basically about a tablespoon size. Add about a chunk or two at a time when mixing it into the flour. That should help it incorporate better. I would try that and then maybe bake a tad bit longer.
Jean
I shalp try that. Next time. Thank you again for sharing your expertise.!
Kara Jane
No problem Jean. Let me know how it goes!
Ashley
Is there anyway i can omit the sour cream?
Kara Jane
Hi Ashley, I wouldn’t recommend omitting the sour cream. It would throw the ingredient ratios off a bit and I couldn’t promise you’d get the right texture in your cake. The sour cream helps a lot with getting a moist cake and a delicate texture. You could try subbing in buttermilk, but the texture may be a bit different.
Pamela
Have you ever used this recipe to make a wedding cake? We had a vanilla cake testing at my daughter’s bridal shower and let the guests choose the cake for her wedding cake. Your recipe was the clear winner. We plan to make a 12, 9,6 inch tiered wedding cake. We will split the layers and fill them with pistachio, peach, and rhubarb fillings. Any suggestions on amounts and time/temperatures for baking? Thanks
Kara Jane
Hi Pamela, That is awesome to hear that they liked it so much! It’s my favorite too.
Ok, onto your question: Yes and I plan to use it again on a wedding cake I’m doing for a friend in September. I haven’t made a 12″ tier from it though. The largest tier was a 10″ and I’ve only used buttercream between the layers, so not sure about the fruit filling. Here’s what I would try though: Normally I don’t split layers, I just make three layers for one tier and put the filling between each layer. Basically there would be three layers of cake and two layers of filling for one tier…then move on to the other two tiers and I’d do the same.
If you go with the fruit filling, my suggestion is to spread just a bit of buttercream between each layer (almost like a crumb coat)…just a thin layer. Then pipe a thickened buttercream dam just around the inside of that layer and then fill it with the fruit filling. That will keep the filling from squishing out of the sides and from soaking straight into the cake too much and making it unstable. Also, make sure to use the dowels for support (I’m sure you already know this, you sound experienced.) I usually use the hard plastic straw-like dowels…I find them on Global Sugar Art. I use the larger white ones and then add in the smaller yellow ones in between. (Yea, I kind of dowel like a crazy person, but I like to be safe.)
As far as the amounts and baking time, I’d mix up one recipe for just the 12″ cake. You’ll have maybe a couple cups of batter left over after filling your pan, but you can just make some cupcakes out of that…then you can treat yourself for all your hard work 😉 I would start by adding maybe 10 minutes to the baking time and just watch it from there. I like to use a heating core when I bake large cakes like that. It really helps them to bake evenly when they’re that large. As far as the other layers, you can get three 6″ layers out of one recipe and you can probably get two 9″ layers out of one recipe. Those you would just bake the normal way.
By the way, I freeze all mine ahead of time. Maybe just a couple weeks ahead of the wedding. They taste just as good, if not better after they defrost and you don’t have to stress yourself out if something goes wrong at the last minute. When you defrost, just remember to defrost them on the counter still in their wrappings, so condensation doesn’t get on the cakes.
Ok, I think I’ve written you an entire novel here…I get long winded. 😉 I hope this helps!
Pamela
Thank you so much for the tips. I will let you know how it goes.
Pam
Pamela
The wedding cake was a huge success. We used a mascarpone frosting. We were worrying that the bottom 12 inch layer was underdone but it tasted great and did not collapse(thanks to the dowels you recommended). I would include a picture but can’t figure out how. Thank you for all of your advice.
Pam
Kara Jane
Hey Pam, that’s wonderful to hear! So glad it was a success. And let me just say that mascarpone frosting sounds delicious! So glad everything worked out 😉
Deshani
Hi Kara
I am allergic to eggs and really wanted to try your recipe. What would you recommend to substitute the egg with?
Thanks
Kara Jane
There are different methods for replacing eggs. Some work better than others, but it does take some experimenting. I’m not an expert on baking without eggs, but there is a few good articles out there that give a bunch of options. (I’ll add a link to one of them here.) I haven’t tested out any of these for this cake recipe, so I’m just not sure how it would come out and it may take some experimenting.
Just a couple things to note though: The banana option will give the cake a slight banana flavor and if you use the flax option, just don’t eat a ton of the cake in one sitting if you’re not used to eating flax. It could cause some tummy issues if you eat a bunch at a time. Here’s the link to that article: https://www.thekitchenwhisperer.net/2014/07/31/egg-substitutes-cooking-baking/
I hope this helps!
Laura
Can you use vanilla beans instead of vanilla paste?
Kara Jane
Yes that would be fine and I think that would taste wonderful. Just make sure to cut open the vanilla bean, scrape it out and use that part from the inside (I’m sure you probably already know that). I found this article that talks about the conversions. Looks like you can use a teaspoon of real vanilla bean in place of a teaspoon of extract. http://www.thekitchn.com/whats-the-difference-vanilla-extract-vanilla-bean-vanilla-paste-169336 I hope this helps!
Raquel
This cake looks so very yummy I will have to try it! Do you know how make cupcakes can this recipe make? Thanks xx
Kara Jane
Hi Raquel, it will make about 24 cupcakes (2 dozen). You may have just a tiny bit of batter left over. Just fill the cupcake liners a tad over the half way mark.
Nam
Hi, thanks for sharing such a nice recipe.
I am wondering can I make it half? ( for some reasons cannot make too many or full batter) If I make it half, how many eggs I need?
Thanks so much~
Nam
Kara Jane
I haven’t made half the recipe, but I’m sure it will be just fine. I know it’s weird about the eggs because you can’t really get half an egg. lol What you can do, and I’ve done this before in recipes, is use one whole egg and then just the egg-white of the second egg. It’s worked for me in the past. Let me know how it goes!
Nam
I feel sad, they were totally failure. My cupcakes and 5” cake were rubbery. I know your recipe are awesome, but my skill is not good enough. ?
Kara Jane
Oh no! I’ve got some tips for you that you can try next time. It’s hard for me to know exactly what went wrong, but I’m going to make some guesses here and hopefully it will be helpful to you. You mentioned in another comment that the cupcakes were rubbery on the outside and under-cooked on the inside. That could just be under baking, or perhaps the oven temp was too low. Check your oven and make sure it’s accurate. Also I bake the cupcakes at a different temp than baking a full cake. You may have seen this, but at the bottom of the post, there are separate instructions for cupcakes. You want to keep the oven temp at 350 degrees.
As far as the cake coming out rubbery, the first thing I think of besides under-baking and the oven temp, is that the batter may have been over-beaten. It’s real easy to do that, so don’t be hard on yourself. That’s usually what it is if a cake is coming out rubbery. The gluten is over-developed. Also, be careful not to be mixing on high.
Some other things to think about. Make sure you’re using cake flour and not regular all-purpose flour and that you’re spooning your flour into the measuring cup and not scooping it and adding it to your batter. That will pack down the flour and essentially adds too much to your batter.
Ok, I hope that helps a little! Let me know how it goes if you try it again 🙂
Nam
Thank you so much! Very nice tips. I will try again later and let you know the result. ??
Kareen
Is the recipe for deep tins or sandwich tins?
Kara Jane
I use either two, 8 inch round, 2 inch deep pans or three, 6 inch, 2 inch deep pans. Either of those work great.
Vicky
From what I could see in the pictures, the layers rose the full 2 inches.. is that right? So, it would make an 8″ x4″ high cake? Just trying to know how to adjust for the cake I’m trying to make! :o)
Kara Jane
Yes that’s exactly right. I used two, 2″ deep, 8″ round pans and this recipe does a good job of rising to the top. There’s not much of a dome on the layers, but it should get fairly close to
the top.
Chantelle
This sounds delicious, I’m searching for a real vanilla-ee cake! I need to make a 12 inch square cake, and I’m putting vanilla custard in the middle. How many recipes do I need?!
Kara Jane
I would use one entire recipe to fill one 12 inch square pan. That means one recipe for each 12″ layer. Just do it all again for how ever many layers you need.
Also it’s best to use a heating core for larger layers like that. It’ll help it bake more evenly.
Let me know how it goes!
Miranda Khzym
I made this recipe and love it. The cake for my 8″ wasn’t rising to the top of the pan so next time I made it I multiplied the recipe by 1-1/2 and it was perfect I put parchment paper collar and it raised nicely. So my question is how many times would I have to the multiply for a cake 12x 18 cake?
Kara Jane
So glad you liked the recipe! For one layer of a 12×18 pan, (if the pan is 2 inches deep) I would probably shoot for a recipe and a half up to two recipes. That’s a large cake. If you’re worried a recipe and a half might not be enough, I’d just do two recipes and fill the pan up three quarters of the way up and any left over amount of batter, you can just make some cupcakes out of it. I’m sure you’ll find someone to eat the extra cupcakes, or do like I do and just keep them for yourself 😉 Also, you may want to use a heating core when you bake the cake. It’s a large cake, so a heating core in the middle will help it rise and bake more evenly. Hope this helps!
Miranda
Great, thank you .