
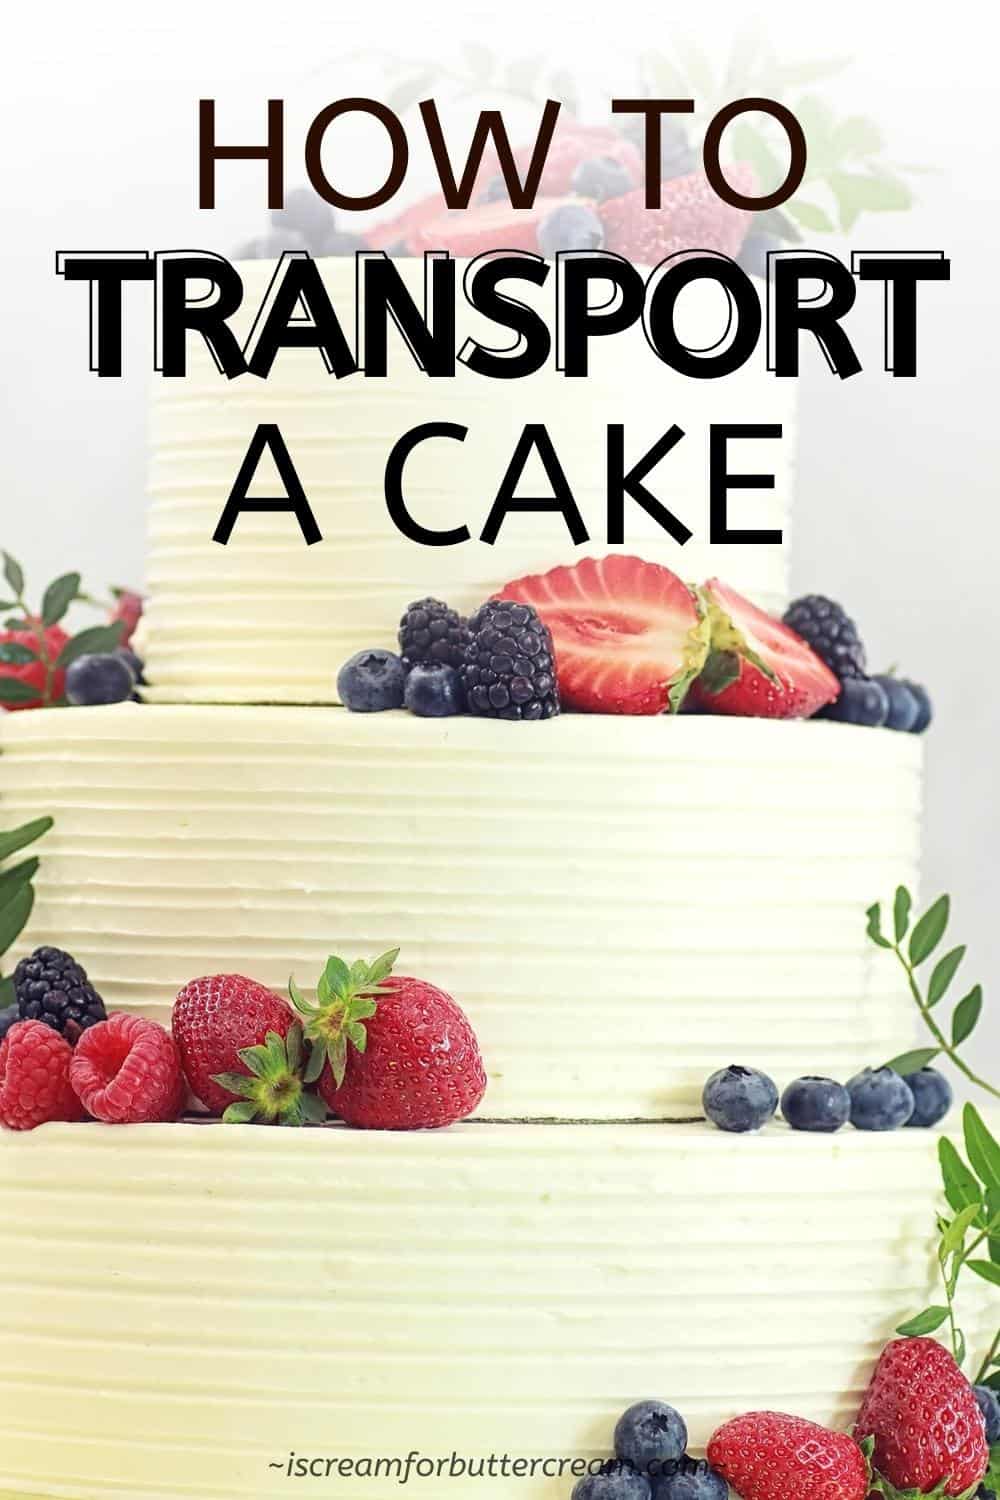
Transporting a cake can be stressful, but knowing these tips, you’ll be able to transport cakes of all sizes safely even if you only have a small car.
We’ll go over some dos and don’ts of traveling with cakes, so you can reach your destination without damaging the cake.

And yes, you can actually transport a cake, even a large custom cake, in a car. It’s not always necessary to have a van or an SUV.
I had a home bakery for a time and would travel with cakes in my car all the time, even wedding cakes. So from big cakes to small cakes, you just need the right tips to help you get it to its destination.
As an Amazon Associate, I earn from qualifying purchases.
Jump to:
- First, make a plan:
- Must-Know general tips for transporting cakes:
- How to transport a wedding cake or a tiered cake:
- How to transport a cake in a car:
- How to transport a cake in a car trunk (the boot):
- How to transport a cake without a box:
- How to transport a cake long distance:
- How to transport a cake in hot weather:
- Other posts you might like:
Transporting cakes is always nerve-racking. It’s scary to think you’ve worked so hard on a cake only to have it smashed when you get to your destination.
I’ve tried to compile all my best tips and tricks here to help alleviate at least some of the stress.

First, make a plan:
If it’s a small cake, it’s just not that big of a deal to travel with. You basically just need to make sure you’re in a cool vehicle and that the cake is on a level surface like a floorboard (not a seat because those lean).
If you’re traveling with a custom cake or a wedding cake or a stacked cake, then there’s more to it.
You really want to scope out where you’re going. Are there lots of bumpy roads? Hard turns? Steep inclines? You need to be prepared for all of these things and keep them in mind.
If you’ll have all of those things or at least a couple, then you may want to rethink traveling with a stacked cake and just take it in separate tiers and stack it at the venue.
The best thing you can do is to think ahead first and formulate a plan.
Now let’s get into some general tips before we get more specific.
Must-Know general tips for transporting cakes:
Here’s a list of general, basic tips that will be helpful any time you need to transport a cake. We’ll go through specific types of cake transport down below.
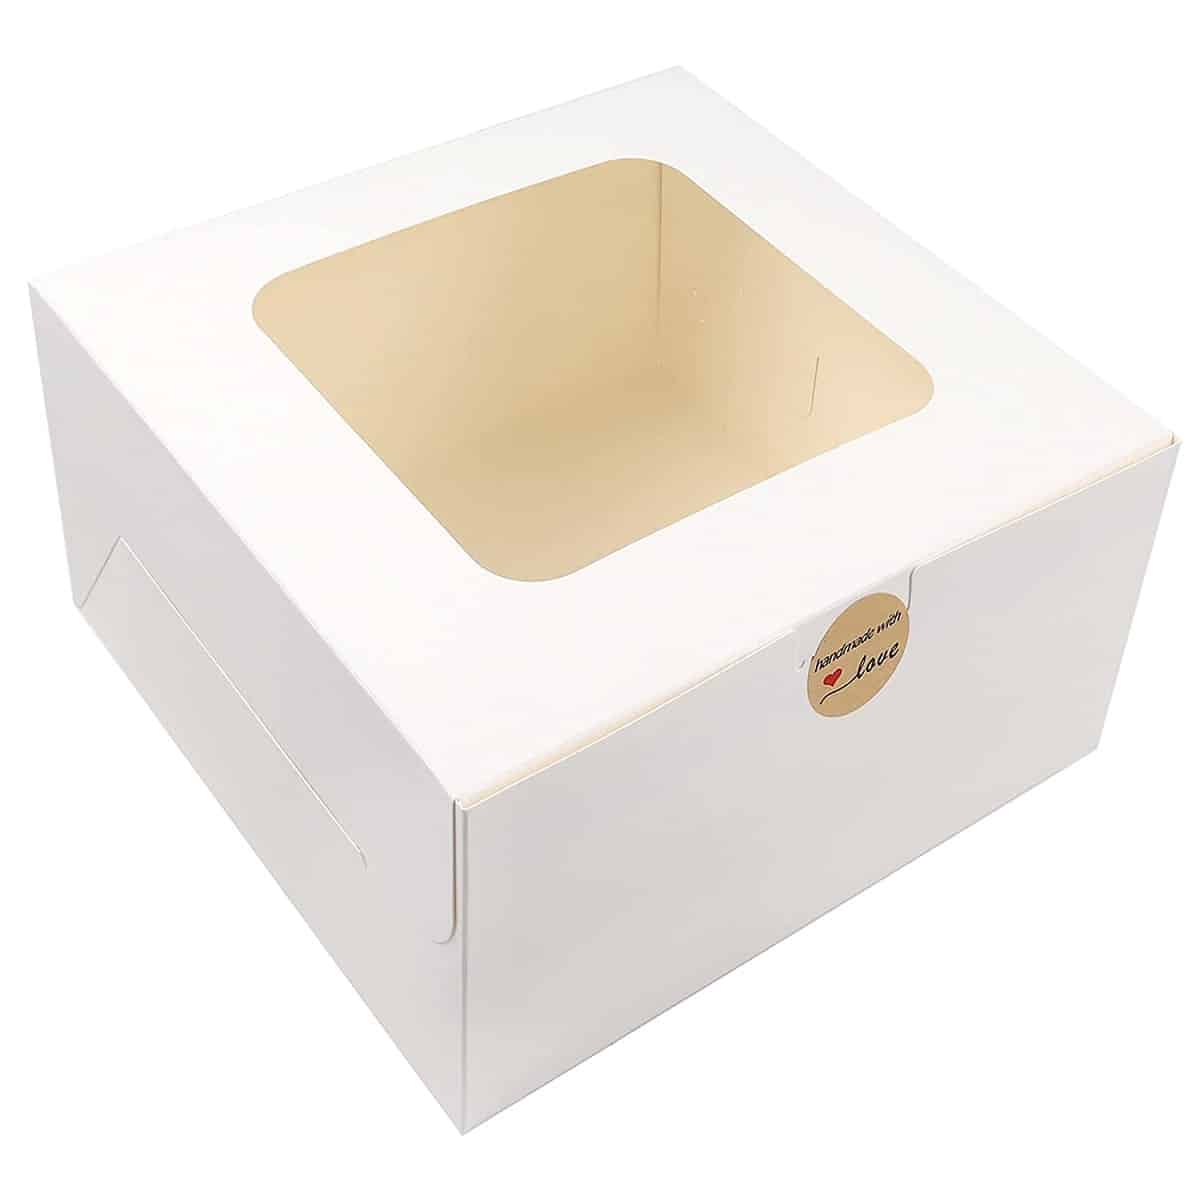
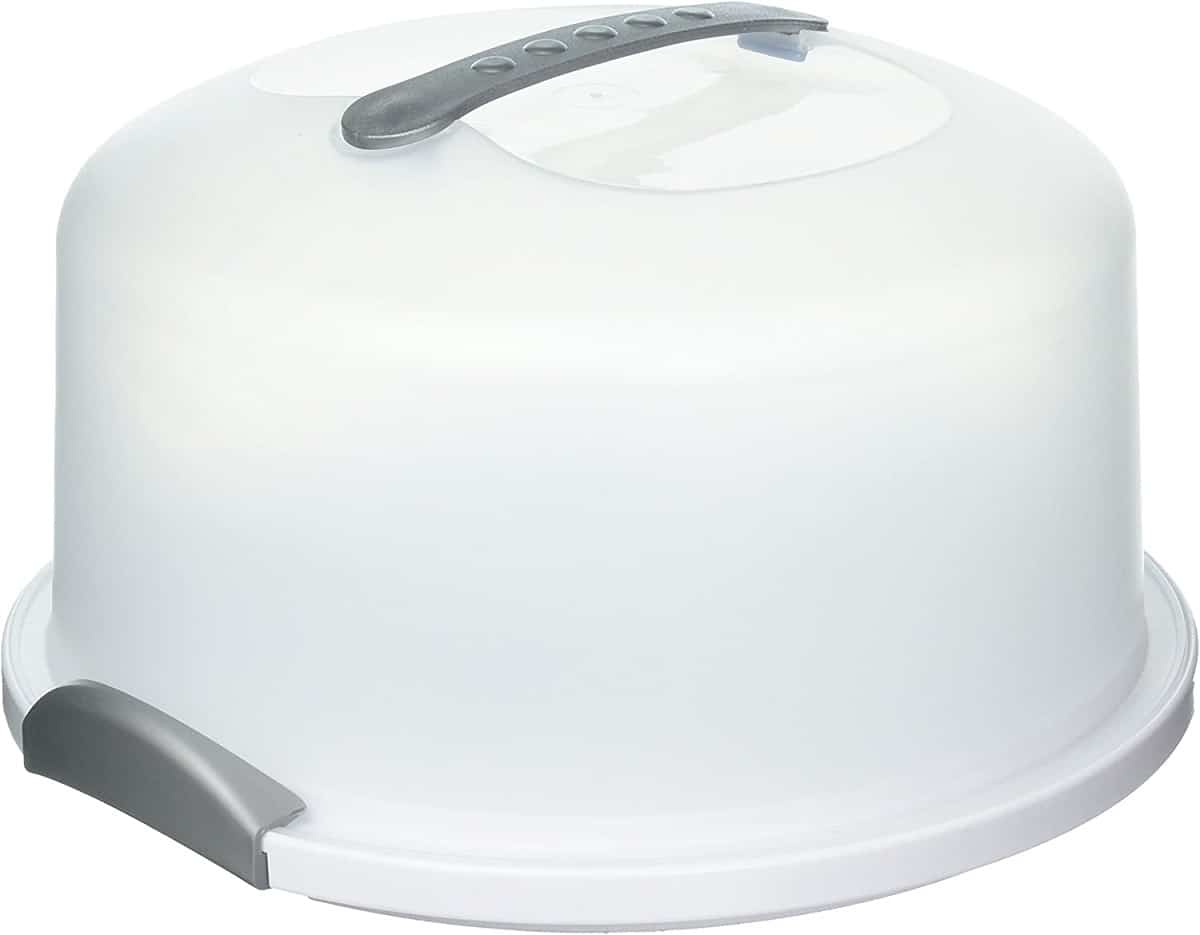
Use a box or a cake carrier depending on the size of the cake:
It’s best to have something that will protect the cake from debris. If you don’t have a box, or can’t find one big enough, we’ll go over that later.
Make sure the box is the same size as the cake base or else the cake will just slide around in the box.
Transport cakes on a flat surface:
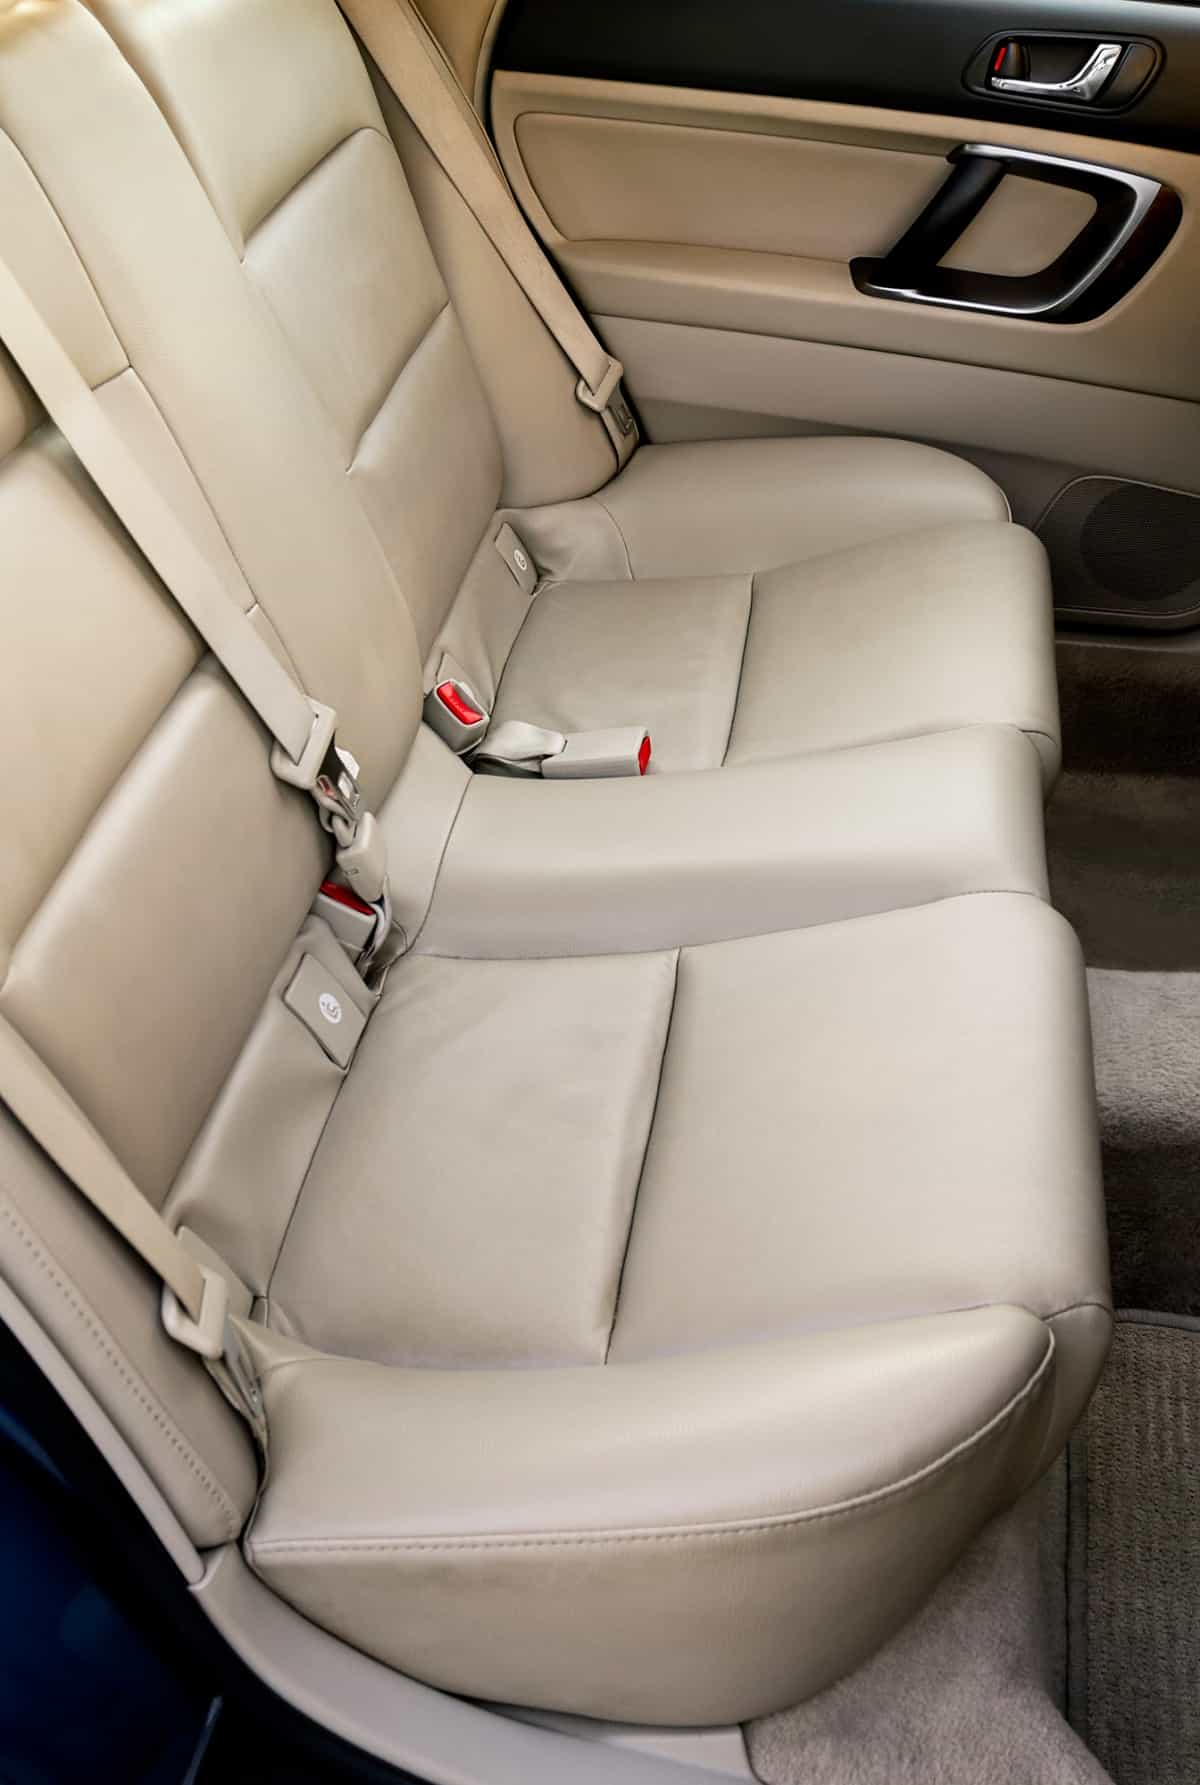
Don’t transport custom cakes on the car seat or someone’s lap, especially if it’s a tiered cake (we’ll get into more specifics regarding tiered cakes later on). You want to transport it on a flat surface like a clean floorboard.
Even if your back seats fold down, you might be tempted to set your cakes on them. You don’t want to do that. Most likely they don’t lay flat. Even if they do, there is probably still a space between the folded-down seats and the back of the front seats. There’s potential for the cake to slide and tilt.
The same applies to the front seat. Seats aren’t level and if you have to slam on your breaks, well, then your dashboard is going to be covered in cake and buttercream.
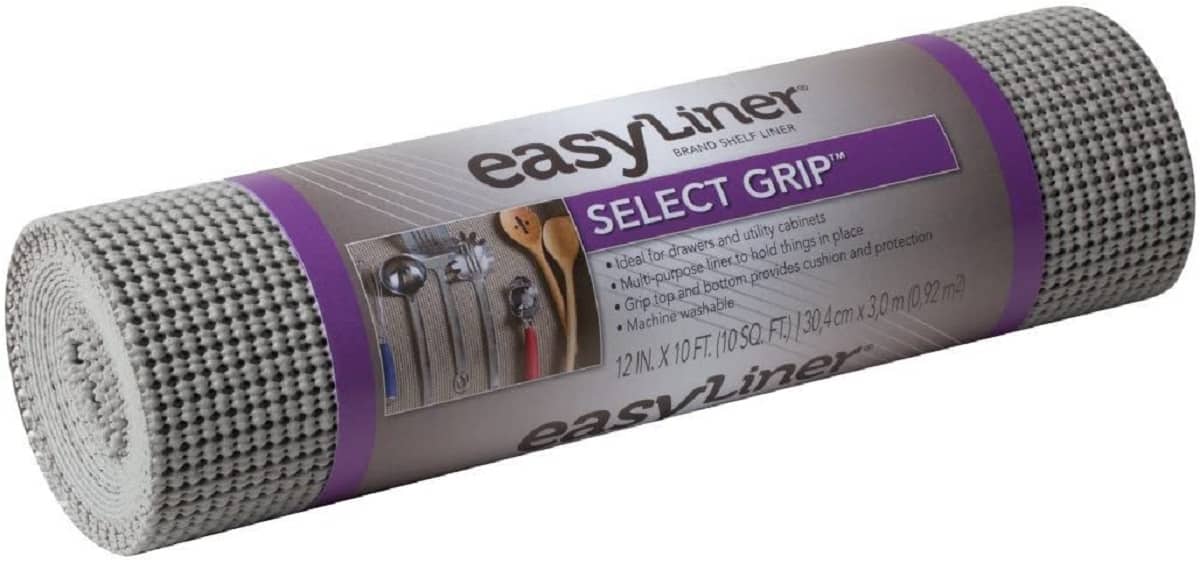
You DO have a better chance of having a level surface if you put the cake on the floorboards. Push your front seat all the way back. Add some nonslip shelf liner (the rubber stuff that’s in a grid pattern) on the floor and set the cake on that.
If you feel it’ll be too tall, just take the tiers separately and put the cake together at the venue. You can set the other tiers in the back on the floorboards. We’ll talk a little more about transporting tiered cakes further down in this post.
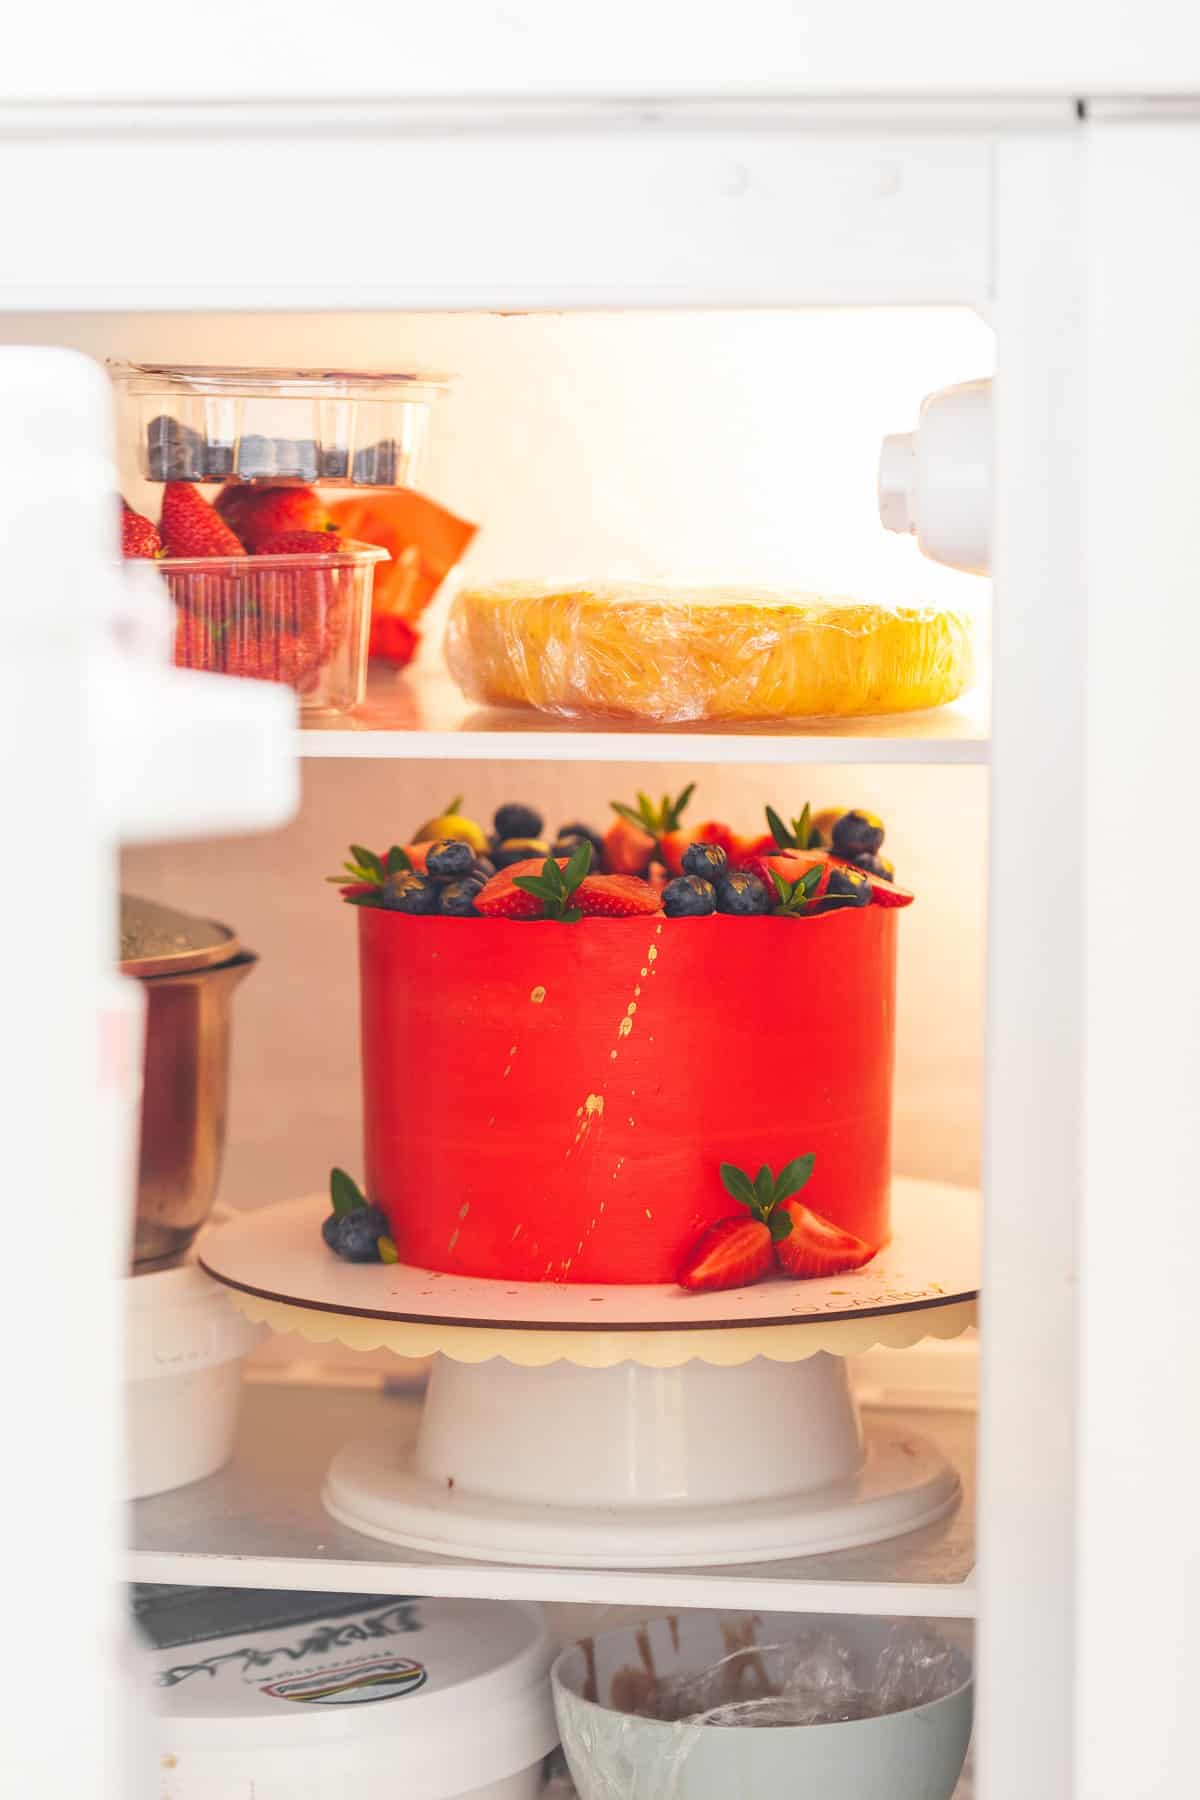
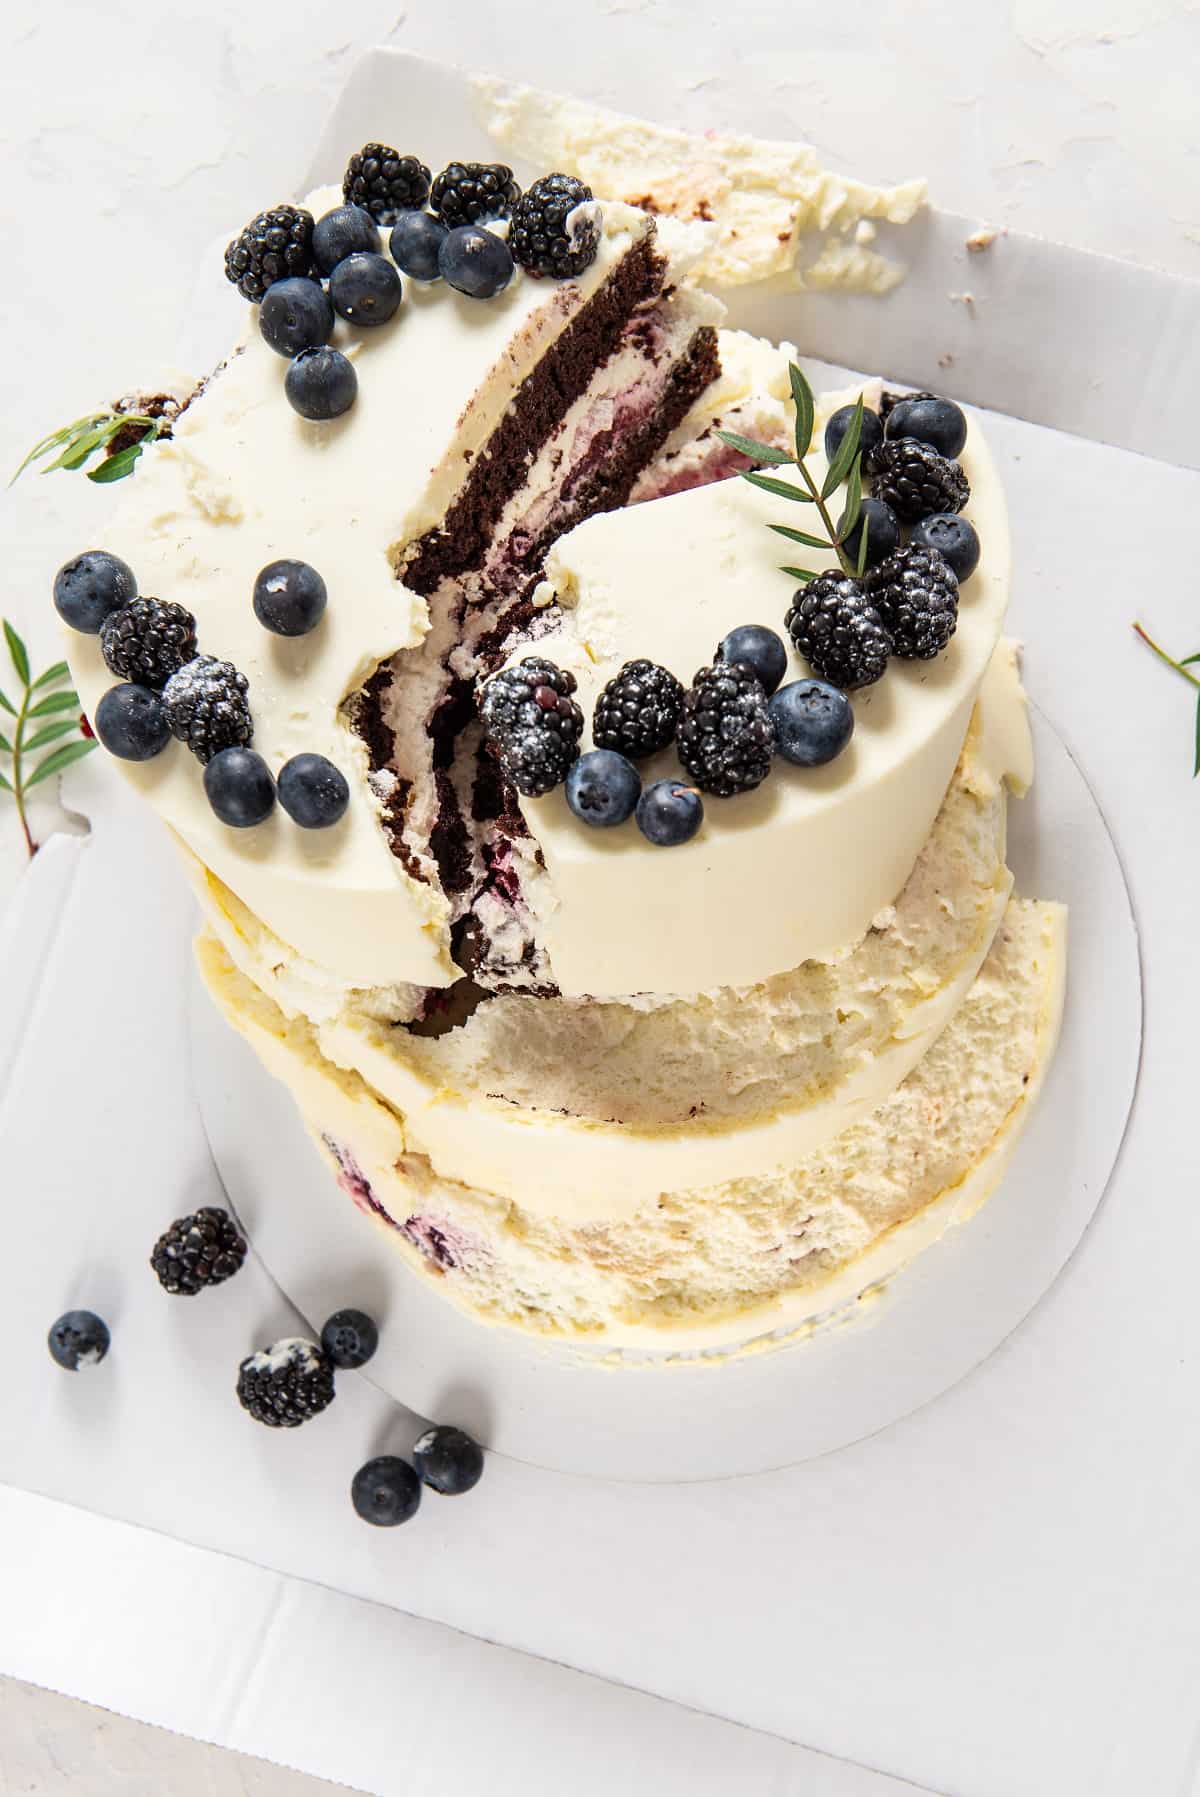
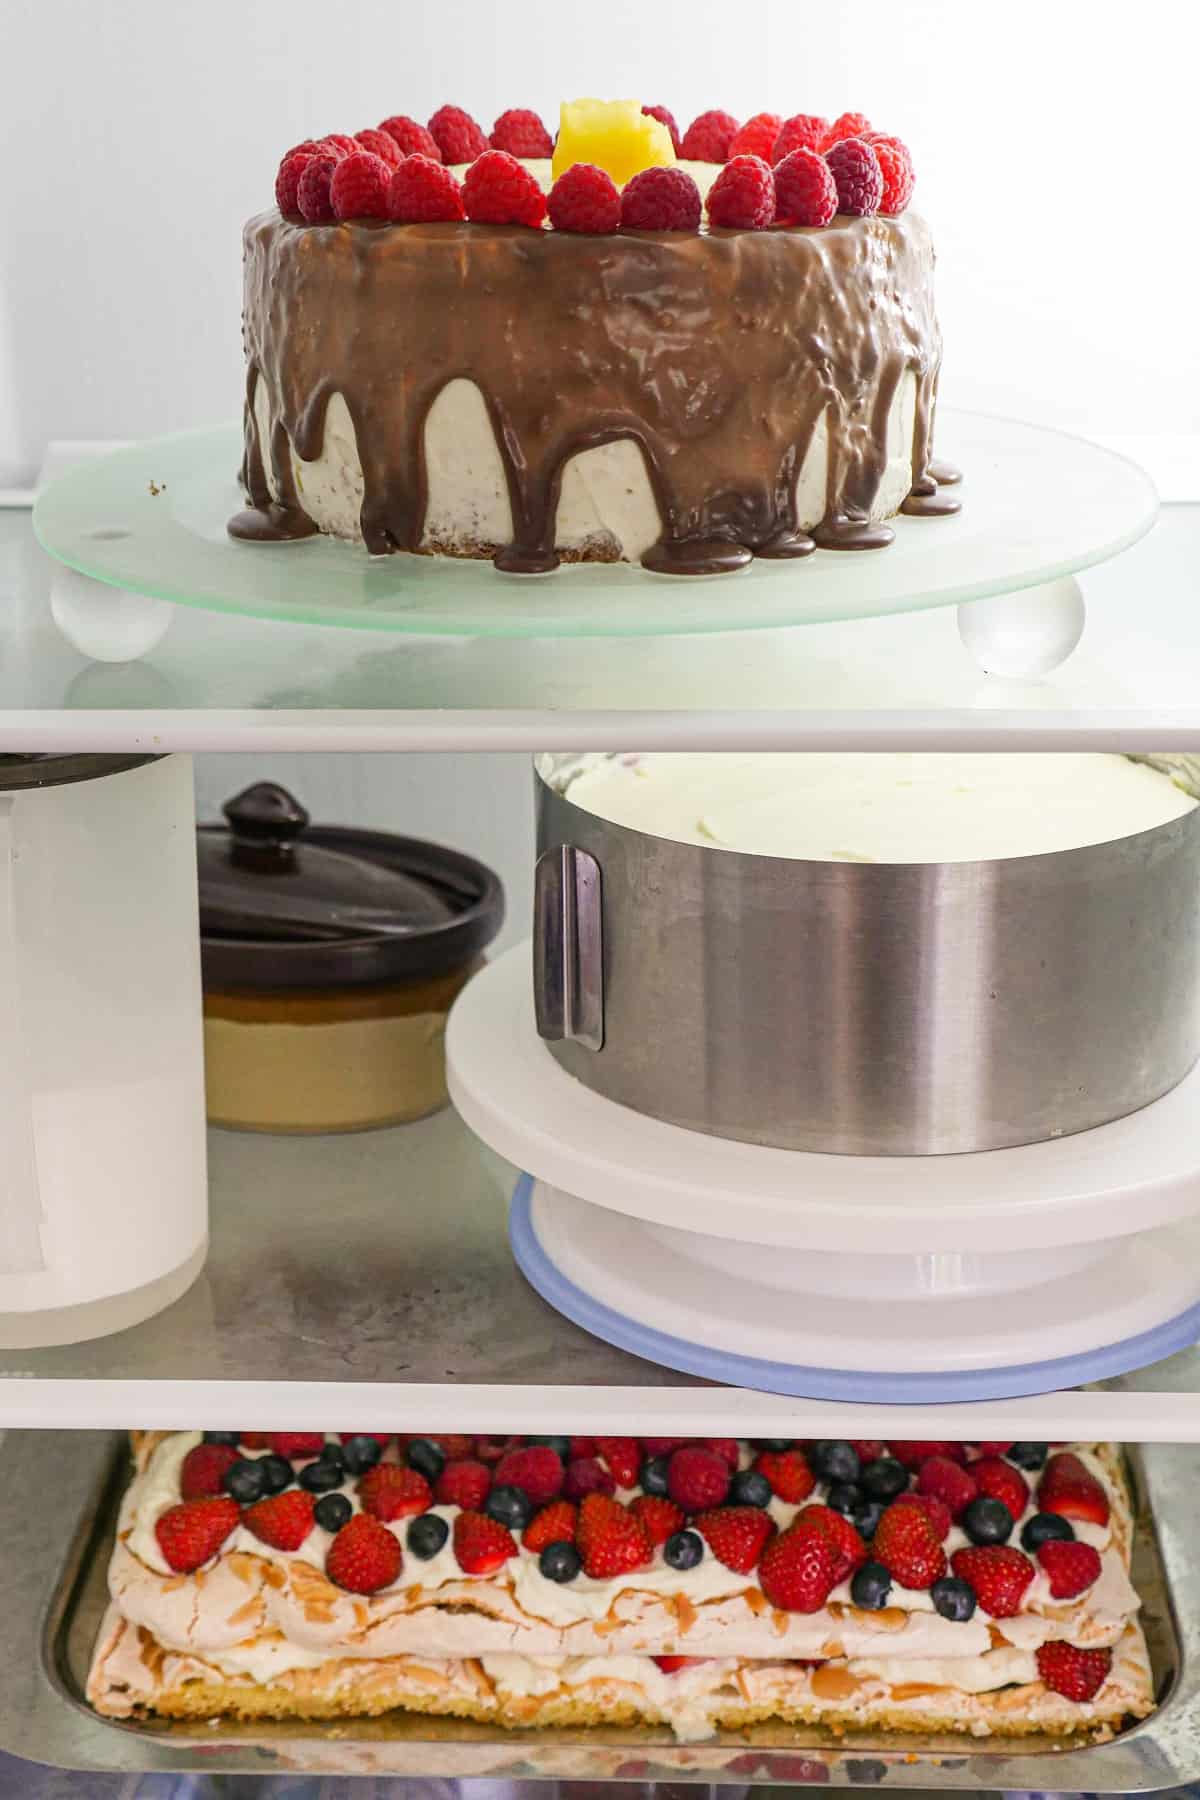
Chill it to firm it up:
This is especially true if it’s a buttercream cake. If it’s a cake with cream cheese frosting or has fruit in it or on it, it should be stored chilled as well.
You can also pre-chill your car as well. Go ahead and turn on the AC and let it cool down before you add the cake.
Give yourself plenty of time:
Leave early enough to drive slow, especially if you’ll be traveling with an intricate cake or a tiered cake. You don’t want to have to rush around stressing yourself out even more.
Drive carefully:
Ok, this is a given, but seriously, take it easy and drive slowly around corners, bumps and everything else. Know where you’re going ahead of time. You can even scope out the roads if it’s not too far away.
Just drive as careful as you can and stay at least several car lengths behind other cars in case they slam on their brakes.
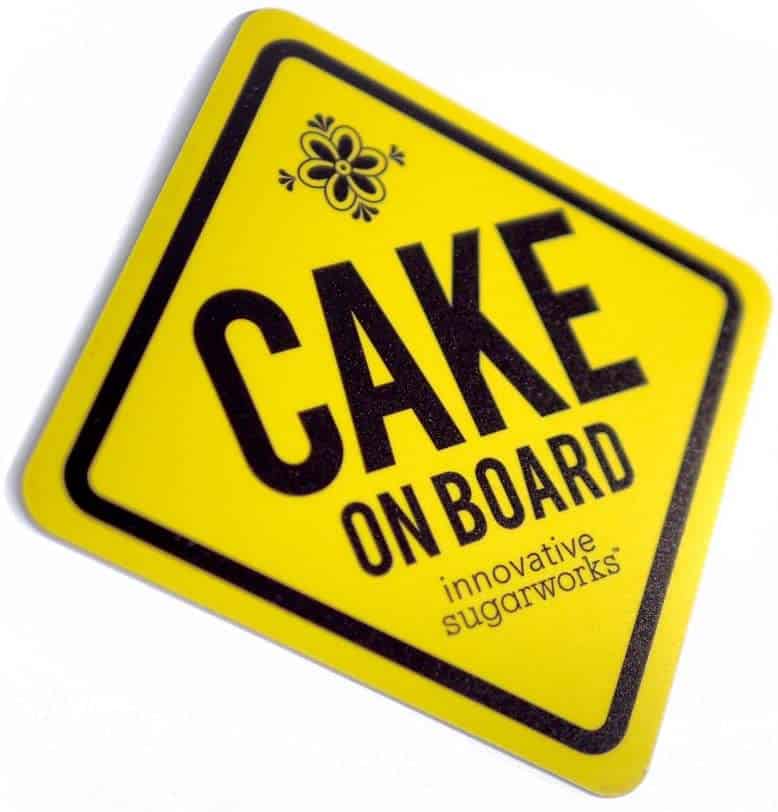
Maybe invest in some signage:
If you do this for a living, you might want to invest in a ‘cake on board’ magnet or sticker for your car. At least that would explain to others on the road why you might be driving a little slow or taking corners slowly.

Use something to cushion the cake:
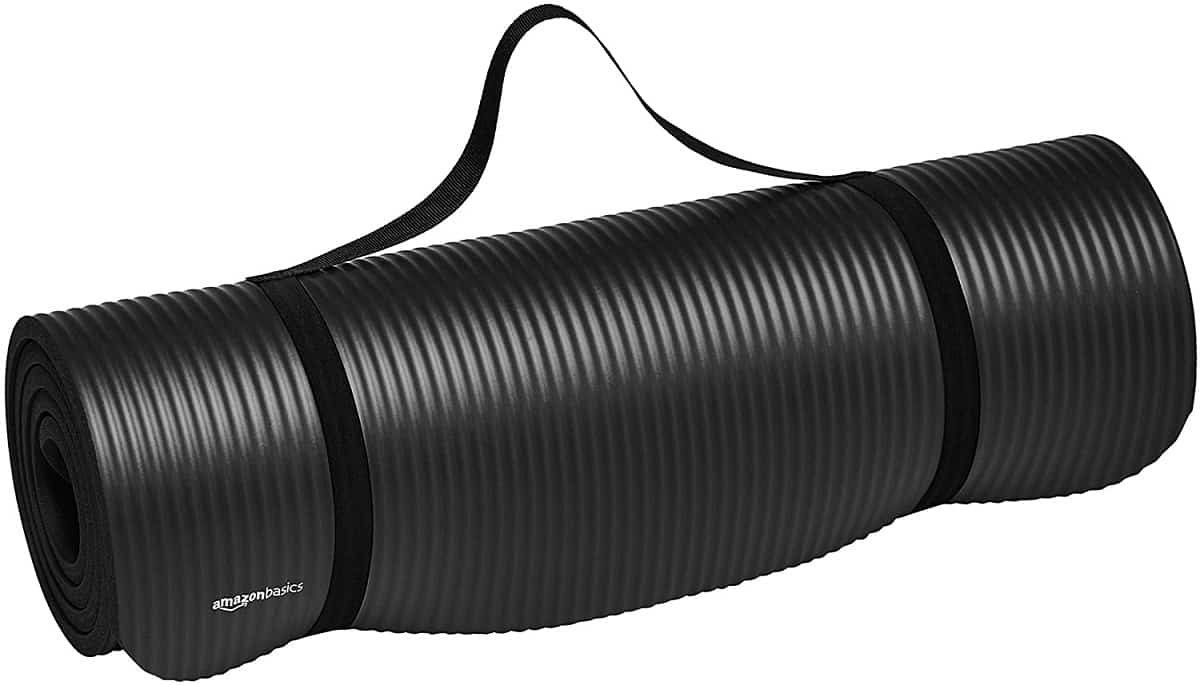
Add something under the cake to absorb some of the shock and bumpiness of the road. You could use a yoga mat or a towel under the cake box.
Use something to keep it from sliding around:
Definitely use a non-stick shelf surface under the cake. The easiest way to do this is to use a shelf liner. It’s the kind that’s got the rubbery, bumpy texture and you can usually find it cheap at the dollar store.
Just cut a square and set it under the cake box to keep the cake from sliding around.
Don’t transport a cake on a cake stand:
This is a bad idea. I know it’s nice to have the cake completely ready to present, but decorate that cake on a cake base and bring the stand separately.
You can set the cake onto the cake stand when you get to the destination. Traveling with the cake already on the stand is a disaster waiting to happen.
If it’s a tiered cake, use supports:
If you’re transporting a cake that’s stacked, make sure you use supports in the cake when you make it. If you didn’t, the cake will fall apart and easily tip over.
If you want to know how to stack cakes properly with supports, see this post here: How to Stack Cakes
Bring an emergency kit:
This is always a must. You want to pack a bag with some items that will be helpful if your cake gets a little squished or you have to repair some buttercream.
You’ll also want to add in the tools you’ll need to stack the cake if you’re transporting it in sections.
Now let’s get into more specific details.
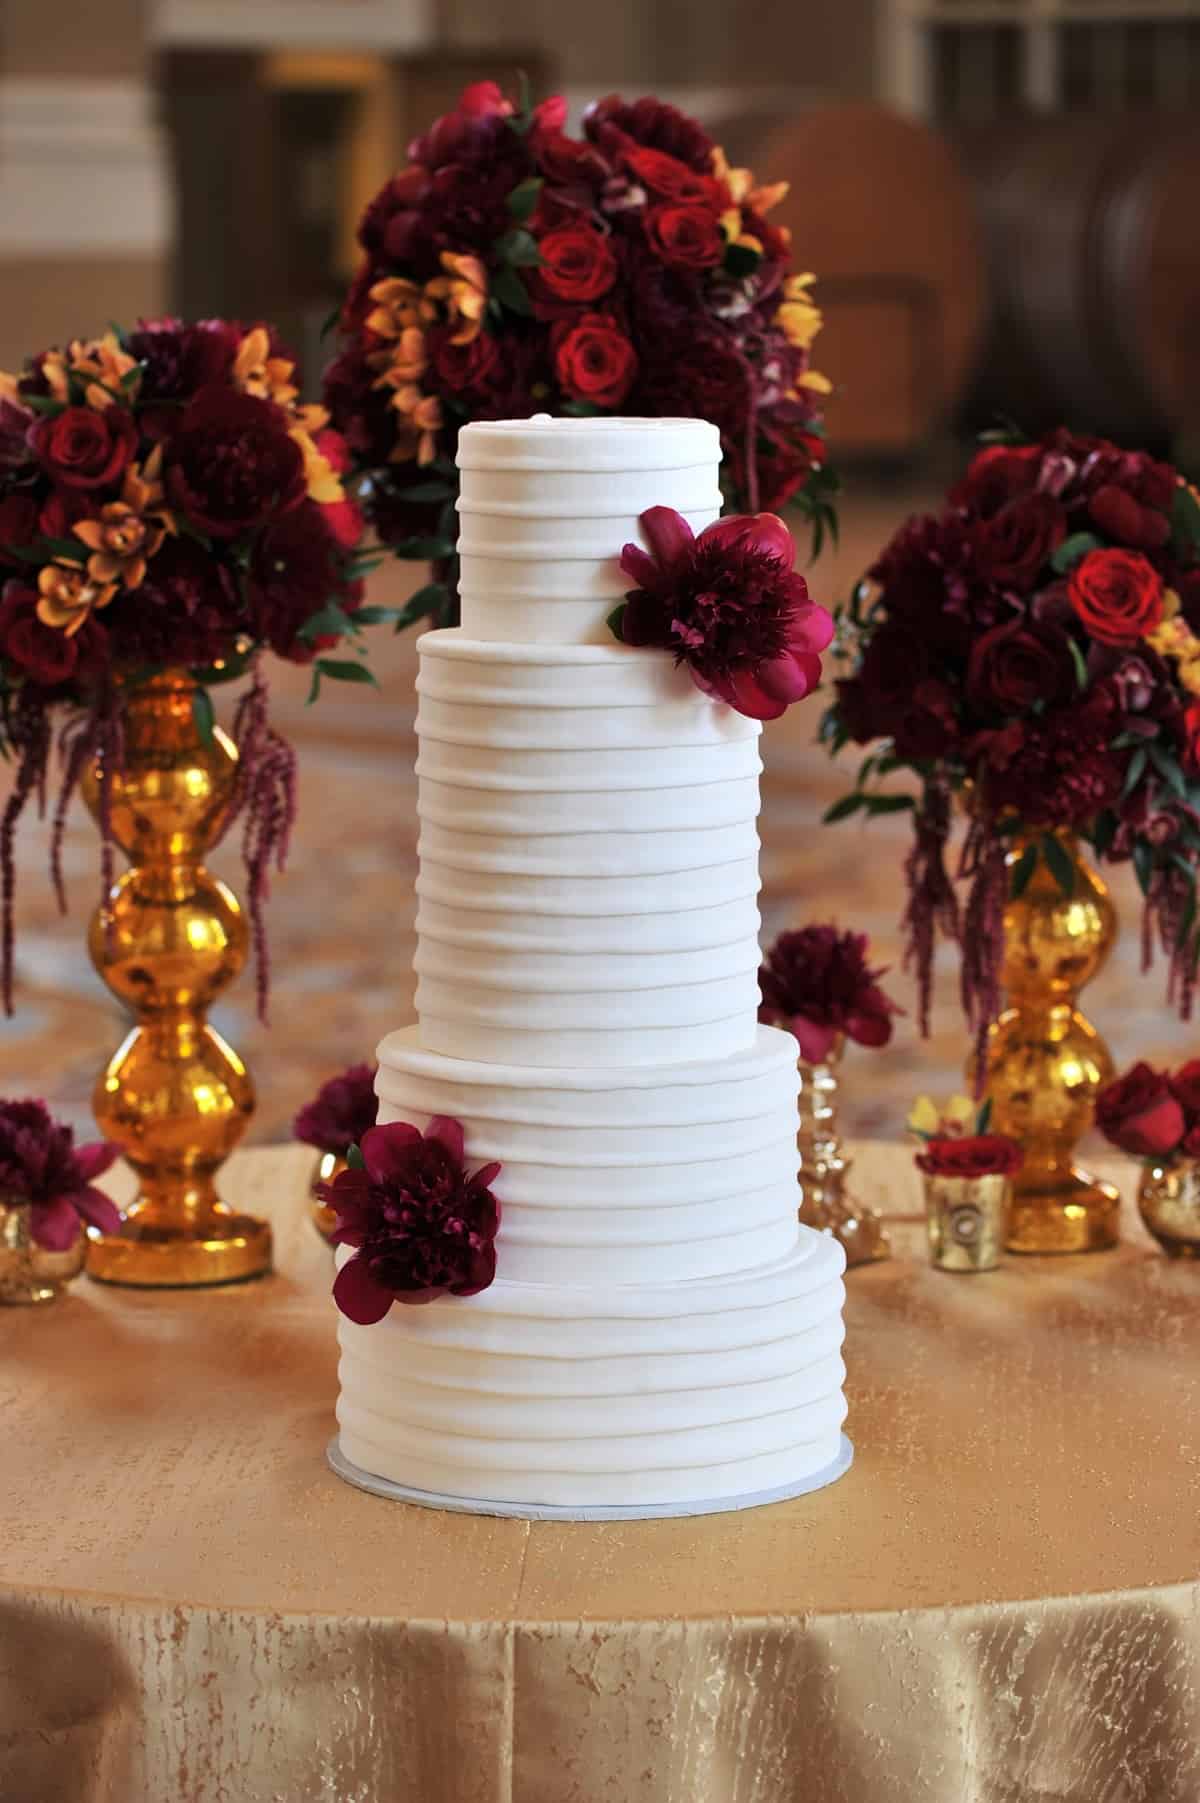
How to transport a wedding cake or a tiered cake:
Figure out how much room you’ve got in your vehicle:
If you’ve got an SUV or even a hatchback, you’ve probably got plenty of room. With a small car though, you have to improvise, which we’re about to get into.
Just know if you drive a small car, it’s completely doable. I’ve done it many times.
You may need to transport it in sections:
If you’ve got a small vehicle, you may need to transport a tiered cake without it being stacked and then just stack it at the venue.
You can box up the separate tiers and transport them on a flat surface (like the clean floorboards) and not worry about anything getting smashed.
Alternately, you can transport the two bottom tiers already stacked, but the other tiers separate and stack at the venue
Don’t transport a cake on a cake stand:
We talked about this earlier, but the cake needs to be on a cake board and then the cake (with the cake board) can be set onto the cake stand when you get to the destination.
A cake stand is just not stable enough for a moving car. Even if it’s one with a wide base, the cake may slide around on it and fall off. It’s better to just not take the risk.
Make your own box if the cake is large:
You might have to make your own box if the cake is taller than the usual cake boxes. I’ve had to do this many times as it’s just really hard to find cake boxes big enough especially for stacked cakes.
You can use taller boxes you can find at Lowe’s, Walmart, or other places too. Just tape up the ends of the box and cut a line down the longest, tallest side so the box actually opens from the side to slide your cake into.

Don’t transport a stacked or tiered cake on a car seat:
Car seats just aren’t level. They lean and while you might get away with transporting a single-tiered cake on them, it won’t work out if you try that with a stacked or tiered cake.
Don’t transport a stacked or tiered cake in someone’s lap:
You don’t want to just have someone holding a tiered cake. A lap isn’t level and our bodies move a lot when riding in a car and we can’t always control what or when we move in response to things.
This is just an all-around bad idea.
Use something to cushion the cake & to keep it from sliding:
We talked about this in the basic tips above, but using a yoga mat, a fluffy towel, or something to cushion the cake is a great idea.
It’s also a good idea to use a non-stick shelf liner under the cake box to keep it from sliding around.
Use a fancy cake transport box:
If you have a cake business and do this for a living, you might want to look at the fancy cake transport boxes they have now. They’re made specifically for transporting tiered cakes and some of them have a central rod that goes into the middle to keep them from toppling over.
Now, to use these, you’d have to have an SUV, van, or at least a hatchback because they’re just too big to fit into a car.
Here’s a link to the Cake Safe which is a transport box for tiered cakes: Cake Safe
How to transport a cake in a car:
Figure out how much room you actually have:
First, you need to be realistic and figure out how much room you actually have in your car and how tall the cake will be.
Also, think about the fact that you might have other passengers, the weather if the seats fold down, etc.
If you’re transporting a single cake, you’ll have lots of options, but if it’s a stacked, tiered cake, we’ll you might need to be a little inventive.
You just might have to haul the cake in your car unassembled.
You must have flat surfaces:
You’ve got to transport the cake on a flat surface and that’s not a car’s seat (even folded down) or a person’s lap. You’ll likely need to use the clean floorboards or a trunk (we’ll go over how to transport it in a trunk below).
Basically, car seats aren’t level. It’s possible to add something to level out the seat, but make sure that it’s not something that can shift while the car is moving.
This is especially important for long trips, in hot weather when the cake can melt a little and shift easier, and also when you’re transporting a stacked cake.
Transport it in sections:
If it’s a tiered cake, you may need to transport the cake in sections. You could potentially stack the bottom two tiers and bring the other tiers along to assemble at the venue. I’ve done that many times.
Use a shock absorber and a non-slip mat:
We’ve talked about this before, but make sure to set down some padding like a fluffy towel or yoga mat to absorb the shock.
Also, add a non-slip shelf liner under the cake boxes to keep them from sliding around.
How to transport a cake in a car trunk (the boot):
First, determine how hot the weather will be:
If it will be hot, then you may not be able to transport a cake in the trunk. You’d really need either a hatchback car or a car where the back seats will fold down, this way the air conditioning will reach the trunk.
Determine how tall the cake will be:
If it’s a tiered cake, you may not be able to fit the entire thing in the trunk. You may have to stack the bottom two tiers only and transport the other tiers in separate boxes, adding them to the cake when you reach the venue.
Use padding and non-slip materials:
I keep harping on this, but it’s so helpful. Add a soft towel and/or a yoga mat to absorb some of the shock from the car ride, then add a non-slip shelf liner under the towel or yoga mat and also under the cake box or cake board to keep everything from sliding around.
Try to use a cake box if you can:
If the cake is large, then you don’t have to use a box specific for cakes. You can use a larger box instead and let it open from the side instead of the top or bottom.
Just grab a box from a local store and make sure that one of the sides will be tall enough to fit the cake. Then tape up the ends and cut your own slit down the longest part of the box, so that it opens from the side allowing you to slide in your cake.
Make sure to drive slowly:
This is a given, but must be said. Take corners slowly, brake slowly, and try not to go over too many rough roads.
Here’s my setup for traveling with tiered cakes in my car:
The back seats in my car will lay down flat and it opens up to the trunk. This is the only way I’m able to transport a cake in the trunk even if it’s hot out.
I usually go ahead and lay down the seats, then turn on the AC to cool off the car if it’s hot. This way the AC reaches the trunk compartment.
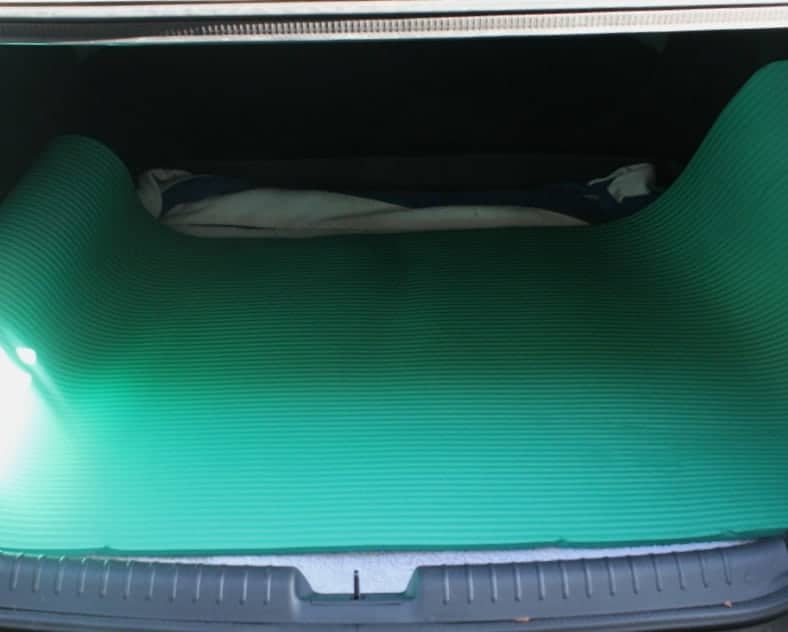
First, you’ll want to make sure the trunk is flat. My trunk has a rubber ‘thing’ on the bottom of it that has ridges, so I add a non-slip liner, a thin towel, and a flattened cardboard box over that to make it a smooth surface.
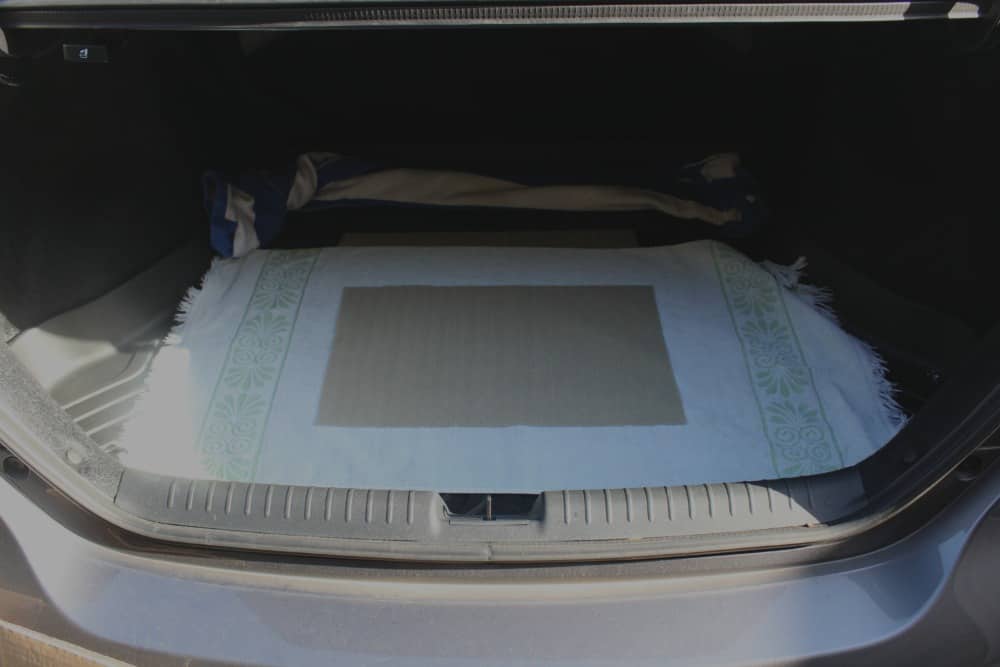
Next, I add a non-slip liner across it and then a big fluffy towel. I don’t want the towel sliding around, so that’s why I add the non-slip liner first.
Now here’s my secret weapon: You want to lessen the amount of jolt the cake could receive from riding in the trunk, but you don’t want to add any ‘bounce’ to it. You just want something that will absorb a little of the shock. So…..the secret weapon is a yoga mat.
It’s simple, but I think it really makes a difference. It adds just enough cushion, but it doesn’t add any ‘bounce’ like foam might. It also acts as a non-slip surface. PERFECT!

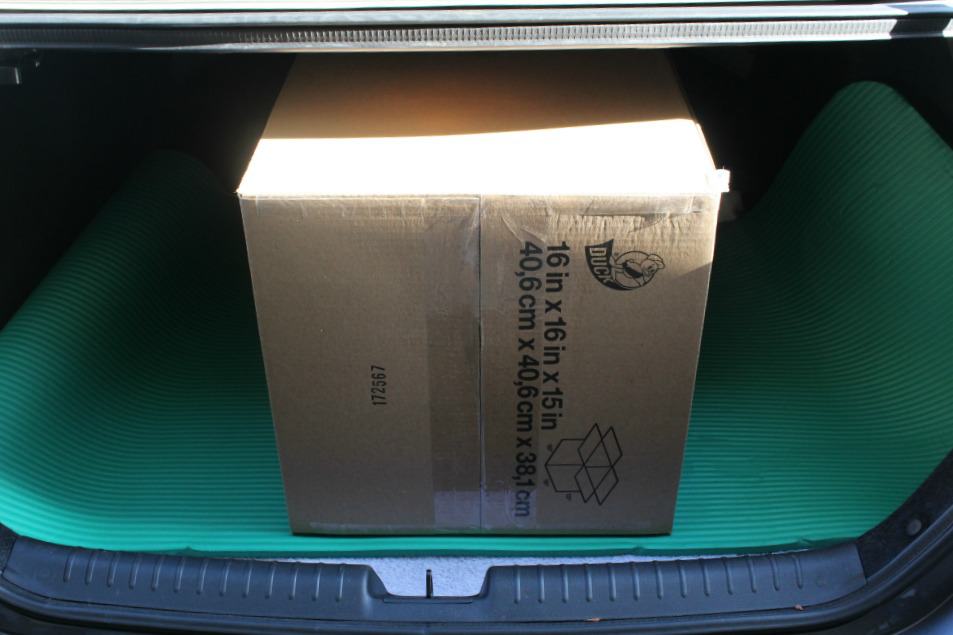
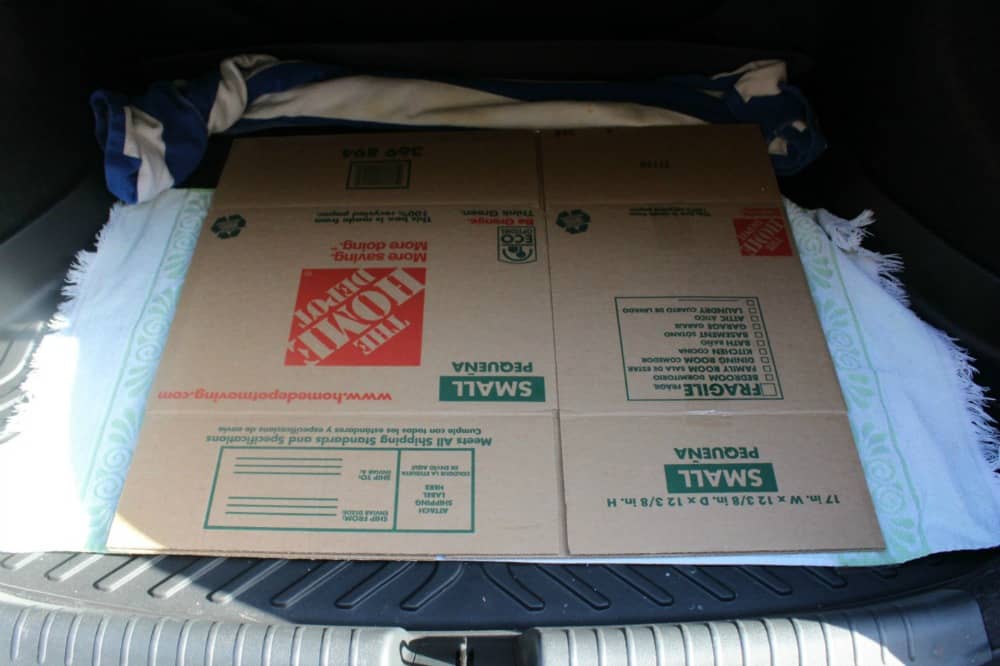
So here’s the thing about my trunk…it’s a deep trunk, but there’s not a very big opening. A large box will not go into the trunk without tilting it here and there.
Well, that won’t work when you’ve got a cake that shouldn’t be tilted because it’s stacked and honestly, those types of cakes are generally heavy at that point, so you definitely don’t want to be tilting it.
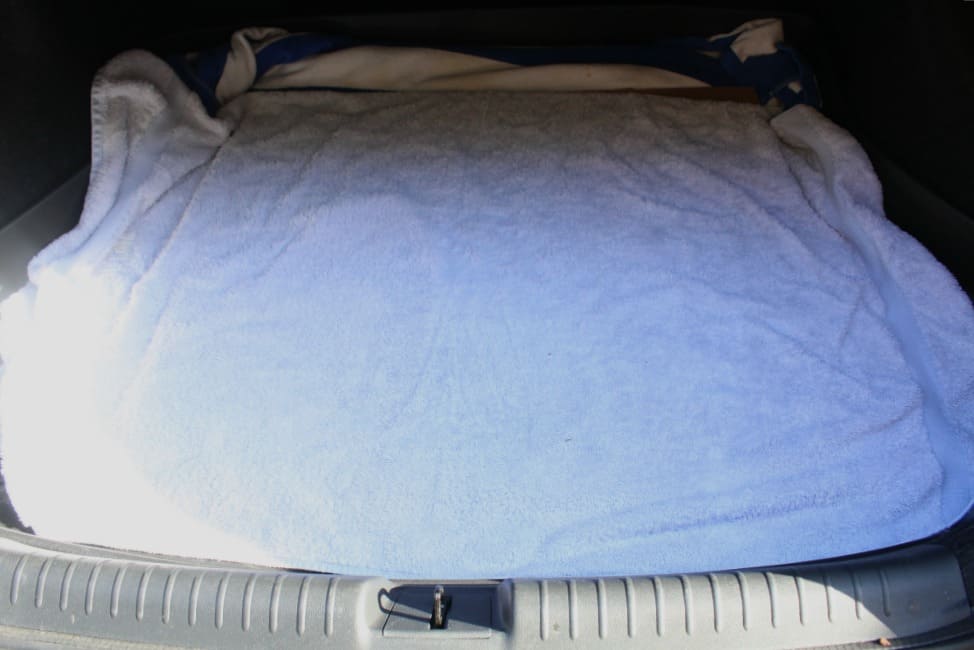
What works for me is that I place the EMPTY large box in the trunk on top of the fluffy towel and yoga mat. Then I grab the tiered cake and have someone hold the flaps of the box open for me while I set the cake in it. Then I seal up the box with tape.

Generally, I’ll stack the bottom two tiers and transport the other tier or tiers in separate boxes and stack them when I get to the venue.
Now I can’t promise you that this method is perfect for every single cake you’ll make, that you’ll never have anyone stop short in front of you, or that an animal won’t run out in front of your car. That kind of thing can happen no matter what kind of vehicle you’re transporting your cake in.
Transporting a cake when you don’t have an SUV or van is not the ideal situation, but with a bit of ingenuity and motivation, it CAN be done!
How to transport a cake without a box:
You don’t have to have a box made specifically for cakes. You can use another box you have laying around, just make sure it’s clean.
You really just need something to keep the dust off the cake as you travel with it, so if it’s a taller, tiered cake, you could even make your own box with cardboard you have around. Just make sure the box opens on the side to slide the cake in. (You can see that in the pictures above.)
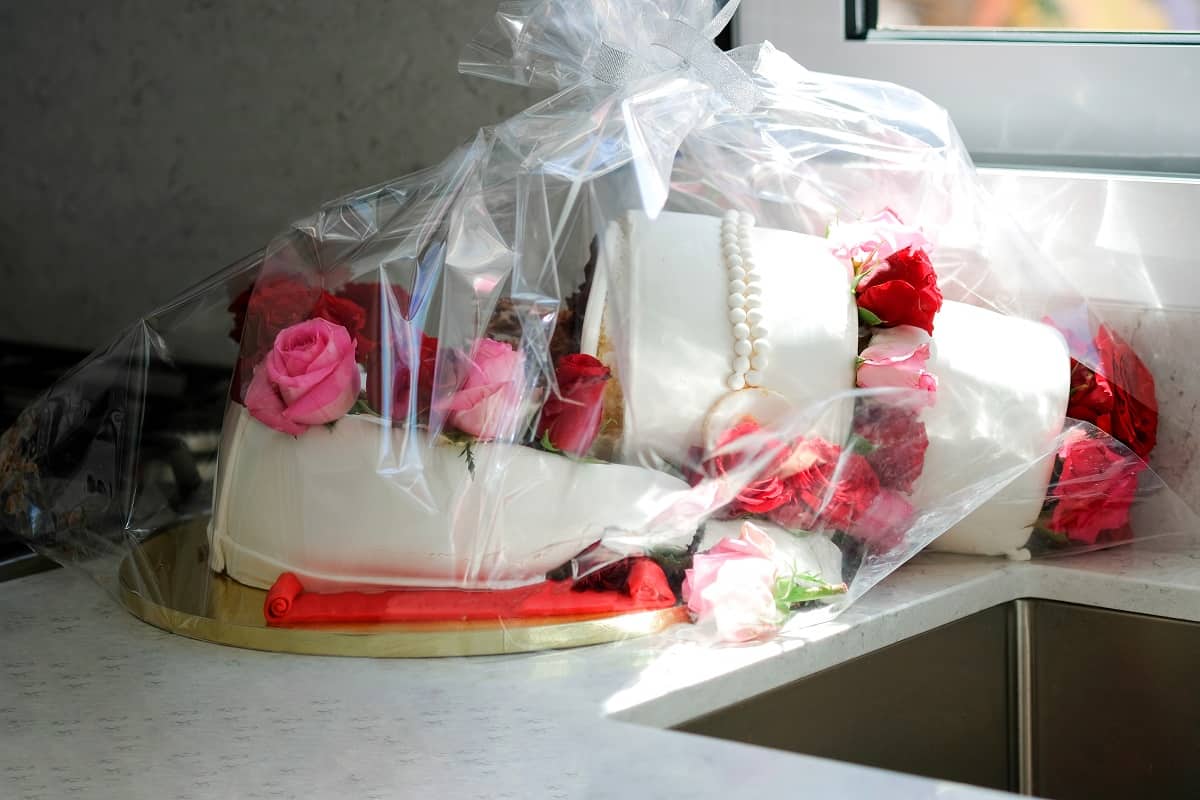
You could also use some type of cellophane to cover it. This may only work if the cake is fondant as the cellophane may stick to the buttercream.
If all else fails, and you have nothing you can use as a makeshift box or cake cover, just make sure your car is really clean.
How to transport a cake long distance:
This will depend on how long of a distance it will be. If you need to fly with a cake, that’s another issue altogether and I don’t have any experience flying with cakes.
If you’ll be traveling a long distance in a motor vehicle though, the best thing to do is to plan well.

Figure out how long the trip will be, the best route to take, and whether you’ll need to keep the cake chilled or not. These are all factors that will play a big part in whether or not you’ll actually be able to travel with a cake.
If the cake needs to be chilled the entire time and the destination is hours away, then you’ll need to work something out like boxing the cake and adding dry ice or ice packs.
Personally, I wouldn’t travel very long distances with a stacked cake, because it’s just going to get constantly jostled. I’d bring the tiers separately and stack them at the location.
When my step-son got married, their wedding was two hours away. His cake wasn’t an exceptionally tall cake. It was just a three-tiered cake.
I stacked the bottom two tiers and brought the top tier seperately to stack once I got to the venue.
One of the reasons for that was that I thought the cake would be too tall for my vehicle and the second was I didn’t want to take the chance of the cake getting jostled and the top tier falling off somehow.
How to transport a cake in hot weather:
Blast the AC ahead of time:
Turn the car on before the trip and blast the air conditioner to cool it down before you ever set the cake inside the car
Chill the cake:
Chill the cake for about 30 minutes or more before the trip to firm it up.
Alternatives for chilling the cake:
Think about using dry ice or ice packs next to the cake to keep it chilled if it’ll be a really long distance.
Use a level surface:
Yep, I’m saying it again…make sure to transport the cake on a level surface like a floorboard or the trunk (see above about the trunk).
Remember that you can set a towel down on the floorboard to make a clean surface and it’s best to have the cake in a carrier or a cake box if you can.
Transporting in a trunk in hot weather:
If you want to transport a cake in the trunk in hot weather, you’ll either need to drive a car with a hatchback or one where the back seats fold down and it opens to the trunk.
Otherwise, the air conditioner won’t be able to reach the trunk area and your cake will be a melted mess once you get to your destination.
(Make sure to check out the other tips above on how to transport a cake in a car trunk.)
I hope this was helpful and that you’re able to transport your cakes and not be too stressed out.
Don’t Forget to Pin it for Later!
FALEMPIN
J’aime beaucoup vos tutoriels ils sont bien expliqués et avec beaucoup d’humour. Merci de nous les faire partager.
Kara Jane
Merci beaucoup!
Kathy
Awesome tips!! How do you pack the cake in the box? Do you have tips for how to pack so that the cake doesn’t slide around in the box?
Kara Jane
Hi Kathy, I use the box sideways, so I can just slide the cake into it and then close the box lids like double doors. That probably doesn’t make any sense, so let me see if I can do better. lol
So, on smaller cakes, I just use regular cake boxes. I set the cake on the cake box and then lift up the sides of the box and attach them all together. For a large cake though, I just get a large box (one that will actually fit in my car). I actually stand it up on it’s side, so that the top opening is on the side. That way, I can just slide the cake in.
The most important thing is to make sure the cake is sitting on a bottom cake base that is the same width as the box. That way it won’t slide around. If the cake base is smaller, then it could all slide around in the box. If you can’t get it a box the exact width of your cake base, just get it pretty darn close and then set a piece of that rubbery shelf liner into the bottom of the box, then add the cake. That shelf liner really does help to keep things from sliding too much. Just make sure the bottom cake base is as close as you can get it in size as the bottom of your box. I hope that helps!
Naomi
Hi, firstly great tips, especially the yoga mat.
I wanted to ask if you can freeze a cake with meringue icing before travel, that has edible images. The meringue icing doesn’t have butter in it.
Also do you think it best to put the edible image straight in the meringue or should I use fondant over it before applying the edible images? It’s a 2 layer birthday cake going in a 3 hr drive. 😬
Kara Jane
So glad you liked the tips. I normally don’t use meringue icing, but when I have on a couple of occasions, I used Swiss Meringue which actually does have butter in it. I don’t have much experience with meringue icing that doesn’t include butter though. I don’t know if you’d be able to freeze it or not and I also don’t generally use edible images, so I’m not much help there. I did find this article that was very informative and it does talk about using edible images on top of meringue buttercream or whipped cream: https://www.legacycakerystudios.com/how-to-apply-an-edible-image-to-a-cake/
Naomi
Thank you for the link, I’ll check it out.
Shireen
Hi. Do you keep your tiers frozen before transporting them? If so, are the decorations on? I’ll be using modeling chocolate and marzipan decorations and I’m not sure how they’ll freeze.
Kara Jane
Hi Shireen, I don’t freeze them before I transport. I like to keep everything room temperature (unless there’s something perishable in the cake). Sometimes I will chill the cake in the fridge for about half an hour or so before I transport it though. That just makes it a bit more firm for traveling. I wouldn’t freeze the whole thing before you travel. It could cause a lot of condensation issues. Hope this helps!
Marie
Hello Kara,
This weekend I had my first naked cake order. it was two tiers (10 and 8 inch) with sunflowers.
I live in AZ and the weather was around 95% outside. I did transport, on a level surface with a mat underneath each tier. However I did not have the cakes in boxes, I think this was my first mistake. When I went to deliver the cake by buttercream was melting, even though I had the air conditioner on full blast. Do you happen to have a good recipe for a sturdy buttercream? Also I did put four dowels in the bottom tier but when I went to stack the top tier on top, the bottom cake feel apart in the back once the top layer smashed the layer. it was just a disaster. Why did my cake crumble like that? I can only think it was the heat. The cake was as room temperature when I went to deliver it. I think I need to use a better buttercream for cakes in AZ and next time I transport I will be using a box.
Kara Jane
Hi Marie, I’m so sorry the cake fell apart on you! I know that had to be so disappointing after all the time you spent making it.
First, I’ll give you some tips for a more heat stable buttercream. I do have a post planned for my heat stable buttercream recipe, but I’ll go ahead and tell you that it’s basically my basic vanilla buttercream recipe, but you’ll use shortening instead of the butter. If you can get the high-ratio shortening, it seems creamier to me. When you make this buttercream, you’ll want to add a pinch of salt to cut the sweetness and you may want to add in a bit of butter extract to give it a more buttery taste. Buttercream made with shortening will stand up better to warmer climates than an all butter buttercream. If it’s really super hot and the cake will go outside, or it’s in direct sunlight, then sometimes there’s just nothing you can do to keep it from melting. Next time before transporting, you might try putting it in the fridge about a half hour or hour before leaving…that may help a bit. I try not to get it too cold though because I don’t want too much condensation going on.
As far as stacking cakes go…I like to use the heavy plastic dowels called ‘poly dowels’. You can get them from Global Sugar Art. They have two different sizes that you can use. I don’t use wooden dowels although many people do. Also some people use straws. If you do that, make sure they are the sturdy plastic bubble tea straws and not regular straws as those just won’t work. I usually put more than 4 dowels in my 10 inch cakes when I’m stacking an 8 inch on top of it. I probably use maybe 7 of the smaller poly dowels. If using the bigger poly dowels, I’ll use maybe 4-5. It’s probably overkill, but I tend to go for extra stability. Also I like to insert one dowel (wherever the highest part of the bottom tier is), mark it where it hits the top of the cake, pull it out and then cut all the dowels that same exact length. That way I know the cake will be level. Also did you use a cake board under the top tier? I’m sure you did, but I just like to check. This was a lot of information, but I hope it helps!
ss
Hi there!
This is such an extremely helpful post thank you! I had a question, as you had mentioned the 2 tier cake was secured with a centre dowel. What happens when you get to the venue and you want to attach the 3rd tier? or in addition to that 4th? How do you secure that? I don’t know if you would put another centre dowel?
Also, if you have a 4 tier cake, do you secure 1st and 2nd tier with a center dowel box it, then secure 3rd and 4th tier with a centre dowel, box it and then how do you attach them together at the venue? Any help would be appreciated!
Kara Jane
Hi there…those are good questions. When you add the center dowel to a cake, make sure that dowel isn’t sticking up out of the top tier. You’ll want to measure the height of the cakes to make sure and cut it the length you need it to be. This way the tier will be nice and flat when you go to add the other tiers later.
So, for the other cake tiers you’ll be adding later, just stack them when you get to the venue. Make sure the cake tiers you’re setting them on have support dowels in them (but obviously the top tier doesn’t need doweling because nothing will be sitting on it.) You don’t really need another center dowel.
I usually just traveled with the other tiers individually boxed, but you can stack them two by two if you wanted. If I added the top tiers at the wedding, then I didn’t add another center dowel. The only reason I add the center dowel, was to keep the cakes I’d already stacked more stable during transport. Most of my cake orders in my area were for two and three tiered cakes…not four. But if I had more tiers, I would just box up those other tiers individually and just stack them at the venue. I hope this helps!
ss
Thank you so much for your response! One last question sorry, if the top tiers aren’t centre doweled into the other cakes, is there ever concern of them shifting while being moved at the venue? like the top tier all of a sudden falling off of the doweled cakes? does the buttercream/royal icing really hold that tier in place?
Kara Jane
Well there’s always a chance of something happening if the cake is moved, but I would normally just set it up where it would stay. It’s whatever you feel most comfortable with though. Personally, I just center-doweled the bottom two or three tiers, then just set the others on top at the venue and on the table that it would actually stay on. I also let the customer know (in my contract) that once the cake was delivered, I wasn’t responsible for any mishaps related to someone bumping it or moving it. I also left instructions on how to take the cake apart and cut it. Hope that makes sense!
ss
That makes total sense, thank you so much for taking the time to respond!!
Kara Jane
You’re welcome…happy to help. 🙂
Shelley
I have a 2 tier cake that has to travel 2 1/2 hrs. I will be separating the tiers the issue is how do I prevent the top decoration not to break. It is a giant sunflower that hangs over the top tier. It’s made of fondant
Kara Jane
Hi Shelley, you could always add the sunflower at the venue if you wanted, but if you want to go ahead and attach it before travelling, you could add bits of paper towels, foam or kleenex between the petals, so they wouldn’t knock against each other while traveling.
KIM Darrell
How do you take a wedding cake apart, and cut?
Kara Jane
That’s a big question. There are several ways you could do it. The most common way is to take the top tier off first (save it if that’s what the bride wants), if not, go ahead and cut it and serve it, then move on to the next tiers. So, basically you’ll just cut one tier at a time. The safest way to do that is to un-stack that tier before you go slicing it. It’s more stable that way. You can cut a couple inches in from the outside and cut a circle, then cut slices out of that outer circle. Some people just slice a huge chunk off the side of the cake, face it down and then cut that into slices. It’s kind of just by personal preference, but whichever way you choose to slice it, make sure you take that into account when ordering the cake or when designing the cake, so you’ll make sure you have enough slices to go around. That may have been confusing, but here are a couple video links that may be helpful. The first video is what I’m used to doing, but the second video is another way it could be done. 1st video: https://www.youtube.com/watch?v=-j9VwBKT9po 2nd video: https://www.youtube.com/watch?v=YEGLm_5zZn0
April
I had a wedding cake disaster a year ago and I haven’t made a wedding cake since. It was for a family member as well which is worse because I still have to associate with those people at parties and such.
First off, I work 7 days on/7 days off with no PTO. I made sure months before that the event would be on my week off so that I could just pay attention to the cake. But, my supervisor wanted me to change weeks a month before the wedding so I couldn’t get that week off. In between 10 hour shifts, all I did was bake. By the end, I only got 2 hours of sleep in 72 hours. I started baking and cooling the layers 2 days before the event (I have a small oven). Then the day came to put everything together. The wedding wasn’t until 6:30pm so I figured I would get a couple hours of sleep after work and start around 11am and it would be fine…. Wrong.
The bride wanted Italian meringue buttercream. I’ve done it for cakes in the past (when it was cooler outside) and they turned out great but those were usually mild/cooler temperatures. The wedding was the beginning of May. where I live, you don’t know if it will be 60-70 degrees or 80-90. With my luck, it was 80-90. I lived up a canyon so it was about 75°F instead of the 80-90° in the valley. However, that house didn’t have air conditioning… Italian meringue needs to cool down while you are mixing it and it wasn’t cooling down fast enough. Eventually it cooled down but it took… forever! I was able to frost the bottom tier but then it started melting as soon as I iced it. I quickly put it in the freezer because the fridge wasn’t cooling it down quickly enough. The middle teir was a pain to ice. It was getting hotter in the kitchen and everytime I would smooth a side down, I could see the icing melt down slightly. I eventually got it smooth and as non-melty looking as possible and stuck it in the freezer with the other teir. I guess it took me a while battling the melting cake as well as filling cupcakes that the next thing I knew, I only had 3 hours until the wedding! And the venue was an hour away!!! It was seriously like a nightmare come true. Trying to maintain my calm, I quickly started on the top teir. I guess it got even hotter in the kitchen because as I was icing the top teir, a streak of the raspberry filling popped out and smeared across the cake. I had a little mental breakdown at that point. I didn’t have time to bake and cool another top teir. I also didn’t have time to make another rasberry filling (used fresh raspberries and cooked it and everything) and more of the filling kept coming through the side which made fixing the icing impossible… so I scraped the filling and icing off, mixed them together and made a raspberry cream filling. It tasted delicious and was good enough for me. The cake was still intact so I made another batch of icing and re-stacked the layers again and attempted to ice it again. The icing was still trying to melt but I got it as smooth as I could under the circumstances and stuck it in the freezer. After that fiasco, I only had like a half hour before I needed to leave! Not enough time to do everything and still be on time. I think I started tearing up at that point. At least all the cupcakes were done and ready to go (all 250 of them). I waited about 20 min for the cake to cool because if I hadn’t, it would’ve arrived a melting disaster. I wanted them to at least have a stable cake to cut into at the very least even if it was later than expected. After the cake cooled, I then attempted to stack and decorate the layers as well as I could with the time that I had… Which was no time. I put a hecka lot of dowels in that thing and finally got it decorated.
Finally, transportation time came… The best part of the whole wonderful experience! I was going to use my mom’s minivan because the back seats folded down in the back… However, she decided to take a random road trip that week… And there was no way that cake was going to fit in my little Nissan Sentra. So, I got to use my dad’s rickety old truck! I had him start his air conditioning an hour before but it was still pretty warm by the time we got in.
At this point I was pretty broken and I just shrugged and was like, here goes nothing! We stuffed all the cupcakes in and I got in the back cab area and held that cake on my lap the entire way to the venue. Every little bump on the road made my heart explode. My dad had to slow down because his truck was so rickety that if he hadn’t, that cake would’ve shaken apart even with those dowels in. I saw the icing start to get warm and try to melt again. By the time we made it to the venue, I was an hour and a half late. I feel so terrible. My grandma looked like she wanted to kill me and I was just trying to keep it together while apologising to everyone. I got the cake to the cake table (which was in the sun), set up the cupcakes, was about to go over to the bride and apologise but the parents stopped me. I guess they didn’t want me apologising to her? I still don’t know. I told them I was sorry and no payment was required, then left. On the way home I pulled off the side of the road and bawled. I still had to work a ten hour shift a couple hours after that. Everytime I think about cakes now, I just cringe.
Kara Jane
Oh April, bless your heart, that sounds like a nightmare! I’m so sorry all that happened! It’s like everything just kept snowballing downhill. Wow, I don’t blame you for not even wanting to think about cakes…that all sounds traumatic. I can’t imagine having to work that much at my day job and then do a full wedding cake and cupcakes like that. When I was still selling cakes, I was terrified of running out of time…that’s truly a nightmare. I hope at some point you’re able to think about cake again and not cringe…at least to just make a nice one for yourself. 🙂
Zelda
How do you keep the cake from sliding around inside the box? I have a simple tall rosette buttercream cake that I’m making for my daughter’s birthday. It’s at a pool an hour and a half away. I’m seriously considering taking it crumb coated, but piping the rosettes in the trunk of my suv on arrival. I’m afraid the cake will slip and the buttercream will mush otherwise.
Kara Jane
Hi Zelda, yes you could always pipe everything once you got there if that makes you feel less stressed. I know it’s stressful transporting cakes. What I do to keep it sliding in the box though is that the cake base needs to be the same width of the box. So let’s say that the cake base is 10 inches round, then the cake box needs to be a 10 inch as well. Then there’s not room for the cake board to slide in that box.
The other thing is that the actual cake will sit on it’s own cake board (the same size as the cake), then that will sit on a larger cake base. You can add a little melted candy melts or hot glue to that larger cake base and then attach the cake tier (which has a cake board on the bottom of it the same size as the cake) to it. That’ll keep it sturdy as well. I hope that made sense.
Also I find that if I add some of that non-skid drawer liner (it’s like shelf paper, but it’s that bumpy rubbery kind), anyway if I add that under the large cake base, and under the actual cake box, that helps keep it from sliding around as well.
The biggest thing though is that the box doesn’t need to be bigger than the cake base. Whatever size the cake base is, get a box that size as well.
You’re still going to need to be careful turning corners, but those tips will help a bunch with keeping it all intact.
I hope that helps!
Jo Conley
I’m making a beer stein cake with fondant wrap the top will be buttercream bubbles I live in the desert and right now the temperature is over 109 I’m supposed to deliver the cake for a birthday party an hour away. Once the fondant go on I can not refresh the cake? And I have no facilities cool enough to apply buttercream when I get there so I’ll have to apply ahead and travel. I have used the shorting buttercream recipes before is that the more sturdy buttercream? I was hoping you had a few ideas that could help. Thanks
Kara Jane
Hi Jo, Wow 109 degrees! Goodness this will be a challenge. I will say that many people chill their cakes, even when they’re fondant cakes. The cake may form condensation on it after it reaches room temp, but in your case you might have to just chance it. I mean better to take the chance of some condensation than it completely melting on you. I’d get the cake chilled, and chill the car as cold as you can get it. See if you can get a box you can pack it in safely. I’ve even heard of people using dry ice inside their boxes to keep the cake cool. I’ve never tried this buy Avalon from Avalon cakes has a post about it. She shows how to make an insulated cake box. You might want to check that out…here’s a link to it: https://avaloncakesschool.com/delivery-box/
Shortening based buttercream is probably the most heat stable kind…although it’ll still melt if it gets hot enough. You can add a tablespoon or two of meringue powder to it to help as well. When using shortening based buttercream, you could add in a small pinch of salt to cut the sweetness and add in a bit of butter extract to help with the taste. I hope this helps!
Kathy
This is soooo helpful! Thank you so much for spending the time reply and for sharing your tips and tricks :).
Kara Jane
Kathy, you’re so welcome and glad I was able to help!
Wendy C
Hi,
I’m wondering if you have any tips for when the client picks up a cake. I am making a 6″ tall round cake (6″-7″ high). There are two fondant / gumpaste toppers that go on top which are 5″ and 7″ tall approx. I was planning to put a centre dowel through the entire cake. I was also planning to secure the toppers (which already have skewers that go 3″ into the cake under them) into bubble tea / fat straws that go all the way in the cake and are secured with royal icing. The royal icing would act as a glue to secure the toppers in place on the cake and also work as apart of a “snow decoration” for the top of the cake. HOWEVER, I am still super nervous about the customer transporting the cake and breaking the cake topper. I have mentioned that I will do my best to secure everything but they are still very delicate topper. I was thinking of having them just add the cake topper at the destination but it’s a hard cake topper to handle and so I thought maybe it’s best to secure it to the cake so they don’t have to do any assembly themselves. I was also planning to chill the cake so it’s a bit more secure for travelling….but yeah…still nervous :0
Kara Jane
Hi Wendy, I totally understand your nervousness. That always made me nervous too. I’d probably do what you suggested and go ahead and attach the topper. I’d be afraid the customer would mess it up or break it if they tried to themselves.
A center dowel is a good idea too since it’s a tall cake.
I would also explain to them how important it is that they drive slowly and do not make sudden stops or go over large bumps and that they need to put the cake on a flat surface, not the seat of the car.
I’d also get them to sign a release of some sort. Just something stating they received the cake and that it was to their expectations and was assembled and upright. That way if they dump it in the car, they can’t say they got it from you like that.
I’d also show them how to properly pick it up. Make sure the box that it’s in is the same size as the bottom cake base, so that it doesn’t slide around in the box. Make sure to use a box though, even if you can’t close it because of a tall cake. Anyway, explain that you have to pick it up from the bottom and be very gentle. That probably sounds condescending, but many people just don’t know that.
I’d also make a little card that lists the items that are inedible that you’ve added to the cake. That way they know to take those out and not to smash someone’s face into the cake. Mention (even if it’s on the card) that there is a center wooden dowel in the cake going all the way through.
I have those cards you can just print out and write on if you want. You can find that here along with a bit more advice: (scroll toward the end of the post to see the cards, they’re free to print out) https://iscreamforbuttercream.com/tips-you-must-know-to-start-selling-cakes-from-home/
Ok, I hope everything goes well!
Liana
thanks for info.
Diana
I need help please. I need to transport a top front cake10″ standing on it side upright. what do I do so that it does not topple over and get damaged.
Kara
Hi Diana, I think I’m a bit confused on what you mean. Can you explain what you mean by transporting a top front cake standing on it’s side upright?